


Prestigio Data Safe II User Manual

User’s Manual
USB2.0 HDD Enclosure
Hi-Storage
Personal Backup

INDEX
PART I HDD ENCLOSURE OPERATING INSTRUCTIONS
1. Getting Started
2. Product Feature Highlights
3. What’s in the Package
4. System Requirements
5. Product Views and Description
6. Install Driver for Windows 98 Environment
PART II Hi-Storage – the Data Security Tool
1. Plug and Play
2. Read and Write
3. Unplug
4. Security Area Only (Single Partition)
5. Install the USB Driver:
6. Use Hi-Storage for the First Time
7. Hi-Storage - Create Partition
8. Login the Security Area
9. Logout the Security Data Zone
10. Manage Password
PART III One-Touch Backup (OTB) -- the “Personal Backup”
1. How to install “Personal Backup”
2. Exit the program
3. Personal Backup
4. Personal Backup Settings
5. [Add] new sync items
6. Copy synchronization item
7. Edit synchronization item
8. Delete synchronization item
9. Log Options
10. Test Run Options
11. Save and Apply
12. Personal backup advanced settings
13. Start scheduled sync
14. Run Sync now
Appendix
PART I HDD ENCLOSURE OPERATING INSTRUCTIONS
1. Getting Start
Thank you for purchasing Prestigio Leather HDD Enclosure product. The product
presents you a new concept of mobile storage of you computer data with safety and
conveniences. Please read this manual thoroughly before you start using the product,
and follow all of the procedures in the manual to use the product correctly.
Safety Precautions
Please follow the safety precautions carefully before you use the Hi-Storage device. Make
sure that you use the device correctly according to the procedures described in this
manual.
Warnings: This mark indicates actions that could lead to serious
injury to your body or damage to the device if ignored
or handled incorrectly.
___________________________________________________________________
Warnings
_____________________________________________________________ _
z Do not attempt to disassemble or alter any part of the device that is not described in this
guide.
z Do not allow the device to come into contact with water or other liquids. In the event that
water or other liquids enter the interior, immediately unplug the device from the computer.
Continued use of the device may result in fire or electrical shock. Please consult your
product distributor or the closest support center.
z To avoid risk of electrical shock, do not plug or unplug the device with wet hands.
z Do not place the device near a heat source or expose it to direct flame or heat.
z Never place the device close to equipment generating strong electromagnetic fields.
Exposure to strong magnetic fields may cause malfunctions or data corruption.

2. Product Feature Highlights
¾ Classic Leather Coated Craftsmanship –
It brings luxury and simplicity into your daily computing lives.
¾ Data Security (the “Hi-Storage”)
With H-Storage application software, you can protect your device with password
log-in and partition your device into “Public” and “Security” Areas.
z Public Area There is no password protection to this area. You can do any
basic functions described in the “Basic Functions” section, in this area.
z Security Area This area cannot be accessed without security log-in. Once you
log in, the device will be switched from “Public Area” to “Security Area”. After
successful switching, you can do any basic functions described in the “Basic
Functions” section, in this area.
You can only view either “Public Area” or “Security Area” at the same time in the
same disk logic unit number (Drive).
¾ One-Touch Backup (the OTB)
This feature enables you to save you data in your computer and in the HDD
enclosure simultaneously.
3. What’s in the Package
z Leather HDD Enclosure Main Unit 1
z USB Cables 2
z Leather Carry Case 1
z User’s Manual 1
z Driver and Software CD 1
z Screws and Screw Driver
4. System Requirements -- There are minimum hardware and software
requirements that must be satisfied to ensure the device function properly.
z Computer -- BM PC/AT Compatible, Power Macintosh, PowerBook, iMAC or
iBook
z Operating System -- Windows 98 Second Edition, Windows Millennium Edition
(Windows ME), Windows 2000, Windows XP, Windows 2003 Server, Linux 2.4
or above, Mac OS 9.0 or above
z Memory: Minimum 32MB of RAM
z User Authority: Administrator (Manager)
z USB Port
z Free Hard Disk Space -- No less than 16 MB(3MB for Win98 driver, 3MB for
Hi-Storage, and 10MB for Personal Backup application)
z Windows 98 SE does not support default Mass Storage Driver. Please install
the driver in the CD of the product package.
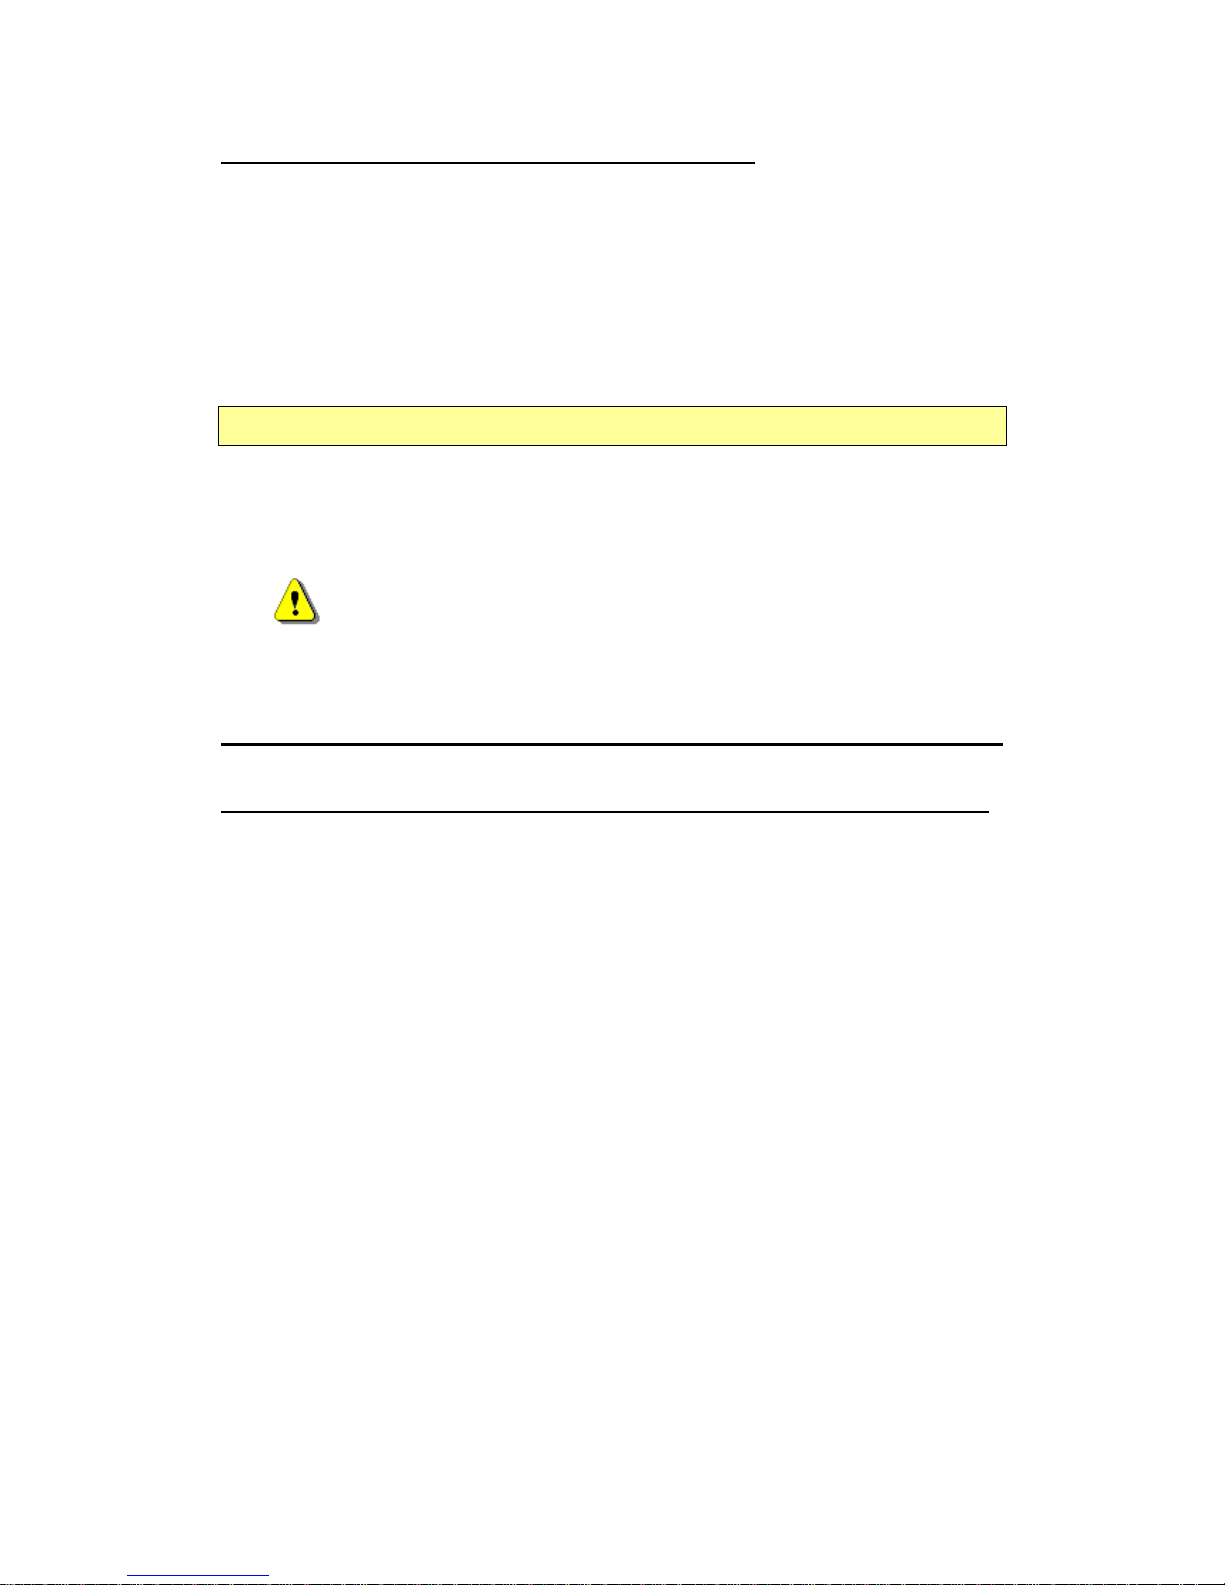
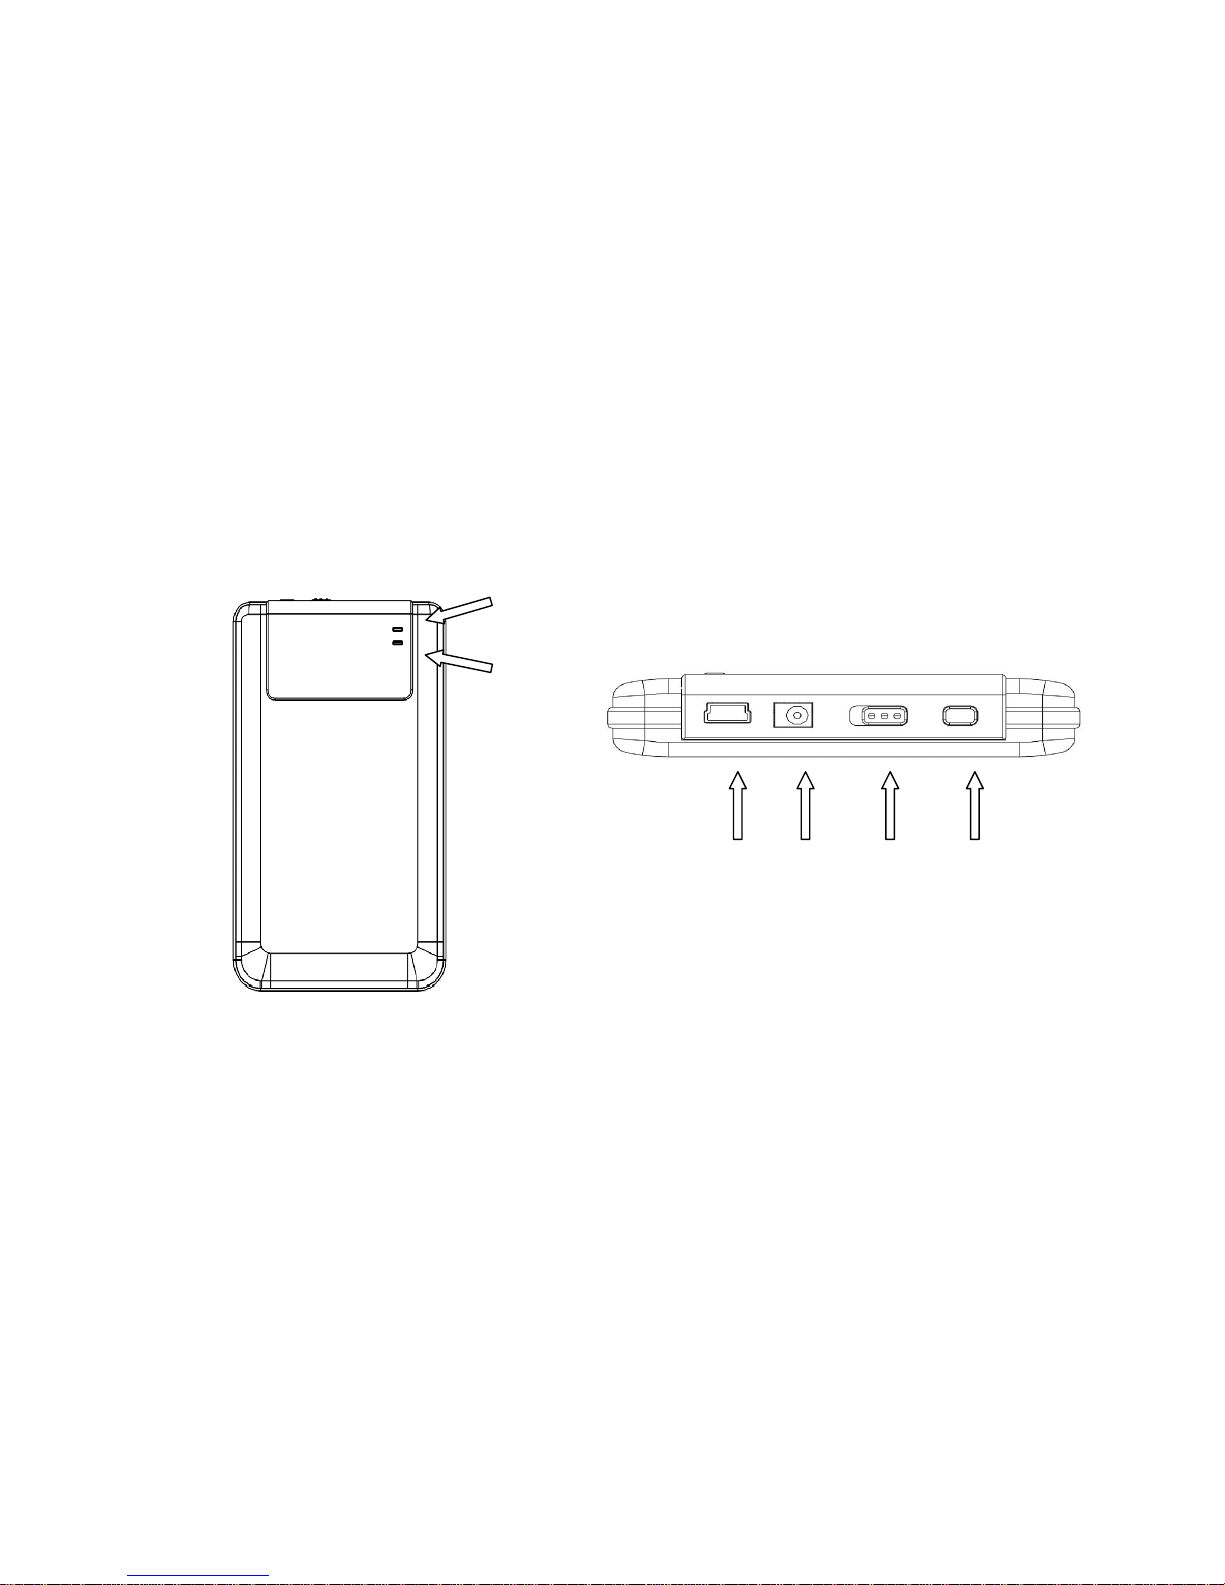
5. Product views & description
Top View Front View
POWER LED
R/W LED
USB DC POWER COPY
PORT ON/OFF
6. Install Driver for Windows 98 Environment
To run the product under Win98 environment, please install the Win98 driver
contained in the CD of the product package
z Turn on the computer
z Connect the HDD enclosure to the USB port of the computer
z Put the CD into the CD ROM drive of the computer
z Win98 will automatically detect the HDD enclosure device and show the dialog
box “Add New Hardware”. Then follow the instruction shown on the dialog box
on the computer screen.
PART II Hi-Storage – the Data Security Tool
Basic Functions
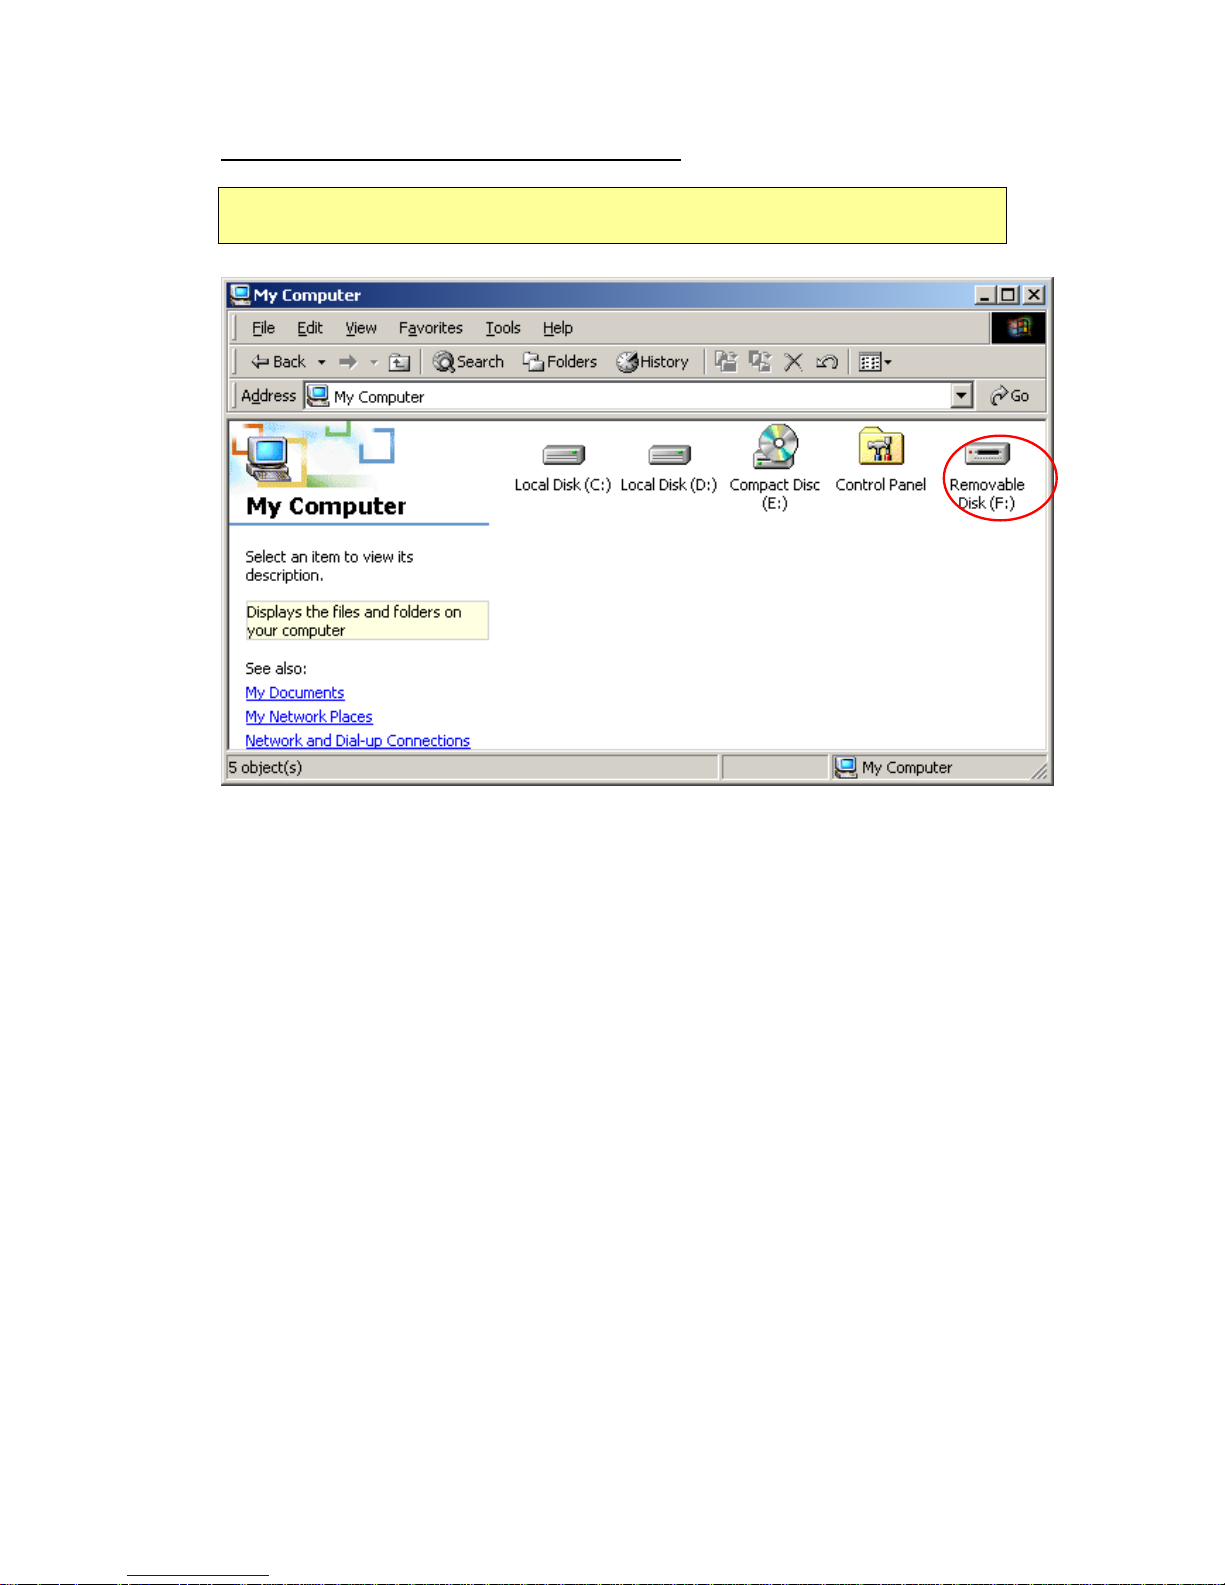
1. Plug and Play
When you plug the device into the USB port of your computer, you will see a
“Removable Disk” icon in the file manager window. In Macintosh, once you plug the
Hi-Storage into the USB port. You can see the disk icon in the “Desktop”.
In Linux OS, you can mount the device by the following instructions.
■ Execute cd/etc/sysconfig/ (cat/etc/sysconfig/hwconf | more)
■ Check the device information in hwconf,write down the mount point.
■ Make a directory in/mnt (ex: mkdir/mnt/usbHD)
■ Then, execute mount/dev/sda1 /mnt/usbHD (if mount point was .dev/sda)
2. Read and Write
You can retrieve or store files in the device as a hard disk. The read/write operation of
the device is the same as that of a hard disk.
3. Unplug
To minimize risk of data loss on Windows ME and 2000, please follow the safe
removal procedure. You can find the safe removal icon in your computer’s notification
area.
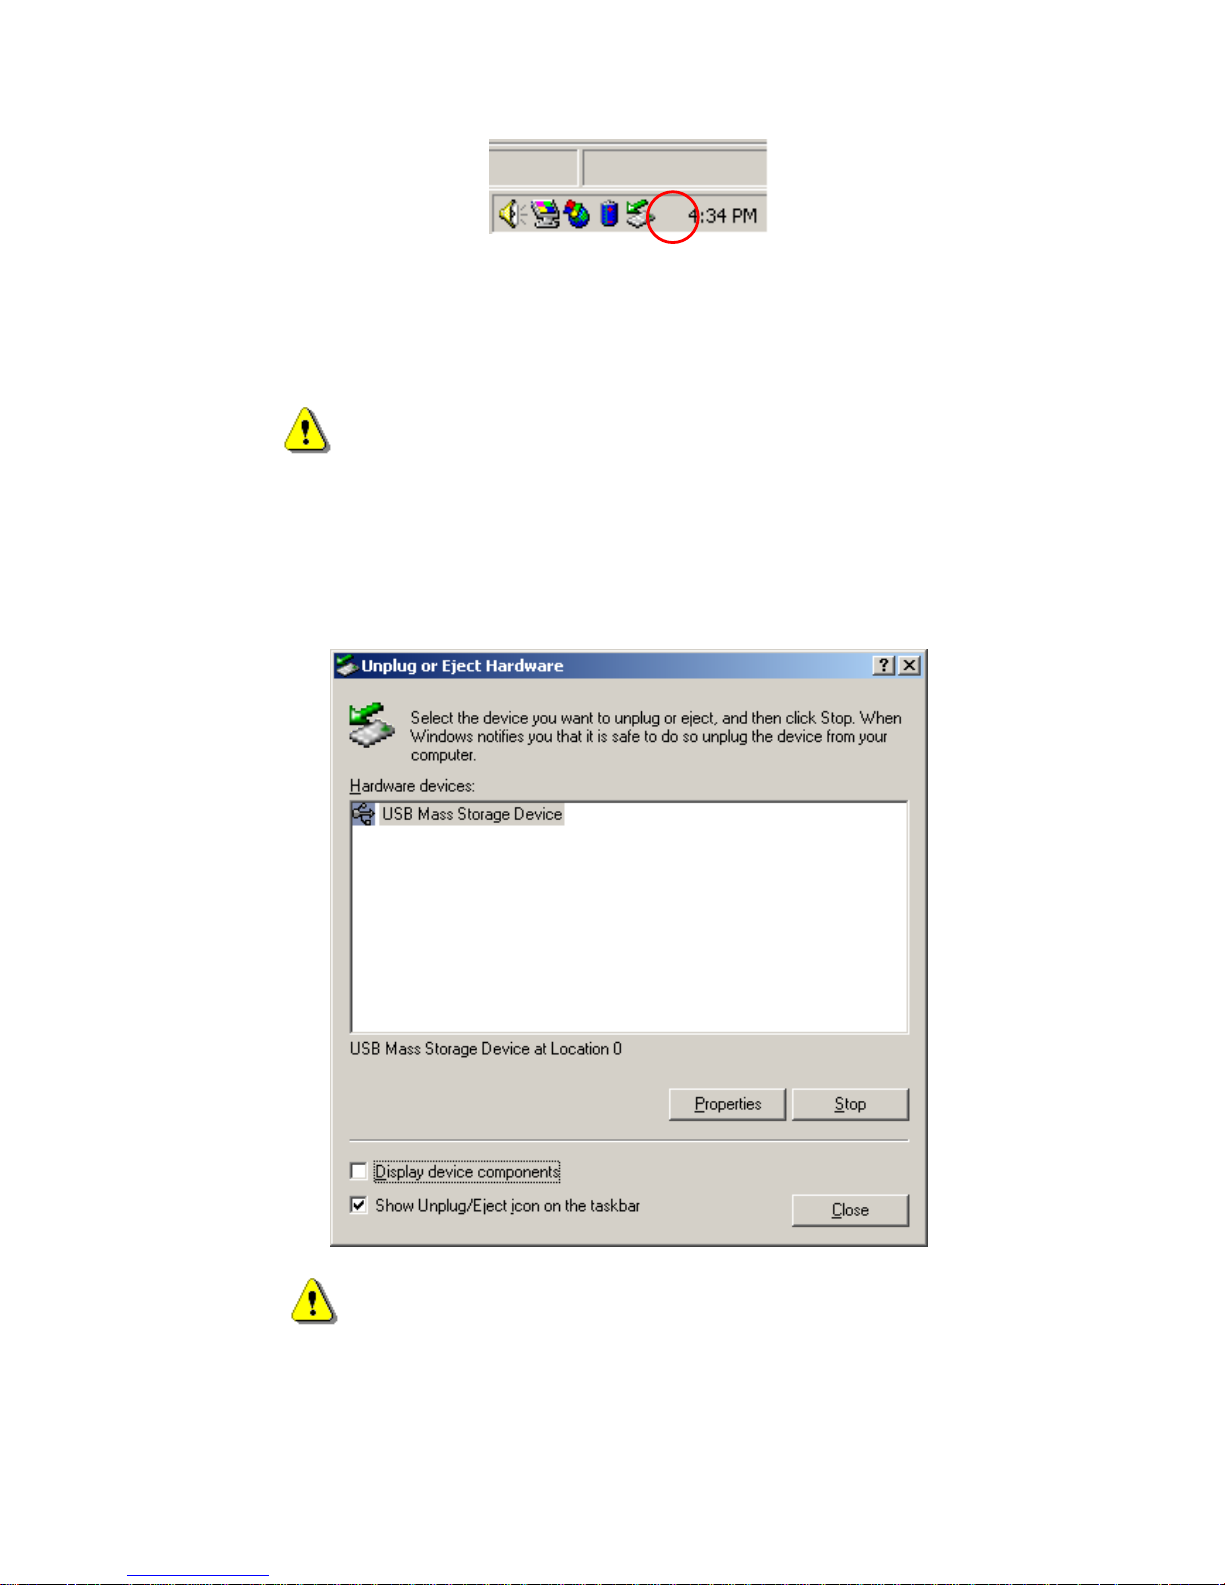
Double click the “safe removal” icon; the “Unplug or Eject Hardware” window will pop
up. You can select the device you want to remove. Then, click the [Stop] button. After
that, you can unplug the device from the USB port of your computer.
Warning: Before removing the Hi-Storage device, make sure the
LED is not flashing. When the LED flashes quickly, there
is some traffic going on between the host computer and
the Hi-Storage device. Don’t remove the Hi-Storage at
this moment. Otherwise, it may cause some damages to
the data or even the Hi-Storage device itself.
Warning: If you do not follow the safe removal procedure on Windows
ME and Windows 2000 operating systems, data loss caused
by the “write cache” issue may happen.
On Macintosh operating systems, you can drag the removable disk icon into the trash.
This action will perform the “Eject” function.
On Linux operating system, please follow the “demount” procedure to demount the
device.
Partition Type
With Hi-Storage application software, you can protect your device with password log-in
and partition your device into “Public” and “Security” Areas.
1. Public Area There is no password protection to this area. You can do any
basic functions described in the “Basic Functions” section, in
this area.
2. Security Area This area cannot be accessed without security log-in. Once you
log in, the device will be switched from “Public Area” to “Security
Area”. After successful switching, you can do any basic
functions described in the “Basic Functions” section, in this
area.
) You can only view either “Public Area” or “Security Area” at
the same time in the same disk logic unit number (Drive).
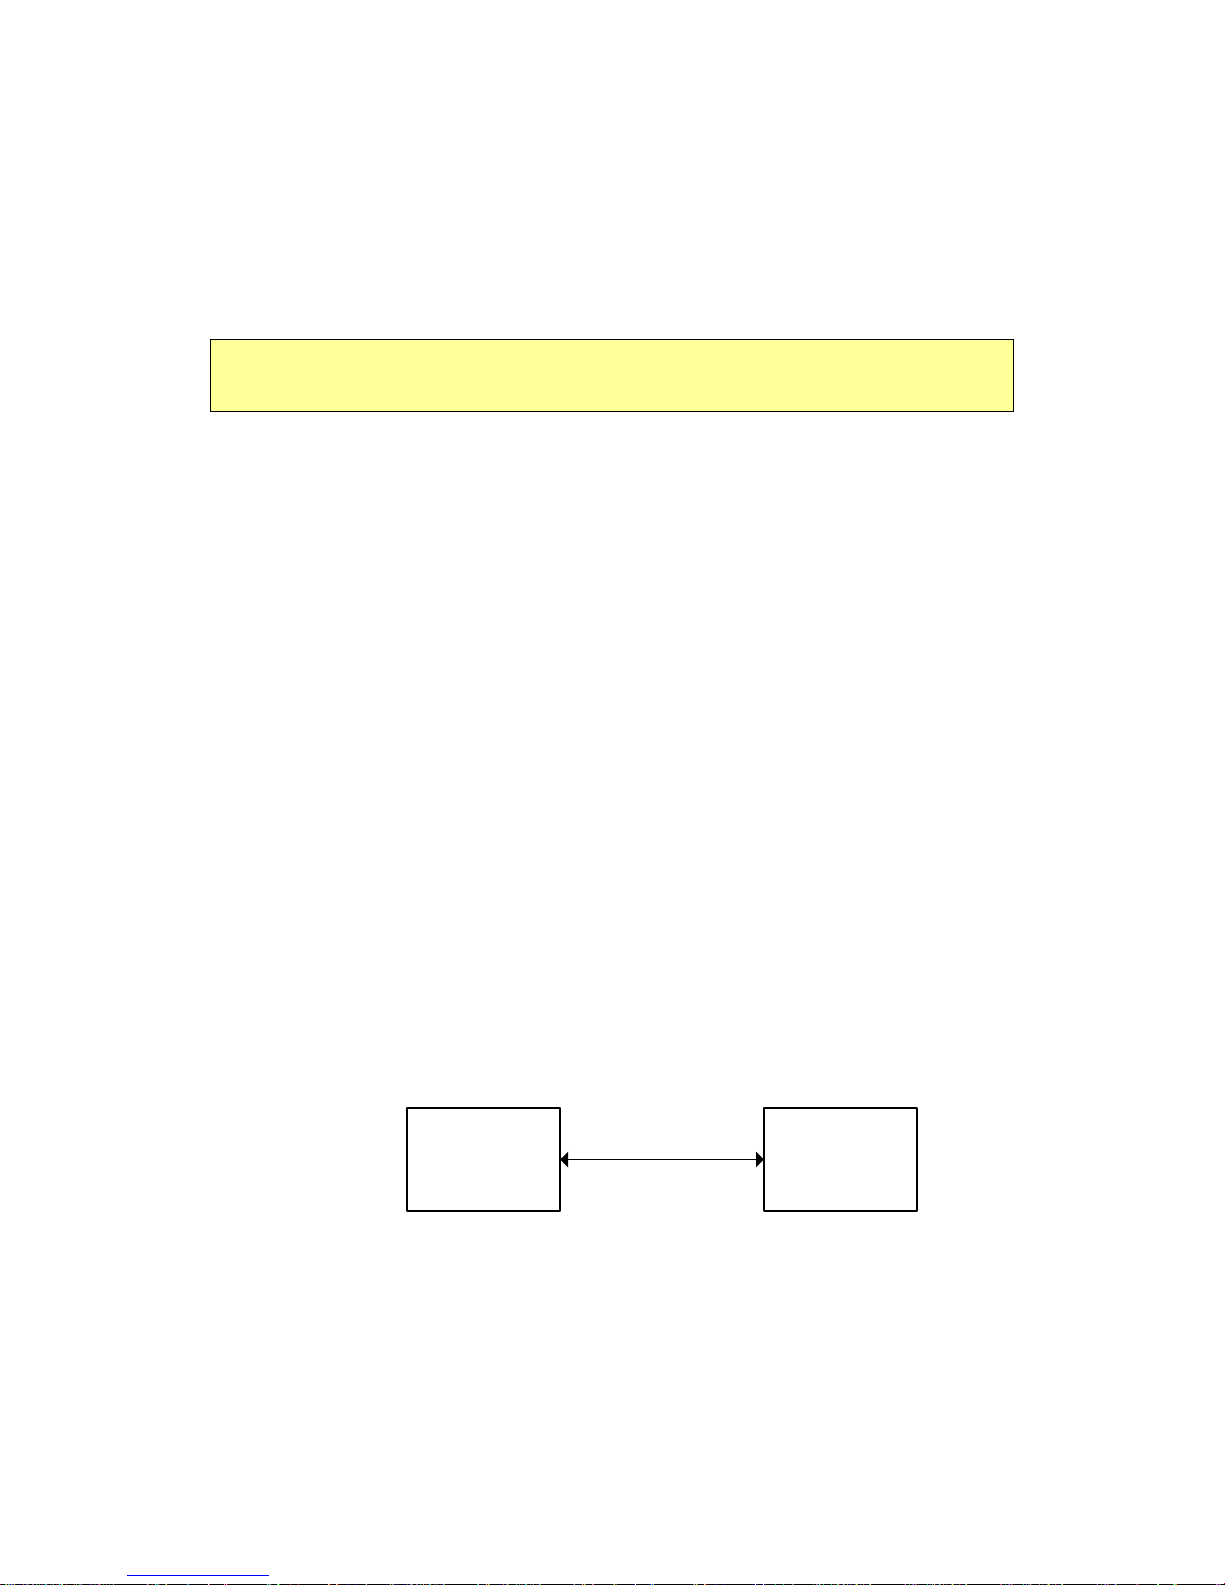
4. Security Area Only (Single Partition)
Partition the device into two areas in one Drive: Public Area and Security Area. The
Public Area is read only. The Security Area can be accessed only with a correct
password.
Please refer to the figure below.
Pubilic
Area
Security
Area
Change View Through
Login & Logout
Drive 1
This figure shows detailed operations of single Drive.