

Page 1
InstructionSheet
InstructionSheet
IMPORTANT SAFETY INFORMATION. READ AND FOLLOW ALL SAFETY INSTRUCTIONS. Follow label information
and instructions concerning Wet or Damp Locations, installation near combustible materials, insulation, building materials,
and proper lamping. Do not install in areas subject to combustible vapors or gases. Before wiring to power supply and
during servicing or relamping, turn off power at fuse or circuit breaker. All servicing or relamping must be performed by
qualified service personnel. Product must be grounded to avoid potential electric shock or other potential hazard.
Product must be mounted in locations and at heights and in a manner consistent with its intended use, and in
compliance with the National Electrical Code and local codes. The use of accessory equipment not recommended by
the manufacturer or installed contrary to instructions may cause an unsafe condition. Do not block light emanating from
product in whole or part, as this may cause an unsafe condition. Do not allow items such as drapes, curtains, screens or
the like to come into contact with the product or to block light from the product, as this may cause an unsafe condition.
INSTALLATION INSTRUCTIONS
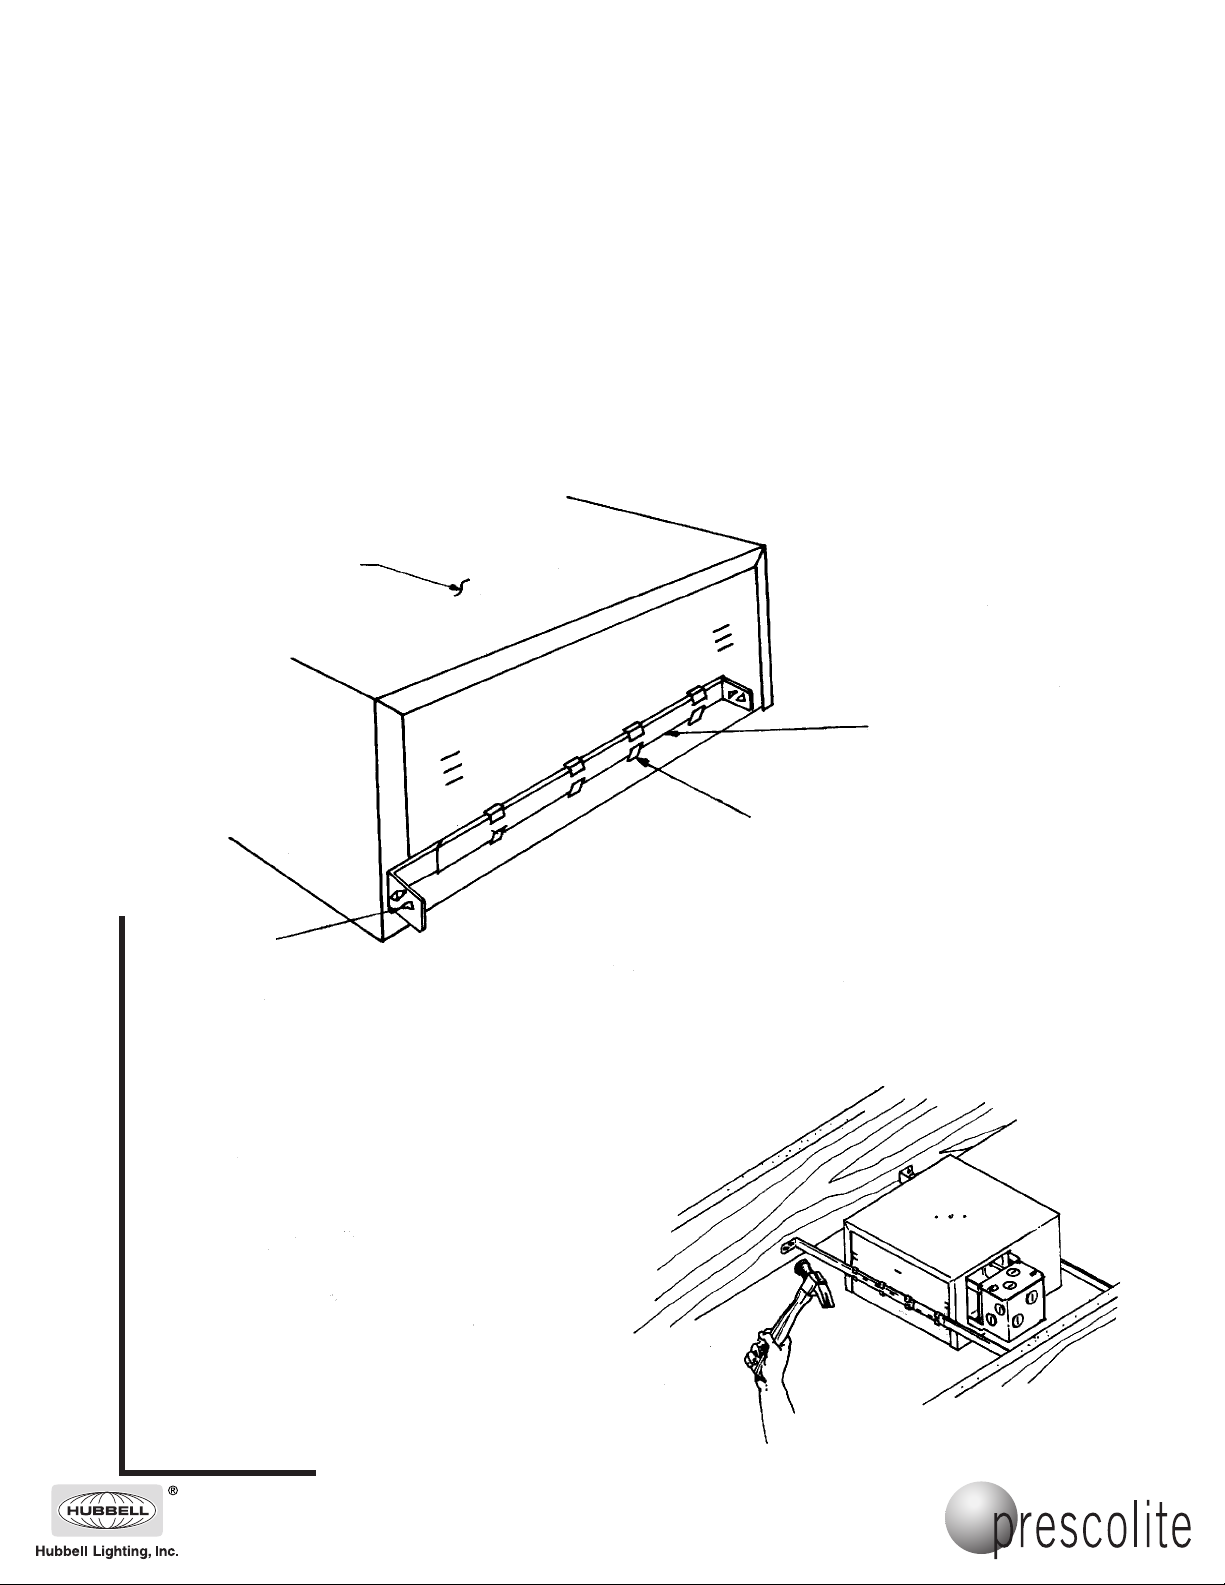
SLIP STRAP INSTALLATION
HOUSING
Part No. . . . . . . . . . . . . . . . . . . . . . . . . . . . . . . . .02003300
www.prescolite.com • Prescolite TollFree Technical Support 1.888.PRS.4TEC • Hours: 8am - 5pm ET
Fig. 1
PRONG
1) Slide slip straps into tabs in housing, adjust to beam
width. Figure 1
Position housing so that bottom edge will be flush with
2)
finished ceiling.
Hammer prongs into beam. Straps may be locked by
3)
deforming one of the tabs in the housing. Figure 2
SLIP STRAP
LOCKING TABS
101 Corporate Drive • Spartanburg, SC 29303
With representatives of
Copyright 2005, 08/05 revision, All Rights Reserved - Printed in U.S.A.
fices in principal cities throughout North
America.
Fig. 2
Page 2
InstructionSheet
Part No. . . . . . . . . . . . . . . . . . . . . . . . . . . . . . . . .02003300
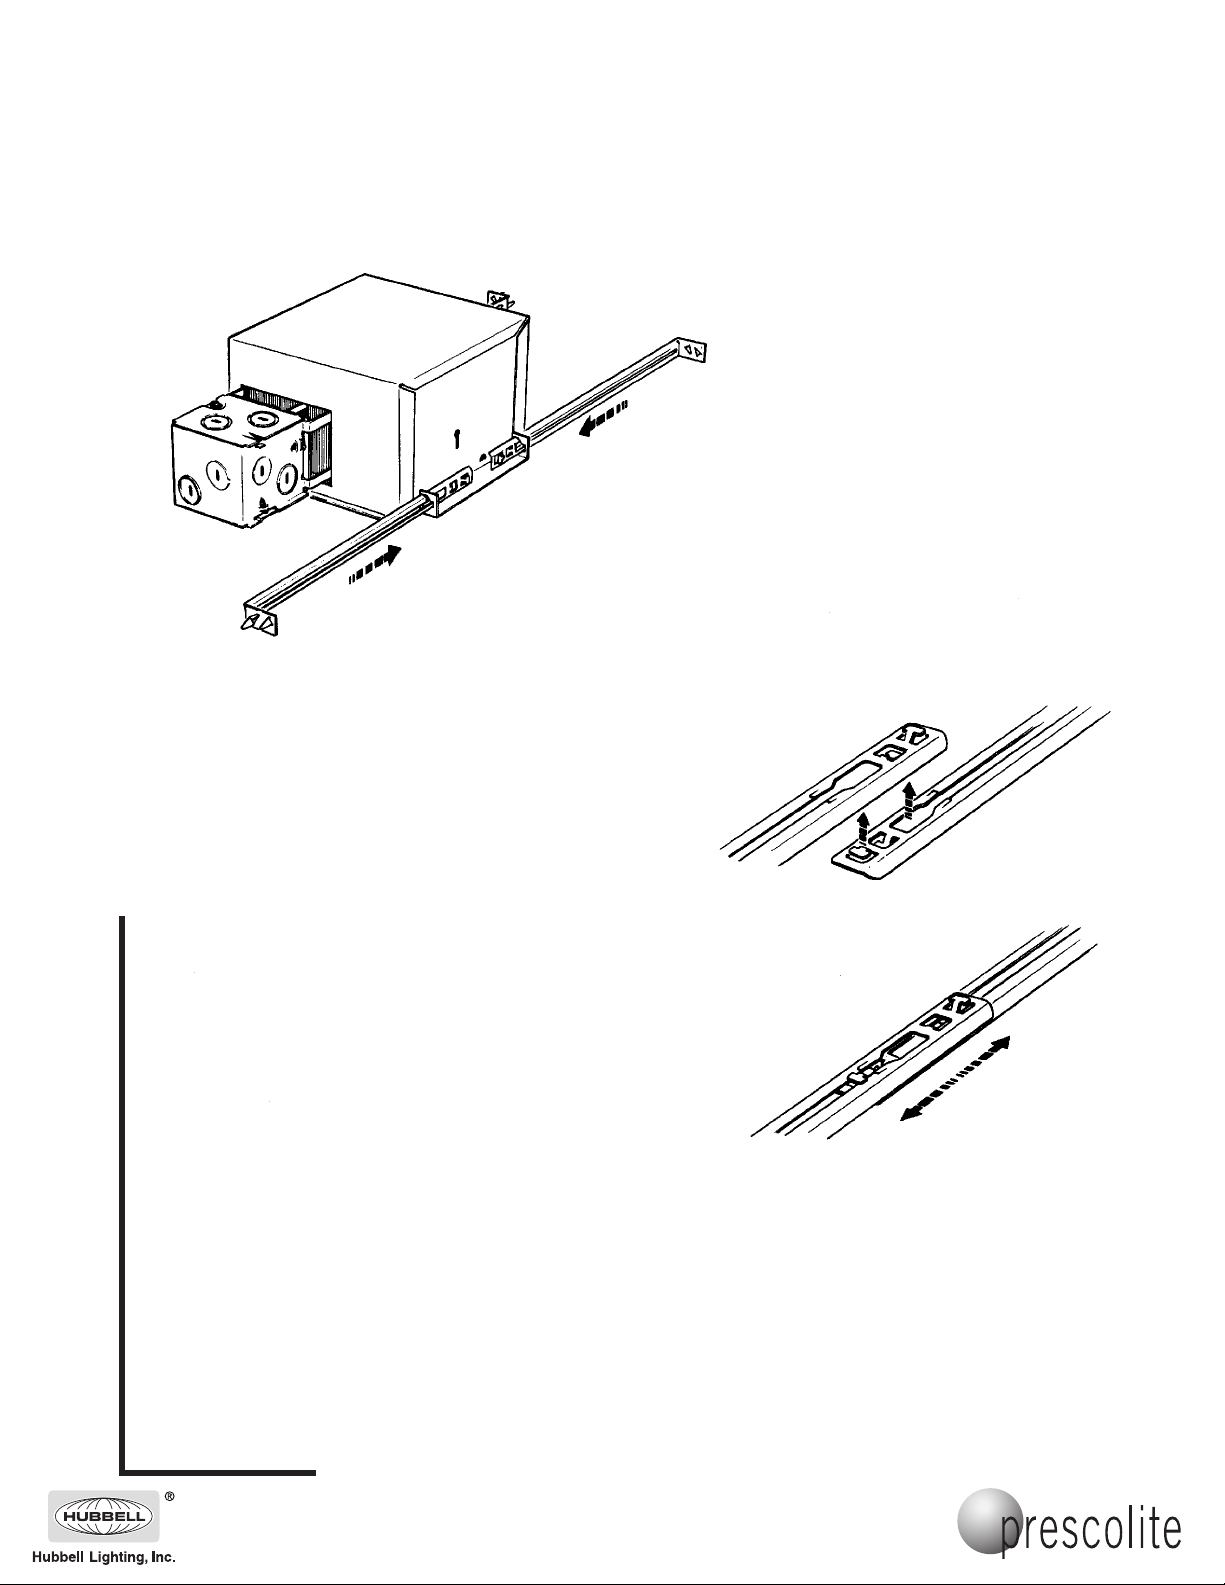
SLIP STRAP INSTALLATION HOUSING WITH PLASTER FLANGE
Fig. 1
Fig. 2
www.prescolite.com • Prescolite TollFree Technical Support 1.888.PRS.4TEC • Hours: 8am - 5pm ET
Fig. 1
1. Insert slip straps thru tabs on plaster
flange.
2. Overlap ends of two sections, placing
tabs on each section into hole in
opposite section.
Fig. 3
3. Push sections together so tabs engage
sides of slots.
4. Adjust slip straps to approx. joist width.
5. Align bottom of bar hangers with bottom
of joist and hammer tabs in place.
NOTE: Aligning bottom of bar hanger
tabs with bottom of joist allows flush trim
installation with 1/2" sheetrock.
6. Slide housing on bar hangers to proper
location between joist and bend up. V
Shaped Retainer
abs (1) ea. corner
T
.
Fig. 2
Fig. 3
101 Corporate Drive • Spartanburg, SC 29303
With representatives of
Copyright 2005, 08/05 revision, All Rights Reserved - Printed in U.S.A.
fices in principal cities throughout North
America.
 Loading...