

Page 1
InstructionSheet
www.prescolite.com • Prescolite TollFree Technical Support 1.888.PRS.4TEC • Hours: 8am - 5pm ET
101 Corporate Drive, Suite L • Spartanburg, SC 29303
With representatives offices in principal cities throughout North America.
Copyright 2004, 08/04 revision, All Rights Reserved - Printed in U.S.A.
Part No. . . . . . . . . . . . . . . . . . . . . . . . . . . . . . . .01858100
InstructionSheet
INSTALLATION INSTRUCTIONS
PENDANT SERIES FIXTURE
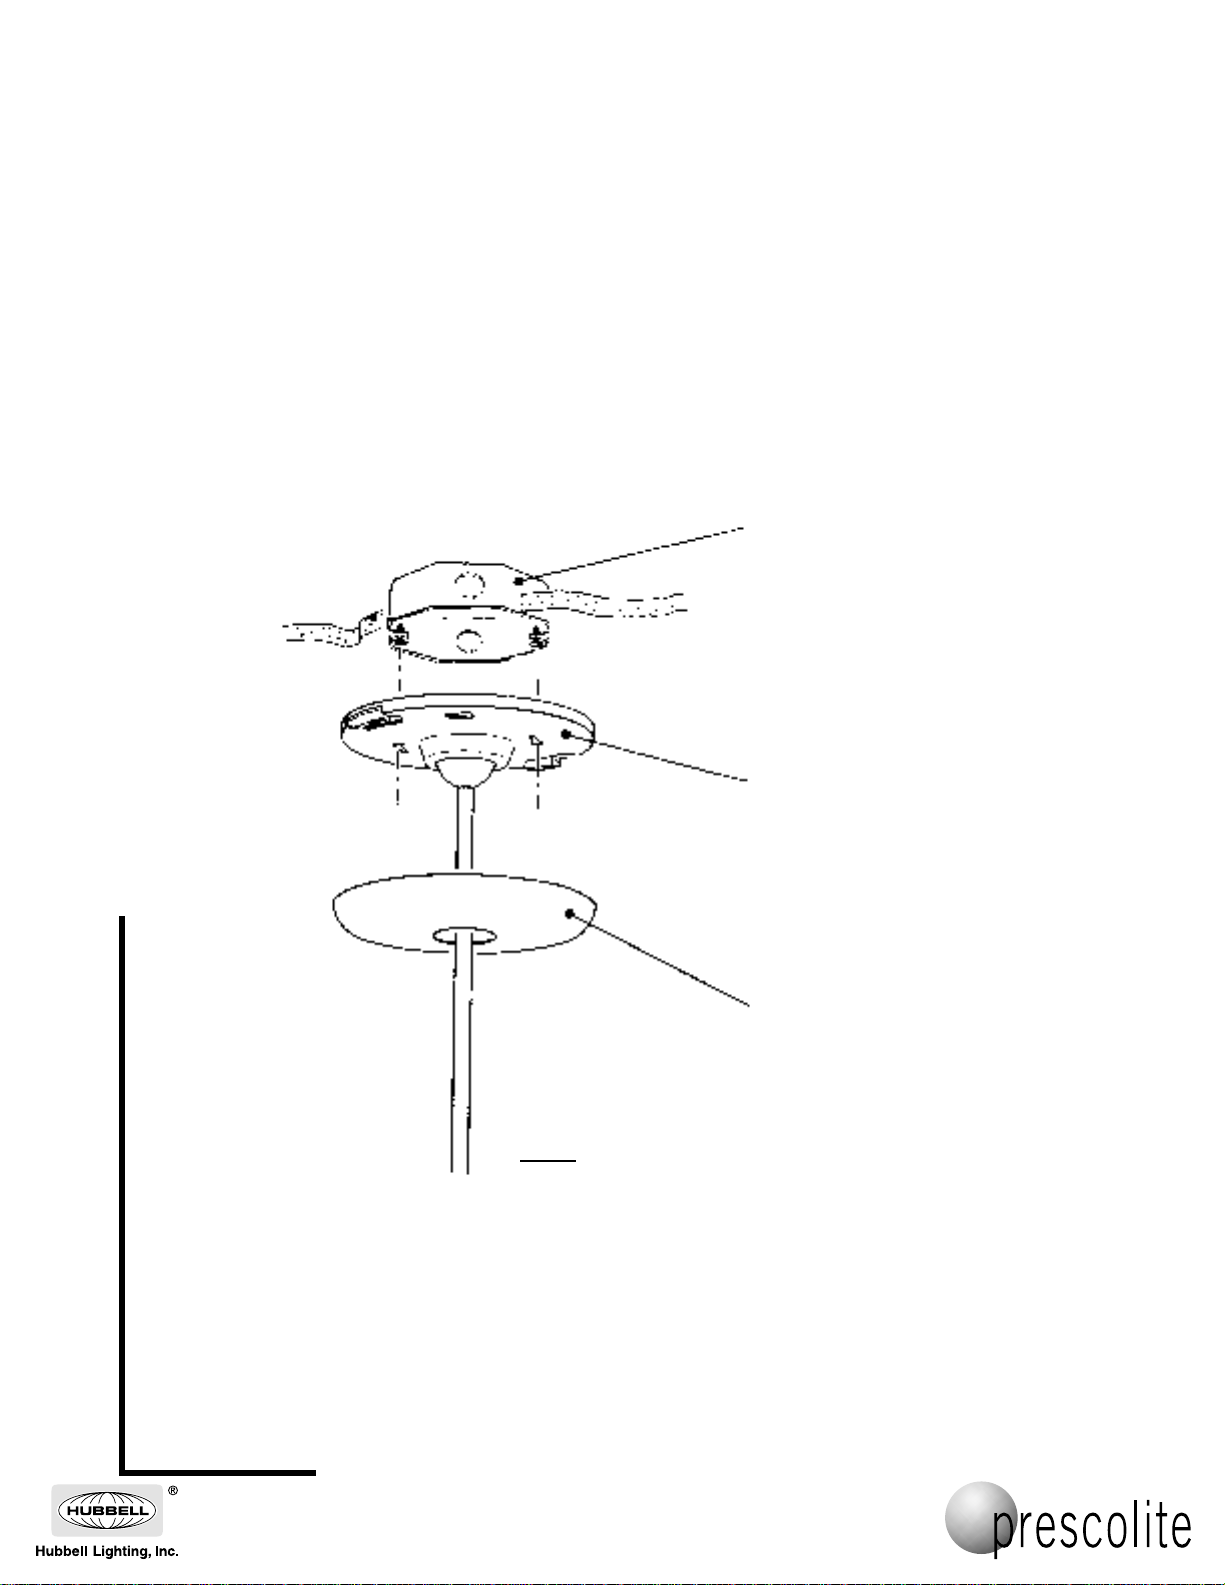
FIG. 1
1. Make electrical connections. Connect ground
wires to green ground leads. Connect white
(common) to white leads. Connect power supply
(line) to black leads. (see wiring diagram).
WARNING: DO NOT pinch wires. Consult a
Qualified Electrician for all other options that
require other wiring configurations.
2.
Fasten mounting plate to outlet box.
3. Twist canopy cover in place. (Fig. 1)
3
1
/4" or 4" O.B.
Cam Action
Retention
Mounting Plate
with keyhole
slots (screws do
not have to be
removed from O.B.)
IMPORTANT SAFETY INFORMATION. READ AND FOLLOW ALL SAFETY INSTRUCTIONS. Follow label information
and instructions concerning Wet or Damp Locations, installation near combustible materials, insulation, building materials,
and proper lamping. Do not install in areas subject to combustible vapors or gases. Before wiring to power supply and
during servicing or relamping, turn off power at fuse or circuit breaker.
All servicing or relamping must be performed by
qualified service personnel. Product must be grounded to avoid potential electric shock or other potential hazard.
Product must be mounted in locations and at heights and in a manner consistent with its intended use, and in
compliance with the National Electrical Code and local codes. The use of accessory equipment not recommended by
the manufacturer or installed contrary to instructions may cause an unsafe condition. Do not block light emanating from
product in whole or part, as this may cause an unsafe condition. Do not allow items such as drapes, curtains, screens or
the like to come into contact with the product or to block light from the product, as this may cause an unsafe condition.
Page 2
www.prescolite.com • Prescolite TollFree Technical Support 1.888.PRS.4TEC • Hours: 8am - 5pm ET
101 Corporate Drive, Suite L • Spartanburg, SC 29303
With representatives offices in principal cities throughout North America.
Copyright 2004, 08/04 revision, All Rights Reserved - Printed in U.S.A.
Part No. . . . . . . . . . . . . . . . . . . . . . . . . . . . . . . .01858100
InstructionSheet
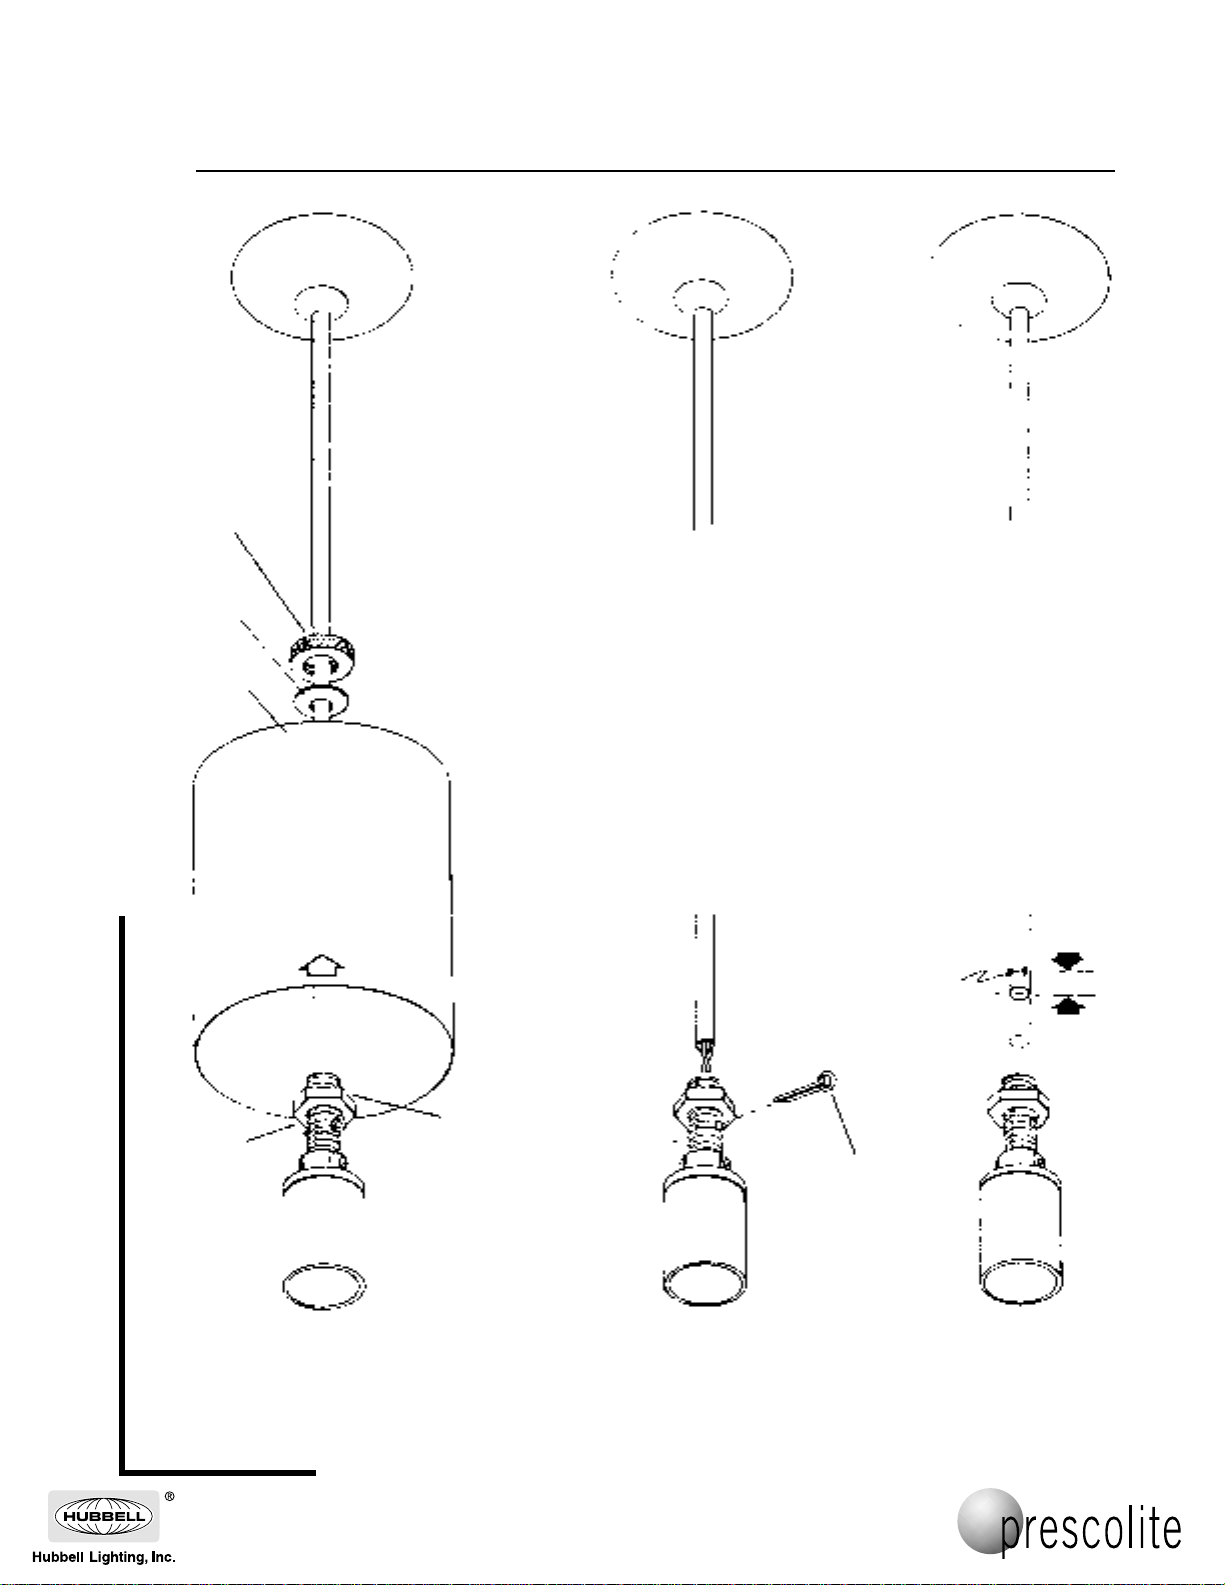
FIG. 1
Cylinder
Knurled
Locknut
Washer
FIG. 3FIG. 2
3/8"
1/8" Dia.
Hole
Cotter Pin
Washer
Locknut
INSTRUCTIONS FOR SHORTENING STEM LENGTHS ON CATALOG NO. 1
122, 1
125, 1128, 1136, 1138 & 1140
1. Remove reflector or baffle, if used.
2. Loosen knurled locknut. (Fig. 1)
3. Push cylinder up stem.
4. Remove cotter pin and pull socket assembly
clear of the stem. (Fig. 2)
5. Cut stem to desired length and drill 1/8"
diameter hole through stem 3/8" from end of
stem to center of hole. (Fig. 3)
6. Reassemble fixture.
 Loading...