

Page 1
InstructionSheet
IMPORTANT SAFETY INFORMATION. READ AND FOLLOW ALL SAFETY INSTRUCTIONS. Follow label information and instructions concerning Wet or Damp Locations, installation near combustible materials, insulation, building materials, and proper lamping. Do not install
in areas subject to combustible vapors or gases. Before wiring to power supply and during servicing or relamping, turn off power at fuse or
circuit breaker. All installation servicing or relamping must be performed by qualified service personnel. Product must
be grounded to avoid potential electric shock or other potential hazard. Product must be mounted in locations and
at heights and in a manner consistent with its intended use, and in compliance with the National Electrical Code
and local codes. The use of accessory equipment not recommended by the manufacturer or installed contrary to instructions may cause
an unsafe condition. Do not block light emanating from product in whole or part, as this may cause an unsafe condition. Do not allow items
such as drapes, curtains, screens or the like to come into contact with the product or to block light from the product, as this may cause an
unsafe condition.
WARNING- This product contains chemicals known to the State of California to cause cancer, birth defects and/or other
reproductive harm. Thoroughly wash hands after installing, handling, cleaning, or otherwise touching this product.
INSTALLATION INSTRUCTIONS
QUICK AND EASY INSTALLATION
In four easy steps, you can install D2LED in your next lighting design.
Before the ceiling is finished, run the appropriate line voltage (and 0-10V dimming control wiring if
applicable) to the approximate location where the D2LED will be installed.
Part No. . . . . . . . . . . . . . . . . . . . . . . . . . . . . 93036374
www.prescolite.com • Prescolite TollFree Technical Support 1.888.PRS.4TEC • Hours: 8am - 5pm ET
D2LED
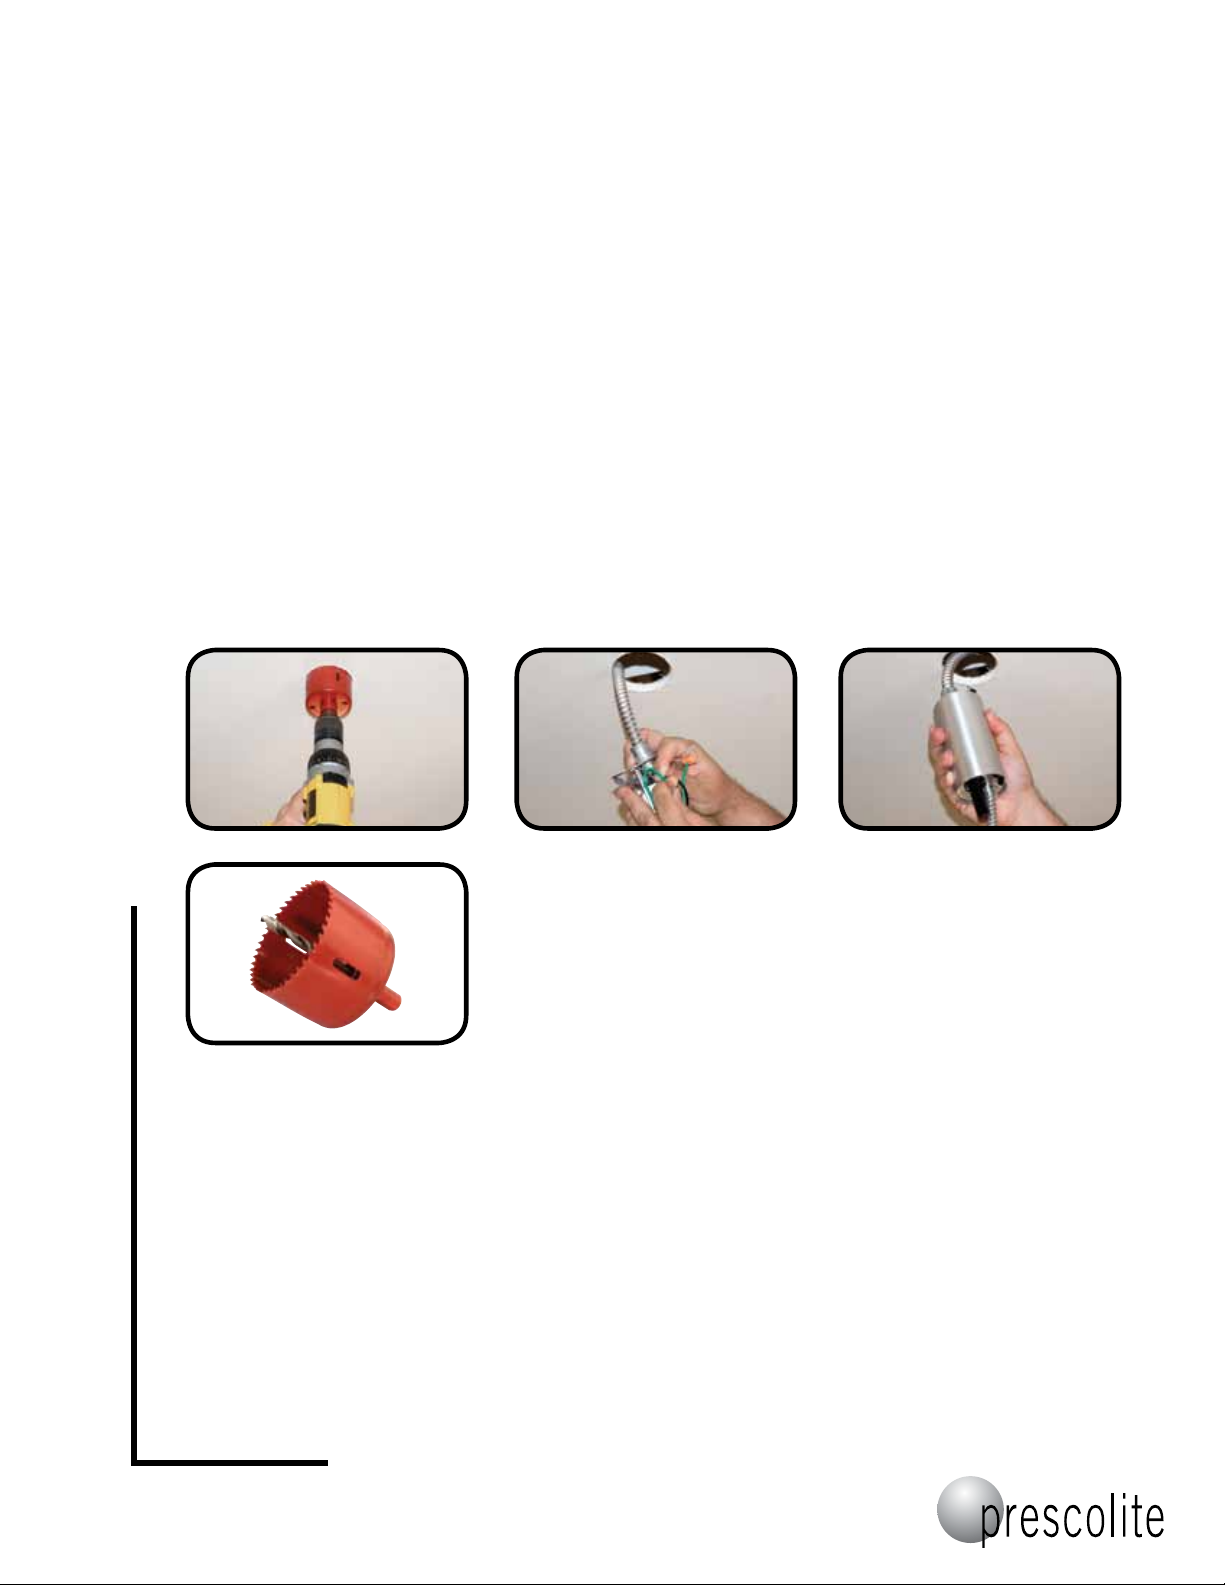
STEP 1:
MAKE CEILING CUTOUT
Use a 2 7/8" hole saw and
pilot drill to cut an opening for
the D2LED downlight. Because
of the small reflector flange of
the D2LED, the accuracy of this
hole is critical. Even a 3" hole
saw may leave a ceiling cut
out too large to be completely
hidden after installation.
STEP 2:
RUN WIRES TO J-TUBE
Pull the pre-existing wiring
below the ceiling and connect
to the J-tube assembly through
the 1/2" knockout. A 3/8" flex
conduit duplex connector may
be used to easily daisy chain
fixtures together. For end-of-run
applications, a standard 1/2"
connector can be used.
Because D2LED features 0-10
volt dimming capability, be sure
to include any low voltage wire
connections in this step. When
wiring for dimming, the low
voltage wiring installs through
the adjoining 1/2" knockout. A
second 3/8" flex conduit duplex
connector may be used in this
knock out where applicable.
STEP 3:
SLIDE/SNAP J-TUBE CLOSED
Simply slide the J-tube closed until
it locks into place with the springs
on opposite ends of the assembly to
complete the third step.
WARNING: Do not pinch wires
between J-Tube cover and
endplates.
701 Millennium Blvd • Greenville, SC 29607
With representatives offices in principal cities throughout North America.
Copyright 2011, 10/27/11 revision, All Rights Reserved - Printed in U.S.A.
Page 2
InstructionSheet
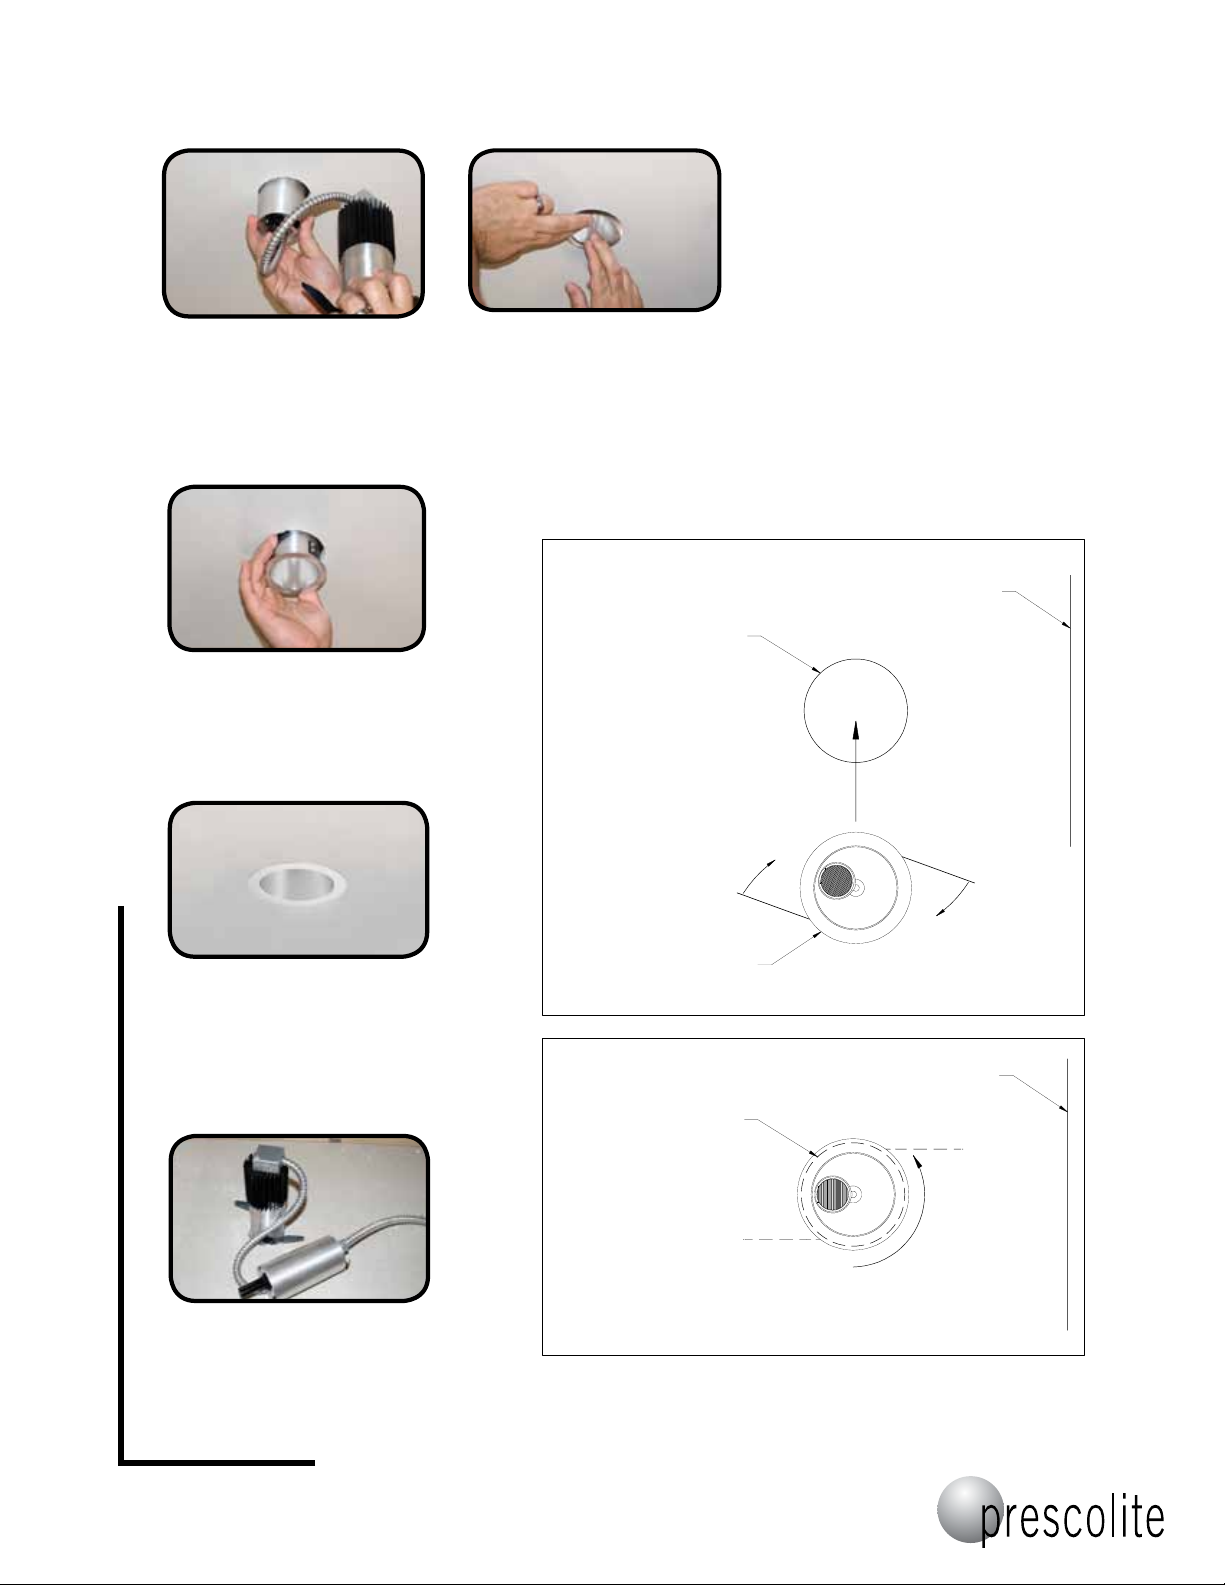
STEP 4:
INSTALL FIXTURE INTO CEILING
Feed J-tube assembly through ceiling
cutout. The J-tube assembly has been
designed to conveniently lay on top of
the ceiling material. (NOTE: This fixture
is designed for use in a non-insulated
ceiling. See installed above ceiling view.)
REMOVAL FOR SERVICING
WALL WASH INSTALLATION
WHEN INSTALLING THE WA LL WASH FIXTURE, IT SHOULD
BE NOTED THAT THE FIXTURE WILL ONLY TURN IN THE
COUNTERCLOCKWISE DIRECTION AFTER INSTALLATION (AS
VIEWED FROM THE ROOM SIDE). WITH THIS IN MIND,
FOLLOW THESE INSTALLATION INSTRUCTIONS:
WALL WASH INSTALLATION:
STEP ONE
Part No. . . . . . . . . . . . . . . . . . . . . . . . . . . . . 93036374
www.prescolite.com • Prescolite TollFree Technical Support 1.888.PRS.4TEC • Hours: 8am - 5pm ET
While the D2LED is designed with a life expectancy of over
50,000 hours, there may be times when you may need to
access the fixture or J-tube assembly. For this reason, the
D2LED has been designed to come out of the ceiling as
easy as it went in.
Twist reflector slightly counter-clockwise while applying
slight downward pressure. Then, once springs are
accessible, squeeze together and remove fixture from
ceiling.
INSTRUCTION S
WALL TO ILLUMINATE
Squeeze retention springs, insert
light engine assembly into the cut
out, and push until springs pop
out above the ceiling, locking the
fixture into place.
Once installed, gently twist
clockwise slightly to secure firmly
against ceiling, being careful not to
leave finger prints on the reflector.
INSTALLED ABOVE CEILING VIEW
CEILING CUTOUT
COMPRESS SPRINGS AND
INSERT WALL W ASH FIXTURE
INTO THE CEILING CUTOUT AT
AN ANGLE TO THE WALL AS SHOWN
WALL WASH
FIXTURE
WALL W ASH INSTALLATION:
STEP TWO
CEILING CUTOUT
WALL TO ILLUMINATE
ROTATE FIXTURE
TO FACE THE WALL
AFTER IT IS SEATED
CAUTION: DO NOT ATTEMPT TO MODIFY OR REWIRE FACTORY-INSTALLED WIRING ON THE FIXTURE. SAFETY AND PROPER
OPERATION OF THE FIXTURE DEPEND ON THE INTEGRITY OF THE WIRING.
KEEP THESE INSTALLATION INSTRUCTIONS
701 Millennium Blvd • Greenville, SC 29607
With representatives offices in principal cities throughout North America.
Copyright 2011, 10/27/11 revision, All Rights Reserved - Printed in U.S.A.
To view an installation video, go online to www.prescolite.com
 Loading...