

Page 1
Installation Instructions
PP-FCMA
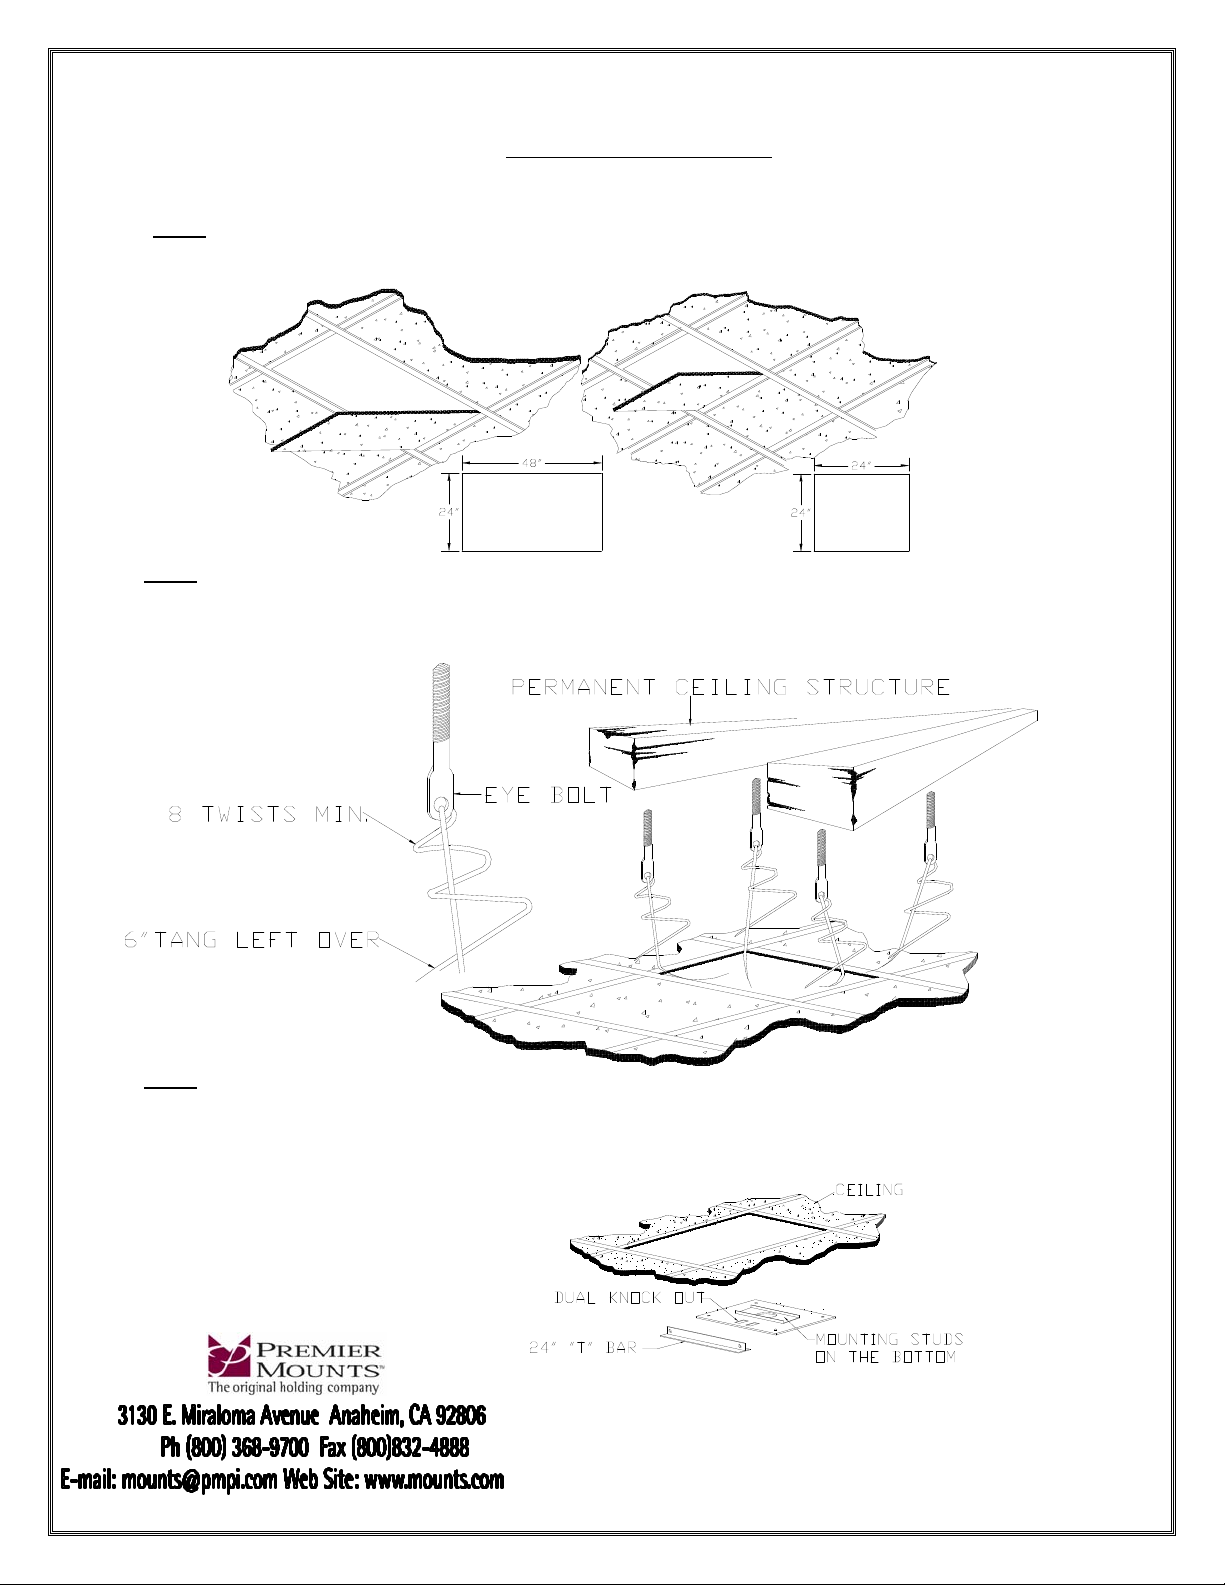
Step 1
Carefully remove a 24”(610mm)x48”(1120mm) or two 24”(610mm)x24”(610mm) suspended ceiling tiles.
Step 2
Install the four (4) each ¼”x3” eye bolts securely into the permanent ceiling structure with a minimum separation of
18”x18” square pattern between eye bolts. Cut four (4) required lengths of the safety suspension support wire supplied.
Run one end of the wire through the eye bolt twist minimum eight (8) times and leave a 6” tang for each eye bolt.
Step 3
Install the PP-FCMA plate securely into the “T” bar frame work with the mounting studs face down and the dual knock
out for electrical box located at the rear of the projector position. Install the additional 24” “T” bar main run cross lots
if needed to support the adapter plate and replacement 24”x 24” ceiling tile.
9530-301-001-01
Page 2
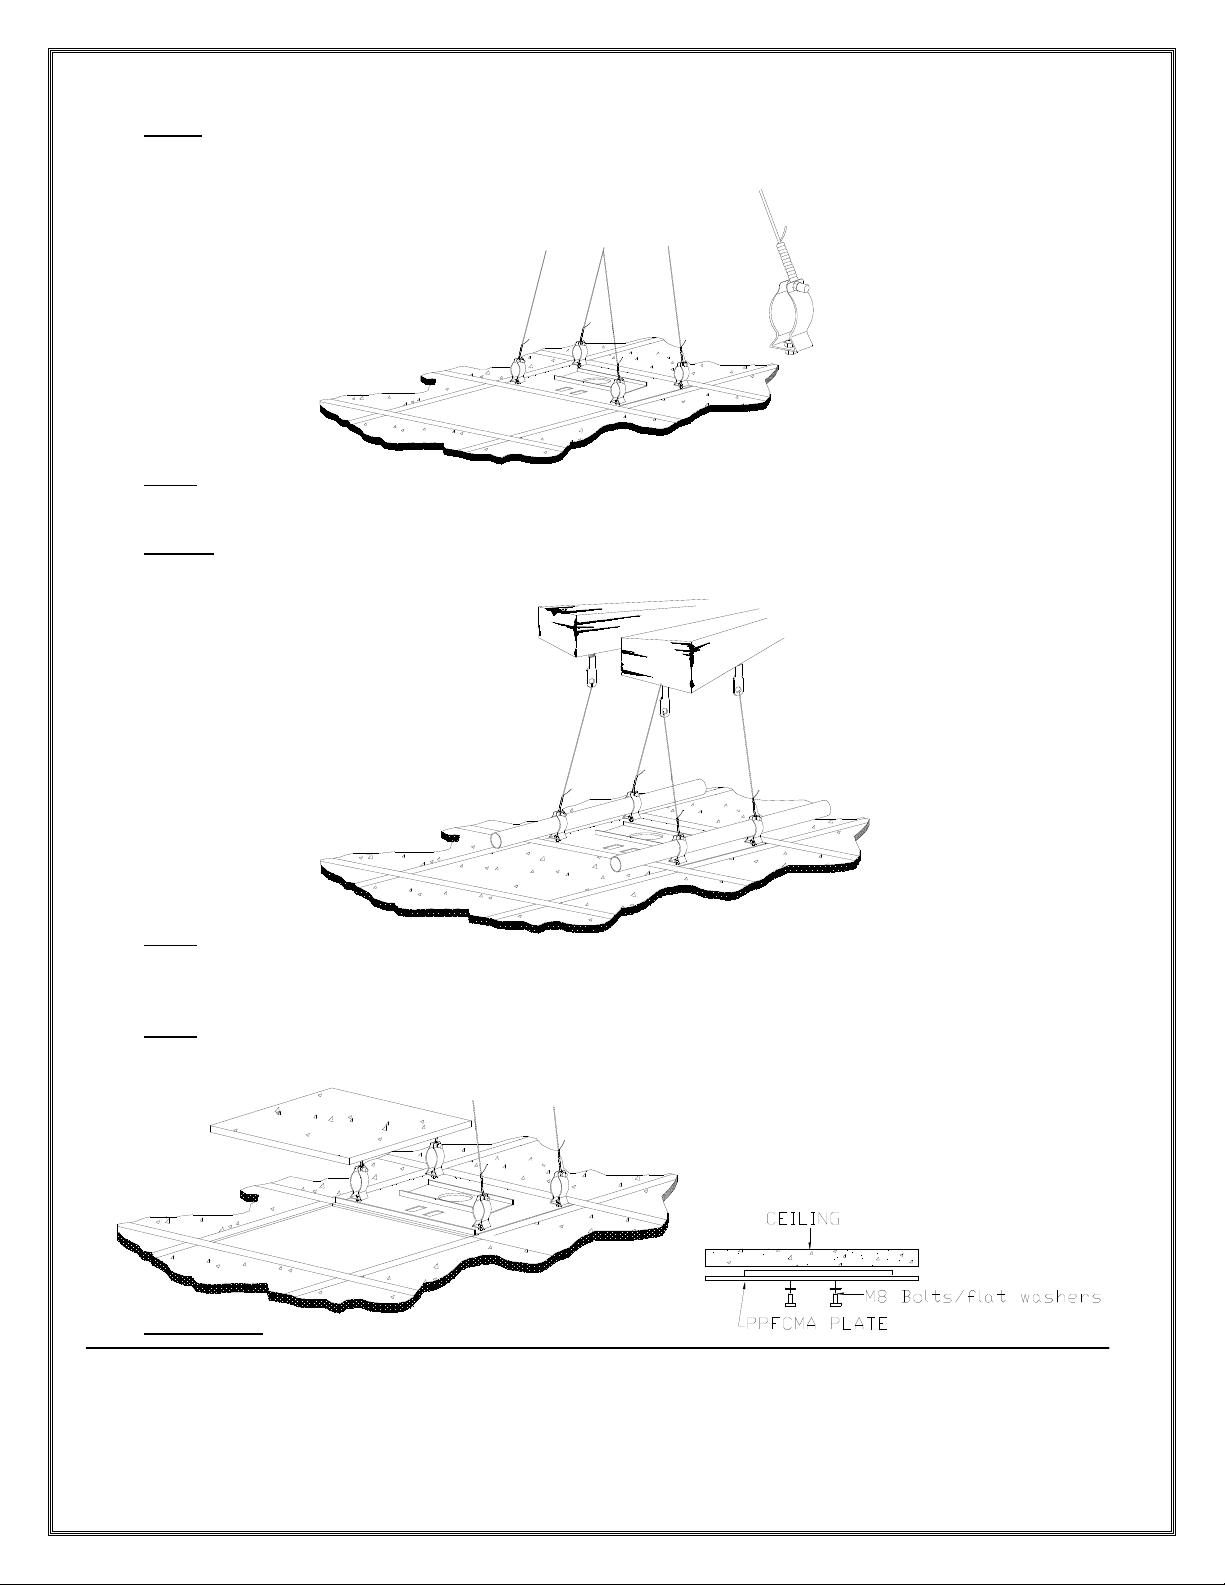
Step 4
Install the four (4) each step bolt into the holes of the adapter plate and secure with the ¼” kep nuts supplied. Install
the four (4) each ¾” EMT pipe “stand off” clamps over the step bolts and secure with the ¼” kep nuts supplied.
Step 5
Run the secured wire under the ¼” cross bolt off the clamp (remove as much slack as possible) and twist minimum
eight (8) times and leave a 6” tang for each clamp.
NOTE:
over 2 sections of the “T” bar frame works on both sides of the clamps in either direction.
Step 6
Run the cables through the 1-1/2” center hole or into the conduit boxes attached to the knock out ports. Reinstall th e tile.
If it is a 24”x 48” cut it to fit the new 24”x 24” tile.
Step 7
Remove the four (4) M8 bolts and washers fo r base box installation. Re install Loose for adjustment. Tighten all hardware.
For additional security if desired run two (2) each ¾” diameter EMT conduit pipe through the clamps and across
WARNING!
The ceiling should be capable of supporting a weight of at least five times the projector or monitor weight. If it cannot, the
ceiling must be reinforced. Proper installation procedure by qualified personnel as outline. In the installation instru ctions
must be adhered to. Failure to do so could result in serious personal injury. For further information or ordering assistance
contact us at the address shown on the front of this page.
 Loading...