

Page 1
INSTALLATION, OPERATION AND MAINTENANCE MANUAL
Save manual for future reference
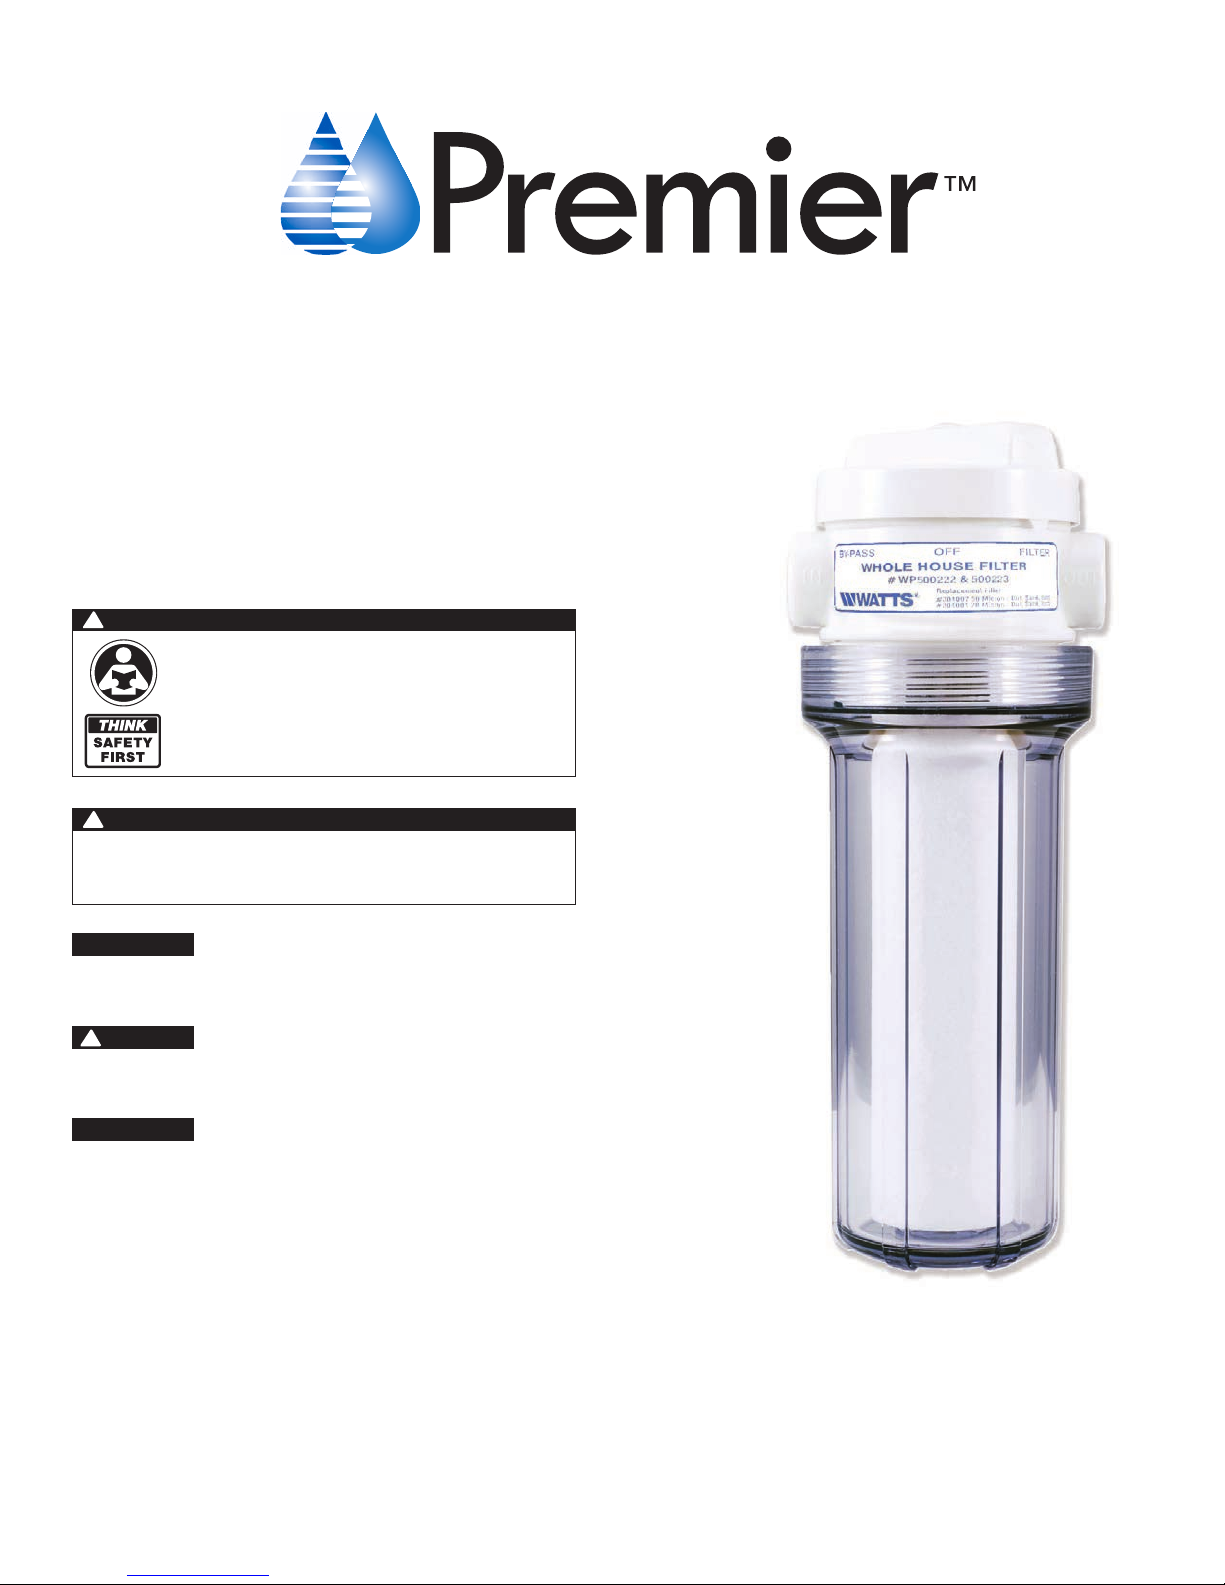
Whole House Filter
Model: WH-LD
!
WARNING
Please read carefully before proceeding with
installation. Your failure to follow any attached
instructions or operating parameters may lead to the
product’s failure.
Keep this Manual for future reference.
!
WARNING
Do not use with water that is microbiologically unsafe or of
unknown quality without adequate disinfection before or
after the system.
IMPORTANT
If you are unsure about installing your WATTS water filter, contact
a WATTS representative or consult a professional plumber.
!
CAUTION
Test the water periodically to verify that the system is performing satisfactorily.
Discard small parts remaining after the installation.
NOTICE
Failure to install the system correctly voids the warranty.
Handle all components of the system with care. Do not drop,
drag or turn components upside down.
Be sure the floor under the water filter system is clean, level
and strong enough to support the unit.
Refer to enclosed warranty for operating parameters to ensure proper use with your water supply.
Watts Premier, Inc.
www.premierh2o.com
P/N WP199953
8716 W Ludlow Drive Suite #1
Peoria, AZ 85381
Page 1
Canada: Tel. (905) 332-4090
Manual Edition: 04/27/2016
USA: Tel. (800) 752-5582
Page 2

Table of Contents
Operational Parameters .................................................................................................................................................... 3
Contents of Whole House Filter
Tools Recommended For Installation
Prior to Installation
Installation
Start Up
Operating Instructions
Suggested Maintenance
Product Registration
Filter Replacement Procedure
Troubleshooting
Limited Warranty
........................................................................................................................................................................ 4
............................................................................................................................................................................ 5
............................................................................................................................................................ 3
....................................................................................................................................................... 5
................................................................................................................................................... 5
......................................................................................................................................................... 5
................................................................................................................................................................ 6
.............................................................................................................................................................. 8
......................................................................................................................................... 3
................................................................................................................................ 3
........................................................................................................................................... 6
Overview
Thank you for your purchase of a Watts Whole House Water Filter. Water quality concerns are quickly becoming more of
a focus for the public. This Watts whole house water filter has been designed and tested to provide you with a higher
quality of water.
This filter is designed to reduce the amount of sediment that would normally enter your home water system. Reducing
the amount of sediment in your home water system will allow your fixtures and water use appliances to work better.
It is important to change out your filters at the recommended intervals as indicated in this system manual. When
replacing the filter elements, pay special attention to any cleaning instructions. Should you have any further questions
please refer to our web site at www.premierH2o.com or call our customer service department at 1-800-752-5582.
Page 2
Page 3

Operational Parameters
NOTICE
Operating Temperature: 100°F (37.8°C) 40° F (4.4°C)
Operating Pressure: 100 psi (7.43 g/cm²) 20 psi (1.40 kg/cm²)
Do not use with water that is microbiologically unsafe or of unknown quality, without adequate
disinfection before or after the system.
Maximum Minimum
Contents of Whole House Filter
Please make sure all of the items listed below are contained in the box. If any of the items are missing please
contact Watts Premier at 800-752-5582 prior to installing.
Filter housing with built-in By-Pass Valve
50 Micron Sediment Filters (x3)
Filter Wrench
Whole House Filter Manual
Tools Recommended For Installation
Hacksaw or Pipe Cutter
Low Grit Sandpaper
(2) 3/4” or 1/2” Crescent Wrenches
Plumber’s Tape (also known as Thread Seal Tape)
Prior to Installation
Watts’s Whole house filter is designed to be installed on the main waterline servicing the house. It should be installed
indoors where it is not subject to cold temperatures or long term exposure to direct sunlight. Watts Inc. does not take
any responsibility for the plumbing of the system into the water line. All water filtration systems must be installed in
accordance with local plumbing codes and regulations.
NOTICE
Note: Fittings will need to be purchased for installation
If pipes will be sweat soldered, do not connect into the unit until the pipes have cooled.
Page 3
Page 4
Installation
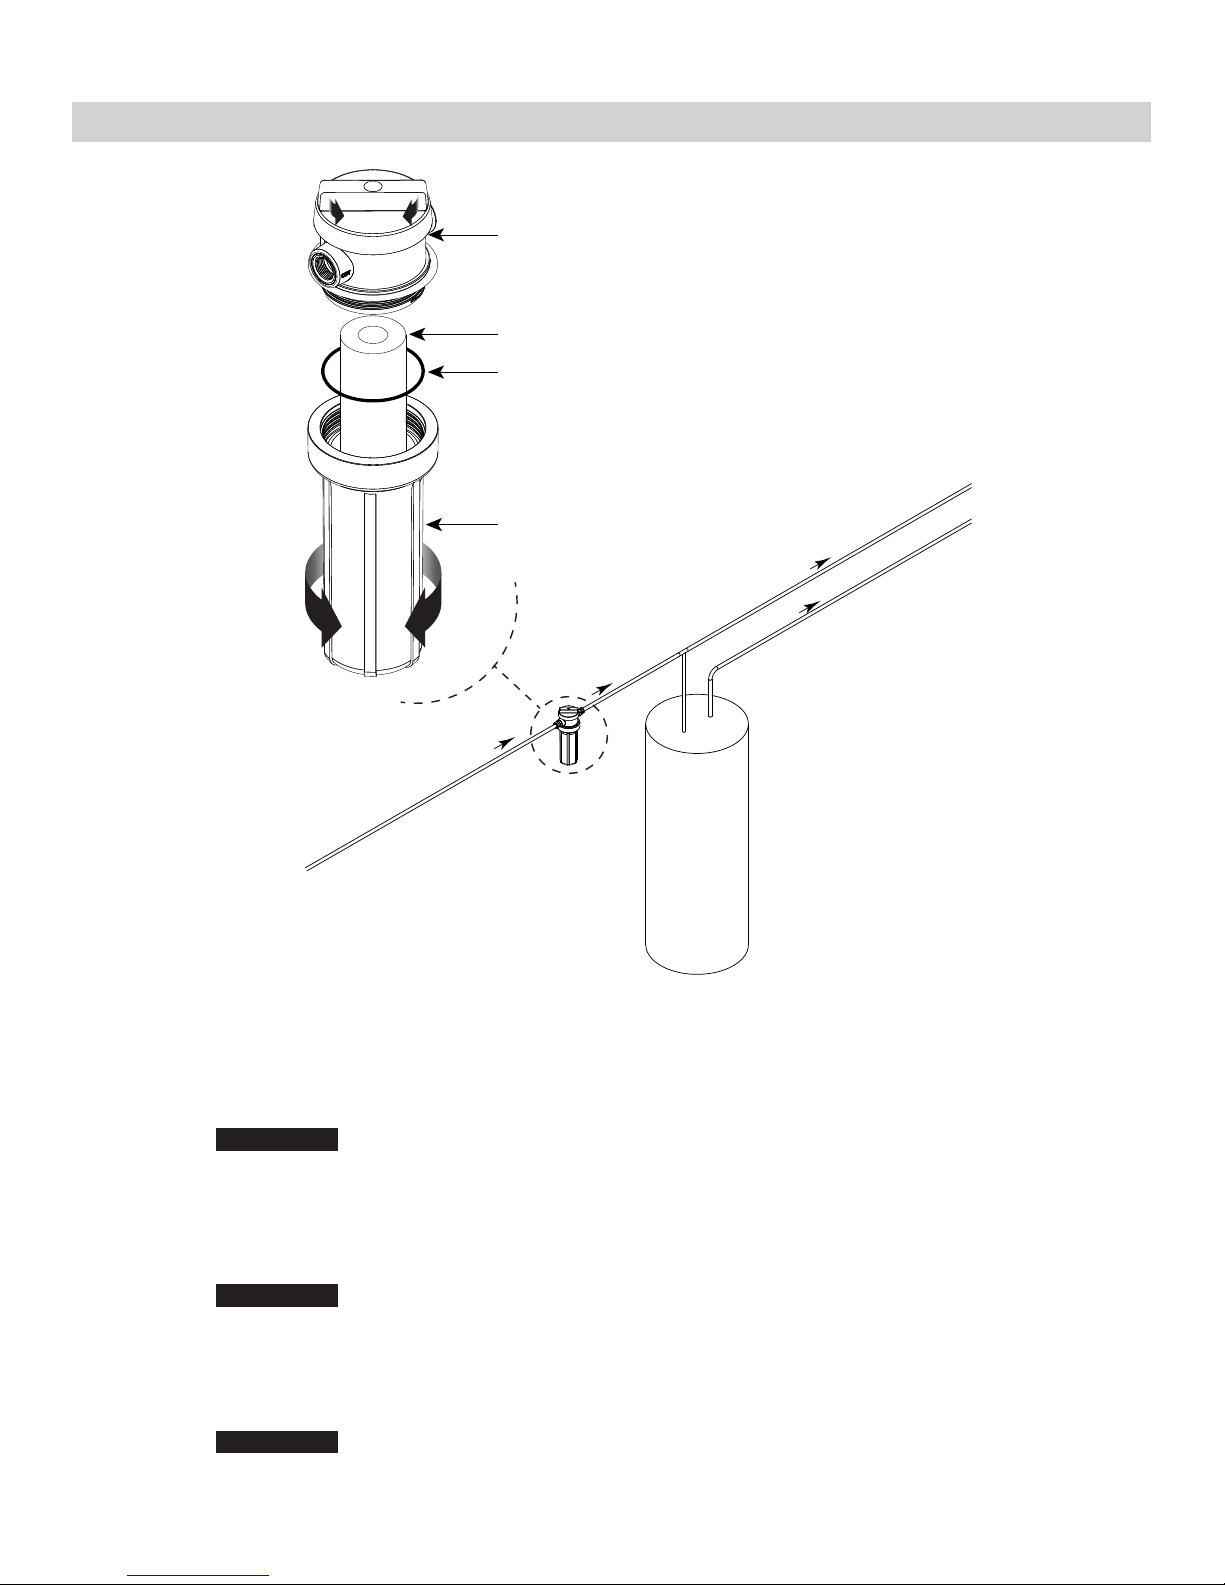
Lid with Built-in
By-pass Valve
(3/4” FPT Ports)
Sediment Filter (PN# 304007)
O-ring (PN# 252235)
Filter Bowl
To
Tighten
To
Loosen
Cold Water
Hot Water
City Water Supply
Hot
Water
Heater
Wrench
(PN# WP164002 - Not Shown)
Figure 1: There are several ways to plumb your whole house Filter into your existing
water line. The diagram above is the basic install layout.
Step 1: Determine the size of the incoming water line you will be tapping into.
Step 2: Determine the pipe material (Copper, Pex, CPVC, or other)
Step 3: Make sure water flow direction coincides with the “IN” and “OUT” ports marked on the unit.
NOTICE
For copper we recommend using brass 3/4” MPT x (plumbing size) 1/2” or 3/4”
compression style fittings. For all other types check with your plumbing professional.
Step 4: Make sure to use teflon tape on all male pipe threading used.
CAUTION
Make sure not to overtighten threaded port to unit!
Step 5: Shut off main water supply and open a faucet beyond the connection to relieve water pressure.
Step 6: Determine placement of the unit. The amount of pipe to be removed will be dependant on the type of
fittings used.
NOTICE
This unit must be installed vertically with the lid on top.
Page 4
Page 5

Step 7: Cut the water line where the Whole House Filter is to be installed. Copper plumbing needs to be cleaned
& de-burred of any imperfections. Make sure the installation location allows for easy servicing of the
system, including a clearance beneath the filter bowl for filter changes.
Step 8: Plumb waterline to system. Make sure that the flow direction is correct through the filter system.
Start Up
Step 1: Make sure the valve on the lid is turned to “FILTER”.
Step 2: Open a faucet downstream of the Whole House filter unit.
Step 3: Slowly turn on main water supply until faucet downstream is steadily flowing.
Step 4: Turn off faucet and check for leaks at your connections. Monitor for leaks for 24 hours after installation.
Operating Instructions
This whole-house filter features a Valve-in-Head design. This allows you to control water flow through the unit without
additional hardware.
Valve Operation (See Label for Position)
BY-PASS Allows water to continue to flow through the house NOT utilizing the filter.
OFF Shuts off water before the filter.
FILTER Allows water to flow through the house utilizing the filter.
Note: In all three modes the unit will remain under pressure.
Suggested Maintenance
This whole house filter can use 5, 10, 20, or 50 micron sediment filters. This kit includes three (3) 50 micron filter. The
recommended filter is a 50 micron. The recommended time for replacing your filter is every three (3) to six (6) months
depending on your incoming water conditions. If your water contains more sediment you may be required to change
your filters more often. Failure to change filters regularly will reduce water pressure & flow. Visually check filter for
sediment or dirt loading.
Product Registration
To Register your product, please visit www.premierh2o.com and select “Product Registration” under the “Product Info”
menu
Watts is concerned for the safety of your personal information. WATTS collects personal information when you register with Watts. This information is
stored in our data base and we do not rent, sell, or share personal information with other people or nonaffiliated companies. We reserve the right to
send you certain types of communications such as direct mail, email, or by telephone relating to our products or products that you have purchased. We
limit access to your personal information to those employees who will directly provide you with services or products in order to do their jobs.
Page 5
Page 6
Filter Replacement Procedure
Step 1: Shut off the water to the filter housing by turning the bypass valve to “BYPASS” or “OFF”
Step 2: The bowl of the system can be removed by turning it clockwise (see Figure 1). Use the supplied filter
wrench to loosen the housing.
Step 3: Remove the old filter and discard.
Step 4: Clean the filter housing with a mild soap solution and rinse with water. Check O-ring and lubricate with
water soluble lubricant.
Step 4: Replace filter.
Step 5: Reinstall by turning the filter bowl counter-clockwise (see Figure 1) onto the lid. Make sure O-ring is
Step 6: Turn bypass valve back to “FILTER”
Step 7: Check for leaks. Monitor unit for leaks for 24 hours after filter replacement.
NOTICE
properly seated.
NOTICE
Petroleum based lubricants (such as Vaseline®) must not be used
Hand tighten housing. Wrench should only be used to loosen housing.
Troubleshooting
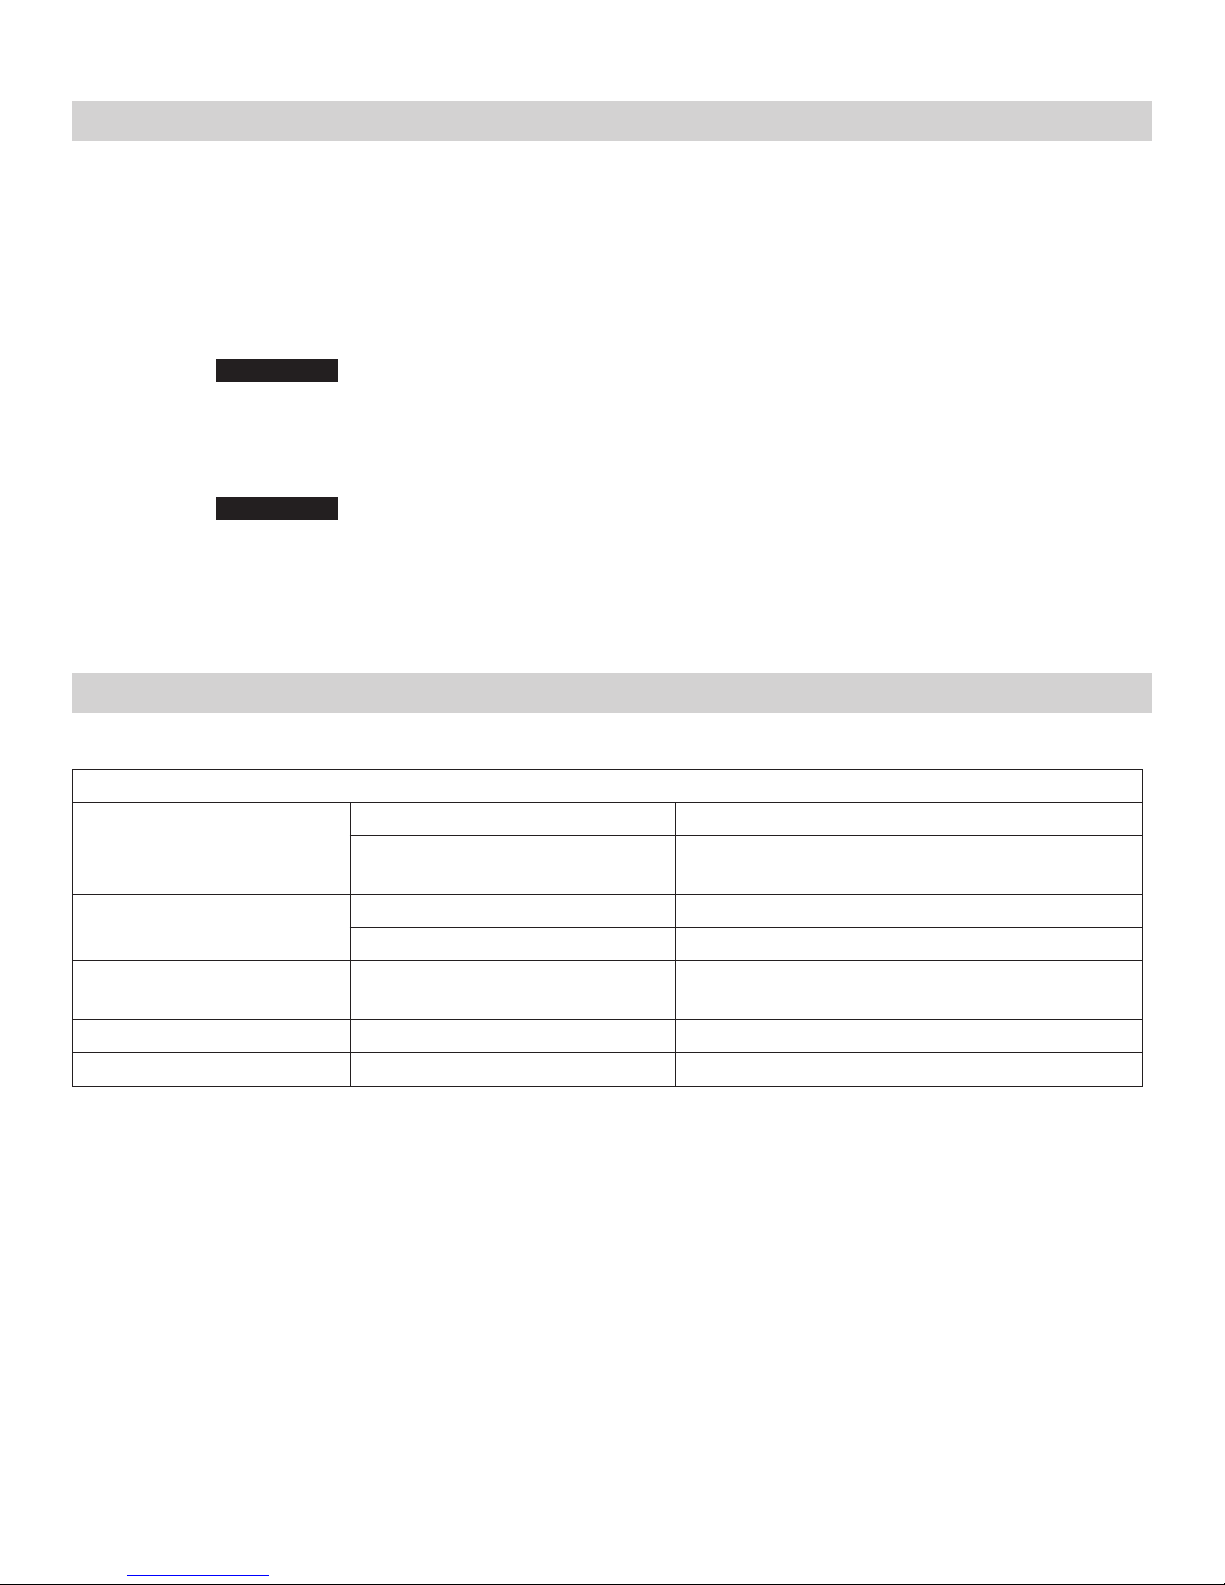
Problem Cause Solution
Filter bowl has no water in it. Water is not turned on at Main Check that the water is on at Main
Valve turned to “BY-PASS” or
“OFF”
Leaking at the bowl. O-Ring kinked or not seated. Check / Replace / Re-seat O-Ring.
Bowl not tightened enough. Tighten bowl.
Leaking at the valve fittings.
Leaking at top of valve (lid). Faulty lid. Call Watts at 1-800-752-5582 for a replacement
Low water flow / pressure Filter clogged Replace Filter
Improper installation / Not enough
plumber’s tape on fitting
Make sure valve is turned to the “FILTER” position.
Replace or repair fittings.
Page 6
Page 7

This page intentionally left blank
Page 8

Limited Warranty
What your Warranty Covers:
If any part of your WH-LD is defective in workmanship (excluding replaceable filters ), return unit after obtaining a return authorization (see below),
within 1 year of the original retail purchase, Watts Premier will repair or, at Watts Premier’s option, replace the system at no charge.
How to obtain Warranty Service:
For warranty service, call 800-752-5582 for a return authorization number. Then, ship your unit to our factory, freight and insurance prepaid, with proof
of date of original purchase. Please include a note stating the problem. Watts Premier will repair it, or replace it, and ship it back to you prepaid.
What this warranty does not cover:
This warranty does not cover defects resulting from improper installation, (contrary to Watts Premier printed instructions), from abuse, misuse, misapplication, improper maintenance, neglect, alteration, accidents, casualties, fire, flood, freezing, environmental factors, water pressure spikes or other such
acts of God.
This warranty will be void if defects occur due to failure to observe the following conditions:
1. The System must be hooked up to a potable municipal or well cold water supply.
2. The pH of the water must not be lower than 5 or higher than 10.
3. The incoming water pressure must be between 20 and 85 pounds per square inch.
4. Incoming water to the system cannot exceed 100 degrees F (38 degrees C.)
This warranty does not cover any equipment that is relocated from the site of its original installation.
This warranty does not cover any charges incurred due to professional installation.
LIMITATIONS AND EXCLUSIONS:
WATTS PREMIER WILL NOT BE RESPONSIBLE FOR ANY IMPLIED WARRANTIES, INCLUDING THOSE OF MERCHANTABILITY AND FITNESS FOR A
PARTICULAR PURPOSE. WATTS WILL NOT BE RESPONSIBLE FOR ANY INCIDENTAL OR CONSEQUENTIAL DAMAGES, INCLUDING TRAVEL EXPENSE,
TELEPHONE CHARGES, LOSS OF REVENUE, LOSS OF TIME, INCONVENIENCE, LOSS OF USE OF THE EQUIPMENT, AND DAMAGE CAUSED BY THIS
EQUIPMENT AND ITS FAILURE TO FUNCTION PROPERLY. THIS WARRANTY SETS FORTH ALL OF WATTS PREMIER’S RESPONSIBILITIES REGARDING THIS
EQUIPMENT.
Other Conditions:
If Watts Premier chooses to replace the equipment, Watts Premier may replace it with reconditioned equipment. Parts used in repairing or replacing the
equipment will be warranted for 90 days from the date the equipment is returned to you or for the remainder of the original warranty period, whichever
is longer. This warranty is not assignable or transferable.
Your Rights Under State Law:
Some states do not allow limitations on how long an implied warranty lasts, and some states do not allow the exclusion or limitation of incidental or
consequential damages, so the above limitations or exclusions may not apply. This warranty gives you specific legal rights, and you may have other
legal rights which vary from state to state.
WARNING: This product contains chemicals known to the State of California to cause cancer and birth defects or other reproductive harm.
For more information: www.watts.com/prop65
 Loading...