

Page 1
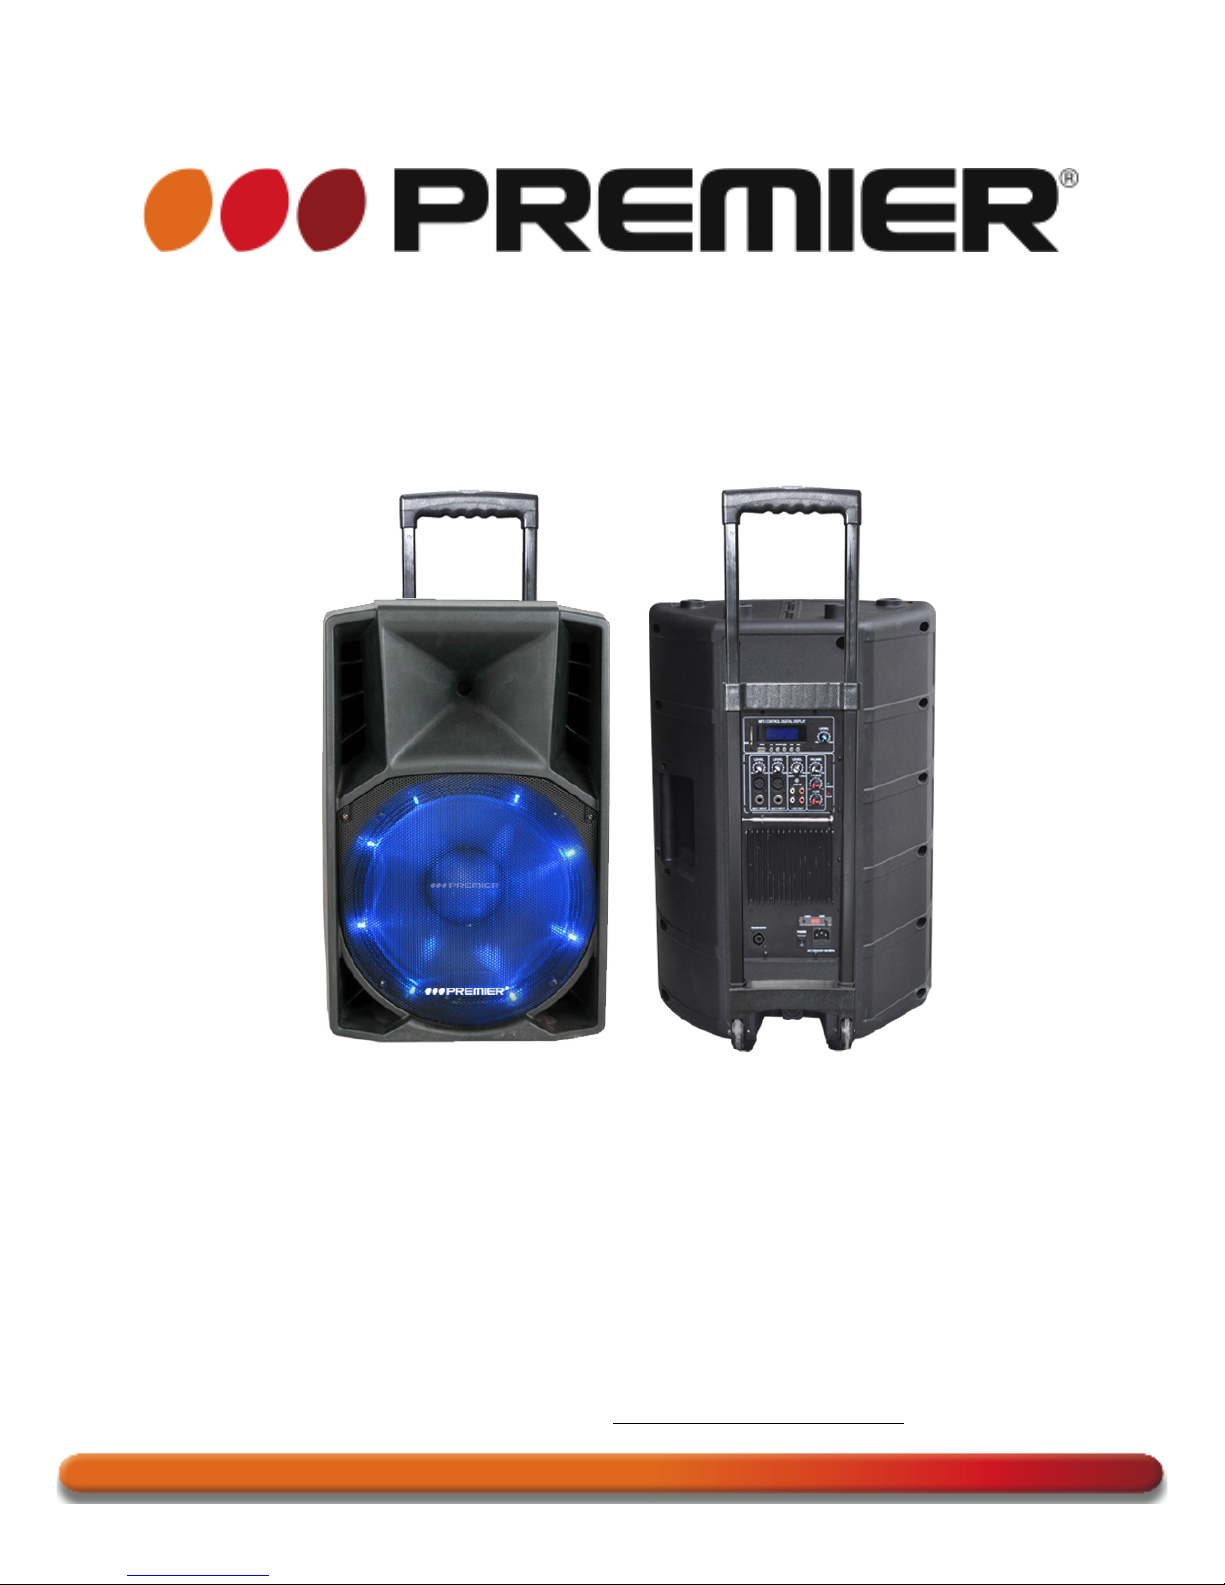
MANUAL DE INSTRUCCIONES
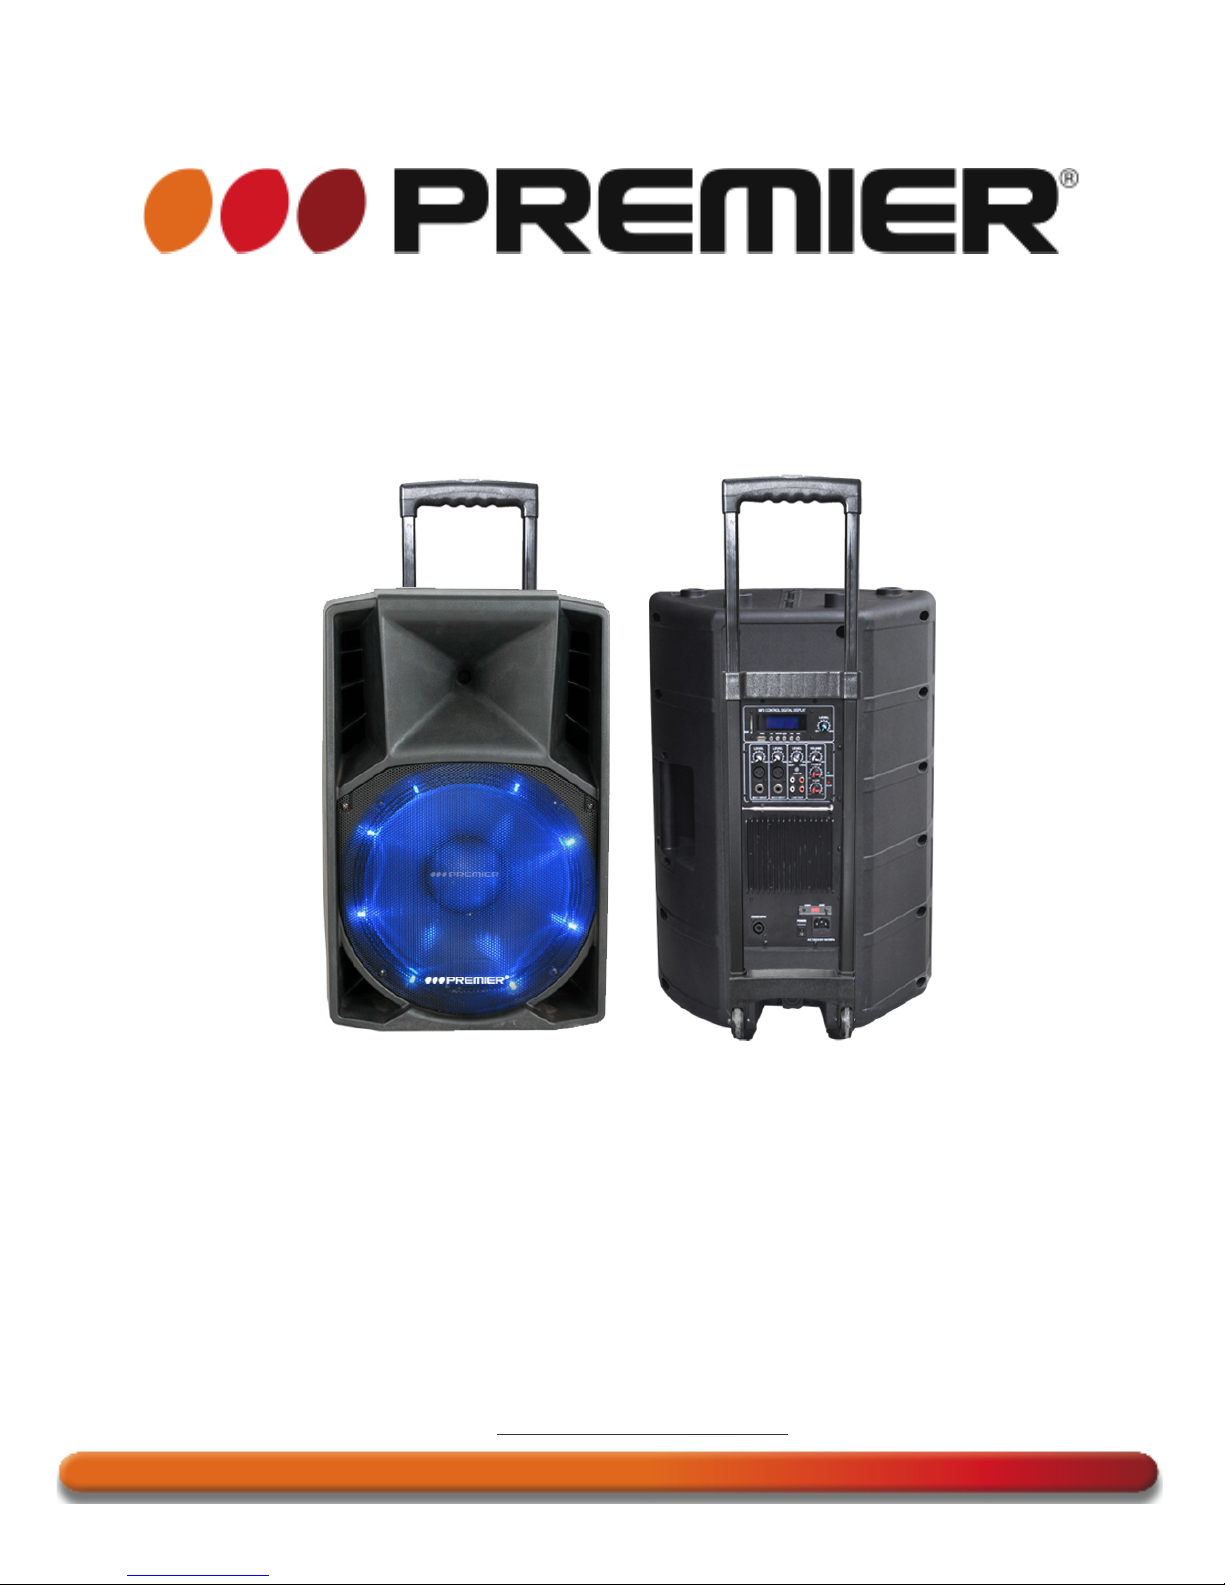
PARLANTE ACTIVO MULTIMEDIA (15”)
BB-5506USBT
ESTIMADO CLIENTE
Con el fin de que obtenga el mayor desempeño de su producto, por favor lea este manual de
instrucciones cuidadosamente antes de comenzar a utilizarlo, y guárdelo para su futura referencia.
Si necesita soporte adicional, no dude en escribir a: [email protected]
Page 2
Page 1
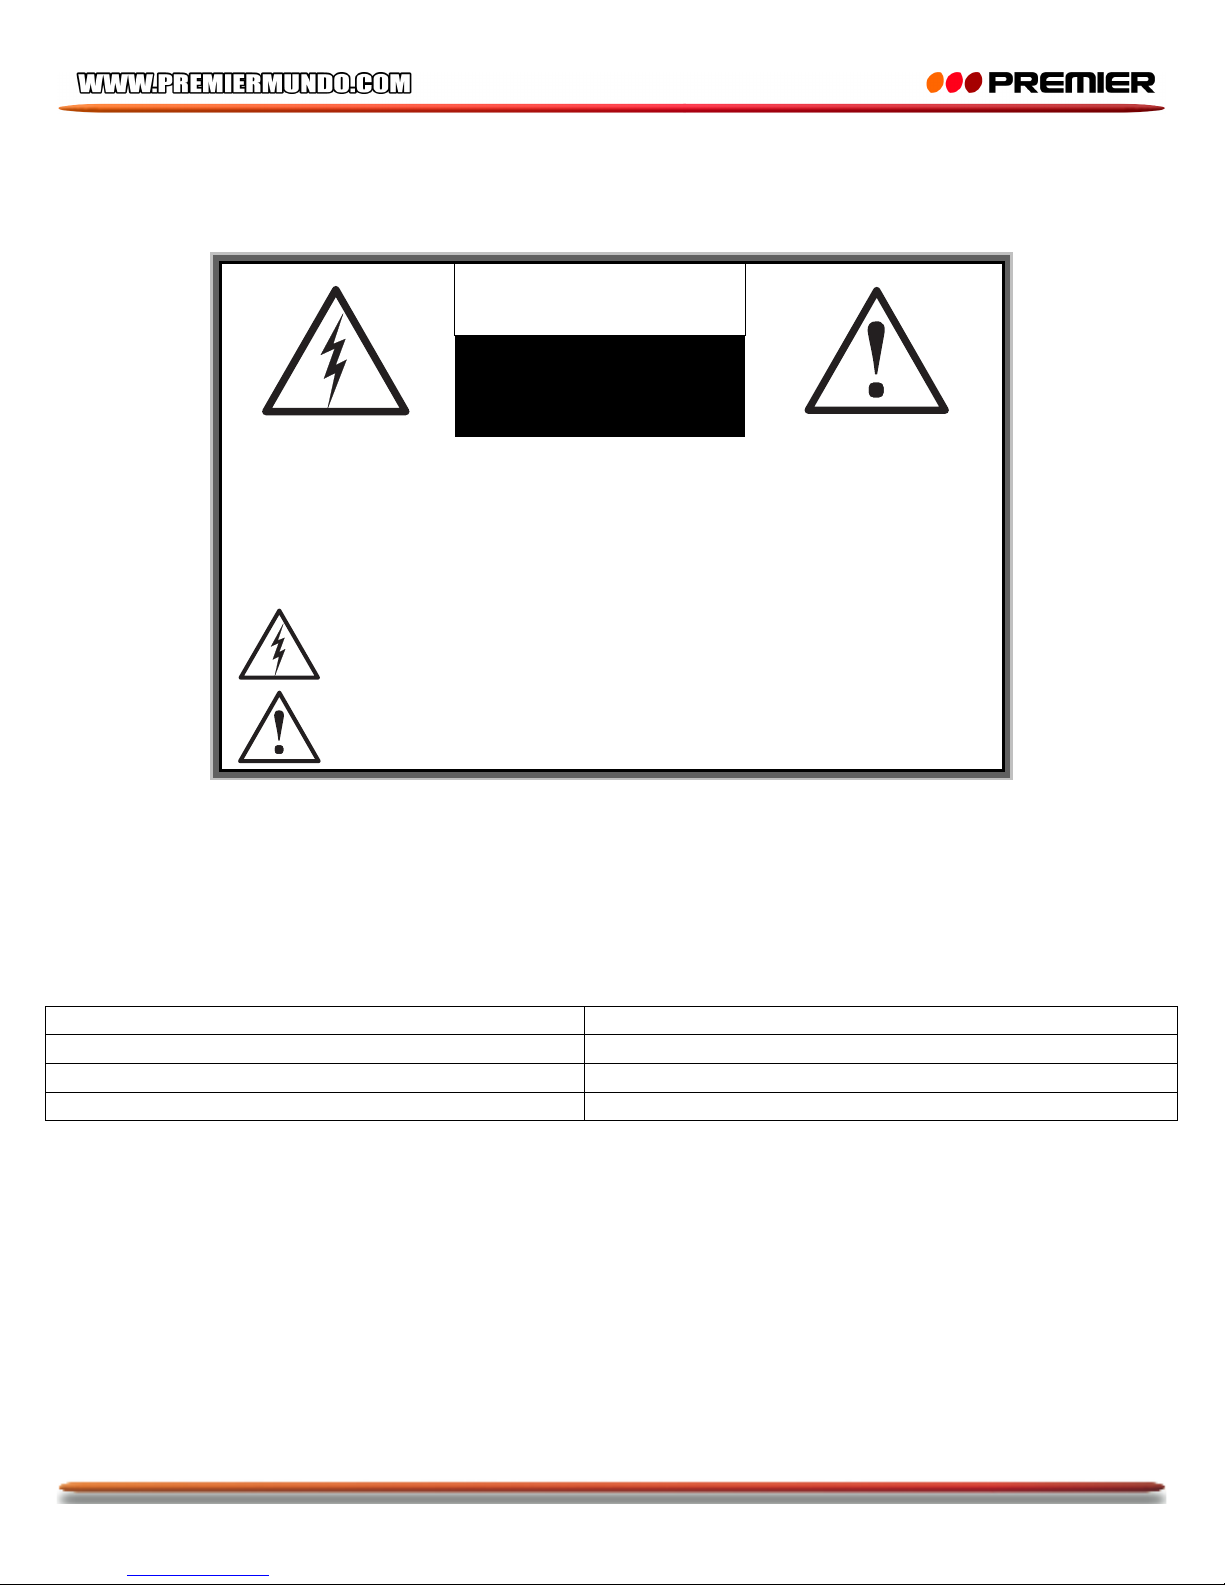
PRECAUCIÓN
RIESGO DE CHOQUE
ELÉCTRICO , NO ABRA
Precaución: Para reducir el riesgo de choque eléctrico, no retire
la cubierta, no hay partes manipulables por el usuario al interior
de la unidad. Refiera todo mantenimiento o intervención técnica
a personal técnico calificado.
Este símbolo indica la existencia de voltaje peligroso al
interior de esta unidad, que constituye un riesgo de choque
eléctrico.
Este símbolo indica que hay importantes instrucciones de
operación y mantenimiento en la literatura que acompaña a
esta unidad.
LÍNEAS DE SERVICIO AL CLIENTE PREMIER
Venezuela:
0800 – ELECTRIC (353-2874)
Panamá:
507 300-5185
Sitio Web:
www.premiermundo.com
E-mail:
NOTA
Nos reservemos el derecho de modificar las especificaciones, características y/u operación de esta
unidad sin previo aviso, con el fin de continuar las mejoras y desarrollo del mismo.
Page 3

Page 2
INSTRUCCIONES DE USO
Antes de conectar el parlante, asegúrese que el sistema esta apagado y los controles se encuentran en
su nivel mínimo, de lo contrario la unidad podría dañarse.
1. Conecte el enchufe de la unidad a un tomacorriente con adecuada conexión a tierra. Antes de
realizar la conexión, asegúrese que el voltaje del área corresponde con el voltaje de la unidad.
2. Conecte el micrófono en la entrada MIC en la unidad con un conector de 6.3mm o Canon.
3. Conecte un sistema auxiliar (CD, DECK, MP3, Video, Etc) en la entrada de línea de la unidad.
4. Encienda la unidad. Una luz verde en el parlante indicara que esta se encuentra encendida.
5. Ajuste el nivel de volumen del micrófono y la entrada de línea al nivel medio.
6. Incremente de a poco el nivel de volumen de la unidad para evitar daños en sus oídos.
7. Ajuste el valor de los Bajos y Agudos para ecualizar el sonido.
8. Cuando la unidad detecta sobrecarga, se encenderá un indicador LED rojo. Si esto sucede,
disminuya el nivel de volumen.
Precaución!
No coloque el micrófono muy cerca del parlante, ya que esto puede causar un eco que puede dañar el
sistema.
FUNCIONES EXTRA
El canal L/R (RCA) como salida de línea puede manejar un amplificador e incluso otra unidad en
cascada.
En la parte inferior de la unidad hay un agujero diseñado especialmente para colocar un soporte.
BLUE-CONNECT
Paso 1: Presione el botón “MODO” hasta que encuentre Blue-Connect en la pantalla.
Paso 2: Encienda la función Bluetooth™ en su dispositivo móvil, y busque el dispositivo “PREMIER” e
ingrese el código “0000” para finalizar la conexión entre el dispositivo externo y la unidad.
Paso 3: Una vez se han conectado las dos unidades, reproduzca la música desde el dispositivo móvil y
disfrute de la potencia de su unidad.
Page 4
Page 3
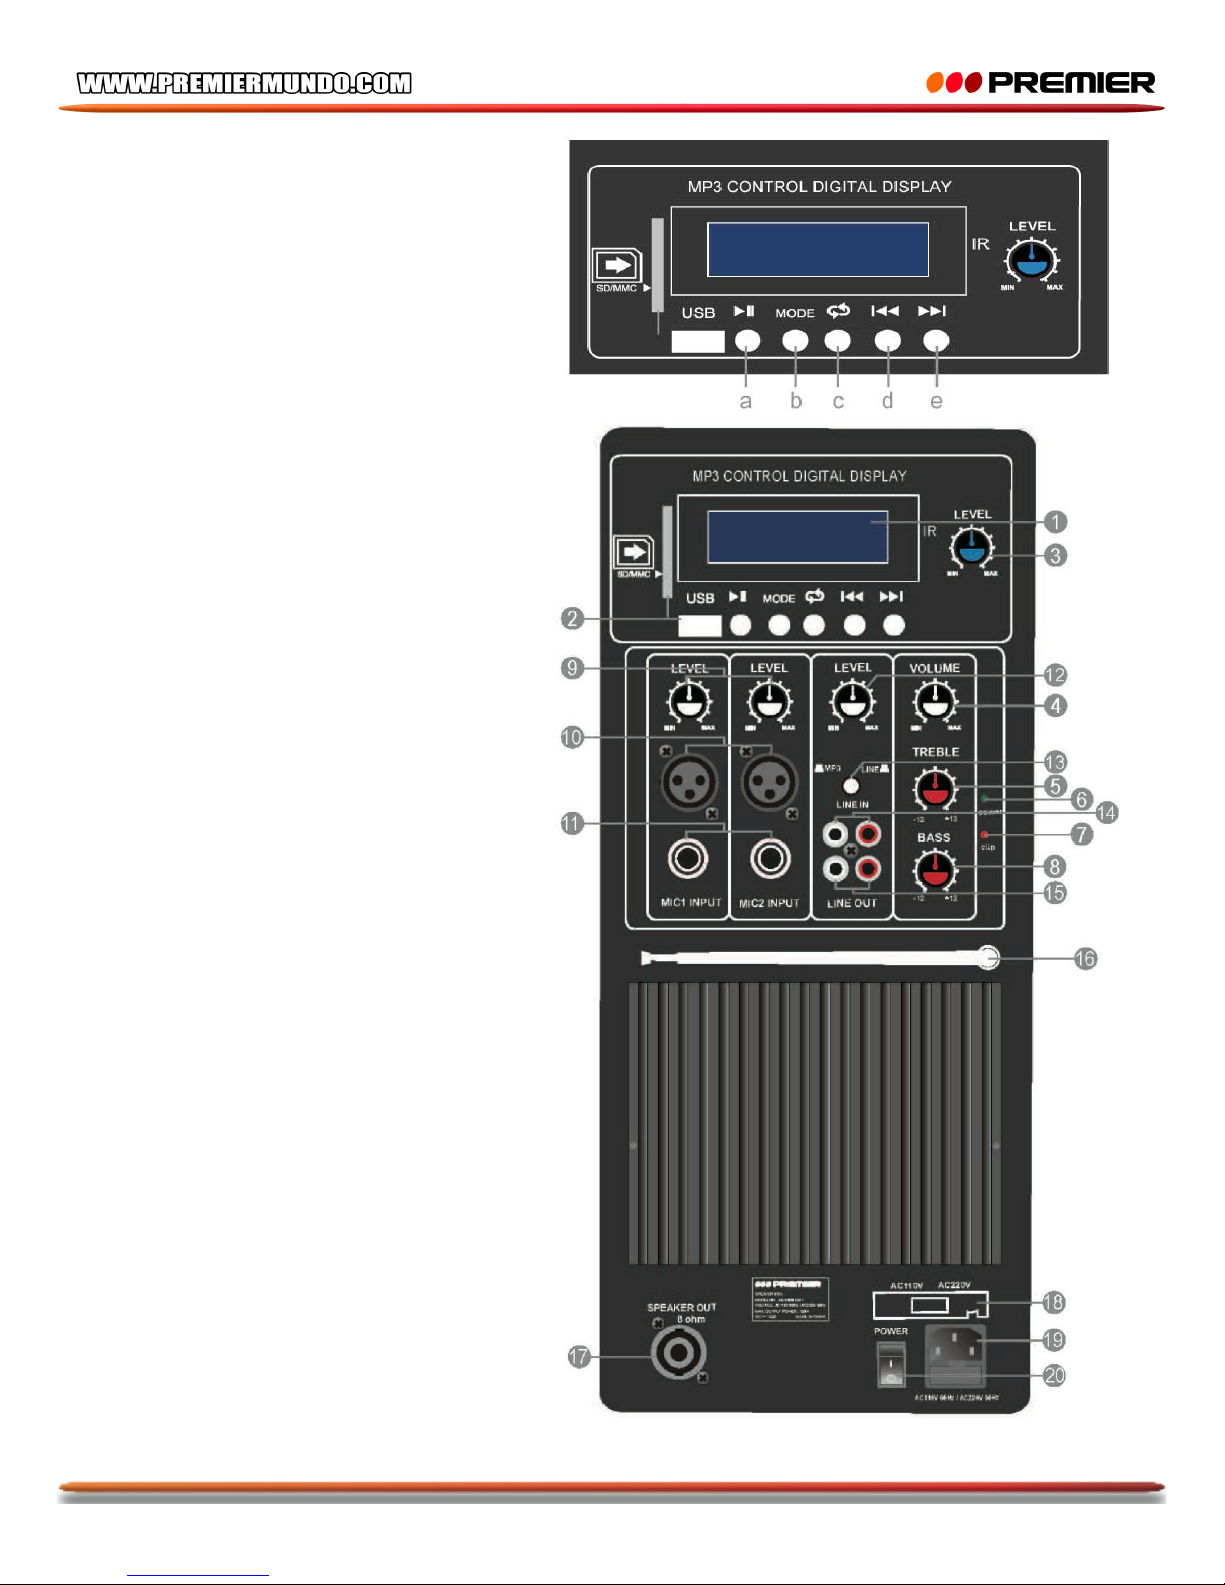
CONTROLES EN LA UNIDAD
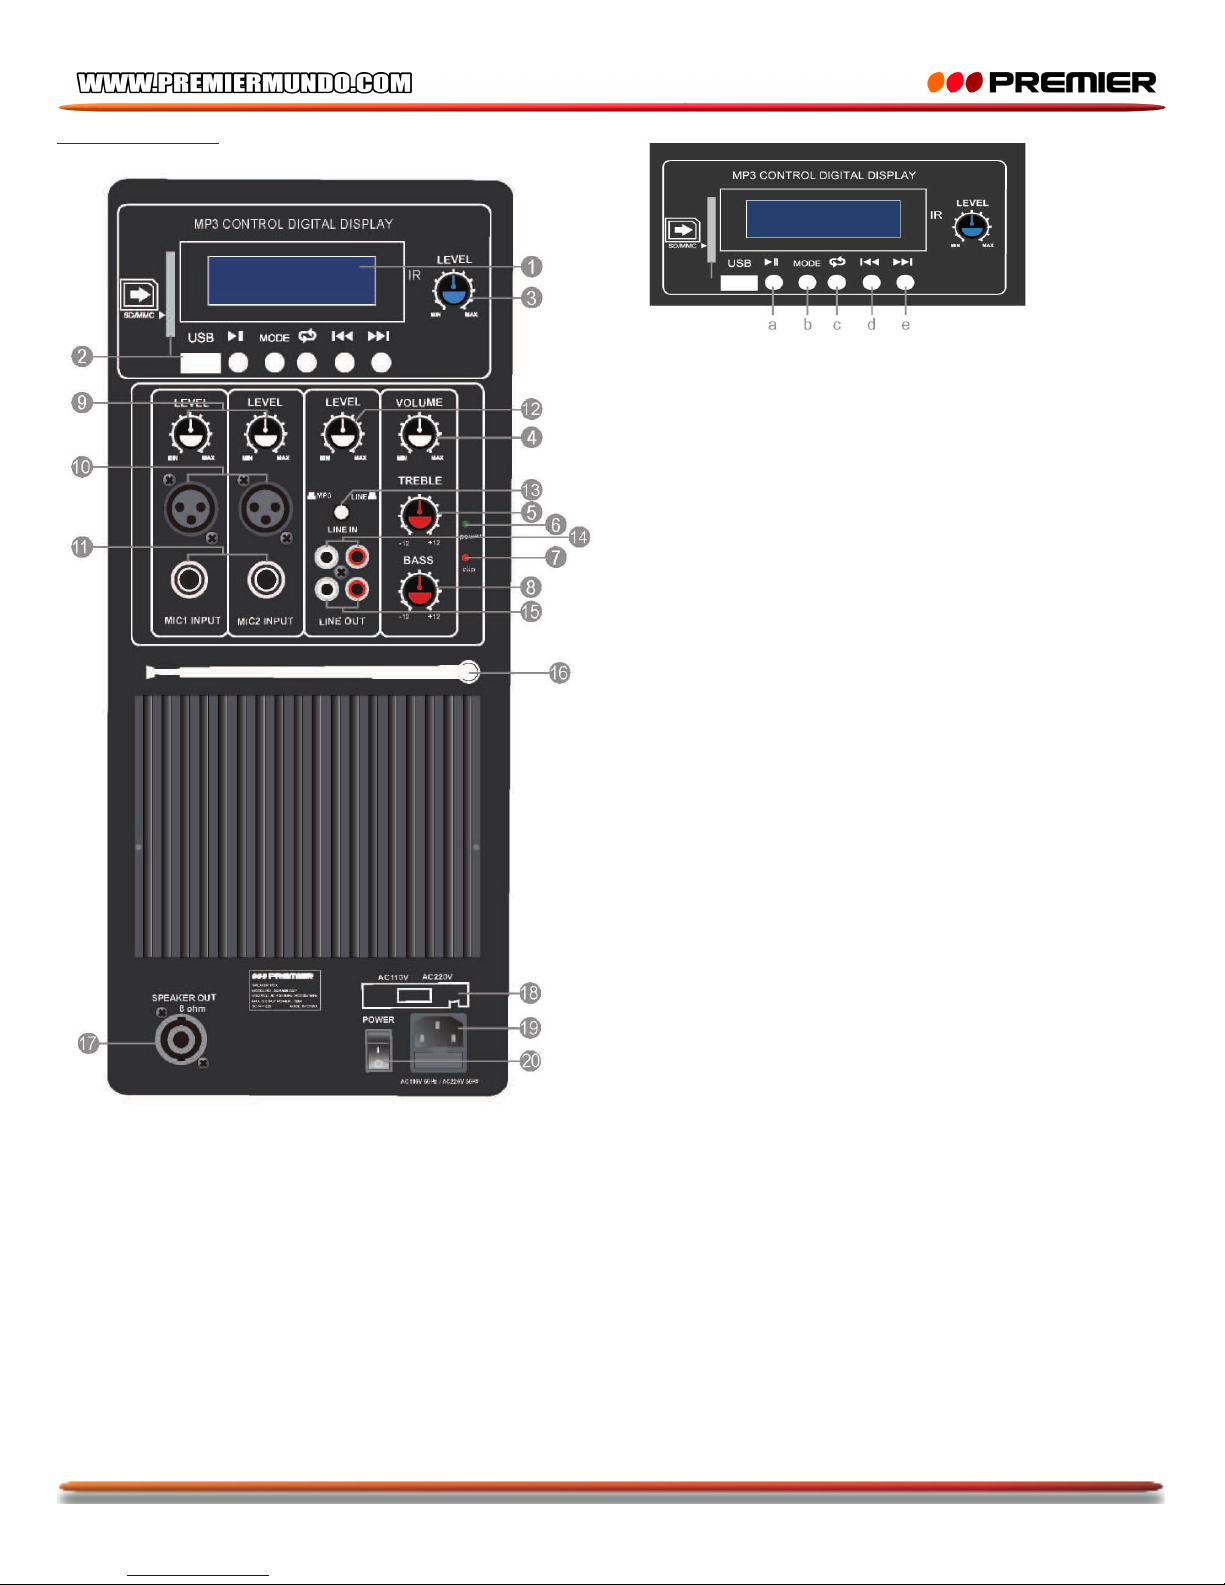
a. Reproducir / Pausar (Función de
búsqueda automática en modo FM)
b. Modo: Presione y sostenga por 3
segundos para ingresar a Modo, presione y
sostenga para Encender o Apagar la
unidad. La luz de la pantalla LCD
permanecerá encendida.
c. Repetir: Presione este botón para Repetir
uno, Repetir todo, Desactivar o modo
Aleatorio.
d. Hacia Arriba: Siguiente Pista / Canción,
en modo Blue-connect. Canal o Carpeta en
modo de Carpeta
e. Hacia Abajo: Ultima Pista / Canción, en
modo Blue-Connect. Canal o Carpeta en
modo de Carpeta
1. Reproductor MP3
2. Entrada USB/SD: Memoria Máxima
32GB
3. Control de Volumen para micrófono
inalámbrico.
4. Control de volumen de la unidad
5. Ajuste de agudos
6. Indicador de potencia
7. Indicador de saturación
8. Ajuste de bajos
9. Nivel de volumen de micrófono
10. Entrada de micrófono 1 y 2
11. Conector de entrada de línea de
micrófono de 6.3mm 1 y 2
12. Nivel de línea: controla la entrada de
línea y los niveles de salida de línea
13. Cambiar fuente de entrada (Línea, MP3)
14. Entrada de línea
15. Salida de línea
16. Antena FM
17. Salida de parlante de 8Ohm
18. Voltaje de potencia
19. Entrada del cable de potencia
20. Interruptor de encendido / apagado
Page 5
Page 4
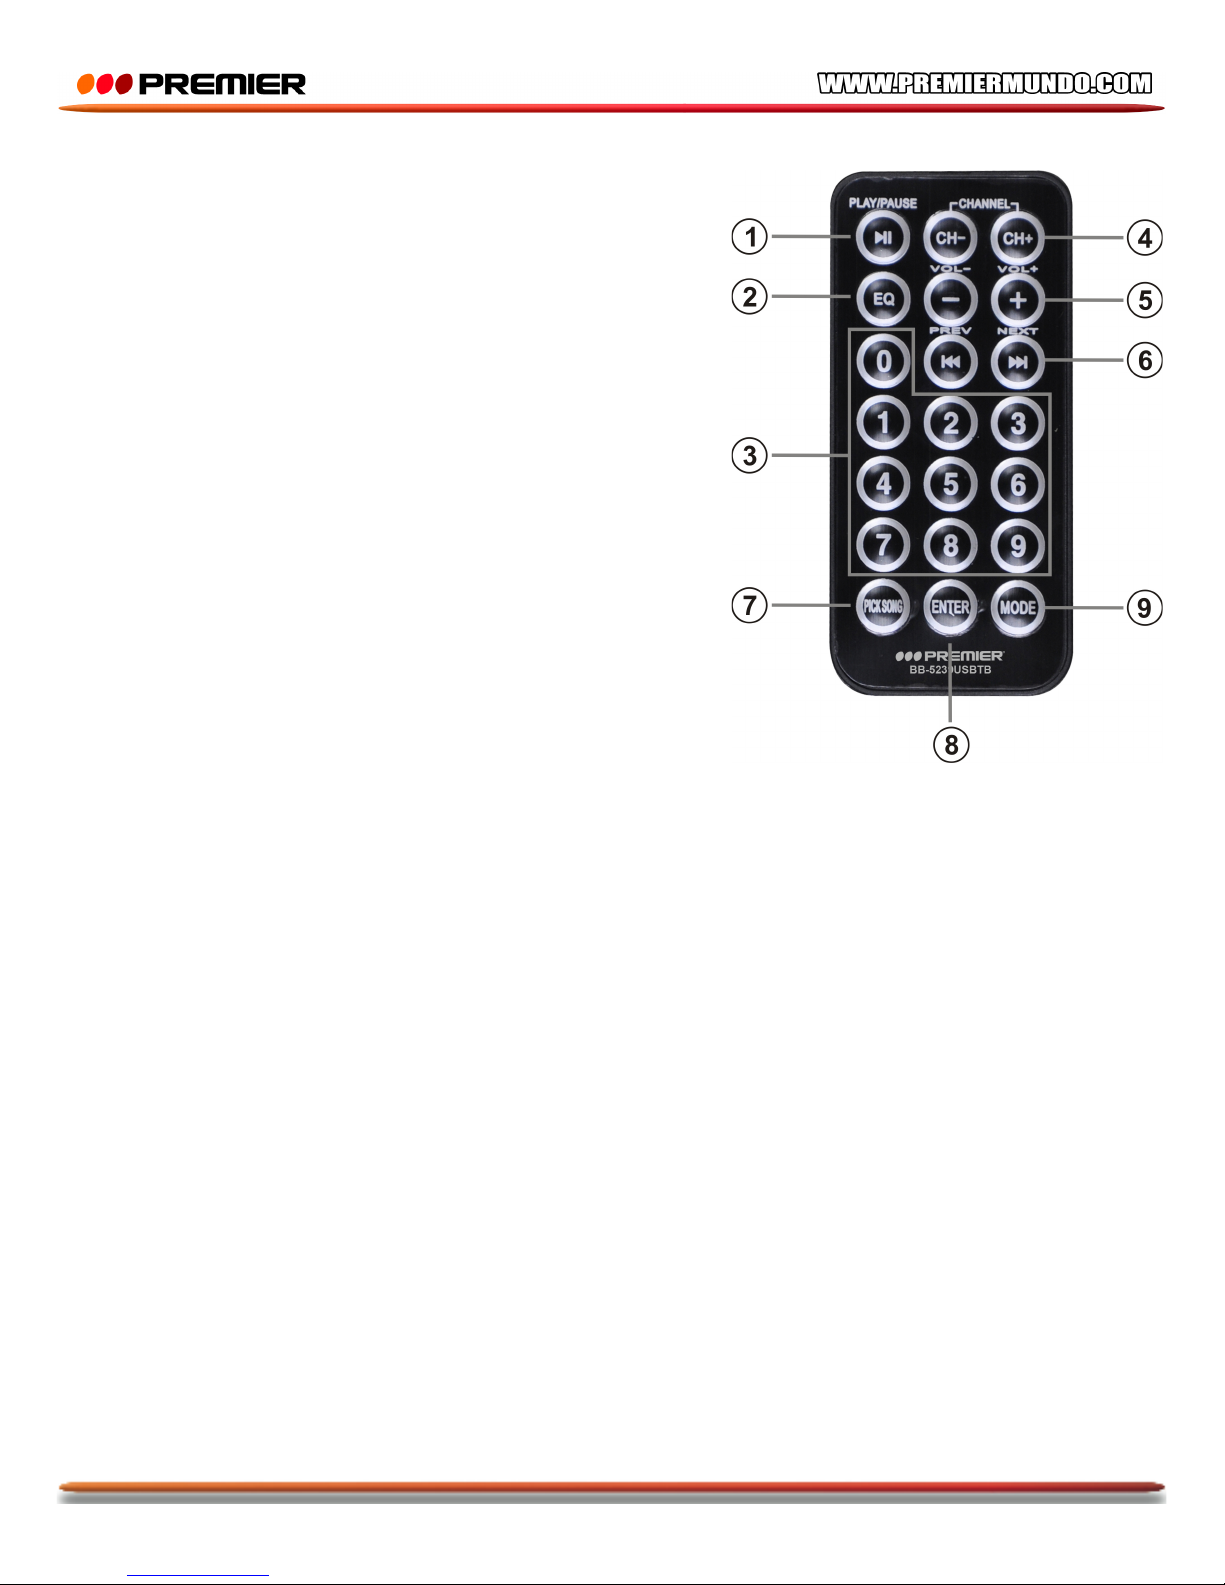
CONTROL REMOTO
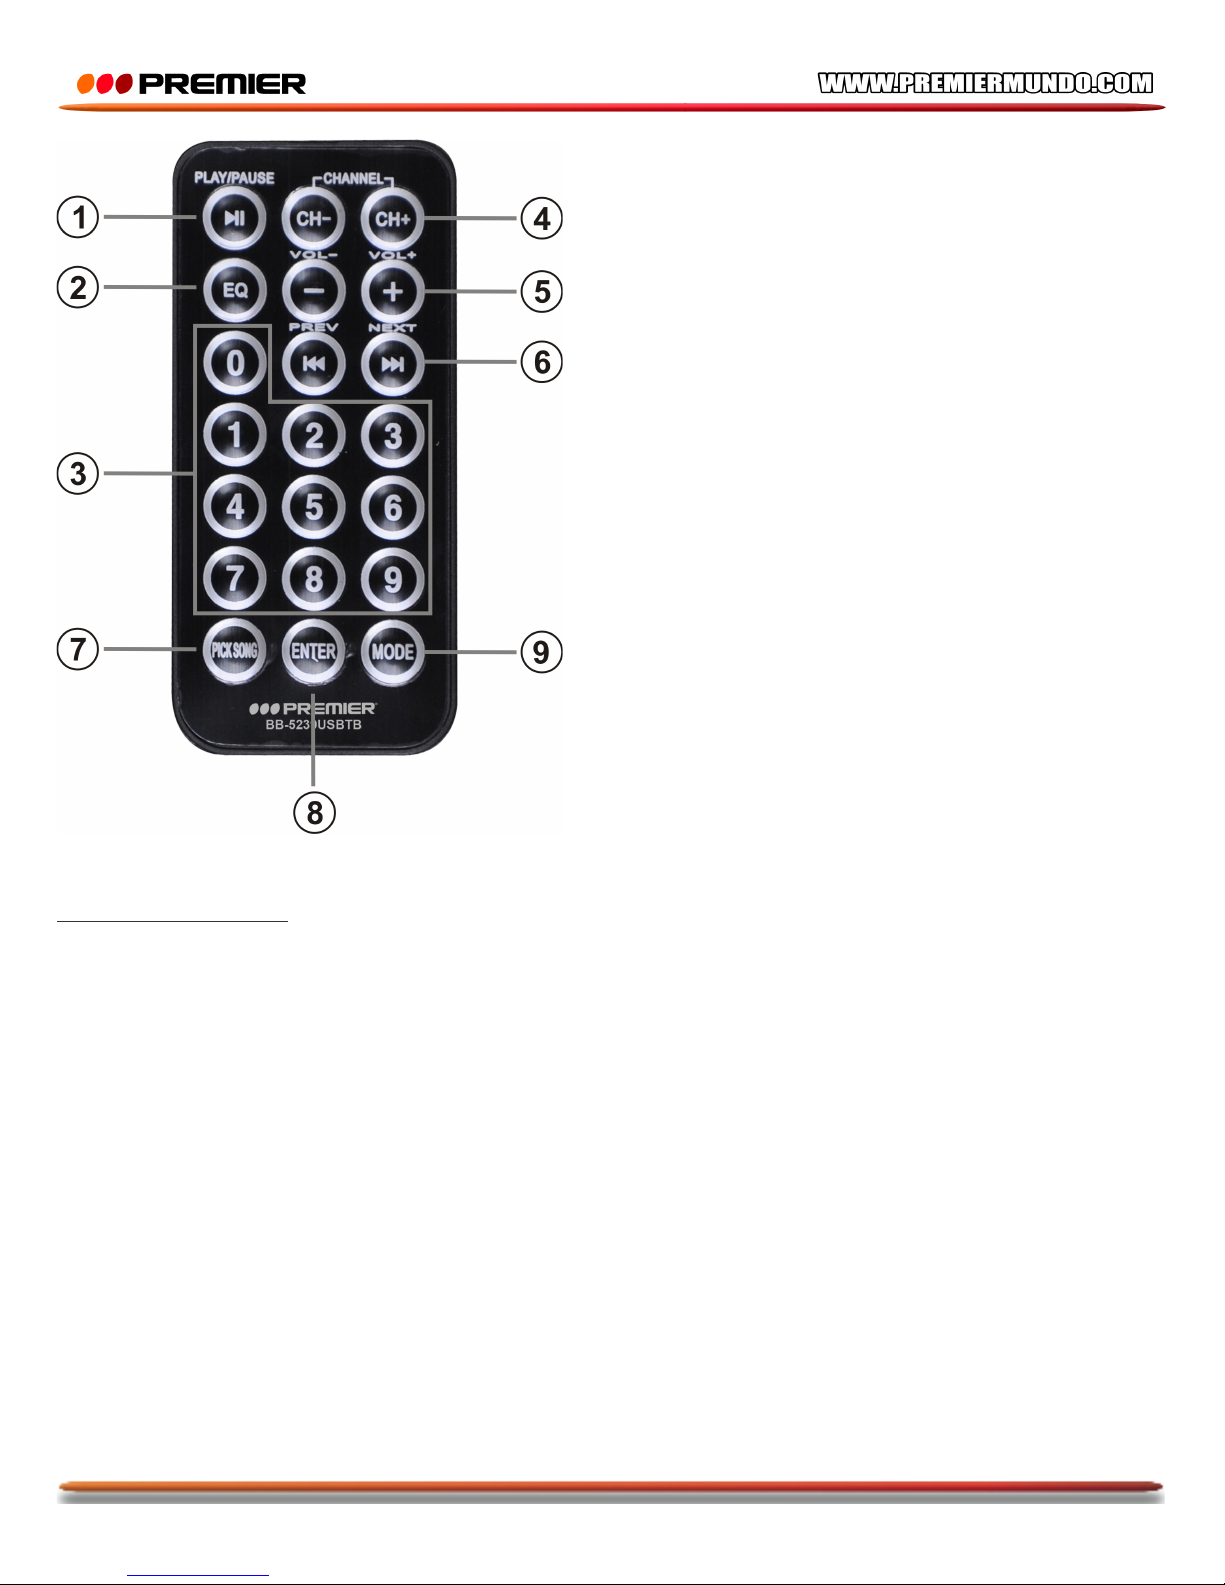
1. Reproducir / Pausar
2. Ecualizador
3. Botones numéricos
4. Presione CH-/CH+ para saltar pistas de a 10 en modo
MP3, o para incrementar la frecuencia 0.1MHz en modo
FM
5. Ajustar volumen
6. Anterior / Siguiente: Presione una vez para ir a la anterior
o siguiente pista en modo MP3. Presione y sostenga para
avanzar o retroceder rápidamente
7. Presione una vez para silenciar, presione y sostenga para
Grabar.
8. Ingresar: presione y sostenga para Repetir: Aleatoria /
Uno / Todo / Carpeta.
9. Modo: Presione para cambiar entre USB/SD/FM/Blueconnect. Presione y sostenga para apagar la unidad, la
pantalla LCD permanecerá encendida.
ESPECIFICACIONES
• Parlante woofer de 15”, magneto de 170x20mm
• Parlante tweeter con magneto de 110x15mm, 8 Ohm
• Ranura USB/SD/MMC
• Función Blue-Connect
• Voltaje: AC110V/60Hz ó AC220V/50Hz
• Salida Máxima: 150V.
Page 6

Page 7
10.
INSTRUCTION MANUAL
MULTIMEDIA ACTIVE SPEAKER (15”)
BB-5506USBT
DEAR CUSTOMER
In order to achieve the best performance of your product, please read this instruction manual carefully
before using, and keep it for future reference.
If you need extra support, please write to [email protected]
Page 8
P-1
CAUTION
RISK OF ELECTRIC
SHOCK, DO NOT
OPEN
Caution: To reduce the risk of electric shock do not open
this device, there are not serviceable parts for customers.
Please refer any maintenance or repair to qualified
personnel.
This sign means the existence of dangerous voltage at
the inside of the unit, which states a risk of electric shock.
This sign means that there are important instructions of
operation and handling in the manual that comes with this
device.
PREMIER CUSTOMER SERVICE
Venezuela:
0800 – ELECTRIC (353-2874)
Panama:
507 300-5185
Website
www.premiermundo.com
E-mail:
NOTE
This unit may be submitted to changes in specifications, characteristics and/or operation without prior
notice to the user, in order to continue improving and developing its technology.
Page 9

P-2
INSTRUCTION
Before connecting the speaker, make sure the system is off and the controls on the
minimum level.On the contrary the system could damage.
1.-Plug the AC plug to electric power and to the speaker.
2.-Plug the microphone on the “MIC”input with a 6.3 connector or Canon.
3.-Plug an auxiliary system (CD,DECK,MP3,MP3,DVD.etc) on “ LINE IN” input
4.-Turn on the systems. A green LED light up on the speaker to indicate it is on.
5.-Set the volume on the middle level on the MIC and LINE IN input.
6.-Increase little by little the master volume (place on the right side of LINE OUT”
connector)
7.-Set TREBLE and BASS controls to equalize the sound.
8.-A red LED light up when the system detects overload power. You must decrease the
volume.
Caution
Do not close the microphone to the speaker, it can cause feedback echo and it damages
the system.
EXTRA FUNCTIONS
L/R channel ( RCA ) as LINE OUT can handle an amplifier or even another unit, in
cascade.
On the bottom of the speaker there is a hole to place a stand.
OPERATING PROCEDURES FOR BLUE CONNECT FUNCTION
Step 1 : Push the bottom “ MODE” , until to find “ Blue-connect “ on the display,
otherwise “no-b” on the display.
Step 2: Turn on smart phone bluetooth function , search for speaker box Blue connect
--- “ PREMIER ” , input 4 digits code “ 0000 “ to finalize the connection of Blue
connect between smart phone and speaker box.
Step 3: Once the Blue connect is connected between smart phone and speaker box,
play the music on the smart phone, then please enjoy the big power sound from
PREMIER speaker box !
Page 10
P-3
CONTROLS
a. Play/Pause button(PLAY with automatic search function
on FM)
b. Mode button: Press and hold for 3 sec to enter folder
mode, long press this button to power ON/OFF the unit but
the backlite of LCD display is still lighted
c. Repeat button: Repeat one, repeat all, repeat off,random
mode.
d. Upward button: Next track/next song(in Blue-connect
mode)/Channel or folder(in folder mode)
e. Downward button: Last track/last song(in Blue-connect
mode)/channel or folder(in folder mode)
1. MP3 PLAYER
2. USB/SD input: Max Memory 32G
3. VOLUME CONTROL for wireless Microphone
Use it set the volume level for wireless microphone.
4. Volume control
Use it set the volume level for the unit
5. TREBLE
This knob adjusts treble.
6. POWER INDICATOR
This LED indicator light will illuminate when the speaker is
powered on.
7. SATURATION INDICATOR
This LED indicator light will liiuminate if there is an
overcharge. If this happens decrease the volume levels.
8. BASS
This knob adjusts bass.
9. MICROPHONE VOLUME LEVEL 1& 2
Allows you to increase or decrease the volume level.
10. MICROPHONE INPUT 1&2
Connector for a balanced microphone.
11. 6.3mm MICROPHONE LINE INPUT JACK 1 & 2
12. LINE LEVEL
Controls line input and line output levels.
13. CHANGE INPUT SOURCE
There are 2 input sources for your choose, they are: LINE
and MP3.
14. LINE INPUT
Allows cassette recorder or CD player to the Main output.
15. LINE OUT
Provides signal output to a cassette deck and home audio
equipment.
16. FM ANTENNA
17. SPEAKER OUT 8 OHM
Allows you to connect another speaker to this socket.
18. VOLTAGE OF POWER
This switch is used to select the voltage of power.
19. POWER CABLE INPUT
Allows you to connect the power cable.
20. ON/OFF SWITCH
Powers the device on/off.
Page 11
P-4
SPECIFICATION
! 15” woofer speaker box,170sx20MM magnet
! Tweeter speaker 110*15mm magnet,8ohm
! USB/SD/MMC slot and function
! Blue connect function
! AC110V/60HZ or AC220V 50Hz
! Max output 150W
!
1. Play/Pause
2. EQ
3. KEY number for selecting the music.
4. Press CH- / CH+ for song skipping 10-
/10+ at MP3 mode , or for increasing
frequency 0.1Mhz at FM mode
5. Reduce/increase the volume
6. Previous button: previous track/channel
or folder(in folder mode).
Forward button:next track/channel or
folder(in folder mode).
7. Short press for MUTE, long press for
RECORDING
8. ENTER: long press this button to enter
REPEAT: RANDOM/ONE/ALL/FOLDER
9. MODE: USB / SD / FM / BLUE Connect
function of conversion, and the folder exit,
in USB/SD mode, long press this button
to power ON/OFF the unit but the backlite
of LCD display is still lighted
 Loading...