

Page 1
Installation
Manual
MODEL ANE-42
Page 2
GET TO KNOW YOUR UNIT
1
Tools Needed:
- Stud Finder
- 12-14” Level
- Tape Measure
- Small Flathead
Screwdriver
2
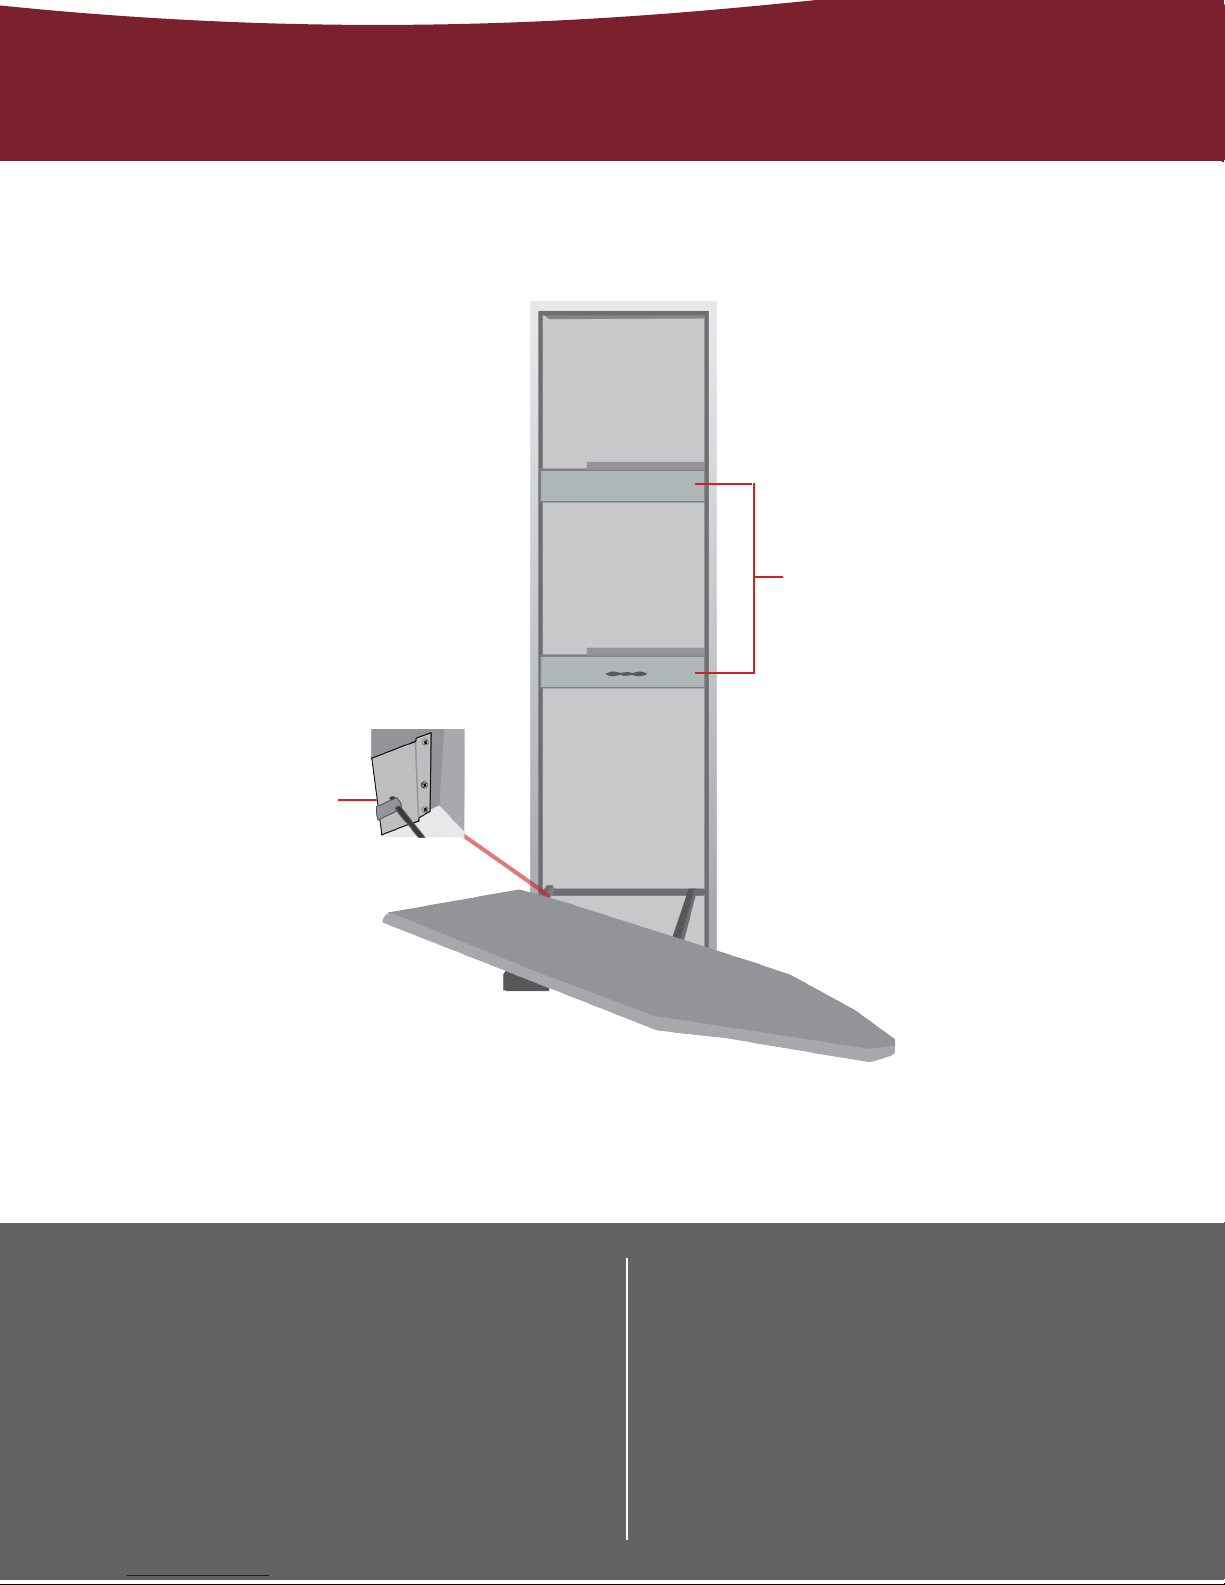
1. CROSS BRACES 2. SIDE BRACKETS
- 1/4” Nut Driver
(optional)
- Safety Glasses
- Utility Knife
Recessed Mounting:
- Two #10 x 1 1/2” wood screws for top
portion of cabinet
- Two #14 x 2 1/2” Phillips screws for top
side brackets
Supplied Parts:
- Electric Drill
(with 1/4” & 1/8” drill bit)
Surface Mounting:
- Two #14 x 4” wood screws
Page 3
PRE-INSTALLATION
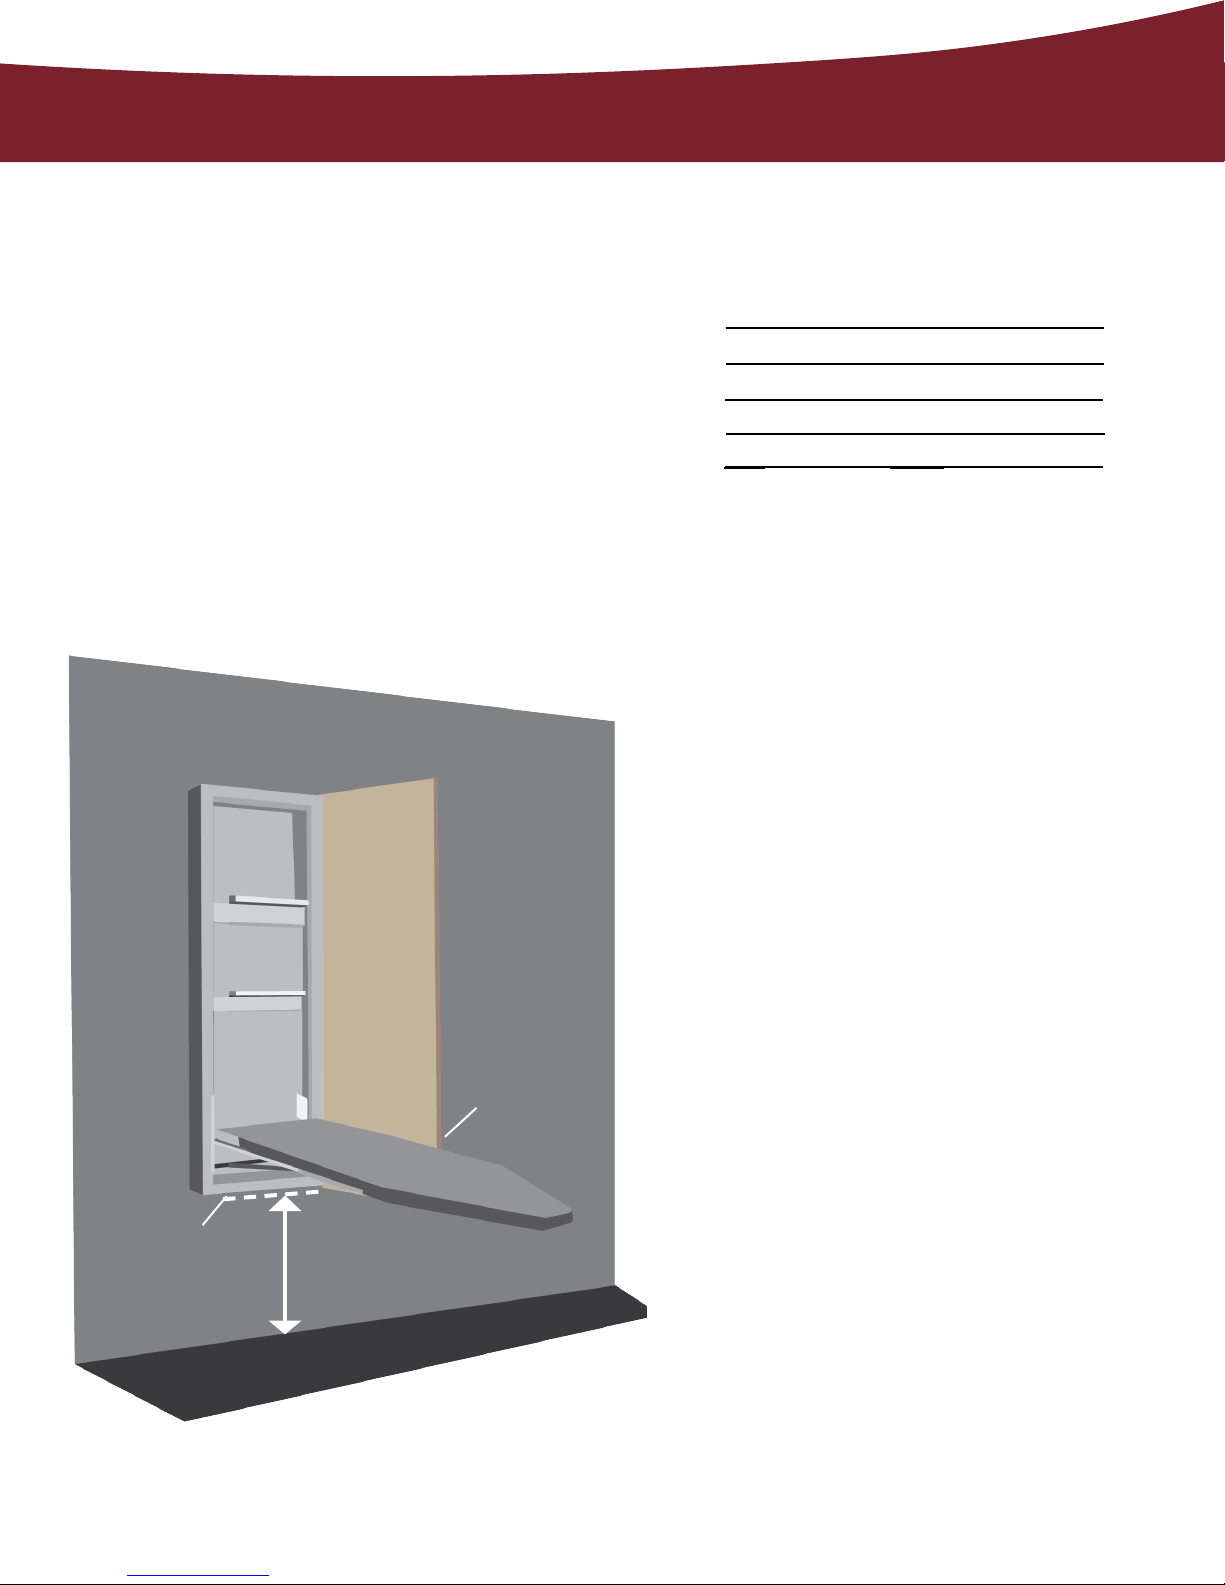
1. DETERMINE MOUNTING HEIGHT
Using the charts provided, determine
the mounting height above oor (the
distance between the oor and the
bottom of the cabinet). First choose
your desired ironing board height
from the left column, then locate the
corresponding mounting height in the
right column.
Desired Ironing
Board Height
36”
35”
34”
33”
Mounting
Height Above
Floor
29”
28”
27”
26”
2. LOCATE STUDS & UTILITIES
Using a stud nder, locate the wall
studs to be used for mounting.
Locate the existing wiring or other
utilities in the wall to prevent drilling
into/severing a wire and/or other utility
during installation.
Mounting
Height
Above Floor
Desired Ironing
Board Height
Page 4
3. ENSURE ADEQUATE SPACE
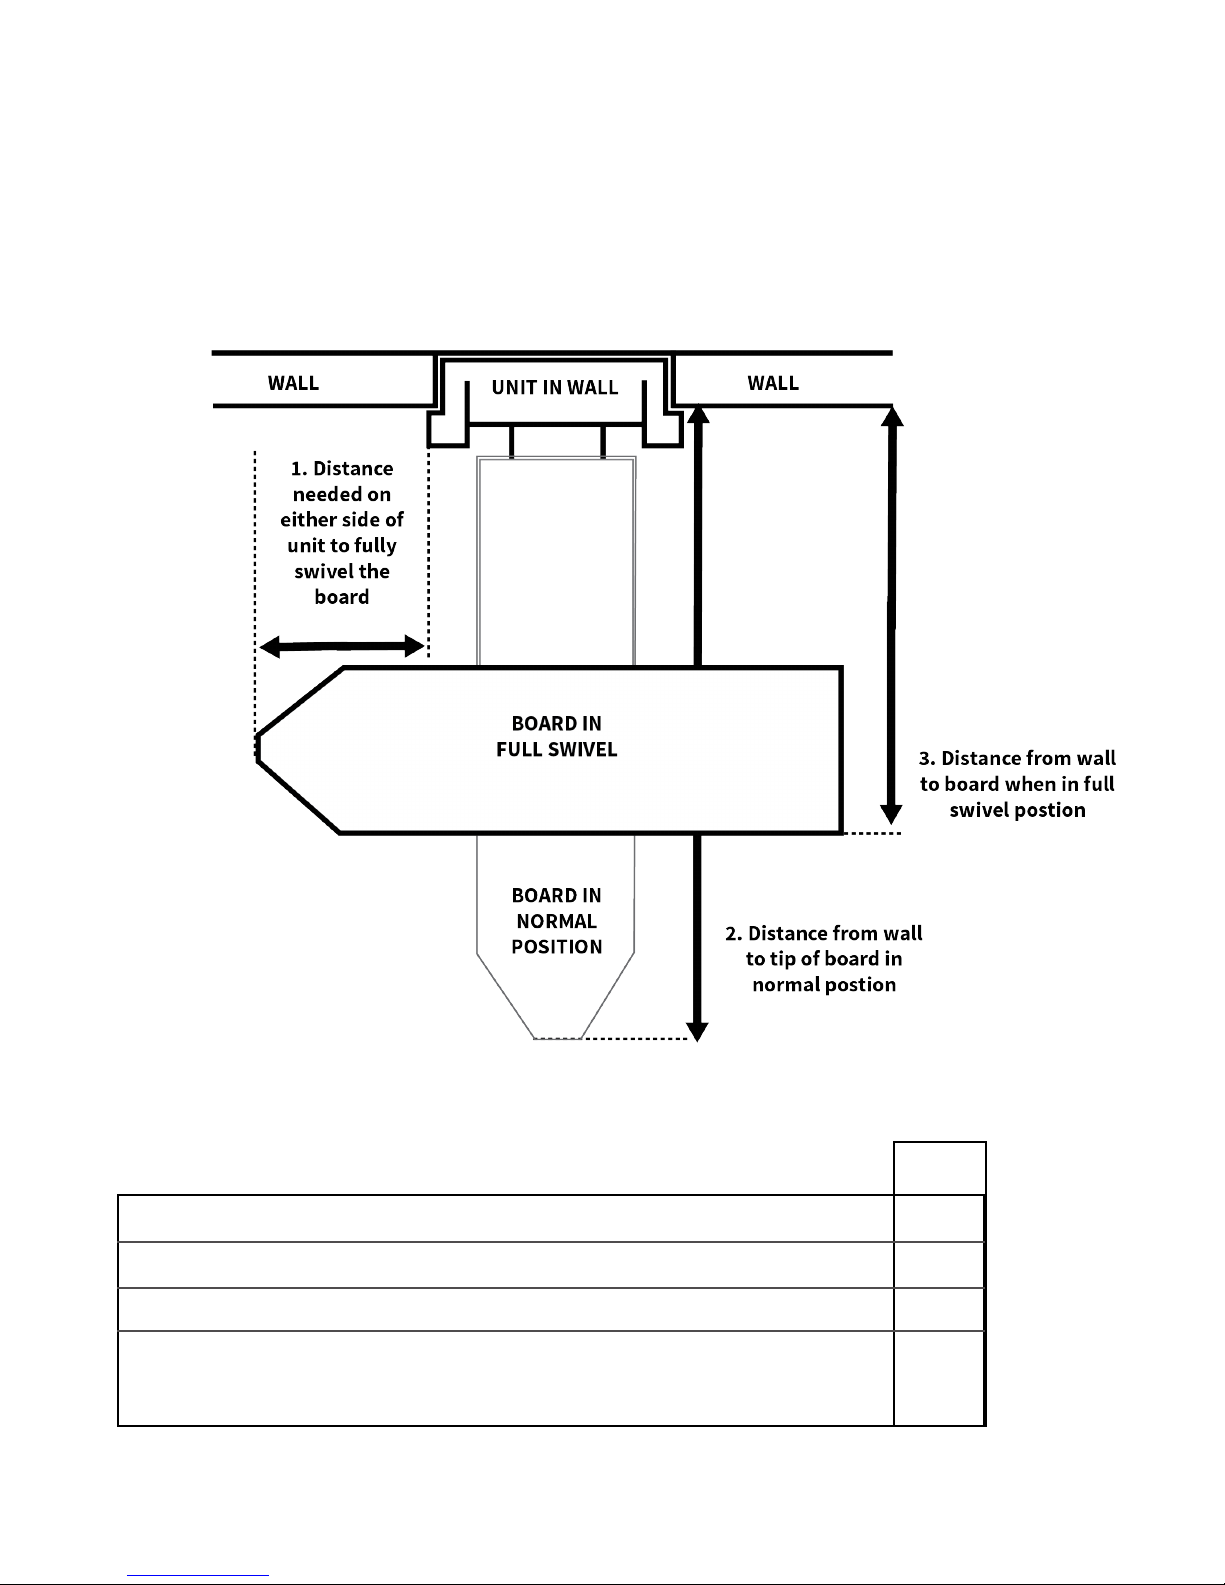
Refer to the chart provided below to ensure
adequate clearance for ironing. The cabinet
door opens at 180 degrees; allow 16” from side
of cabinet for door to fully open.
1. Distance needed on either side of unit to fully swivel the board
2. Distance from wall to tip of ironing board
3. Distance from wall to board when in full swivel position
4. Standing area clearance (not shown)
The suggested distance from the side of the ironing where the user
typically stands to ensure adequate space for ironing.
ANE42
5/8
14
”
7/8
46
”
7/8
32
”
24”
Page 5
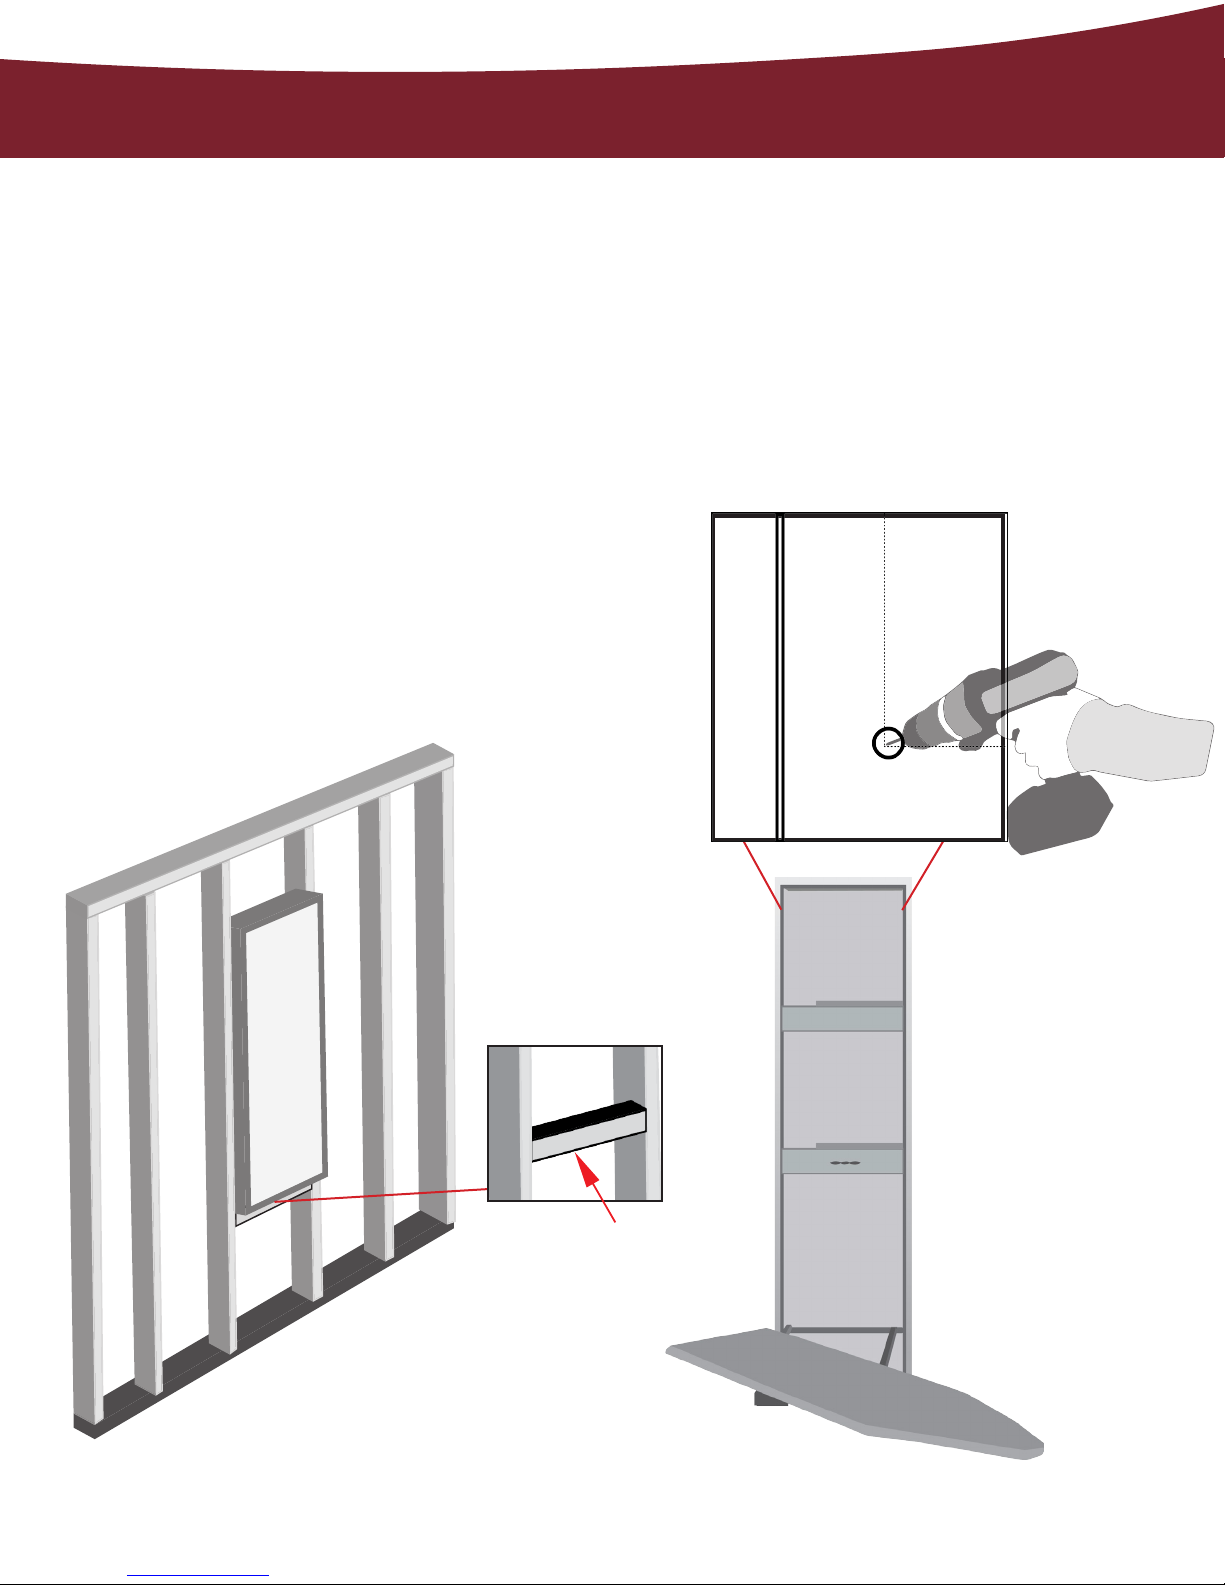
RECESSED INSTALLATION
Note: Instructions based on installation between 16” on-center studs.
1. CUT WALL OPENING
Cut an opening into the wall based
on unit dimensions given below.
14
3/8
” x 51
1/4
x 3
7/8
”
2. ATTACH CLEATS
Attach a 2” x 4” cross support
cleat between the studs so it
is level with the bottom of the
opening. This will give support to
the drywall during installation and
the cabinet once installed in the
wall.
3. PRE-DRILL HOLES
Your unit will be attached to the studs by
screws in the upper and lower sides of
the cabinet.
Using a 1/8” drill bit, pre-drill holes into
the sides of the cabinet, 14” from the top
and 2
1/2
” from the back.
14” from top of cabinet
1/2
2
” from back
of cabinet
Example shown with exposed
studs & unit to illustrate mounting.
CLEAT
Page 6
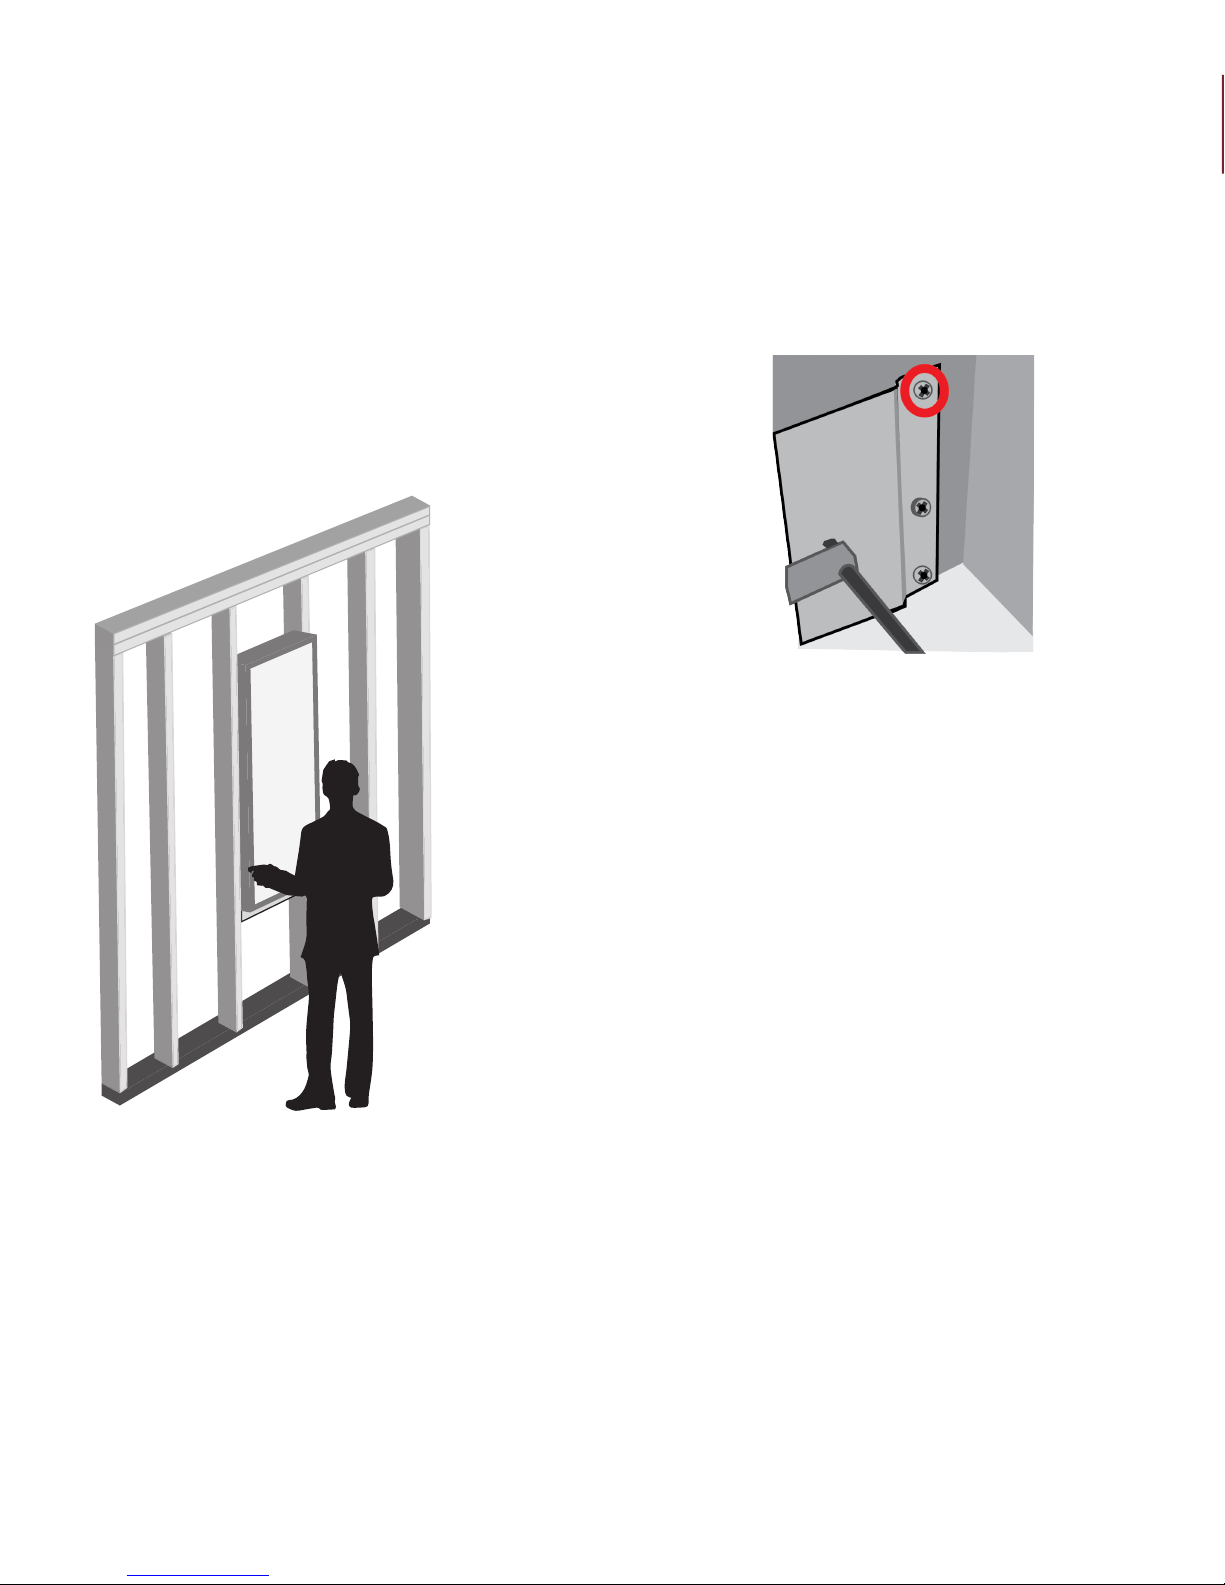
4. INSTALL UNIT IN WALL
Begin installation by carefully lifting unit
into the wall opening. Make sure the
cabinet is plumb and level. If needed,
add shims to help unit t snug in place.
5. ATTACH CABINET TO STUDS
Using the pre-drilled holes in top of
cabinet, attach unit to studs with two
#10 x 1
1/2
” screws for top installation.
6. REMOVE BRACKET SCREW
Locate side ironing board brackets
that are secured to cabinet with
three screws. Then remove the
top screw from each bracket. This
is where the bottom part of your
cabinet will be secured to the studs.
7. PRE-DRILL HOLES IN SIDES
Pre-drill holes into the cabinet using
the holes in side brackets where
screws were just removed.
Example shown with studs
to illustrate mounting.
Finish installation by screwing the
two #14 x 2
1/2
” screws into the
pre-drilled holes to secure bottom
part of cabinet into the cabinet.
8. INSTALLATION COMPLETE!
Cabinet is now fully installed! If desired,
decorative trim or molding may be
added to cover any irregularities in the
wall.
Page 7
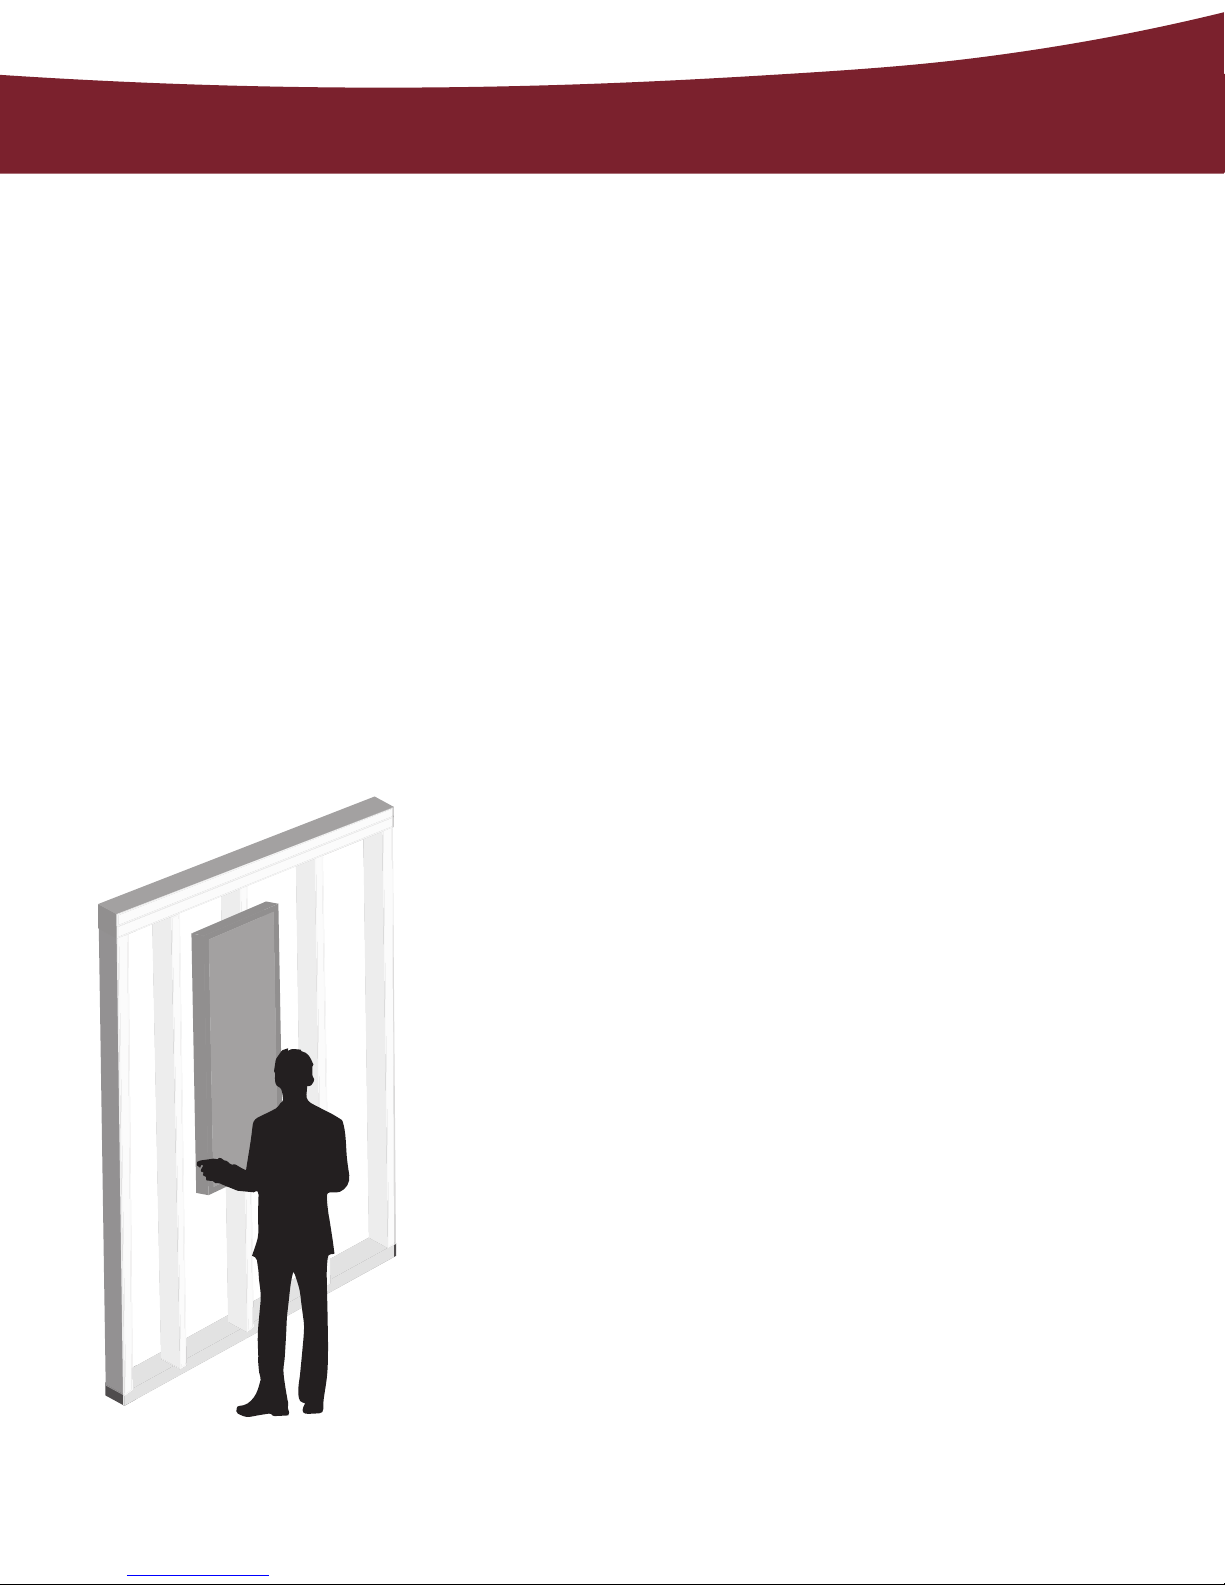
SURFACE MOUNT INSTALLATION
1. PREPARE CABINET
Screws will be drilled through the
upper and lower cross braces inside
the cabinet. Determine location of
screws, ensuring that the location of the
mounting screw is as close to the center
of the cabinet as possible.
2. PRE-DRILL PILOT HOLES
Using a 1/4” drill bit, pre-drill holes in
the upper and lower cross braces
inside the cabinet as determined in
previous step. Ensure that the holes in
both braces are drilled to the same
measurement.
3. LOCATE & MARK STUD
Using a stud nder, locate stud in wall
and mark the wall according to the
pre-drilled holes in cabinet. Setting
cabinet aside, pre-drill holes in wall
using a 1/4” drill bit. Do not attempt
to mount only through hard board of
cabinet.
4. PARTIALLY INSERT SCREW
Partially insert a #14 x 4” screw
in the upper cross brace.
5. INSTALL UNIT
Begin installation by carefully lifting
unit into position. Then, attach the
cabinet to the wall by fully inserting
the screw in the upper cross brace
into the wall stud.
Example shown with
studs & unit to illustrate
mounting.
Make sure the unit is plumb and
level. Shim if necessary. Fully tighten
installation screw.
6. INSERT SECOND SCREW
Insert the second #14 x 4” screw into
the pre-drilled hole in the bottom
brace of the cabinet and attach to
wall making sure cabinet remains
square and level.
7. ADD TRIM
Add Decorative trim or molding to
make cabinet sides ush with the face
frame.
Page 8
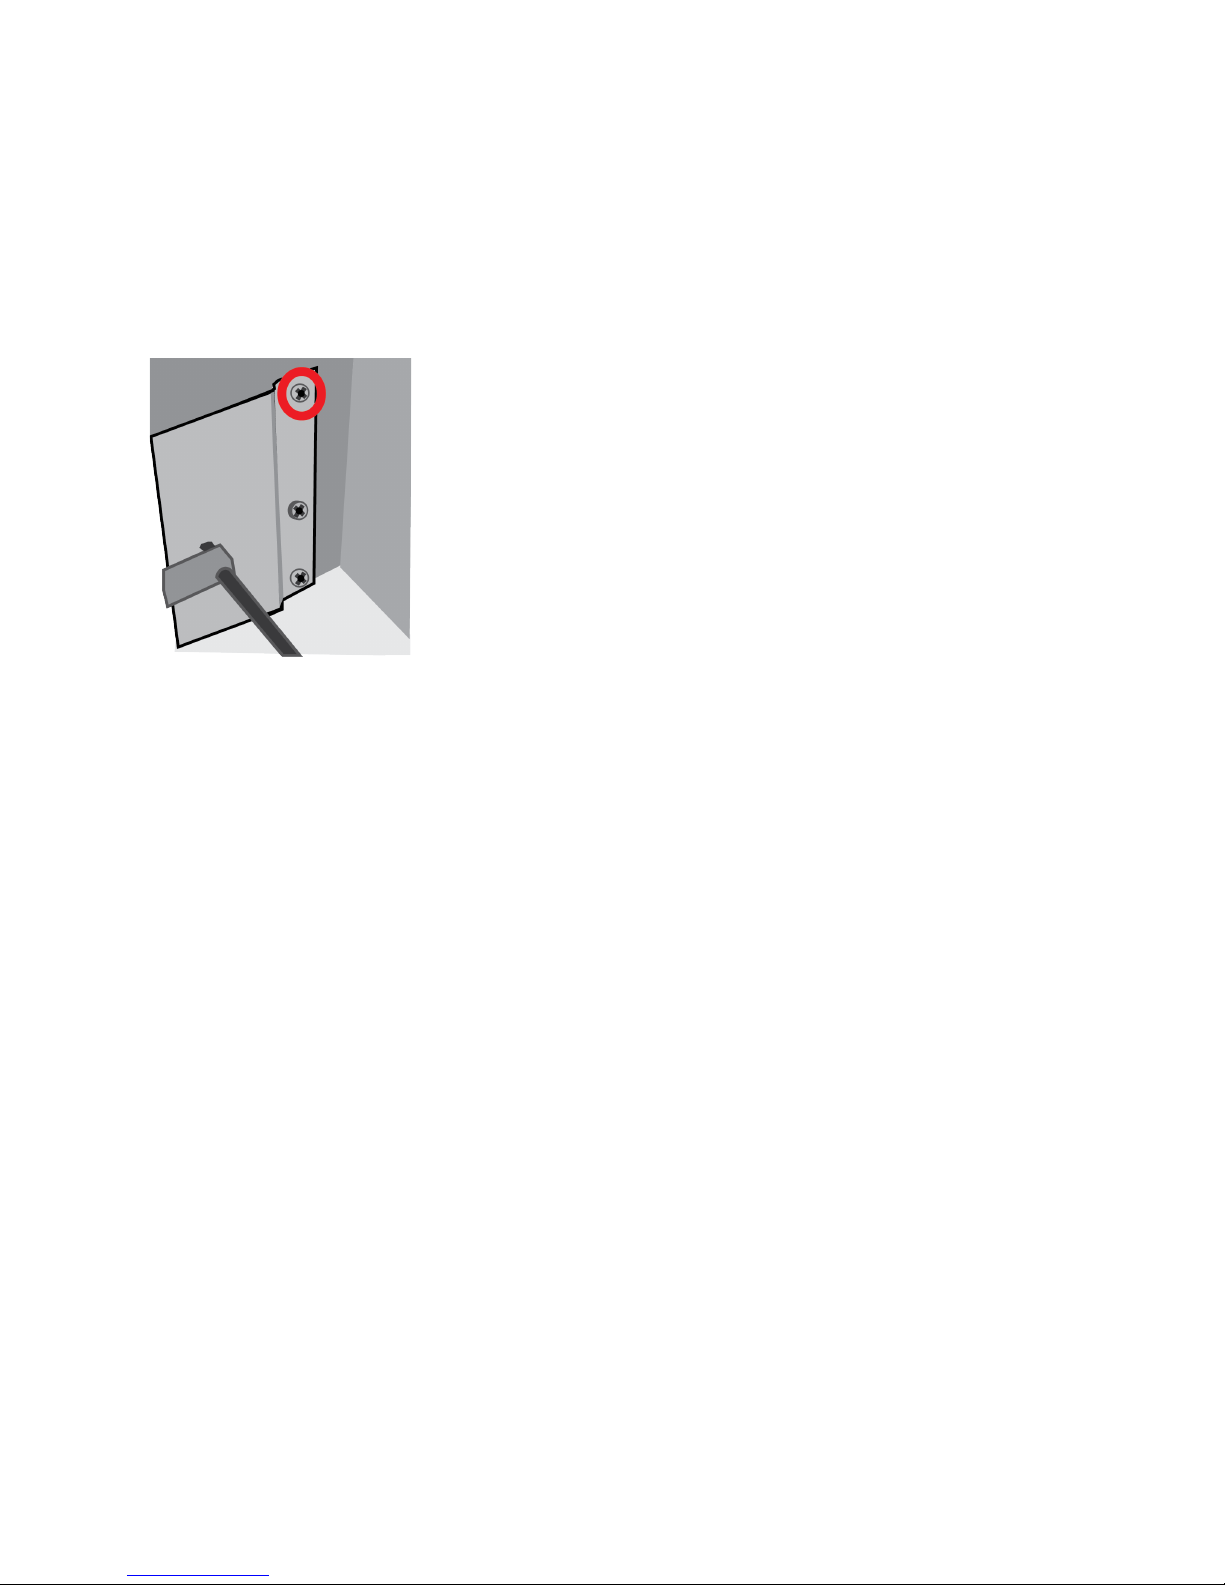
8. REMOVE BRACKET SCREW
Locate side ironing board brackets
that are secured to cabinet with
three screws. Then remove the top
screw from each bracket. Replace
with a #14 x 3/4” Phillips screw. This
will add stability long-term.
9. INSTALLATION COMPLETE
Cabinet is now fully installed!
 Loading...