

Page 1

V. 1.
2
SNMP Web Card Quick Guide
1.
. Overlook
..
Ethernet port (10/100Base-T)
Sensor port
Golden finger: connects to
UPS slot
Ethernet port status LEDs
SNMP I SNMP II (Only for 3-phase online UPS)
Ethernet port status LEDs:
100M LED (Green) Flash Port is operating at 100Mbit/s
Off Card is not connected to the network
10M LED (Yellow) Flash Port is operating at 10Mbit/s
Off Card is not connected to the network
2.
. Installation and Connection
..
Follow below steps to install and connect the SNMP web card:
Step 1: Remove the cover of intelligent slot on the back panel of UPS and
retain the screws
Step 2: Slide the card into the open slot and secure with the screws from step
1. (see chart 2-1)
Chart 2-1
Refer to chart 2-2 for connecting the SNMP web card.
Step 3: Plug Ethernet cable to the Ethernet port (RJ-45) on the SNMP web
manager.
Step 4: Use one more Ethernet cable. Connect one end to the sensor port on the
SNMP web manager and the other end to the optional environmental monitoring
device.
Chart 2-2
Page 2
3.
. Configuration
..
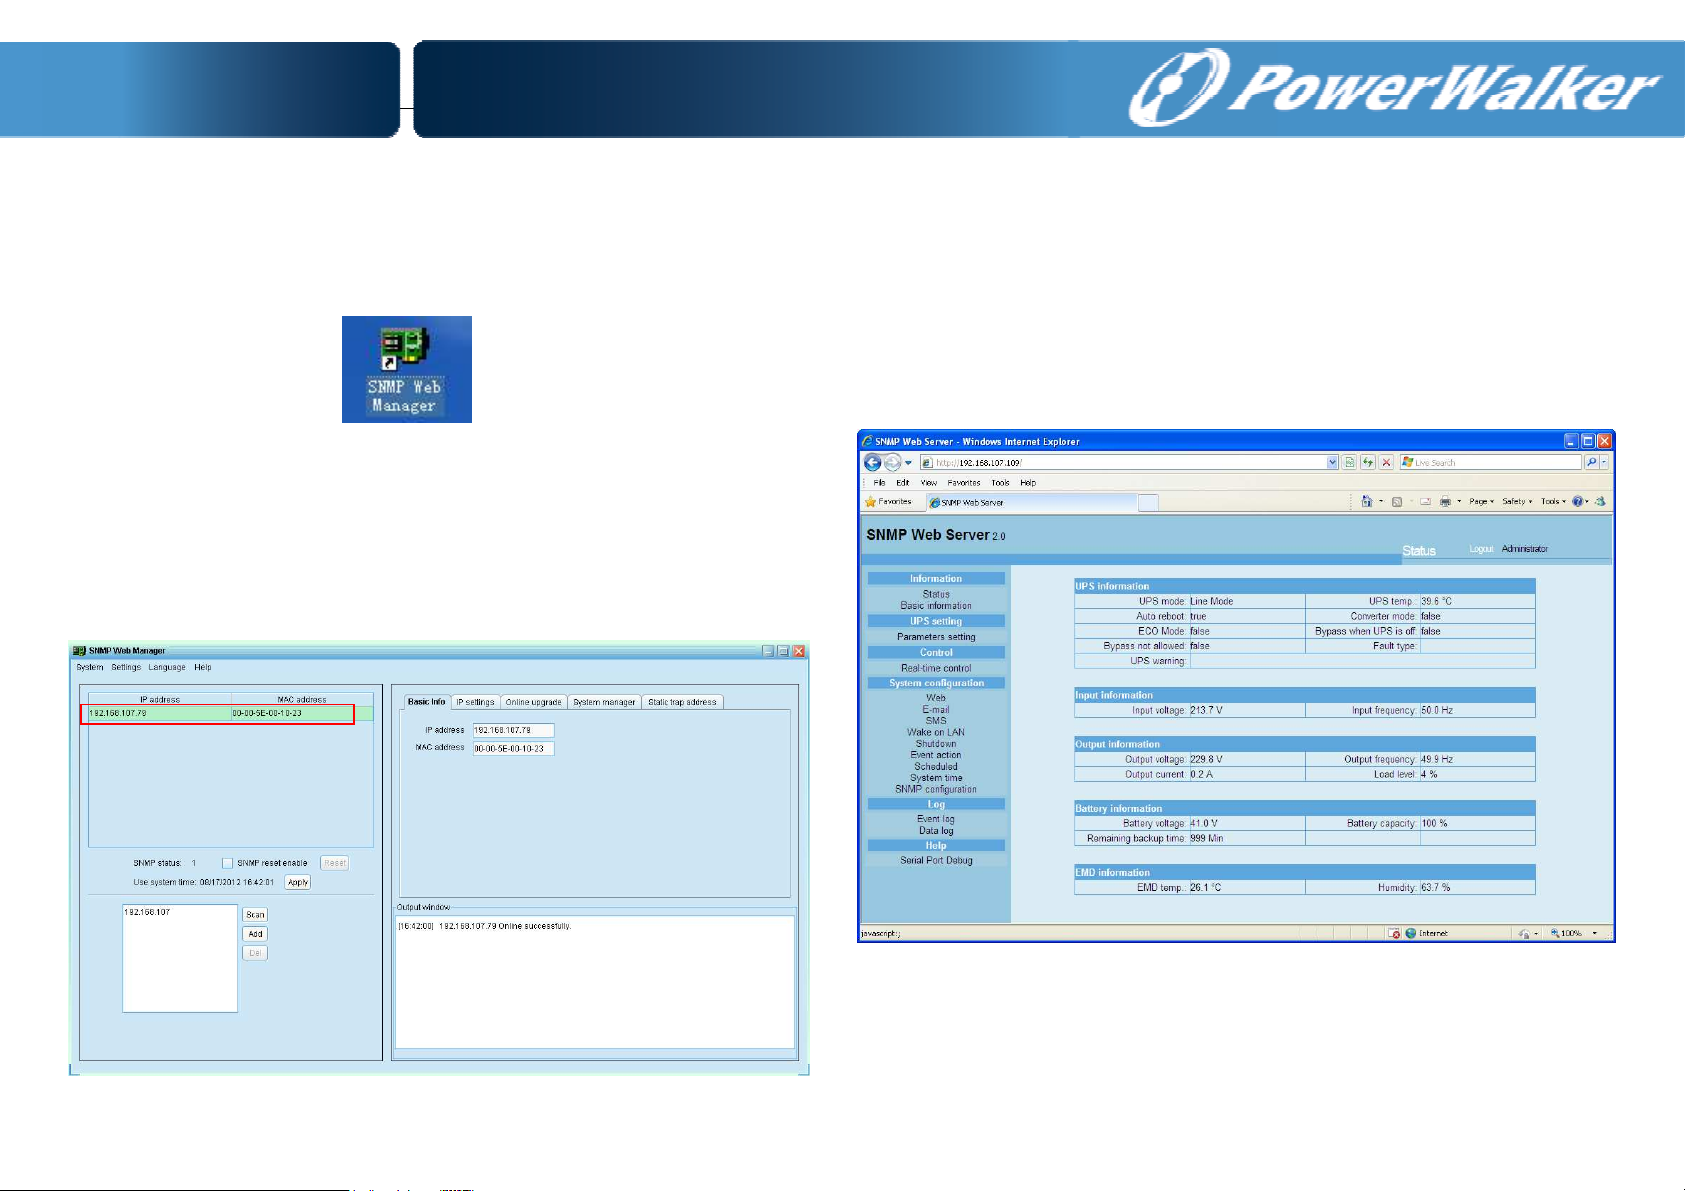
a) Please install SNMP web manager software in your PC. After software is
installed successfully, the Installer will leave a shortcut icon on
your desktop.
Chart 3-1
b) Enter specific IP address to search all SNMP devices in LAN. (The SNMP
web manager will automatically collect the IP address from sever by
default via a DHCP server. It will apply default IP address of
192.168.102.230, default subnet mask as 255.255.255.0, and default
gateway as 0.0.0.0 without a DHCP server.
c) User can modify IP setting, online upgrade, password management, and
static trap address setting in SNMP Web Manager interface. It is
necessary to enter password for any medications. The default password is
12345678.
4. Monitoring
Double click the selected device from the device list (refer to Chart 3-2) to open
web page as Chart 4-1.
Chart 3-2
Chart 4-1
Please check SNMP Web Manager User Manual for detailed configuration.
 Loading...