

Power Acoustik RAZOR RZ4-1200D, RAZOR RZ4-2000D, RAZOR RZ1-1500D, RAZOR RZ1-2300D User Manual
Page 1
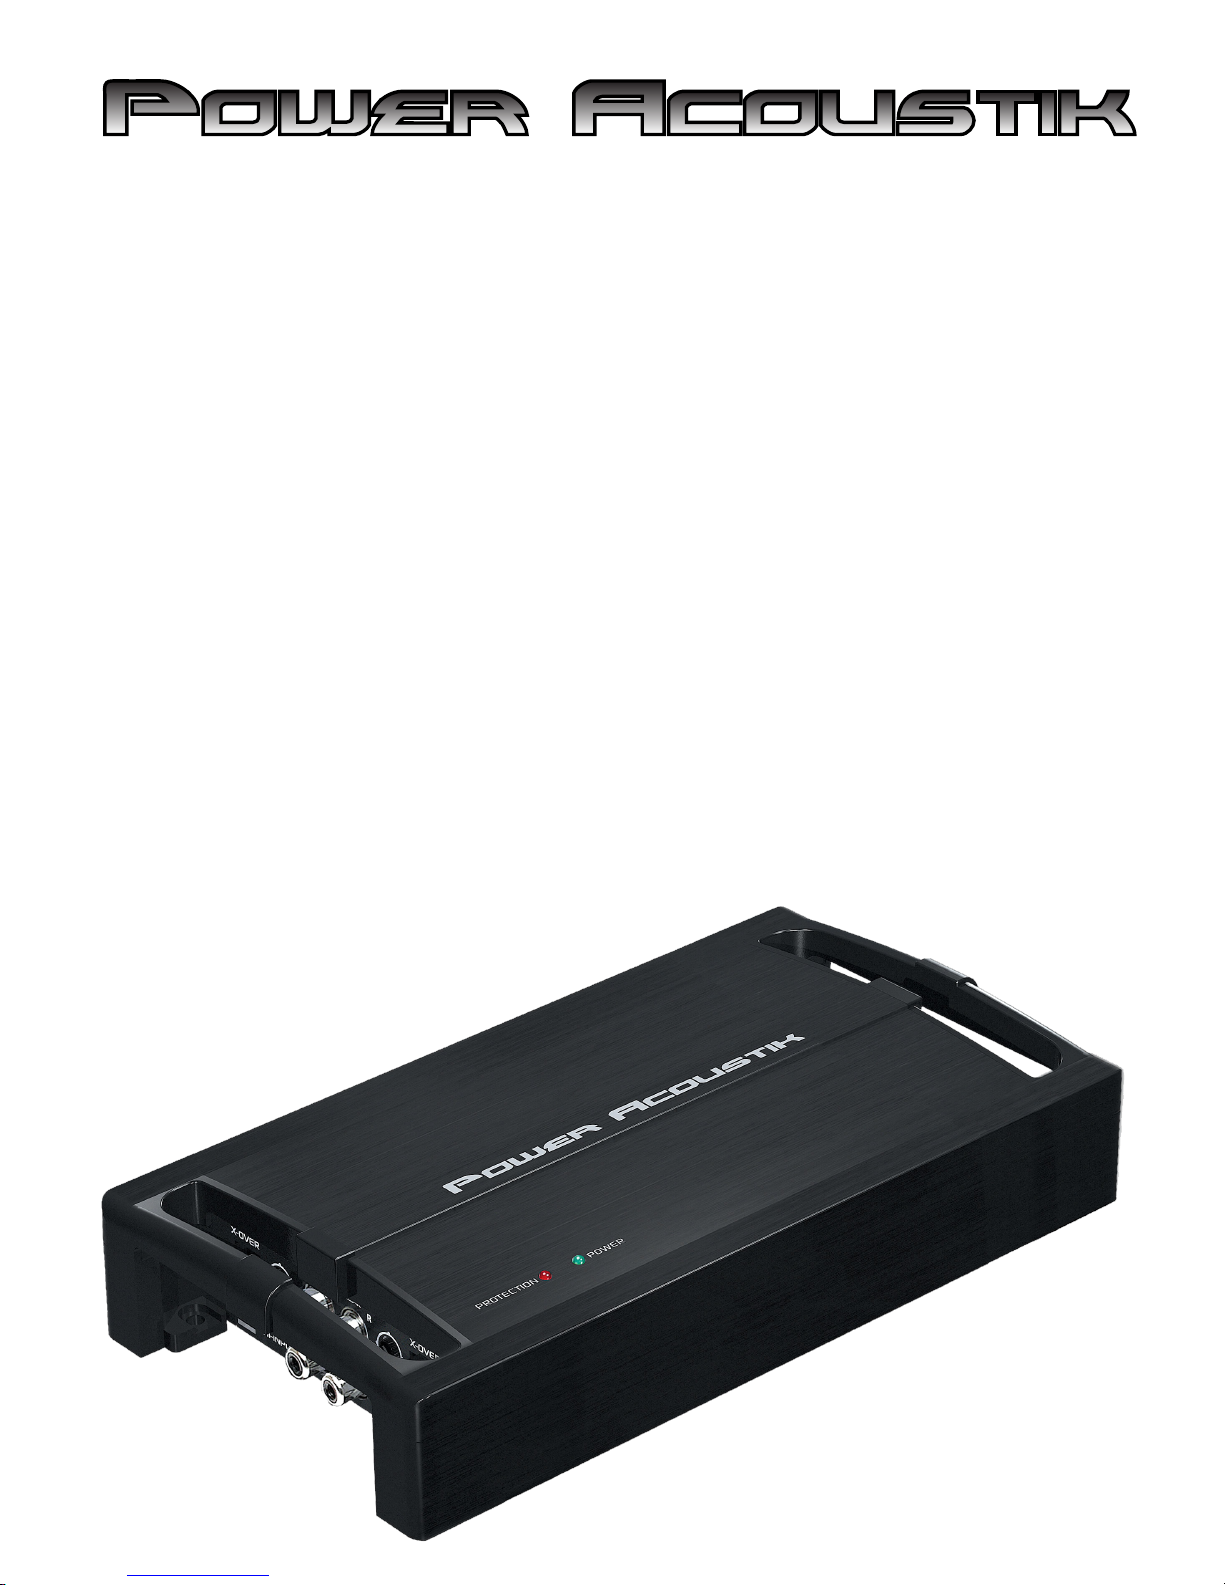
RAZOR
Class D Full Range & Monoblock Amplifiers
RZ4-1200D RZ4-2000D
RZ1-1500D RZ1-2300D
WWW.POWERACOUSTIK.COM
Page 2
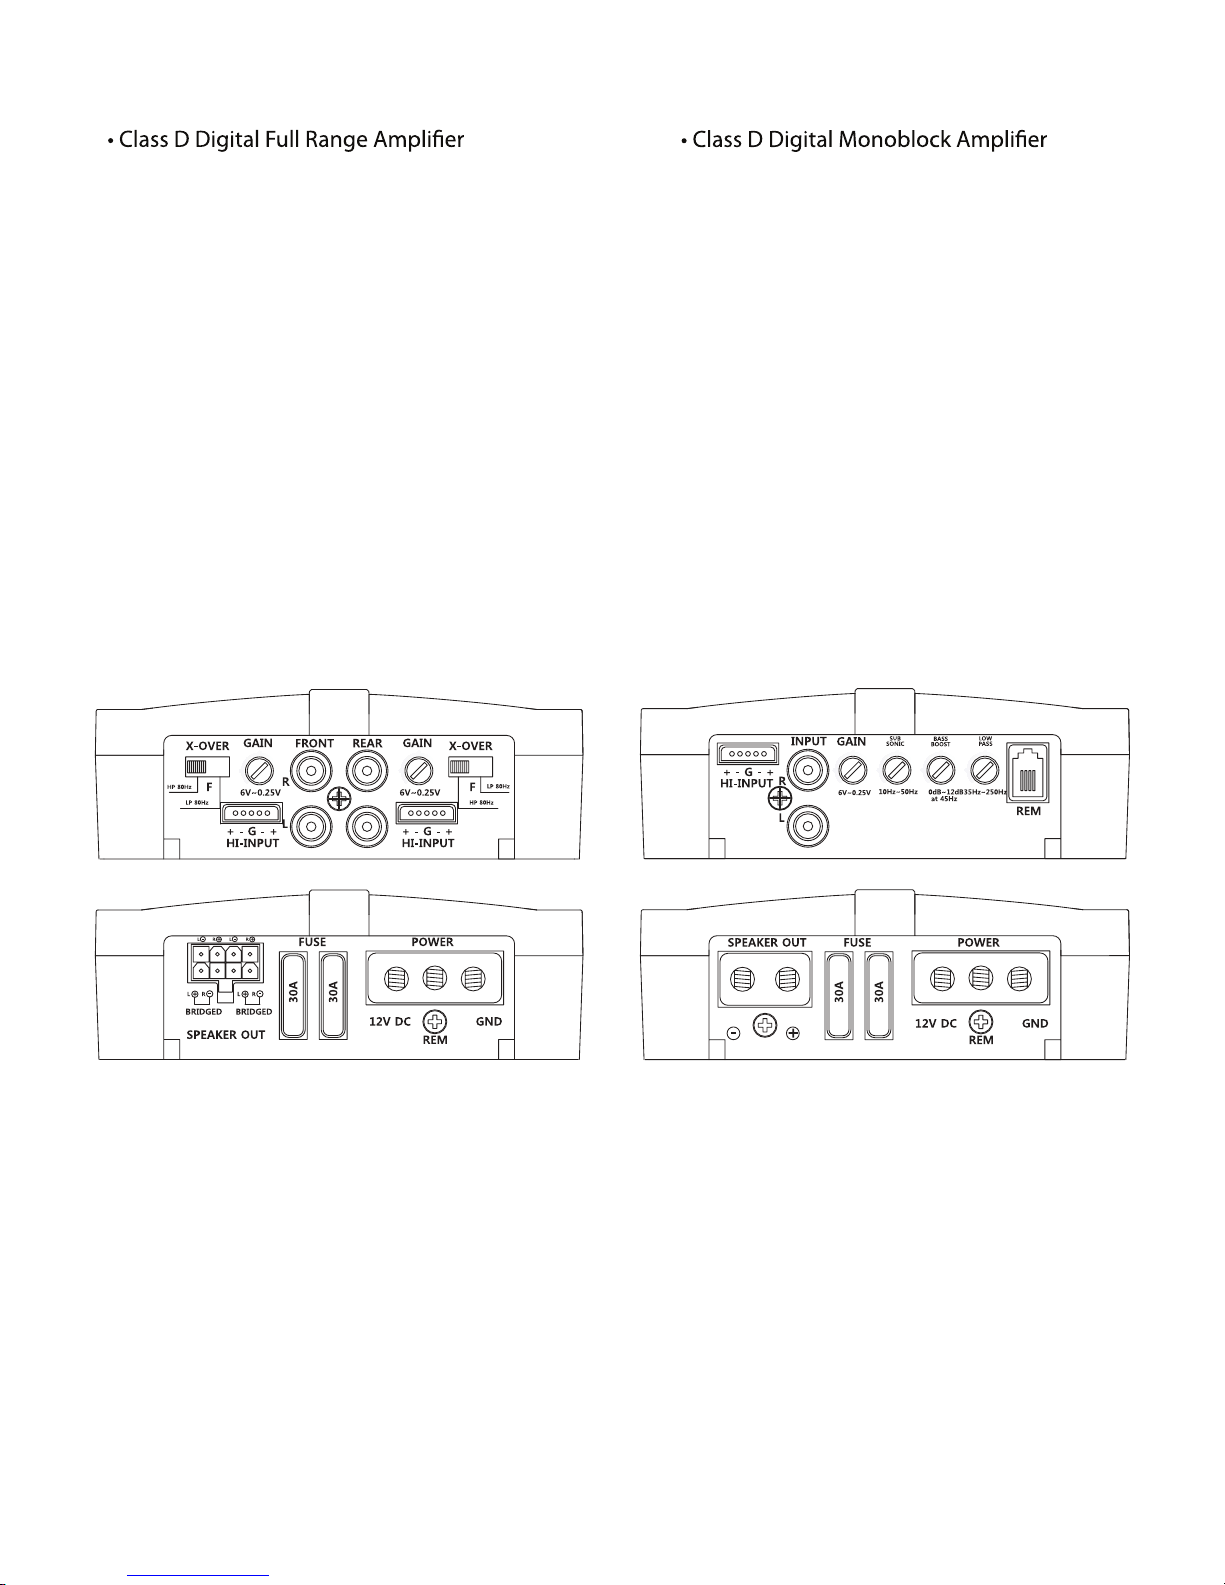
4 Channel RZ4-1200D & RZ4-2000D
• Full MOSFET PWM Power Supply
• SMD Technology on Double Sided PCB
• 8ga Power Terminals & 12ga Speaker Outputs
• High & Low Level Signal Inputs
• Selectable 80Hz 12dB High/Low Pass Filter
• 2-Ohm Stereo, 4-Ohm Bridged Stable
• Total Harmonic Distortion: 0.5%
• Frequency Response: 10-35kHz
• Signal-to-Noise Ratio:70dB
• Damping Factor: > 250
• Stereo Channel Separation: < 55dB
• Input Sensitivity: 200mV-6V
• Dimensions: 4.75"w x 1.5”h
Monoblock RZ1-1500D & RZ1-2300D
• Full MOSFET PWM Power Supply
• SMD Technology on Double Sided PCB
• 8ga Power & 8ga Speaker Output Terminals
• High & Low Level Signal Inputs
• Remote Mount Gain Control Included
• Variable 35-250Hz 12dB Low Pass Filter
• Variable 10-50Hz 12dB Subsonic Filter
• Variable 0-12dB 45Hz Bass Boost
• Total Harmonic Distortion: 0.5%
• Frequency Response: 20-150kHz
• Signal-to-Noise Ratio:70dB
• Damping Factor: > 100
• Input Sensitivity: 200mV-6V
• Dimensions: 4.75"w x 1.5”h
POWER RATINGS RZ4-1200D RZ4-2000D RZ1-1500D RZ1-2300D
RMS Power 4Ω, 14.4V
100w x 4 160w x 4 600w 900w
RMS Power 2Ω, 14.4V
150w x 4 250w x 4 900w 1,400w
RMS Power 4Ω Bridged, 14.4V
300w x 2 500w x 2 - -
Dimensions (4.75"w x 1.5"h)
9" 11" 10" 11"
Page 3
Mounting Your Razor
any wood, metal, or carpeted surface. The heatsink can be mounted directly to the chassis of the car, or isolated
for best performance. It needs proper ventilation, so avoid mounting the amp under seats, in the engine bay, or
any other area that moisture might accumulate. Be sure the mounting screws do not penetrate the fuel tank,
vibrations can cause damage.
Warning
Power Acoustik highly recommends that an in-line fuse or circuit breaker be installed within 18” of the battery.
Although your Razor amplifier has adequate internal protection, it is possible a damaged wire between
the component and the battery may result in a fire. The in-line fuse or circuit breaker should be installed in a
location that is easy to access, and all wiring should be routed safely, following the below suggestions:
- Avoid placing wires near hot or moving objects
- Always use wire grommets when routing wire through the firewall or any other metal surfaces
- Avoid the potential for damaged wires by routing all wires away from moving hinges, seats, brake & gas
pedals, hood and trunk hinges, etc.
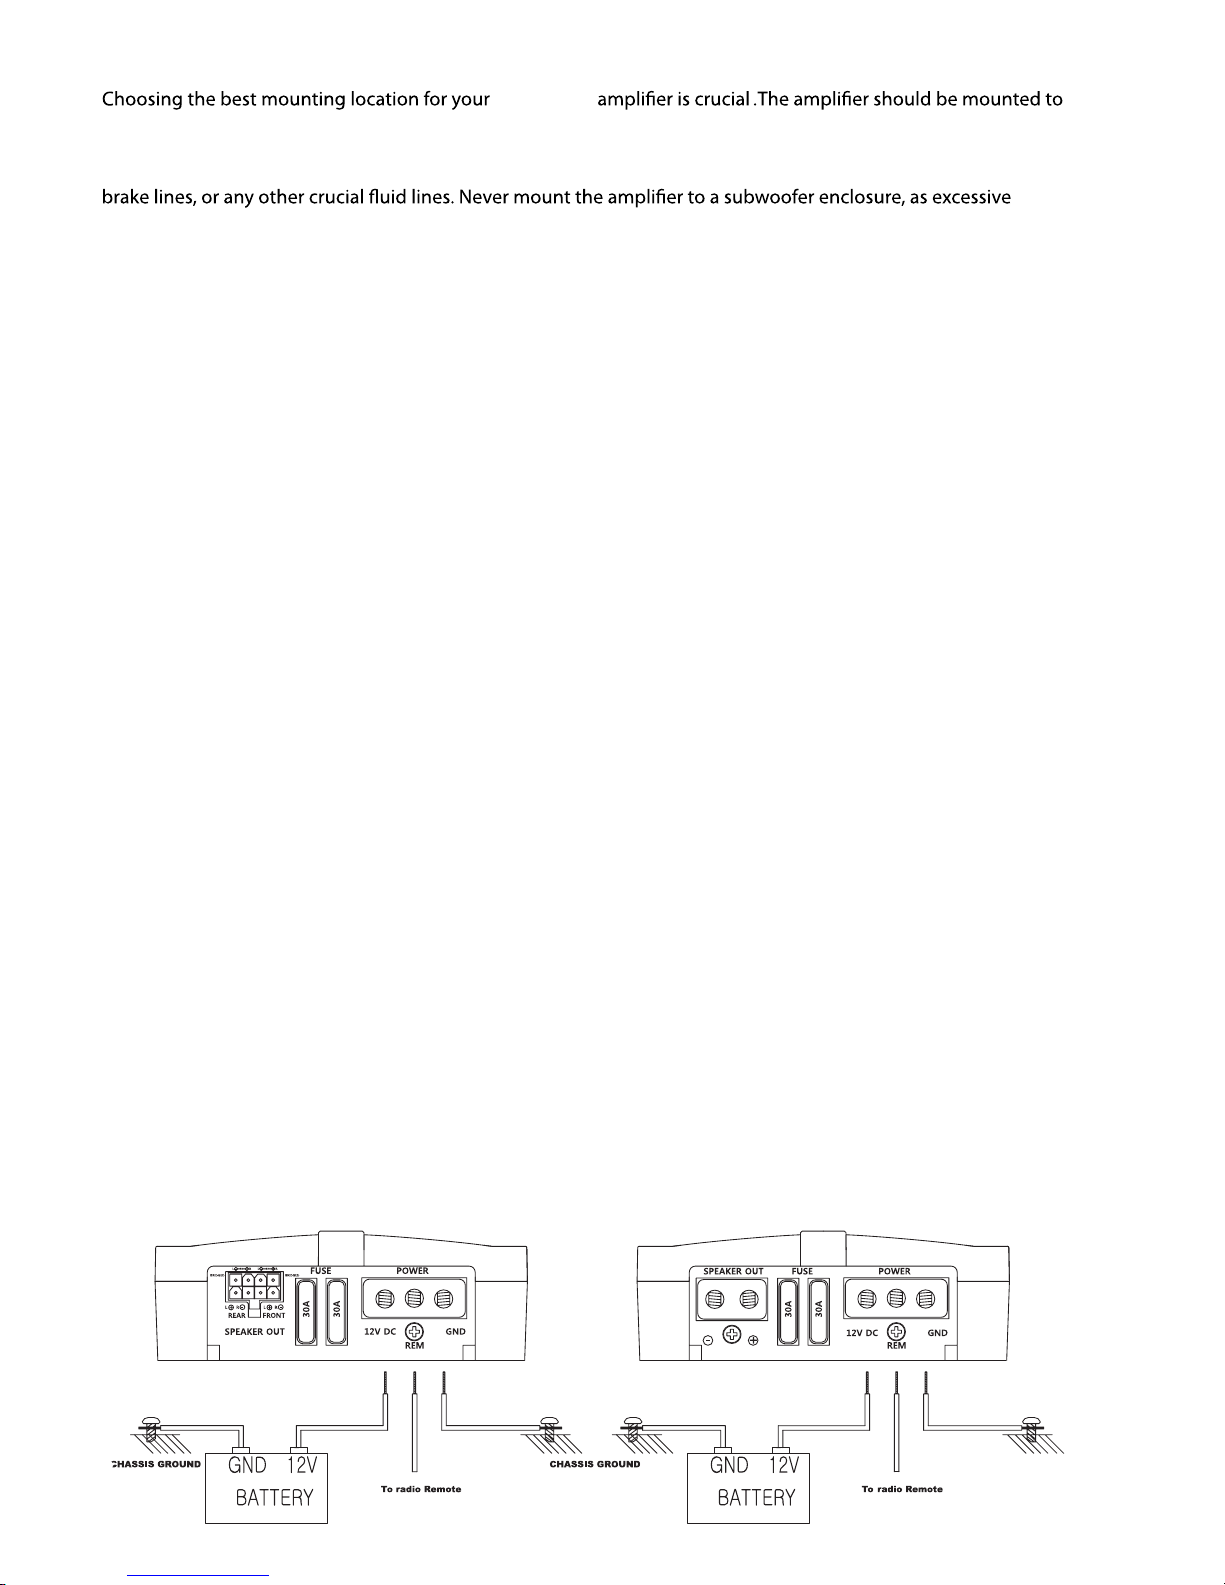
Power Connections
It is important to have good quality power and ground connections. Remember, to complete an electrical circuit,
the ground connection is just as important as the positive power connection. Before any power connections are
made, disconnect the ground cable of the battery. Use 8 gauge or larger automotive grade wire if the distance
from the battery to the amp is excessive. Avoid sharp or rough edges as a safeguard against short circuiting and
potential fire hazards.
GND = Connect the proper gauge ground wire to the amplifier GND terminal. Locate the position on the chassis
of the car where the amplifier will be grounded. Use solder or a crimped ring terminal to connect the ground
wire. Pre-drill the prepped chassis to bolt the ground ring terminal with a nut, bolt, and lock washer. Insulate the
metal and the connector with paint or silicone to prevent rust and oxidation. Silicone also works great to prevent
nuts and bolts from working loose in harsh environments of an automobile. Upon completion of the ground
connection, grab the wire and connector to confirm the connection is solid. To prevent engine noise, it is
recommended to ground the head unit and other electronic audio devices to the same location.
REM = Connect the remote wire (power antenna output) from the head unit to the REM terminal. If the head unit
is not equipped with a remote/antenna output, locate a wire that is controlled by the accessory position of the
key. It is important to have the amplifier turn off with the radio or key. If the amplifier remains on, the battery will
drain.
12V = Connect the proper gauge power wire to the B+ terminal. Trace the power wire through the car to the
in-line fuse or circuit breaker that is no more than 18” from the battery. Remember, the in-line fuse or circuit
breaker protects the car in the event of short circuit. Connect the in-line fuse or circuit breaker to the battery, but
do not install the fuse or activate the circuit breaker yet.
RZ4-1200D & RZ4-2000D Power Connections RZ1-1500D & RZ1-2300D Power Connections
new Razor
Page 4

High Level input connections
The high level inputs are for use with speaker level wiring. Most factory source
units do not have RCA outputs. Use this connection if your source unit does not
have RCA outputs. CAUTION:
Never use the high and low level inputs at the
same time!
RZ4-1200D & RZ4-2000D
RZ4-1200D & RZ4-2000D RZ1-1500D & RZ1-2300D
Page 5

Razor Pre-Amp Features
1. Remote Level Control Connection
Connect the remote level control to this
terminal. The remote level control allows
adjustment of the subwoofer level from a
remote location in the vehicle.
2. Low Pass Crossover
Adjust the frequency setting of the low pass
crossover. The frequency range is
35Hz-250Hz. Frequencies higher than the
setting will be filtered out of the audio signal.
3. Subsonic Crossover
Adjust the frequency setting of the subsonic
crossover. The frequency range is
10Hz-50Hz. Frequencies lower than the
setting will be filtered out of the audio signal.
4. Power & Protection Indicator LED
When the amplifier is on and in proper
working condition, the green LED will
illuminate. Refer to the Troubleshooting
Guide for possible solutions if the amplifer
will not power on.If the amplifier activates its
protection mode, the red LED will illuminate.
Refer to the Troubleshooting Guide for
possible solutions if the amplifier activates
its protection mode.
5. Level Sensitivity
Adjust the amplifers pre-amp sensitivity
level. The minimum sensitivity level is
250mv, while the maximum level is 6V.
6. RCA Audio Input Connection
Using high quality shielded stereo RCA
cables, connect the source signal to the
amplifier RCA inputs.
7. High Level Input
Connect the speaker outputs from the head
unit tot he high level input if RCA outputs are
not available. NEVER use high level and
RCA inputs at the same time.
8. Bass Boost
Adjust the amplifiers 45Hz Bass Boost level
up to 12dB.
9. Crossover Selection Switch
Choose an 80Hz fixed frequency high pass
crossover, 80Hz fixed frequency low pass
crossover, or full range operation.
1
2
3 8
57
6
4
9
9
8 5 5
8
7 7
4
RZ1-1500D
RZ1-2300D
RZ4-1200D
RZ4-2000D
Page 6

Setting the gains:
It is a fact that very few people, including professional installers, know how to set gains
correctly. Failure to do so yields higher distortion, a higher noise floor which decreases
dynamic headroom, less than optimum operating conditions for electronic equipment, and
higher failure rate for both the electronic equipment and transducers alike.
While most people set this control by ear to how loud they want their music, this is not the
intent of this control. The range is from 0.25 volts to 6 volts. The control is meant for
matching the output of the source unit’s signal voltage. For example, if you have a source
unit with low output voltage, you would probably have the control set fairly high, towards the
0.25V range. A lot of head units have 4 volts of output signal voltage which means that your
control would be set midway through the range. If you happen to have a line driver (signal
booster) that yields 6 volts or more, you will set the gain at the minimum position, towards
the 6V range.
In all of these examples, when properly level matched, the amplifier will put out full volume.
Setting the control above the proper point may cause damage to the amplifier and speakers,
and can result in poor sound quality and overall undesirable results.
Bass Boost control:
The monoblock amplifiers feature a variable Bass Boost control, centered at 45Hz. You can
adjust the amount of boost from 0dB to 18dB.
Page 7

Investigate the layout of your vehicle before drilling or cutting any holes.
Take care when you are working near the gas tank, brake lines, hydraulic lines, and electrical wiring. Do not use the amplifier without securly
mounting it, as the amp or vehicle may be damaged in the event of an
accident. Do not mount the amplifier where the wire connections are
unprotected or are subject to pinching or damage from other vehicle
components. The 12V power wire must be fused within 18” of the
battery. Ensure the source unit is powered off before making any wiring
connections. If you need to replace the fuses, use only the same type
and size. Using a fuse of a different type or rating may result in damage
to the amplifier or vehicle, which will not be covered under the
manufacturer’s warranty.
Page 8

LIMITED 90-DAY CONSUMER WARRANTY
LIMITED ONE-YEAR CONSUMER WARRANTY WITH PURCHASE AND INSTALLATION BY A POWER ACOUSTIK
AUTHORIZED DEALER
Power Acoustik Electronics, (The Company) warrants to the original retail purchaser of
its products that should this product under normal use and conditions, be proven
defective in material or workmanship within 1 Year from the original date of purchase
and professional installation or 90 Days if self installed. Those items with
manufacturer’s defects will be repaired or replaced at our option with without charge for
parts and repair labor.
To obtain repair or replacement within the terms of this warranty, the product or
products are to be returned with proof of warranty coverage (e.g. a copy of the receipt
for your purchase and installation), Specific information of the nature of the defect(s),
all transportation costs are to be paid by the sender including a cashier’s check for
$15.00 to cover the return freight and packing.
This warranty does not extend to the elimination of externally generated static or noise,
or to cover installation costs for initial installation, removal or reinstallation of the
products or to damaged, media sources (DVD’s, VHS tapes, Speakers, Amplifiers, Car
stereo’s or Electrical System Failures).
This warranty does not apply to any product or part thereof which, in the opinion of the
company, has been abused or damaged through alteration or modification, improper
installation, mishandling, misuse, neglect, accident, or by the removal of the unit.
The Extent of the company’s liability under this warranty is limited to the repair or
replacement provided above and, in no event, should the company’s liability exceed the
purchase price paid by the purchaser for the product.
This warranty is in lieu of all other express warranties or liabilities. Any implied warranties, including any implied warranty of merchantability, shall be limited to the duration of
this written warranty. Any action for breach of warranty hereunder including any implied
warranty of merchantability must be brought within a period of 48 months from the
original date of purchase. In no case shall the company be liable for any consequential
or incidental damages for breach of this or any other warranty, express or implied,
whatsoever. No person or representative is authorized to assume for the company any
liability other than expressed herein in connection with the sale of this product.
Some states do not allow limitations on how long an implied warranty lasts or the
exclusion of incidental or consequential damage so the above limitations or exclusions
may not apply to you. This warranty gives you specific legal rights and you may also
have other rights, which vary from state to state.
Power Acoustik Electronics,
1550 S. Maple Ave. Montebello, CA. 90640
Phone # 1-800-832-4647
 Loading...