

Powakaddy FW3S, FW7S, EBS, FW5S Owner's Manual

FREEWAY
RANGE
OWNERS MANUAL
All PowaKaddy electric trolleys
have been awarded the Quiet Mark
by the Noise Abatement Society
Digital Speed Setting
IMPORTANT- you must fully charge your battery for a recommended
12 hrs before using your trolley. Always recharge your battery within
24 hrs of use. Failure to do so could reduce the life of your battery.
Note: Your Lithium or Lithium Extended battery is stored in the frame for transportation. Remove the battery and
activate using the isolation switch located on the underside of the battery. This switch must be in the on position
when using the trolley and during charging. (See Section 2 Plug‘n’Play™ for battery removal)
+-
12h
0 1
Getting Started
Thank you for purchasing the new PowaKaddy. We hope you enjoy your new trolley and welcome your feedback and comments.
Please read these instructions carefully. Battery care is very important, please refer to the back page of this manual for battery
care instructions.
When you receive your new PowaKaddy you will have the following:
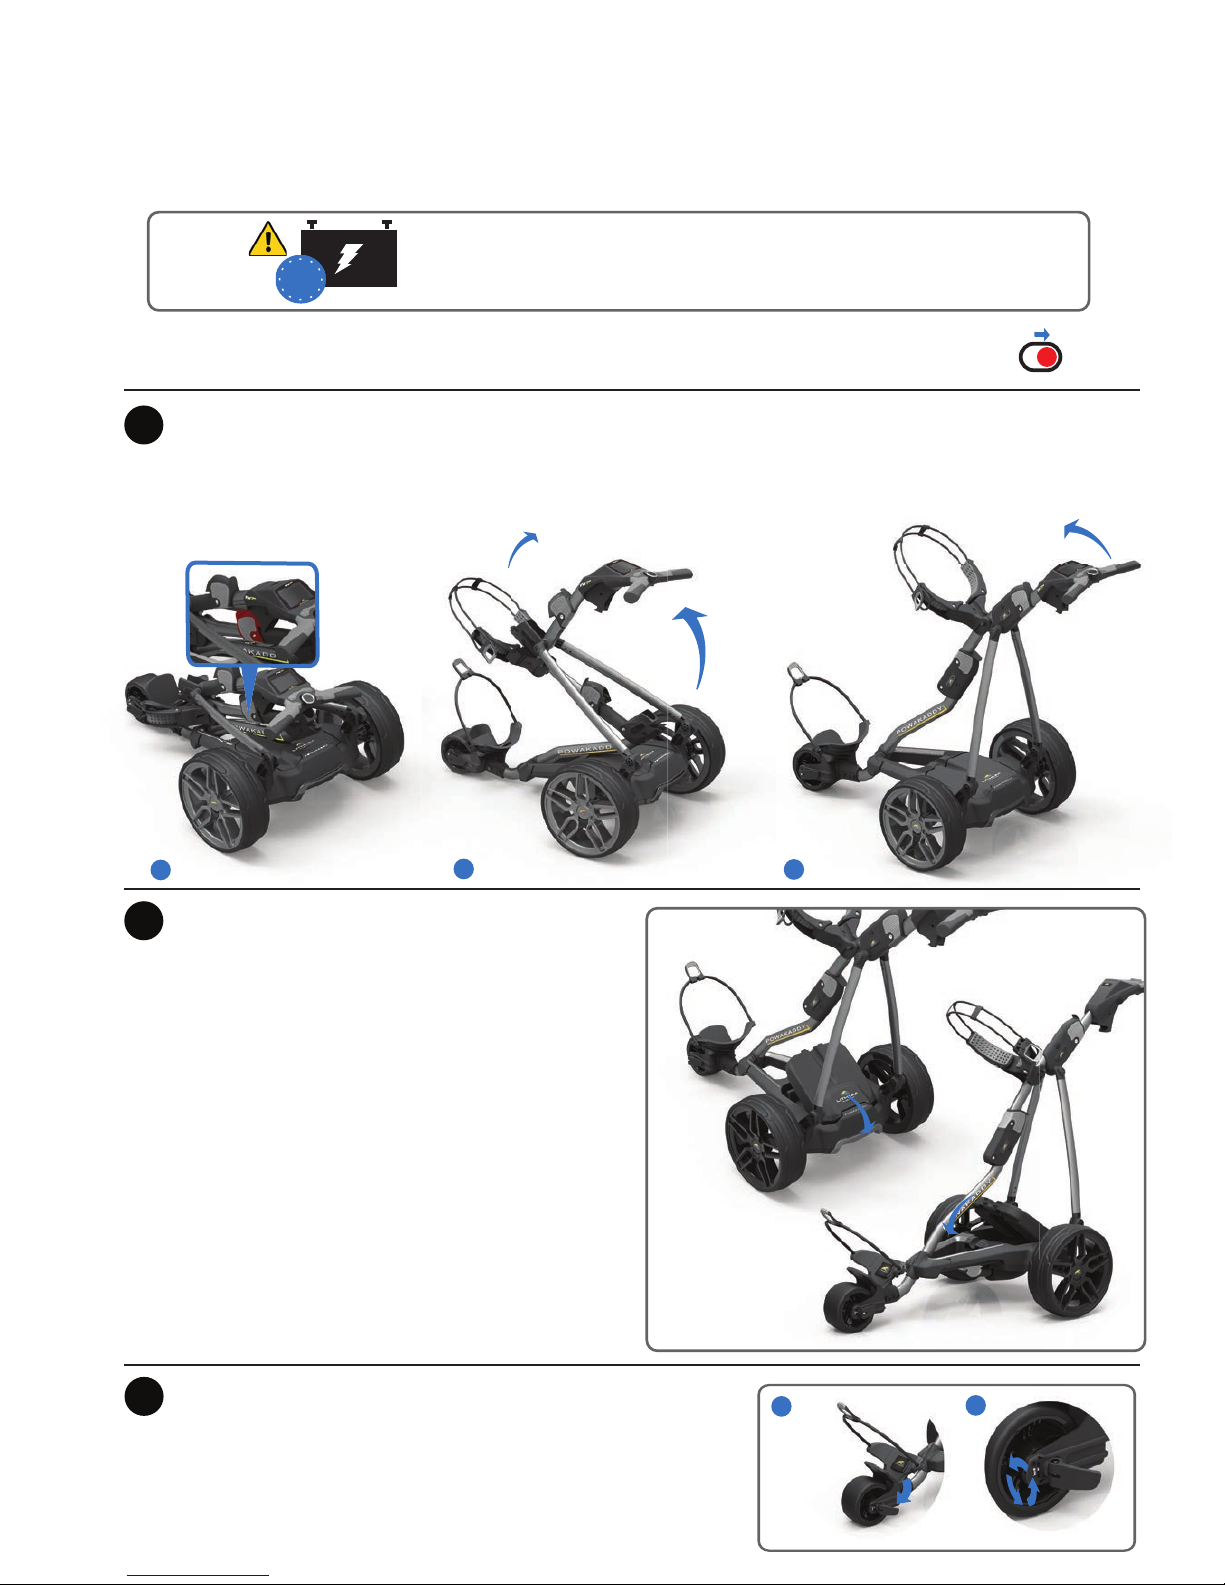
Fit the wheels by pressing the yellow release button and pushing onto the axle until the clutch is engaged. The wheels can be
locked into two positions on the axle; push onto the inner groove to engage drive. The outer groove can be used when drive is not
required. To open the frame, slide the main lock (highlighted red below) forward to release the handle latch and open as shown
below.
Your FW trolley features an innovative Plug’n’Play™ battery
system including sprung terminals and a locking feature to
maintain power connection over uneven terrain. Once your
battery is charged and trolley assembled connect your battery
as shown.
• Engage the rear of the battery first.
• Press the front until the battery clips into position.
The trolley’s power will automatically be connected.
To remove the battery depress the front latch and lift the front of
the battery out.
Note: The Lithium battery can be stored within the tray for
transportation. Please ensure you de-activate the battery using
the red isolation switch located on the underside. Leaving
your battery in the ON (1) position could lead to your battery
discharging or trolley activating during transportation.
1
2
4
Your trolley will already be pre-set to run straight. If you find your trolley
tracking to the left or right you can re-adjust this by releasing the front wheel
lever and rotating the adjustment roller. Rotate up to make your trolley track
more to the LEFT and rotate down to track more to the RIGHT. Once you are
happy the trolley is running straight re-apply the lever to lock in position.
1
2
Front Wheel Adjustment
3
1 x Trolley | 1 x Battery (Lead-Acid or Lithium) | 1 x Charger | 2 x Wheels | 1 x Instruction pack
PLUG’
n
’ PLAY
TM
1
2
A
B
C
12h
Left Function Button
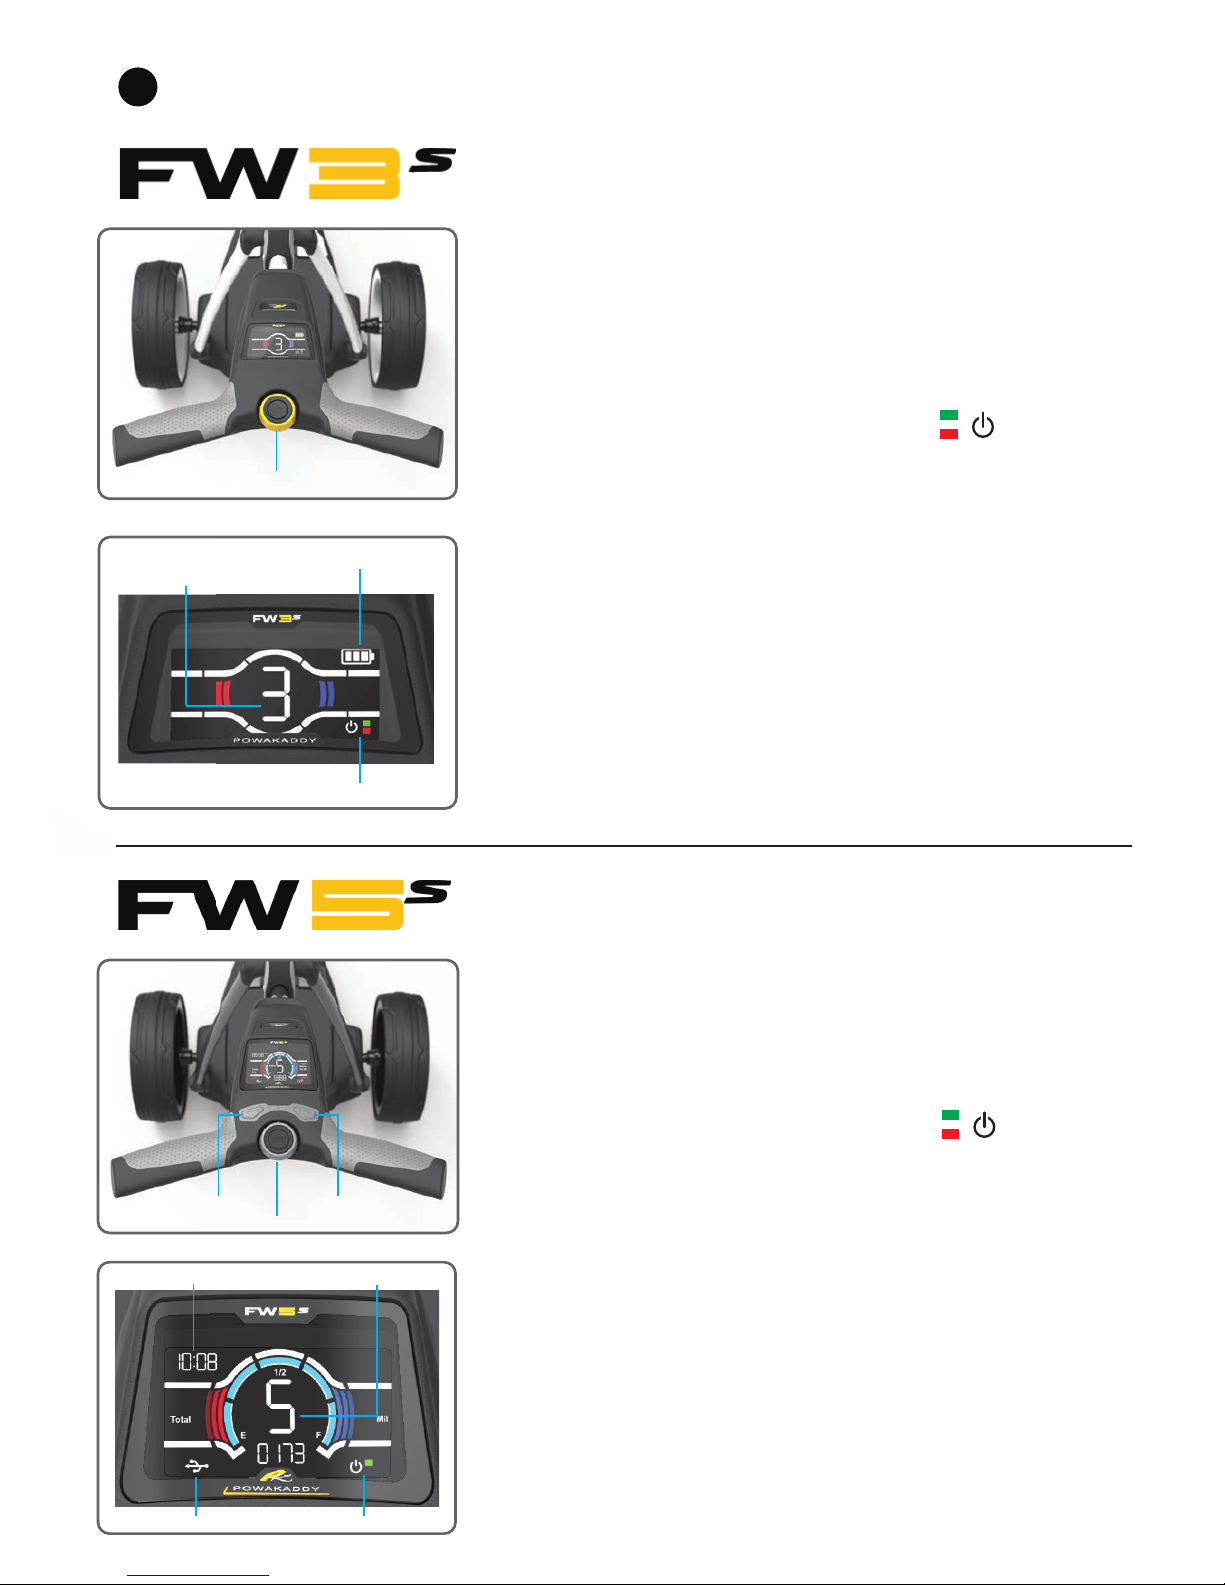
Digital Speed Setting:
Rotate the central control knob to adjust the speed of the trolley from 0 - 9 when
the motor is powered on. Press central control knob to pause and resume your
selected speed.
Enhanced Battery Gauge:
Displays your battery status.
The FW3s simple and intuitive controls feature a bright wide screen display and
enhanced battery gauge.
Power Indicator:
Displays whether power is being applied to
the drive system.
The light will illuminate red on start up to indicate the motor power
condition as off. Press the on / off control in the centre to power the
motor on and the green light will illuminate. Rotate the central control knob
clockwise to increase and counter-clockwise to decrease the speed.
Central Control Knob: Turn to control the speed of the trolley in normal
operation. Press to pause and resume at your selected speed.
Power Indicator
Battery Gauge
Digital Speed Setting
4
Controls Overview
Central Control Knob
Clock Digital Speed Indicator
Power IndicatorUSB
Left Function Button - Press to toggle between Time/Trip Time and Total Distance/Trip
Distance
•Total: This will show the total distance covered by the trolley. This cannot be reset.
•Trip Time: This displays the “on” time of the trolley. This will reset when the battery is
disconnected.
•Trip: This displays the total trip distance travelled during the round. This will reset when
the battery is disconnected.
Left Function Button
Central Control Knob
Right Function Button
Power Indicator:
Displays whether power is being applied to
the drive system. (green/red)
ON
OFF
The all new stylish FW5s features a bright colour multi-function display packed
with additional features to enhance your game.
ON
OFF
Once your battery is connected your trolley is ready to use. The control functions
for each model are detailed below.
Digital Speed Setting:
Rotate the central control knob to adjust the speed of the trolley from 0 - 9 when
the motor is powered on. Press central control knob to pause and resume your
selected speed.
Central Control Knob: Turn to control the speed of the trolley in normal
operation. Press to pause and resume at your selected speed.
Note: The Freeway Range now includes a power save mode as standard on all
models to extend the life of your battery. If you have the trolley powered and do
not use the trolley for more than 20 mins, the display will automatically power
off to save energy. When you are ready to move off simply press or move the
control dial on the handle to wake up the display.
 Loading...