

Page 1
pottery barn kids
AMELIA HEADBOARD
PRE-ASSEMBLY:
• Read all instructions before beginning assembly. The illustrations provided allow for easier assembly when
used in conjunction with the assembly instructions.
• For your safety and ease, assembly by tw o adults is recommended.
• Remove all parts and hardware from the box and lay out on a clean, carpeted, or scratch-free work surface.
Use care as some parts or hardware may have sharp points or edges.
• Do not dispose of any contents until assembly is completed to avoid accidentally discarding small parts or
hardware.
• Use the parts and hardware lists to identify and separate each of the pieces included.
• Note: Do not fully tighten all bolts until all par ts are in place. Failure to follow these instructions may cause
the bolts to misalign during assembly.
• The use of power tools for assembly is not recommended. Power tools can damage hardware or split
wood.
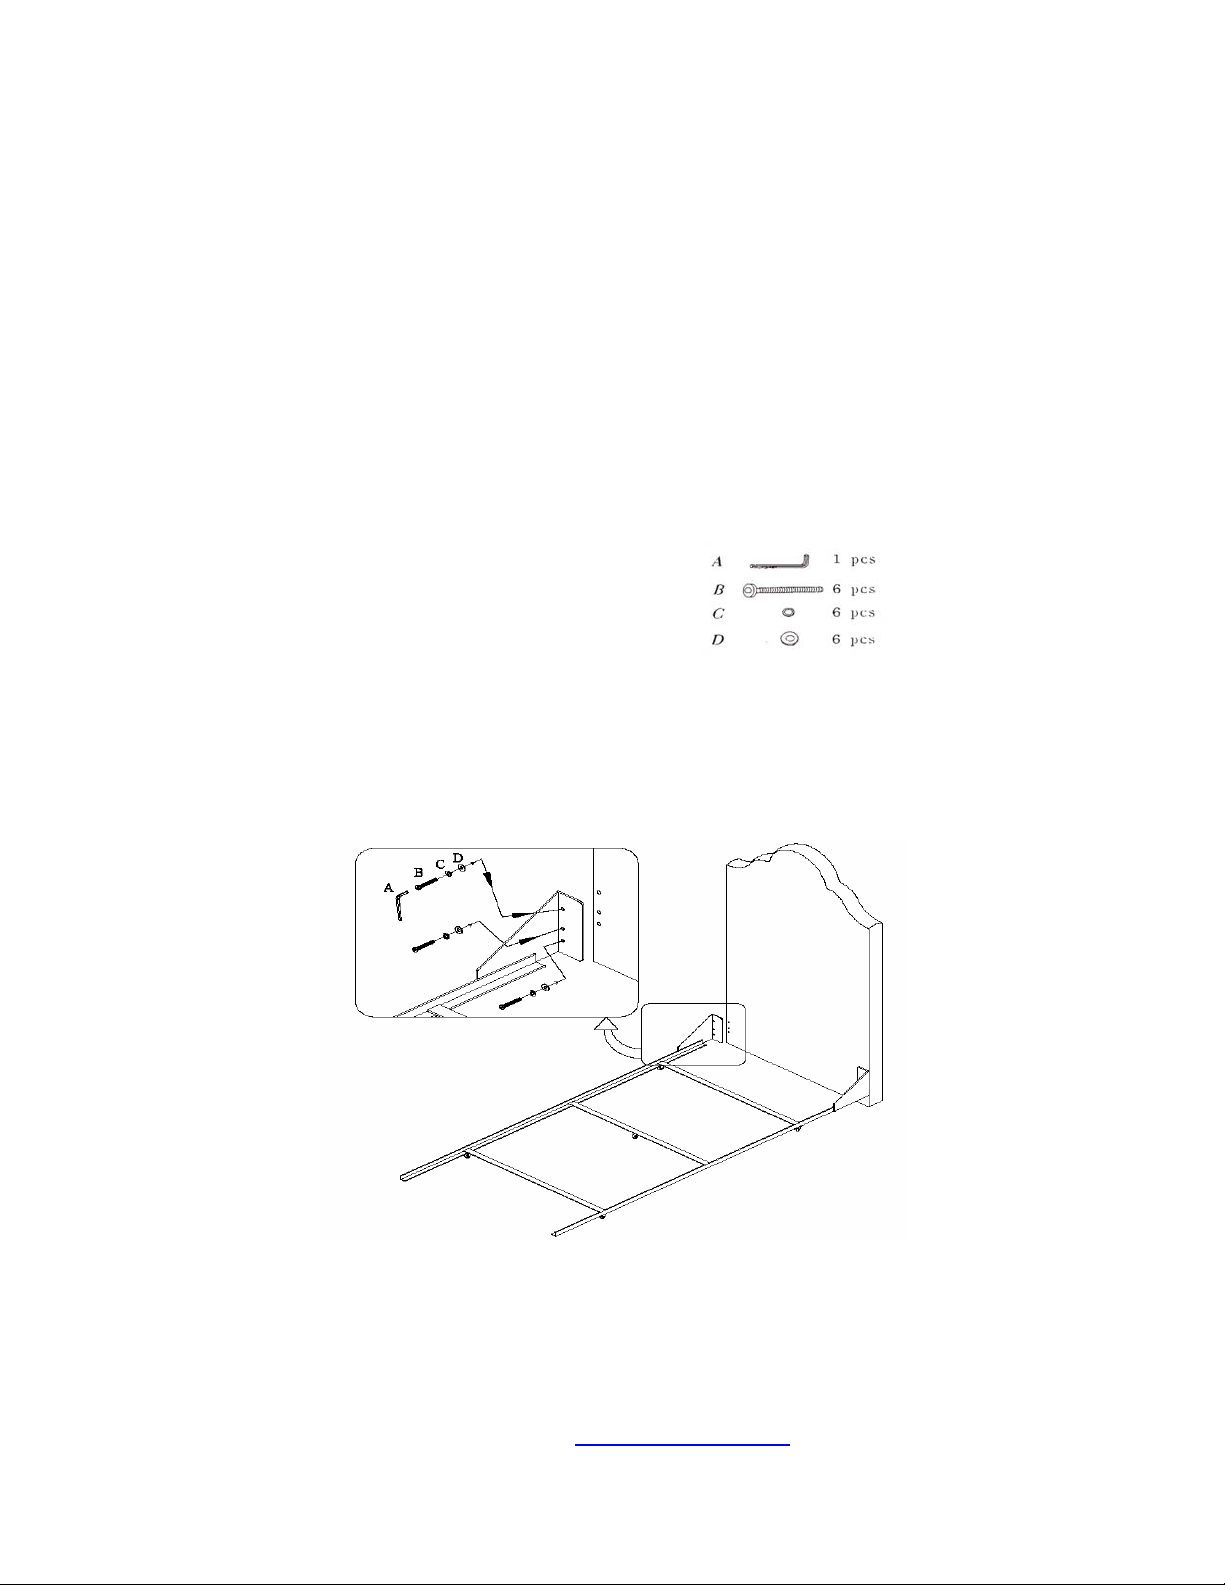
PARTS INCLUDED: HARDW ARE ENCLOSED:
Headboard (A) Allen Key 4mm (1)
(B) Allen Bolts 1/4” X 2” (6)
PARTS REQUIRED: (C) Lock washer dia.0.45” (6)
Assembled Metal Bed Frame (D) Flat washer dia.0.74” (6)
(sold separately)
Assembly Instructions:
1. Hold Headboard upright and tilted slightly towards the faceplates of the pre-assembled bed frame. Align
the slots/holes in the faceplate with the pre-drilled holes on the headboard.
2. Insert an Allen Bolt (B) into a Lock washer (C), a flat washer (D), and through the faceplate opening on
your Metal Bed Frame and into the pre-drilled hole on the Headboard. Repeat with remaining bolts.
Tighten bolts using enclosed Allen Key (A).
CARE INSTRUCTIONS:
z Keep your furniture looking new by avoiding direct heat and sunlight.
z Dust lightly and vacuum weekly.
z Fabric can be spot cleaned with mild soapy water.
z For more thorough cleaning professional upholstery cleaning is recommended.
z Periodically tighten all connections.
Thank you for your purchase
stores l catalog l www.potterybarnkids.com
USA 1.800.290.8181
 Loading...