

Page 1

pottery barn kids
IRON BED AND CANOPY (EACH SOLD SEPARATELY)
CAUTION: This item contains small parts that have sharp points and edges in
the unassembled state. Care should be taken when unpacking and assembling
this item.
Please read all instructions before beginning assembly.
For ease of assembly two people are recommended.
Save all packing materials until assembly is complete to avoid accidentally
discarding smaller parts or hardware.
PARTS INCLUDED:
(1) Headboard (A)
(1) Footboard (B)
(2) Side Rail (C)
(3) Metal Support Slats (D)
(2) Short Canopy Post (E) (For Canopy only)
(2) Long Canopy Post (F) (For Canopy only)
(2) Long Stretcher (G) (For Canopy only)
(2) Short Stretcher (H) (For Canopy only)
(4) Finial Base (I)
(4) Finial (J)
(18) Bolt Ø1/4”x3/4” #1
(12) Small Rubber Washer #2
(1) Allen Wrench #3
(12) Metal Washer #4
(6) Nuts #5
(1) Open Wrench #6
(8) Large Rubber Washer #7
(4 pieces used for bed only)
(4) Plug #8 (For canopy only)
Page 2
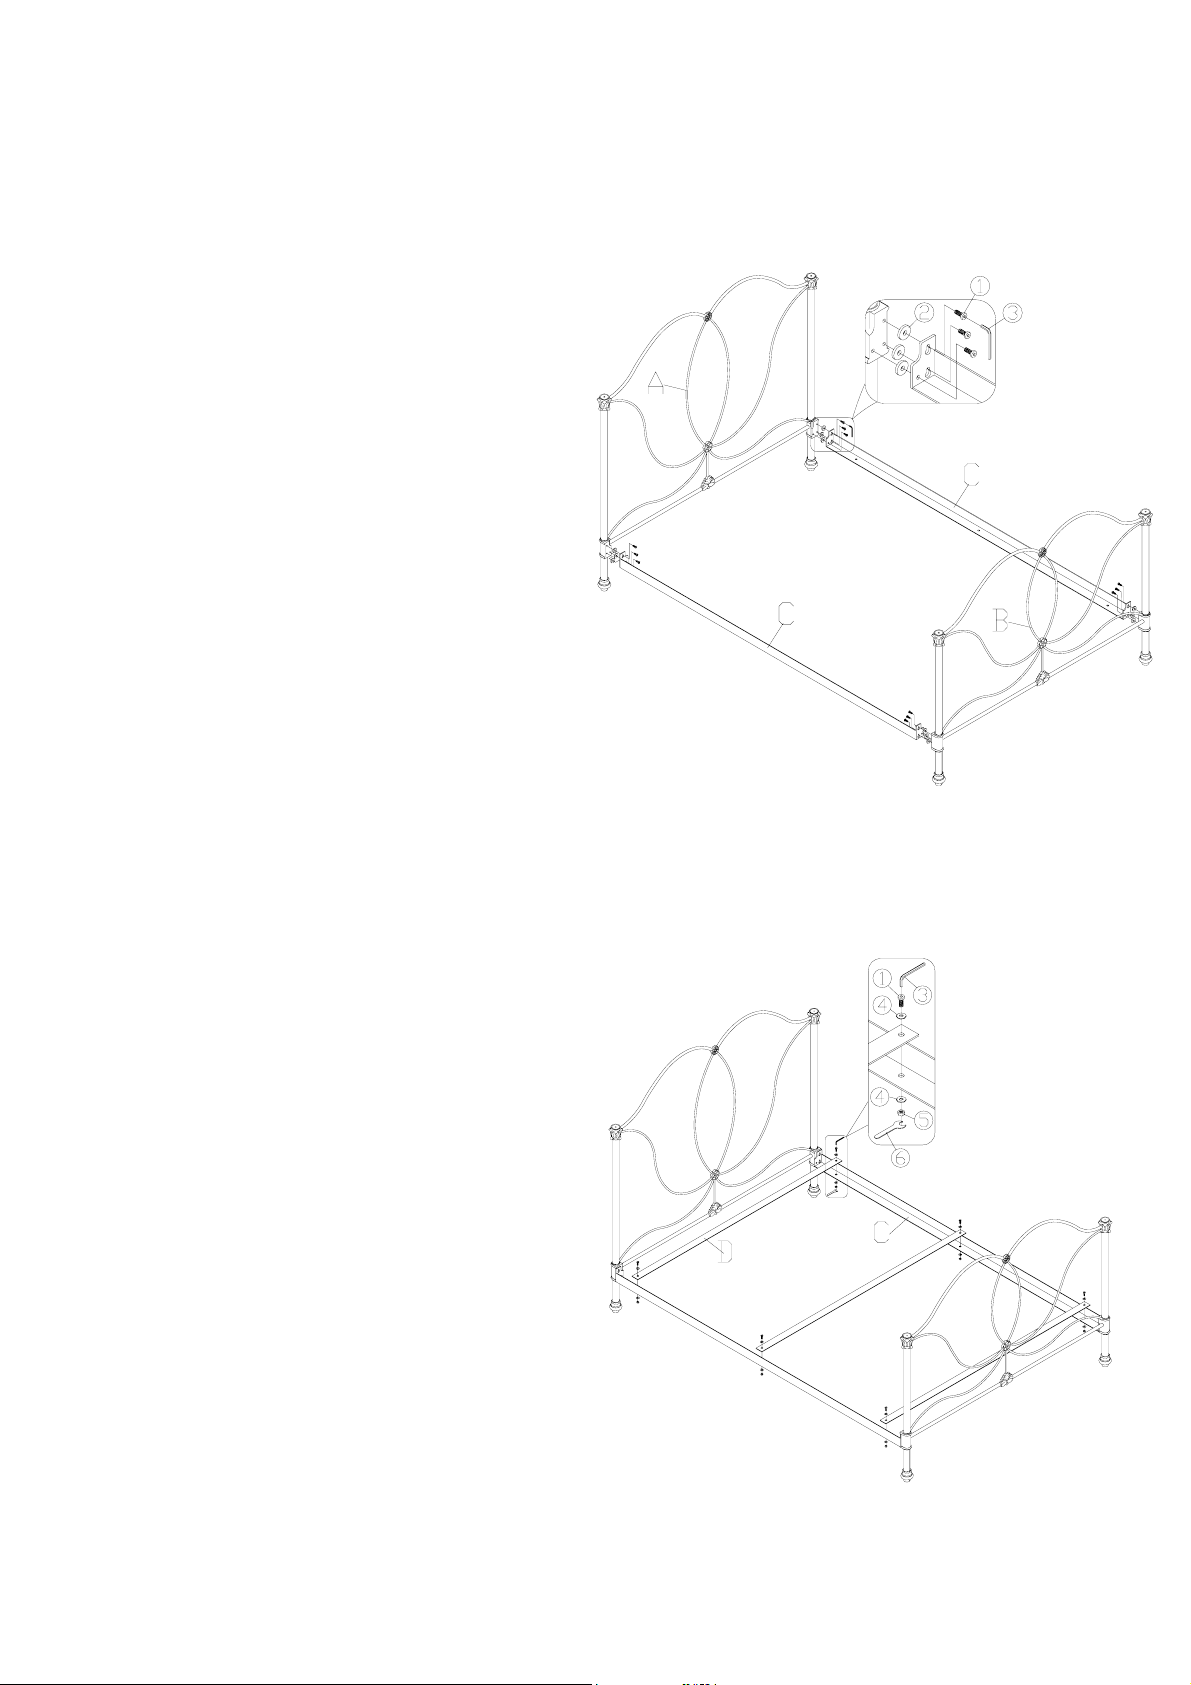
ASSEMBLY:
Assembly of the side rails and bed frame:
Step#1
1. Attach Headboard (A) to Side
Rail (C) using (6) Bolts #1 placed
through (6) Small Rubber
Washers #2 tighten
using Allen Wrench #3.
2. Attach Footboard (A) to Side
Rail (C) using (6) Bolts #1
Through (6) Small Rubber
Washers #2. Tighten with
Allen Wrench #3.
Step #2
Attach Side Rail (C) and Metal
Support Slats (D). Secure in place with the
(6) Bolts #1, (12) Metal Washer #4
(both above and below the slat as
shown) Complete with (6)
Nuts #5 tighten using both
Open Wrench #6 and
Allen Wrench #3.
Page 3

To complete bed without canopy:
Step #3
Insert (4) Finials (E) through
(4) Large Rubber Washers #7
into top of Headboard (A).
To complete bed with canopy:
Step #3
Insert (2) Short Canopy Posts (E)
Through (2) Large Rubber
Washers #7 into the
Headboard (A). Insert (2) Long
Canopy Posts (F) with (2) Large
Rubber Washer #7 into the
Footboard (B).
Page 4

Step #4
Insert Finals (J) into top of
Finial Base (I). Insert Finial Base (I)
through Large Rubber Washer #7
into both the top of Short Canopy Post (E)
and Long Canopy Post (F) as shown.
Pay attention to the two holes on the Finial
Bases (I) they should be facing toward the
other holes on the other Finial Bases.
Step #5
Insert Plugs #8 into the right hole of
each Finial Base (I).
Attach Short Stretchers (H) between
the Headboard and Footboard posts
as shown.
Attach Long Stretcher (G)
Between the Headboard and
Footboard as shown
Care Instructions:
Dust with a soft, dry or slightly damp
cloth. Avoid the use of cleaners and
polishes.
Thank you for your purchase.
stores | catalog | www.potterybarnkids.com
 Loading...