

Posturite EvacuRite User Manual
‘With you every step of the way’
Setup Guide
Basic User Guide
Usage / Inspection Log
www.posturite.co.uk

EvacuRite Evacuation Chair
Please note that this manual provides setup and general operating instructions and does not replace a structured training course delivered
by a qualified trainer.
` Maximum Load: 160 Kg / 25 Stone
` Stair Angle: up to 40°
EvacuRite Evacuation Chair Training
It is recommended that appropriate training is undertaken before this chair is used in a trial or actual evacuation. To arrange a suitable
course, please contact Posturite Ltd using the contact address at the end of this manual.
Best Practice
Best practice dictates that the chair operator is the same or heavier in weight than the evacuee. If the evacuee is significantly heavier, the
chair operator may not be able to provide a controlled and safe descent of the stairs.
Contents:
A. Fitting the EvacuRite chair bracket to a wall 03
B. Preparing the EvacuRite chair for use 04
C. Releasing guide tracks for use on stairs 06
D. Assisting the chair downstairs 07
E. After use 08
Cleaning and chair maintenance 10
Inspection checklist 10
2
Inspection log 11
Usage log 12
Trained operator details 13
Warranty 14
Do’s & don’ts 14
Chair specifications 15
A. Fitting the EvacuRite chair bracket to a wall
NB: The EvacuRite chair should not be sited outside.
1. Carefully remove the EvacuRite chair, wall bracket and cover from the box.
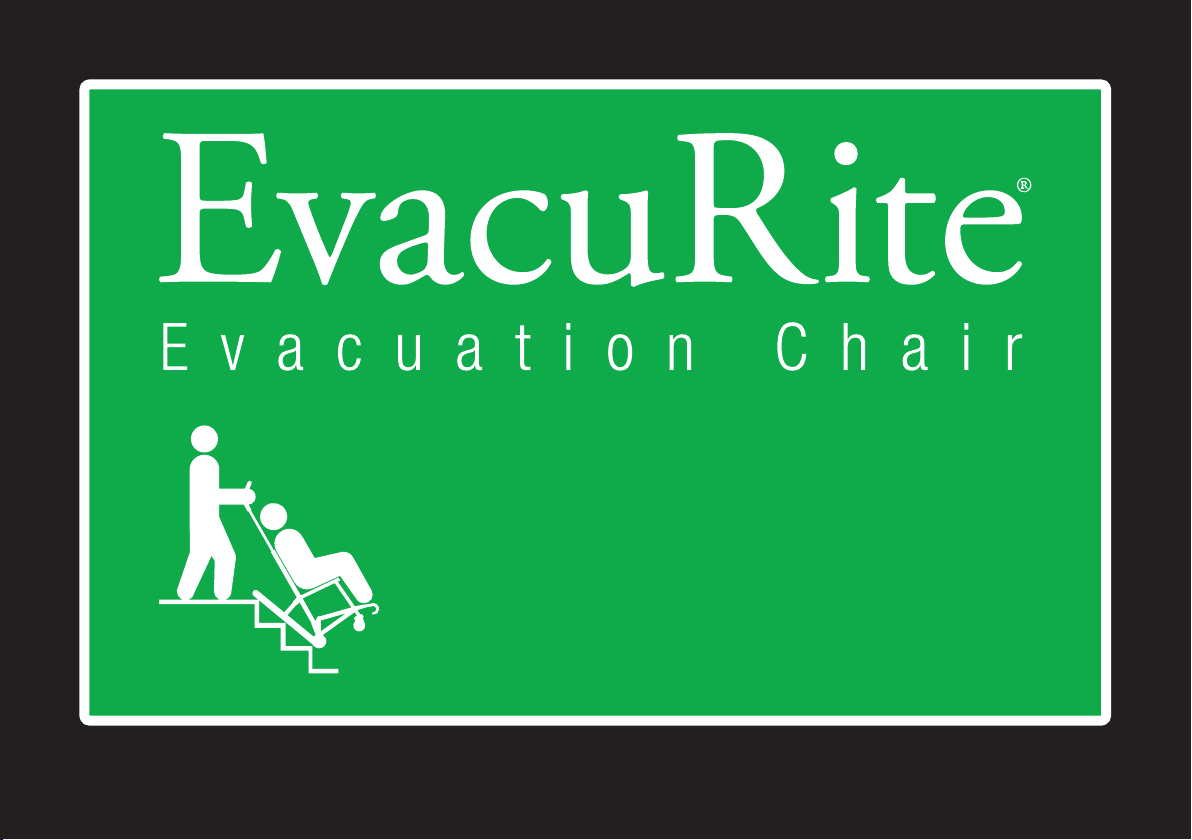
2. After choosing where the chair will be kept, fix the bracket onto the chosen wall using
appropriate screws and rawl plugs for the type of wall, so that the:
- Distance from the floor to the centre of bracket holes is 955mm - see Fig A.
When attaching to a plasterboard wall, the centre of the bracket should be screwed into the wall’s
wooden joists. If wooden joists are not found, suitable rawl plugs and screws should be used to
achieve a firm fixing of the bracket to the wall.
3. Once the wall bracket is in place, keeping the chair closed, with the black tracks facing the
wall, push the green brake handle bar into the two clips on the bracket. The clips on the wall
bracket will fit between the brake levers.
4. Ensure that the black curved handles are facing forwards. The black retaining knobs will click
shut to secure the black handles in the forward position. It may be necessary to slightly lift and
adjust the black handles by a small amount to achieve this secure location.
5. Position the cover neatly onto chair. Once this instruction booklet has been thoroughly read,
locate the serial number of the chair (found on the brake handle bar) and note into the available
space on page 11.
6. Please keep this manual safe by inserting into the clear pocket on the top of the cover.
WALL
2
4
955 mm
Fig A
3
B. Preparing the EvacuRite chair for use
Chair release
1. Remove the cover, leaving the chair in the wall bracket at this stage.
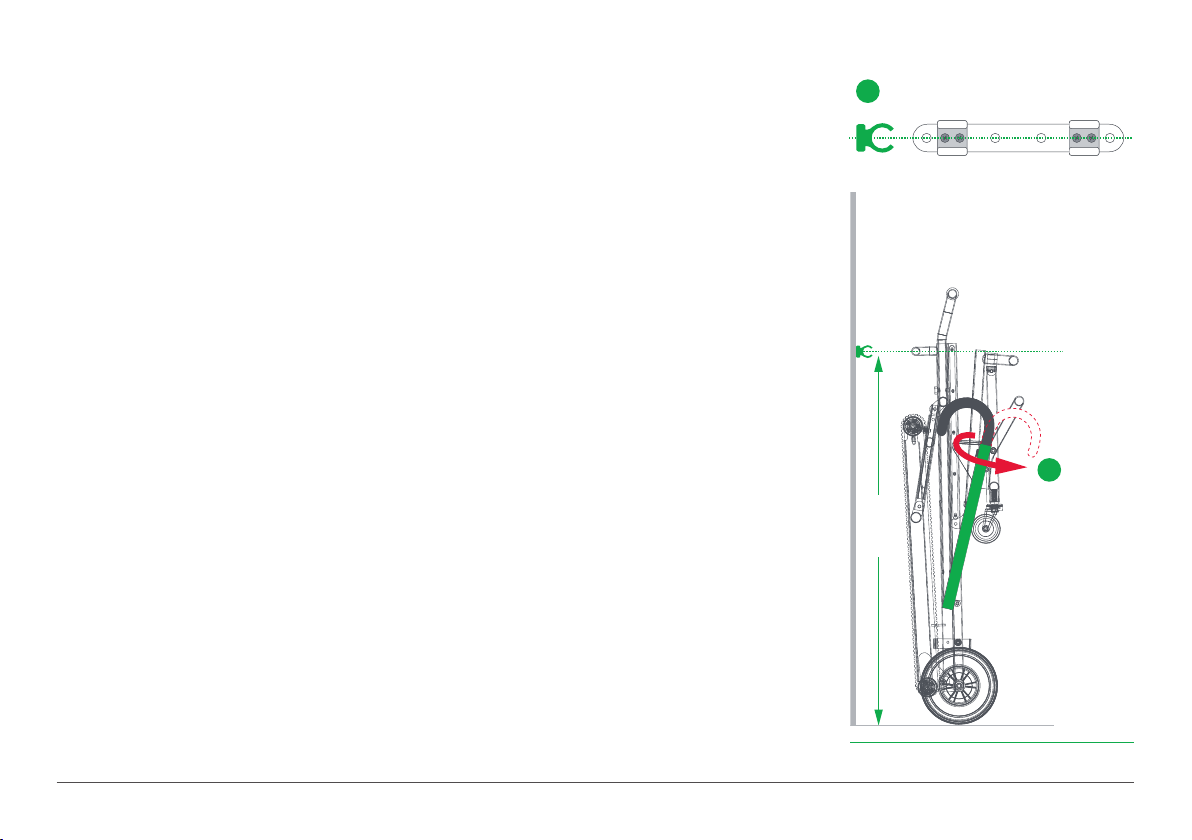
2. Holding the front seat bar (see Fig B), un-clip the BLACK retaining straps (chest straps) at the
front of the chair and move straps away so as not to hinder the decent of the seat forwards.
Lower the seat down gently until an audible click is heard to lock seat in the open position. Check
seat is locked open.
3. Place the chest straps on top of chair seat.
4. Pull the chair off and away from the wall bracket clips.
5. Wheel the chair to where it is needed.
6. Before anyone sits on the chair both brakes must be ‘locked on’. Each brake is ‘locked on’ by
squeezing the brake lever and pushing in the silver locking spring. The brake lever can then be
released and the brake will remain ‘on’ whilst the silver locking pin is pushed in. Repeat with
other brake. Check that both rear wheels are now locked in position.
7. Make sure the foot rest is in the ‘up’ position and that both the lap and chest belt straps are
undone beside chair.
8. Seat Evacuee onto the chair.
Foot rest release
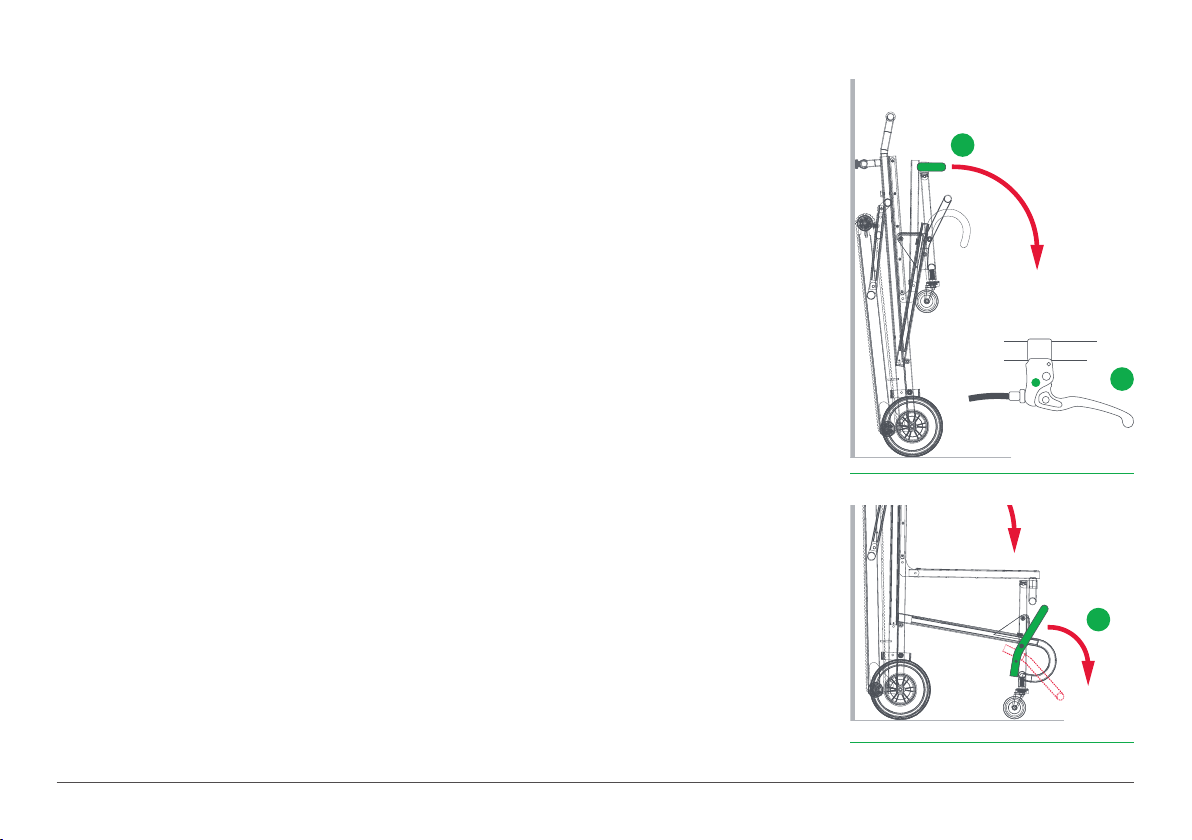
9. Release the BLUE leg strap, lower the footrest and place evacuee’s feet onto the foot rest. It is
advisable at this stage for the evacuee to remove any shoes with high heels. Attach the BLUE leg
straps around the shins of the evacuee and adjust tightness - to keep legs in place but not too
tight to be uncomfortable - do not let any excess strap trail on the ground - see Fig C.
2
6
Fig B
9
Fig C
4
10. Attach both the lap belt and the chest belt across the evacuee (Chest belt should be attached
around both arms and chest) and adjust accordingly so evacuee is securely fastened and
comfortable in the chair - do not let any excess strap trail on the ground.
11. Release the brakes by squeezing, then releasing both brake levers - the locking pins will be
released.
12. NOTE: EVACUEE MUST NOT BE LEFT UNATTENDED WHILST IN THE CHAIR.
Evacuee can now be wheeled to the appropriate location for the next phase of evacuation
13. When ready and positioned at the top of the stairs, re-apply brakes and ‘lock on’
(see instruction B6).
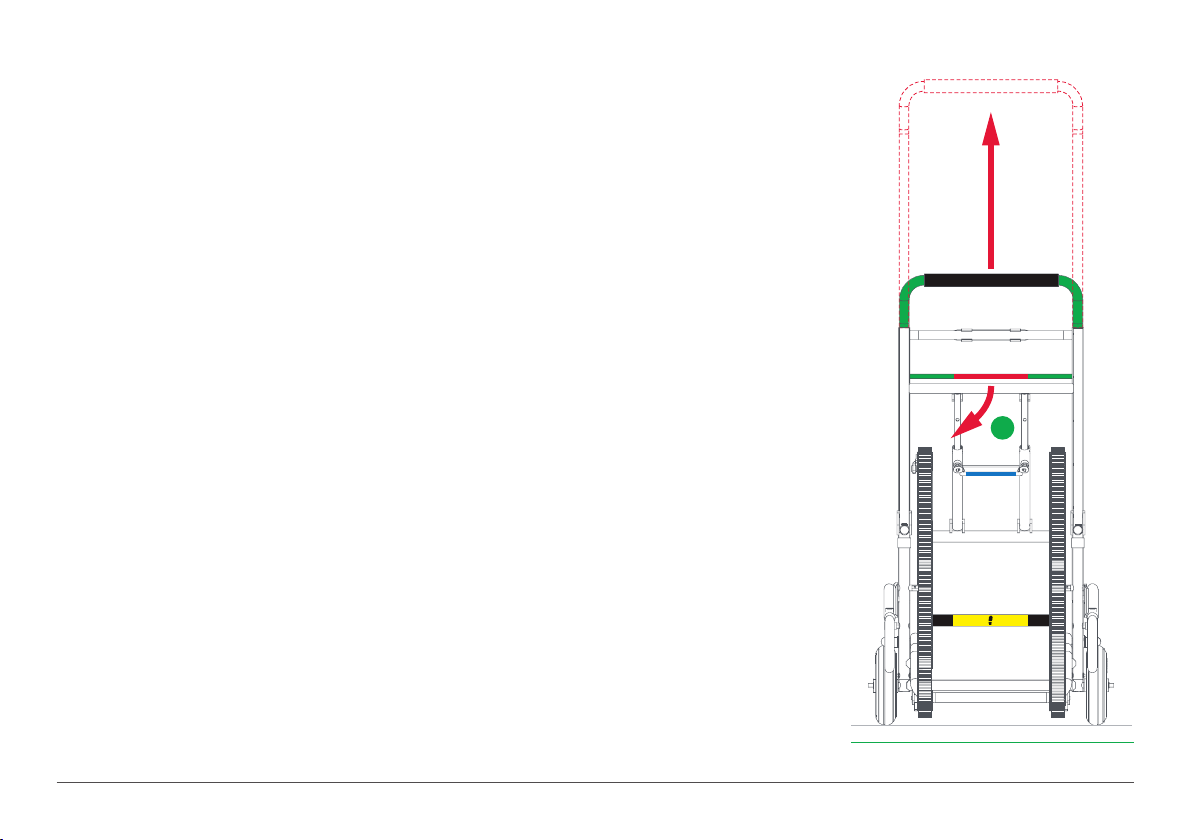
Raise the handle extension
14. At the rear of the chair, with one hand pull the RED coloured bar firmly towards you thus
releasing the locking pins (either side) and simultaneously with the other hand, lift up the top
handle until an audible click is heard to lock this bar in the raised position. Check that this
handle is locked into position - See Fig D.
15. Adjust the head support pillow on the top handle to the desired height.
16. If needed, the extra head retaining strap can be attached around the forehead of the evacuee.
17. Do not attempt to use the chair on stairs until the slide tracks have been opened and
secured. See section C.
14
Fig D
5
 Loading...