


POSTEK PPLE COMMAND MANUAL
1
Introduction
Barcode label printer
POSTEK PPLE
Command Manual
V3.04
Postek Electronics Co., Ltd.
2015
POSTEK PPLE COMMAND MANUAL
2
Introduction
B1. Command Syntax
- Generally speaking, command names consist of 1 or 2 (case sensitive) alphanumeric characters.
- Some commands require one or more optional parameters and/or optional commands to perform special
functions.
- All command lines should be concluded by a “LF-0AH” or “CR-0DH+LF-0AH” via “enter” to a new line.
1. Basic command format.
Format 1: Commands without parameters
Syntax
Description
X<LF> or X <CR><LF>
Command with single alpha character
XX<LF> or XX<CR><LF>
Command with two alpha characters
Format 2: Commands with a fixed number of parameters
Syntax
Description
Xp1, p2, p3,…, pn <LF> or
Xp1, p2, p3,…, pn<CR><LF>
Command with a single leading alpha character
XXp1, p2, p3,…, pn <LF> or
XXp1, p2, p3,…, pn <CR><LF>
Command with two leading alpha characters
Format 3: Commands with optional parameters
X [p1, p2, p3…, pn] <LF>
2. String
In command sets, we can use data strings with the following characteristics:
Name: for graphics, soft fonts and forms.
Data: for fonts and bar code
The quotation mark character (“) designates the beginning and ending of a string.
The backslash (\) character designates that the following character(s) is literal and will be encoded into the
data field. Please refer to the following
Examples:
Character input
To Print
Input “ \”
\
\\
0x00 – 0x7F
\x00 - \x7F
Note: All commands and names are case sensitive.

POSTEK PPLE COMMAND MANUAL
3
Introduction
B2. Fonts
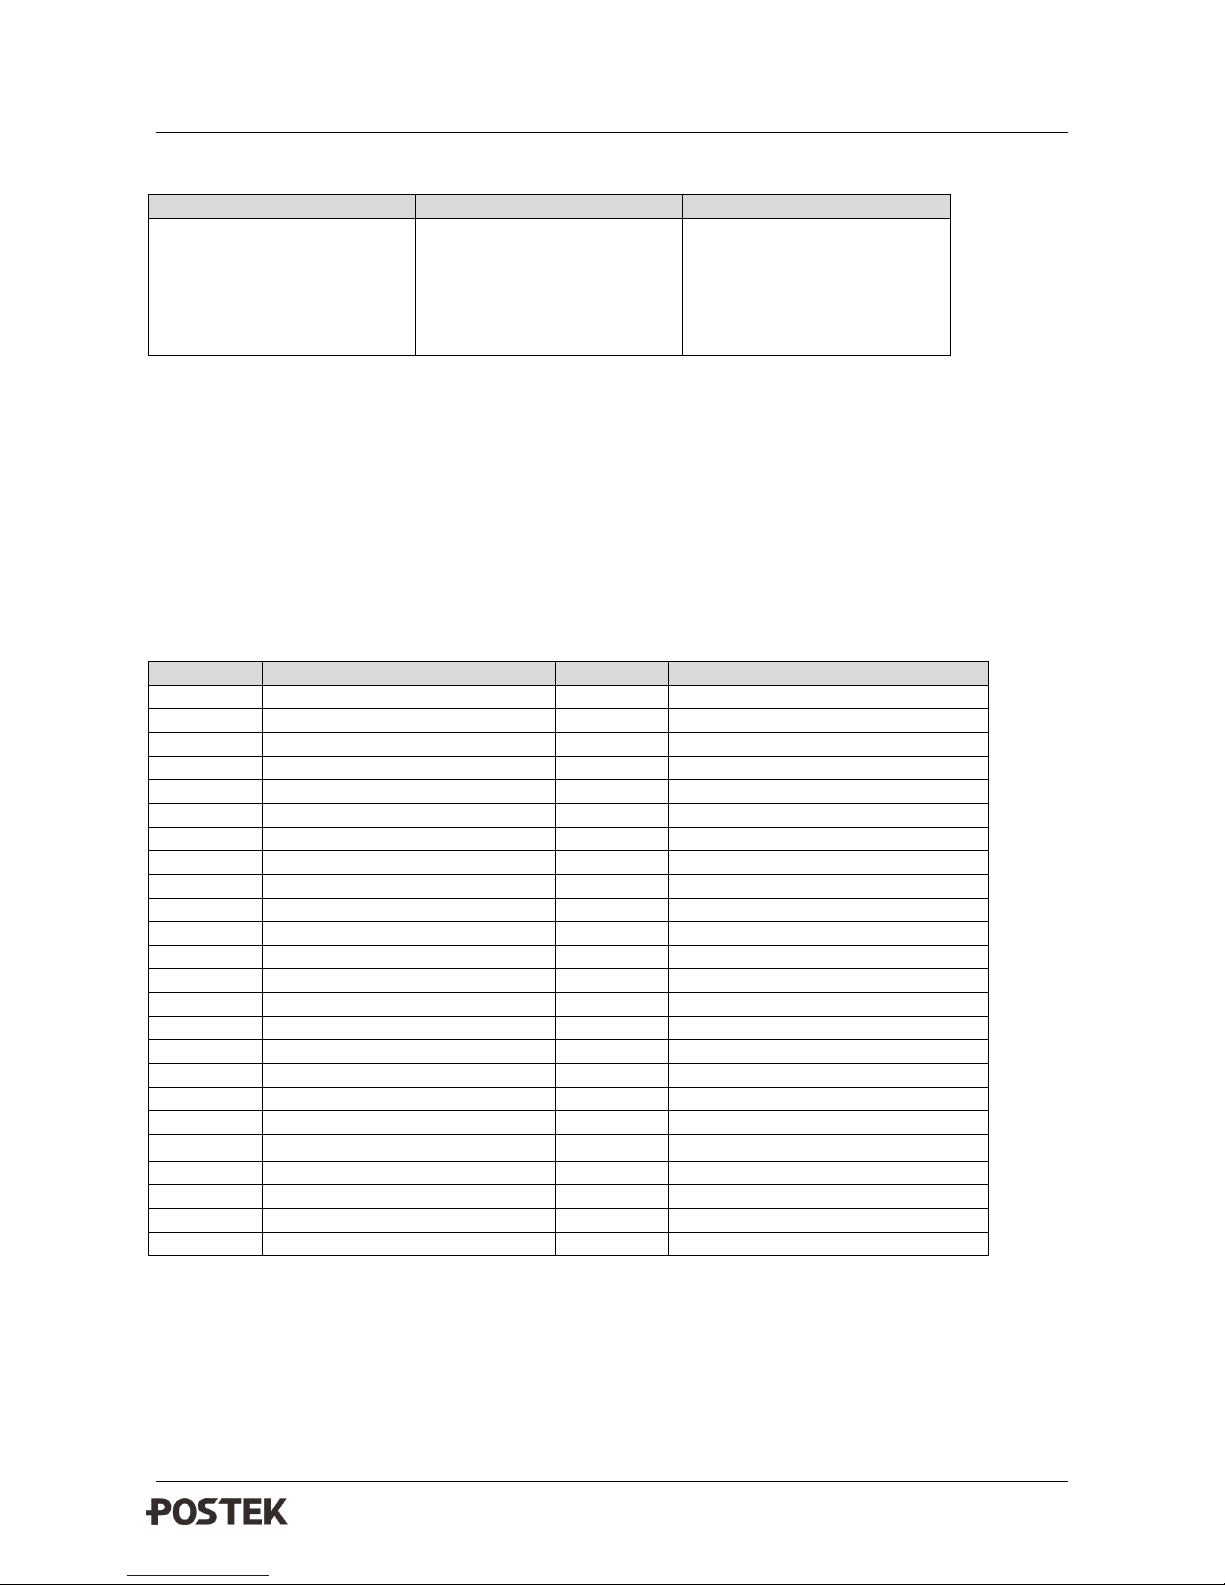
Based on their storage mediums, the command set has defined 3 kinds of Fonts.
- Internal Fonts
- Soft Fonts
- Externally Stored Fonts
1. Internal fonts
Five kinds of internal fonts reside within the printers ROM, and unlike soft fonts, they cannot be deleted. Each
font has a unique ID number.
ID #
Font Size
Comment
1
20 cpi, 6 pts
2
17 cpi,7 pts
3
14.5 cpi,10 pts
4
13 cpi,12 pts
5
5.6 cpi,24 pts
Uppercase characters only
2. Soft Fonts
Soft fonts can be downloaded from the host through application software. If the internal font cannot meet the
requirements, soft fonts are another possible solution.
Advantages of Soft Fonts:
- Saves memory space (graphics occupy more memory space)
- Better performance (may be called repeatedly)
- May carry out the automatic Increase/Decrease function
- Similar to internal fonts, they can be scaled, rotated or reversed
- May be saved into either RAM or Flash memory (permanent storage)
- May be deleted, when no longer required or the storage capacity is insufficient
Soft fonts may be downloaded, as per your individual needs. Each soft font has a unique ID number. And based
on the ID number, you may download, choose or delete the soft fonts as required. The soft font ID number may
range from A to Z.
3. Externally Stored Fonts
The font board and/or font carrier are optional items. The ID number reserved for external storage fonts ranges
from 7 to 10. 7 and 8 are for Chinese character Fonts, 9 and 10 are for Korean Character Fonts.
1. Character Set
POSTEK PPLE COMMAND MANUAL
4
Introduction
The code table may be redefined as another kind of character set or code page.
8 Bit character
7 Bit character
Character Set
Code page 437
Code page 850
Code page 852
Code page 860
Code page 863
Code page 865
USASCII, British,
Danish, French,
German, Italian,
Spanish, Swedish,
Swiss
B3. Command Set
Command sets can be categorized into the following four groups:
- Setting commands
- Label formatting commands
- Interaction commands through the serial port.
- Object downloading commands
Command
Description
Command
Description
T
Print text
N
Clear image buffer
B
Print 1D barcode
O
Option select **
b
Print 2D barcode
W
Print label
C
Counter
WA
Print automatic
H
Print darkness setting
Q
Set label and media gap length
EI
Print soft font name
q
Set label width
EK
Delete soft font
R
Set reference point
ES
Download soft font
S
Set printing speed
FE
End form store
TD
Set date format
FI
Print form name
TS
Set RTC date & time
FK
Delete form
TT
Set time format
FR
Execute form
U
Print Configuration
FS
Store form
UN
Disable error reporting
GG
Print graphic information
US
Enable error reporting
GI
Print graphic list
V
Define variable
GK
Delete graphic
X
Box draw
GM
Store graphic
Z
Print direction
GW
Print binary graphic
ZS
Enable download to Flash memory
I
Character set Selection *
ZN
Enable download to RAM
JB
Disable back feed **
?
Download variable
JF
Enable back feed **
^ee
Immediate Error Report
LE
Line draw exclusive
^@
Reset the Printer **
LO
Line draw Black
LW
Line draw White
* Incomplete Commands
** Reserved Commands

POSTEK PPLE COMMAND MANUAL
5
B4. Command reference
B4. Command reference
This section contains a complete listing of all commands in alphabetical order.
The coordinates system for the barcode label printer is shown below:
Note: <LF> is decimal “10”of USASCII, or hexadecimal “OAH”, also called “enter”
Dots are equal to one inch divided by the maximum resolution of the printer.
For example: 1 inch = 25.4mm or 1000mil
203 DPI Printers: 1 dot = 25.4mm / 203 = 0.125mm (1dot = 1000mil / 203 = 5mil)
300 DPI printers: 1 dot = 25.4mm / 300 = 0.085mm (1dot = 1000mil / 300 = 3mil)
T command: Print a text string, counter and variable
Description: Prints a text string, variable or counter.
Syntax:
Tp1, p2, p3, p4, p5, p6, p7, “DATA”<LF>
Tp1, p2, p3, p4, p5, p6, p7, Cn<LF>
Tp1, p2, p3, p4, p5, p6, p7, Vn<LF>
Tp1, p2, p3, p4, p5, p6, p7, “DATA”Cn<LF>
Tp1, p2, p3, p4, p5, p6, p7, “DATA”Vn<LF>
Tp1, p2, p3, p4, p5, p6, p7, Combo <LF>
Parameter explanation:
P1: Horizontal start position (X) in dots.
Label
feed
direction
(0,0)
X
Y
Print line
0dot
864/1248dot
POSTEK PPLE COMMAND MANUAL
6
B4. Command reference
P2: Vertical start position (Y) in dots.
P3: Select rotation. 0 - no rotation; 1 - rotate 90 degrees; 2 - rotate 180 degrees; 3 - rotate 270 degrees.
P4: Font selection. 1-5: Internal fonts; A-Z: downloaded soft fonts.
a: built-in 24*24 dot matrix Chinese fonts.
Value
Description
1
Western language font 1
2
Western language font 2
3
Western language font 3
4
Western language font 4
5
Western language font 5
a
24*24 dot matrix Chinese font
A~Z
Soft fonts
P5: Horizontal multiplier,expands the text horizontally. Value range: 1-24
P6: Vertical multiplier,expands the text vertically. Value range: 1-24
p7: Choosing ‘N’ prints normal text (i.e. black characters on a white background)
Choosing ‘R’ prints reversed text (i.e. white characters on a black background)
“DATA”: A fixed data field.
Cn: Defines a counter value. Please refer to the C order
Vn: A string of variable characters; please refer to V order.
Combo: A combined string of characters using “DATA”, Cn and/or Vn parameters
Example: “data1”CnVn”data2”.
A combined string cannot surpass a length of 100 characters.
Note: Use the syntax below when using a counter value and variable strings:
Vn [st, len] Cn [st, len]
Note: n is the ID of the counter value or variable string;
st indicates the starting position. Usually it is 0;
Len indicates the length of the sub-string.
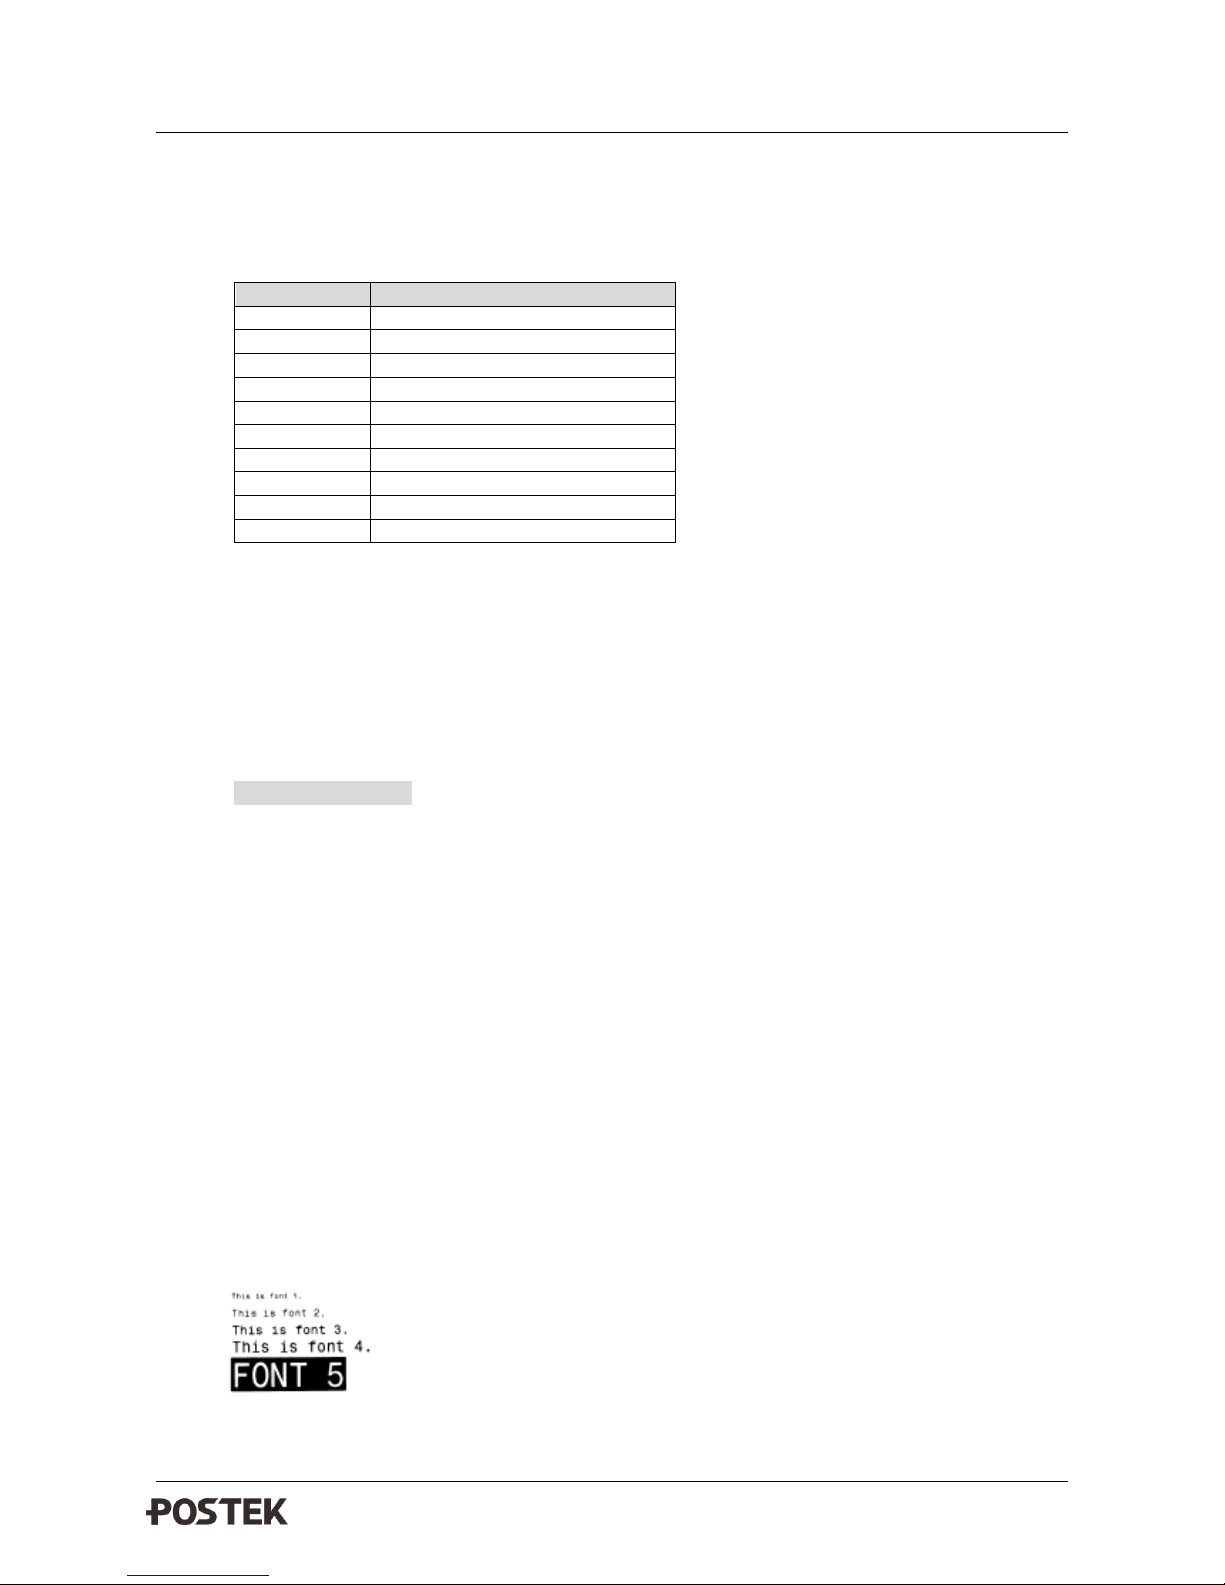
Example:
N
T50, 30, 0, 1, 1, 1, N, “This is font 1.”
T50, 7, 0, 2, 1, 1, N, “This is font 2.”
T50, 110, 0, 3, 1, 1, N, “This is font 3.”
T50, 150, 0, 4, 1, 1, N, “This is font 4.”
T50, 200, 0, 5, 1, 1, R, “FONT 5”
W1
Printout:
POSTEK PPLE COMMAND MANUAL
7
B4. Command reference
B command: Print barcode
Description: Prints a specific barcode.
Syntax:
Bp1, p2, p3, p4, p5, p6, p7, p8, “DATA”<LF>
Bp1, p2, p3, p4, p5, p6, p7, p8, Cn<LF>
Bp1, p2, p3, p4, p5, p6, p7, p8, Vn <LF>
Bp1, p2, p3, p4, p5, p6, p7, p8, “DATA”Cn <LF>
Bp1, p2, p3, p4, p5, p6, p7, p8, “DATA” Vn<LF>
Bp1, p2, p3, p4, p5, p6, p7, Combo <LF>
Parameter explanation:
P1: Horizontal start position (X) in dots.
P2: Vertical start position (Y) in dots
P3: Select printing direction. 0 - no rotation; 1 - rotate 90°; 2 - rotate 180°; 3 - rotate 270°
P4: barcode selection.
P4 Value
Barcode type
0
Code 128 UCC (shipping container code)
1
Code 128 AUTO
1A
Code 128 subset A
1B
Code 128 subset B
1C
Code 128 subset C
1E
UCC/EAN
2
Interleaved 2 of 5
2C
Interleaved 2 of 5 with check sum digit
2D
Interleaved 2 of 5 with human readable check digit
2G
German Postcode
2M
Matrix 2 of 5
2U
UPC Interleaved 2 of 5
3
Code 3 of 9
3C
Code 3 of 9 with check sum digit
3E
Extended Code 3 of 9
3F
Extended Code 3 of 9 with checksum digit
9
Code93
E30
EAN-13
E32
EAN-13 2 digit add-on
E35
EAN-13 5 digit add-on
E80
EAN-8
E82
EAN-8 2 digit add-on
E-85
EAN-8 5 digit add-on
K
Codabar
P
Postnet
UA0
UPC-A
UA2
UPC-A 2 digit add-on
UA5
UPC-A 5 digit add-on
UE0
UPC-E
UE2
UPC-E 2 digit add-on
UE5
UPC-E 5 digit add-on
p5: Establishes the narrow bar width, in dots.

POSTEK PPLE COMMAND MANUAL
8
B4. Command reference
p6: Establishes the wide bar width, in dots
p7: Establishes the barcode height, in dots
P8: Choosing 'N' prints normal text (i.e. black characters on a white background)
Choosing 'R' prints reversed text (i.e. white characters on a black background)
“DATA”: A fixed data field.
Cn: Defines a counter value. Please refer to the C order
Vn: A string of variable characters. Please refer to V order.
Combo: A combined string; using “DATA”, Cn and/or Vn parameters
Example: “data1”CnVn”data2”.
A combined string cannot surpass a length of 100 characters.
Note: Use the syntax below when using a counter value and variable strings:
Vn [st, len] Cn [st, len]
Note: n is the ID of counter value or variable string;
st indicates the starting position. Usually it is 0;
Len indicates the length of the sub-string.
Example:
N
B20, 20, 0, E80, 3, 3, 41, B, “0123459”
B20, 120, 0, K, 3, 5, 61, B, “A0B1C2D3”
B190, 300, 2, 1, 2, 2, 51, B, “0123456789”
B20, 330, 0, UA0, 2, 2, 41, B, “13579024680”
W1
Printout:
b command: Prints 2D bar code
Description: Prints a specific 2D barcode.
POSTEK PPLE COMMAND MANUAL
9
B4. Command reference
Syntax:
bp1, p2, p3, [specific parameters and data]
Parameter Explanation:
p1: Horizontal start position (X) in dots.
p2: Vertical start position (Y) in dots.
p3: barcode selection.
p3 value
Bar Code type
P
PDF-417
M
Maxi Code
DX
DataMatrix ECC200
D0
DataMatrix ECC000
D1
DataMatrix ECC050
D2
DataMatrix ECC080
D3
DataMatrix ECC100
D4
DataMatrix ECC140
QR
QR
Maxi Code
1. UPS format data:
[Mode, 1], “Data”
Mode: Represents mode 2 - 4.
1: Printing in UPS format.
2. Data in other formats:
[Mode, 0, Cl, Co, Po], “Data”
Mode: Represents mode 2 - 4.
0: Print in formats other than UPS.
Cl: 3 digit numeric.
Co: 3 digit numeric.
Po: Suppose the current mode is 3, PostalCode should be Alphanumeric within 6 characters (A – Z, or 0
– 9). If the current mode is 2, then PostalCode should be numeric with 9 digits.
Note: The control character RS is used for detaching the data stream formats, denoted by ‘_IE’, GS is used
for separating the data fields, denoted by ‘_1D’, EOT indicates the end of the data stream, denoted by
‘_04’. The maximum capacity of the data is 93 characters, 138 if all numeric characters.
UPS standard format is as follow:
Message Header: [)>RS
Transportation Data
Format Header: 01GSyy <yy denotes the number of the year>
Package n/x: GS<n/x>
Package Weight: GS<weight>
Address Validation: GS<validation>
Ship to Street Address: GS<street address>

POSTEK PPLE COMMAND MANUAL
10
B4. Command reference
Ship to City: GS<city>
Ship to State: GS<state>
RS: RS
End of Message: EOT
(* Mandatory Data for UPS must be assigned)
Tracking Number: *<tracking number>
SCAC: GS<SCAC>
UPS Shipper Number: GS<shipper number>
Julian Day of Pickup: GS<day of pickup>
Shipment ID Number: GS<shipment ID number>
Example:
N
b10, 10, M,4,0,1Z000A7&dajc_iaj-3=+~#^$5&#fe[{:'s;fk.,LAKFalkdgjoiu12815/w35::'./dfoi38&*^}!+
W1
Printout:
PDTF-417:
[w, v, s, c, p, x, y, r, l, t, o], “Data”
w: Maximum printing width in dots
v: Maximum printing height in dots
s: Error correction scope: 0-8
c: Data compression scope: 0 or 1. Default is 0.
x: Module width: 2-9 in dots
y: Module height: 4-99 in dots
r: Maximum row count.
l: Maximum column count.
t: Intercept symbol: 0 = no intercept 1 = intercept
o: Rotation: 0 - 0, 1- 90, 2 - 180, 3 - 270°.
Example:
N
b50, 30, P, 00, 00, s0, c0, x3, y6, r0, l0, t0, o0, “ABCabc12345”
W1

POSTEK PPLE COMMAND MANUAL
11
B4. Command reference
Printout:
Datamatrix Ecc200
[w, v, o, m], “Data”
w: Maximum printing width in dots
v: Maximum printing height in dots
o: Rotation: 0 – 0°, 1 – 90°, 2 – 180°, 3 – 270°
m: Magnification, in dots.
Range: (1 - 9)
(1 – enlarge 1 time, 2 – enlarge 2 times, 3 – enlarge 3 times…).
Example:
N
b20, 220, DX, 0, 0, o0, m5, “Data Matrix”
W1
Printout:
QR
[w, v, o, r, m, g, s], “data”
w: Maximum printing width in dots
v: Maximum printing height in dots
o: Rotation: 0 – 0°, 1 – 90°, 2 – 180°, 3 – 270°
r : Magnification, in dots,
Range (1 - 9)
(1 – enlarge 1 time, 2 – enlarge 2 times, 3 – enlarge 3 times…).
m: Data Encodation
Range (0 - 4)
0 – Numeric mode
1 – Alphanumeric mode
2 – Byte mode 0 - 256
3 – Chinese characters mode
4 – Mix mode
g: Selecting Correction level

POSTEK PPLE COMMAND MANUAL
12
B4. Command reference
Range (0 - 3)
0 – ‘L’ Level
1 - ‘M’ Level
2 - ‘Q1’ Level
3 - ‘H1’ Level
s: Selecting Mask patterns
Range (0 - 8)
0 – Mask pattern 000 1 – Mask pattern 001 2 – Mask pattern 010
3 – Mask pattern 011 4 – Mask pattern 100 5 – Mask pattern 101
6 – Mask pattern 110 7 – Mask pattern 111 8 – Auto Selection
Example:
N
b200, 200, QR, 0, 0, o0, r5, m2, g0, s0, “ABCabc12345”
W1
Printout:
C Command: Counter
Description: This command defines a counter variable.
Syntax: Cp1, p2, p3, p4, “MSG”<LF>
Parameter explanation:
p1: Counter ID. Range: 0-9
p2: Maximum number of digits for the counter. Range: 1-40.
p3: Field justification: L-left, R-right, C-center, N-none
p4: This is the step value of counter. “+”or “-” sign followed by a single digit of 1 - 9, then followed by
a change symbol (i.e. D - decimal base, B - binary system, O - octonary number system, H hexadecimal system,
X - user defined pattern, to a maximum of 64 characters.
Step values:
“+1” = Increases each time by 1, according to Decimal base computation. Example: 1234, 1235,
1236….
POSTEK PPLE COMMAND MANUAL
13
B4. Command reference
“+3D”= Increases each time by 3, according to Decimal base computation. Example: 1234, 1235,
1236….
“-1B”= Decreases each time by 1, according to Binary computation. Example: 1111, 1110,
1101 ….
“-4O= Decreases each time by 4, according to Octonary number system computation. Example:
1234, 1230, 1224….
“-6H”= Decreases each time by 1, according to hexadecimal base computation. Example: 1234,
122E, 1228….
“+3X”= Increase each time by 3, according to a user-defined pattern. Example: In user-defined
rule: TE2DOKLU046MNY37, the starting value is “T062”, followed by T062, T06K, T060….
“MSG”: Displays a text string on the printers LCD display or KDU Display.
Example:
N
FK “TEST”
FS “TEST”
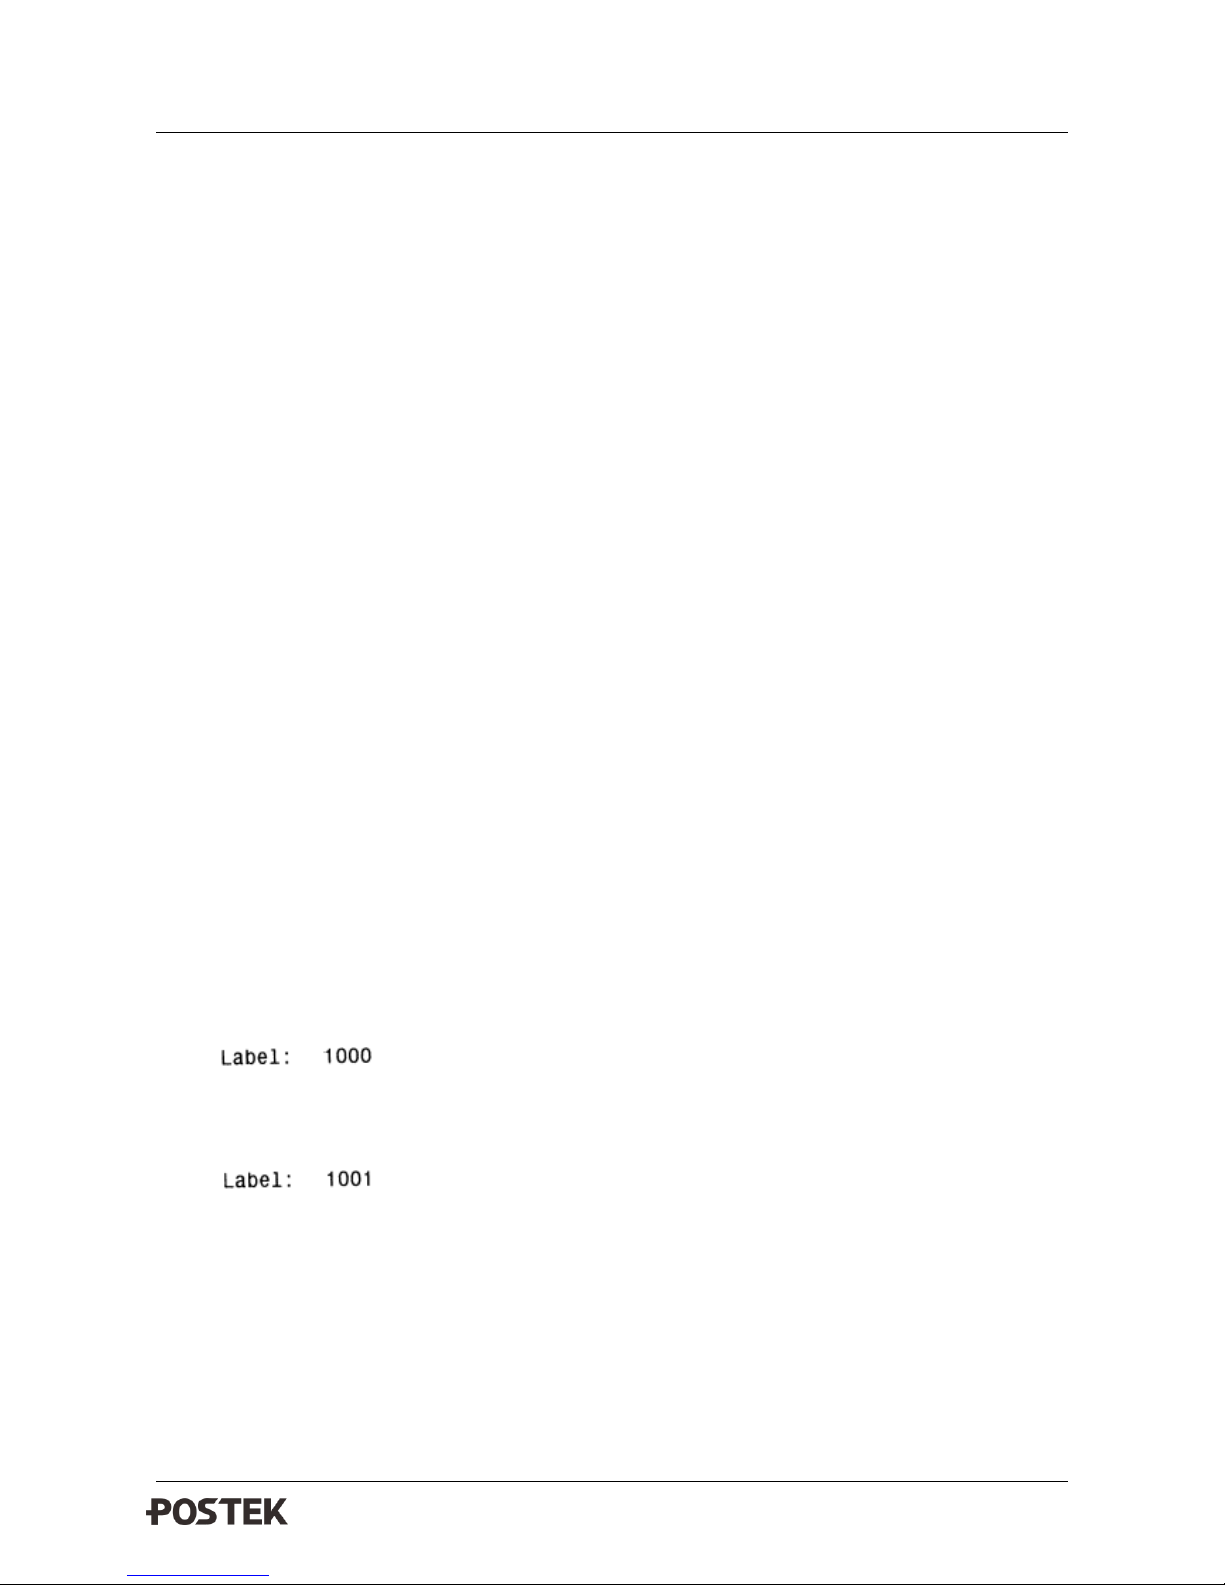
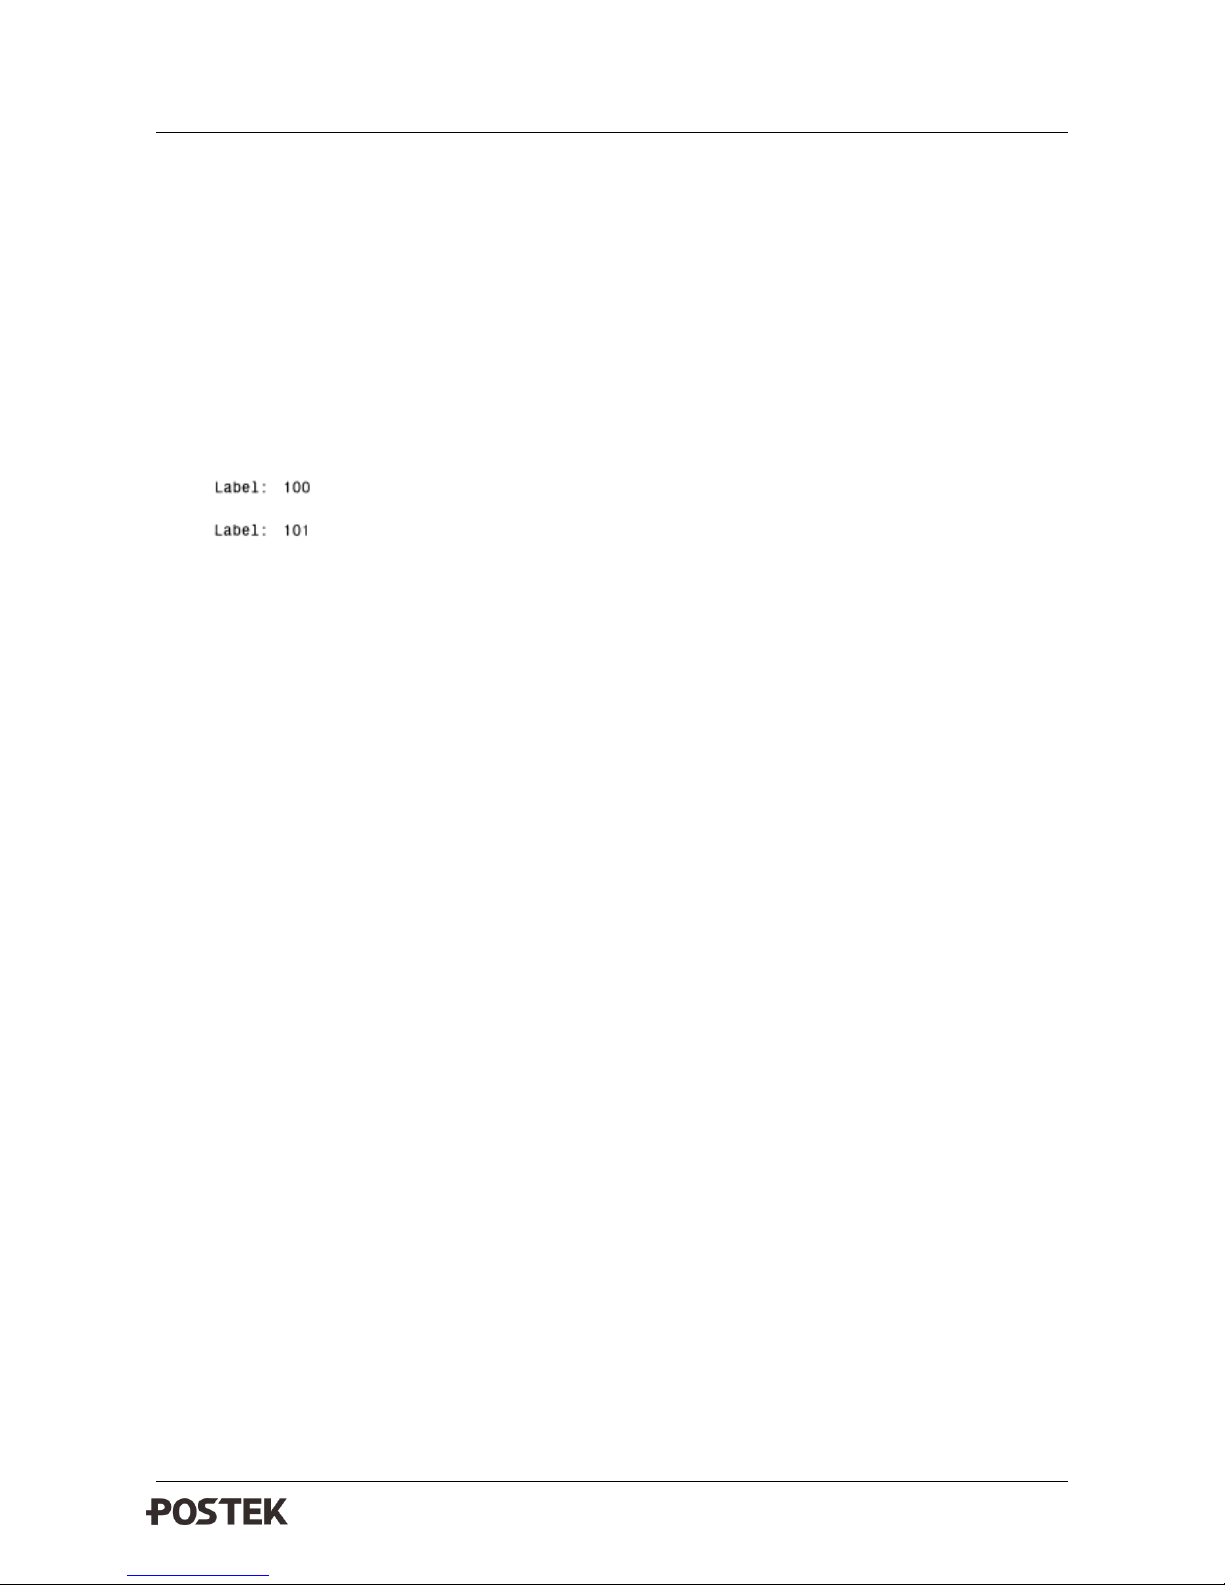
C0, 6, N, +1, “Enter Code:”
T100, 100, 0, 4, 1, 1, N, “Label:”
T300, 100, 0, 4, 1, 1, N, C0
FE
The above command will store a form named “TEST” to the printer.
If the following command is sent to printer, it will printout:
FR “TEST”
?
1000
W2
Printout:
H Command: Print Darkness
Description: Use this command to control the print darkness. This value does not represent the temperature of the
TPH. It is a relative value. The lightest print darkness is achieved with a value of 0 and the greatest print darkness
POSTEK PPLE COMMAND MANUAL
14
B4. Command reference
is achieved with a value of 20.
Syntax: Dp1<LF>
Parameter explanation:
p1: value range: 0-20, default is 8.
Example:
N
H10
T100, 100, 0, 3, 1, 1, N, “DARKNESS=10”
W1
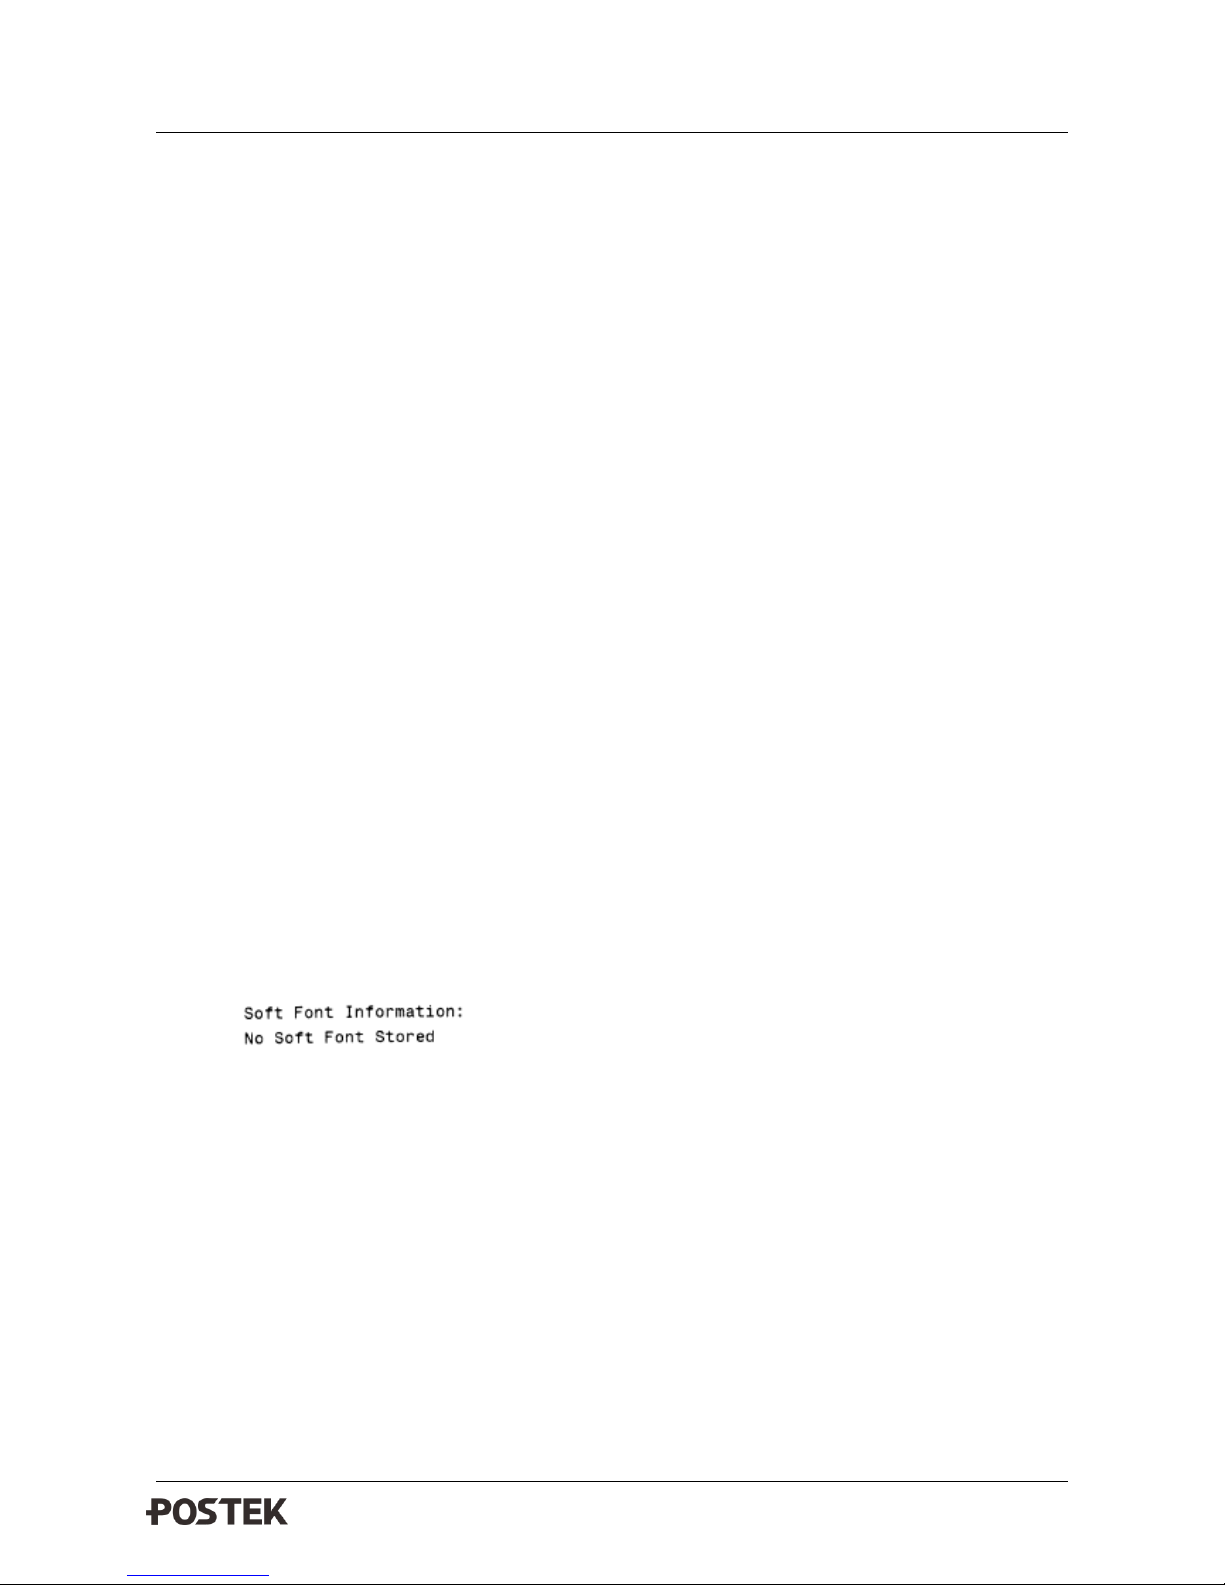
EI Command: Print a detailed soft font list
Description: This command will cause the printer to print a list of all soft fonts that are stored in memory.
Syntax: EI<LF>
Example:
EI
Printout:
If the printer has not stored any soft fonts, it will print:
SOFT FONT INFORMATION:
NO SOFT FONT STORED!
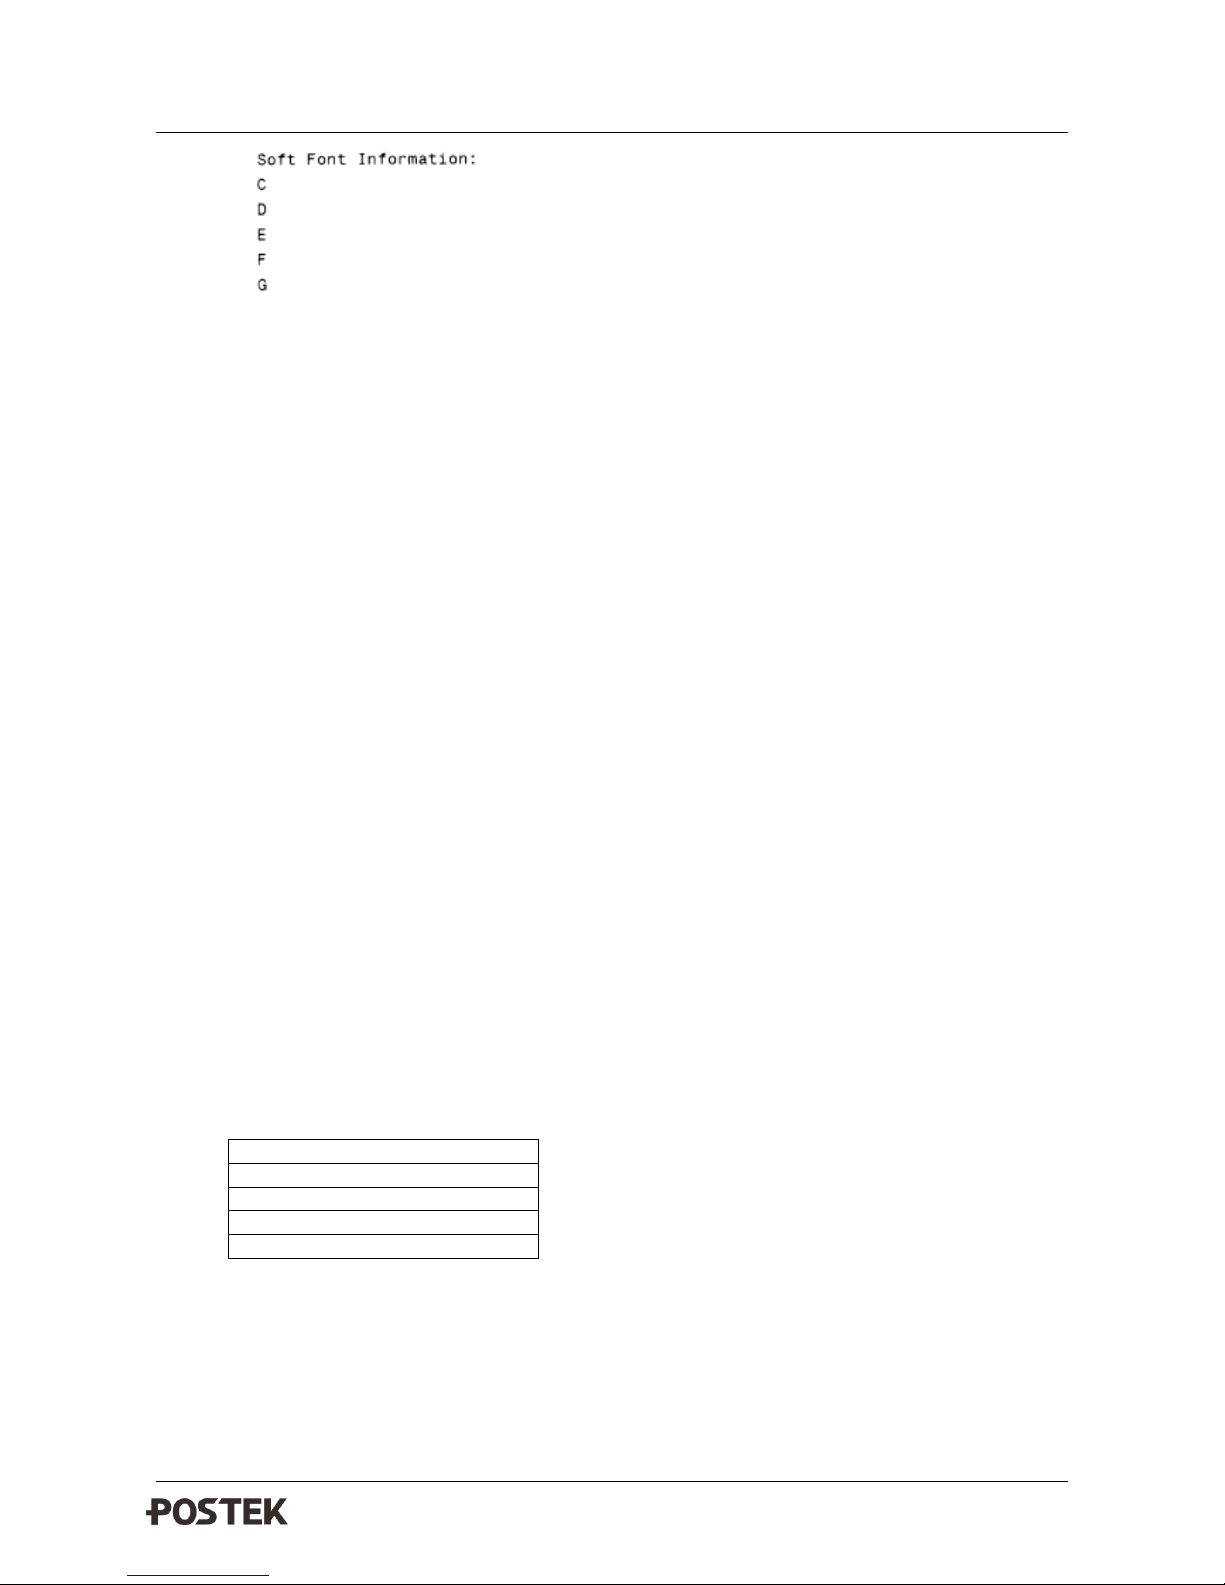
If the printer has stored soft fonts with ID C, D, E, F, G respectively, with C and D stored in RAM and E, F, and G
stored in Flash memory, it will print:
SOFT FONT INFORMATION:
5 SOFT FONT STORED!
RAM:
C
D
FLASH:
E
F
G
POSTEK PPLE COMMAND MANUAL
15
B4. Command reference
EK Command: Deletes soft fonts
Description: This command is used to remove one or all, soft fonts stored in RAM and/or Flash memory.
Syntax:
EK “ID”<LF>
EK “*”<LF>
Parameter explanation:
ID: Soft font ID, values from A-Z.
Note: Using the “*” parameter will remove all soft fonts from RAM or Flash memory.
ES Command: Download soft fonts to printers RAM or Flash memory.
Description: This command is used to download soft fonts to the printers RAM or Flash memory.
Syntax:
ES “ID” p1, p2, <font format 0><font data 0>…<font format N-1><font data N-1>
Parameter explanation:
ID: One upper case letter from A to Z.
p1: Number of characters to be downloaded.
p2: Font height
Basic soft font format:
Font form 0
Character 0
…
Font form N-1
Character N-1
<font format N> :
“Nth character” data format:

POSTEK PPLE COMMAND MANUAL
16
B4. Command reference
Byte 0,1
Expressed as a hexadecimal number.
For ASCII characters, the high byte is 0x00
and the low byte is the ASCII code; For
Chinese characters use GB code
Byte 2
Character overall width; equal to the character
actual width + character gap. Value:
0x00-0xFF pixels.
Byte 3
Character actual width.
Value: 0x00-0xFF in bytes.
<Font data N>:
“Nth character” data format:
Byte 0…
Character image data. The length is byte 3*p2
Example:
Parameter
Data
Hexadecimal
Byte 2
16
10
Byte 3
14
0E
p2
16
10
FE Command: Ends form store
Description: This command is used to end a form store sequence, started by the “FS” command.
Syntax: FE<LF>
Example:
FS “FORMA”
…
FE

POSTEK PPLE COMMAND MANUAL
17
B4. Command reference
FI Command: Print form list
Description: This command prints a list of forms currently downloaded to the printers Flash memory or RAM
from the host.
Syntax: FI<LF>
Example:
FI
Printout:
If the printer has not stored any forms, it will print:
FORM INFORMATION:
NO FORM STORED!
If the printer has stored forms with names FORMA, FORMB and FORMC. FORMA is stored in RAM and
FORMB and FORMC are stored in Flash memory. It will print:
FORM INFORMATION:
3 SOFT FONT STORED!
RAM:
FORMA
FLASH:
FORMB
FORMC
FK Command: Delete form
Description: This command causes the printer to deletes forms currently stored in the printers Flash memory or
RAM.
Syntax: FK “FORMNAME”<LF>

POSTEK PPLE COMMAND MANUAL
18
B4. Command reference
FK “*”<LF>
Parameter explanation:
FORMNAME: Will delete soft form name with a maximum of 16 characters.
Note: Using the “*” parameter will remove all forms from RAM or Flash memory.
FR Command: Execute form
Description: This command is used to retrieve and execute a stored form.
Syntax: FR “FORMNAME”<LF>
Parameter explanation:
FORMNAME: Form name to be retrieved, up to a maximum of 16 characters
Example:
FK “FRMA” ; delete form FRMA
FS “FRMA” ; downloads new form FRMA
T50, 30, 0, 4, 1, 1, N, “THIS IS FRMA.”
FE ; concludes a form download
FR “FRMA” ; retrieves form
W1
FS Command: Download form to printer
Description: This command begins a form download until the FE command is received. If the “ZS” command is
used, the form will be downloaded to Flash memory.
If the ZN command is used, the form will be downloaded to RAM.
Syntax: FS “FORMNAME”<LF>
Parameter explanation:
FORMNAME: user-defined form name with a maximum of 16 characters.
GG Command: Print Graphics
Description: This command is used to print graphics previously downloaded and stored on the printers RAM or
Flash memory.
Syntax: GGp1, p2, “GNAME”<LF>
Parameter explanation:

POSTEK PPLE COMMAND MANUAL
19
B4. Command reference
p1: Horizontal start position(X) in dots.
p2: Vertical start position(Y) in dots.
GNAME: graphic name with a maximum of 16 characters; or variable name (variable Data: V00-V99).
Example:
N
GG100, 50, “PCXGRAPH”
W1
GI Command: Print graphic information
Description: This command prints a list of all graphics stored in RAM or Flash memory.
Syntax: GI<LF>
Example:
GI
Printout:
If the printer has not stored any graphics, it will print:
GRAPHICS INFORMATION:
NO GRAPHICS STORED!
If the printer has stored graphics with name GRAPHA and GRAPHB, and GRAPHA is stored in RAM and
GRAPHB is stored in Flash memory, the following will be displayed:
GRAPHICS INFORMATION:
2 GRAPHICS STORED!
RAM:
GRAPHA
FLASH:
GRAPHB

POSTEK PPLE COMMAND MANUAL
20
B4. Command reference
GK Command: Delete Graphic
Description: This command deletes graphics currently stored in Flash memory or RAM.
Syntax:
GK “GNAME”<LF>
GK “*”<LF>
Parameter explanation:
GNAME: Graphic name; up to a maximum of 16 characters
Note: Using the “*” parameter will remove all graphics from RAM and Flash memory.
GM Command: Download graphics to printer
Description: This command is used to download and store graphics information to the Flash memory or RAM.
Syntax:
GM “GNAME”p1<LF>
PCX file
Parameter explanation:
GNAME: Defines graphic name to be stored, up to a maximum of 16 characters.
p1: PCX graphics file size (decimal) in bytes
PCX file: a PCX format graphic
Example:
GK “PCXA”
GM “PCXA”3858
… [PCX file for PCXA graphics]…
N
T30, 30, 0, 4, 1, 1, R, “PCXA...”
GG30, 100, “PCXA”
W1
GK “*”

POSTEK PPLE COMMAND MANUAL
21
B4. Command reference
Printout:
GW Command: Print binary graphics
Description: Graphics are sent row by row without compression; each bit represents a dot; a value of”0”prints a
dot; a value of “1”does not print a dot.
Syntax: GWp1, p2, p3, p4 […raster data…] <LF>
Parameter explanation:
P1: Horizontal start position (X), in dots.
P2: Vertical start position (Y), in dots.
P3: Width of graphic in bytes (1Byte=8bits).
P4: Height of graphic, in dots.
P5 ([…raster data…]): Binary graphic data; data size = p3 X p4 (Bytes)
I Command: Character set selection
Description: This command is used to select the character set; the default character set is Code page 437(English).
Syntax: Ip1, p2, p3<LF>
Parameter explanation:
P1: number of data bits; 8 for 8-bit data and 7 for 7-bit data.
P2: Character set
P3: KDU country code.
8-bit data
(p1=8)
Character set
(Code page)
7-bit data
(p1=7)
Character set
0
English (437)
0
USASCII
1
Latin 1 (850)
1
British
2
Slavic (852)
2
German
3
Portugal (860)
3
French
4
Canadian/French
(863)
4
Danish
5
Nordic (865)
5
Italian
6
Spanish
7
Swedish
8
Swiss

POSTEK PPLE COMMAND MANUAL
22
B4. Command reference
Example:
N
I7, 5, 001
T50, 30, 0, 3, 1, 1, N, “£100”
W1
This example will use the 7-bit, Italian character set
Printout:
JB/JF Command: Disable/Enable back feed
Description: This command is used to adjust the stop position of the label. The back feed setting is disabled as the
factory default.
Syntax: JB<LF>
JF [p1] <LF>
Parameter explanation:
p1: Feed distance, using dots.
Example:
JF14
LE Command: Line draw by exclusive OR operation
Description: This command draws a line using an exclusive OR operation.
Syntax: LEp1, p2, p3, p4<LF>
Parameter explanation:
P1: Horizontal (X) start position in dots.
P2: Vertical (Y) start position in dots.
P3: Horizontal length in dots.
P4: Vertical height in dots.
Example:
N
LE50, 30, 100, 10
LE100, 20, 5, 110
W1

POSTEK PPLE COMMAND MANUAL
23
B4. Command reference
Printout:
LO Command: Line draw by OR operation
Description: This command draws a line using an OR operation.
Syntax: LOp1, p2, p3, p4<LF>
Parameter explanation:
P1: Horizontal (X) start position in dots.
P2: Vertical (Y) start position in dots.
P3: Horizontal length in dots.
P4: Vertical height in dots.
Example:
N
LO50, 30, 100, 10
LO100, 20, 5, 110
W1
Printout:
LS Command: Line draw diagonal
Description: This command is used to draw diagonal black lines, overwriting previous information.
Syntax: LSp1, p2, p3, p4, p5<LF>
Parameter explanation:
P1: Horizontal (X) start position in dots.
P2: Vertical (Y) start position in dots.
P3: Line thickness in dots.
P4: Horizontal (X) stop position in dots.
P5: Vertical (Y) stop position in dots.

POSTEK PPLE COMMAND MANUAL
24
B4. Command reference
Example:
N
LS50, 30, 10, 100, 80
W1
Printout:
LW Command: Line draw white
Description: This command is used to draw white lines, erasing previous information.
Syntax: LWp1, p2, p3, p4<LF>
Parameter explanation:
P1: Horizontal (X) start position in dots.
P2: Vertical (Y) start position in dots.
P3: Horizontal length in dots.
P4: Vertical height in dots.
Example:
N
LE50, 30, 100, 10
LE50, 60, 100, 10
LE50, 90, 100, 10
LE50, 120, 100, 10
LW100, 20, 5, 110
W1
Printout:
N Command: Clear image buffer
Description: Use this command to clear image buffer prior to building new label image.

POSTEK PPLE COMMAND MANUAL
25
B4. Command reference
Syntax: N<LF>
Note: Do not use N command within stored forms.
O Command: Option select
Description: This command is used to set various printer options. Options available vary by printer configuration.
Syntax: O [D, P, L, C, N] <LF>
Parameter explanation:
D: Enable direct thermal printing
P: Enable continuous printout. (Default)
L: After printing a label the printer will stop, requiring user input to print the next label. Input determined
by: 1. By pressing the “feed” button for each label to be printed. 2. Will continue automatically after previously
printed label is removed (with peeler kit installed)
C: Enable Cutting mode. (Only with cutter kit installed)
N: Enable Peeler mode. (Only with peeler kit installed)
Example:
O<LF>: thermal transfer, without cutter and peeler.
OD<LF>: direct thermal, without cutter and peeler.
OC<LF>: direct thermal, with cutter installed
Note: 1. Cutter and peeler cannot be installed at the same time.
2. If the printing mode is incorrectly selected, the LED at the front panel will begin blinking, please refer
to the trouble shooting section in User’s Manual.
W Command: Print Label
Description: This command is used to output the contents of the image buffer.
Syntax: Wp1 [, p2] <LF>
Parameter explanation:
p1: Number of label sets. Range: 1-65535.
P2: Number of copies of the same label. Range: 1-65535
Note: The W command cannot be used inside of a stored form sequence. For automatic printing of stored forms,
use the WA command.

POSTEK PPLE COMMAND MANUAL
26
B4. Command reference
Example:
FK “TEST”
FS “TEST”
C0, 6, N, +1, “Enter Start No.:”
T20, 50, 0, 4, 1, 1, N, “Label:”
T120, 50, 0, 4, 1, 1, N, C0
FE
N
Q20, 0
FR “TEST”
?
100
W2, 3
Printout:
WA Command: Print Automatic (only used in form)
Description: Use this command in a stored form sequence to automatically print the form (as soon as all variable
data has been supplied).
Syntax: WAp1 [, p2]<LF>
Parameter explanation:
p1: Number of label sets. Range: 1-65535.
p2: Number of copies of the same label. Range: 1-65535
Example:
FK “TEST1”
FS “TEST1”
C0, 6, N, +1, “Enter Start No.:”
T20, 50, 0, 4, 1, 1, N, “Label:”
POSTEK PPLE COMMAND MANUAL
27
B4. Command reference
T120, 50, 0, 4, 1, 1, N, C0
WA2
FE
N
Q20, 0
FR”TEST1”
?
100
Printout:
Q Command: Set Form and Gap Length/black line/ perforation
Description: Use this command to set the form and gap length, black line thickness or perforation.
Syntax: Qp1, p2<LF>
Parameter explanation:
p1: Label length measured in dots. Value range: o to 65535
Default: length of media set by AutoSense.
p2: Gap length or thickness of black line/perforation, in dots. Value range: 16 to 240
The value of p2 is directly related to the mode being used.
Gap mode: By default, set p2 to the gap length. In special cases perforations are used in Gap Mode.
Black Line Mode: Set p2 to the black line thickness in dots.
Continuous Media Mode: Set p2 to 0 (zero); The transmissive (gap) sensor will be used to detect the end of
media.
Example:
1. Common Gap mode:

POSTEK PPLE COMMAND MANUAL
28
B4. Command reference
If:
p1 = 20.0 mm (160 dots at 200dpi)
p2 = 3.0mm (24 dots at 200dpi)
The Q command should be:
Q160, 24
2. Special gap mode:
If:
p1= 12.5 mm (100 dots at 200dpi)
p2 = 3.0mm (24 dots at 200dpi)
p3 = 3.0mm (24 dots at 200dpi)
The Q command should be:
Q100, 24+24
3. Black line mode: (perforations are on black lines) :
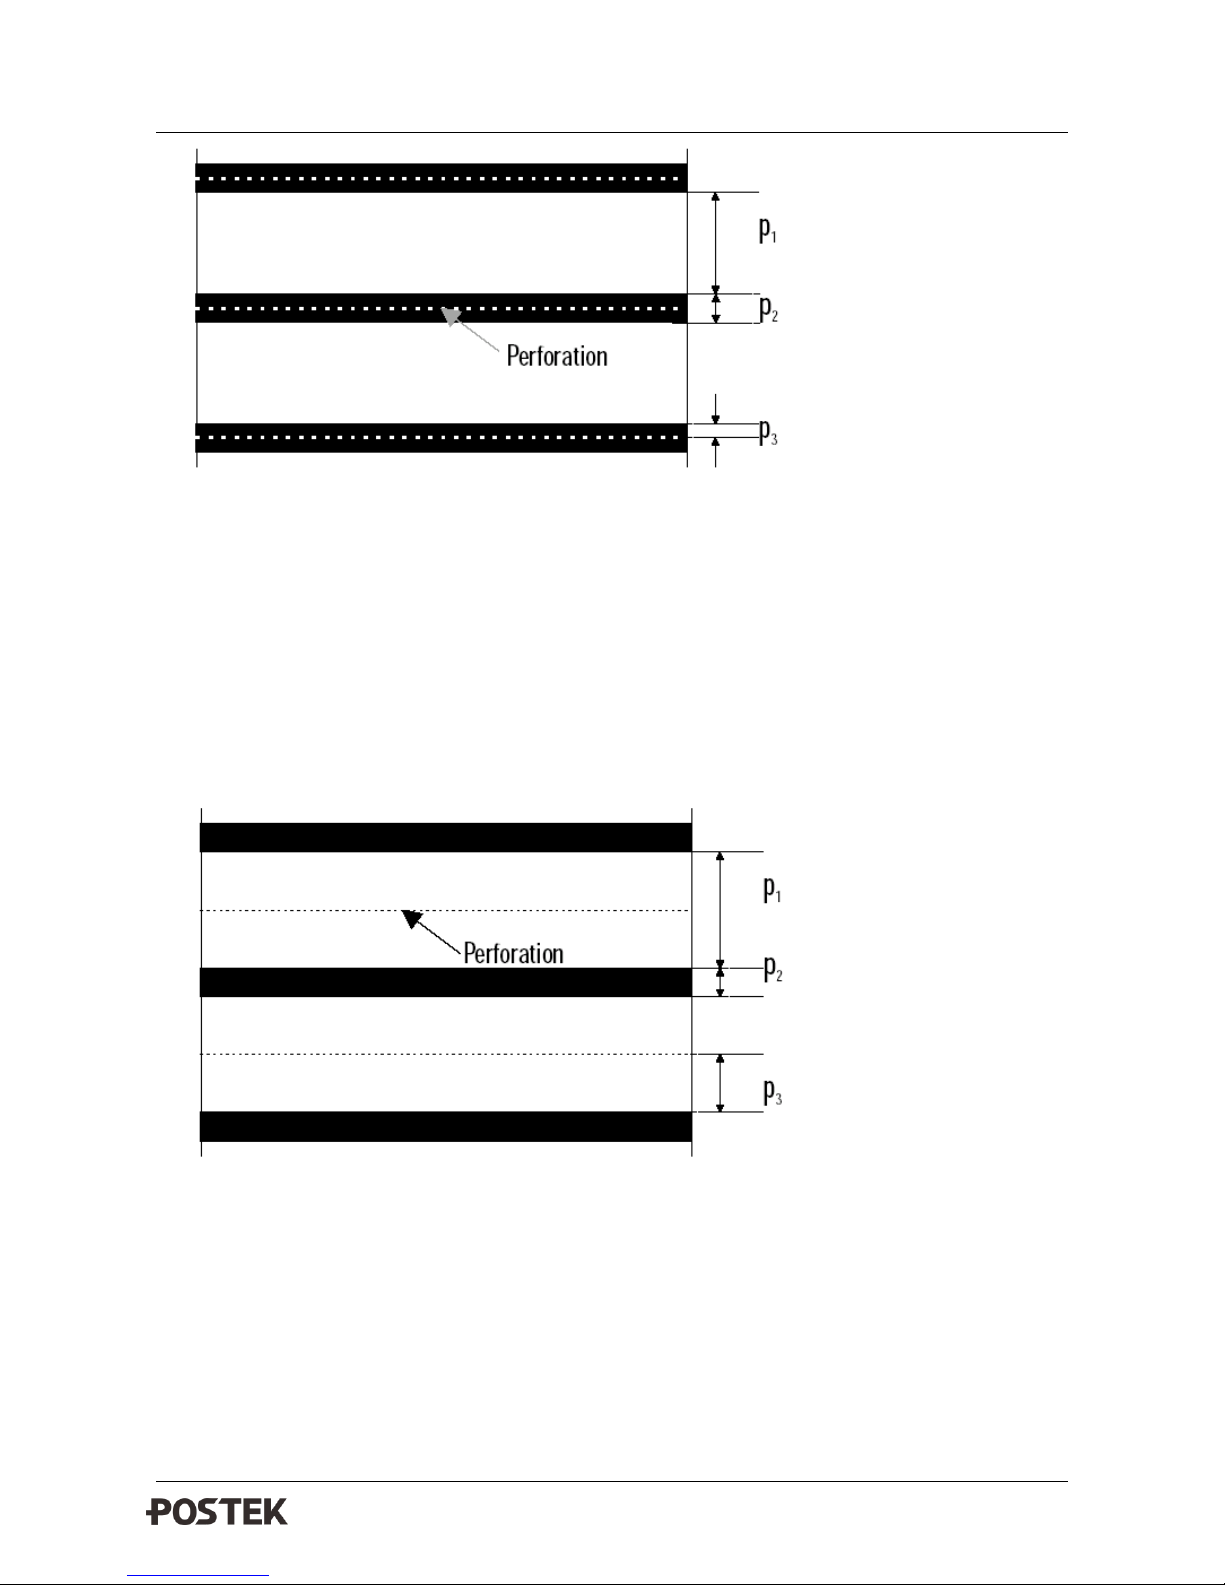
POSTEK PPLE COMMAND MANUAL
29
B4. Command reference
If:
p1 = 31.0 mm (248 dots at 200dpi)
p2 = 7.0mm (56 dots at 200dpi)
p3 = 0.5 mm (4 dots at 200dpi)
The Q command should be:
Q248, B56+4
4. Black line mode (perforations are not on black lines):
If:
p1 = 31.0 mm (248 dots at 200dpi)
p2 = 7.0mm (56 dots at 200dpi)
p3 = 17 mm (136 dots at 200dpi)
The Q command should be:
Q248, B56-136
POSTEK PPLE COMMAND MANUAL
30
B4. Command reference
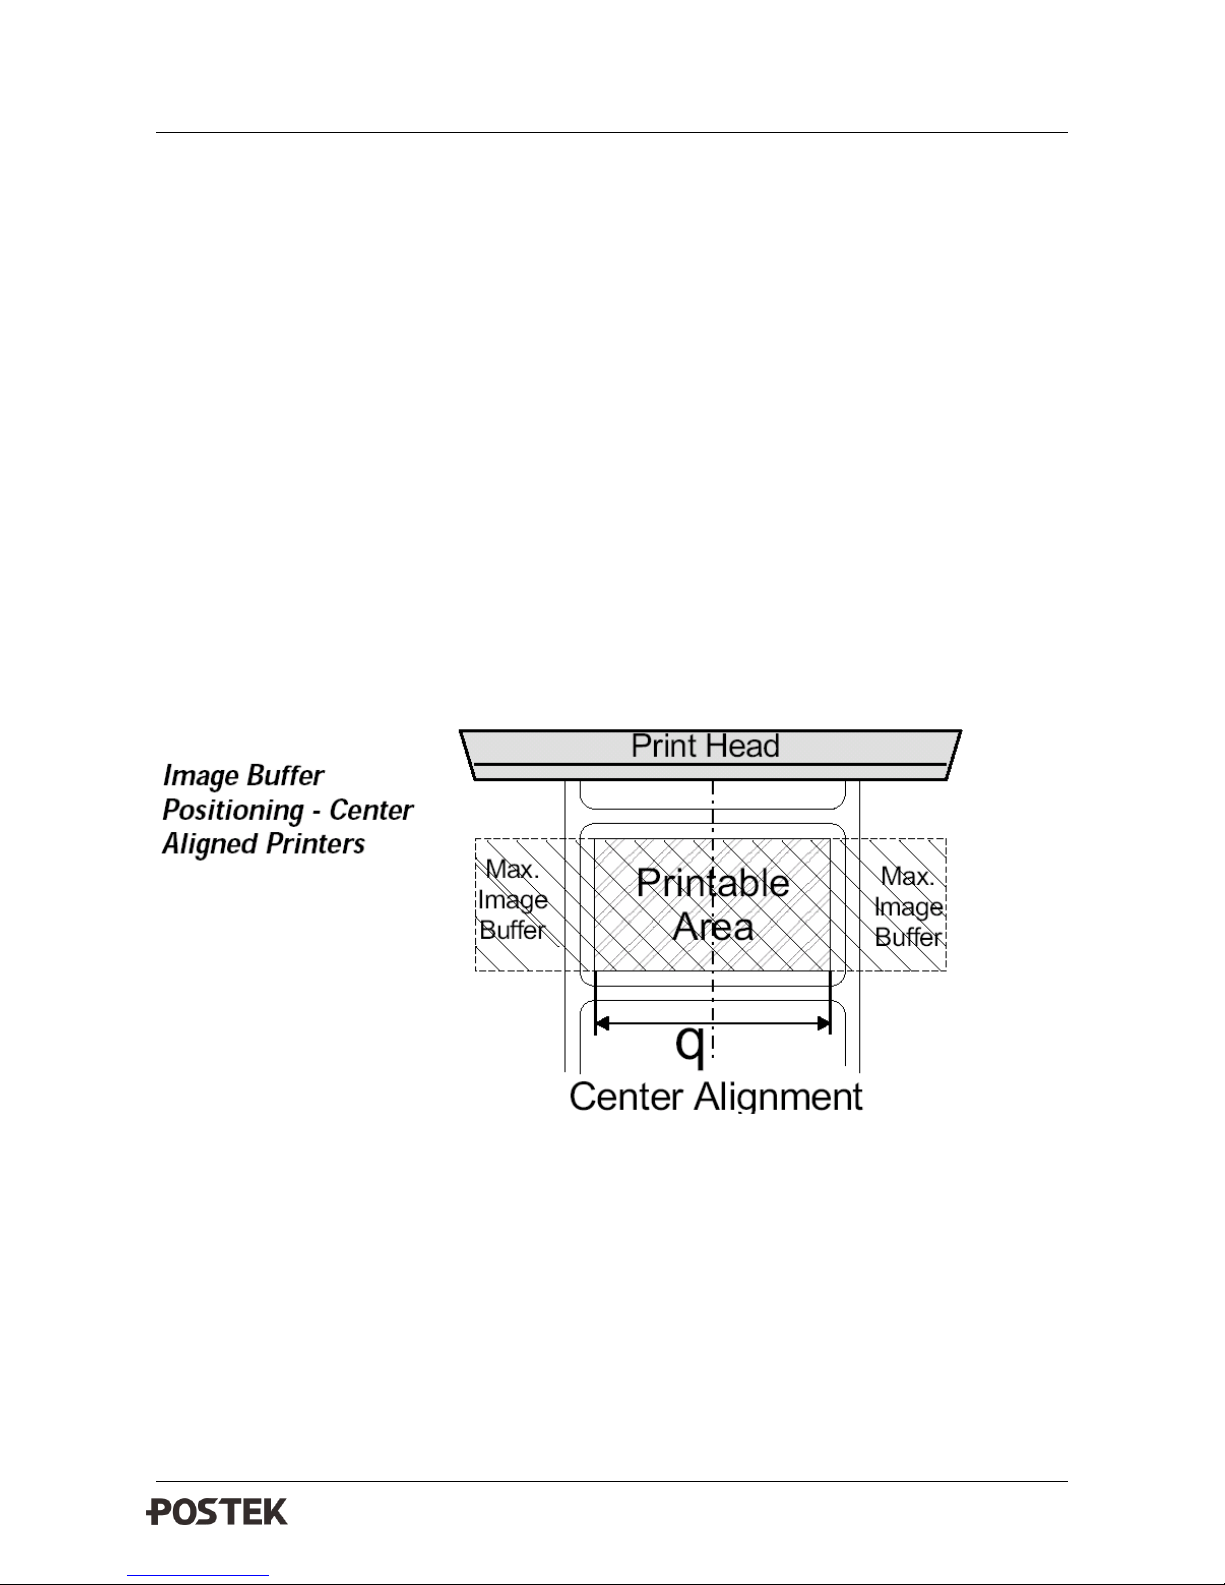
q Command: Set Label Width
Description: This command used to sets the label width.
Syntax: qp1<LF>.
Parameter explanation:
p1: the width of the label in dots.
.
Note: If the R Command (Reference Point) is sent after this command, the image buffer will be automatically
reformatted to match the width of the print head and is offset by the R command specified image buffer starting
point, nullifying the q command.
Example:
N
q250
T20, 30, 0, 2, 1, 1, N, “q command:”
T20, 60, 0, 2, 1, 1, N, “Label width: 250 dots”
W1
R Command: Set Reference Point
Description: This function is used to set or change the coordinate origin point.
Syntax: Rp1, p2<LF>
Parameter explanation:
p1: X coordinate distance from reference point in dots.
POSTEK PPLE COMMAND MANUAL
31
B4. Command reference
p2: Y coordinate distance from reference point in dots.
TD Command: Set Date format
Syntax: TDp1|p2|p3<LF>
Parameter explanation:
p1,p2,p3: Set format parameters of year, month, day, as below:
State Code
Descriptions
y2
Display 2-digit year (10)
y4
Display 4-digit year (2010)
me
Display 3 alphabetic ASCII
month(JAN)
mn
Display 2-digit month(01)
dd
Display 2-digit day(15)
|: Set the separator displayed, such as “-”、”,” “/”…
Default printing format is: y4-mn-dd
Example: Suppose it is March 11, 2015 by now.
TD //Use the default printing format: 2015-03-11
TDy2/me/dd //Use the format: 15/Mar/11
TDdd-me-y4 //Use the format: 11-Mar-2015
TDdd, mn, y4 //Use the format: 11,03,2015
TDdd /me/y4 //Set the print format
A100, 200, 0, 4, 1, 2, N, “Date of manufacture” TD // Date of manufacture 11/Mar/2015
A100, 400, 0, 4, 1, 2, N, “Next Week” TD+7 //Next Week 18/Mar/2015
TD //Use default printing format
A100, 400, 0, 4, 1, 2, N, “Data of expiration”TD+30 //Data of expiration 2015-04-12
Note:
1. Only applicable to models with RTC function inbuilt.
2. When printing realtime with this command, the date & time being printed out is related to the last used
time printing command (TT), please reference to TT command for detailed information.
TS command: Set the printer interior RTC Date & Time
Syntax: TSp1, p2, p3, p4, p5, p6
Parameter explanation:
p1 : Month setting,span:01-12:
p2 : Day setting, span: 01-31:
p3 : Year setting,span: 00-99:Corresponding years: 2000-2099
p4 : Hour setting,span: 00-23:
p5 : Minute setting,span: 00-59:
p6 : Second setting,span: 00-59:

POSTEK PPLE COMMAND MANUAL
32
B4. Command reference
Example:
TS03, 11, 15, 13, 20, 00 //RTC date & time is set to March 11, 2015 13:20
TS12, 31, 00, 01, 30, 00 //RTC date & time is set to December 31, 2000 1:30
Note:
1. Only applicable to models with RTC function inbuilt.
2. When printing realtime with this command, the date & time being printed out is related to the last used
time printing command.
TT command: Set time format
Syntax: TTp1 [, p2, p3][+]<LF>
Parameter explanation:
p1,p2,p3=h,m or s: Set the format parameter of year, month and day. See the table below:
State Code
Descriptions
h
Display 2-digit hour(e.g. 11)
m
Display 2-digit minute(e.g. 30)
s
Display 2-digit second(e.g. 50)
[+]: Enable 12-hour clock, when printing, the time is printed in 12-hour clock, with “AM” or “PM” as a
postfix.
Default printing format: h: m: s
Example: Suppose it is March 11, 2010 22: 50: 30 by now.
TT //Use the default time format: 22: 50: 30
TTh, m, s //Use the format: 22: 50: 30
TTh, m //Use the format: 22: 50
TTh: m: s+ //Use the format: 10: 50: 30PM
TTh: m: s+ //Set the format to: 10: 50: 30PM
A100, 200, 0, 4, 1, 2, N, “Now is:” TT Now is: 10:50:30PM
A100, 400, 0, 4, 1, 2, N, “Time after an hour is”TT+60 Time after an hour is: 11:50:30PM
Note:
1. Only applicable to models with RTC function inbuilt.
2. When using TD command together with TT command, the date & time being printed out is related to the
last used TT command above.
Example: Suppose it is March 11, 2010 23: 55: 30 by now.
TTh: m+
TDdd-mn-y4
A100, 200, 0, 4, 1, 2, N, “After an hour”TT+60 After an hour 00:50AM //TT+60 Add 60mins to
the current time.
A100, 300, 0, 4, 1, 2, N, “Date” TD Date 2010-03-12 //The date correspond to TT+60
A100, 400, 0, 4, 1, 2, N, “Date” TD+1 Date 2010-03-13 //The date correspond to one day

POSTEK PPLE COMMAND MANUAL
33
B4. Command reference
after TT+60.
A100, 400, 0, 4, 1, 2, N, “Date” TD+2 Date 2010-03-14 //The date correspond to two
days after TT+60.
A100, 500, 0, 4, 1, 2, N, “Time now” TT Time now 23:55PM //Print the time correspond to TT.
A100, 600, 0, 4, 1, 2, N, “Date now” TD Date now 2010-03-11 //Print the date correspond to TT
(current time).
S Command: Speed select
Description: Use this command to select the print speed.
Syntax: Sp1<LF>
Parameter Explanation:
p1: value range: 0 to 6 and 10 to 80
p1 value
Speed
0 or 1
1 ips (25 mmps)
2
2 ips (50 mmps)
3
3 ips (75 mmps)
4
4 ips (100 mmps)
5
5 ips (125 mmps)
6
6 ips (150 mmps)
7
7 ips (175 mmps)
8
8 ips (200 mmps)
9
9 ips (225 mmps)
10
10 ips (250 mmps)
p1 Value
Speed
10
1.0 ips (25 mm/s)
15
1.5 ips (37 mm/s)
20
2.0 ips (50 mm/s)
25
2.5 ips (63 mm/s)
30
3.0 ips (75 mm/s)
35
3.5 ips (83 mm/s)
40
4.0 ips (100 mm/s)
50
5.0 ips (125 mm/s)
60
6.0 ips (150 mm/s)
70
7.0 ips (175 mm/s)
80
8.0 ips (200 mm/s)
90
9.0 ips (225 mm/s)
100
10.0 ips (250 mm/s)
U Command: Prints Current Configuration
Description: Use this command to print the current printer configuration for page mode printing. The printout is
the same as the Dump Mode printout initiated by the printer's autosense routine. The printer does not enter Dump

POSTEK PPLE COMMAND MANUAL
34
B4. Command reference
Mode.
Syntax: U<LF>
Printout:
1. English display

POSTEK PPLE COMMAND MANUAL
35
B4. Command reference
2. Chinese character display:
条码标签打印机 TX 3
软件版本:PO S TEK_ P PL TX6. 15
产品编号:00 . 8112 . 011
内置FLA S H:4M B
内置RAM : 8MB
标签页数(张):114
打印总长度(米):8
当前串口速率:19 200,N ,8,1
并口协议及接口规范:Centronics
工作方式:热转印
纸张探测方式:穿透
碳带探测器:有效
撕纸模式:关闭
切纸模式:关闭
手动剥纸:关闭
当前打印黑度:10
本机MAC地 址 :00 1B E7 00 76 DB
本机IP地址 :1 99.9. 9.196
本机子网掩码:2 5 5.25 5 .255 . 0
本机网关:0. 0 .0.0
TCP端 口 号 :9100
245,9 36,900,3 6,311
内部字体:
I2
The Font 1 ASC II: Aa BbCc 012 345 6789
The F ont 2 ASC II: A aBbCc 01234 567 89
Th e Fo nt 3 A SC II: AaBbCc0 12 345 67 89
中文宋体
The Font 4 ASCII : AaBbCc0123456789
The Font 5 ASCII: ABC
Th e Fo nt 6 : AaBb Cc01234 56789

POSTEK PPLE COMMAND MANUAL
36
B4. Command reference
UN/US Command: Disable/Enable Error Reporting
Description: Use this command to enable the printer’s status reporting feature. The printer sends its feedback
through the RS232 port.
Syntax: UN<LF>
US<LF>
If an error occurs, the printer will send a NACK (0x15), followed by the error number, to the host. If no errors
occur, the printer will echo ACK (0x6) after each P command.
Error Code
Error/Status Description
0x00
No Error
0x01
Object Exceeded Label Border
0x02
Bar Code Data Length Error
0x03
Insufficient Memory to Store Data
0x04
Memory Configuration Error
0x05
RS-232 Interface Error
0x06
Paper or Ribbon Empty
0x07
Duplicate Name: Form, Graphic or Soft Font
0x08
Name Not Found: Form, Graphic or Soft Font
0x09
Not in Data Entry Mode
0x0a
Print Head Up (Open)
0x0b
Pause Mode or Paused in Peel mode
0x0c
Does not fit in area specified
0x0d
Data length to long
0x0c
PDF-417 coded data to large to fit in bar code
0x0d
0x0e
V Command: Define Variable
Description: Use this command to define variable data for the text and bar code data fields in stored forms.
Syntax: Vp1, p2, p3, “MSG”<LF>
Parameter explanation: p1: Variable ID number. Range: 00 to 99.
P2: Maximum number of characters. Range: 1 to 99.
Note: If you use KDU, the length should limited to under 16 characters.
P3: Field Justification; L-left justification, R- right justification, C-center, N-no justification.
“MSG” Displays a text string on the printers LCD display or KDU Display.
Example:
N
FK”TEST2”

POSTEK PPLE COMMAND MANUAL
37
B4. Command reference
FS”TEST2”
V0, 16, L, “Enter Title:”
C0, 6, N, +1,”Enter Code:”
T100, 100, 0, 4, 1, 1, N, V0
T400, 100, 0, 4, 1, 1, N, C0
FE
Store the above commands to the printer, then send the following commands:
Q100, 0
FR”TEST2”
?
Part Number:
1234
W1,2
Printout:
X Command: Box Draw
Description: This command is used to draw a box.
Syntax: Xp1, p2, p3, p4, p5<LF>
Parameter explanation:
P1: Horizontal start position (X) in dots.
P2: Vertical start position (Y) in dots.
P3: Line thickness in dots.
P4: Horizontal stop position (X) in dots.
P5: Vertical stop position (Y) in dots.
Example:
N
T50, 30, 0, 4, 1, 1, R, “BOXES”
X50, 120, 5, 250, 150
X120, 100, 3, 180, 280
W1

POSTEK PPLE COMMAND MANUAL
38
B4. Command reference
Printout:
Z Command: Set Print Direction
Description: Use this command to set print orientation for all graphics, text, bar codes, lines and boxes.
Syntax: Zp1<LF>
Parameter explanation: p1: Orientation; Acceptable values are B or T. The default value is T.
B: Print from bottom right corner.
T: Print from top left corner.
Example:
N
ZT
T50, 30, 0, 4, 1, 1, R,”ZT”
W1
ZN/ZS Command: Disable/Enable Flash Memory
Description: Use this command to enable/disable Flash memory.
Syntax: ZN<LF>
ZS<LF>
Example: ZS
FK”TEST3”
FS”TEST3”
T100, 100, 0, 4, 1, 1, N, “Test Flash”
FE
The above command will be stored to the flash memory of printer.
The following command will execute form: “TEST3”
FR”TEST3”
W1

POSTEK PPLE COMMAND MANUAL
39
B4. Command reference
? Command: Download Variables
Description: This command is used to send variable or counter data fields to the printer. The host system can send
data representing variables and/or counters to the printer after a stored form containing variables and/or counters
has been retrieved. The amount of data following the question mark and LF must exactly match with the total
number and order of variables and counters in that specific form.
Syntax :?< LF>
FK”form1” // delete previous stored “form1”, if there was any
FS”form1”: //begin form store
V00, 15, N, “Enter Part Name:”
V01, 5, N, “Enter Quantity:”
T50, 10, 0, 3, 1, 1, N, V00
T50, 400, 0, 3, 1, 1, N, “Quantity: “V01
FE: ends form store sequence
FR”form1” //execute “form1”
? // ready to accept variables input
Screws //first variable “V00” is set to String “Screws”
235 //second variable V01 is set to String “235”
W1 //print one label
^@ Command: Reset the Printer
Description: This command emulates Power Off and then Power On, thus reinitializing the printer.
Syntax: ^@<LF>
The reset command is not available during the download of PCX graphics, soft fonts or while the printer is in
dump mode.
The reset command cannot be used within a stored form.
The reset command can be sent to the printer during all other printing operations.
The printer will ignore all commands sent while the reset command is executing, up to 2 seconds.
^ee Command: Immediate Error Report
Description: Use this command to get printer error and status reports immediately.
Syntax: ^ee<LF>

POSTEK PPLE COMMAND MANUAL
40
B4. Command reference
The printer will report 4 bytes back to the host in the following format:
0x0d 0x0a :< CR><LF>
0xXX 0xXX : Error/Status code
RF Command: Read /Write RFID Tag
Syntax: RFp1, p2, p3, p4, p5, “DATA” <CR><LF>
Parameter explanation:
p1: RFID operation. 0-Read; 1-Write;
p2: RFID data format. 0-HEX; 1-ASCII;
p3: Starting block number;
p4: Byte size of RFID data;
p5: Write-in Block. 0-Reserved; 1-EPC; 2-TID; 3-USER;
“DATA”: A string. (Format determined by p2.)
Note: All values of RF command must be filled in, or the command will not be executed.
Example 1:
N
RF1, 0, 2, 6, 1, “313233343536”
W1
Result:
Example 2:
N
RF1, 1, 0, 6, 3, “POSTEK”
W1
Result:
RZ Command: Lock/Unlock and Set password for RFID tag
Syntax: RZp1, p2, “DATA”<CR><LF>
Parameter explanation:
p1: Action;
Read EPC Block (Starting block number=2)
313233343536
Read USER Block (Starting block number=0)
504F5354454B

POSTEK PPLE COMMAND MANUAL
41
B4. Command reference
Options: 0-Unlock; 1-Lock; 2-Unlock Permanently; 3-Lock Permanently; 4- Set Password;
p2: Block;
Options: 0- Kill Password; 1- Access Password; 2-EPC; 3-TID; 4-USER;
“DATA”: A constant string consists of 8 HEX characters.
Note: All values of RZ command must be filled in, or the command will not be executed.
Example:
N
RZ1, 1, “73BE115B”
W1
Result:
Example 2:
N
RF4, 0, “5462EF21”
W1
Result:
RS Command: RFID Setup
Syntax: RSp1, p2, p3, p4, p5<CR><LF>
Parameter explanation:
p1: Reserved, Default value: 0;
p2: Distance between top of label and the optimal RFID chip writing position; Range: 0-999, Default value: 0.
Unit: mm.
p3: Reserved, Default value: 0;
p4: Maximum number of retries, if exceed, the printer will stop and report a RFID error; Range: 0-9, Default:
value: 2;
p5: Reserved, Default value: 0.
Example:
RS0, 0, 0, 2, 0
Result: This example sets the number of retries to 2.
Set the password for Access Password Block to “73BE115B”
Once password is set, it will be not allowed to do Write/ Lock/ Unlock
operations to the certain Block unless you know the password.
Kill Password is set to “5462EF21”

POSTEK PPLE COMMAND MANUAL
42
B4. Command reference
CF command: Rename Stored Fonts
Syntax: CFp1, p2, p3
Parameter explanation:
p1: Where to find the font, options: “1” or “0”, meaning “Flash” or “SDRAM”.
p2: Font ID you want to use in the “T” command, from “A”~”Z”.
p3: Name of the font stored, for example, “arial”.
BF command: Set Barcode Font Type and Size
Syntax: BF p1, p2, p3
Parameter explanation:
p1: should be the same with what was defined in the “CF” command.
P2: the font width, unit in dots.
P3: the font height, unit in dots.
Note: Each “BF” command corresponds to only one “B” command, and it should be placed right before the
“B” command.
g command: Designate the Spacing Between Neighboring Characters
Syntax: gp1
Parameter explanation:
p1: Length of the spacing, unit in dots.
Note: Each “g” command corresponds to only one “T” command, and it should be placed right before the “T”
command. Fonts usually have initial spacing, value set after the “g” command does not overwrite the initial
value, but is added to the initial value.
Final spacing = initial spacing + p1.
Examples:
Example1. Printing truetype fonts:
I8, 001
N
CF1, A, arial
g10
T0500, 500, 3, A, 64, 64, N, “123456”
g10
T0500, 500, 0, A, 64, 64, N, “123456”
g10
T0500, 500, 1, A, 64, 64, N, “123456”
g10

POSTEK PPLE COMMAND MANUAL
43
B4. Command reference
T0500, 500, 2, A, 64, 64, N, “123456”
W1, 1
Example 2. Printing barcodes with truetype human readable
I8, N, 001
N
Q4000, 24
q3000
CF1, A, arial
BF “A”, 48, 48
B500, 525, 0, 1, 6, 18, 200, B, “00234567”
BF “A”, 48, 48
B500, 525, 1, 1, 6, 18, 200, B, “00234567”
BF “A”, 48, 48
B500, 525, 2, 1, 6, 18, 200, B, “00234567”
BF “A”, 48, 48
B500, 525, 3, 1, 6, 18, 200, B, “00234567”
W1
Y Command:RS232 Serial Port Setup
Syntax: Yp1, p2, p3, p4, <LF>
Note: This command is applicable for POSTEK G-2108 and G-3106 models only.
Parameter explanation:
p1: Baud rate setup;
p1
Transfer Rate
57
57, 600
38
38, 400
19
19, 200
96
9, 600
p2: Parity bits setup;
Options: O-Odd, E-Even, N-None;
Note: “O” is a letter, not a number.
P3: Data bits setup;
Options: 7-7 data bits; 8-8 data bits;
p4: Stop bits setup;
Options: 1-1 stop bits; 2-2 stop bits.
Example:
Y38, O, 7, 1

POSTEK PPLE COMMAND MANUAL
44
B4. Command reference
JG Command: Set Feed Distance
Syntax: JGp1<CR> <LF>
Parameter explanation:
p1: Set feed distance, unit in dots.
Example:
JG120
JH Command: Set Back Feed Distance
Syntax: JHp1<CR> <LF>
Parameter explanation:
p1: Set back feed distance, unit in dots.
Example:
JH120
 Loading...