

Porter-Cable 7529 User guide
Double Insulated
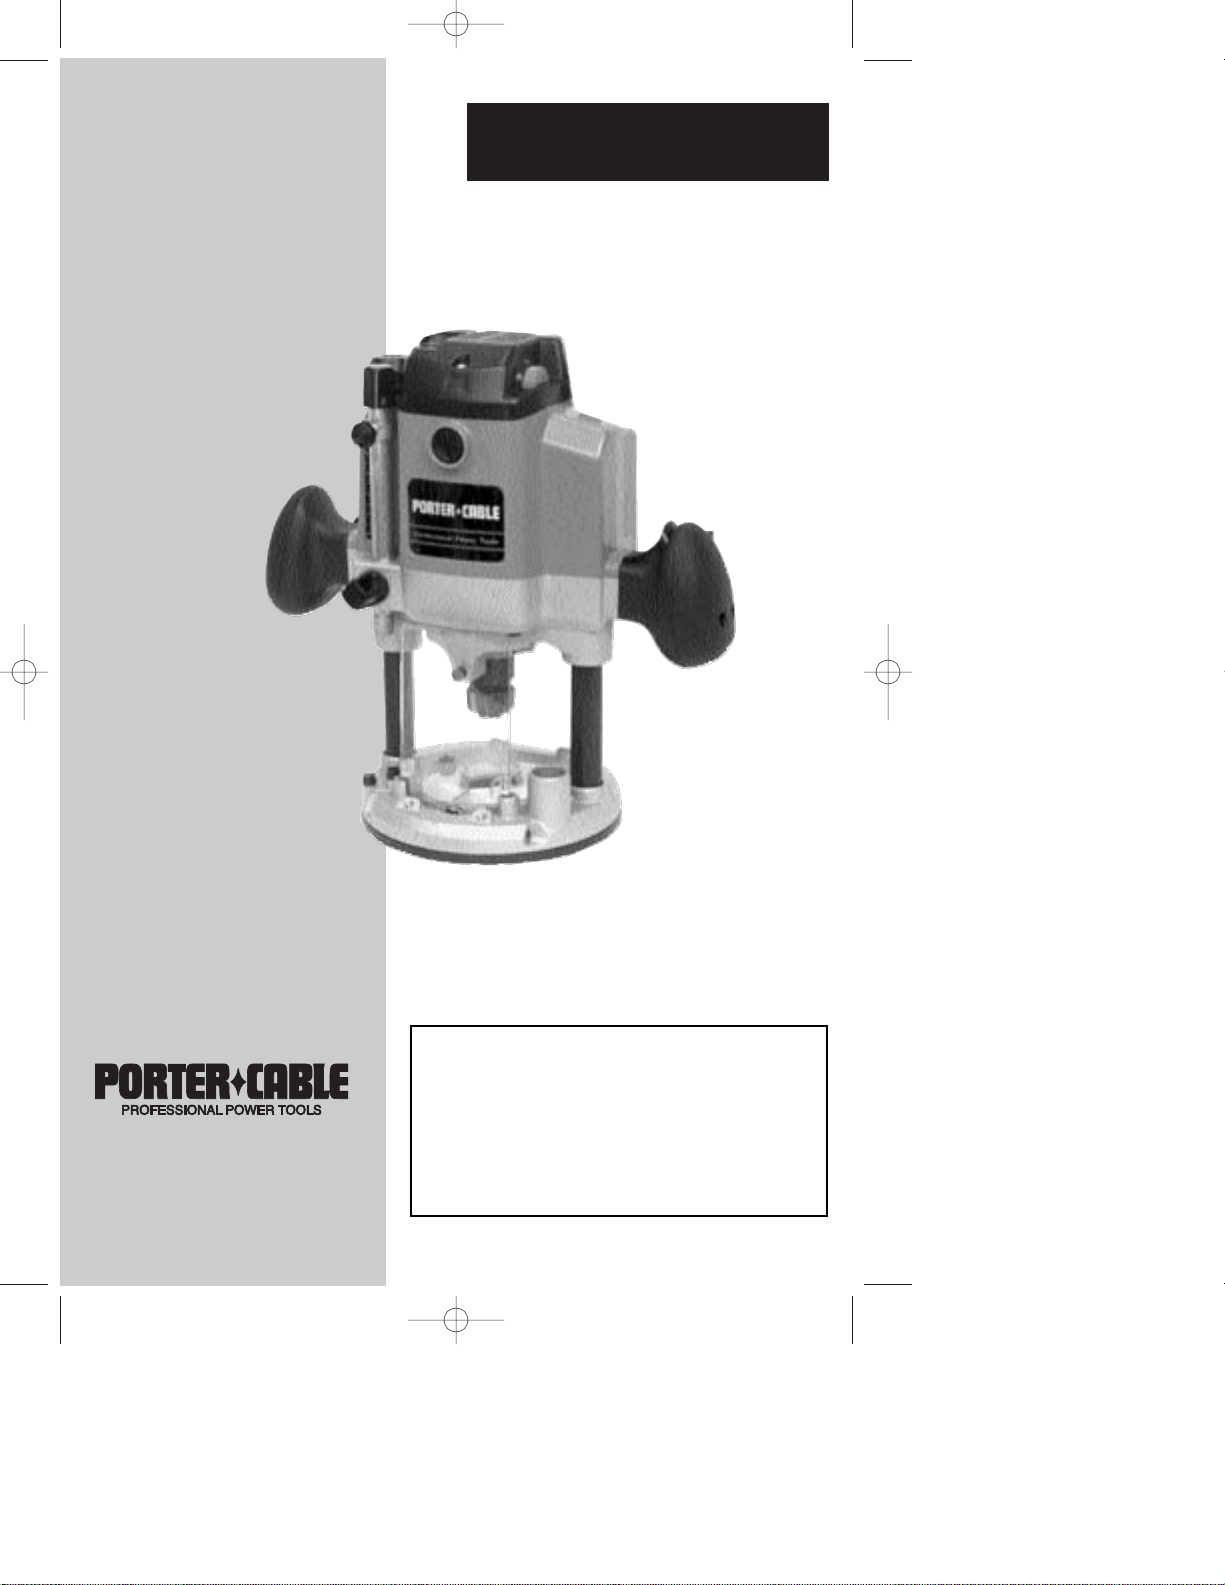
Plunge Router
ESPAÑOL: PÁGINA 17
FRANÇAISE : PAGE 35
MODEL 7529
Instruction
manual
The Model and Serial No. plate is located on the main
housing of the tool. Record these numbers in the
spaces below and retain for future reference.
Model No. ______________________________________
Type ___________________________________________
Serial No. _______________________________________
IMPORTANT
Please make certain that the person who is
to use this equipment carefully reads and
understands these instructions before
starting operations.
Part No. 900468 - 07-11-02
To learn more about Porter-Cable
visit our website at:
http://www.porter-cable.com
Copyright © 2002 Porter-Cable Corporation
900468 - 07-11-02.qxd 7/25/02 9:23 AM Page 1

WARNING: SOME DUST CREATED BY POWER SANDING, SAWING,
GRINDING, DRILLING, AND OTHER CONSTRUCTION ACTIVITIES
contains chemicals known to cause cancer, birth defects or other
reproductive harm. Some examples of these chemicals are:
· lead from lead-based paints,
· crystalline silica from bricks and cement and other masonry products, and
· arsenic and chromium from chemically-treated lumber.
Your risk from these exposures varies, depending on how often you do this
type of work. To reduce your exposure to these chemicals: work in a well
ventilated area, and work with approved safety equipment, such as those dust
masks that are specially designed to filter out microscopic particles.
GENERAL SAFETY RULES
WARNING! READ AND UNDERSTAND ALL INSTRUCTIONS. Failure
to follow all instructions listed below, may result in electric shock, fire and/or
serious personal injury.
SAVE THESE INSTRUCTIONS.
WORK AREA
1. Keep your work area clean and well lit. Cluttered benches and dark
areas invite accidents.
2. Do not operate power tools in explosive atmospheres, such as in the
presence of flammable liquids, gases, or dust. Power tools create sparks
which may ignite the dust or fumes.
3. Keep bystanders, children, and visitors away while operating a
power tool. Distractions can cause you to lose control.
ELECTRICAL SAFETY
1. Double insulated tools are equipped with a polarized plug (one blade
is wider than the other). This plug will fit in a polarized outlet only one
way. If the plug does not fit fully in the outlet, reverse the plug. If it still
does not fit, contact a qualified electrician to install a polarized outlet. Do
not change the plug in any way. Double Insulation eliminates the need
for the three wire grounded power cord and grounded power supply system.
2. Avoid body contact with grounded surfaces such as pipes, radiators,
ranges and refrigerators. There is an increased risk of electric shock if your
body is grounded.
3. Don’t expose power tools to rain or wet conditions. Water entering a
power tool will increase the risk of electric shock.
4. Do not abuse the cord. Never use the cord to carry the tools or pull
the plug from an outlet. Keep cord away from heat, oil, sharp edges or
moving parts. Replace damaged cords immediately. Damaged cords
increase the risk of electric shock.
5. When operating a power tool outside, use an outdoor extension cord
marked “W-A” or “W”. These cords are rated for outdoor use and reduce the
risk of electric shock.
2
900468 - 07-11-02.qxd 7/25/02 9:23 AM Page 2

3
PERSONAL SAFETY
1. Stay alert, watch what you are doing, and use common sense when
operating a power tool. Do not use tool while tired or under the influence
of drugs, alcohol, or medication. A moment of inattention while operating
power tools may result in serious personal injury.
2. Dress properly. Do not wear loose clothing or jewelry. Contain long
hair. Keep your hair, clothing, and gloves away from moving parts. Loose
clothes, jewelry, or long hair can be caught in moving parts.
3. Avoid accidental starting. Be sure switch is OFF before plugging in.
Carrying tools with your finger on the switch or plugging in tools that have the
switch ON invites accidents.
4. Remove adjusting keys or wrenches before turning the tool ON. A
wrench or a key that is left attached to a rotating part of the tool may result in
personal injury.
5. Do not overreach. Keep proper footing and balance at all times.
Proper footing and balance enables better control of the tool in unexpected
situations.
6. Use safety equipment. Always wear eye protection. Dust mask, nonskid safety shoes, hard hat, or hearing protection must be used for
appropriate conditions.
TOOLS USE AND CARE
1. Use clamps or other practical way to secure and support the
workpiece to a stable platform. Holding the work by hand or against your
body is unstable and may lead to loss of control.
2. Do not force tool. Use the correct tool for your application. The
correct tool will do the job better and safer at the rate for which it is designed.
3. Do not use tool if switch does not turn it ON or OFF. Any tool that
cannot be controlled with the switch is dangerous and must be repaired.
4. Disconnect the plug from the power source before making any
adjustments, changing accessories, or storing the tool. Such preventive
safety measures reduce the risk of starting the tool accidentally.
5. Store idle tools out of reach of children and other untrained persons.
Tools are dangerous in the hands of untrained users.
6. Maintain tools with care. Keep cutting tools sharp and clean.
Properly maintained tools, with sharp cutting edges are less likely to bind and
are easier to control.
7. Check for misalignment or binding of moving parts, breakage of
parts, and any other condition that may affect the tool’s operation. If
damaged, have the tool serviced before using. Many accidents are caused
by poorly maintained tools.
8. Use only accessories that are recommended by the manufacturer for
your model. Accessories that may be suitable for one tool may become
hazardous when used on another tool.
900468 - 07-11-02.qxd 7/25/02 9:23 AM Page 3

4
SERVICE
1. Tool service must be performed only by qualified repair personnel.
Service or maintenance performed by unqualified personnel could result in a
risk of injury.
2. When servicing a tool, use only identical replacement parts. Follow
instructions in the Maintenance Section of this manual. Use of unauthorized
parts or failure to follow Maintenance Instructions may create a risk of electric
shock or injury.
SPECIFIC SAFETY RULES AND SYMBOLS
1. Hold tool by insulated gripping surfaces when performing an
operation where the cutting tools may contact hidden wiring or its own
cord. Contact with a “live” wire will make exposed metal parts of the tool
“live” and shock the operator.
2. DISCONNECT TOOL FROM POWER SOURCE before making
adjustments or changing bits.
3. TIGHTEN COLLET NUT securely to prevent the bit from slipping.
4. USE A CLAMP or some other device to hold the workpiece rigidly in position.
and clear the path of the tool of obstructions.
5. PROVIDE CLEARANCE under workpiece for router bit when throughcutting.
6. CHECK TO SEE THAT THE CORD will not “hang up” during routing
operation.
7. CLEAR THE ROUTER BIT AREA before starting motor.
8. MAINTAIN FIRM GRIP on router to resist starting torque.
9. KEEP HANDS CLEAR OF BIT when motor is running to prevent personal
injury.
10. KEEP CUTTING PRESSURE CONSTANT. Do not overload motor.
11. LET THE MOTOR COME TO A COMPLETE STOP before putting the tool
down.
12. NEVER TOUCH router bits after use. They may be extremely hot.
13. NEVER TIGHTEN COLLET NUT without a bit.
14. DO NOT USE ROUTER BITS with a diameter in excess of 2-
1
/2" at RPM
above 13,000. Router bits up to 3-
1
/2
" in diameter can be used when speed
control is set for 13,000 RPM or less.
15. ALWAYS KEEP CHIP SHIELD clean and in place.
16. AVOID “CLIMB-CUTTING” (see “Using The Router” section in this manual).
“Climb-cutting” increases the chance for loss of control resulting in possible
personal injury.
17. SOME WOOD CONTAINS PRESERVATIVES WHICH CAN BE TOXIC.
Take extra care to prevent inhalation and skin contact when working with these
materials. Request, and follow, any safety information available from your
material supplier.
18. WARNING: There are certain applications for which this tool was
designed. Porter-Cable strongly recommends that this tool NOT be modified
and/or used for any application other than for which it was designed. If you
have any questions relative to its application DO NOT use the tool until you
have written Porter-Cable and we have advised you.
Technical Service Manager
Porter-Cable Corporation
4825 Highway 45 North
Jackson, TN 38305
900468 - 07-11-02.qxd 7/25/02 9:23 AM Page 4

5
SYMBOL DEFINITION
V ....................... volts
A ....................... amperes
Hz ....................... hertz
W ....................... watts
kW ....................... kilowatts
µF ....................... microfarads
l ....................... liters
kg ....................... kilograms
N/cm2....................... newtons per square centimeter
Pa ....................... pascals
h ....................... hours
min ....................... minutes
s ....................... seconds
....................... alternating current
3 ....................... three-phase alternating current
3N ....................... three-phase alternating current with neutral
....................... direct current
n
0 ....................... no load
....................... alternating or direct current
........................ Class II Construction
....................... splash-proof construction
....................... watertight construction
…/min ....................... revolutions or reciprocation per minute
REPLACEMENT PARTS
When servicing use only identical replacement parts.
MOTOR
Many Porter-Cable tools will operate on either D.C., or single phase 25 to 60
cycle A.C. current and voltage within plus or minus 5 percent of that shown on
the specification plate on the tool. Several models, however, are designed for
A.C. current only. Refer to the specification plate on your tool for proper voltage
and current rating.
CAUTION: Do not operate your tool on a current on which the voltage
is not within correct limits. Do not operate tools rated A.C. only on D.C.
current. To do so may seriously damage the tool.
EXTENSION CORD SELECTION
If an extension cord is used, make sure the conductor size is large enough to
prevent excessive voltage drop which will cause loss of power and possible
motor damage. A table of recommended extension cord sizes will be found in
this section. This table is based on limiting line voltage drop to 5 volts (10 volts
for 230 volts) at 150% of rated amperes.
If an extension cord is to be used outdoors it must be marked with the suffix
W-A or W following the cord type designation. For example – SJTW-A to
indicate it is acceptable for outdoor use
.
900468 - 07-11-02.qxd 7/25/02 9:23 AM Page 5
6
Length of Cord in Feet
115V 25 Ft. 50 Ft. 100 Ft. 150 Ft. 200 Ft. 250 Ft. 300 Ft. 400 Ft. 500 Ft.
230V 50 Ft. 100 Ft. 200 Ft. 300 Ft. 400 Ft. 500 Ft. 600 Ft. 800 Ft. 1000 Ft.
0-2 18 18 18 16 16 14 14 12 12
2-3 18 18 16 14 14 12 12 10 10
3-4 18 18 16 14 12 12 10 10 8
4-5 18 18 14 12 12 10 10 8 8
5-6 18 16 14 12 10 10 8 8 6
6-8 18 16 12 10 10 8 6 6 6
8-10 18 14 12 10 8 8 6 6 4
10-12 16 14 10 8 8 6 6 4 4
12-14 16 12 10 8 6 6 6 4 2
14-16 16 12 10 8 6 6 4 4 2
16-18 14 12 8 8 6 4 4 2 2
18-20 14 12 8 6 6 4 4 2 2
Nameplate Ampere Rating
RECOMMENDED EXTENSION CORD SIZES FOR USE WITH PORTABLE ELECTRIC TOOLS
FUNCTIONAL DESCRIPTION
FOREWORD
MODEL 7529’s versatility - speed range of 8,000 to 23,000 RPM, collet
sizes of
1
/4", 3/8" (optional) and 1/2", dual plunge adjustments, and bit size up
to 3
1
/2" diameter - allow it to handle the most demanding routing
applications in various materials.
ASSEMBLY
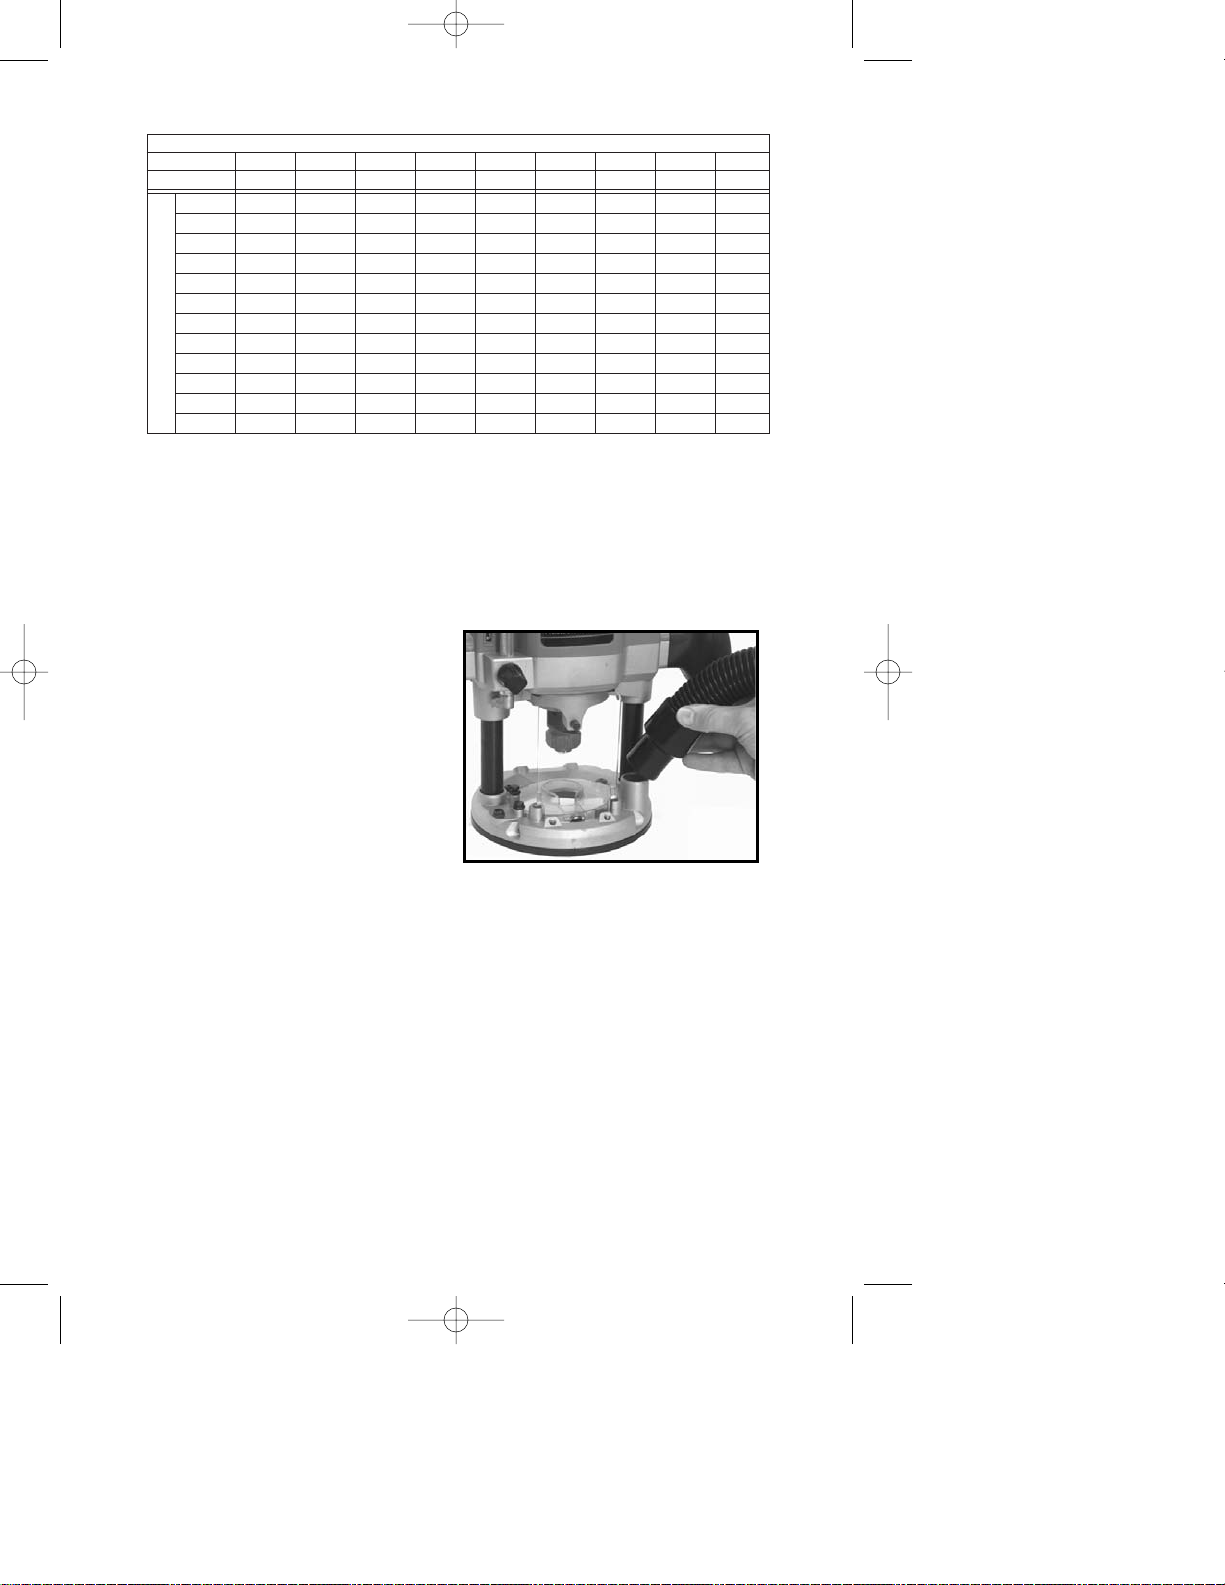
VACUUM HOSE
A standard 1" vacuum hose can be
attached to the dust port to
connect the tool to a vacuum
cleaner or dust collection system
(Fig.1).
TEMPLET GUIDE INSERT &
OPTIONAL TEMPLET
GUIDES
The templet guide insert is included with the router for use with optional
templet guides. A wide variety of templet guides is available from your PorterCable/Delta supplier for use in pattern and templet routing operations.
1. DISCONNECT TOOL FROM POWER SOURCE.
2. Remove the chip deflector (A) Fig. 2, the three clear dust cover retaining
screws (B) (slotted screw-driver or T20 torx wrench), and the clear dust
cover (C) Fig. 2.
3. With the motor at its highest position, move the plunge locking lever (C)
Fig. 8 to the free motion position by rotating it to the left (in the operating
position) as far as it will go. The lever will lock into position.
Fig. 1
900468 - 07-11-02.qxd 7/25/02 9:23 AM Page 6
 Loading...