

Page 1
Steps Installation
For installation setup of the followed steps as below:
RoHS
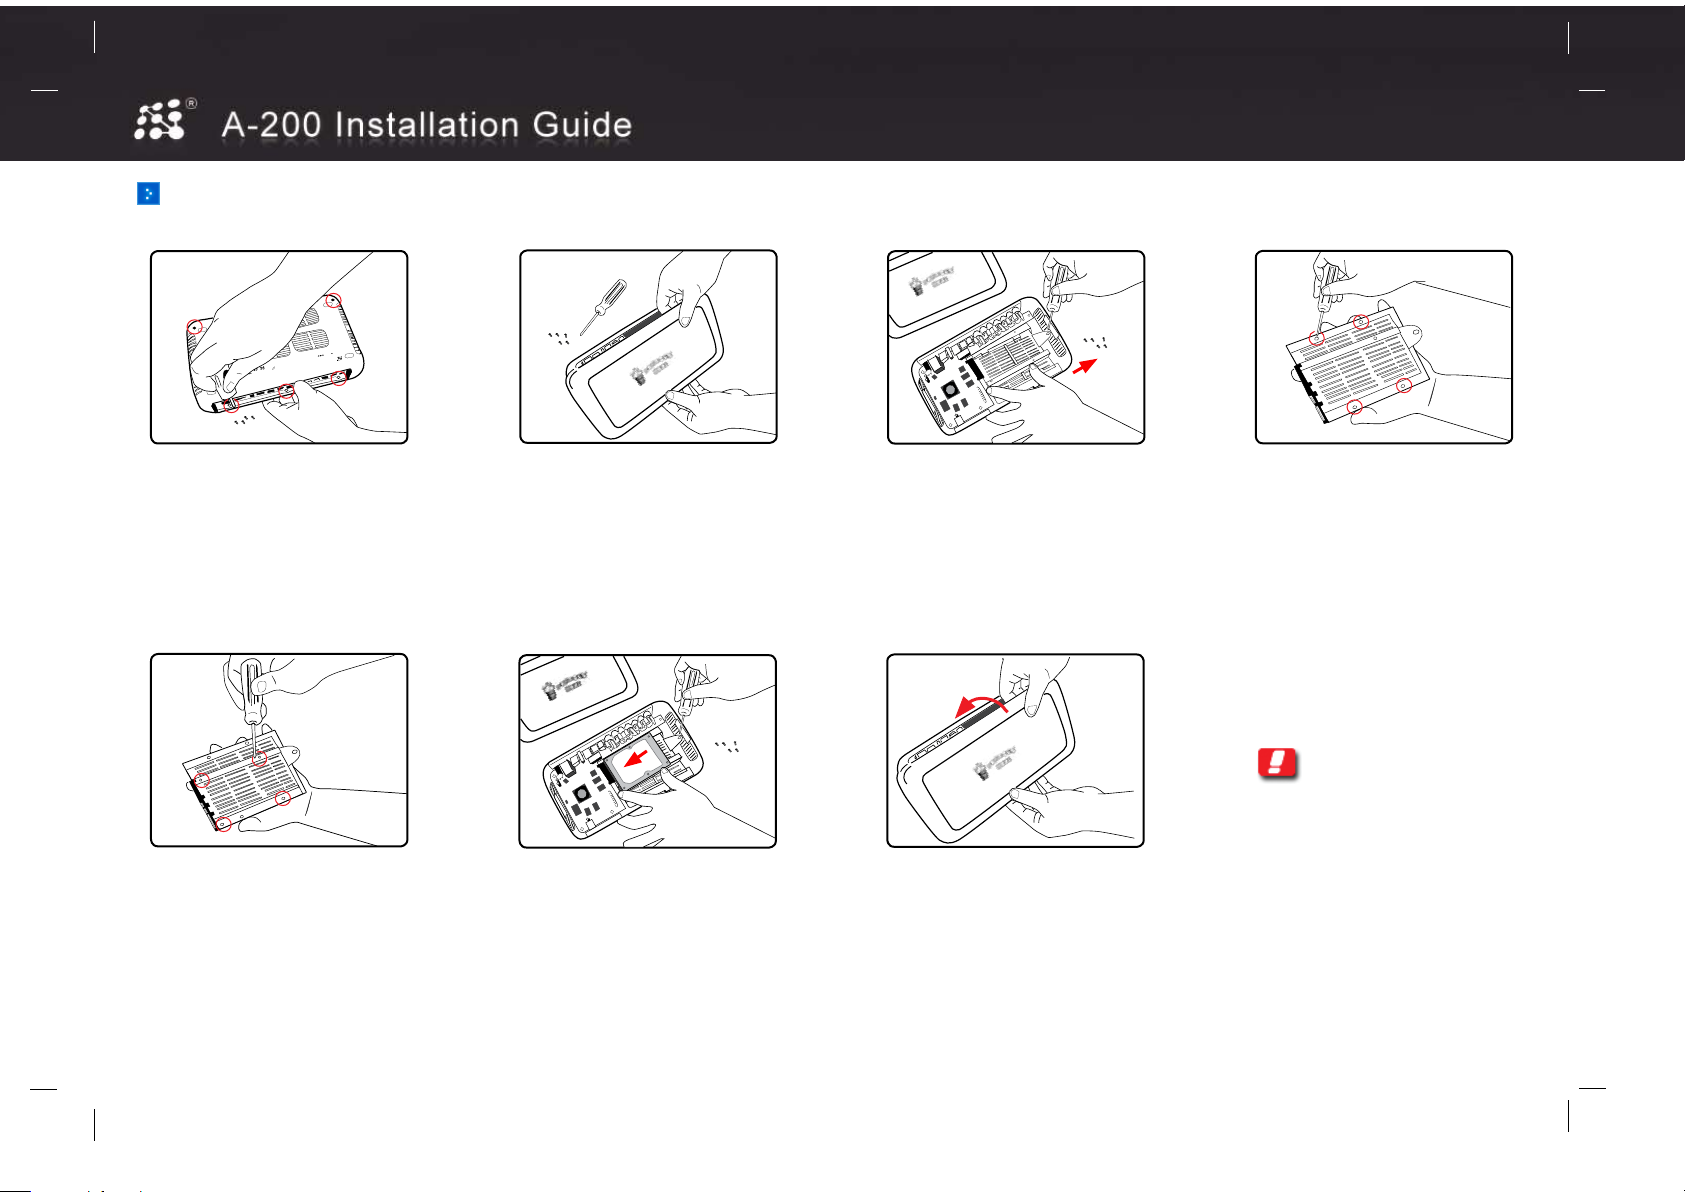
Step 1
Fl ip t he A -20 0 ov er t o sh ow i t ’s und er sid e.
Re mo ve t he 2 s cr ews loc ate d at the f ro nt
of t he d ev ic e nea r th e rub be r pa ds, the n
re mo ve t he 3 s crews l oc ate d at t he b ac k
of the devic e at the protruding ledge.
176 mm (H)
Step 5
(2.5” drive) Place the HDD on top of the H DD
tray and align it with the top left corner of the
tr ay. N ow f l ip t he t ray ov er a lon g wi th t he HD D.
4 of the h ol es a t the bac k of t he t ray sh oul d
al ig n wit h th e co r re spo nd ing soc ke ts o n the
bottom of the HDD. Screw in all 4 sockets.
Figure 1.0 : Remove the s crews at the back of the devic e
Figure 5.0 : Scr ew the HDD tray (2.5” drive)
Figure 2.0 : Gras p the lid at the back of the device Figur e 3.0 : Rem ove the sc rew and ge ntly sid e the tray Figure 4.0 : Scr ew the HDD tray (3.5” drive)
Step 2
Tur n th e A-2 00 s o tha t th e to p lo go is fac in g
you. Grasp the lid at the back of the device
and gently lift it towards you. The lid will
come free with a loud click. Set the lid aside.
Step 3
In si de t h e A- 200 , re move t he sc re w on t he
ri ght of t he pl as ti c HDD t ray. Gen tl y si de th e
tray to the right to remove it.
Step 4
(3.5 ” dr ive) Pla ce t he HD D on to p of t he
HDD tray and align it with the top left
co r ne r of t he t ray. N ow f lip the t ra y over
al on g wit h th e HDD. 4 o f th e hol es a t th e
ba ck o f th e tray s hou ld a li gn wi th t he
co r re spo nd in g soc ke ts o n th e bot to m of
the HDD. Screw in all 4 sockets.
Note:
1) Disconnec t all cables from the A-200
before proceeding.
Figure 6.0 : Inse rt the HDD plate inside the A-200
Figure 6.0 : Inse rt the HDD plate inside the A-200
Step 6
Once the HDD has been securely fastened
to t he t ra y, pl ace t he t ray bac k in t he A -20 0
and gently side it to the left to lock it back
in place. Make sure that the tray has been
se curel y la tc hed t o th e ba se a nd t hat t he
Figure 7.0 : Replace the t op lid of the A-200
Step 7
Replace the top lid of the A-200 by lifting the
li d at a ang le a nd a lig ni ng t he fr on t of t he l id
wi th t he devi ce . Gentl y lo we r the bac k of t he
lid into place and it should click into position.
Flip the A-200 over and replace all 5 screws.
2) The hard disk drive (HDD) is not
provided.
HD D con ne cto r ha s ma te d ful ly w it h the
A- 200 c irc ui t bo ard. Repl ac e the s cr ew o n
the right end of the tray.
260 mm (W)
 Loading...