

Page 1

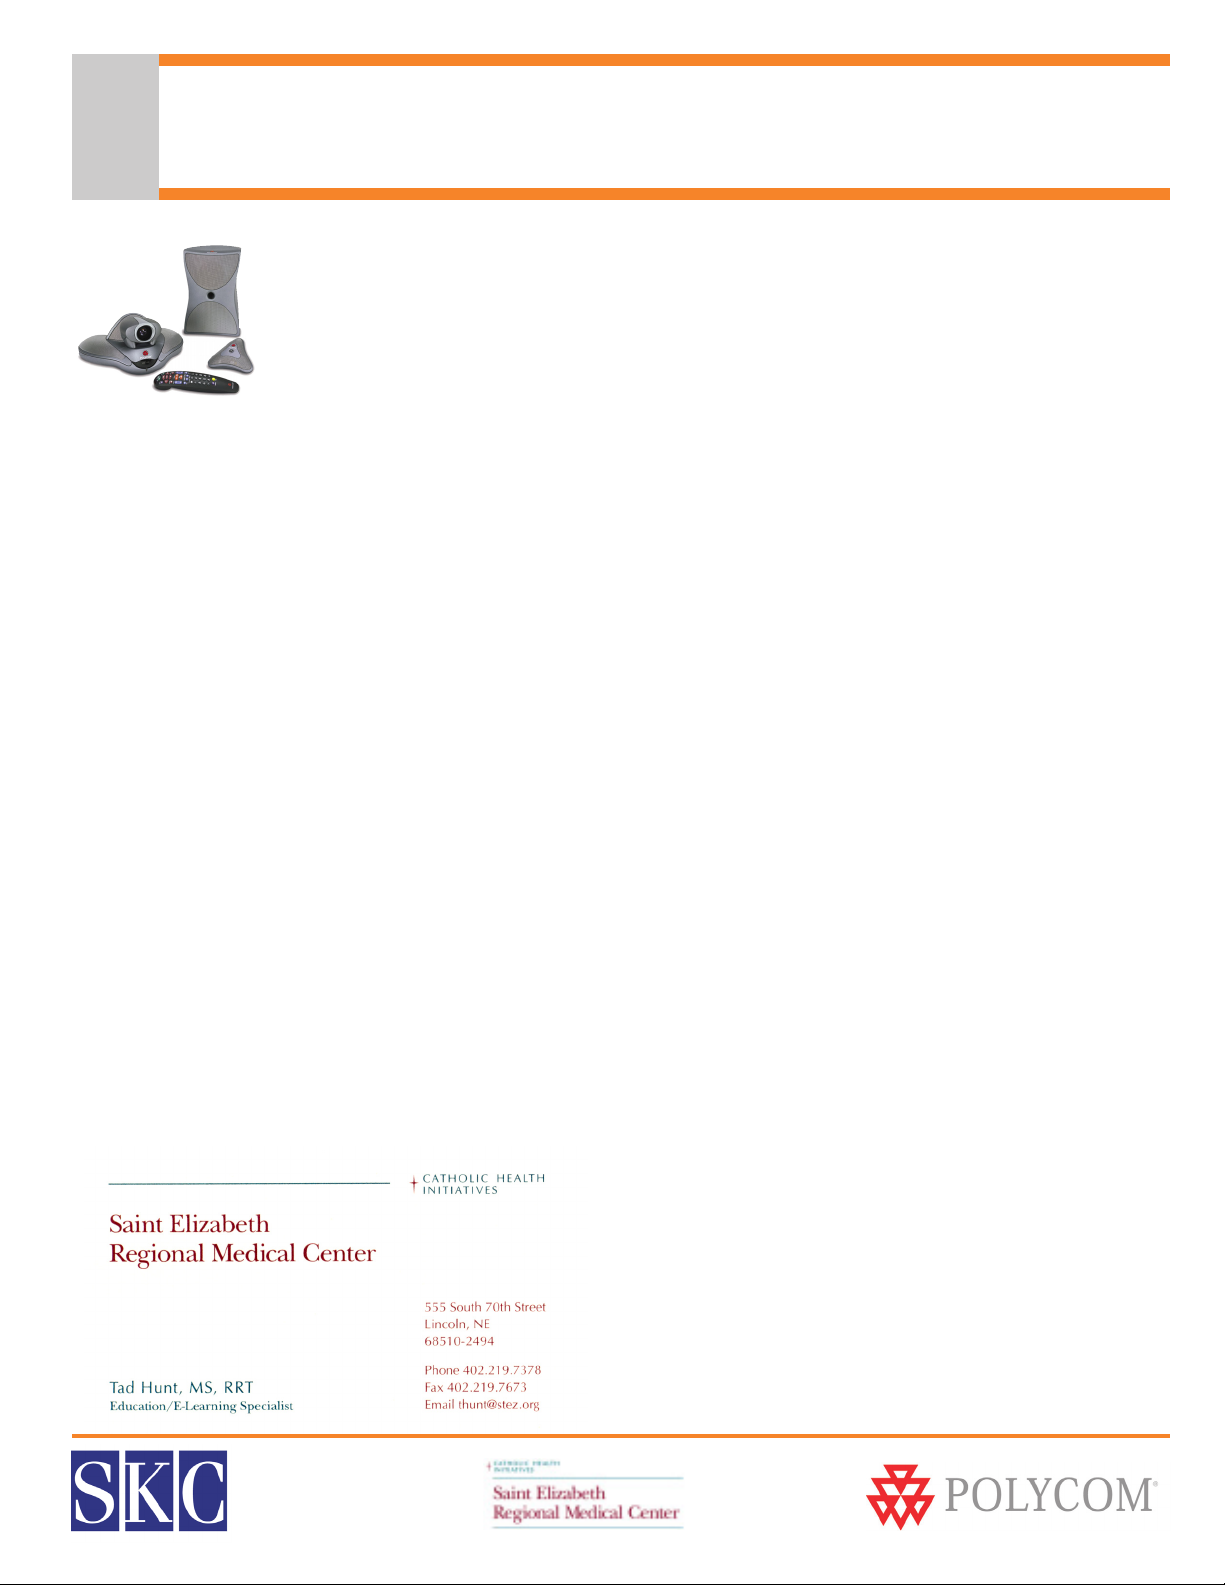
Using Your
Polycom® Video Conferencing
System
A Beginner’s Guide to Video Conferencing Features & Use
SERMC Contact: Tad Hunt (402) 219-7378 thunt@stez.org SKC Contact: (800) 882-7779 contact.us@skccom.com
Page 2
Welcome to Polycom Video Conferencing!
Welcome to Video Conferencing!
Thank you for purchasing a Polycom® video conferencing system from SKC
Communication Products, Inc. Polycom systems are designed to provide the highest
quality audio and video performance in an easy-to-use system. This user guide
describes the basic system features and how to use them.
About SKC
SKC is a leading provider and integrator of telephony and conferencing solutions from industry leading
manufacturers, including Polycom, Avaya, and Plantronics. As a Platinum Certified Polycom reseller, you can
expect the highest levels of service and support from our account teams, engineers, and support technicians.
24-Hour Test Sites
As you become familiar with your new Polycom video conferencing system, feel free to use our test sites. Our
24/7 testing facilities can be reached at the numbers below. If you would like someone to join your test call
on our end, please call (800) 882-7779, extension 4, during regular business hours.
IP Test Site: 12.158.130.34
ISDN Test Site: 913.693.8252
For Additional Support
For more detailed product information, please reference the documentation CD included with the VSX 7000,
or contact the SKC video support team. Additional product information is also available online at
www.skccom.com.
Video Support: (800) 882-7779, Ext. 4
Account Support: (800) 882-7779
E-mail: video.support@skccom.com
Hub Site Coordinator
SERMC Contact: Tad Hunt (402) 219-7378 thunt@stez.org SKC Contact: (800) 882-7779 contact.us@skccom.com 2
Page 3
Table of Contents
Welcome to Polycom Video Conferencing! ...................................................................................................... 2
What’s Included with Your VSX 7000 .................................................................................................................. 4
What’s Included with Your ViewStation FX ....................................................................................................... 5
Using the Remote Control...................................................................................................................................... 6
Setting Up the VSX 7000......................................................................................................................................... 7
Setting Up the ViewStation FX ............................................................................................................................. 8
Placing, Answering & Ending Video Calls .......................................................................................................... 9
Volume & Mute Control........................................................................................................................................... 9
MultiPoint Video Calls............................................................................................................................................10
Cameras & Camera Presets...................................................................................................................................11
Displaying a Document Camera or DVD/VCR ...............................................................................................11
Sharing PC Content ................................................................................................................................................12
Visual Concert FX & Visual Concert VSX ..........................................................................................................12
Full Screen and Picture-in-Picture Viewing ....................................................................................................13
Dual Monitor Emulation .......................................................................................................................................14
Do Not Disturb Setting ..........................................................................................................................................14
Tips for Effective Video Conferences ................................................................................................................16
SERMC Contact: Tad Hunt (402) 219-7378 thunt@stez.org SKC Contact: (800) 882-7779 contact.us@skccom.com 3
Page 4
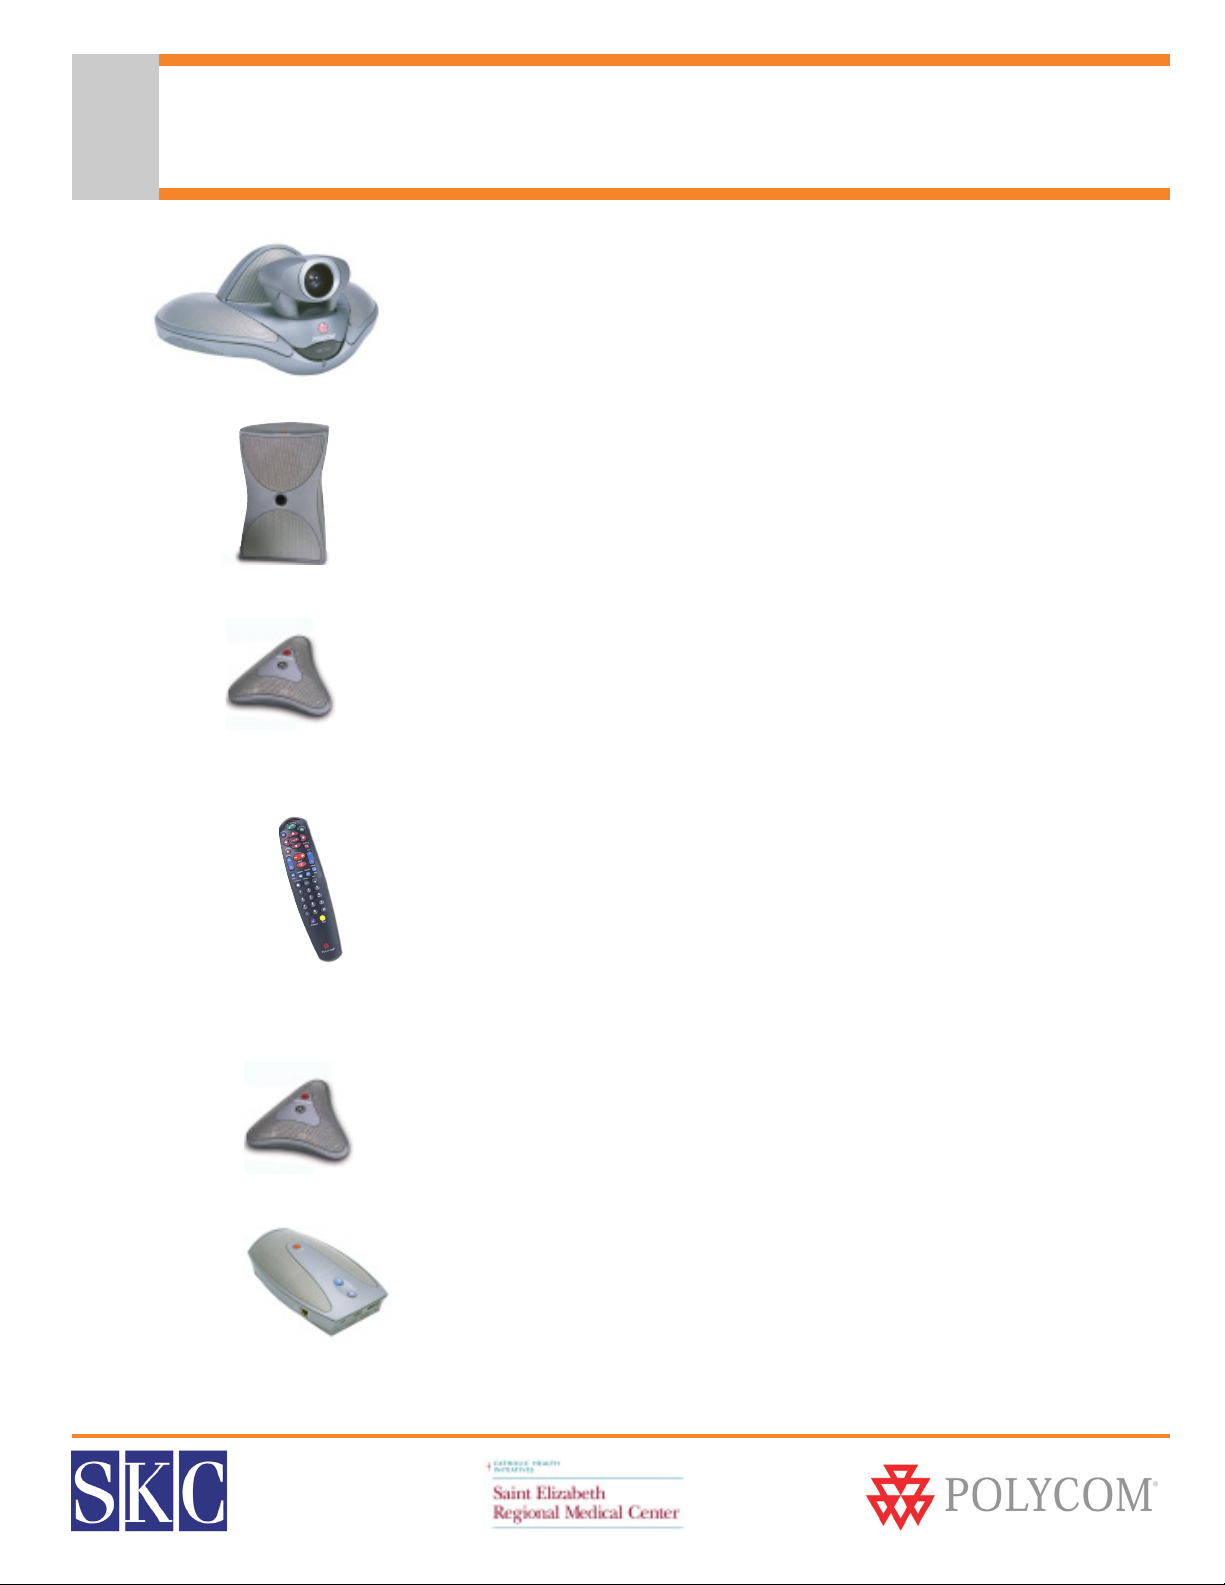
What’s Included with Your VSX 7000
VSX 7000 Set-Top Codec
• Sits on your monitoror on a shelf above the monitor
• Built in pan/tilt/zoom camera with auto focus
• Built in speaker
VSX 7000 Subwoofer
• Picks up lower voice frequencies for enhanced audio quality
• Connects system to power supply
• Houses Quad BRI module in ISDN systems
• Connects V.35 serial interface, when applicable
VSX 7000 Microphone
• 360° pick up
• Center push-to-mute button turns red when muted
• Connects directly to the VSX 7000, or to Visual Concert VSX
• Can add 2 additional mics, or 1 mic and a Visual Concert VSX
Polycom Remote Control
• Enhanced design groups color coded buttons by function
• Used to operate VSX 7000 and navigate on-screen menus
• Uses 3 - AAA batteries (included)
• See page 6 for detailed remote control diagram
Optional Accessory Items & Upgrades
Available separately, or in bundled packages. Contact your SKC Account Executive for more information.
Additional Mic Pods
• For increased coverage in larger conference rooms
• VSX 7000 supports up to 3 total add-ons, which can be either
3 mics total, or 2 mics & Visual Concert VSX
Visual Concert VSX
• Sends live PC/laptop graphics to the video conference
• Connects through the microphone port
• Mic pods attach to the Visual Concert VSX
Dual Display Adapter Cable
• Connects second monitor or VGA projector
SERMC Contact: Tad Hunt (402) 219-7378 thunt@stez.org SKC Contact: (800) 882-7779 contact.us@skccom.com 4
Page 5
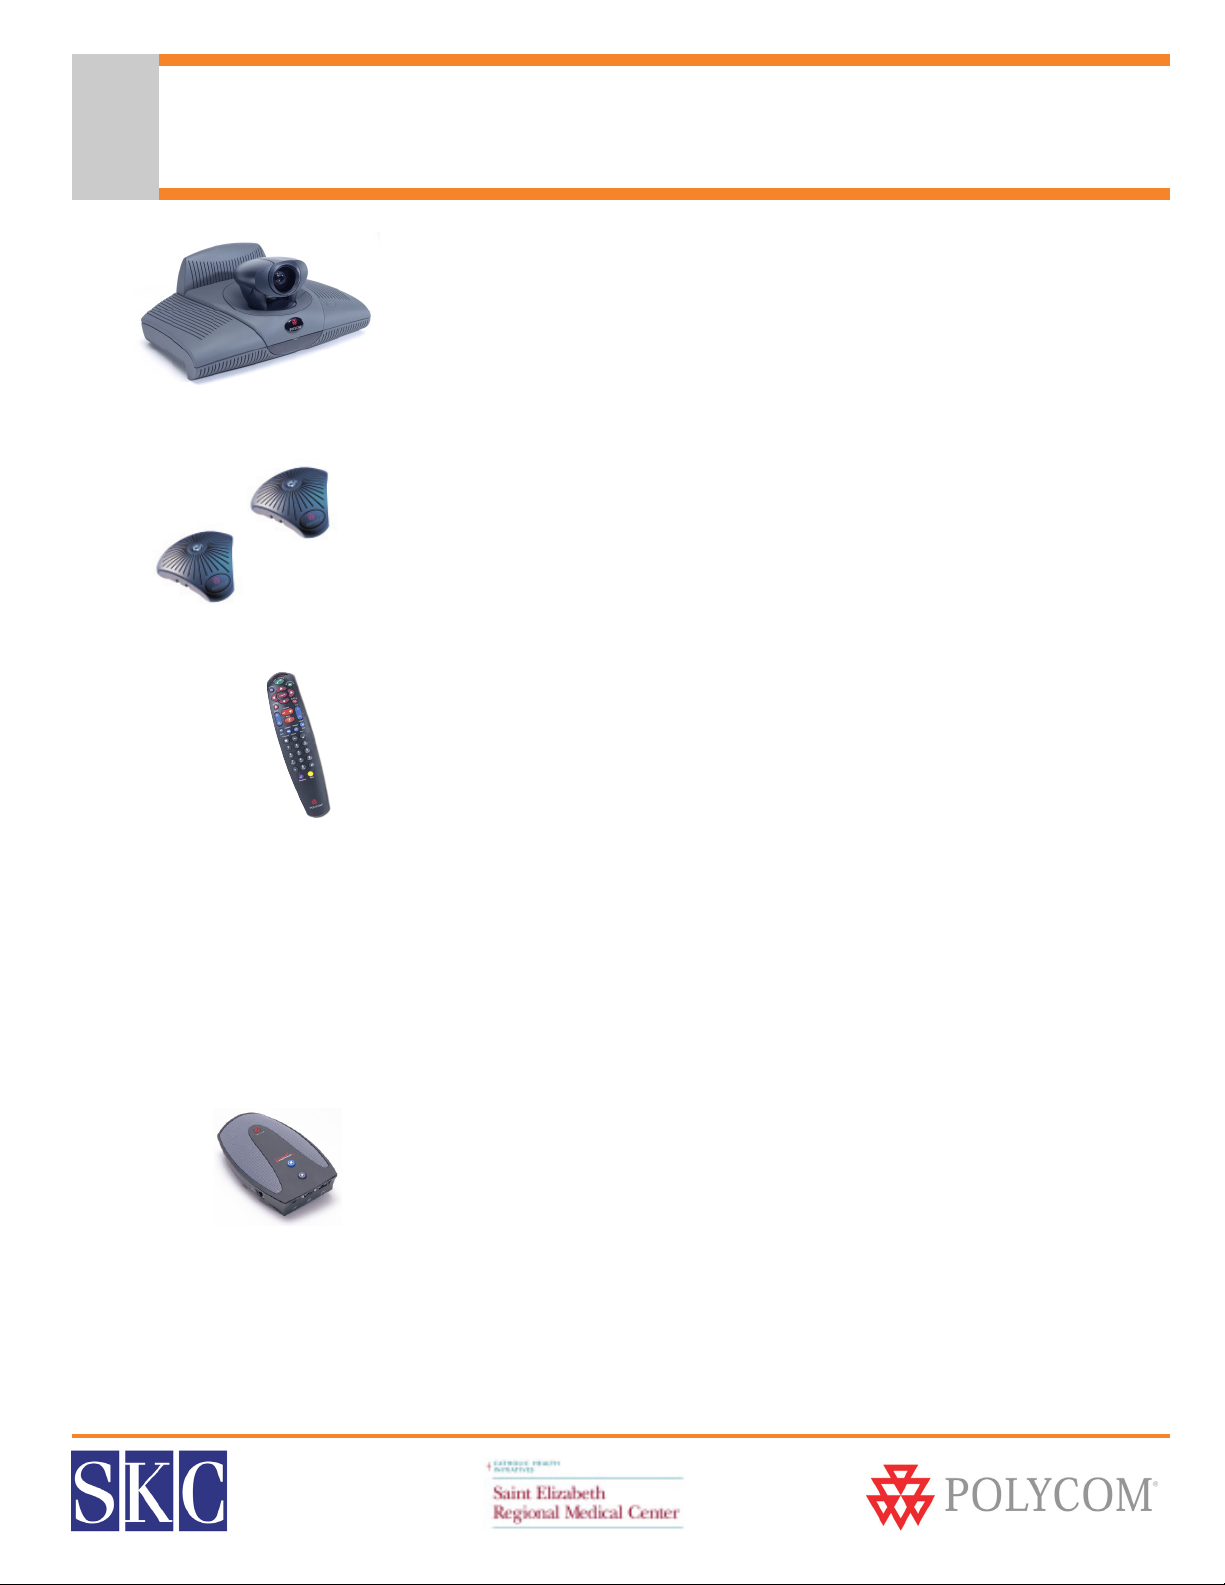
What’s Included with Your ViewStation FX
ViewStation FX Set-Top Codec
• Sits on your monitor or on a shelf above the monitor
• Built in pan/tilt/zoom camera with auto focus
ViewStation Microphones - Qty. 2
• 360° pick up
• Center push-to-mute button turns red when muted
• Connects directly to the ViewStation FX, or to Visual Concert FX
Polycom Remote Control
• Enhanced design groups color coded buttons by function
• Used to operate ViewStation FX and navigate on-screen menus
• Uses 3 - AAA batteries (included)
• See page 6 for detailed remote control diagram
Optional Accessory Items & Upgrades
Available separately, or in bundled packages. Contact your SKC Account Executive for more information.
Visual Concert FX
• Sends live PC/laptop graphics to the video conference
• Connects through the microphone port
• Mic pods attach to the Visual Concert FX
SERMC Contact: Tad Hunt (402) 219-7378 thunt@stez.org SKC Contact: (800) 882-7779 contact.us@skccom.com 5
Page 6
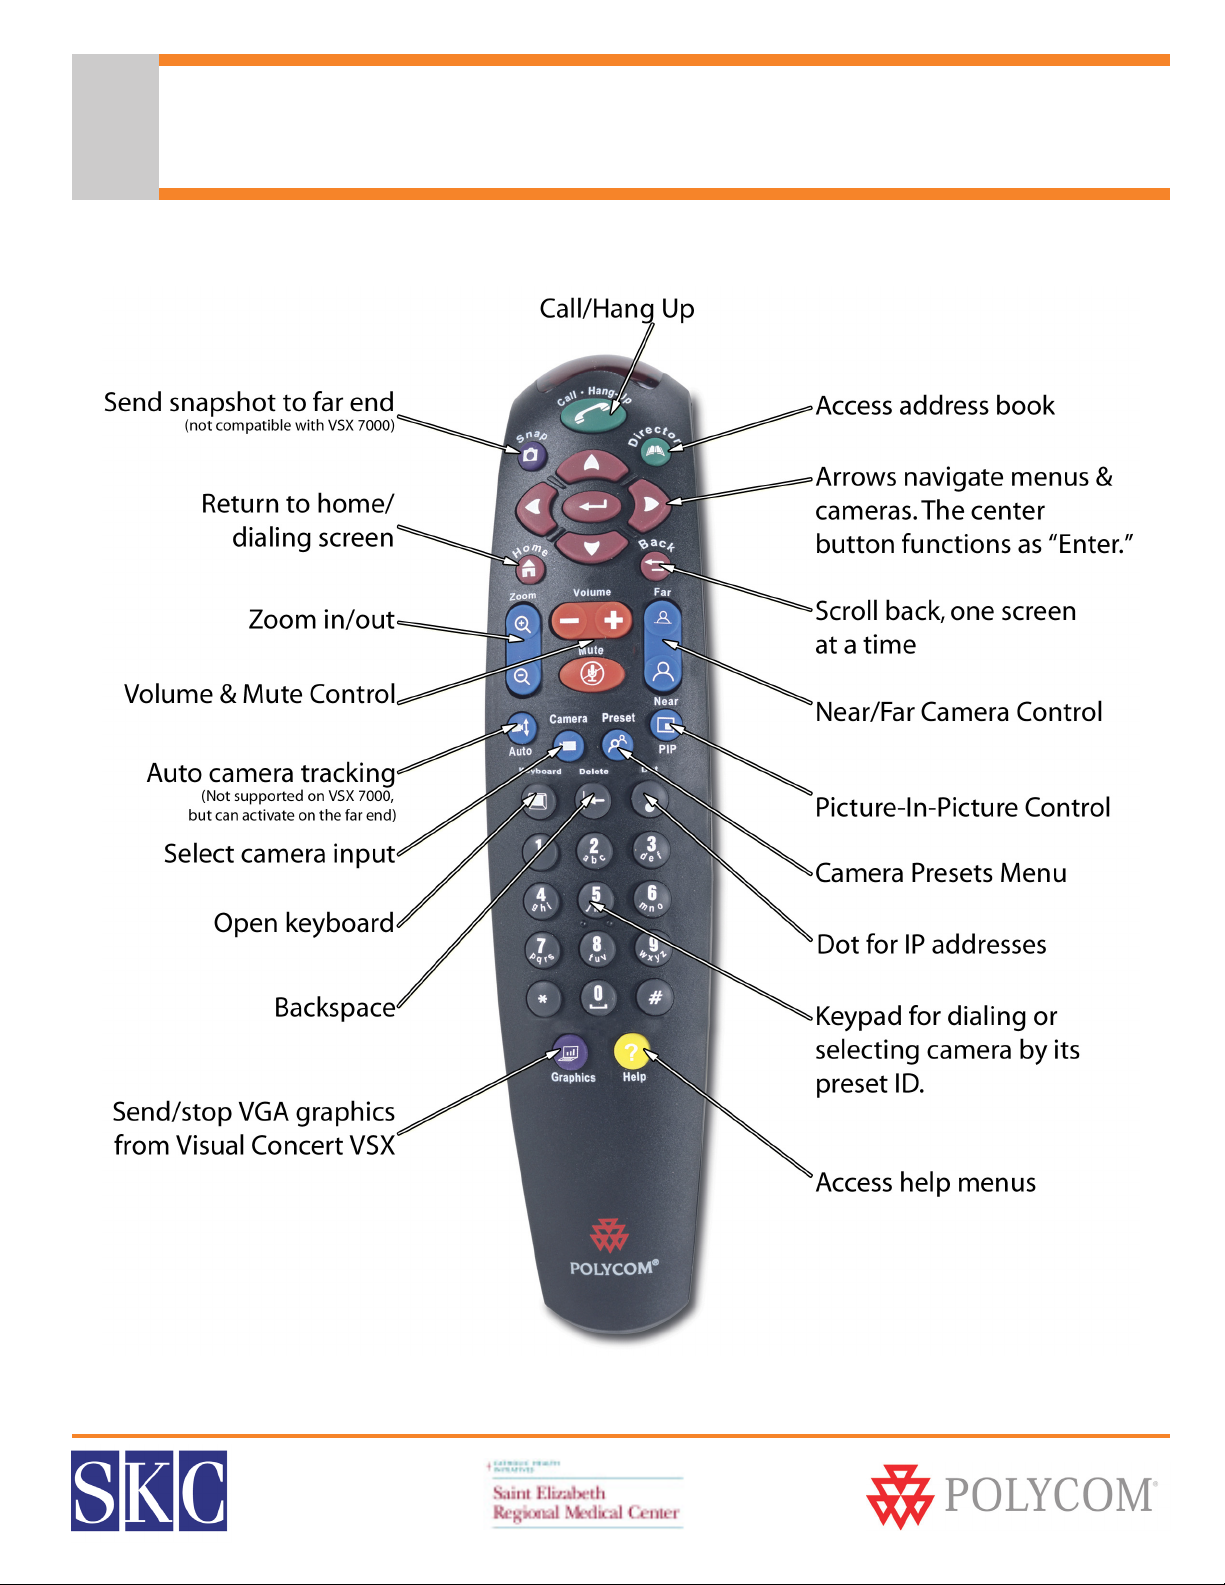
Using the Remote Control
SERMC Contact: Tad Hunt (402) 219-7378 thunt@stez.org SKC Contact: (800) 882-7779 contact.us@skccom.com 6
Page 7

Setting Up the VSX 7000
Equipment Placement
• Place the VSX 7000 codec on the monitor, or a shelf directly above the monitor. The front lip should
overlap the front of the monitor.
• Place the subwoofer near the codec. The subwoofer should not be placed in a closed cabinet or cart.
• Center the mic pod(s) on the table, at least 3’ from the system, with at least 6’ between each mic pod.
Connecting the Cables
1. Connect the VSX to the monitor with the yellow S-Video cable and/or Red/White/Yellow composite cables.
2. If you have purchased a dual monitor cable, connect it to the VSX 7000, then connect each monitor.
3. If using a second camera or document camera, connect its S-video cable to the Camera 2 input (top input).
4. If using a VCR/DVD, connect its red/white/yellow composite audio/video cable to the top RCA in/outputs.
5. Connect any RS-232 peripherals, such as a Crestron control panel, to the RS-232 port, if applicable.
6. Connect the brown mic pod cable to the VSX 7000 and the mic pod. If you purchased a People + Content
Visual Concert VSX, connect it to the mic port, then connect the mic(s) to the Visual Concert VSX.
7. Connect the black LAN cord to the orange LAN port on the VSX 7000 and your local network connection.
8. If using the Quad BRI ISDN or V.35 serial interface, connect the cables to the network.
9. Connect the subwoofer cable to the light blue port. Connect the ISDN module, if applicable, by removing
the plate on the back of the subwoofer.
10. Verify the power switch on the back of the VSX 7000 is turned to OFF (O), then connect the power cord to
the subwoofer and plug into a power outlet. Put 3-AAA batteries in the remote.
Note: Your system administrator or SKC installation technician will configure the settings for your VSX 7000.
For further configuration assistance, please reference the Administrator’s Guide or contact SKC.
SERMC Contact: Tad Hunt (402) 219-7378 thunt@stez.org SKC Contact: (800) 882-7779 contact.us@skccom.com 7
Page 8

Setting Up the ViewStation FX
Equipment Placement
• Place the ViewStation codec on the monitor, or a shelf directly above the monitor. The front lip
should overlap the front of the monitor.
• Center the mic pod(s) on the table, at least 3’ from the system, with at least 6’ between each mic pod.
Connecting the Cables
1. Connect to the monitor with the yellow S-Video cable and/or Red/White/Yellow composite cables
2. If using a second monitor, connect its S-Video cable to the Monitor 2 S-Video input
3. If using an auxiliary camera or document camera, connect it to the Camera 2 input
4. If using a VCR/DVD, connect its red/white/yellow composite audio/video cable to the top RCA in/outputs
5. Connect the brown mic pod cable to the ViewStation and the mic pod
6. Connect the gray LAN cord to the orange LAN port on the FX and your local network connection
7. If using the Quad BRI ISDN or V.35 serial interface, connect the cables to the network and to the port on the
back of the ViewStation
8. Verify the power switch on the back of the ViewStation is turned to OFF (O)
9. Connect the power supply to the codec and plug into a power outlet. Put 3-AAA batteries in the remote..
10. Turn the ViewStation and monitor on
Note: Your system administrator or SKC installation technician will configure the settings for your ViewStation.
For further assistance, please reference thePolycom User Manual that came with your system, or contact SKC.
SERMC Contact: Tad Hunt (402) 219-7378 thunt@stez.org SKC Contact: (800) 882-7779 contact.us@skccom.com 8
Page 9

Placing, Answering & Ending Video Calls
To Answer an Incoming Video Call
The system is set to auto-answer calls by default. If auto-answer is turned off:
• Your system will ring and alert you on-screen that you have an incoming call
• Press the Green Call - Hang Up button on the remote to answer the call
• Make sure your microphone is not muted
To Place a Call
• Make sure the Polycom unit and monitor(s) are powered on
• Press the Green Call - Hang Up button on the remote to place a call
• FX only - Select “Video Call”
• A dialing window will open on your monitor
• Use the numbers and arrows on the remote control to navigate the call screen
• Use the keypad to dial the IP or ISDN number of the site you are calling. When dialing an IP address,
use the dot button above the 3
• Arrow to the “Quality” window to select call speed. Use the center button as an “Enter” button
• You can specify that you are dialing IP or ISDN, or let the system auto detect the call type
• Press the Green Call - Hang Up button to dial the call
• Make sure your microphone is not muted
To Hang Up a Call
• Press the Green Call - Hang Up button on the remote control
• FX only - Select “Disconnect Video Call”
• The system will ask you to confirm that you wish to hang up
• Use the center button in the arrow pad to confirm hang up
Placing a Call Through the Address Book or Call History
• Press the Green Call - Hang Up button
• Arrow to Directory or Recent Call History and press Enter
• Arrow to the desired number, then press Enter to select it
• You can also access the address book with the green Directory button
Volume & Mute Control
• Use the orange Volume lever on the remote to adjust call volume
• To mute the mic(s), press the orange Mute button on the remote control
• The clear button in the center of the mic pod will also mute the system
• A red light appears on the mic & a muted mic icon will appear onscreen
• To unmute, press the Mute button on the remote or the mic pod
SERMC Contact: Tad Hunt (402) 219-7378 thunt@stez.org SKC Contact: (800) 882-7779 contact.us@skccom.com 9
Page 10

MultiPoint Video Calls
MultiPoint Plus Software Upgrade
The Polycom unit has a built-in 4 port MCU, which is activated with the purchase of a MultiPoint Plus
Software License Key. This license allows you to connect up to three far sites to one conference, and supports
mixed IP and ISDN endpoints. Once you have activated the MultiPoint license in your Polycom unit, it’s easy
to make multipoint calls. You can add particpants at any time during your conference and can disconnect
one, two, or all three at any time.
Adding a Site to a MultiPoint Call
• Call the first site as described on the previous page
• While in a call, press the Green Call - Hang Up button on the remote
• Select “Add Call”
• Dial the number you wish to call, or select it from the address book
• Repeat these steps until all sites are connected
Disconnecting a Site in a MulitPoint Call
While in a MultiPoint call, you can disconnect sites one at a time at any time during the call.
• Press the green Call - Hang Up button
• The disconnect screen will show you the sites connected in the call
• Press the number on the keypad, 1, 2 or 3, that corresponds with the site you want to disconnect
• The system will disconnect the site immediately; there will be no secondary confirmation
• To disconnect the entire call, press the Green Call-Hang Up button twice
Using the Address Book to Store a MultiPoint Call
• Press the Directory button on the remote, or arrow to “Directory” on the home dialing screen
• Select “New”
• Select “MultiPoint”
• Select the participants and speed for the call, and assign a name to the group
• The next time you can select the group by group name from the address book
Using an External Bridge
If you need to connect, or “bridge” more than 4 sites, or if you do not have a MultiPoint
License, you can connect your videoconference over an external bridge. SKC offers a
full range of conferencing services, and can assist you with any bridged conferences
you hold. For more information, call (888) 336-9752, or contact your Hub coordinator,
Tad Hunt, at (402) 219-7378.
SERMC Contact: Tad Hunt (402) 219-7378 thunt@stez.org SKC Contact: (800) 882-7779 contact.us@skccom.com 10
Page 11

Cameras & Camera Presets
Controlling the Near and Far End Cameras
• Press the blue Near or Far button on the right side of the remote control
• The on-screen camera icon will point towards you if controlling the near end
camera, or away from you if you are controlling the far end camera
• Use the arrows on the remote to move the camera up/down and left/right
• The blue Zoom In/Out button will zoom the image as desired
• Note: Some system administrators will restrict far end camera control
What is a Camera Preset?
The Polycom unit can store 10 local camera presets, letting you aim and zoom to specific locations with the
touch of a button. You may also set up to 10 camera presets for the far end location, if their system supports
presets and they allow remote sites to control their camera. Presets provide a quick, convenient way to move
the camera to frequently used positions in the conference room.
To Store Camera Presets
• Press the blue Near or Far button on the right side of the remote to let the system know which
camera you are going to assign presets to
• Adjust the camera position as described above
• When at the desired location, press and hold 0-9 on the keypad
• The camera location will now be assigned that preset number
• To reassign a preset, re-aim the camera, then press 0-9. This will override the existing preset.
• To clear all stored Presets, press the # key
Using Camera Presets
• To view your presets, press the blue Preset button on the remote
• During a conference, press 0-9 to move the camera to its preset position
• You can also press the preset button, then arrow to the desired number
• The camera can be controlled with the arrows and zoom button after
being moved to a preset location. This will not affect or change your
preset assignments.
Displaying a Document Camera or DVD/VCR
• If you have purchased a document camera or DVD/VCR, it can be used during
video conferences
• Press the blue camera button on the remote
• Arrow to the Document Camera or DVD/VCR icon, then press enter
• To return to the main camera, repeat the above steps, selecting the first icon
SERMC Contact: Tad Hunt (402) 219-7378 thunt@stez.org SKC Contact: (800) 882-7779 contact.us@skccom.com 11
Page 12

Sharing PC Content
Visual Concert Accessory
The Visual Concert FX and the Visual Concert VSX People +
Content accessory connects a laptop or desktop PC to the
Polycom unit, letting you share live PC graphics during a
videoconference. It can sit on your conference table or be
mounted under the table or in a cabinet. It connects to the mic
port on the back of the video codec, with the mic pod(s)
connecting to the Visual Concert accessory.
Connecting a Laptop or PC
Connect the PC to the Visual Concert cable through the PC
Audio, LAN and VGA ports on the computer. When finished
presenting, you can disconnect the cable without any harm to your computer, open documents, or open
programs.
To Send PC Content
• Make sure your laptop is set up to share from the VGA out port
• Press the purple Play button on the Visual Concert
• You can also press the purple Graphics button on the remote
• Your video feed will be replaced with live graphics from the connected PC
• Far sites will view your PC content while the Visual Concert is activated
To Stop PC Content & Return to Video Conference
• Press the blue Stop button on the Visual Concert
• You can also press the purple Graphics button on the remote
• Your video feed will resume
• The content on your PC will not be affected or changed by the Visual Concert
SERMC Contact: Tad Hunt (402) 219-7378 thunt@stez.org SKC Contact: (800) 882-7779 contact.us@skccom.com 12
Page 13

Full Screen and Picture-in-Picture Viewing
Single Monitor Video Viewing
When dialing from the home screen, you will see the near end video view in a small window. Upon
connecting, the far end will automatically switch to full-monitor view. Most users prefer to view their local
video as well, so they know what the far end is seeing during the conference. The ViewStation FX and VSX
7000 have built-in Picture-in-Picture support. The VSX 7000 also supoprts Dual Monitor Emulation (described
on the next page).
Dual Monitor Video Viewing
The VSX 7000 is equipped to connect to one S-Video monitor, but can support two with the purchase of a
Dual Monitor Accessory Cable. The FX can connect to two monitors without any additional cables.
Using Picture-In-Picture with Single Monitor Viewing
• Press the blue PIP (Picture-in-Picture) button on the remote control twice
• The PIP window will open with a yellow border around it
• While this yellow border is on, push the PIP button to move the viewing
window around the screen
• The PIP border will turn blue when it has locked into position
• The PIP window displays what your main camera is sending to the far end
• If a far site sends any type of content, you will see their content in the main part of the screen, and
the people on the far end in your PIP window
Using Picture-In-Picture (PIP) with Dual Monitor Viewing
• During video conferences, one monitor will show the near end, while the other shows the far end
• If a far site sends content, such as PC content or DVD/VCR video, the content is displayed on one
monitor, while the far end video displays on the other monitor. Local video can be viewed in PIP.
Swapping PIP Images
• Occasionally, you will want to swap the images seen in the small and large windows
• Press the blue Camera button on the remote control
• Press the Enter button to swap the images
• Repeat these steps to swap the images back
Ending Picture-in-Picture Display
• To end Picture-in-Picture display, push the blue PIP button on the remote control.
SERMC Contact: Tad Hunt (402) 219-7378 thunt@stez.org SKC Contact: (800) 882-7779 contact.us@skccom.com 13
Page 14

Dual Monitor Emulation (VSX Only)
What is Dual Monitor Emulation?
The VSX 7000 features a unique dual monitor emulation (DME)
feature, providing dual monitor-type display on a single monitor.
With DME, users will see near & far end video simulatenously on the
same monitor. During content presentations, the content will
display on a single, large viewing area, while near & far end video
appear in smaller windows.
Turning On Dual Monitor Emulation
• Push the Home button on the remote control
• Arrow to the System button in the lower left corner of the screen, and press enter
• Select “Admin Settings”
• Select “Monitors”
• Select “TV Monitors”
• Arrow to “Dual Monitor Emulation” at the bottom of the page, and press enter to check the box
• Push the Home button on the remote control again, and proceed with your video call
• If in a call, press the blue Near button to return to your video call
Turning Off Dual Monitor Emulation
• Touching the PIP button on the remote will turn off Dual Monitor Emulation
• If you prefer, repeat the steps above to access the Dual Monitor Emulation setting
• Press enter to un-check the setting
Dual Monitor Emulation Settings & Controls
• By default, two equal-sized, side-by-side viewing areas will appear
• Press the blue PIP button once, and the far end video will appear full screen (no local view)
• Press PIP a second time, and the far end will appear in a large viewing window, while the local view
will open in a small window in the corner of the monitor
• If sending or receiving Visual Concert PC graphics, the content will appear in a large
window, while the local and far video view will appear in two smaller windows.
SERMC Contact: Tad Hunt (402) 219-7378 thunt@stez.org SKC Contact: (800) 882-7779 contact.us@skccom.com 14
Page 15

Do Not Disturb Setting
About Do Not Disturb
By default, your Polycom video conferencing system will automatically accept incoming video calls. This can
be changed by your system administrator, or you can utilize the Do Not Disturb setting. When you have your
Polycom unit set to Do Not Disturb, callers will hear a busy signal when trying to connect with your system,
and you will not receive an on-screen notification of any incoming call attempts.
Turning On Do Not Disturb - VSX 7000
• Push the Home button on the remote control
• In the lower right hand corner, select the blue button with an arrow and phone
• Select “ON” to set the Do Not Disturb setting
• While Do Not Disturb is turned on, an icon will appear in the lower right corner of your monitor
• This icon will disappear when Do Not Disturb is turned off
Turning Off Do Not Disturb - VSX 7000
• Push the Home button on the remote control
• In the lower right hand corner, select the blue button with an arrow and phone
• Select “OFF” to end the Do Not Disturb session
• Callers will again be able to dial in and connect to your video conferencing system
Turning On/Off Do Not Disturb - ViewStation FX
• Push the Home button on the remote control, or the back button on older remotes
• This will open the Main Screen
• Select “System Info”
• Select “User Setup”
• Arrow to the “Auto Answer Point to Point” menu.
• The drop down menu selections are yes, no, and do not disturb.
Ye s will auto answer any incoming call
No will give you a pop-up to manually accept a call
Do Not Disturb will not alert you to any incoming calls; far
sites will get a “busy” signal
SERMC Contact: Tad Hunt (402) 219-7378 thunt@stez.org SKC Contact: (800) 882-7779 contact.us@skccom.com 15
Page 16

Tips for Effective Video Conferences
Before Your Video Call
• Take time to experiment and practice with the equipment before your conference
• Learn how to use any accessories or peripherals, such as document cameras and DVD/VCRs
• Arrange a test conference beforehand, either to another site in your company or to an SKC test site.
• Appoint a leader/facilitator for each site
• Distribute any needed materials before the meeting
During Your Video Call
• Begin on time and stay focused on the goals of your meeting
• Introduce the conference particpants as you would in a face-to-face meeting
• Allow for a brief delay as each side speaks. Double your usual wait time after asking a question.
• Maintain eye contact by looking directly at the camera
Clothes & Lighting
• Close any drapes or blinds as daylight may conflict with room lighting
• Light pastels & muted colors look best in video conferences
• Avoid bright colored clothing, solid black or red, and busy patterns (i.e. small checks or narrow stripes)
• If you wear white, a jacket or sweater will improve contrast
• Avoid clothes that match the wall color
• Be aware of any jewelry that jingles, as the noise will be picked up by the microphone(s)
• Red lipstick and dark eye shadow are not ideal in video conferences
Speak & Act Naturally
• Use natural gestures when you speak, just as you would if you were in the same room
• Speak normally, and don’t shout - the mics are designed to pick up your voice at normal volumes
• Ask questions and encourage participation by all conference attendees, near and far
• Talk a bit slower than normal to ensure you are heard clearly
• Avoid interrupting another speaker
Cameras & Microphones
• Position mics in the center of the table, and use additional mics in larger rooms
• Use mute, especially when moving the microphones
• Avoid rustling papers, tapping, and other distracting noises, especially near the mics
• Be aware of live microphones at all times. Even if you think you are muted, act as if you’re not
• Limit side conversations - the mics pick up even quiet conversations and whispering
• Fill the screen with the people in the conference, rather than tables, chairs, walls, or floor space
• Set and use your camera presets for quick, easy camera placement
SERMC Contact: Tad Hunt (402) 219-7378 thunt@stez.org SKC Contact: (800) 882-7779 contact.us@skccom.com 16
Page 17

Tips for Effective Video Conferences
Learn the Videoconferencing System
There’s no reason for you to feel intimidated - if you can use a TV remote control, you can use a
videoconferencing unit! Take time to experiment and practice with the videoconferencing system before
your conference - especially if you plan to use peripherals such as a document camera, computer hookup, or
other devices. If you have associates who are interested in learning the system, solicit their help. The goal is
for the system to appear as transparent as possible so you and your audience can focus on the subject, not the
technology.
Keep Eye Contact
To help remote learners (associates) participate and feel included, relate directly to them by looking directly
into the video camera. If you do not look into the video camera, associates will feel as though they are just
watching - not participating - in the class. Envision the video camera as one of the associates in the class.
During meetings, don’t turn away from the camera and begin a private conversation. This can make your
remote participants feel just that: REMOTE!
Show Interest in All Participants
Since videoconferencing participants are spread across distances, facilitators must make a point of
communicating with remote partcipants by name and/or location. Keep a pencil and paper handy and make
a “participant map” using the names/location of your participants. Most people feel awkward talking to a TV
monitor and will lapse into passivity if not specifically addressed. Two-way compressed video systems usually
exhibit an audio delay, so double your usual wait time after asking a question or soliciting comments. Lastly,
bring particpants into each interaction by repeating every question or comment made, ensuring that the
other sites can hear.
Dress Appropriately
Wear solid-colored clothing rather than bold, complex patterns. Stripes or busy patterns can destroy picture
clarity as the camera tries to constantly adjust to the movement of your clothing. Bright red can “bleed” and
video quality may suffer. Take a hint from professional TV and photography and notice the colors and
patterns worn by TV news announcers. If you will be signing as part of your videoconference with the hearing
impaired, it is likely your hands will be using your clothing as a background, which adds yet another element.
Remembebr too that dangly earrings, bracelets, and necklaces can be heard over the microphone or can add
glare.
Move and Gesture Slowly and Smoothly
Move and gesture normally, but avoid swaying, rocking, or pacing. Compressed video cannot transmit rapid
movements without some loss of picture quality. If you like to walk around, go ahead, but make sure you
know the parameters of the camera range. You can tape off your spot so you know exactly how far you can go.
If you tend to walk with your hands flying about, you can zoom the camera in close enough so that your
hands aren’t in the shot.
SERMC Contact: Tad Hunt (402) 219-7378 thunt@stez.org SKC Contact: (800) 882-7779 contact.us@skccom.com 17
Page 18

Tips for Effective Video Conferences
Maintain Appropriate On-Camera Positioning
Position yourself on-camera according to the elbows and wrists rule: when you stretch out your arms, the
edge of the screen falls between your elbows and wrists. Use close-up shots judiciously, especially when
participants are not used to videoconferencing. It is important that partcipants see you or another speaker’s
facial expressions, but remember that the camera is sensitive to movement and will exaggerate blinking eyes,
moving hands, or shifting in chairs. In small group conferencing, try to include all participants in the shot. Set
up camera presets so that you can zoom in on the main speaker or pan to each person when needed. In a
large group, you may want to set presets for various areas within the room as well as a group shot and a closeup of the facilitator. If you plan to have a formal Question and Answer segment, use tape or designate specific
seats and make a camera preset for them.
Demonstrate Enthusiasm Toward the Subject Matter
Videoconferencing participants will find it difficult to pay attention if the subject is not presented in an
interesting way or if the facilitator is tense or bored. Get beyond the “talking head” model and make the
session as interactive as possible. Start off by asking questions that promote a group response. Use a
participant map to specifically address your assosciates or other participants. After the first few minutes, they
will forget the technology and focus on the subject.
Speak in a Strong, Clear Voice
Take advantage of the system to communicate naturally, using inflection and body language. It’s not
necessary to yell. It is even more important than usual to wait for the other person to finish speaking. Things
can get really confusing if there are multiple participants all speaking at once. You may need a facilitator or
some pre-designated plan for controlling who has the microphone. Other particpants should mute their local
microphones when they don’t expect to be speaking. Don’t forget that remote participants can still hear
everything until the call is completely disconnected!
SERMC Contact: Tad Hunt (402) 219-7378 thunt@stez.org SKC Contact: (800) 882-7779 contact.us@skccom.com 18
 Loading...