

Pistola
vaporizzatrice
PISTOLA VAPORIZADORA
PISTOLET DE VAPORISATION
DAMPFPISTOLE
STEAM PISTOL
STOOMPISTOOL
PISTOLA DE VAPORIZAÇÃO
R

EEEENNNNGGGGLLLLIIIISSSSHH
HH
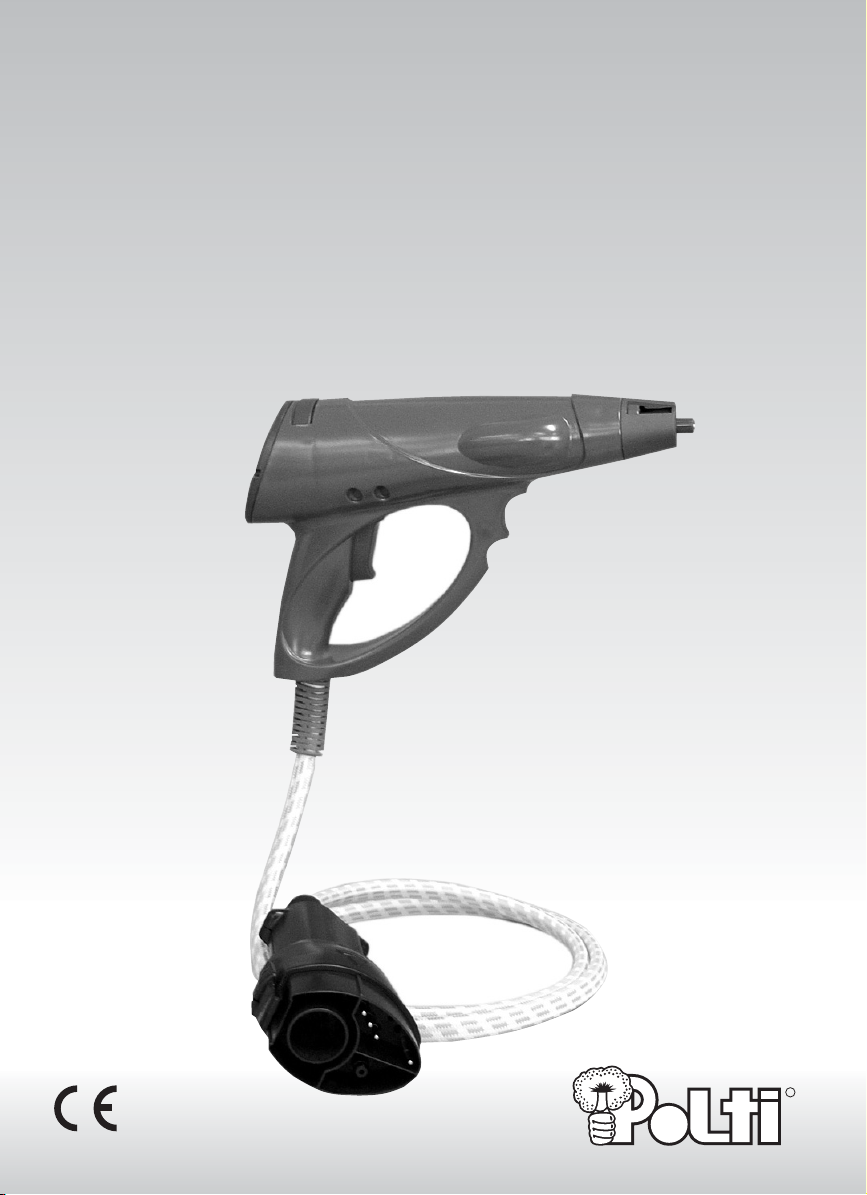
B2) Monobloc plug
B3) Locking button of the monobloc plug
J1) Steam request button
J2) Ferrule
ACCESSORY
J3) Curtain Freshener Accessory
J4) Clothes deodorising accessory
J5) Round bristled brush
J6) Bristled brush for tile grout
J7) Curved Lance
Before using your steam gun, carefully read the
usage instructions of Vaporetto Lecoaspira
UUUUSSSSIIIINNNNGGGG TTTTHHHHEEEE SSSSTTTTEEEEAAAAMMMM PPPPIIIISSSSTTTTOOOOLL
LL
• Open the flap of the built-in socket (9); fit the
monobloc plug (B2) by pushing it, without pressing the
button, until you hear the click of the locking mechanism, then make sure it is well locked (fig.A).
•To disconnect the monobloc plug (B2) from the appliance, push the button (B3) and pull the monobloc so
as to separate it from the appliance (fig. B).
• Attach the accessory recommended for the type of
surface to clean as indicated in paragraph on “PRACTICAL ADVICE FOR USING THE ACCESSORIES”
•Wait until the pressure light of Vaporetto Lecoaspira
(4) comes on. Press the steam button (J1) on the
steam pistol to release the steam. Release the button
to stop the steam.
NOTE: The first time the appliance is operated some
drops of water may come out with the steam. We recommend that you point the steam jet onto a cloth.
UUUUSSSSIIIINNNNGGGG TTTTHHHHEEEE AAAACCCCCCCCEEEESSSSSSSSOOOORRRRIIIIEEEESS
SS
You may fit different types of accessories onto the
steam pistol that are best suited for cleaning the type of
surface.
2
EE
EE
NN
NN
GG
GG
LL
LL
II
II
SS
SS
HH
HH
PISTOLA VAPORIZZATRICE
Fig. 6
Fig. 7
Fig. 5
Fig. 3
Fig. 4
Fig. 2Fig. 1
J4
J5
J6
J7
J3
B2
J1
J2
B3
Fig. A Fig. B
R

To properly attach the accessories, proceed as follows:
• Couple the tooth at the base of the accessories inside
the seat on the accessory attachment ferrule (J2).
Next, turn it in the direction of the required angle until
it is completely fastened (Fig. 1).
The accessories get very hot during use, so take some
precautionary measure before taking them off. Use a
kitchen glove, or let them cool first.
PPPPrrrraaaaccccttttiiiiccccaaaallll aaaaddddvvvviiiicccceeee ffffoooorrrr uuuussssiiiinnnngggg tttthhhheeee aaaacccccccceeeessssssssoooorrrriiiieeeess
ss
Curtain freshener accessory (J3) (Fig. 3)
• Specially designed to iron curtains vertically without
removing them.
How to use it: Move the accessory downwards in order
to iron the curtains and to eliminate creases or smells,
the useful sponge attached to the accessory will absorbe any excess drops of steam.
Adjust the strength of the steam jet according to the
kind of fabric to be ironed.
To prevent the sponge wetting the curtains with absorbed water, simply remove the sponge and sqeeze it
out, then replace the sponge by reattaching to the accessory with velcro strips and go on with ironing.
Clothes deodorising accessory (J4) (Fig. 4)
• Recommended for removing crumbs, dandruff, animal
hair and pilling from sweaters, trousers, jackets and
coats and from other textile surfaces. To freshen and
deodorise clothes.
How to use it: run the accessory upward over the surface to eliminate all particles on it. Steam the item to
eliminate wrinkles and deodorise it.
Round bristle brush (J5) (Fig. 5)
• Recommended for removing hardened dirt on hard to
reach surfaces, such as corners, burners, sanitary fixtures and inside the car. The different colours let you
use the brush on the same surface ensuring perfect
hygiene.
Bristled brush for tile grout (J6) (Fig. 6)
• Recommended for removing stubborn dirt from very
narrow areas, such as the grooves between tiles, door
jambs, roller shutters, radiators, and so on.
Curved lance (J7) (Fig. 7)
• Recommended for sanitising hidden areas that are
hard to reach with the other accessories. It lets you
obtain a more concentrated jet, thanks to its particular
shape.
To properly attach the curved lance (J7), proceed
as follows:
• Separate the accessory attachment ferrule (J2) from
the body of the appliance by turning it in an anticlockwise direction (Fig. 2).
• Attach the ferrule to the tube in the direction of the desired angle and fasten it by doing the operation in the
reverse order to separate the ferrule (J2) from the pistol.
Polti S.p.A. shall not be held liable for accidents
caused by using the STEAM PISTOL in a manner
not conforming to these instructions and the instructions provided for using Vaporetto
Lecoaspira.
3
EE
EE
NN
NN
GG
GG
LL
LL
II
II
SS
SS
HH
HH
PISTOLA VAPORIZZATRICE
 Loading...