

Polhemus G4 Radio, G4-RF Installation Manual

G
4
Radio Installation Manual
Polhemus
40 Hercules Drive
PO Box 560
Colchester, VT 05446-0560
Tel: 802-655-3159
Fax: 802-655-1439
URM10PH234
REV A
AUG 2010
Introduction
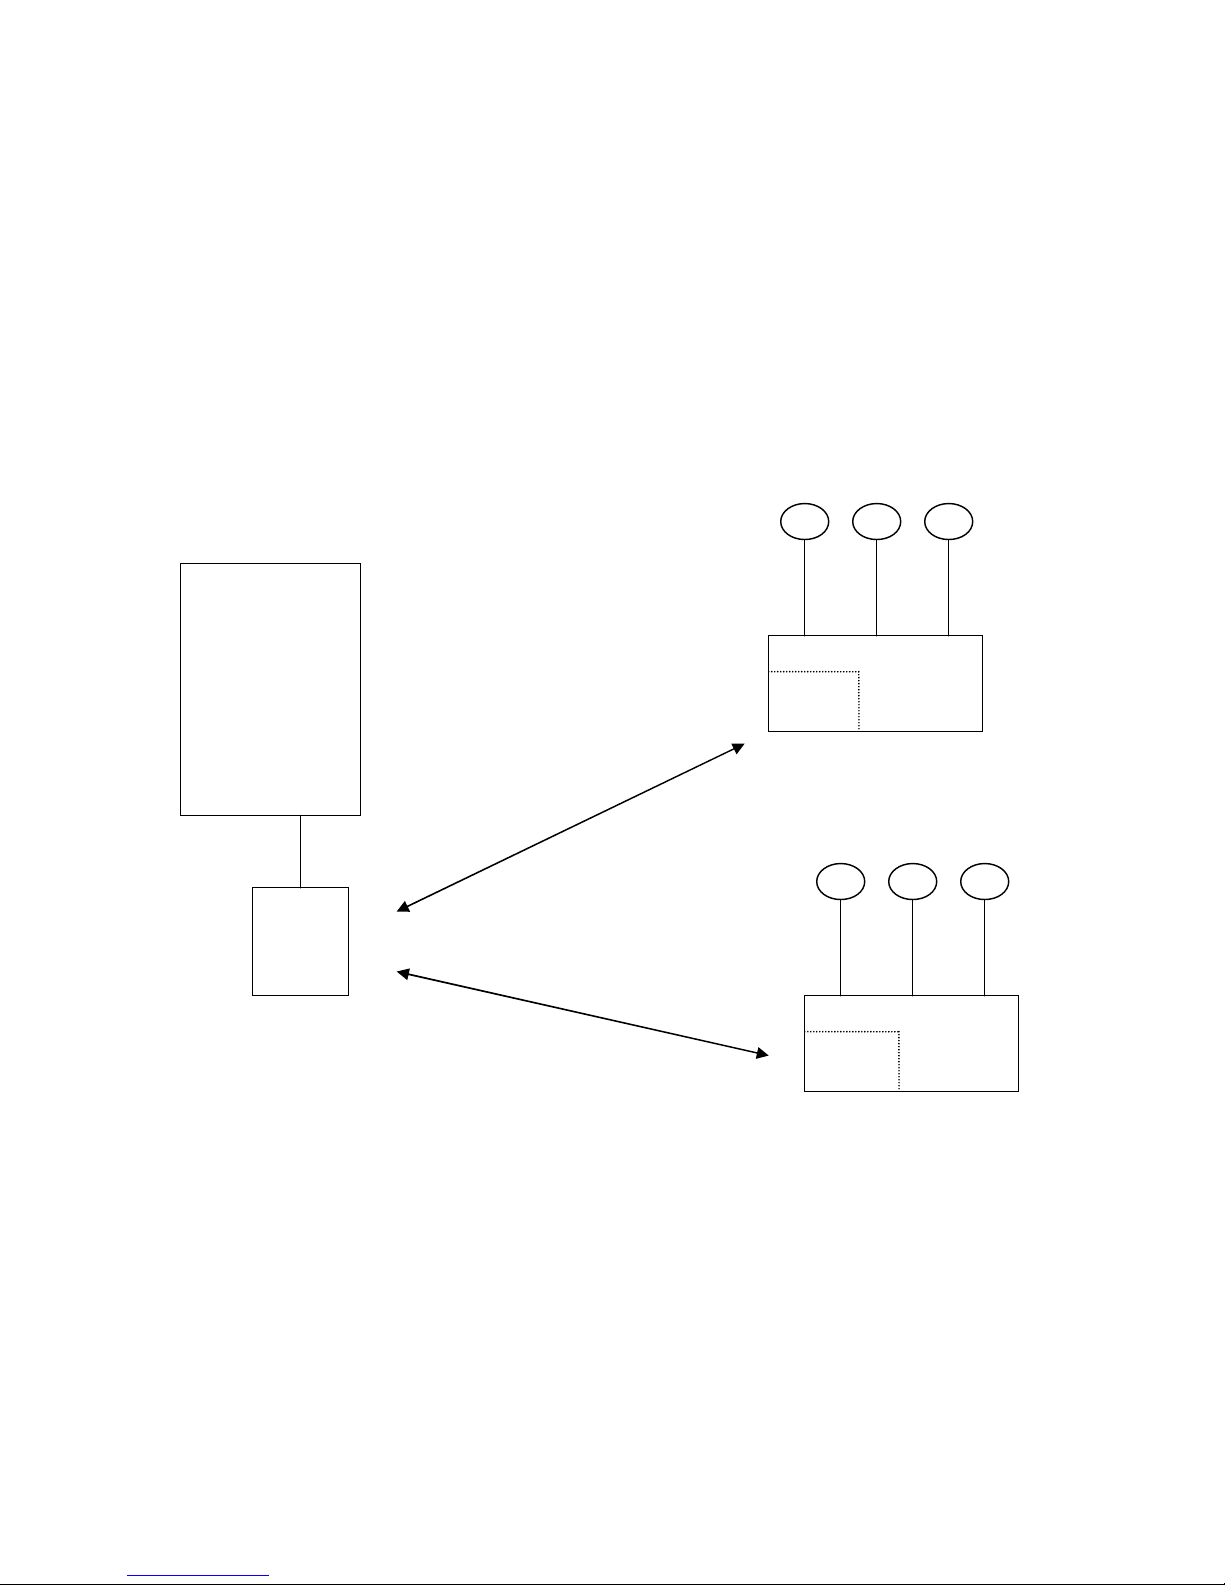
The G4 radio link is a 2.4 GHz Spread Spectrum system consisting of one or more data
collecting HUB devices that each have their own RF transceiver module and a common
USB dongle radio module that attaches to a host computer. The user can use Polhemus
provided software to operate the system or develop their own custom software
applications using Polhemus provided SDK for Windows or LINUX. A simple block
diagram of the system is shown below.
Magnetic Sensors
Host
Computer
RF
Module
USB
Dongle
2.4
GHz
RF link
G4 system
G4
RF
Module
HUB
Magnetic Sensors
G4
RF
Module
HUB
The user is required to do a one time set-up to associate the USB dongle with the HUB
devices. Once that is done the system connects automatically and there is no need for
user intervention to operate the RF system.
URM10PH234 REV A AUG 20101
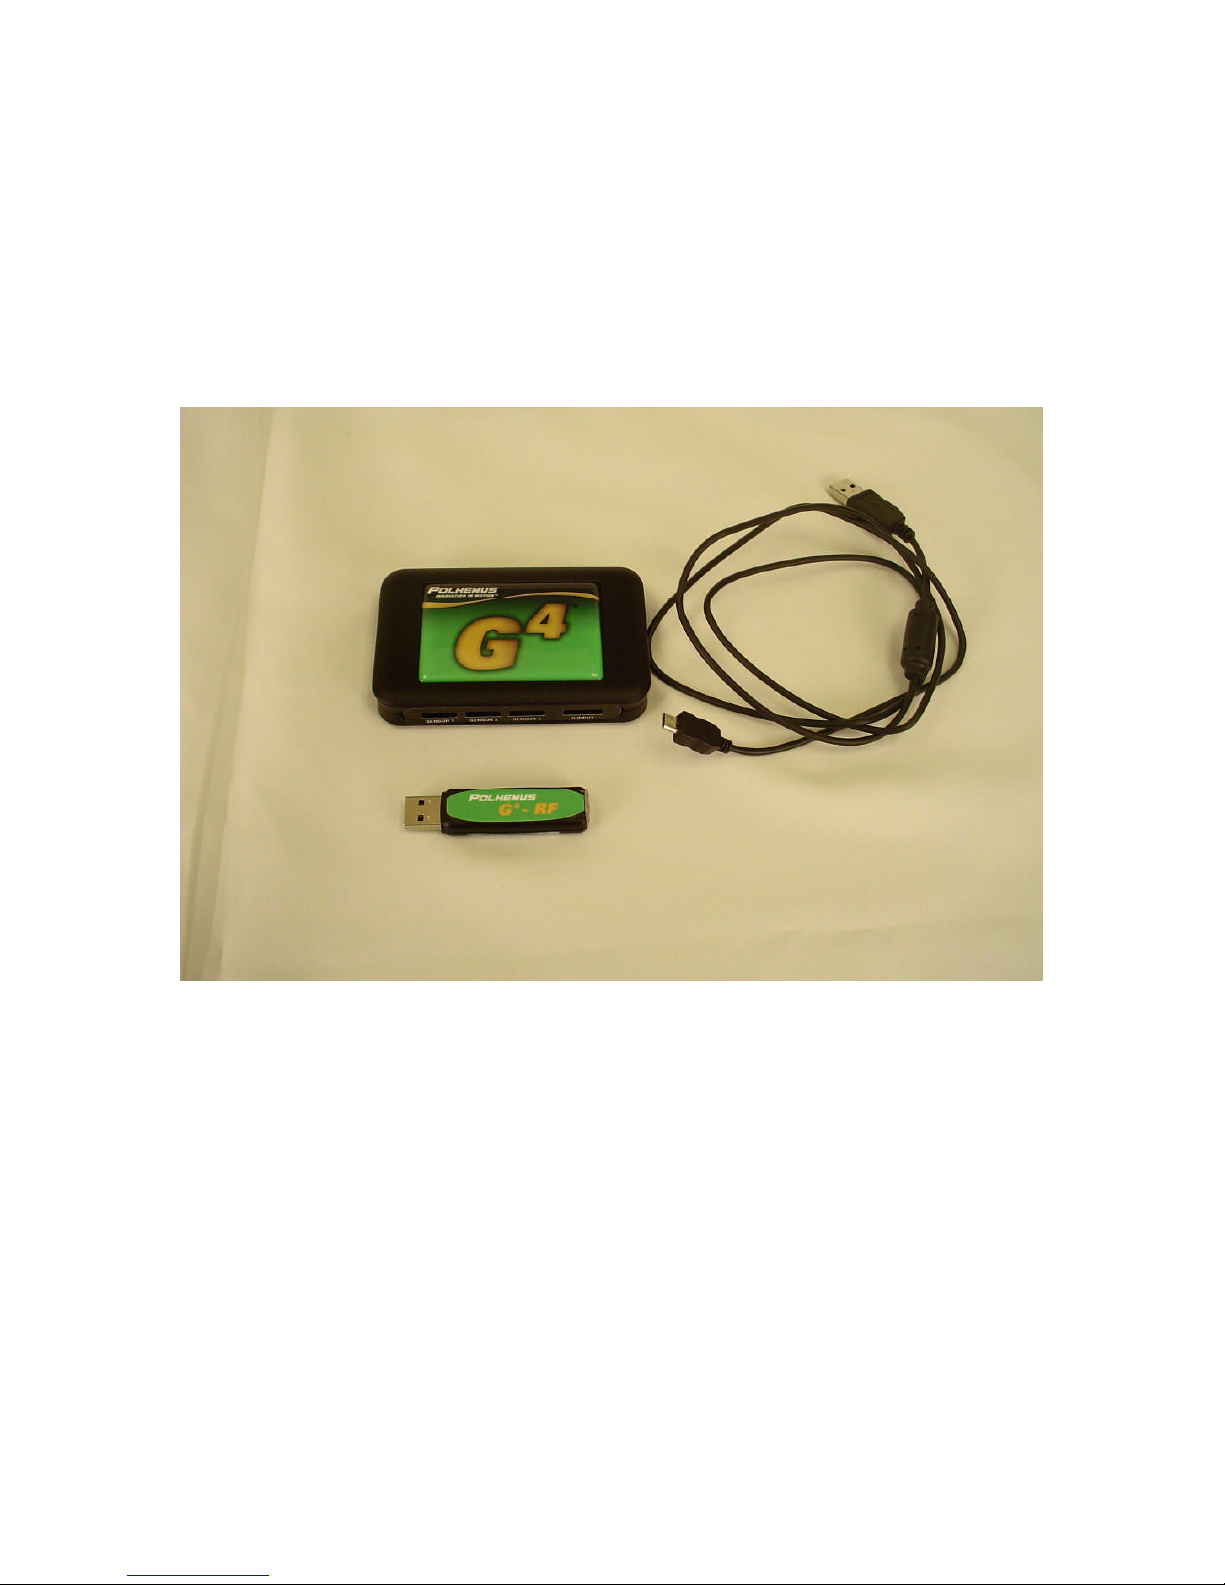
Preparing the system
To prepare the system you will need the Hub or Hubs, the USB dongle and a USB cable
(provided with the system). You must also have a host computer available with the
configuration software provided on the CD that came with the G4 system loaded on the
host computer. When you place the CD in the host computer the installation program
will automatically run. Follow the instructions to load all the required software
components.
The diagram below shows the connection ports, switch and LED indicators on the Hub.
All that is required for the RF setup is a USB cable. There is no need to have any sensors
plugged in for the initial setup. The battery in the hub is charged via the USB cable so
allow at least 30 minutes of charging time to ensure you can complete the set-up and test
the system before needing to charge the battery again. The G4 Hub had 3 sensor ports for
connecting magnetic sensing devices. It has a digital I/O port that is user configurable for
us to 8 separate digital inputs. A USB connection is used for charging the Hub battery
and configuring the HUB. It can also be used in areas of heavy RF interference to bypass
the RF link and send the data directly to the USB port. Four blue indicators are used to
display the RF signal strength.
URM10PH234 REV A AUG 20102
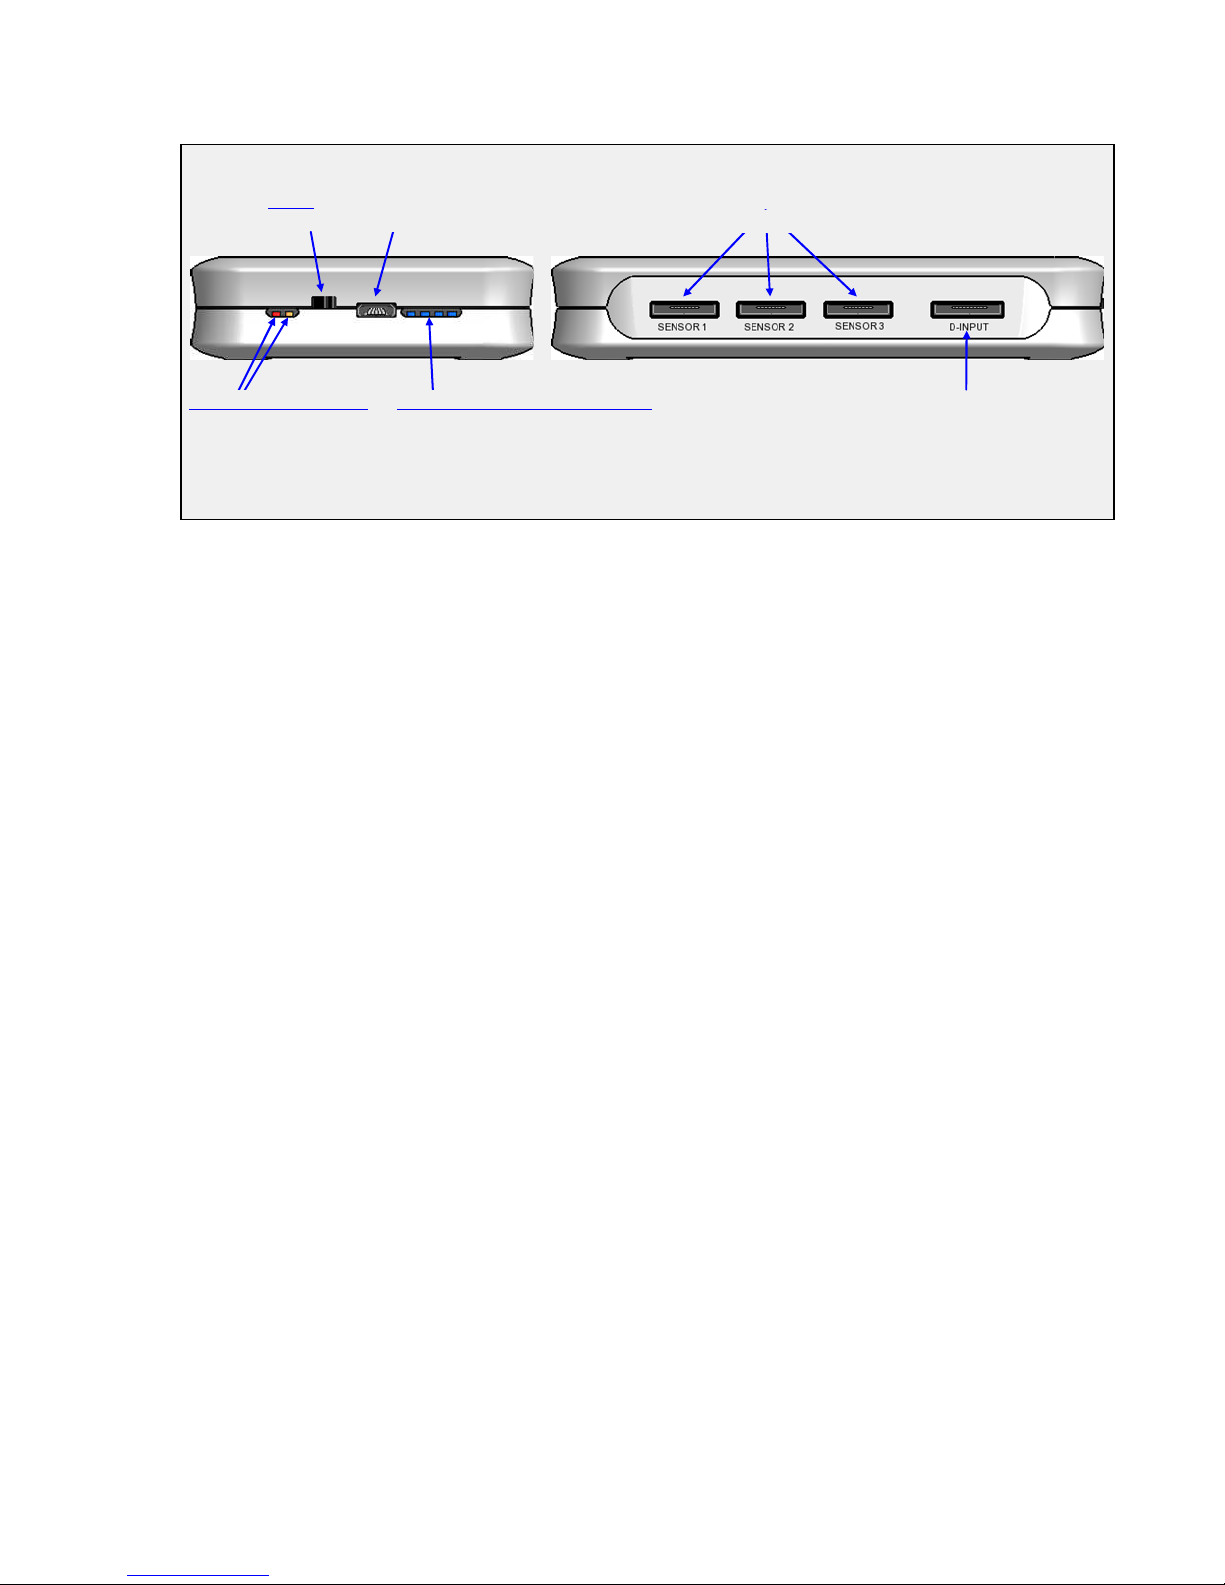
Power
OFFON
4 Lights = Strongest
Red = Low
USB
Sensor Ports
Digital Accessory Port
T
OP
S
IDE
Battery Status Indicators
Orange = Charging
RF Signal Strength Indicators (Blue)
Strobing = Searching
The next sections will describe how to set up the radio sytem. Polhemus has provided
configuration software that walks the user thhough the set up process step by step. Two
software versions are available: one for Windows™ and one for LINUX™.
URM10PH234 REV A AUG 20103
Windows Setup
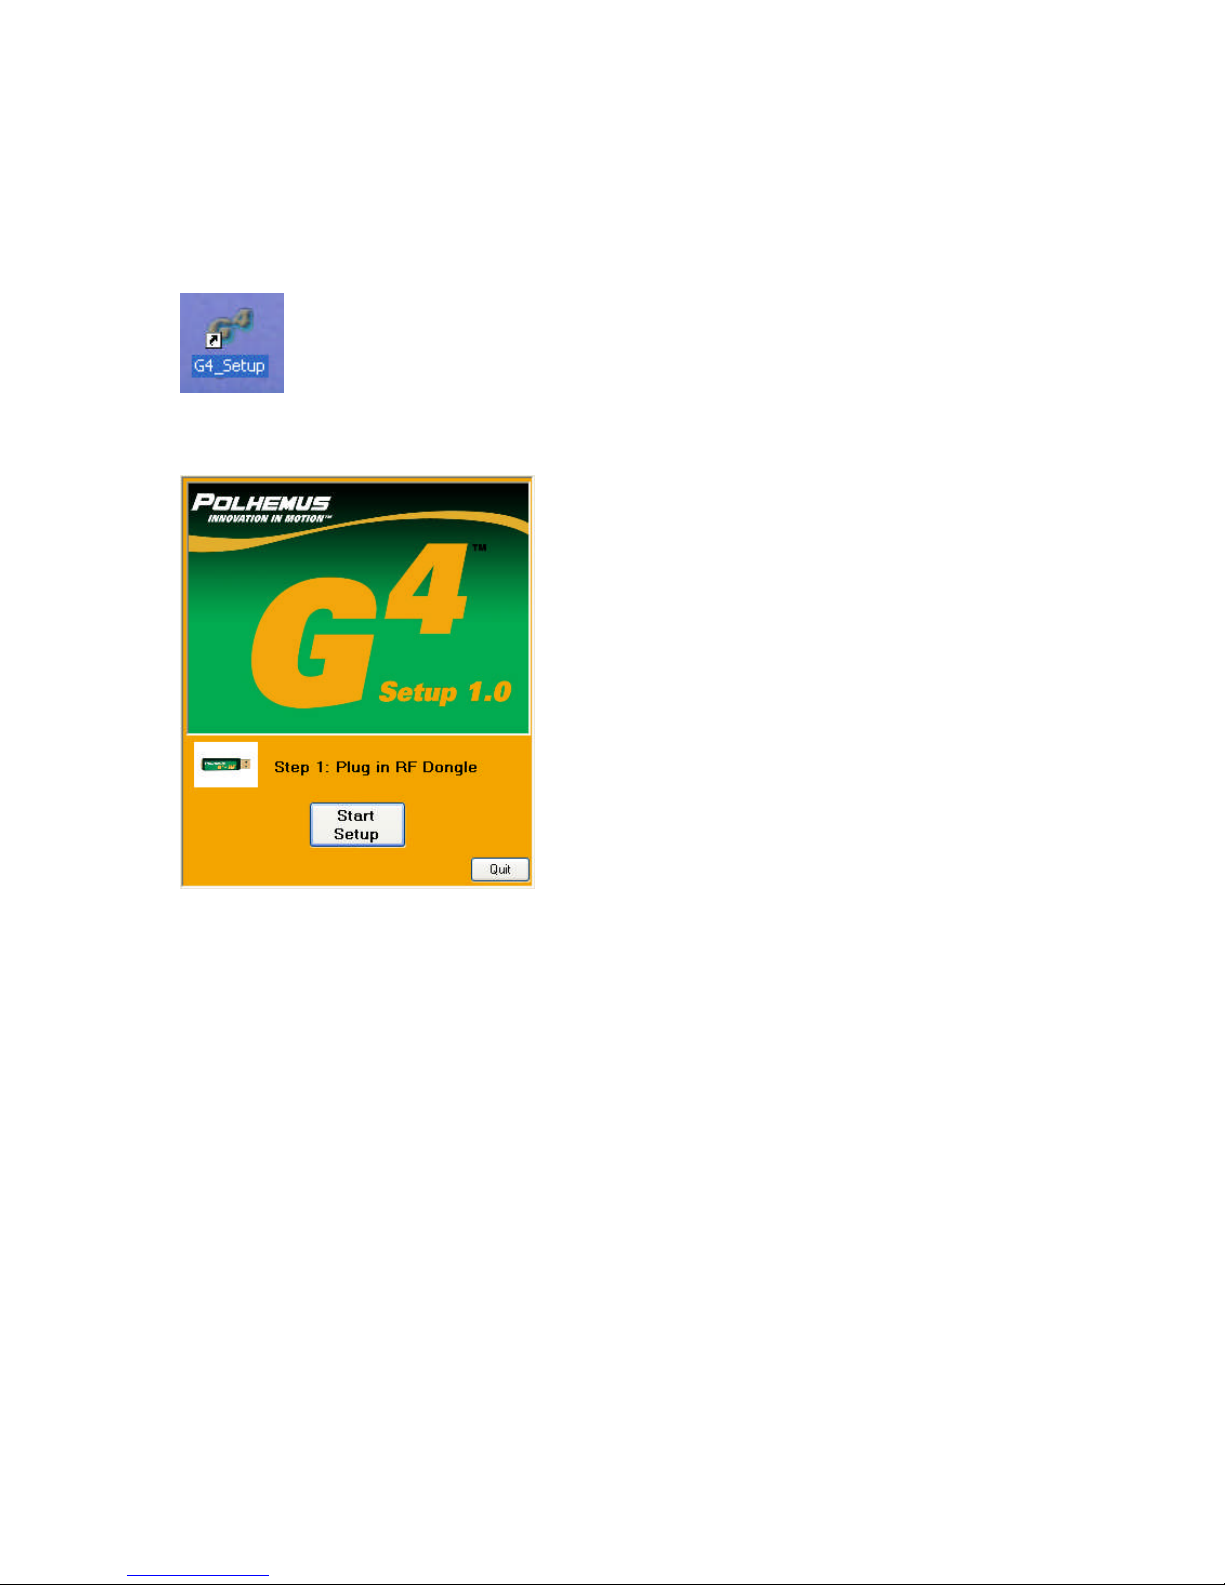
Install the G4 host software from the CD provided with the system. After installation
click on the G4 configuration icon located on the desk top.
The following screen will appear:
Plug in the RF dongle to an available USB port on the host computer. The found new
hardware ICON will appear and a request for you to load the USB driver. Click the
button that loads the drivers automatically. Press the Start Setup button. The following
screen will appear. Note in this screen example a generic serial number is shown. The
factory serial number will be shown on an actual setup.
URM10PH234 REV A AUG 20104
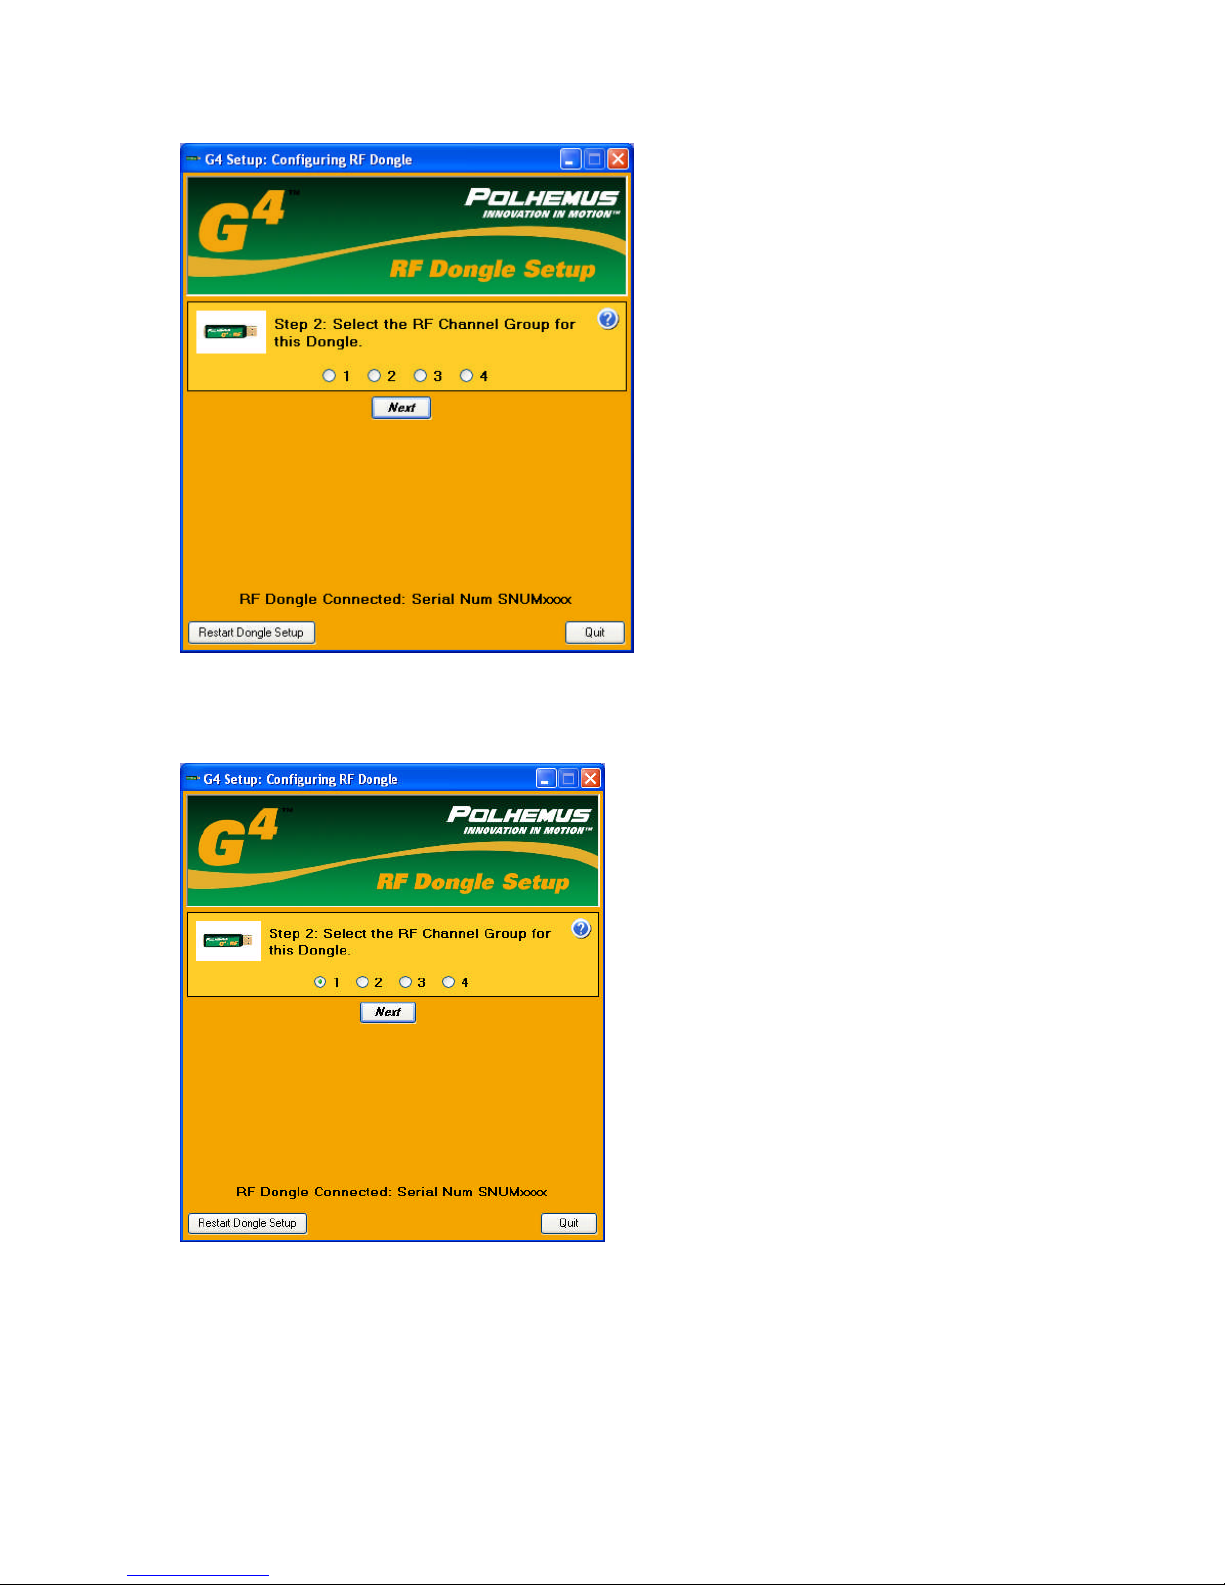
You have your choice of one of four RF channel groups. This allows the user to attempt
different RF channels in case of interference. In this case channel 1 is chosen.
Click on the next button. The follow screen appears
URM10PH234 REV A AUG 20105
 Loading...