

Page 1
Page 2

1 THE BASICS ....................................................................... 7
1.1 OVERVIEW ........................................................................ 7
1.2 SAFETY PRECAUTIONS .................................................... 7
2 OPERATION ...................................................................... 15
2.1 ICONS ............................................................................. 15
2.2 KEY EXPLANATIONS ...................................................... 16
2.3 USING THE TOUCHSCREEN ............................................ 17
2.4 CONNECTING TO THE NETWORK ................................... 18
2.4.1 Inserting and removing the SIM card .......................... 18
2.4.2 Turning your phone on and off .................................... 18
2.4.3 Unlocking the SIM card ............................................... 19
2.4.4 Unlocking your phone ................................................. 20
2.4.5 Connecting to the network ........................................... 20
2.4.6 Making a call ............................................................... 20
2.4.7 Making a domestic call ................................................ 21
2.4.8 Making an international call ....................................... 21
2.4.9 Making a call from the list ........................................... 21
2.4.10 Making an emergency call ......................................... 22
2.4.11 Call menu ................................................................... 22
3 FUNCTIONAL MENU ....................................................... 23
3.1 BACKUP AND RESTORE .................................................. 23
3.2 BROWSER ........................................................................ 23
3.3 CALCULATOR .................................................................. 23
3.4 CALENDAR ...................................................................... 24
-2-
Page 3

3.5 CAMERA .......................................................................... 24
3.6 CLOCK ............................................................................. 24
3.7 DOWNLOADS ................................................................... 24
3.8 EMAIL............................................................................... 24
3.9 FILE MANAGER ............................................................... 25
4.0 FM RADIO ......................................................................... 25
4.1 GALLERY............................................................................ 25
4.2 GMAIL .............................................................................. 26
4.3 LOCK ............................................................................... 26
4.4 MAPS ............................................................................... 26
4.5 MESSAGING ..................................................................... 26
4.6 MUSIC .............................................................................. 27
4.7 PEOPLE ........................................................................... 27
4.8 PHONE ........................................................................... 28
4.9 PLAY STORE .................................................................. 28
5.0 SEARCH ........................................................................... 28
5.1 SETTINGS ........................................................................ 28
5.2 SIM TOOLKIT ................................................................... 30
5.3 SOUND RECORDER ......................................................... 30
5.4 TODO ................................................................................. 31
5.5 TORCH ............................................................................. 31
5.6 VIDEOS ............................................................................... 31
6 TEXT INPUT ....................................................................... 31
7 SD CARD INTRODUCTION ............................................ 32
-3-
Page 4

8 FAQS AND SOLUTIONS ................................................. 33
9 CAUTION ............................................................................. 37
1 COMMENCER ................................................................... 45
1.1 PRESENTATION .................................................................. 45
1.2 CONSIGNES DE SECURITE ................................................. 45
2 MODE D'EMPLOI ............................................................. 54
2.1 ICONES ............................................................................... 55
2.2 DESCRIPTION DES TOUCHES ......................................... 56
2.3 UTILISATION DE L'ECRAN TACTILE ................................ 57
2.4 CONNEXION AU RESEAU .................................................... 57
2.4.1 INSERER ET RETIRER LA CARTE SIM ............................ 57
2.4.2 ALLUMER ET ETEINDRE VOTRE TELEPHONE ................. 58
2.4.3 DEVERROUILLER LA CARTE SIM ................................... 59
2.4.4 DEVERROUILLER VOTRE TELEPHONE ........................... 59
2.4.5 CONNEXION AU RESEAU ................................................ 60
2.4.6 PASSER UN APPEL .......................................................... 60
2.4.7 PASSER UN APPEL DOMESTIQUE ................................... 60
2.4.8 PASSER UN APPEL INTERNATIONAL ............................... 61
2.4.9 PASSER UN APPEL DEPUIS UNE LISTE ........................... 61
2.4.10 PASSER UN APPEL D'URGENCE ................................... 62
2.4.11 OPTIONS EN APPEL ................................ ...................... 62
3 MENU UTILITAIRES........................................................... 63
3.1 SAUVEGARDE ET RESTAURATION ..................................... 63
-4-
Page 5

3.2 NAVIGATEUR .................................................................... 63
3.3 CALCULATRICE ............................................................... 63
3.4 AGENDA ........................................................................... 64
3.5 APPAREIL PHOTO ............................................................ 64
3.6 HORLOGE ........................................................................ 64
3.7 TELECHARGEMENTS ....................................................... 64
3.8 EMAIL ................................................................................. 65
3.9 GESTIONNAIRE DE FICHIERS ............................................. 65
4.0 RADIO FM .......................................................................... 65
4.1 GALERIE ............................................................................ 66
4.2 GMAIL ................................................................................ 66
4.3 VERROUILLAGE ................................................................. 66
4.4 MAPS ............................................................................... 66
4.5 MESSAGERIE ................................................................... 66
4.6 MUSIQUE ......................................................................... 67
4.7 CONTACTS ....................................................................... 67
4.8 TELEPHONE ..................................................................... 68
4.9 PLAY STORE .................................................................. 69
5.0. RECHERCHER ................................................................. 69
5.1 PARAMETRES .................................................................. 69
5.2 BOITE D'OUTILS SIM ......................................................... 71
5.3 DICTAPHONE ...................................................................... 71
5.4 TACHES .............................................................................. 71
5.5 LAMPE TORCHE ............................................................... 72
5.6 VIDEOS ............................................................................... 72
6 SAISIE DE TEXTE ............................................................... 72
-5-
Page 6

7 UTILISATION D'UNE CARTE SD .......................................... 73
8 FAQ ET SOLUTIONS ......................................................... 74
9 DÉCLARATION DE CONFORMITÉ ......................................... 78
-6-
Page 7

1 The Basics
1.1 Overview
Thank you for choosing the GSM/GPRS digital mobile phone.
After reading this guide you will be able to fully master the use of your
phone and appreciate all its functions and ease of use.
Not only does the smartphone provide you with basic call
functions such as call Register, but also with many practical functions
and services, to improve the time you spend working and playing.
The color screen mobile phone complies with the GSM/GPRS
technology and has been approved by certification authorities both
domestically and abroad.
The availability of some services and features described in this
manual depends on the network and your subscription. Therefore,
some menu items may not be available in your phone. The shortcuts to
menus and features may also vary from phone to phone.
Our company reserves the right to revise this manual content
without prior notice.
1.2 Safety precautions
Read these safety instructions before using your device and store them
for possible future reference
BATTERY, CHARGER, AND OTHER ACCESSORIES
-7-
Page 8

- If the charger cord is damaged, have it repaired by the
manufacturer, its service or a similarly qualified person in order to avoid
any hazard.
- The power supply must be replaced by a new one in case of
malfunction, because this power supply is not repairable.
- The socket-outlet shall be installed near the equipment and shall
be easily accessible
- The charger is not intended for use by persons (including children)
with reduced physical, sensory or mental capacity. Persons who have
not read the manual, unless they have received explanations by a
person responsible for their safety and supervision should not use this
unit.
- Children should be monitored to ensure that they do not play with
the charger.
- The charger should always be readily accessible.
- The device should not be exposed to dripping or splashing water.
- No objects filled with liquids such as vases shall be placed on the
device.
- Always leave a minimum distance of 10 cm around the unit to
ensure sufficient ventilation.
- Open flame sources, such as candles, should not be placed on
top of the device.
- The device is intended for use only in a temperate climate.
- CAUTION: Danger of explosion if battery is incorrectly replaced or
not replaced by the same type or equivalent.
-8-
Page 9

- The battery should not be exposed to excessive heat such as
sunshine, fire or similar.
- Different types of batteries, new and used batteries should not be
mixed.
- The battery must be installed according to the polarity.
- If the battery is worn, it must be removed from the product.
- The battery must be disposed of safely. Always use the collection
bins provided (check with your dealer) to protect the environment.
- At full volume, prolonged listening to the portable audio device
may damage the user’s hearing and cause hearing troubles (temporary
or permanent deafness, hearing drone, tinnitus, hyperacusis).
So we recommend not to listen to the portable audio device at high
audio volume and no more than one hour per day at medium audio
volume.
Safety Instructions
SWITCH OFF IN RESTRICTED AREAS
Switch the phone off where the use of mobile telephones is not allowed
or where there is a risk of causing interference or danger, for example
on board an aircraft, near medical equipment, fuel, chemicals or
blasting sites.
ROAD SAFETY COMES FIRST
Check the current laws and regulations regarding the use of mobile
-9-
Page 10

phones in the areas where you drive.
Do not handle the telephone when driving.
Concentrate fully on the driving
Use a hands-free kit whenever possible
Leave the road and park up before making or receiving a call,
if the driving conditions allow.
Radio signals could affect some of the car’s electronic
systems such as the audio stereo and alarm systems.
If the car is equipped with an airbag, do not hinder its
deployment with fixed or wireless equipment. This could result in
serious injury due to inadequate performance.
INTERFERENCE
All wireless devices are susceptible to interference which may affect
their performance.
AUTHORISED PERSONNEL
Only qualified people are authorized to install or repair this product
ACCESSORIES
Only use batteries, chargers and other accessories which are
compatible with this equipment. Do not connect incompatible products.
KEEP THE EQUIPMENT DRY
This equipment is not water proof. Keep it dry.
-10-
Page 11

CHILDREN
Keep your phone in a safe place, out of the reach of young children.
The telephone contains small parts that may present a choking hazard.
EMERGENCY CALLS
Emergency numbers may not be available on all cellular networks.
Therefore you shouldn’t solely depend on the mobile phone to make an
emergency call.
Check with your local service provider.
Precautions for use
This mobile phone meets guidelines concerning the exposure to
radio waves.
Your mobile phone is a radio transmitter and receiver. It was designed
to meet the limits recommended by international guidelines to limit the
exposure to radio waves. These guidelines were developed by and
independent scientific organization, The ICNIRP; and include safety
margins designed to ensure the protection of all, regardless of age and
health.
The recommendations on exposure guidelines for mobile phones
employ a unit of measure known as the Specific absorption rate or SAR.
The SAR limit defined in the ICNIRP recommendations is 2.0
watts/kilogram (W/kg) averaged over 10 grams of tissue. In tests to
determine the SAR, the equipment is used in standard usage positions
at its highest certified power level in all tested frequency bands. The
-11-
Page 12

actual SAR level of a device in use may be lower than the maximum
value because the equipment is designed to only use the necessary
power required to reach the network. That amount changes depending
on a number of factors such as the distance from a network base
station.
Radio frequency interference
Radio frequency output from electronic devices can interfere with other
electronic equipment and cause malfunctions. Although this phone has
been designed in accordance with EU regulations on radio frequency
emission, telephone wireless transmitters and electrical circuits can
cause interference with other electronic equipment. We therefore
recommend taking the following precautions :
Aircraft: Wireless equipment can cause interference in aircraft.
Turn off your telephone before boarding the aircraft
Do not use on the ground until allowed to do so by the flight
crew.
Vehicles: Telephone radio frequency emissions can affect the electronic
systems of motor vehicles. In relation to your vehicle, check with the
manufacturer or dealer.
Medical implants :
Medical equipment manufacturers recommend a minimum distance of
15 centimeters between a wireless device and an implanted medical
-12-
Page 13

device such as a pacemaker or defibrillator to avoid any interference
with the medical device. It is recommended that people fitted with such
devices :
-Always keep wireless equipment more than 15cm away from the
medical device.
-Never carry wireless equipment in a breast pocket.
-Place such equipment at the opposite ear to the medical device.
-Turn off the wireless equipment if they think it is interfering with their
device
-Follow the instructions provided by the medical implant manufacturer.
If you are fitted with a medical implant and have any questions related
to the use of your mobile/wireless equipment, you should consult your
doctor.
Hearing :
Warning: Using a headset risks not be able to correctly hear outside
sounds. Do not use a headset when it could endanger your safety.
Some mobile devices can interfere with the proper operation of hearing
aids.
Other medical devices: Radio transmitting equipment including mobile
phones may interfere with the proper operation of insufficiently
protected medical equipment. Consult a doctor or the medical
equipment manufacturer to find out out whether the equipment is
sufficiently protected from external radio wave signals. Turn of your
-13-
Page 14

device where required by regulations, particularly in hospitals.
Health facilities: Hospitals and health facilities may be using
equipment which is particularly sensitive to external radio frequency
emissions. Turn off the telephone when staff or notices tell you to.
Blasting sites and marked areas :
Turn off your device in potentially explosive areas. Follow all official
instructions. Sparks in such areas can cause an explosion or a fire,
resulting in serious injury or death. Turn off your equipment in petrol/gas
stations, especially when near the fuel pumps. Strictly follow usage
restrictions in fuel depots, chemical plants or in places using explosives.
Potentially explosive areas are often, but not always, clearly signed.
These include areas where it is normally considered advisable to turn of
vehicle engines, the area below deck on ships, chemical storage or
transfer plants, and areas where the air contains chemical products or
particles, such as grain, dust and metal powder. Check with the makers
of LPG (such as propane or butane) vehicles that the device can be
used safely in their vicinity.
All our phones conform to international standards and regulations, and
if need be national ones, with a view to limiting user exposure to
electromagnetic fields. These standards and regulations were adopted
after the completion of extensive scientific research. This research
established no link between the use of the mobile phone and any
adverse effects on health if the device is used in accordance with
-14-
Page 15

standard practices.
However if you would like to reduce the level of exposure to radio
frequency radiation you can follow the following rules :
- Call when reception conditions are good to lessen the amount of
radiation. To do this, avoid calling from underground car parks or when
travelling by train or car.
- Call when the telephone connection is at its best (displayed by
maximum bars of network reception)
- Use a hands-free kit to ensure the phone is kept away from pregnant
women’s bellys and adolescents’ lower abdomens.
Operating environment
This equipment conforms to the recommendations on the exposure to
radio waves when it is used in its normal position next to the ear or at a
minimal distance of 1.5cm. When a case, belt clip or holder is used to
carry the phone on the body, these should not contain metal and should
position the equipment slightly away from the body.
Sending data files or messages requires a good quality network
connection. The sending of files or messages can be delayed until such
a connection becomes possible. Follow the instructions according to
the delay as the transmission hasn’t been achieved.
2 Operation
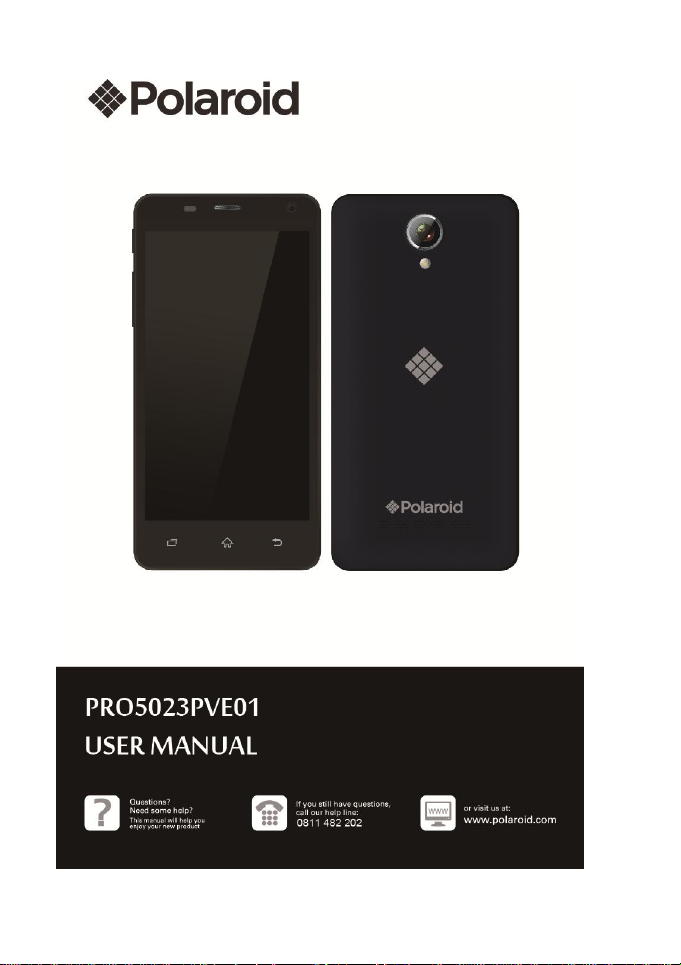
2.1 Icons
In the standby mode, the following icons may appear in standby
-15-
Page 16
Icon
Description
Indicate the intensity of network signals.
Show missed calls.
Location by satellite.
Receive a new message.
An application is being downloaded.
The downloading is over.
The alarm clock has been set and activated.
A call is in progress.
The phone is playing a song.
The application manager is on.
Show battery level.
Enable USB.
The access is blocked.
Get connected to the wireless network
Turn on the Bluetooth.
No SIM card is installed in the phone.
No storage card is installed in the phone.
Key
Explanations
screen:
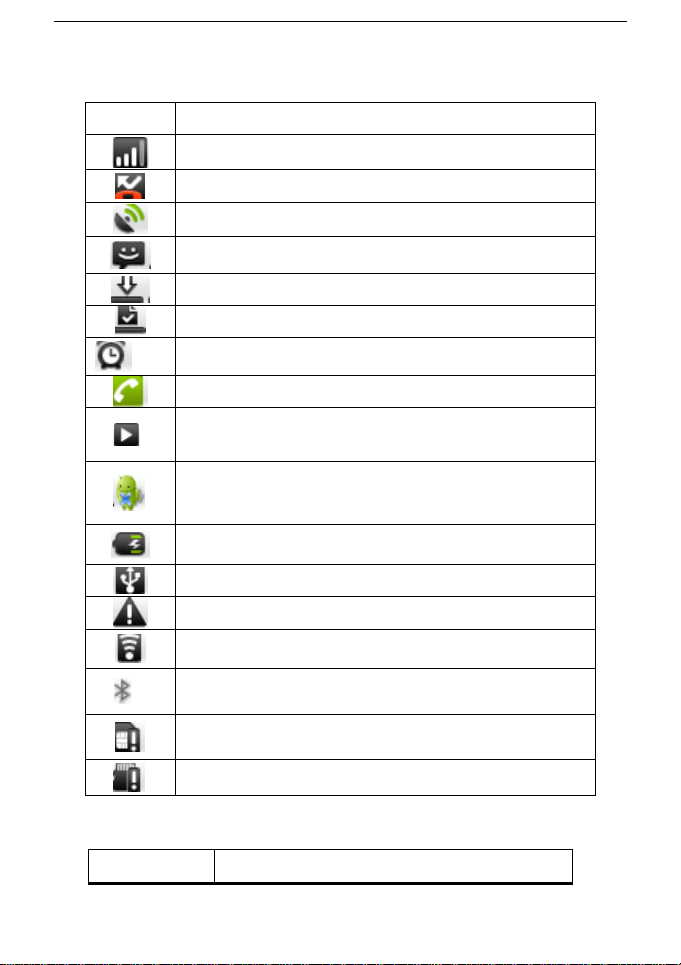
2.2 Key explanations
-16-
Page 17
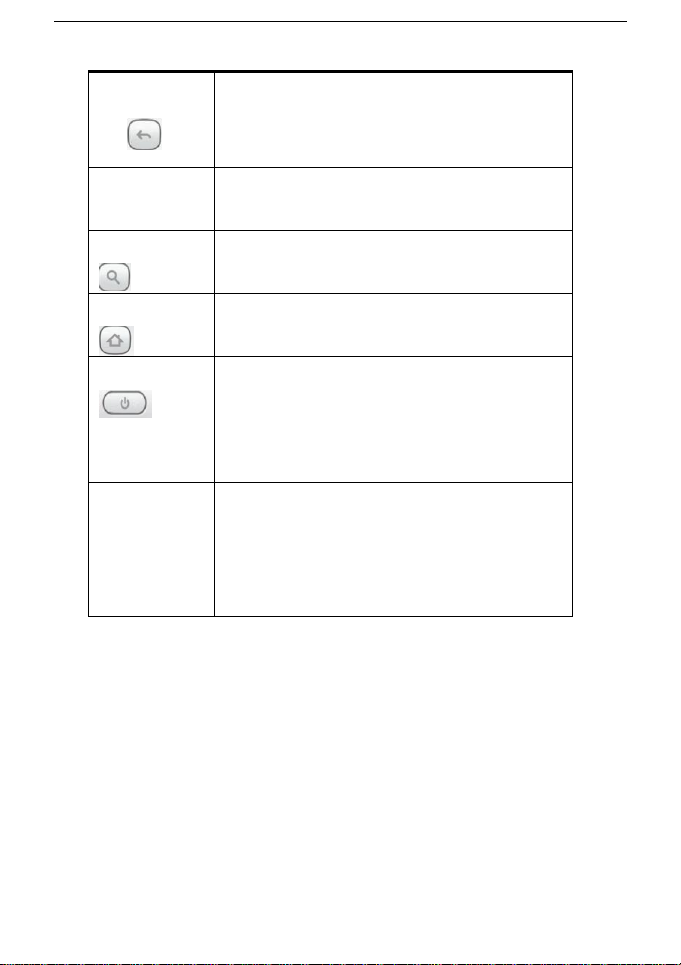
Return
key
●Return to the previous menu.
Menu key
●Show options of current menu.
Search key
●Generally press the key to open google
screen.
Home key
●At any status, press the key to return to
the standby screen.
Power key
● Hold down this key to turn your phone
off and on.
● Generally, press this key to lock the
mobile phone.
Side volume
keys
● During the conversation, press the two
keys to adjust the volume.
● While playing an audio file, press the
two keys to adjust the volume.
Note: In this guide, the phrase “press the key” refers to pressing and
thereafter releasing a key. “Hold down a key” refers to pressing a key
and keeping it depressed for 2 seconds or longer.
The descriptions and functions of keys depend on the model of
your phone.
2.3 Using the touchscreen
Your phone provides many touch keys in the Main screen. To use
-17-
Page 18

these keys correctly, calibrate the touch screen in advance (see
“Calibrator”). Meanwhile please follow the instructions:
■Do not touch the screen with wet hands.
■Do not touch the screen with great forces.
■Do not touch the screen with metallic or conductive objects.
2.4 Connecting to the network
2.4.1 Inserting and removing the SIM card
Turn off the phone; remove the battery and unplug other external
power supplies. Insert the SIM card into the SIM holder as shown
in the phone.
When you need to remove the SIM card, turn off the phone,
remove the battery and then remove the SIM card from the holder.
Warning: Do turn off your phone before removing the SIM card. Never
insert or remove the SIM card when an external power supply is
connected, as this may cause damage to the SIM card.
2.4.2 Turning your phone on and off
To turn on the phone, hold down the POWER key on the top; to
turn off the phone, hold down the POWER key.
If you have turned on your phone without inserting the SIM card,
the phone will prompt you to install the SIM card. With the SIM card
already inserted, your phone automatically verifies the availability of the
SIM Card.
Then, the screen shows the following:
Enter PIN1 —— if your have set the SIM card password.
Enter phone password —— if you have set your phone password
Search for network—— the phone searches for the appropriate
-18-
Page 19

network.
Notes:
If when you turn on the mobile phone, an exclamation mark appears on
the screen and does not disappear, this is possibly caused by
misoperation, that is, you press the Power key and the Volume Up key
at the same time. Such misoperation activates the recovery mode,
hence the occurrence of exclamation mark. If you just turn off the phone,
next time when you turn it on, it will still come to the recovery mode.
Solution:
Press the Home key ( )when the exclamation mark and robot
appear, a menu will pop up. Use the Menu key ( ) to select
"reboot system now" to restart the phone.
2.4.3 Unlocking the SIM card
The PIN 1 (personal identification number) secures your SIM card
from being misused by others. If you have selected this function, you
must enter the PIN1 code each time you turn on the phone so that you
may unlock the SIM card and then make or answer calls. You can
deactivate SIM card protection (see “Safety settings”). In this case, the
misuse of your SIM card cannot be prevented.
Press the Hang Up key to turn on your phone;
Enter your PIN1 code. Clear the incorrect digits by using the right
soft key, and press OK for confirmation. e.g. if your PIN1 is 1234,
please enter:
1 2 3 4
If you enter incorrect numbers for three times in succession, your
SIM card will be locked and your phone will ask you to enter PUK 1
number. If you do not know the PUK1 code, do not try. Instead, contact
your network service provider. See “Safety settings”.
Note: your network service provider sets a standard PIN1 code (4 to 8
-19-
Page 20

digits) for your SIM card. You should immediately change this number.
See “Safety settings”.
2.4.4 Unlocking your phone
To prevent unauthorized use, you can set phone protection. If you
have selected this function, you must draw unlocking pattern each time
you turn on your phone, to unlock the phone and then make or answer
calls. You may clear the unlocking pattern (see “Safety settings”). In this
case, the unauthorized use of your phone cannot be protected.
If you forget your phone password, you must contact the retailer or
local authorized service center to unlock your phone.
2.4.5 Connecting to the network
Once your SIM card is unlocked, your phone searches for
available network automatically (the screen will show the network
searching is underway). If your phone has found the available network,
the name of network service provider appears at the center of screen.
Note: Making an emergency call。Note: If “only for emergency calls”
appears on the screen, it indicates that you are beyond the network
coverage (service area), and that you can still make emergency calls
depending on the signal intensity.
2.4.6 Making a call
When the logo of network service provider appears on the screen,
you can make or answer a call. The bars at the upper left corner of
screen indicate the intensity of network signal.
Conversation quality is significantly affected by obstacles, thus
moving within a small area while making or answering a call can
improve the conversation quality.
-20-
Page 21

2.4.7 Making a domestic call
In the Dial screen, enter a number, and press the Dial key to make
a call. To change the number, delete the digits you have entered.
During dialing, the animation appears on the screen. After the call is
picked up, the screen will show call status information. If the connection
alert tone has been set, your phone will ring the alert tone (network
dependent).
To end a call, press the Hang Up key.
Zone code Phone number Dial key
2.4.8 Making an international call
To make an international call, hold down the 0 key on the Dialing
screen until the international prefix "+” for appears. This allows you to
dial an international number without knowing its international fix (e.g. 00
for China).
Following the entry of international prefix, enter the country code
and complete phone number. For the country codes, follow the general
conventions, for example, 49 for Germany, 44 for UK, and 46 for
Sweden.
Like making an international call via a fixed telephone, omit the
“0” at the head of a city code.
For example, to call our hotline from another country, you can
dial:
+86 21 114
+ Country code Complete phone number Dial key
2.4.9 Making a call from the list
All calls dialed and received are stored within a list in your phone.
Those dialed and received recently are exhibited at the top of the list
(see “Call Register”). All the numbers are sorted by Dialed Calls,
Received Calls and Missed Calls. Your phone also provides options for
you to view all calls. When the call Register is full, the old numbers will
-21-
Page 22

be deleted automatically. To view the list, do the following:
To view the dialed calls, press the Dial key
You can dial any number from the list by pressing the Dial key.
When the call list appears, press OK to see details, or go to
Options -> Save to place the number into your Phonebook.
2.4.10 Making an emergency call
If you are beyond the network coverage (see network-signal-intensity
bars at the upper left corner of the screen), you can still make
emergency calls. If your network service provider does not provide
roaming service to the area, the screen will show “only for emergency
calls”, alerting you that you can only make such calls. If you are within
the network coverage, you can also make emergency calls even
without the SIM card.
2.4.11 Call menu
The Call menu is only visible during an active call, and features
such as Call Waiting, Call Diverting, and Multiple-party Call are network
dependent. Contact your network service provider.
The call options include:
Mute
Do not send local voice.
Handsfree
Switch on the loudspeaker to amplify the voice.
Hold
Put the current call on hold or retrieve the call on hold.
End a call.
End the current call.
More
*Start voice recording
Start voice recording.
*Turn on Bluetooth
-22-
Page 23

The Bluetooth device, if any, can be used.
*New call
Make another new call.
3 Functional Menu
(※The following features depends on specific models)
3.1 backup and restore
This feature allows you to backup and restore.
notice,piease insert your SD card.
3.2 Browser
Browser enables you to surf the web via your phone, as if via a
computer. You may create a bookmark on your phone and synchronize
the bookmark with your computer. You can quickly go to your favorite
websites from the Main screen. You may select from the horizontal
and vertical modes to view a webpage. The phone automatically
changes the screen orientation to suit the webpage, depending on how
you are rotating your phone.
3.3 Calculator
Your phone provides a calculator with 4 basic functions so that you
can perform some simple calculations.
To clear the latest input or result, press the “Clear” key.
Note: The calculator is limited in accuracy and will result in
rounding error.
-23-
Page 24

3.4 Calendar
Calendar allows you to view your schedules and events at any time.
You may view schedules one by one or at the same time.
Select to show calendar by day, week or month. If “by week”, the
calendar will be shown by week. This application is convenient for you
to add events or view schedule.
3.5 Camera
Your phone provides the camera and video recorder features. No
matter where you will go, you can take high-resolution photos and
videos. Press Options to set options.
3.6 Clock
■ clock
Enter the menu to display the current time
■ Alarms
Your phone provides many groups of alarm clocks. Select one of
them to edit and customize alarm clock.
3.7 Downloads
Here you can see the download on the web browser
download things, may cancel or suspend or delete etc.
3.8 Email
The Email application lets you to forward Emails to anyone who
has an Email address.
Enable the application, set up an Email account, and then you can
-24-
Page 25

edit, delete, receive or send Emails, as if via a computer. You can also
add or enter another Email account. This application needs support
from the network.
3.9 File Manager
Enter the file management for replication, move, delete
operation
4.0 FM Radio
Wear your earpieces of radio before searching for channels.
Glossary:
Channel list:Display the list of FM radio channels. You can select
to play one of them. (The list can contain 20 channels maximum.)
Search:Select this option to automatically search for channels
and generate the list of channels.
Loudspeaker: Press the button to use the radio loudspeaker.
and : Tap to move to another channel.
►and: Tap to broadcast and pause.
4.1 Gallery
Gallery is a picture manager that typically exhibitsminiatures. Thanks
to the tool, you needn’t page up or down several even dozens of times
to find your favorite. Just a slight slide on the screen, lots of pictures
appear in your sight. In addition, the tool displays pictures in 3D manner,
and supports the features of “save picture”, “set picture as desktop”,
and “share picture”.
-25-
Page 26

4.2 Gmail
The use of Google account synchronization to Google
download application market
4.3 Lock
Click this function can quickly lock screen.
4.4 Maps
Into the map can be positioned.
4.5 Messaging
Messaging lets you send text and multimedia messages to any
contact that has an SMS device. The multimedia messages include
photos, video clips (for iPhone 3GS or other new style phones),
contacts information, and voice memos. What’s more, you can send
messages to several contacts at the same time.
Note: Perhaps Messaging is not available in all countries and
regions. Probably you need pay for using Messaging. For more
information, consult your network operator.
As long as you are within the network, you can use “Messaging”.
As long as you can make a call, you can send messages. You probably
have to pay for sending or receiving messages, depending on your
network operator.
Send a message: Tap it, enter the number and name of the
contact or select the contact from Contacts. Tap the text box above
keypad, enter the information and then tap “Send”.
-26-
Page 27

After selecting the number, you can select such options as Call,
Add subject, Attach, Insert facial expression, and more. Tap Settings to
set ringtone, Delivery reports, and maximum quantity of messages.
4.6 Music
Enter a play list of songs to play music.
4.7 People
The “People” lets you easily call your colleagues or friends, or
send emails or short messages to them. You may add contacts directly
from your phone, or synchronize “Contacts” with any application on
your computer. You may open “Contacts” directly from the Main screen,
or open it via the “Dialing” application.
Add a People:
To add a contact, directly enter the name and phone number, or
import the name and phone number from the SIM card. (The quantity of
contacts you can add is limited by the memory of your phone.)
Search for People:
To search for a contact, press the Search key in search screen, and
a search box will pop up. In the search box, enter the key words, such
as first name, second name, and company name. While you are
entering the key word, the matching contacts immediately appear.
Edit a People:
To edit details of a contact, select “Edit a contact”.
Delete a People:
To delete the current contact, select “Delete a contact”.
-27-
Page 28

From the menu, you can also set the tone of incoming calls,
synchronize with or share an account, or import or export a contact.
4.8 Phone
In the dialing interface to input the number and then click
to dial. This interface can also view call records and set etc
4.9 Play Store
Play Store provides direct access to useful applications which
you can download and install on your phone.
5.0 Search
Google can be used to search the information you want.
5.1 Settings
Reach the menu, customize your phone settings.
Dual-SIM settings:Select SIM card 1 or SIM card 2.
Wireless and network:Set and apply the fly
mode, wireless network, Bluetooth, virtual
private network, and mobile network.
Call settings:Set some advanced features
such as fixed dialing number, voicemail box,
call diverting, call barring, and call cost, etc.
These features depend on the network operator.
Audio effect:Customized setting-up of the
sound effects.
Audio profiles:General, Silent, Meeting
-28-
Page 29

and Outdoor optional. In the meanwhile, customized setting-up of
some scene modes are allowed.
Select one mode to enter the customized
setting-up, operational are vibration, volume, ring tones, notifications
and key beep, etc.
Display:Customized setting-up of the Phone
Orientation, Luminance and Screen Time-Out is allowed.
Location and Safety:Activate or deactivate
the connection to wireless network and GPS; set unlocking pattern;
lock the SIM card; set the SD card.
Applications:View, manage and delete the
applications on your phone.
Account and synchronization:Set the synchronization of your
phone account with your phone.
Privacy:Set the google services on your
phone. Back up the data of settings.
Restore factory settings to clear all
personal data on your phone.
SD card and phone storage: Display the
internal memory of the memory card and
phone memory.
Language and keypad:Select a language and input method.
Voice input and output: Available by downloading and installing
the voice data “Speech Synthesis Data Installer” from the e-market.
Accessibility:Turn on and off accessibility.
Date and time:Set current date and time.
-29-
Page 30

Schedule power on/off:Set the time to turn
on or off your phone.
About phone:View the signal intensity,
battery level, service status, mobile software and hardware information,
etc.
Wallpaper settings:Press the Menu key in
the standby screen, and then select “Wallpapers”. There are many
pieces of wallpapers for you to select from. These wallwapers come
from five sources.
5.2 SIM Toolkit
Insert the SIM card, can manipulate the related
application
5.3 Sound Recorder
Voice Recorder is used for creating audio files.
To start voice recording:Tap .
To end voice recording:Tap .
To play back voice recording:Tap .
The audio files are automatically stored on your phone. They can
be viewed with ES browser. You can select from various players to play
the voices recorded.
-30-
Page 31

5.4 ToDo
Enter to-do editing text.
5.5 Torch
Click on the menu to open or close the flashlight
5.6 Videos
Enter the video playlist click on any video files.
6 Text Input
Enter text via the keypad. Examples of text include contact details,
emails, short messages, and websites. The keypad provides the
functions of spelling prediction, spelling correction and learning while
using.
The smart keypad may give you prompts of correct spelling,
depending on which application you are using.
Enter text:
1 Tap the text box (memo, or new contact) to call the keypad.
2 Tap the keys on keypad.
At the initial stage, you can tap keys using either of your index
fingers. Once you get familiar with the keypad, you can try tapping keys
using both of your thumbs.
While tapping a key, the corresponding letter will appear above
your thumb or another finger. If you are tapping a wrong key, you may
slide to the correct one. Only when your tapping finger leaves a key,
can the corresponding letter be entered in the text box.
-31-
Page 32

To delete a character
Tap 。
To enter an
upper-case letter
Tap , and then tap that letter.
To enter a digit
Tap , and then tap that digit.
To enter a symbol
Tap , and then tap that
symbol.
Quickly enter a space
Press the space key twice
successively.
To toggle between
Chinese and English
input methods
Tap “Chinese” key.
7 SD Card Introduction
Your mobile phone supports SD card to expand the memory. Install the
SD card according to the indication.
As one of storages for your phone, SD card has been set as the
-32-
Page 33

default storage at factory. You can directly use it without making any
settings.
Use as flash disk: If “Phone——Data Wire——PC” is well connected,
the PC will prompt “New hardware is found”, and“MT65xx Android
Phone requires to be installed” will appear in the dialog box, see the
figure below:
Check the relevant menus in the phone are opened or closed, selecting
one by one as follows:
Main Menu - Settings - Application - Development - USB debugging.
Uncheck “USB debugging”.
After checking and confirmation, reconnect “Phone - Data Wire - PC”,
and make sure SD card has been inserted, the phone and SD Card
trough are normal. Follow the prompts appearing in the phone to
operate, so that data uploading and downloading with U disk can be
achieved.
。Note: The phone hard disk used as U disk not supported, SD card
supported only.
Your mobile phone supports the plug-in feature. However, if you insert
or remove the SD card without turning off your phone, we advise you to
turn on and off your phone, to ensure its normal operation. Generally, it
is not recommended to remove and install the SD card.
8 FAQs and Solutions
If you have any questions about the phone, please find the
solutions from the table below.
-33-
Page 34

FAQs
Causes
Solutions
Poor
reception
When you use your
phone at poor
reception areas, for
example, near high
rise buildings or base
rooms, the radio wave
cannot be transmitted
effectively.
Avoid this as far as
you can.
When you use your
phone at network
traffic congestion,
such as working time
and off-duty time, the
congestion can result
in poor reception.
Avoid this as far as
you can.
This is related to the
distance to base
station in question.
You may ask the
network service
provider to provide
service coverage
map.
Echoes or
noises
The trunk line of
network is in bad
condition. It is a
regional problem.
Hang off the call and
dial again. Choose
another better line.
In some areas, the
call lines are in bad
condition.
Shorter
standby time
The standby time is
relevant to network
settings.
In poor reception
areas, turn off your
phone temporarily.
Replace the batteries
Change with a new
battery.
-34-
Page 35

When no signals are
received, your phone
will continue
searching for base
stations, thus
consuming a large
amount of battery
power and reducing
standby time.
Use your phone at
strong signal areas or
Turn off the phone
temporarily.
Failed to turn
on your phone
The battery power is
used up.
Check the battery
power level or charge
the battery.
SIM card error
The SIM card is
damaged.
Contact your network
service provider.
The SIM card is not
properly installed.
Ensure the SIM card
is properly installed.
The metallic face of
the SIM card is
contaminated.
Wipe the face with a
clean cloth.
Failed to
connect to the
network
The SIM card is
invalid.
Contact your network
service provider.
Beyond the GSM
coverage.
Consult the network
service provider for
service areas.
The signal is feeble.
Retry at a stronger
signal area.
Failed to
make a call
The call barring
feature is used.
Cancel the call
barring settings.
The fixed dialing
number feature is
used.
Cancel the fixed
dialing number
settings.
PIN code
error
Enter incorrect PIN
codes for three times
in succession.
Contact your network
service provider.
Failed to
charge the
battery
The battery or the
charger is damaged.
Change a new battery
or charger.
-35-
Page 36

Change the battery
when ambient
temperature is lower
than -10℃ or above
55℃
Change the
environment.
Poor connection.
Check whether the
plug is properly
connected.
Failed to add
contacts to
phonebook
The storage space of
phonebook is used
up.
Delete some contacts
from the phonebook.
Failed to set
up some
features
Your network service
provider does not
provide the services,
or you haven’t
subscribed them.
Contact your network
service provider.
Rated voltage : DC 5V 0.7A
Battery Capacity type and voltage : Li-ion 1800mAh 3.7V
Adaptor caracteristics : INPUT AC 100-240V 50/60Hz
OUTPUT DC 5V 0.7A
Memory : 4GB
Memory free for user : ±1.5GB
SAR Value :
-36-
Page 37

9 Caution
0700
EC Compliance Statement
Hereby, Market Maker Brand Licensing declares that the appliance,
regarding to this user manual, complies with the essential requirements
and other relevant provisions of Directive 1999/5/CE. The declaration of
conformity can be viewed at the following address:
Market Maker Brand Licensing
79/81 ANCIENNE ROUTE NATIONALE 7
69570 DARDILLY
PLR IP Holdings, LLC, its licensees and affiliates, fully support all
electronic waste initiatives. As responsible stewards of the environment,
and to avoid violating established laws, you should properly dispose of
this product in compliance with all applicable regulations, directives or
other governances in the area where you reside. Please check with
local authorities or the retailer where you purchased this product to
determine a location where you can appropriately dispose of the
product.
-37-
Page 38

THE DISPOSAL OF ELECTRICAL AND ELECTRONIC EQUIPMENT
WASTE PRODUCTS ON THE PART OF FINAL USERS IN THE
EUROPEAN UNION
This symbol on the product or on the container indicates that this
product cannot be eliminated with the general waste. The user is
responsible for eliminating this kind of waste by throwing them away at
a “recycling point” specifically for electrical and electronic waste.
Selective collection and electrical equipment recycling contribute to
preserve natural resources and warrant waste recycling to protect
environment and health. In order to receive further information about
electrical and electronic waste collecting and recycling, contact your
Local Council, the service of household waste or the establishment
where the product was acquired.
To avoid possible hearing damage, do not listen at high audio volume
for long periods of time.
Polaroid, Polaroid & Pixel are trademarks of PLR IP Holdings, LLC,
used under license. All other trademarks are the property of the
-38-
Page 39

respective owner, who has not sponsored, endorsed or approved this
product. PLR IP Holdings, LLC does not manufacture this product or
provide any Manufacturer’s warranty or support.
Copyright © 2015. All rights reserved.
Android is a trademark of Google Inc.
-39-
Page 40

-40-
Page 41

-41-
Page 42

1 COMMENCER ............................................................................ 45
1.1 PRESENTATION ............................................................................ 45
1.2 CONSIGNES DE SECURITE ............................................................. 45
2 MODE D'EMPLOI ....................................................................... 54
2.1 ICONES ...................................................................................... 55
2.2 DESCRIPTION DES TOUCHES ......................................................... 56
2.3 UTILISATION DE L'ECRAN TACTILE ................................................... 57
2.4 CONNEXION AU RESEAU ............................................................... 57
2.4.1 INSERER ET RETIRER LA CARTE SIM ................................... 57
2.4.2 ALLUMER ET ETEINDRE VOTRE TELEPHONE .......................... 58
2.4.3 DEVERROUILLER LA CARTE SIM ......................................... 59
2.4.4 DEVERROUILLER VOTRE TELEPHONE .................................. 59
2.4.5 CONNEXION AU RESEAU .................................................... 60
2.4.6 PASSER UN APPEL ............................................................ 60
2.4.7 PASSER UN APPEL DOMESTIQUE ......................................... 60
2.4.8 PASSER UN APPEL INTERNATIONAL ..................................... 61
2.4.9 PASSER UN APPEL DEPUIS UNE LISTE .................................. 61
2.4.10 PASSER UN APPEL D'URGENCE ......................................... 62
2.4.11 OPTIONS EN APPEL ......................................................... 62
3 MENU UTILITAIRES ................................................................ ..... 63
3.1 SAUVEGARDE ET RESTAURATION ................................................... 63
3.2 NAVIGATEUR ............................................................................. 63
3.3 CALCULATRICE .......................................................................... 63
3.4 AGENDA ................................................................................... 64
-42-
Page 43

3.5 APPAREIL PHOTO ....................................................................... 64
3.6 HORLOGE ................................................................................. 64
3.7 TELECHARGEMENTS .................................................................. 64
3.8 EMAIL ........................................................................................ 65
3.9 GESTIONNAIRE DE FICHIERS ......................................................... 65
4.0 RADIO FM ............................................................................... 65
4.1 GALERIE ..................................................................................... 66
4.2 GMAIL ........................................................................................ 66
4.3 VERROUILLAGE ........................................................................... 66
4.4 MAPS ....................................................................................... 66
4.5 MESSAGERIE ............................................................................ 66
4.6 MUSIQUE .................................................................................. 67
4.7 CONTACTS ................................................................................ 67
4.8 TELEPHONE .............................................................................. 68
4.9 PLAY STORE ............................................................................ 69
5.0. RECHERCHER ..................................................................... 69
5.1 PARAMETRES ............................................................................ 69
5.2 BOITE D'OUTILS SIM .................................................................... 71
5.3 DICTAPHONE ............................................................................... 71
5.4 TACHES ...................................................................................... 71
5.5 LAMPE TORCHE ......................................................................... 72
5.6 VIDEOS ...................................................................................... 72
6 SAISIE DE TEXTE .................................................................... 72
7 UTILISATION D'UNE CARTE SD .............................................. 73
-43-
Page 44

8 FAQ ET SOLUTIONS .............................................................. 74
9 DÉCLARATION DE CONFORMITÉ ........................................... 78
-44-
Page 45

1 Commencer
1.1 Présentation
Merci d'avoir choisi le téléphone numérique mobile GSM/GPRS.
Après avoir pris connaissance de ce guide, vous pourrez utiliser votre
téléphone au maximum de ses capacités et apprécier sa simplicité
d'utilisation.
En plus des fonctionnalités d'appel élémentaires comme
l'historique, le smartphone offre une grande richesse de fonctionnalités
et de services, pour votre vie professionnelle et votre divertissement.
Ce téléphone à écran couleur est compatible avec la technologie
GSM/GPRS et à été approuvé par les autorités locales et
internationales.
La disponibilité de certains services ou fonctionnalités décrits
dans ce manuel peuvent dépendre de votre fournisseur de services ou
forfait. En conséquence, il se pourrait que certains éléments ne soient
pas présents dans votre téléphone. Les raccourcis de menus et
fonctionnalités peuvent aussi varier d'un téléphone à l'autre.
Notre compagnie se réserve le droit de modifier le contenu de ce
manuel sans préavis.
1.2 Consignes de sécurité
Lisez attentivement ces instructions de sécurité avant d’utiliser votre
appareil et conservez-les pour une éventuelle consultation ultérieure.
BATTERIES, CHARGEURS ET AUTRES ACCESSOIRES
-45-
Page 46

Si le cordon d’alimentation du chargeur est endommagé, le faire
réparer par le fabricant, son service après-vente ou une personne de
qualification similaire afin d’éviter un danger.
Le chargeur n’est pas prévu pour être utilisé par des personnes (y
compris les enfants) dont les capacités physiques, sensorielles ou
mentales sont réduites ou des personnes dénuées d’expérience ou de
connaissance, sauf si elles ont pu bénéficier, par l’intermédiaire d’une
personne responsable de leur sécurité, d’une surveillance ou
d’instructions préalables concernant l’utilisation de l’appareil.
Il convient de surveiller les enfants pour s’assurer qu’ils ne jouent pas
avec le chargeur.
Le chargeur doit toujours demeurer aisément accessible.
L'appareil ne doit pas être exposé à des égouttements d'eau ou des
éclaboussures.
Aucun objet rempli de liquide tel que des vases ne doit être placé sur
l'appareil.
Laissez toujours une distance minimale de 10 cm autour de
l'appareil pour une aération suffisante.
Il convient de ne pas placer sur l'appareil de sources de flammes
nues, telles que des bougies allumées.
L'appareil est destiné à être utilisé sous un climat tempéré
uniquement.
ATTENTION: Danger d'explosion si la batterie n'est pas remplacée
correctement. Ne remplacer que par le même type ou un type
équivalent.
-46-
Page 47

La batterie ne doit pas être exposée à une chaleur excessive telle
que celle du soleil, d'un feu ou d'origine similaire.
Différents types de batteries ou des batteries neuves et usagées ne
doivent pas être mélangés.
La batterie doit être mise en place en respectant la polarité.
Si la batterie est usée, elle doit être enlevée du produit.
La batterie doit être mise au rebut de façon sûre. La déposer dans
des bacs de collecte prévus (renseignez-vous auprès de votre
revendeur) afin de protéger l'environnement.
L'écoute d'un baladeur musical à forte puissance peut endommager
l'oreille de l'utilisateur et entraîner des troubles auditifs (surdité
temporaire ou définitive, bourdonnements d'oreille, acouphènes,
hyperacousie). Il est donc vivement recommandé de ne pas utiliser le
baladeur à plein volume ni plus d’une heure par jour à volume moyen.
MISE HORS TENSION DANS LES ZONES RÉGLEMENTÉES
Mettez l'appareil hors tension lorsque l'utilisation de téléphones sans fil
n'est pas autorisée ou lorsqu'elle risque de provoquer des interférences
ou de présenter un danger, par exemple à bord d'un avion, à proximité
d'équipements médicaux, de carburants, de produits chimiques ou de
zones où sont utilisés des explosifs
LA SÉCURITÉ ROUTIÈRE AVANT TOUT
Vérifiez les lois et règlements en vigueur en matière d’utilisation des
téléphones portables dans les zones où vous conduisez.
-47-
Page 48

• Ne tenez pas le téléphone dans votre main alors que vous conduisez.
• Concentrez toute votre attention sur la conduite.
• Utilisez un kit mains libres, si possible.
• Quittez la route et garez-vous avant d’émettre ou de recevoir un appel,
si les conditions de conduite le requièrent.
• Les radiofréquences peuvent affecter certains systèmes électroniques
de votre véhicule, tels que le
système audio stéréo ou les équipements de sécurité.
• Lorsque votre véhicule est équipé d’un airbag, ne gênez pas son
déclenchement avec un équipement sans fil ou fixe. Il pourrait en effet
provoquer de graves blessures en raison de performances
inadéquates.
INTERFÉRENCES
Tous les appareils sans fil peuvent subir des interférences susceptibles
d'avoir une incidence sur leurs performances.
PERSONNEL HABILITÉ
Seul le personnel qualifié est habilité à installer ou réparer ce produit.
ACCESSOIRES
N'utilisez que des batteries, chargeurs et autres accessoires
compatibles pour cet appareil. Ne connectez pas de produits
incompatibles
MAINTENEZ VOTRE APPAREIL AU SEC
-48-
Page 49

Votre appareil n'est pas étanche. Maintenez-le au sec.
ENFANT
Conservez votre téléphone dans un endroit sûr, hors de portée des
jeunes enfants. Votre téléphone comprend des petites pièces qui
peuvent présenter un risque de suffocation.
APPELS D’URGENCE
Les numéros d’urgence peuvent ne pas être disponibles sur tous les
réseaux cellulaires. Vous ne devez donc pas dépendre uniquement de
votre téléphone portable pour émettre un appel d’urgence.
Renseignez-vous auprès de votre fournisseur de service local.
Précautions d’usage de l’appareil
Cet appareil mobile est conforme aux directives en matière
d'exposition aux fréquences radioélectriques.
Votre appareil mobile est un émetteur-récepteur radio. Il a été conçu de
manière à respecter les limites recommandées par les directives
internationales en matière d'exposition aux fréquences radioélectriques.
Ces directives ont été développées par une organisation scientifique
indépendante, l'ICNIRP ; elles intègrent des marges de sécurité
destinées à assurer la protection de tous, indépendamment de l'âge et
de l'état de santé.
Les recommandations en matière d'exposition applicables aux
appareils mobiles sont fondées sur une unité de mesure appelée le
-49-
Page 50

débit d'absorption spécifique ou DAS. La limite DAS définie dans les
recommandations de l'ICNIRP est de 2,0 watts/kilogramme (W/kg) en
moyenne sur un tissu cellulaire de 10 grammes. Lors des tests visant à
déterminer le DAS, l'appareil est utilisé dans des positions de
fonctionnement standard et fonctionne à son niveau de puissance
certifié le plus élevé dans toutes les bandes de fréquences testées. Le
niveau de DAS réel d'un appareil en cours d'utilisation peut être
inférieur à la valeur maximale car l'appareil est conçu pour utiliser
uniquement la puissance nécessaire pour atteindre le réseau. Cette
valeur change en fonction d'un certain nombre de facteurs tels que la
distance par rapport à une station de base du réseau.
Interférences de radiofréquence
Les émissions de radiofréquence des appareils électroniques peuvent
perturber le fonctionnement d’autres
appareils électroniques et engendrer des dysfonctionnements. Bien
que ce téléphone ait été conçu, testé et fabriqué en accord notamment
avec les réglementations sur les émissions de radiofréquence de
l’Union européenne, les transmetteurs sans fil et circuits électriques de
du téléphone peuvent causer des interférences avec
d’autres équipements électroniques. Nous vous recommandons donc
de prendre les précautions suivantes :
Avion : Les appareils sans fil peuvent générer des
interférences dans les avions.
•Éteignez votre téléphone avant d’embarquer dans un
-50-
Page 51

avion.
• Ne l’utilisez pas sur la piste sans autorisation de
l’équipage.
Véhicules : Les émissions de radiofréquence du téléphone peuvent
affecter le système électronique des véhicules motorisés. En ce qui
concerne
votre véhicule, vérifiez avec le constructeur ou son représentant.
Implants médicaux :
Les fabricants d'appareils médicaux recommandent une distance
minimale de 15 centimètres entre un appareil sans fil et un implant
médical tel qu'un stimulateur cardiaque ou un défibrillateur, afin d'éviter
toute interférence avec l'appareil médical. Il est recommandé aux
personnes équipées de tels appareils :
-De toujours veiller à maintenir l'appareil sans fil à une distance de plus
de 15 cm de l'appareil médical.
-De ne pas porter l'appareil sans fil dans une poche de poitrine.
-De placer l'appareil sans fil au niveau de l'oreille opposée à l'appareil
médical.
-D'éteindre l'appareil sans fil si elles pensent qu'une interférence peut
se produire.
-De suivre les instructions fournies par le fabricant de leur implant
médical.
Si vous portez un implant médical et avez des questions concernant
-51-
Page 52

l'utilisation de votre appareil sans fil, consultez votre médecin
Audition :
Avertissement : si vous utilisez un kit oreillette, vous risquez de ne pas
pouvoir entendre correctement les sons extérieurs. N'utilisez pas de kit
oreillette si cela risque de nuire à votre sécurité.
Certains appareils sans fil peuvent interférer avec le bon
fonctionnement de certaines prothèses auditives.
Autres dispositifs médicaux : Les équipements de transmission par
fréquences radioélectriques, y compris les téléphones sans fil, peuvent
interférer avec le bon fonctionnement des appareils médicaux
insuffisamment protégés. Consultez un médecin ou le fabricant de
l'appareil médical pour déterminer s'ils sont protégés correctement des
signaux de fréquences radioélectriques externes. Éteignez votre
appareil dans les endroits où le règlement l'exige, notamment dans les
hôpitaux.
Établissements de santé : Les hôpitaux et établissements de santé
peuvent utiliser des équipements particulièrement sensibles aux
émissions de radiofréquence extérieures. Éteignez le téléphone
lorsque le personnel ou des panneaux vous y invitent.
Zones à explosion et sites signalés : Éteignez votre appareil dans les
zones où l'atmosphère est potentiellement explosive. Conformez-vous
à toutes les instructions affichées. Des étincelles dans de telles zones
-52-
Page 53

peuvent provoquer une explosion ou un incendie, causant des
blessures corporelles graves voire mortelles. Éteignez votre appareil
dans les stations-essence, près des pompes à carburant des
stations-service. Observez strictement les restrictions d'utilisation dans
les dépôts de carburant, les zones de stockage et de distribution, les
usines chimiques ou dans les endroits où sont utilisés des explosifs
Les zones où l'atmosphère est potentiellement explosive sont souvent,
mais pas toujours, signalées clairement. Il s'agit notamment des zones
où il est habituellement conseillé de couper le moteur des véhicules, de
la zone située en dessous du pont des bateaux, des installations
destinées au transfert ou au stockage de produits chimiques et des
zones dont l'air contient des produits chimiques ou des particules, par
exemple le grain, la poussière ou les poudres métalliques. Vérifiez
également auprès des constructeurs de véhicules utilisant des gaz de
pétrole liquéfiés (tels que le propane ou le butane) si l'appareil peut être
utilisé en toute sécurité à proximité de ces véhicules.
Tous nos téléphones sont conformes aux normes et réglementations
internationales et, le cas échéant, nationales visant à limiter l’exposition
des utilisateurs aux champs électromagnétiques. Ces normes et
réglementations ont été adoptées après la réalisation de recherches
scientifiques approfondies. Ces recherches n’établissent aucun lien
entre l’utilisation d’un téléphone mobile et tout effet nocif sur la santé si
l’appareil est utilisé conformément aux normes et réglementations
applicables.
Cependant, si vous voulez réduire le niveau d’exposition aux
-53-
Page 54

rayonnements radiofréquences vous pouvez appliquer les règles
suivantes :
-Téléphoner dans de bonnes conditions de réception pour diminuer la
quantité de rayonnements. Pour ce faire, éviter de téléphoner dans les
parkings souterrains, lors de déplacement en train ou en voiture.
-Téléphoner quand le téléphone capte au mieux (affichage d’un
maximum de barrettes de réception de réseau)
-Utiliser un kit main-libre tout en veillant à éloigner le téléphone du
ventre pour les femmes enceintes et du bas ventre pour les
adolescents.
Environnement et utilisation
Cet appareil est conforme aux recommandations en matière
d'exposition aux fréquences radioélectriques lorsqu'il est utilisé soit
dans sa position normale contre l'oreille, soit à une distance minimale
de 1,5 centimètres. Lorsqu'un étui, un clip ceinture ou un support est
utilisé à des fins de transport sur soi, il ne doit pas contenir de parties
métalliques et doit placer l'appareil à une distance minimale de votre
corps.
L'envoi de fichiers de données ou de messages requiert une connexion
de qualité au réseau. L'envoi des fichiers ou messages peut être
retardé jusqu'à ce qu'une telle connexion soit possible. Suivez les
instructions relatives à la distance de séparation tant que la
transmission n'est pas achevée.
2 Mode d'emploi
-54-
Page 55

Icône
Description
Intensité du signal réseau
Appels manqués
Localisation satellite
Nouveau message reçu
Application en cours de téléchargement
Téléchargement terminé
Alarme définie et activée
Appel en cours
Musique en écoute
Le gestionnaire d'applications est activé
Niveau de batterie
USB activé
Accès bloqué
Connexion au réseau mobile
Bluetooth activé
Aucune carte SIM insérée dans le téléphone
Aucune carte mémoire insérée dans le téléphone
2.1 Icônes
En veille, les icônes suivantes peuvent apparaître à l'écran.
-55-
Page 56

Touche
Descriptions
Touche
Retour
●Revenir au menu précédent
Touche Menu
●Affiche les options du menu actuel.
Touche
recherche
●Une pression affiche l'écran d'accueil
Google.
Touche Accueil
●Depuis n'importe où dans l'interface,
revient à l'écran d'accueil.
Bouton
marche/arrêt
● Maintenez pour allumer ou éteindre
votre téléphone.
● Appuyez sur cette touche pour
verrouiller le téléphone mobile.
Boutons de
volume
●Pendant un appel, appuyez sur les
touches pour régler le volume de
l'oreillette.
●Pendant que vous écoutez de la
musique, appuyez sur les touches pour
régler le volume de l'oreillette.
2.2 Description des touches
Remarque : Dans ce mode d'emploi, « appuyer sur » veut dire que
vous appuyez brièvement sur la touche en question. « Maintenir » veut
-56-
Page 57

dire que vous maintenez la touche appuyée pendant 2 secondes au
moins.
La description et le type de touches dépend du modèle de votre
téléphone.
2.3 Utilisation de l'écran tactile
Votre téléphone est utilisé principalement en touchant l'Écran
d'accueil. Pour garantir le bon fonctionnement de l'écran, calibrez-le
lors de la première utilisation (voir « Calibration »). Il est important de
respecter ces règles d'utilisation générales :
■Ne pas toucher l'écran avec les mains mouillées.
■Ne pas exercer de force excessive en touchant l'écran.
■Ne pas toucher l'écran avec des objets métalliques ou objets
conducteurs.
2.4 Connexion au réseau
2.4.1 Insérer et retirer la carte SIM
Éteindre le téléphone, retirer la batterie et toute source
d'alimentation externe. Insérer la carte SIM dans le logement SIM,
comme illustré dans le téléphone.
Pour retirer la carte SIM, éteindre le téléphone, retirer la batterie
puis retirer la carte SIM de son logement.
Avertissement : éteindre le téléphone avant le retrait de la carte SIM.
Ne jamais insérer ou retirer la carte SIM si une source d'alimentation
externe est branchée. Cela pourrait entraîner des dommages à la carte
SIM.
-57-
Page 58

2.4.2 Allumer et éteindre votre téléphone
Pour éteindre votre téléphone, appuyez longuement sur la touche
d'alimentation située en haut à droite de celui-ci. Pour l'éteindre,
appuyez longuement sur la touche d'alimentation.
Si vous allumez votre téléphone sans avoir installé de carte SIM,
celui-ci vous demandera de le faire. Une fois la carte SIM installée,
votre téléphone en vérifiera la validité.
Ensuite, les écrans suivants apparaîtront dans l'ordre :
Saisir PIN1—––si vous avez défini un code de carte SIM.
Saisir le mot de passe téléphone––––si un mot de passe
téléphone est défini.
Rechercher un réseau––––le téléphone recherche un réseau
approprié.
Remarques :
Si un point d'exclamation apparaît lorsque vous allumez le téléphone et
ne disparaît pas, cela indique probablement une mauvaise
manipulation de votre part, vous avez appuyé sur la touche de volume
haut et d'alimentation en même temps. Cette manipulation permet de
lancer le mode récupération (recovery), ce qui explique cet écran. Si
vous éteignez le téléphone puis le rallumez et que le même écran
recovery apparaît.
Solution :
Appuyez sur la touche d'accueil ( ) lorsque le robot et le point
d'exclamation sont affichés, et un menu apparaîtra. Appuyez sur la
-58-
Page 59

touche Menu ( ) pour sélectionner « redémarrer le système
maintenant » et redémarrer le téléphone.
2.4.3 Déverrouiller la carte SIM
Le PIN 1 (personal identification number) est une sécurité pour
votre carte SIM et empêcher les utilisations non autorisées. Si cette
fonction est sélectionnée, vous devrez saisir le PIN 1 à chaque fois que
vous allumez le téléphone pour déverrouiller la SIM puis passer des
appels ou décrocher le téléphone. Vous pouvez désactiver la protection
de la carte SIM (voir "Sécurité") Dans ce cas, votre carte SIM pourra
être utilisée librement.
Appuyer sur la touche Fin d'appel de votre téléphone ;
Saisir le code PIN. Effacer les numéros saisis par erreur à l'aide
de la touche tactile droite, puis appuyer sur OK pour confirmer.
Par exemple, si votre code PIN est 1234, saisissez :
1 2 3 4
Si le code saisi est faux par 3 fois en succession, votre carte SIM
sera verrouillée et votre téléphone vous demandera de saisir le code
PUK 1. Si vous ne connaissez pas le code PUK 1, ne pas faire de
tentative. Prenez contact avec votre fournisseur de services réseau.
Voir "Sécurité"
Remarque : votre fournisseur de services réseau défini un code PIN 1
standard (4 à 8 chiffres) pour votre carte SIM. Vous devriez le modifier
immédiatement. Voir "Sécurité"
2.4.4 Déverrouiller votre téléphone
Pour empêcher les utilisations non autorisées, vous pouvez définir
des protections. Si cette fonction est sélectionnée, vous devrez
dessiner le schéma de déverrouillage à chaque fois que vous allumez
le téléphone pour déverrouiller celui-ci puis passer des appels ou
décrocher le téléphone. Vous pouvez effacer le schéma de
déverrouillage (Voir "Sécurité") Votre téléphone n'est alors plus protégé
contre les accès non autorisés.
Si vous oubliez votre mot de passe téléphone, vous devrez
contacter le revendeur ou centre de services agréé local pour le faire
-59-
Page 60

déverrouiller.
2.4.5 Connexion au réseau
Une fois la carte SIM déverrouillée, votre téléphone recherche les
réseaux disponibles automatiquement (l'écran indique que la recherche
est en cours). Si votre téléphone à trouvé un réseau disponible, le nom
du fournisseur de réseau apparaît alors au milieu de l'écran.
Remarque : Passer un appel d'urgence. Remarque : Si seule la
mention "Appel d'urgence" apparaît à l'écran, cela veut dire que
vous-vous trouvez en dehors de la zone de couverture réseau (zone de
service), et que vous pouvez toujours effectuer des appels d'urgence
selon l'intensité du signal.
2.4.6 Passer un appel
Lorsque le logo du fournisseur de services apparaît à l'écran, vous
pouvez passer ou recevoir des appels. Les barres en haut à droite de
l'écran indiquent l'intensité du signal réseau.
La clarté de la conversation est affectée très significativement par
la présence d'obstacles, donc se déplacer sur une petite zone lors du
passage ou réponse d'appel peut améliorer la qualité de l'appel.
2.4.7 Passer un appel domestique
Dans l'écran de composition, saisir un numéro, puis appuyer sur
la touche Composition pour passer l'appel. Pour modifier le numéro,
supprimer simplement les chiffres à modifier. Lorsque l'appel est en
composition, une animation apparaît à l'écran. Une fois que votre
correspondant à décroché, l'écran affichera le statut de l'appel. Si une
tonalité de décrochage est définie, votre téléphone émettra un son
lorsque votre correspondant à décroché (selon le réseau).
Pour mettre fin à un appel, appuyez sur la touche Fin d'appel.
Code pays numéro de téléphone touche d'appel
-60-
Page 61

2.4.8 Passer un appel international
Pour passer un appel international, maintenez la touche 0 appuyée
sur l'écran de composition jusqu'à apparition du préfixe international "+”.
Ceci vous permettra de passer un numéro international sans en
connaître le code international (par exemple, 00 pour la Chine).
Après la saisie du code international, taper le code pays suivi du
numéro de téléphone complet. Les codes pays sont toujours fixes, par
exemple, 49 pour l'Allemagne, 44 pour l'Angleterre et 49 pour la Suède.
Identiquement à la composition internationale par téléphone fixe,
omettre le "0" situé devant le code ville.
Par exemple, pour appeler notre ligne d'assistance depuis un
autre pays, vous pouvez passer :
+86 21 114
+ Code pays numéro de téléphone complet touche
d'appel
2.4.9 Passer un appel depuis une liste
Tous les appels passés et reçus sont enregistrés dans une liste
dans votre téléphone. Les appels passés et reçus récemment sont
affichés en haut de la liste (voir "Historique des appels"). Tous les
numéros sont triés par Appels passés, Appels reçus et Appels
manqués. Votre téléphone peut également afficher la totalité des
appels. Lorsque l'historique des appels est plein, les plus vieux
numéros seront effacés. Pour afficher la liste :
Pour voir les appels passés, appuyez sur la touche Composition.
Vous pouvez appeler n'importe que numéro de la liste à l'aide de
la touche Composition.
Une fois que la liste apparaît, appuyez sur OK pour en voir les
détails, ou allez dans Options, Enregistrer pour ajouter le numéro à
votre liste de contacts.
-61-
Page 62

2.4.10 Passer un appel d'urgence
Si vous-vous trouvez en dehors de la couverture réseau (voyez
l'indicateur d'intensité du réseau dans le coin supérieur droit de l'écran),
il est toujours possible d'effectuer des appels d'urgence. Si votre
fournisseur de services réseau n'offre pas de couverture en itinérance
dans la région, l'écran affichera "Appels d'urgence uniquement", vous
indiquant ainsi que vous ne pouvez passer que des appels limités. Si
vous-vous trouvez dans la zone de couverture réseau, vous pouvez
passer des appels d'urgence même sans carte SIM.
2.4.11 Options en appel
Le menu Appel n'est disponible que pendant un appel en cours, et
les fonctionnalités telles que Mise en attente, Transfert d'appel et Appel
en conférence sont disponibles selon votre réseau. Prenez contact
avec votre fournisseur de services réseau.
Les options en appels sont :
Muet
Pour couper le microphone.
Mains libres
Active le haut-parleur pour amplifier la voix.
Mise en attente
Pour mettre l'appel actuel en attente ou le reprendre.
Raccrocher.
Met fin à l'appel.
Plus
*Lance l'enregistrement vocal.
Lance l'enregistrement vocal.
*Activer le Bluetooth
L'appareil Bluetooth, si présent, peut être utilisé.
*Nouvel appel
Passer un nouvel appel.
-62-
Page 63

3 Menu utilitaires
(※Les fonctionnalités suivantes sont disponibles sur certains
modèles uniquement
3.1 Sauvegarde et restauration
Cette fonctionnalité vous permet de sauvegarder et de restaurer.
Remarque : insérez votre carte SD.
3.2 Navigateur
Le navigateur vous permet de naviguer sur internet depuis votre
téléphone, comme si vous étiez sur votre ordinateur. Vous pouvez créer
des favoris et les synchroniser avec votre ordinateur. Vous pouvez
consulter rapidement vos sites préférés depuis l'écran d'accueil. Vous
pouvez basculer entre l'affichage horizontal et vertical lorsque vous
consultez une page. Le téléphone adapte automatiquement l'orientation
pour adapter l'affichage au site web, selon l'orientation réelle de votre
téléphone.
3.3 Calculatrice
Votre téléphone comporte une calculatrice pratique avec 4
fonctions de base pour vous aider à effectuer des calculs simples.
Pour effacer la dernière saisie ou résultat, tapez sur « Effacer ».
Remarque : la calculatrice offre une précision limitée, et pourrait
introduire des erreurs d'arrondissement.
-63-
Page 64

3.4 Agenda
L'agenda vous permet de visualiser votre emploi du temps et
événements à tout moment. Vous pouvez afficher les événements un
par un, ou tous à la fois.
Sélectionner pour voir le calendrier en affichage Jour, Semaine ou
mois. En sélectionnant « Semaine », l'agenda basculera en affichage
hebdomadaire. Cette application est parfaite pour vous aider à
organiser votre emploi du temps ou créer des événements.
3.5 Appareil photo
Votre téléphone comporte des fonctionnalités d'appareil photo et
de caméscope. Vous pouvez ainsi prendre des photos et vidéos haute
résolution où que vous soyez. Tapez sur Options pour configurer.
3.6 Horloge
■ horloge
Permet d'afficher l'heure actuelle.
■ Alarmes
Votre téléphone peut contenir plusieurs alarmes personnalisées.
En sélectionner une pour la personnaliser.
3.7 Téléchargements
Vous pouvez ici consulter les téléchargements effectués depuis le
navigateur, et les annuler, les mettre en pause, les supprimer, etc.
-64-
Page 65

3.8 Email
L'application email vous permet d'écrire des emails à des
correspondants disposant d'une adresse email.
Activez l'application, saisissez vos information de compte email, et
vous pouvez modifier, supprimer ou envoyer des emails, comme sur
votre ordinateur. Vous pouvez également ajouter ou saisir un autre
compte email. L'application nécessite un accès au réseau.
3.9 Gestionnaire de fichiers
Lancez le gestionnaire de fichiers pour copier, déplacer ou
supprimer des éléments.
4.0 Radio FM
Vous devez brancher le casque avant de pouvoir écouter la radio.
Glossaire :
Liste des fréquences : pour consulter la liste des chaînes radio
FM. Vous pouvez en sélectionner une pour l'écouter. (la liste peut
contenir 20 chaînes au maximum)
Rechercher : sélectionner cette option pour effectuer une
recherche des chaînes automatique et en générer la liste.
Haut-parleur : appuyer sur ce bouton pour diffuser la radio via le
haut-parleur.
et : appuyez pour pour écouter une autre chaîne.
►et : pour commencer et arrêter la diffusion.
-65-
Page 66

4.1 Galerie
La galerie est un gestionnaire d'images qui affiche des miniatures.
Avec cet outil, vous pouvez avoir une vue globale de toutes vos images
et trouver rapidement votre favorite. Faites simplement défiler l'écran
pour voir plus d'images. La Galerie est le gestionnaire d'images qui par
défaut affiche des miniatures en 3D. Permet de « Sauvegarder l'image
», « Utiliser l'image comme Fond d'écran » et « Partager ».
4.2 Gmail
Définissez la sunchronisation de compte Google pour pouvoir
télécharger des images depuis le magasin en ligne.
4.3 Verrouillage
Tapez sur ce bouton pour verrouiller immédiatement l'écran.
4.4 Maps
Trouvez votre position via l'application Maps.
4.5 Messagerie
La messagerie vous permet d'envoyer des messages texte (SMS)
et multimédia (MMS) à tout contact possédant un appareil capable de
les recevoir. Les MMS peuvent comporter des photos, clips vidéo (pour
iPhone 3GS ou téléphones plus récents), informations de contact et
mémos vocaux. En outre, vous pouvez envoyer le message à plusieurs
contacts à la fois.
Remarque : la fonction de messagerie pourrait ne pas être
-66-
Page 67

disponible dans tous les pays et régions. Cela peut être un service
payant. Pour de plus amples informations, contactez votre opérateur
réseau.
Tant que vous-vous trouvez dans la zone de couverture réseau,
vous pouvez utiliser la fonction de messagerie. Tant que vous pouvez
recevoir des appels, vous pouvez envoyer des messages. L'envoi et la
réception de messages peut être un service payant, selon l'opérateur
réseau.
Envoyer un message : saisir le message, le numéro et le nom du
contact, ou sélectionner depuis la liste des contacts. Taper dans la boîte
texte au dessus du clavier, saisir les informations puis appuyer sur
"Envoyer".
Une fois le numéro sélectionné, vous pouvez sélectionner des
options comme Appel, Ajouter sujet, Attacher une pièce jointe, Insérer
un émoticône, et plus encore. Taper sur Paramètres pour définir la
sonnerie, accusé de réception et la quantité maximum de messages.
4.6 Musique
Choisissez le fichier désiré pour écouter de la musique.
4.7 Contacts
Les « contacts » vous permettent d'appeler aisément collègues ou
amis, envoyer des emails ou SMS. Vous pouvez ajouter des contacts
directement depuis votre téléphone, ou synchroniser les « contacts »
depuis toute application sur votre ordinateur. Vous pouvez ouvrir les «
contacts » depuis l'écran d'accueil directement, ou l'ouvrir depuis
-67-
Page 68

l'application « Téléphone ».
Créer un contact :
Pour ajouter un contact, saisir directement le nom et numéro de
téléphone ou importer ceux-ci depuis la carte SIM. (Le nombre de
contacts que vous pouvez ajouter est limité par la quantité de mémoire
de votre téléphone).
Rechercher un contact :
Pour rechercher un contact, appuyer sur la touche Recherche, pour
faire apparaître une fenêtre de recherche. Dans la boîte de recherche,
saisir les mots clefs, comme le prénom, nom ou société. Les résultats
de recherche apparaissent au fur et à mesure de votre saisie.
Modifier un contact :
Pour modifier les détails d'un contact, sélectionner « Modifier un
contact ».
Supprimer un contact :
Pour supprimer le contact actuel, sélectionnez « Supprimer un
contact ».
Dans le menu qui apparaît, vous pouvez également définir la
sonnerie d'appel, et effectuer la synchronisation avec un compte ou
exporter des contacts.
4.8 Téléphone
Dans l'interface du téléphone, saisissez le numéro et tapez pour
passer l'appel. Depuis cette interface, vous pouvez également voir
l'historique des appels, etc.
-68-
Page 69

4.9 Play Store
Le Play Store offre un accès direct à un grand nombre
d'applications utiles que vous pouvez télécharger et installer sur votre
téléphone.
5.0. Rechercher
Google peut vous aider à trouver des informations.
5.1 Paramètres
Ce menu vous permet de configurer les paramètres de votre
téléphone.
Paramètres de double-SIM:sélectionnez SIM 1 ou SIM 2.
Sans-fil et réseaux : définissez et appliquez le mode Avion
, les paramètres de réseaux sans fil, Bluetooth, réseau privé virtuel et
des réseaux mobiles.
Paramètres d'appel : pour configurer des fonctionnalités
avancées comme par exemple les numéros d'appel fixes, la boîte
vocale, le transfert d'appel, le blocage d'appel, les coûts d'appel, etc.
Ces fonctionnalités sont dépendantes des fonctions de votre
réseau mobile.
Audio : pour configurer et personnaliser les réglages sonores.
Profiles audio:Général, Silencieux, Réunion
et Extérieur. Ces modes peuvent être personnalisés selon vos goûts et
besoins.
Sélectionnez le mode à personnaliser pour modifier la vibration, le
volume, le type de sonnerie, notifications et son des touches, etc.
-69-
Page 70

Affichage : pour personnaliser l'orientation de l'écran
, la luminosité et le délai de veille.
Localisation et sécurité : pour activer ou désactiver
la connexion au réseaux mobile et GPS ; définir le schéma de
déverrouillage, le verrouillage SIM et configurer la carte SD.
Applications:pour consulter, gérer et supprimer
les applications installées dans votre téléphone.
Comptes et synchronisation : pour définir les options des
comptes de synchronisation de votre téléphone.
Confidentialité : pour régler les services Google
sur votre téléphone. Sauvegarder les données de configuration.
Utilisez Restaurer les paramètres d'usine pour effacer toutes
les données personnelles présentes sur votre téléphone.
Carte SD et stockage interne : Affiche la quantité
de mémoire interne et sur la carte mémoire du téléphone.
Langue et saisie : pour sélectionner la langue de l'interface et
configurer les paramètres de saisie du texte.
Entrée et sortie de la voix : Cette option est disponible après
avoir téléchargé et installer les données vocales « Installeur des
données de synthèse vocale » depuis le magasin en ligne.
Accessibilité : pour activer ou désactiver l'accessibilité.
Date et heure : pour régler l'heure et la date.
Allumage et mise hors tension auto : pour définir des heures
d'allumage ou de
mise hors tension automatiques pour votre téléphone.
À propos du téléphone : pour consulter la puissance du signal,
-70-
Page 71

le niveau de la batterie, l'état du service, les versions logicielles et
matérielles, etc.
Paramètres de fond d'écran : appuyez sur menu
sur l'écran d'accueil et sélectionnez « Fonds d'écran ». Vous pourrez
alors choisir le fond d'écran qui vous plaît. Vous pouvez choisir ces
fonds d'écran depuis 5 sources différentes.
5.2 Boîte d'outils SIM
Insérez la carte SIM, pour modifier les options relatives à cette
dernière
5.3 Dictaphone
Le dictaphone vous permet de créer des fichiers audio.
Pour commencer l'enregistrement :tapez sur .
Pour mettre fin à l'enregistrement :tapez sur .
Pour écouter l'enregistrement :tapez sur .
Les fichiers audio sont enregistrés automatiquement dans votre
téléphone. Vous pouvez les retrouver avec l'explorateur de fichiers ES.
Vous pouvez alors choisir le lecteur avec lequel écouter les
enregistrements.
5.4 Tâches
Saisissez le texte de la tâche à effectuer.
-71-
Page 72

5.5 Lampe torche
Tapez sur menu pour allumer ou éteindre la lampe torche
5.6 Vidéos
Consultez la liste des vidéos puis tapez sur celle qui vous
intéresse.
6 Saisie de texte
Saisir du texte à l'aide du clavier tactile. Ceci fonctionne dans
l'application de contacts, emails, SMS et adresses internet. Le clavier
comporte des fonctionnalités de prédiction, de correction d'orthographe
et apprend au fur et à mesure de son utilisation.
Le clavier intelligent affiche l'orthographe correcte, selon
l'application utilisée.
Saisir du texte :
1 Taper dans la boîte de texte (mémo, ou nouveau contact) pour
afficher le clavier.
2. Taper sur le clavier.
Au début, vous pouvez commencer en utilisant vos indexes pour
taper. Lorsque vous devenez plus familiarisé avec celui-ci vous pouvez
alors taper avec les pouces.
Lorsque vous tapez une touche, celle-ci apparaît agrandie au
dessus de votre doigt. Si vous tapez une lettre incorrecte, déplacez le
doigt sur la touche correcte avant de le relever. En effet, la touche sera
enregistrée uniquement après avoir relevé le doigt.
-72-
Page 73

Pour supprimer un
caractère
Tapez sur 。
pour saisir une lettre
majuscule.
Tapez sur , puis sur la
lettre.
Pour saisir un chiffre
Tapez sur , puis sur le
chiffre.
Pour saisir un
symbole
Tapez sur , puis sur le
symbole.
Pour entrer un
espace
Appuyer sur la touche d'espace
deux fois en succession.
Pour basculer entre
les saisies en Chinois
et en Anglais
tapez sur la touche « Chinois ».
7 Utilisation d'une carte SD
Votre téléphone mobile prend en charge les cartes SD. Installer la carte
selon les instructions données.
-73-
Page 74

En tant que stockage pour votre téléphone, la carte SD à été
définie comme stockage par défaut en usine. Vous pouvez donc
l'utiliser immédiatement sans réglage préalable.
Utilisation une carte mémoire flash : Veillez à ce que la connexion «
Téléphone——Câble de données——PC » est correctement effectuée.
L'ordinateur affichera le message « Nouveau périphérique détecté »,
puis « MT65xx Android Phone doit être installé » :
Consultez les menus relatifs dans le téléphone, et activez-les si désiré :
Menu principal - Paramètres - Applications - Développement Déboggage USB. Décochez « Déboggage USB ».
Une fois confirmé, effectuez la connexion « Téléphone——Câble de
données——PC » de nouveau et assurez-vous que la carte mémoire
est bien présente et que le téléphone détecte correctement la carte SD.
Suivez les étapes affichées à l'écran, de manière à pouvoir utiliser le
téléphone en tant que dispositif u-disque.
Remarque : le téléphone ne peut lire les u-disques, seulement les
cartes SD.
Votre téléphone mobile comporte une fonction de connexion et
déconnexion à chaud. Mais, si vous insérez et retirez la carte SD sans
avoir éteint votre téléphone, cela peut entraîner des problèmes. Nous
vous conseillons donc d'éteindre le téléphone avant d'en retirer ou d'y
installer une carte SD. Il est en général déconseillé de retirer ou
d'installer la carte SD.
8 FAQ et Solutions
Si vous avez une quelconque question concernant le téléphone,
-74-
Page 75

FAQ
Causes
Solutions
Mauvaise
réception
Si vous utilisez le
téléphone dans des zones
de mauvaise réception,
comme près d'un haut
bâtiment ou dans un
sous-sol, il se peut que les
ondes radios soient
partiellement bloquées.
Évitez donc ces
zones autant que
possible.
Si vous utilisez votre
téléphone à un moment de
haut trafic téléphonique,
comme au début de la
journée de travail ou à la
fin, cela peut résulter en
une mauvaise réception.
Évitez donc cela
autant que
possible.
Ceci est aussi dû à la
distance entre vous et la
station réceptrice la plus
proche.
Vous pouvez
faire une
demande
d'élargissement
de la zone de
couverture
auprès de votre
opérateur
réseau.
Échos et
bruits
parasites
Les antennes réseau sont
en mauvais état. Ceci est
un problème qui affecte
toute une région.
Raccrocher et
repasser l'appel.
Choisissez une
autre ligne.
Dans certaines régions,
les lignes d'appel sont en
mauvaise condition.
reportez-vous d'abord au tableau ci-dessous.
-75-
Page 76

Autonomie
réduite
L'autonomie du téléphone
est liée aux paramètres du
réseau.
Dans une zone
de mauvaise
réception,
éteindre le
téléphone
temporairement.
Replacez la batterie.
Remplacer avec
une nouvelle
batterie.
Si aucun signal ne peut
être reçu, votre téléphone
continuera la recherche,
ce qui peut augmenter la
consommation de la
batterie de manière
substantielle.
Utilisez votre
téléphone dans
les zones de
bonne
couverture
réseau ou
éteignez-le
temporairement.
Impossible
d'allumer
votre
téléphone.
La batterie est vide.
Vérifiez le niveau
de la batterie ou
rechargez-la.
Erreur de
carte SIM
La carte SIM est
endommagée.
Prenez contact
avec votre
fournisseur de
services réseau.
La carte SIM n'est pas
insérée correctement.
Vérifiez que la
carte SIM est
insérée
correctement.
La puce de la carte SIM
est sale.
Nettoyez la zone
métallique à
l'aide d'un tissu
propre.
Connexion au
réseau
impossible
La carte SIM n'est pas
valide.
Prenez contact
avec votre
fournisseur de
services réseau.
-76-
Page 77

En dehors de la
couverture GSM.
Contacter
l'opérateur
réseau pour
toute requête.
Le signal est faible.
Déplacez-vous
vers une zone à
meilleure
couverture.
Impossible de
passer un
appel
La fonction de blocage
d'appel est activée.
Désactivez La
fonction de
blocage d'appel.
La fonction de
composition fixe est
activée.
Désactivez la
fonction de
composition fixe.
Erreur de
code PIN
Le mauvais code PIN à
été saisi par trois fois en
succession.
Prenez contact
avec votre
fournisseur de
services réseau.
Impossible de
charger la
batterie.
La batterie ou le chargeur
est défaillant.
Changez la
batterie ou le
chargeur.
Changez la batterie
lorsque la température
ambiante est inférieure à
-10 °C et supérieure à
55 °C.
Déplacez-vous.
Mauvaise connexion
électrique.
Vérifiez que la
prise est
correctement
branchée.
Impossible
d'ajouter un
contact au
répertoire.
Le répertoire est plein.
Supprimer des
contacts du
répertoire.
Impossible de
configurer
Votre opérateur réseau ne
prend pas en charge ces
Prenez contact
avec votre
-77-
Page 78

certaines
fonctionnalités
.
services, ou votre
abonnement ne vous y
donne pas accès.
fournisseur de
services réseau.
Voltage mesuré : DC 5V, 0.7A
Capacité, type et voltage : Li-ion 1800mAh 3.7V
Caractéristiques de l'adaptateur : ENTRÉE AC 100-240V~, 50/60Hz
SORTIE DC 5V, 0.7A
Mémoire : 4 Go
Mémoire disponible pour l'utilisateur : ±1,5 Go
Valeur DAS :
9 Déclaration de conformité
Par la présente, Market Maker Brand Licensing déclare que l’appareil
cité dans cette notice est conforme aux exigences essentielles et aux
autres dispositions pertinentes de la directive 1999/5/CE. La
déclaration de conformité peut être consultée à l’adresse suivante :
Market Maker Brand Licensing
81 ART NATIONALE 7
69570 DARDILLY
0700
-78-
Page 79

PLR IP Holdings, LLC, se licenciés et affiliés, supportent complètement
l'initiative écologique pour un monde meilleur. En tant que gardiens
responsables de l'environnement, et pour éviter de violer les lois
établies, vous devez disposer de ces produits dans le respect des
réglementations applicables, directives et autres gouvernances dans
votre région. Contactez les autorités locales et votre revendeur pour
obtenir plus d'informations concernant le recyclage dans votre région.
LA MISE AU REBUT CORRECTE DES DÉCHETS ÉLECTRONIQUES
DÉCOULE DE LA RESPONSABILITÉ DE L'UTILISATEUR FINAL
DANS L'UNION EUROPÉENNE
Le symbole de la poubelle barrée présent sur le produit indique que
celui-ci ne peut pas être mis au rebut avec les déchets ménagers
classiques. L'utilisateur est responsable de l'élimination de ce type de
produit dans les points de collecte désignés spécifiquement pour les
recevoir. Le tri sélectif des déchets est bénéficiaire à l'environnement et
aide à préserver les ressources naturelles et la bonne santé des
personnes. Pour obtenir plus d'informations concernant le recyclage
des produits électriques et électroniques, veuillez contacter les
autorités locales ou votre revendeur.
-79-
Page 80

Afin d’éviter des dommages auditifs éventuels, ne pas écouter à un
niveau sonore élevé pendant une longue durée.
Polaroid, Polaroid & Pixel sont des marques déposées de PLR IP
Holdings, LLC, utilisées sous licence. Toute autre marque mentionnée
est propriété de son détenteur respectif, qui n'a pas sponsorisé ou
approuvé ce produit. PLR IP Holdings, LLC ne fabrique pas ce produit
et ne fournit aucune garantie constructeur ou assistance.
Android est une marque déposée de Google Inc.
-80-
Page 81

-81-
Page 82

FCC
This device complies with part 15 of the FCC Rules. Operation is
subject to the condition that this device does not cause harmful
interference
Any Changes or modifications not expressly approved by the party
responsible for compliance could void the user's authority to operate
the equipment.
Note: This equipment has been tested and found to comply with the
limits for a Class B digital device, pursuant to part 15 of the FCC Rules.
These limits are designed to provide reasonable protection against
harmful interference in a residential installation. This equipment
generates uses and can radiate radio frequency energy and, if not
installed and used in accordance with the instructions, may cause
harmful interference to radio communications. However, there is no
guarantee that interference will not occur in a particular installation. If
this equipment does cause harmful interference to radio or television
reception, which can be determined by turning the equipment off and on,
the user is encouraged to try to correct the interference by one or more
of the following measures:
-Reorient or relocate the receiving antenna.
-Increase the separation between theequipment and receiver.
-Connect the equipment into an outlet on a circuit different from that to
which the receiver is connected.
-82-
Page 83

-Consult the dealer or an experienced radio/TV technician for help
Specific Absorption Rate (SAR) information:
This MOBILE PHONE meets the government's requirements for
exposure to radio waves. The guidelines are based on standards that
were developed by independent scientific organizations through
periodic and thorough evaluation of scientific studies. The standards
include a substantial safety margin designed to assure the safety of all
persons regardless of age or health.
FCC RF Exposure Information and Statement The SAR limit of USA
(FCC) is 1.6 W/kg averaged over one gram of tissue. Device types:
i544 (FCC ID: 2ADPL-I544) has also been tested against this SAR limit.
The highest SAR value reported under this standard during product
certification for use at the ear is 0.792W/kg and when properly worn on
the body is 1.293W/kg. This device was tested for typical body-worn
operations with the back of the handset kept1.0cm from the body. To
maintain compliance with FCC RF exposure requirements, use
accessories that maintain a 0.5 cm separation distance between the
user's body and the back of the handset. The use of belt clips, holsters
and similar accessories should not contain metallic components in its
assembly. The use of accessories that do not satisfy these
requirements may not comply with FCC RF exposure requirements,
and should be avoided.
-83-
Page 84

Body-worn Operation
This device was tested for typical body-worn operations. To comply with
RF exposure requirements, a minimum separation distance of 0.5 cm
must be maintained between the user’s body and the handset,
including the antenna. Third-party belt-clips, holsters, and similar
accessories used by this device should not contain any metallic
components. Body-worn accessories that do not meet these
requirements may not comply with RF exposure requirements and
should be avoided. Use only the supplied or an approved a
-84-
 Loading...