

Page 1
PLA-4200M
Page 2

Page 3
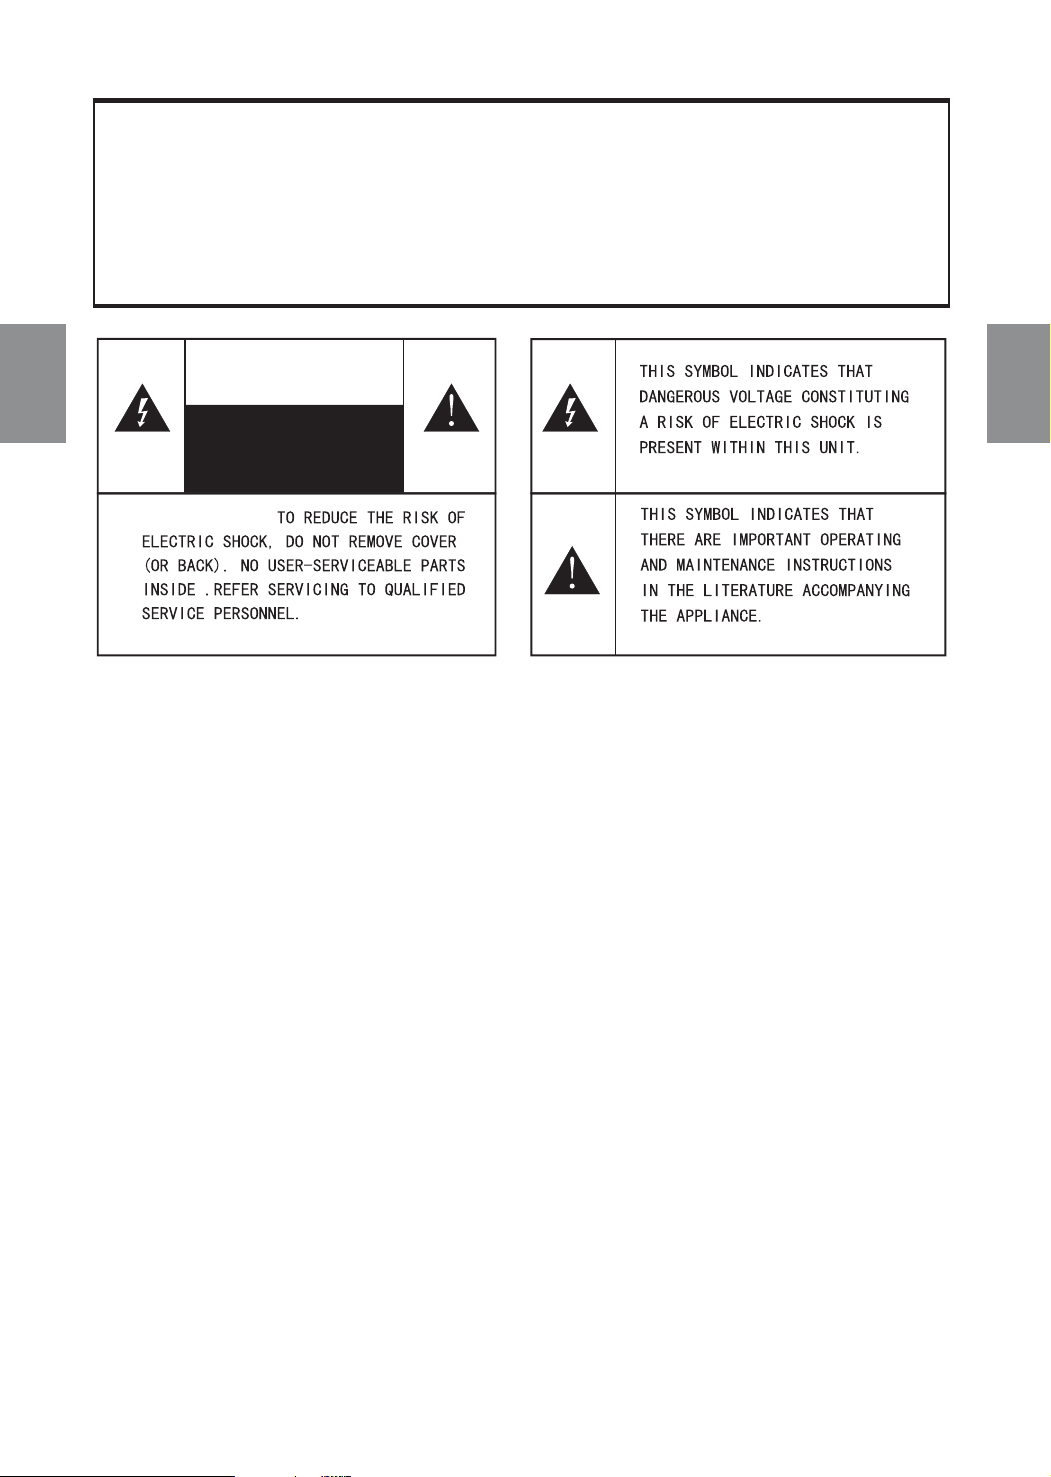
WARNING:
To reduce the risk of fire or electric shock, do not expose this apparatus to rain or moisture.
The plasma monitor shall not be exposed to dripping or splashing. No object filled with
liquids, such as vases, shall be placed on it.
CAUTION
RISK OF ELECTRIC SHOCK
DO NOT OPEN
CAUTION :
This important warning is located on the rear of the cabinet.
CAUTION:
Do not place this Plasma Monitor on an unstable cart, stand, or table. The
Plasma Monitor may fall, causing serious injury to a child or adult, and
serious damage to the Plasma Monitor.Use only with a cart or stand recommended
by the manufacturer or sold with the Plasma Monitor.
IMPORTANT SAFETY INSTRUCTIONS
1 Read these instructions.
2 Keep these instructions.
3 Heed all warnings.
4 Follow all instructions.
5 Do not use this apparatus near water.
6 Clean only with dry cloth.
7 Do not block any ventilation openings .Install in accordance with the manufacturers
instructions.
8 Do not install near any heat sources such as radiators, heat registers, stoves, or
other apparatus(including amplifiers)that produce heat.
9 Do not defeat the safety purpose of the polarized or grounding-type plug. A polarized
plug has two blades with one wider than the other. A grounding type plug has two
blades and a third grounding prong .The wide blade or the third prong are provided
for your safety. If the provided plug does not fit into your outlet , consult an
electrician for replacement of the obsolete outlet.
Page 4

10 Protect the power cord from being walked on
or pinched particularly at plugs, convenience
receptacles, and the point where they exit from
the apparatus.
11 Only use attachments/accessories specified by
the manufacturer.
12 Use only with the cart, stand ,tripod, bracket,
or table specified by the manufacturer ,or sold
with the apparatus. When a cart is used ,use
caution when moving the cart/apparatus
combination to avoid injury from tip-over.
13 Unplug this apparatus during lightning storms
or when unused for long periods of time.
14 Refer all servicing to qualified service personnel.
Servicing is required when the apparatus has
been damaged in any way , such as power-supply
cord or plug is damaged, liquid has been spilled
or objects have fallen into the apparatus, the
apparatus has been exposed to rain or moisture,
does not operate normally, or has been dropped.
Page 5
Thank you for purchasing the PLA-4200M Plasma Color TV Receiver. Please read this instruction
manual carefully before operating this unit. Observe the standard operating procedures.
Table of Contents
10
10
11
11
12
13
13
13
14
14
15
1
1
1
2
2
3
3
5
7
9
1
I . Preface
1. Features of this unit
2. Safety precautions
recautions
3. P
1
II. Unpacking check
III. Accessories
IV. The arrangement of the set
V. Preparation for use
VI. Basic operation
VII. How to adjust the image display
VIII. How to adjust the sound
IX. How to select OSD language and the adjustment of MISC
X.
How to adjust the time
XI.
How to receive PC, HDTV, YP P signal under PC/DTV status
XII. Adjustment of image display under PC/DTV input status
.
XIII The PIP function under PC/DTV status
XIV. STILL control
XV. MUTE control
XVI. Technical specifications
. Troubleshooting
XVII
Attached tables
BR
I Preface
Features of this unit
High sharpness.
High contrast.
High brightness.
Progressive display without flicker.
High resolution computer port can receive PC/RGB, DTV/YP P signal.
Super-thin design
Infrared remote control.Multi-language display on screen.
Receive CABLE/AIR TV signal(NTSC-M).
Parental lock and closed caption function.
Multiway video S-VIDEO input PAL/SECAM/NTSC .
BTSC stereo function.
When no signal is present for 5 minutes, the TV enters standby mode .
When no signal is present for 5 minutes, all video functions enter energy saving mode
.
YC C ,
BR
Safety precautions
To prevent electric shock, do not operate the unit in a damp environment
The unit contains high-voltage electric current. Do not open the unit
BR
.
.
.
Page 6
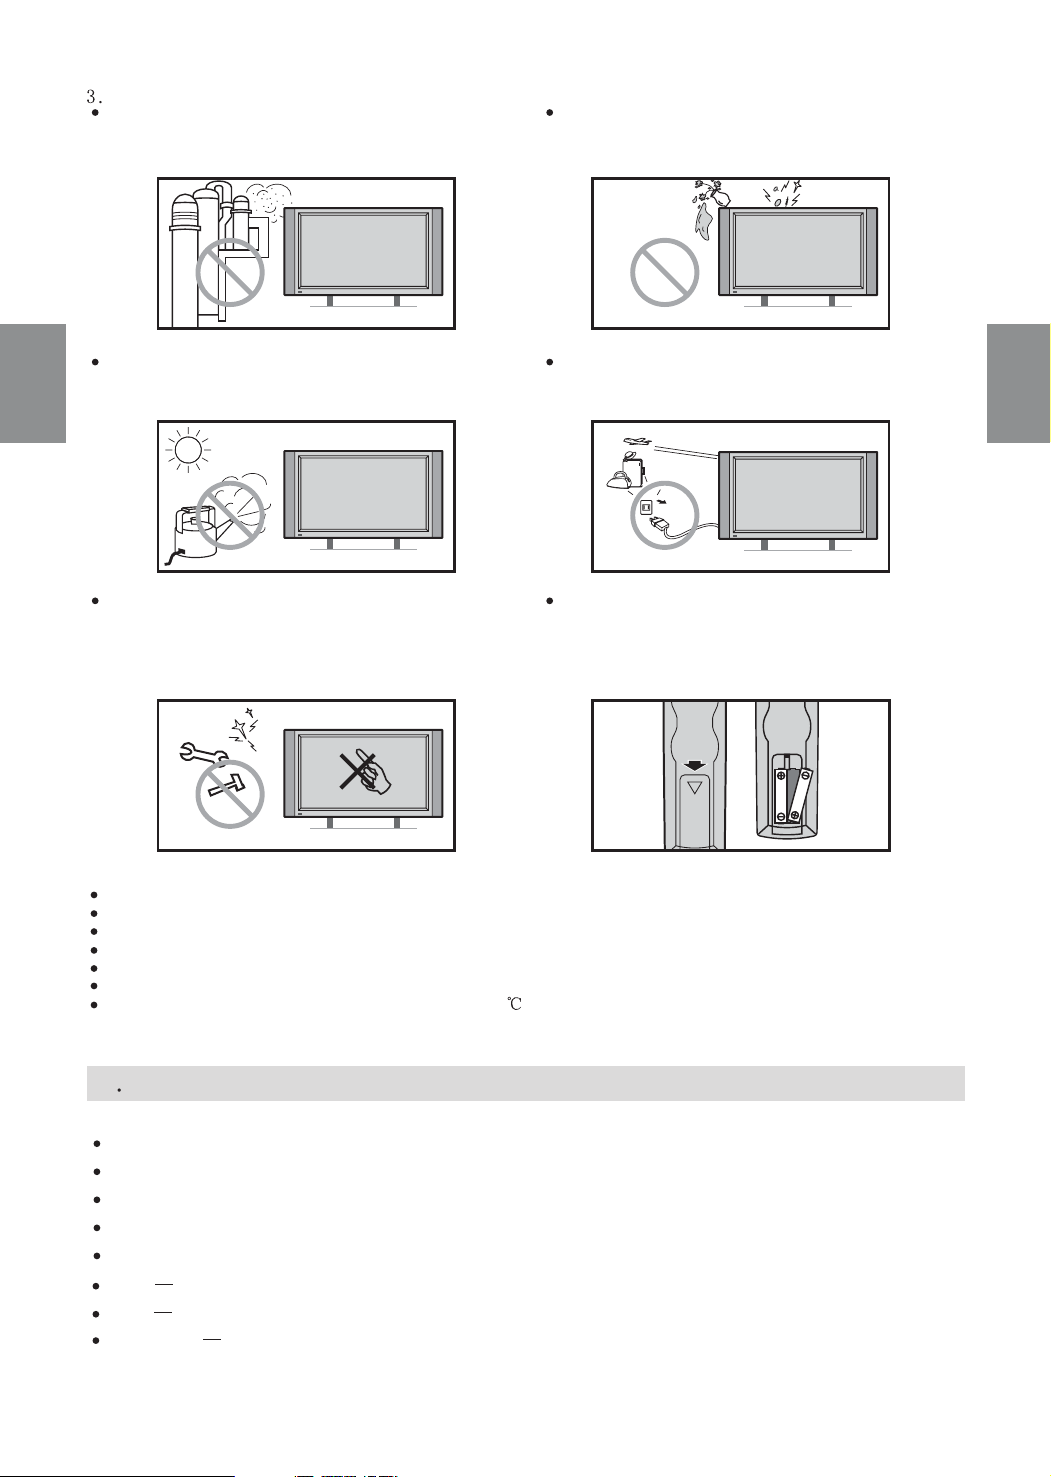
Precautions
Not for use in industrial environments. Do not expose
to high temperatures or a large amount of dust.
Do not shake the unit or drop things on it. Do not
place liquids on top of it.
2
Do not expose unit to damp or direct sunlight.
Do not touch the screen or strike the screen with
anything.
If you will not use the unit for several days, unplug
the AC power cord.
Do not hold the buttons on the remote control down
for a long time. If you will not use the remote
control for a long time, remove the batteries to
prevent leakage and damage.
2
Do not leave a still image on the screen for a long time.
Use a clean, soft cloth with water and a mild detergent to clean the screen.
Do not use alcohol, harsh detergents, polishes, or anti-static spray on the screen. These could cause damage.
Assure the unit is in a well-ventilated area and that the vent holes are not covered.
After turning the unit off, allow it cool down for at least 2 minutes before turning it on again.
During an electrical storm, unplug the unit and disconnect the antenna to prevent lightning damage .
The ambient temperature under normal usage: 0-35
Ambient humidity: 20%-70%RH
II Unpacking check
Model No. of the unit-confirmation
Package in good condition
Bar code clear
The appearance of the whole set no damage
The button of the switch and the remote controller- sensitive
image clear
sound good
Accessories whole set
Page 7

III Accessories
Remote controller
AC power cord
RF line
S-Video cable
BR
YP P cable
Operating Instructions
Quality warranty card
1 piece
1 piece
1 piece
1 piece
1 Piece
1 Piece
1 Piece
3 3
IV The arrangement of the set
Location: The unit is designed to be used in large spaces such as conference rooms, reception halls, etc.
To maximize performance and safety, place the unit with consideration of its dimensions and weight.
The ideal location will have:
Spacious and clean ambient environment;
Good ventilation;
Safe and stable rated voltage;
The surface for arrangement shall be with suitable
dimensions, solid and stable;
Best viewing distance is 3 meters from the screen.
See drawing.
Thebestdistanceis3m.
Note: Locate the unit indoors where where direct
sunlight cannot shine on the screen to avoid eye strain
while viewing.
Page 8

2. Signal source
Back of the unit
4
and its audio input
AUDIO IN
R
L
PC/RGB
PC IN
AUDIO IN
S-VIDEO IN
RLR
S-VIDEO
and its audio input
AUDIO IN
L
YCBC
YCBC
YC C
BR
R
IN
R
AIR/CABLE
AIR/CABLE
input
AV IN
AV 2
AV 1
VIDEO
and its audio input
Diagram for connecting this unit to external video and audio equipment
AIR/CABLE
AUDIO IN
R
L
PC IN
S-VIDEO IN
AUDIO IN
AIR/CABLE
AV IN
AV 2
AV 1
YCBC
R
L
AUDIO IN
R
L
R
IN
AUDIO
L
R
AV 1 input
VIDEO
DTV/YP P input
AV 2 input
AUDIO
L
R
BR
AC IN
100V~-240V
~
50Hz/60Hz
AC power
input socket
AC power
input socket
AC IN
100V~-240V
~
50Hz/60Hz
4
AV 1
S-VIDEO
OUT
LR LR
AUDIO OUT
AUDIO OUT
Y
C
bCr
AV 2
OUT
VIDEO
OUT
LR
AUDIO
OUT
DVD VCD&
OUT
top-box etc.
LR
AUDIO
OUT
PC
LR LR
S-VIDEO
OUT
AUDIO OUT
AUDIO OUT
DVD&HDTV
OUT
VIDEO
Note: Do not connect or disconnect any input signal when the unit is powered. Certain computer applications
require equipment to be powered up in a particular order. Most computers should not be switched on until the
peripheral is powered.
Page 9

V Preparation for use
1.Install the battery for the remote controller
a. Press the cover of the battery compartment on the
remote controller and remove it.
b. Insert 2 batteries, make sure the polarity (+) or (-) of
batteries conforms to the polarity marks in the battery
compartment.
c. Slide the cover of the battery compartment to the
original place.
Note:
Do not drop or dismantle the remote controller.
5
Donotgetitwet
If the remote will not be used for some time remove
the batteries to prevent damage.
Do not mix new and old batteries.
Properly recycle used batteries.
Be familiar with the name and function of the remote control buttons
Description of basic remote control buttons and key controls on the front panel:
Back of the remote controller
5
Control button
MENU
CH+
CH-
VOL+
VOL-
TV/VIDEO
POWER
The function during viewing
Select the screen display menu system
Select to display the next stored channel
Select to display the previous stored channel
Increase volume
Decrease volume
Switch the input signal
Switch the set to standby status.
The function when using the menu
Enter the next menu button
Select to display the previous menu item
Select to display the next menu item
The content selection for item
Increase the value of the current item
Decrease the value of the current item
The content selection for item
Exit Menu button
Switch the set to standby status
The operation status shown by the power indicator :
1.Green light-Operation status
2.Red light- Standby status
3.Flashing of green light-Energy saving status and when the screen display No Signal message
Front of the whole set
Remote Sensor
Power Indicator
Main Power Switch
Note: When the electricity is just switched on, the unit is under Standby status.
Page 10

Descripti on of remot e controll er
Name
POWER
MUTE
TV/VI DEO
Funct ion
Stand by O n/Off button
MUTE On/O ff button
TV/AV1/AV 2/S-V IDEO/ Compo nent
/Anal og R GB/DT V YP bPr Selec tion butt on
SLEEP
BRI
6 6
PIP
EXIT
MENU
CH+
CH-
VOL+
VOL-
Sleep tim ing off button
Short cut butto n fo r br ightn ess chang e of the ima ge
pictu re-in -pict ure selec tion when PC/ DTV mode
Exit Menu bu tton
Men u selec ti on button /co nfirm ation butt on /SE T button
Progr am u p/ m enu upwar ds b utton
Progr am d own / me nu d ownwa rds butto n
Vol ume increase/ item value incr ease
/ it em c onten t se lecti on b utton
Vol ume decrease/ item value decr ease
POWER
TV/VIDEO
SLEEP
MUTE
BRI
/ it em c onten t se lecti on b utton
CLOSE D
CAPTI ON
PARENT
VIDEO
MTS
SWAP
CH
ADD/E RASE
STILL
12345 67890
100
CLOSE D CA PTION sel ectio n bu tton
Paren t se lecti on b utton
Setti ng b utton of imag e si ze
Selec tion butt on o f so und mode
SAP/M ONO/S TEREO
Chann el p layba ck b utton
Chann el a dd/er ase butto n
Still ima ge b utton
Digit sel ectio n button
hundr ed d igit button
C
CLOSED
APTI
P
PI
VOL-
ON
VIDEO
1 2
MTS
CH+
MENU
CH-
SWAP
3
EXIT
VOL+
R
A
P
CH
ADD/ERASE
4
T
EN
5
9 0
6 7 8
STILL
100
Page 11

VI Basic operation
Note: The function of the button on the front panel is accord with that on the remote controller.
1.POWER button.
Insert one end of the AC power cord into the AC power socket of the unit.
Insert the power plug of the AC power cord into a suitable AC outlet.
Press the main power switch on the unit. The red Power Indicator will light as the unit enters standby status.
Press the red POWER button on the remote controller and the unit will turn on. The green Power Indicator
will light and an image will appear on the screen.
To turn the unit off, press the red POWER button on the remote and the unit will return to standby status.
The Power Indicator on the front panel of the unit will change from green to red.
7 7
Press the Main Power switch on the unit to power it down completely.
Note: DonotswitchofftheunitwhiletheOSDisonthescreen.
The PLA-4200M is a digital device. If there is abnormal behavior, press the Main Power Switch on
the front panel to switch the unit off. Wait 2 minutes and switch the power back on. If the set still
does not work normally, contact the manufacturer.
2. Set the video input source
Select the source by pressing the TV/VIDEO button until the desired source appears.
Analog RGB YPbPr
3. How to setup TV reception
1 Auto channel
Press the TV/VIDEO button on the remote controller
to select the TV status.
Press MENU button.
Press CH+ or CH- button to open the TV SETUP
menu (a).
TV SETUP
MODE
AUTO CHANNEL
FINE TUNE
SET UP DOWN EXIT
Air
Press SET
50
PressMENUbuttontoentertheSetupmodeandpress
CH+ or CH- to select the MODE item.
PressVOL+orVOL-toselectCableorAir
Press CH+ or CH- to select AUTO CHANNEL. Press
the MENU button to begin the automatic search and
store..
2 FINE TUNE
If the image receiving is poor, press CH+ or CH- to select FINE TUNE item in menu (a). Press VOL+ or VOL-
to adjust the picture quality.
3 Select the TV channel
Press the CH+ or CH- button on the remote controller to switch to the previous and next channel of the current
program.
Press the 0-9 digit button and 100 button on the remote controller to select either AIR for channels CH2-CH69
or CABLE for channels CATV1-CATV125
To channels in each mode:
Air channels CH2-CH9: press the appropriate 2-9 digit button directly.
Air channels CH10-CH69: press 2 digit buttons in sequence.
Cable channels CATV1-CATV9: press the appropriate 1-9 digit button directly
Cable channels CATV10-CATV99: press 2 digit buttons in sequence.
Cable channels CATV100-CATV125: press the 100 button first, then press the necessary digit buttons in sequence.
4 CH ADD/ERASE is used to add and erase channels which were programmed with AUTO CHANNEL.
Select the channel to erase by pressing the 0-9 and 100 buttons or the CH+ and CH- buttons on the remote controller.
With the channel selected, press the CH ADD/ERASE button to erase the channel. The Channel No. changes from
yellow to blue when it is erased.
To restore an erased channel, select the blue Channel No. and press the CH ADD/ERASE button.
Note: Please keep at least two stored channels.(The Channel Number is blue.)
Cable Mode has three modes:CABLE-STD,CABLE-HRC and CABLE-IRC.Please choose the suitable
mode depending on your local situation.
Page 12

5 SWAP
When watch ing TV, press th e SWAP button on the remote con troller to sw itch to the previously viewed chan nel.
6 CLOSED CAP TION
Press the C LOSED CAPT ION button on the remote
controlle r, th e menu (b) wil l appear on the screen .
CLOSED CAPTION
Press CH+ o r CH- butto n to select th e item.
Press VOL+ or VOL- but ton to select the item co ntent.
MODE
CHANN EL Ch1
Capti on
MODE: Capti on Tex t O ff Caption
CHANNEL: C H1 CH2 CH1
Press EXIT button to e xit the menu.
UP DO WN LEF T R IGH T EX IT
Note: This function is invalid under the PC/RGB and
DTV/YP bPr status.
7 PARENTAL
Press the PARENT button on the remote controller, the
INPUT PASSWORD
- - - -
image(c) w ill appear on the scre en.
Press the d igit butto n on the rem ote controller to input
the PAS SWORD.
(The facto ry default password is 0 000. Reset the
password t o prevent c hildren from accessing prohibited
materials . )
Note: This function i s invalid u nder the PC/D TV status.
88
PARENTAL MAIN
After ente ring the co rrect pass word, the men u (d) will
MPAA
TV G UI DELIN E
PAS SWORD
SET UP D OWN E XIT
Press SET
Press SET
Press SET
appear on t he screen.
Press CH+ o r CH- button to select ite m.
A. MPAA Rating Control
MPAA RATING
G
PG SHOW
PG-13 SHO W
R SHO W
NC-17 SHO W
X SHO W
UP DO WN LEF T R IGH T EX IT
If you want to unblock temporarily, press MENU button, then the TV set will request the password. If you
enter the password correctly, you can see the program until you change the signal source using TV/VIDEO
Button or get into the PARENTAL menu aga in.
Factory de fault is un block ever y rating.
SHOW
Select MPAA item u nder menu (d), and press MENU
button to c onfirm. Th e image (e) appears on the screen.
Press CH+ o r CH- butto n to select the rating.
Press VOL+ or VOL- but ton to set the rating SHO W o r
BLOCK.
Press EXIT button to e xit the men u.
Page 13

TV GU ID EL IN E
TV -Y
7
TV -Y
TV -
G
G
TV -P
4
TV -1
TV -M
A
CO NTE N
T
Pr ess SE T
D L S V F V
BL OC K CONTENT
D
L
S
V
FV
UP DO WN LEF T R IGH T EX IT
PAS SW OR D CHAN GE
OL D
NE
W
CO NFI RM
NUM BER E XIT
- - - -
- - -
- - -
SHO W
BLO C
BLO C
BLO C
BLO C
BLO C
SH OW
BL OC
BL OC
BL OC
BL OC
B. TV GUIDELI NE
Selec
t TV GUIDELIN E item in menu (d ).
Pres
K
K
K
K
K
K
K
K
K
s MENU button t o confirm, th e image (f) wil l appear
on the screen .
Pres
s CH+ or CH- butt on to select th e rating( exc luding
CONTENT)
Pres
s VOL+ or VOL- bu tton to set the r ating SHOW or
BLOCK
Pres
s CH+ or CH- butt on to select CO NTENT item, a nd
pres
s MENU button t o confirm.
Th
e image (g) wil l appear on the s creen.
Pres
s CH+ or CH- butt on to select th e item.
Pres
s VOL+ or VOL- bu tton to set the i tem SHOW or
BLOCK
Pres
s EXIT button t o exit the menu .
.
.
.
If you want to un block tempo rarily, pr ess MENU button ,
the
n the TV set will r equest the pa ssword. If yo u enter the
th
e password co rrectly, you can see the pr ogram until you
chang
e the signal so urce using TV /VIDEO butt on or get
int
o the Pare n t a l menu agai n.
Factor
y default is un block every r ating.
99
C. PASSWORD CHANG E
Selec
t PASSWORD CHANGE i tem in menu (d) , and
pres
s MENU to confi rm. The image ( h) will appea r on
th
e screen
Pres
-
-
s the digit but ton to select t he necessar y PASS WORD.
Pres
s EXIT button t o exit the menu .
Note:If the PASSWORD is forgotten, plea se contact
e manufactu rer immedia tely.
th
8 M TS control
s the MTS butto n on the remote c ontroller,
Pres
t sound mode. (SAP/MONO /STEREO)
selec
VII How to adjust the image display
PI CT URE
BR IGH TN ESS
CO NTR AS
CO LO
HU
SH ARP NE S
TE MPE R
RE CAL
PI CT URE
BR IGH TN ESS
CO NTR AS
CO LO
HU
SH ARP NE S
TE MPE R
RE CAL
T
R
E
S
ATUR E
L
T
R
E
S
ATUR E
L
SET UP D OWN E XIT
26
50
50
50
No rma
Pr ess SET
SET UP D OWN E XIT
No rma
Pr ess SET
50
l
26
50
50
50
50
l
Press MENU bu tton
Pres
men
butto
Pres
or VOL- to incr ease or decre ase the value o f item.
BRIGHTNES
(ther
CONTRAS
COLO
HU
SHARPNES
TEMPER
image
Pres
Norma
RECALL
Pres
s CH+ or CH- butt on to select PI CTURE menu, the
u (i) will appe ar on the scree n and press MEN U
n to confirm.
s CH+or CH- but ton to select i tem, then pre ss VOL+
S c hange the bri ghtness of the image
e is a BRI shortc ut button on th e remote cont roller) .
T change the c ontrast of the im age.
R change the c olor of the image.
E -change the h ue of the image .
S change the s harpness of the i mage.
ATURE change t he color temp erature of th e
.
s VOL+ or VOL- buto n tochange th e item conten t
l Warm Cool Normal
- recover the f actory sett ing.
s EXIT button t o exit the menu .
Note: when th e signal inpu t status is AV1, AV2,
S-VIDE
O and COMPONE NT, the me nu is (j).
Page 14

VIII How to adjust the sound
SOUND
VOLUME
TREBLE
BASS
BALANCE
AVC on
SET UP DOWN EXIT
21
60
59
0
Press MENU button.
Press CH+ or CH- button to select SOUND menu, the
image (k) will appear on the screen, then press MENU
button to confirm.
Press CH+ or CH- button to select item, then press VOL+
or VOL- button to increase or decrease the value.
VOLUME change the sound volume
TREBLE change the treble in the sound
BASS change the bass in the sound
SOUND
VOLUME
TREBLE
BASS
BALANCE
AVC on
SET UP DOWN EXIT
21
60
59
0
BALANCE ch
and right sound track ( 0 is the balance point)
AVC(automatic volume control): on off on
Press EXIT button to exit the menu.
ange the balance of the left sound track
Note: when the signal input status is AV1, AV2,
S-VIDEO, COMPONENT, the menu is (l).
IX How to select OSD language and the adjustment of MISC
1010
MISC
VIDEO SIZE
OSD LANGUAGE
OSD SHEET
OSD POSITION
MISC
VIDEO SIZE
OSD LANGUAGE
OSD SHEET
OSD POSITION
SET UP DOWN EXIT
Letter Box
English
Opaque
SET UP DOWN EXIT
Letter Box
English
Opaque
MISC(MISC) includes the adjustment of video size
(DIMENSION DE IMAGE),OSD language
(LANGUAGE OSD),OSD sheet(PAGE OSD), OSD
position(POSITION OSD).
Press MENU button.
Press CH+ or CH- button to select MISC(MISC) menu,
the image (m) will appear on the screen, then press
MENU button to confirm.
Press CH+ or CH- button to select the item, then press
VOL+ orVOL- buttontoselectthestatusofitem.
VIDEO SIZE Fill Screen Fit Aspect
Letter Box TV Mode Fill Screen
OSD LANGUAGE
English France English
OSD SHEET translucent opaque translucent
OSD POSITION
PressEXITbuttontoexitthemenu.
Note: when the signal input status is Av1, AV2,
S-VIDEO, COMPONENT, the menu is (n)
Page 15

X How to adjust the time
11
TIME
SLEEP
WAKE UP
TIME
WAKE UP
Every day
PM 04:08
UP DOWN LEFT RIGHT EXIT
TIME
AM 00:00
UP DOWN LEFT RIGHT EXIT
SET UP DOWN EXIT
Off
Press SET
Press SET
Press MENU button.
Press CH+ or CH- button to select TIME menu. The
image (o) will appear on the screen. Then press MENU
button to confirm.
Press CH+ or CH- button to select the item, then press
VOL+orVOL-buttontoset.
SLEEP: off 30min 60min 90min 120min
180min off (there is a SLEEP shortcut button
on the remote controller)
Press CH+ or CH- button to select WAKE UP item and
press MENU button to confirm. The image (p) will
apear on the screen.
PressVOL+orVOL-buttontoset:
every day once off every day
Press digit selection buttons to shift between AM and
PM.
Press CH+ or CH- button to select TIME item and press
MENU button to confirm. The image (q) will appear on
the screen.
Press digit selection buttons to shift between AM and
PM.
PressEXITbuttontoexitthemenu.
11
XI How to receive PC, HDTV, YP P signal under PC/DTV statusBR
Press the TV/VIDEO button on the remote controller to select PC or DTV status.
PC MODE can receive PC(VGA)
DTV MODE can receive YP P (HDTV or SDTV)
Note:
Refer to the diagram on page 4 for the connection of the set and the external video and audio equipment.
BR
Page 16

XII Adjustment of image display under PC/DTV input status
12
PICTURE
BRIGHTNESS
CONTRAST
TEMPERATURE Normal
GEOMETRY Press SET
PICTURE
BRIGHTNESS
CONTRAST
TEMPERATURE User
RED
GREEN
BLUE
GEOMETRY
UP DOWN LEFT RIGHT EXIT
UP DOWN LEFT RIGHT EXIT
Press SET
50
50
50
50
51
51
51
1 The adjustment of brightness and contrast
Press MENU button.
Press CH+ or CH- button to select PICTURE menu, the
menu (r ) will appear on the screen, then press MENU
button to confirm.
Press CH+ or CH- button to select item, then press
VOL+ or VOL- button to change the value of the item.
BRIGHTNESS- change the brightness of the image
(there is a shortcut button on the remote controller BRI) .
CONTRAST- change the contrast of the image.
Press EXIT button to exit the menu.
2 Adjust the color temperature of the image
Press CH+ or CH- button in menu (r) to select
TEMPERATURE item. Then press VOL+ or VOL-
button to change the item content.
Cool Normal Warm User Cool
When selecting User , the menu (s ) will appear on
the screen. Then press CH+ or CH- button to select RED,
GREENorBLUEitem. PressVOL+orVOL-buttonto
increase or decrease the value of the item.
PressEXITbuttontoexitthemenu.
12
GEOMETRY
H-POSITION
V-POSITION
PHASE
H-SIZE
AUTO ADJUST
UP DOWN LEFT RIGHT EXIT
Press SET
50
50
52
50
3 Adjust the image , PHASE, H-SIZE, and
GEOMETRY
AUTO ADJUST
PressCH+orCH-buttontoselect itemin
GEOMETRY
menu (r), then press MENU button to confirm, the menu
(t ) will appear on the screen.
Press CH+ or CH- button to select the item, then press
VOL+orVOL-buttontoincreaseordecreasethevalue
of the item.
H-POSITION: change the horizontal position of the
image.
V-POSITION: change the vertical position of the image.
PHASE change the phase of the image to improve the
image quality.
H-SIZE: change the horizontal width of the image.
When selecting AUTO ADJUST item, the MENU button
can automatically adjust the image to best status.
PressEXITbuttontoexitthemenu.
Note: Sometimes the image of HDTV signal is not at
the center of the screen, please follow the procedures
above to adjust the geometry.
Page 17

XIII The PIP function under PC/DTV input status
PIP
PIP ON/OFF
PIP SOURCE
AUDIO SOURCE
PIP POSITION
SET UP DOWN EXIT
PIP off
TV
PIP
Press MENU button.
Press CH+ or CH- button to select PIP menu, the image
(u) will appear on the screen, then press MENU button
to confirm.
PressCH+orCH-buttontoselecttheitem,thenpress
VOL+orVOL-buttontoselecttheitem.
PressEXITbuttontoexitthemenu.
PIP ON/OFF PIP Off PIP ON PIP Off (the PIP
shortcut button on the remote controller has the same
function).
PIP SOURCE TV AV1 AV2 S-VIDEO
COMPONENT TV
AUDIO SOURCE MAIN PIP MAIN
PIP POSITION
Note:Parental function can work for PIP image. If want to
exit the blocked PIP state, please press TV/VI EO button
D
on the remote controller. And if you want to change the PIP
signal source, please re-set this rating from block to show.
1313
XIV STILL control
Pressing the STILL button on the remote controller freezes the current image . Press the STILL button again ,
the still image is released.
Note:This function in invalid under the PC/DTV status
XV MUTE control
Press the MUTE button to turn off the sound.
Press the MUTE button again and the sound is turned back on. Sound will also be restored if the signal source
is switched, i.e. from TV to AV.
Page 18

14
XVI Technical specifications
Type
System of the broadcasting signal
System of the video signal
Number of Stored programs
Scope of the channel
Signal Intensity
Audio
Speaker output Audio input (speaker)
PC/DTV RGB input
Max. visual angle
Resolution
Power supply
Energy consumption
Dimensions of the whole set
Size of the screen
Width Height ratio of the screen
Weight
Ambient temperature
Ambient humidity
Ambient air pressure
Note: The specifications is subject to modification without notice .
PLA-4200M
NTSC-M
PAL/NTSC/SECAM
125
AIR CH2-CH69 ,CABLE CATV1-CATV125
>=70dB
Input impedance >10K .input voltage 0.1-0.5Vrms
2X5W
PC HDTV(the supporting format is in the attached table)
BR
YP P
Horizontal angle <=150 Vertical angle<=30
852X480
AC 100V-240V (50 /60Hz)
350W(MAX) 3W(Standby)
(W
idth/Height/Depth)46.1X29.1X15.2inch
42 inch
16:9
110 pound
0~35
20%-70%RH
86~106Kpa
Hz
XVII Troubleshooting
If there is any abnormal situation during the operation, please make the corresponding check according to the
following instruction before sending for repair.
No video signal
Video and sound
interference
No image and sound
Image is normal, but
there is no sound
The image has no color
The remote controller does
not work
Others
Check the connection of the power cord.
Check if the power switch is On .
Check if the unit is under standby status.
(Power indictor is red)
Check if the signal source is normally output under the current play status.
Switch off the main power and switch on after 2 minutes.
Check the direction, location and connection of the antenna.
Check if the signal is interfered under the current play status .
Check if there is any interference by the electric apparatus nearby .
Check if the power of the unit and the signal source is stable .
Check if the grounding of the signal cable is good .
Check if any of the building in the environment reflects the radio wave.
Check if the power cable is connected .
Check if the main power is ON.
Check if the signal source has normal output under the current play status.
Check the brightness and contrast of the image and check if the volume setting is correct.
If it is under standby status.
Check if the sound has been input correctly.
Check the volume setting.
Check the MUTE setting.
Check the color setting.
Check if the signal source has been output normally under the current play status.
Check the contact and pole of the remote controller and the batteries, or change the battery.
Clean the transmission window of the remote controller and the receiving window of this unit.
Check if there is any obstacle between the transmission window of the remote controller and the Remote sensor of this unit.
Although the image and sound are normal, there will be noises sometimes with the change of
the operation environment and the expansion of the shell. It is normal .
14
Note:Do not remove the back cover.
Page 19

Attached table 1
HDTV INPUT SUPPORT
15
The supporting display format.
15
Attached table 2
PC INPUT SUPPORT
the image is not clear enough
Note: when the PC inputs the SVGA, the image is the best.Design and specifications are subject to change
without notice
Page 20

English
For service, support and warranty information, visit
www.polaroidelectronics.com or in the US call 1-866-289-
5168, in Canada call 1-866-301-7922 and in Mexico call 01800-400-2443.
“Polaroid” is a registered trademark of Polaroid Corporation
of Waltham, MA USA and licensed for use on the MODEL #
to Petters Consumer Brands, LLC.
French
Pour les informations concernant l’entretien, l’assistance et
la garantie, visiter
le 1-866-289-5168 aux États-Unis et le 1-866-301-7922 au
Canada. Au Mexique appeler le 01-800-400-2443.
«Polaroid» est une marque déposée de Polaroid
Corporation, Waltham, MA, États-Unis, et dont l’usage est
autorisé pour le MODEL # auprès de Petters Consumer
Brands, LLC.
Spanish
Para información relacionada al mantenimiento, soporte y
garantía, visite
Estados Unidos, llame al 1-866-289-5168. En Canadá, llame
al 1-866-301-7922. En México llame al 01-800-400-2443.
“Polaroid” es una marca registrada de Polaroid Corporation,
Waltham, MA, USA. Petters Consumer Brands, LLC, ha sido
autorizado para usarla en el MODEL #.
www.polaroidelectronics.com ou appeler
www.polaroidelectronics.com o, en los
Page 21

2029074SS
 Loading...