

Polaris WaterStar, WaterStars Owner's Manual
IMPORTANT INFORMATION
OWNER’S MANUAL
To ensure proper operation and long life for the
Polaris, be sure to insist on genuine Polaris parts.
No. Part # Description Qty
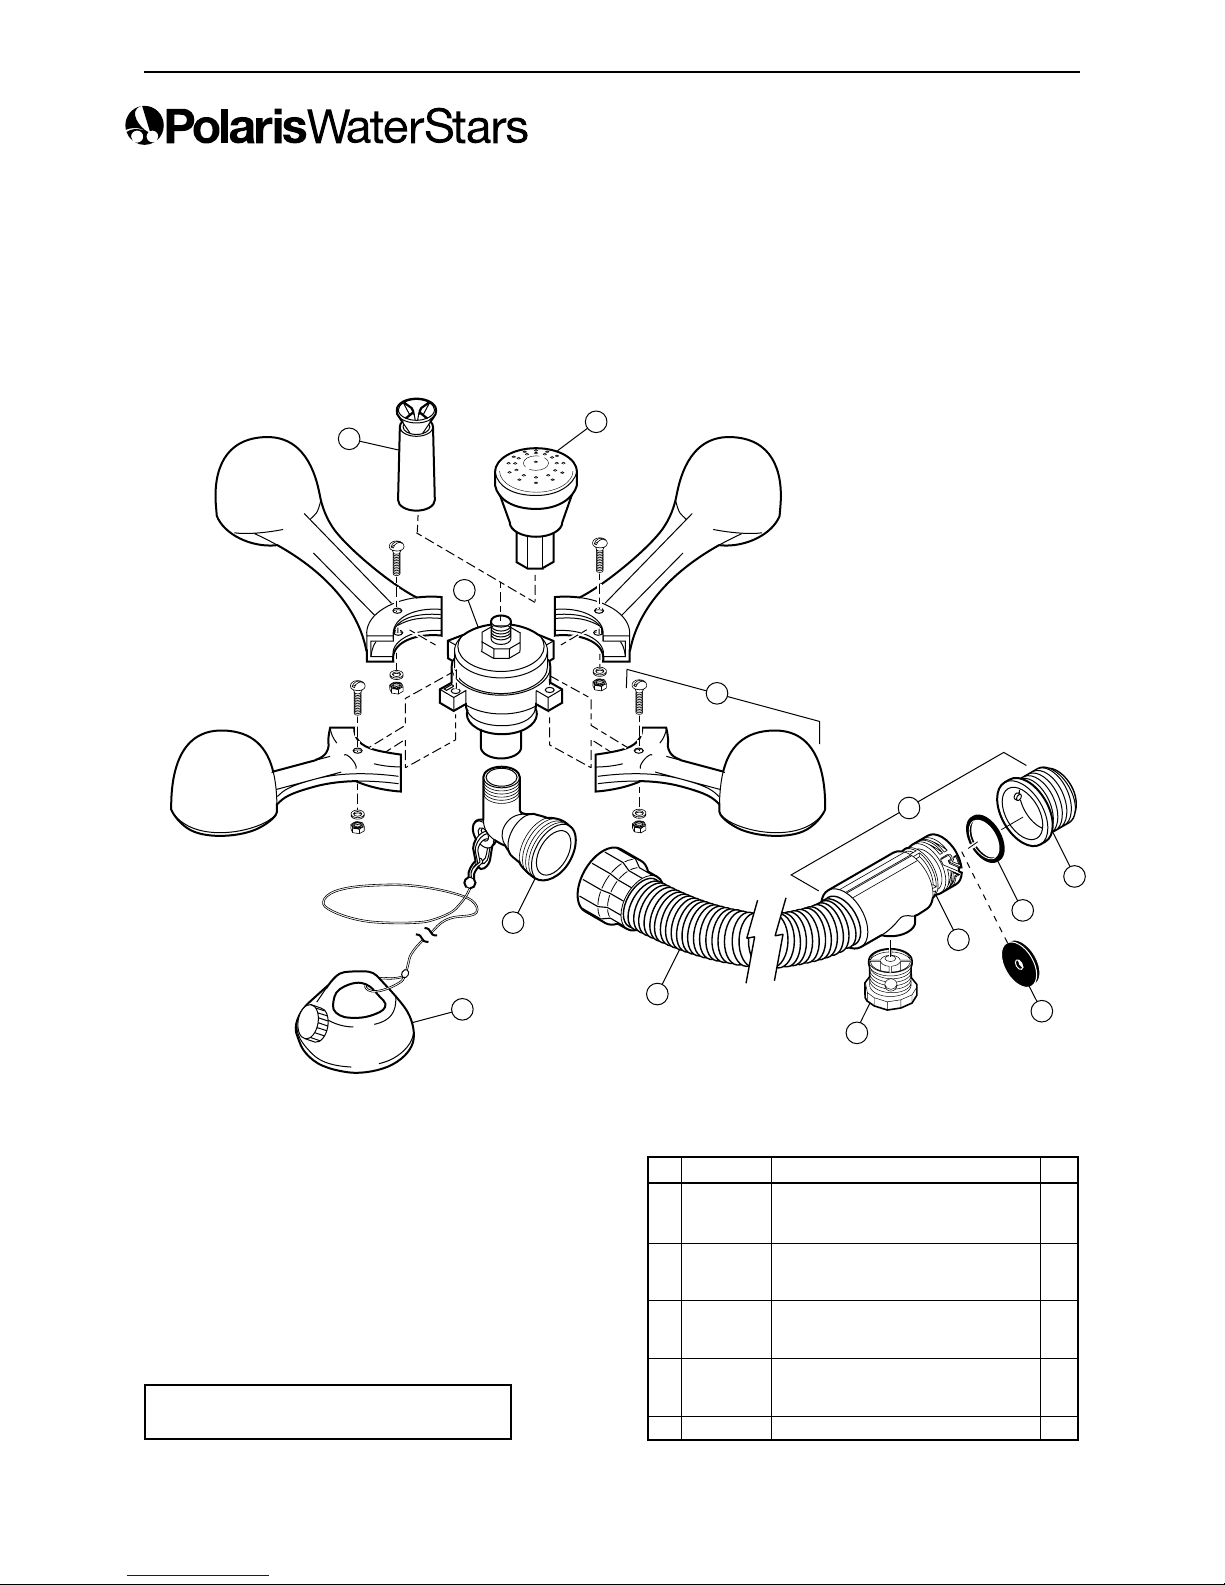
1 7-240-00 Fountain Head, Glory 1
2 7-230-00 Fountain Head, 3-tier 1
3 7-225-00 Center Assembly 1
4 7-200-00 Pod 4
5 7-260-00 Elbow 1
6 7-270-00 Anchor Assembly 1
7 7-310-00 Hose Kit, 10 Foot 1
8 11-203-00 Adjustable Plug, UWF 1
9 6-502-00 Quick Disconnect, UWF 1
10 6-505-00 O-ring, UWF/QD 1
11 6-500-00 Universal Wall Fitting (UWF) 1
12 7-295-00 UWF Connector Assembly 1
13 11-103-00 Restrictor Washer 1
Exploded Parts Diagram
1
3
5
6
2
4
12
11
10
9
7
13
8
I. Introduction
Your new Polaris WaterStars will create a
beautiful fountain from the pressure of a typical
filtration pump. The greater the water pressure
delivered to the WaterStars, the higher your
fountain display can be.
The WaterStars comes with the universal wall
fitting connector assembly. Once the universal
wall fitting is installed, it is possible to quickly
and easily switch from a Polaris pool cleaner to
the Polaris WaterStars and back again. If the
pool cleaner is not equipped with a quick
disconnectXXX to fitting the universal wall
fitting, it can be converted to this improved
system with parts available through a
participating Polaris dealer.
If you do not currently have a pool cleaner,
please see Section V on page 3 for instruction
about Polaris automatic pool cleaners.
II. Installation Instructions
A. WaterStars Components
The Polaris WaterStars box contains:
•
Center As bly with Pods
• 3-tier Fountain Head
•
Glory Fountain Head
• 90-degree Elbow
•
Anchor Assembly
• Complete Hose Assembly with Quick
Disconnect and Universal Wall Fitting
• Restrictor Washer
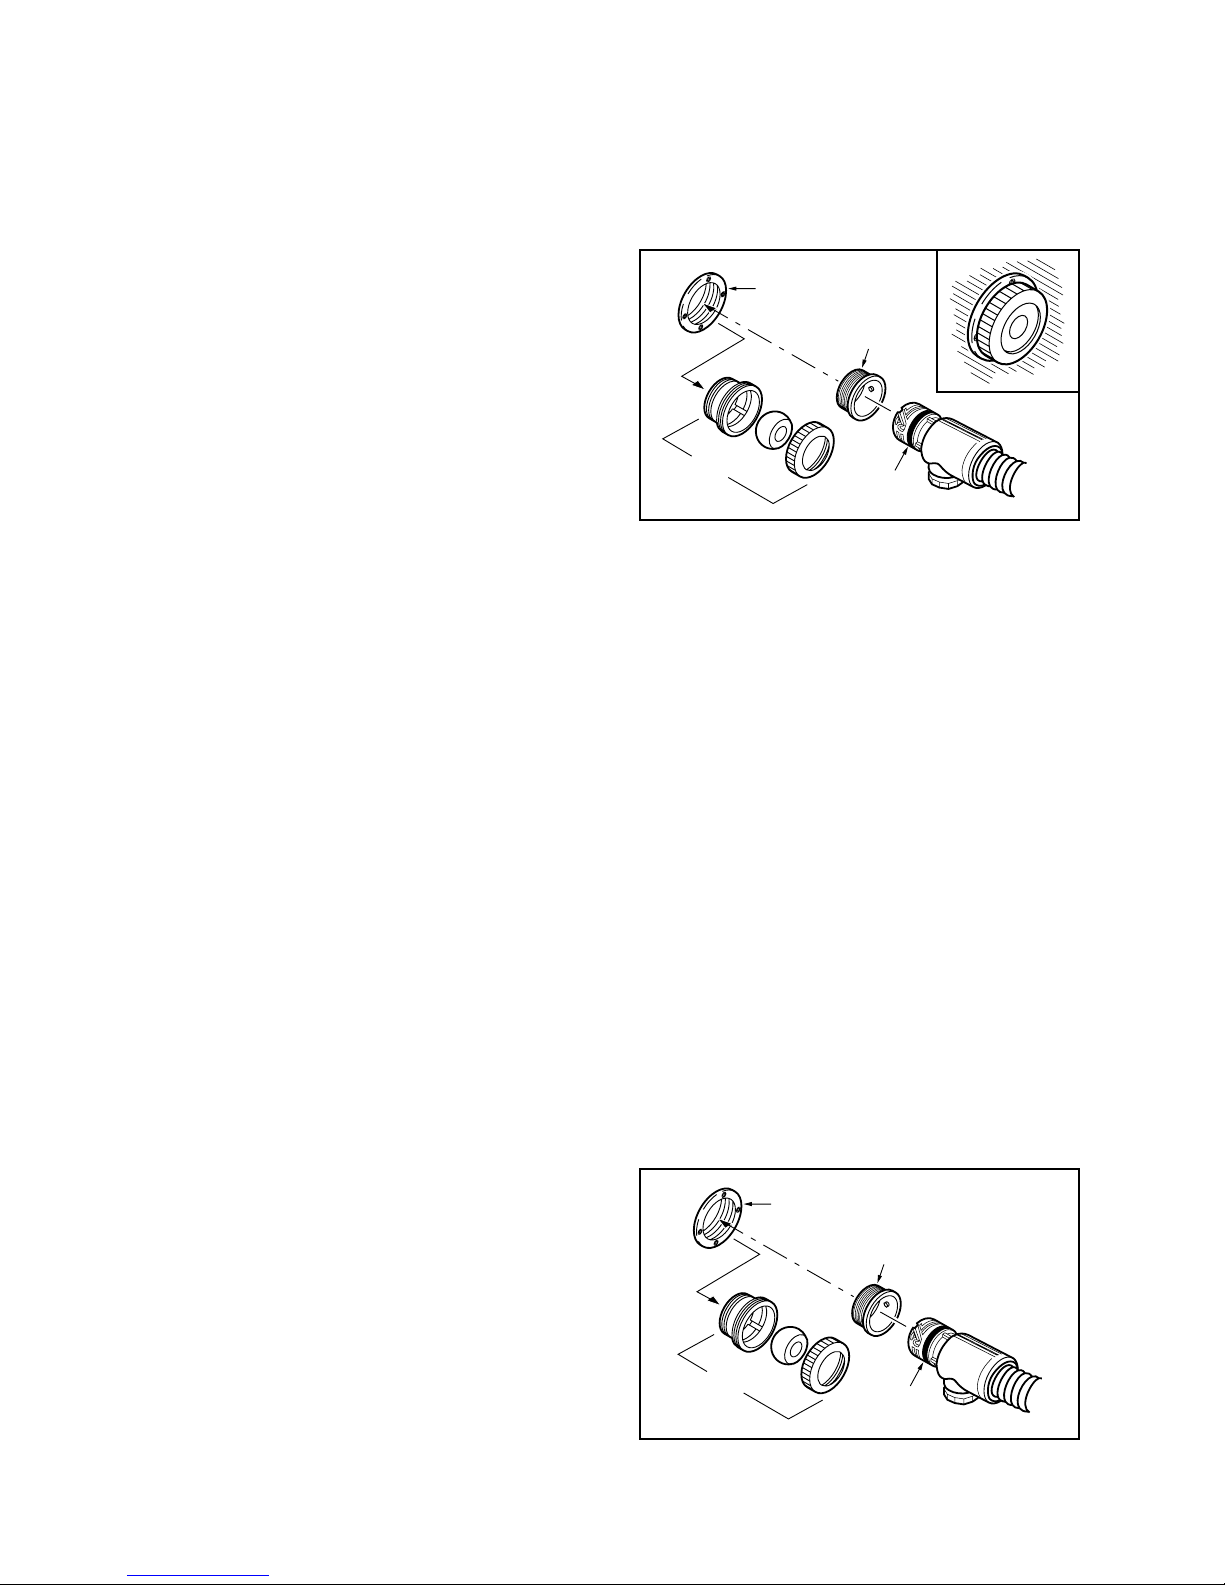
B. Installing the Universal Wall Fitting
Note: It is important to hav a clean pool filter
before installing the WaterStars.
1. Turn on the pool fil tion pump and flush out
the plumbing line. Turn off the pump.
2. Unscrew the universal wall fitting from the
quick disconnect
• If the return line has 1-1/2" female threads
exposed, screw in the universal wall fitting by
hand. Turn the quick disconnect clock wise into
the universal wall fitting to tighten it into place.
Once the universal wall fitting is secure, the
quick disconnect can be removed without
reusing the universal wall fitting.
• If the return line for the Polaris looks like the
one below, remove the parts shown and install
the universal wall fitting as described above.
NOTE: If the pool does not have a 1-1/2" threaded
fitting, a special adapter kit will be required to
install the WaterStars. For further informtion,
contact your participating Polaris dealer
.
C. Assembling the WaterStars
1. Select either the 3-tiered fountain head or
the glory fountain head. Save the unused head
so you can change the water display as desired.
Screw the head onto the center as bly, being
careful not to over tighten.
2. Screw the small end of the elbow into the
bottom of the center assembly
3. Remove the cap from the anchor and fill it
with sand or small rocks. Add water to eliminate
any air inside the anchor and screw on the cap.
4. Attach the clip on the end of the anchor
cord to the eyelet on the elbow.
5. Attach the hose to the large end of the elbow.
6. With the pool filtration pump off, connect
the hose to the pool wall by turning the quick
disconnect clockwise into the universal wall
fitting. Pull away from the pool wall to secure.
1
1-1/2" Return Line
Universal
Wall Fitting
Remove
Quick
Disconnect
1-1/2" Return Line
Universal
Wall Fitting
Remove
Quick
Disconnect
 Loading...