

Page 1

Contents
How does Polar Pacer work.................................................... 5
Polar Pacer parts......................................................
Getting going ...........................................................
How to start heart rate measurement ..................................... 7
Functions during heart rate measurement.............................. 8
See your heart rate and elapsed time ......................
Illuminate the display ...............................................
Turn the Target Zone sound signal on/off.................
Check the time of day ..............................................
Stop the stopwatch ..................................................
Stop heart rate measurement...................................
How to recall training information ......................................... 10
How to set your Target Zone................................................. 11
How to set the watch ............................................................ 13
Setting the alarm clock...........................................
Setting the time of day ...........................................
Exercising with your Polar Heart Rate Monitor ..................... 16
General exercise recommendation ........................
Intensity of exercise ...............................................
Frequency of training .............................................
Mode of activity ......................................................
Structure of an exercise session ............................
References .............................................................
Quick guide for exercising.................................................... 22
Define the amount of your physical activity ...........
Determine your exercise goals ..............................
Examples of exercise recommendations ...............
Care and maintenance ......................................................... 26
Taking care .............................................................
Batteries .................................................................
Precautions ........................................................................... 28
In a water environment ...........................................
Interference ............................................................
Frequently asked questions.................................................. 30
Technical specifications........................................................ 32
Polar books and accessories ............................................... 33
Service .................................................................................. 34
Check list................................................................
Sending instructions...............................................
Polar’s service procedure.......................................
Limited Polar warranty .......................................................... 36
Disclaimer ............................................................................. 37
Notes..................................................................................... 38
5
6
8
8
8
9
9
9
13
15
17
17
20
20
21
21
22
24
24
26
27
28
29
34
35
35
Pacer.manual GBR/E 18/12/00, 9:432-3
Page 2
Congratulations on purchasing the Polar Pacer
Heart Rate Monitor. We are proud to assist you in
achieving your personal fitness goals.
This guide will provide you with the basic
information on how to exercise with your Polar
Heart Rate Monitor and how to get the best
benefit of its functions.
Wirelessly and continuously yours,
How does
Polar Pacer
Work
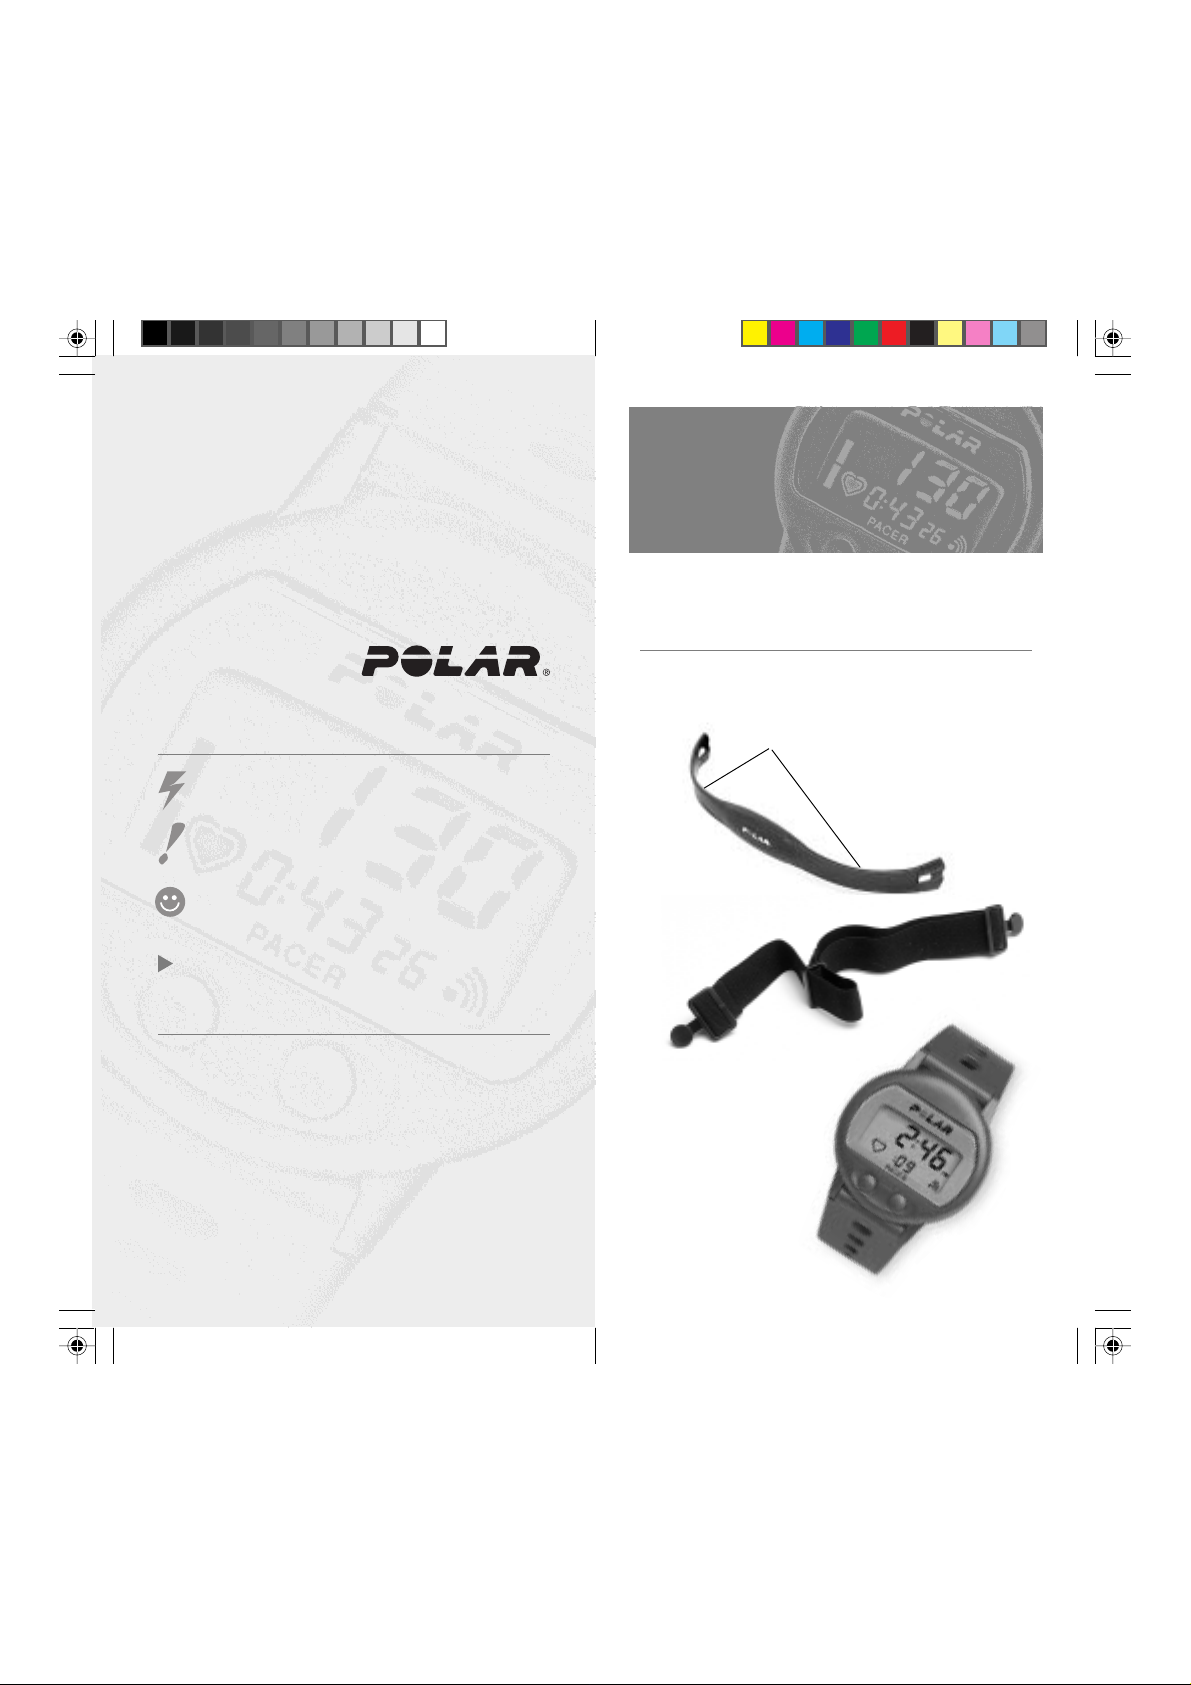
POLAR PACER PARTS
Your Polar Pacer consists of three parts:
VISUAL CUES TO READ THIS GUIDE
Indicates a tip to do things faster.
Indicates important issues. Please, pay attention!
Indicates a useful tip. It is good to know these things.
See also
IMPORTANT TO REMEMBER!
• Adjust the strap length snug enough and wet the
transmitter electrodes to ensure flawless heart rate
measurement.
• Do not bend or stretch the transmitter.
• Do not operate the buttons of the wrist receiver under water.
• Wash and dry your transmitter regularly after use.
• Do not store your Polar Heart Rate Monitor wet.
Store it in a dry and cool place.
• Keep the Polar Heart Rate Monitor out of
extreme cold and heat.
4
1. Polar Transmitter
• Grooved electrode areas
2. Elastic strap
3. Polar Pacer
Wrist Receiver
5
Pacer.manual GBR/E 18/12/00, 9:434-5
Page 3
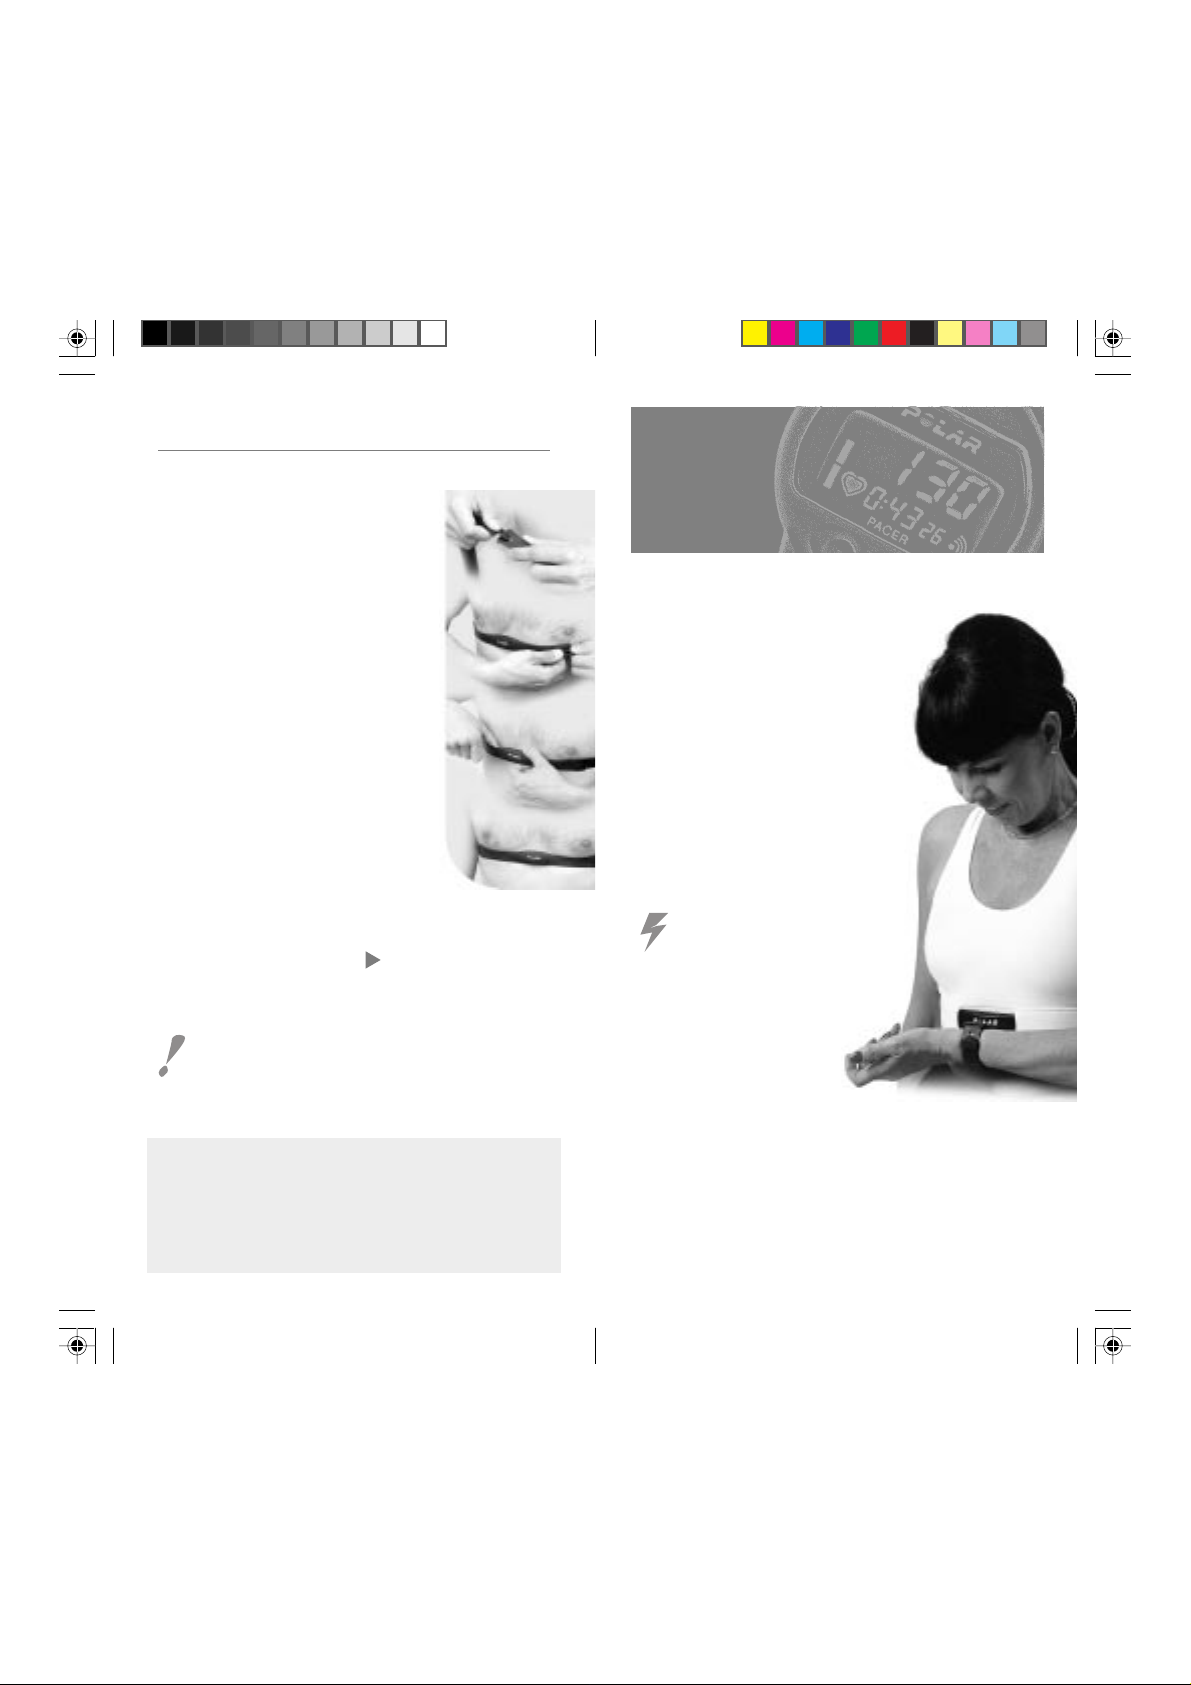
GETTING GOING
How to Start
1. Attach the Polar Transmitter
to the elastic strap.
2. Adjust the strap length to fit
snugly and comfortably.
3. Secure the strap around your chest,
below the chest muscles. Lock the buckle.
Check that the Polar logo is in a central
upright position.
4. Pull the Transmitter off your chest and wet
the grooved electrode areas on the
back of it.
5. Check that the wet electrode areas are
firmly against your skin.
6. Wear the Wrist Receiver as you would
wear an ordinary watch.
Alternatively, if you go biking, you may attach the Wrist
Receiver to a Polar Bike Mount. Polar Products.
Keep the Wrist Receiver within the transmission range
(1 metre / 3 feet).
It is recommended that you wear the Transmitter
against your bare skin to ensure flawless operation.
However, if you wish to wear the Transmitter over a
shirt, moisten the shirt well under the electrodes.
It is important that the electrodes are wet during exercise.
After exercising to preserve the electrodes and battery life:
1. Wash the Transmitter carefully with a mild soap
water solution.
2. Rinse it with pure water.
3. Dry the Transmitter carefully.
6
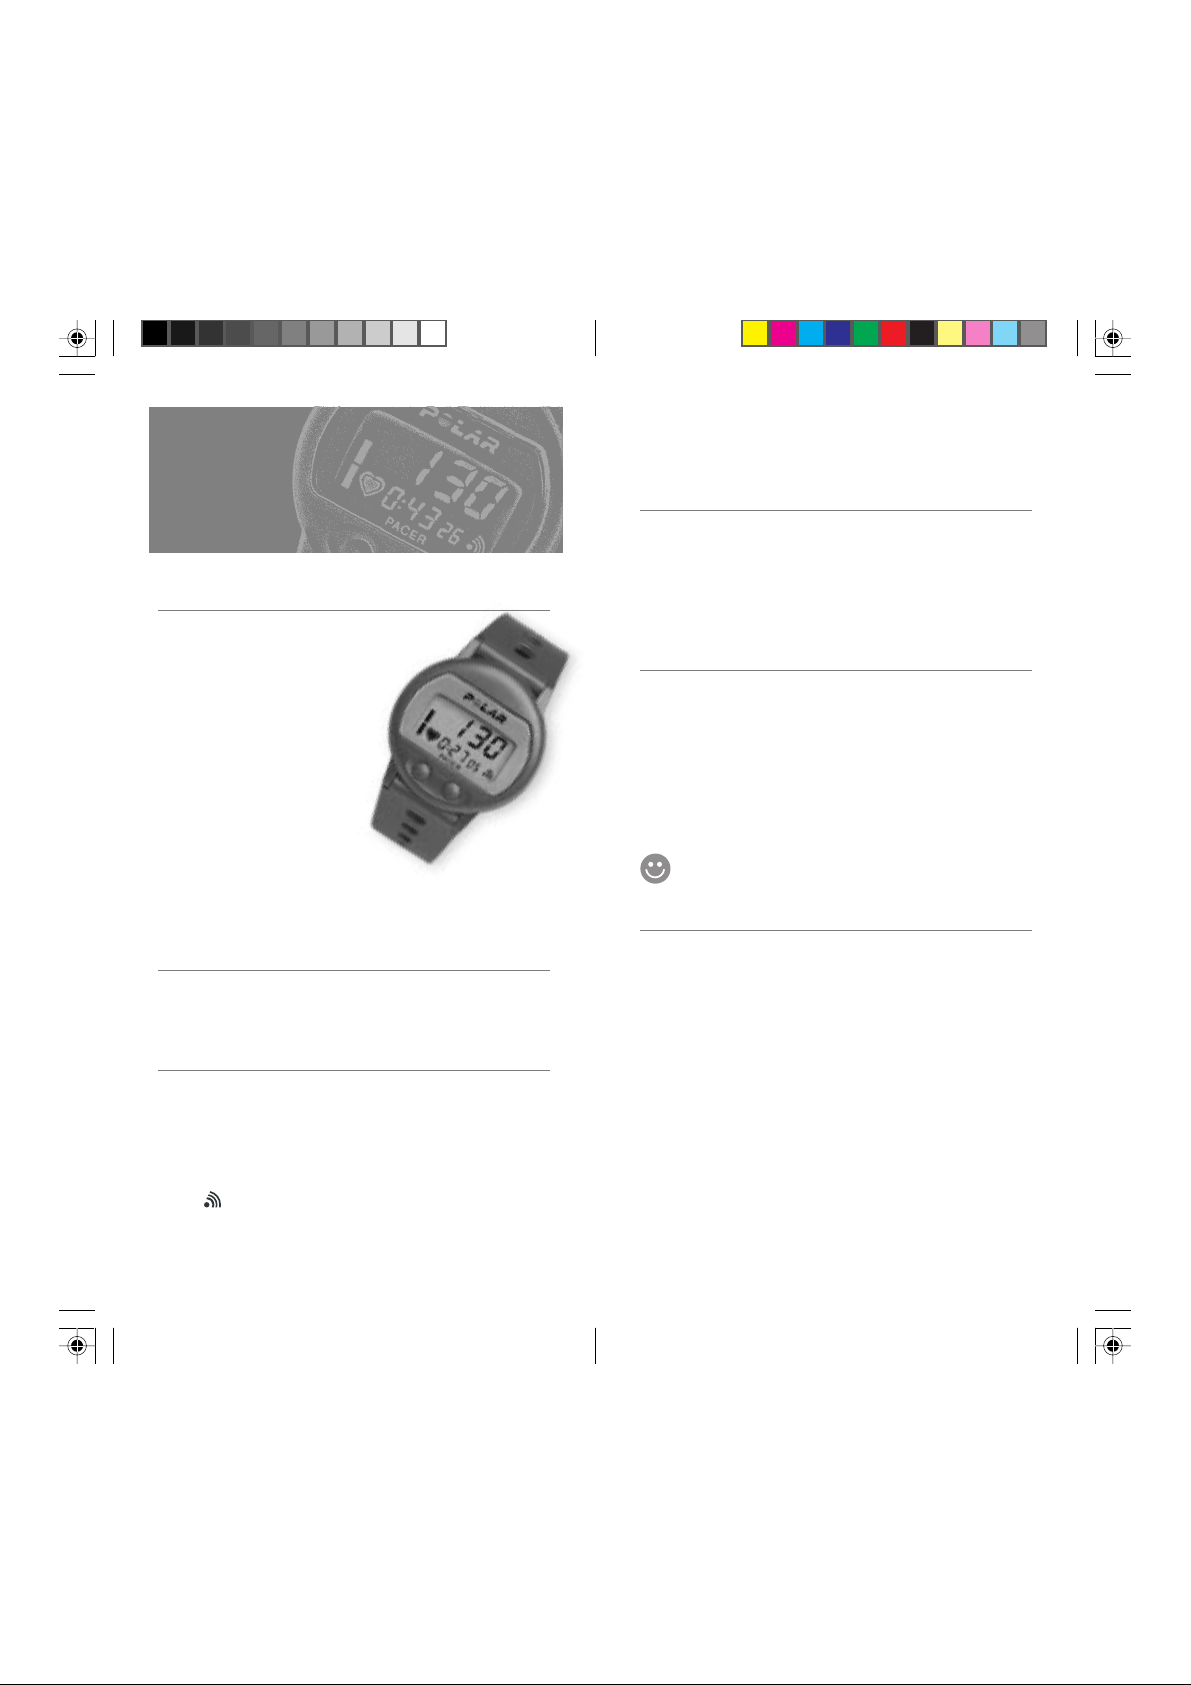
Heart Rate
Measurement
1. Wear the Transmitter and the Wrist
Receiver as described previously.
2. Begin with the display showing
time of day.
3. To start, choose from the
following alternatives:
One touch start:
mode press and hold the right
button of the Receiver for
1 second.
Quick start:
mode, bring the Polar logo of
the Receiver to the Transmitter’s
Polar logo and wait for a beep
signal.
Heart rate measurement
commences and heart
symbol starts flashing.
Stopwatch starts running
in the lower line of the display. Your heart rate (in beats
per minute) appears in the display in approximately
5 seconds.
4. You can now start exercising with your Polar Pacer.
In the Time
In the Time
7
Pacer.manual GBR/E 18/12/00, 9:436-7
Page 4
Functions During
Heart Rate
Measurement
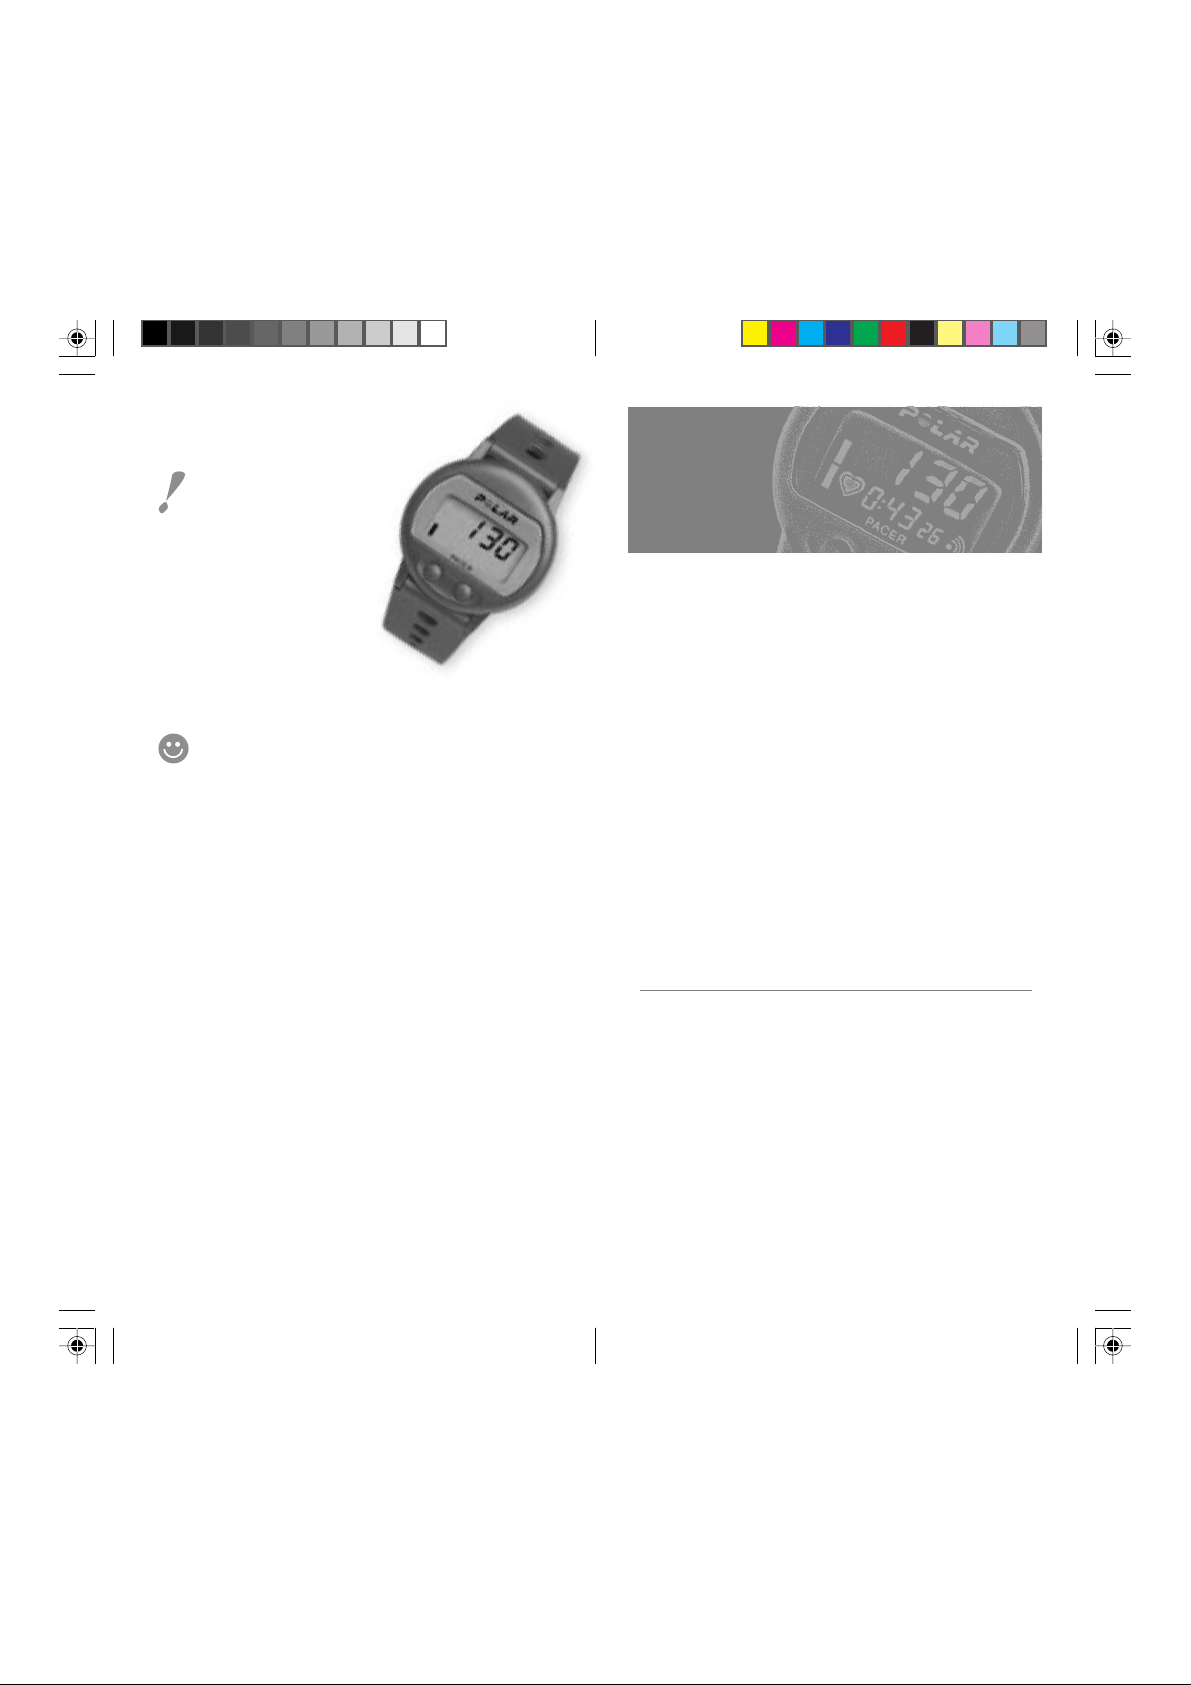
SEE YOUR HEART RATE AND ELAPSED TIME
1. You can see your heart rate in beats per
minute. A flashing heart symbol indicates
an ongoing heart rate measurement.
The inner heart symbol flashes at
the pace of your heart.
2. The total exercising time runs
in the lower line of the display.
3. Bars will appear in the left side
of the display, one bar after every
ten minutes spent in the T arget Zone.
4. You can hear a beep after every
30 minutes of exercise in the Target Zone.
Also a flashing heart rate reading informs you of being
outside your Target Zone.
CHECK THE TIME OF DAY
Whilst exercising you don’t have to press any button to check
the time of day momentarily. Just bring the Wrist Receiver near
the Transmitter’s Polar logo.
The time of day and backlight will be on
for a few seconds.
STOP THE STOPWATCH
The total elapsed time is running in the lower line of the display .
1. Press the left button shortly.
The stopwatch stops.
2. Press the left button shortly again.
The stopwatch continues running.
You may need this function if you have to stop your
exercise momentarily e.g. in traffic lights.
STOP HEART RATE MEASUREMENT
ILLUMINATE THE DISPLAY
Press the right button briefly.
Backlight is activated for a few seconds.
TURN THE TARGET ZONE SOUND SIGNAL ON/OFF
When the Target Zone sound symbol appears in the display,
you will hear an alarm sound with each heart beat if you go
above the Upper Limit or below the Lower Limit of your Target
Zone. Press and hold the right button to turn the Target Zone
sound signal on or off.
sound signal is on
8
Pacer.manual GBR/E 18/12/00, 9:438-9
1. Press and hold the left button to stop heart rate
measurement.
Heart rate measurement stops.
Time spent in the Target Zone appears in the upper
line of the display.
Total exercising time appears in the lower line of the
display.
2. Press the left button briefly.
Time of day appears in the display.
In case you forget to stop the heart rate measurement when
ending your exercise session and taking off the Transmitter,
the Wrist Receiver turns itself into Time mode if no heart rate
signal is received for 5 minutes.
9
Page 5
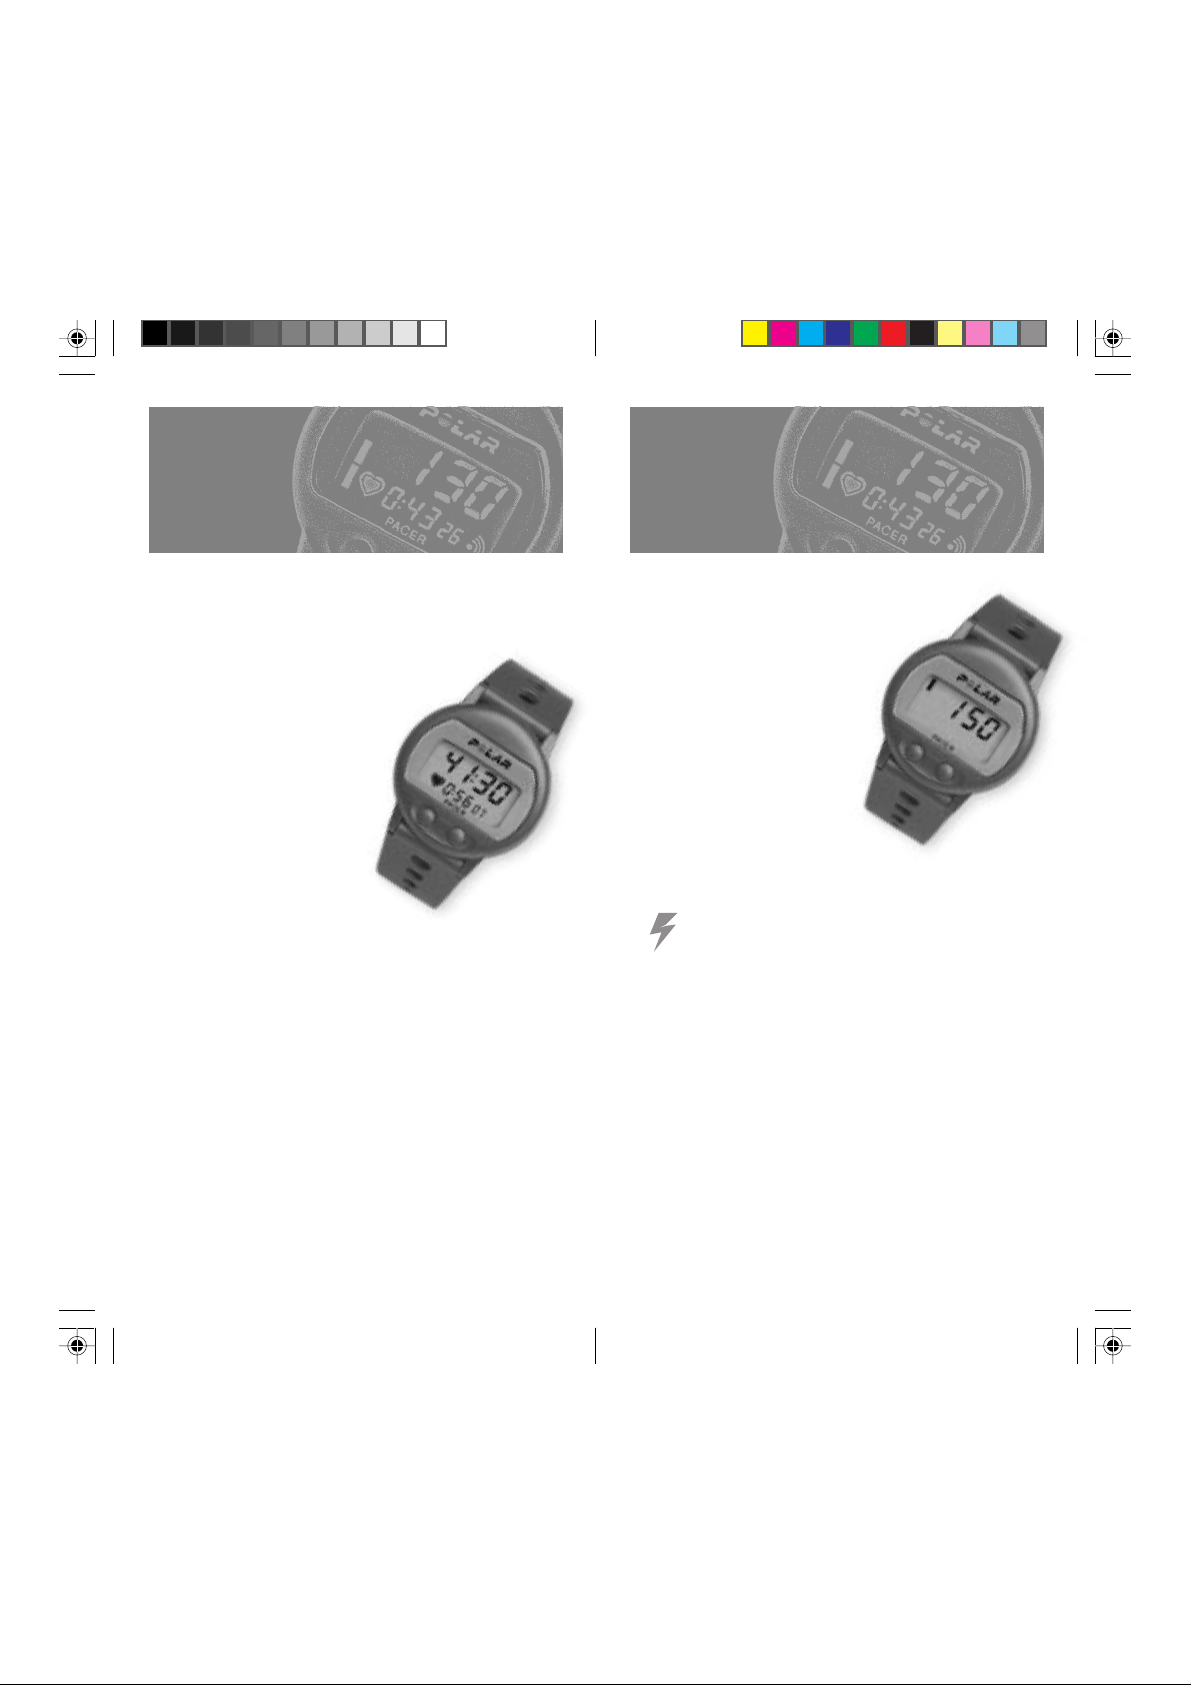
How to Recall
How to Set
Training
Information
Polar Pacer provides you the following information
of your last training session:
• Time spent in the Target Zone
• Total exercising time
1. When you stop heart rate measurement
you will have the training information
displayed.
2. To review the last training
information start in the Time mode.
Press the left button three times.
Time spent in the Target
Zone appears in the
upper line of the display.
Total exercising time appears
in the lower line of the display.
3. To return to the Time mode, press the left button once.
Your last training information is in the memory of Polar Pacer
until the next time you measure heart rate. When you start
heart rate measurement again, your previous training
information will be replaced by the new one.
Polar Pacer saves only one training file at a time.
Your
Target Zone
1. Begin with the display showing time of day.
2. Press the left button to enter
the Target Zone setting mode.
The Upper Limit reading
appears flashing in the display.
The upper bar, indicating the
Upper Limit, appears in
the upper left corner of
the display.
3. Press the right button to set
the Upper Limit value of your
personal Target Zone.
The numbers will increase in 5 beat increments.
The digits run faster if you press and hold the right
button. Release the button at the desired value.
4. Press the left button to lock your selection.
The Lower Limit reading appears flashing in the display.
The lower bar, indicating the Lower Limit, appears in
the lower left corner of the display.
5. Press the right button to select the correct value
for the Lower Limit.
The value for the Lower Limit starts to
increase in 5 beats increments.
10
Pacer.manual GBR/E 18/12/00, 9:4310-11
6. Press the left button to lock your selection.
Your last training information appears
in the display.
11
Page 6
7. Press the left button to return to the Time mode.
The Upper Limit cannot be
set below the Lower Limit.
When the Lower Limit value
reaches the Upper Limit
value, the Lower Limit
will be reset to 15, the
lowest possible setting.
It may be necessary to
reduce the Lower Limit value
first and then return to set the
Upper Limit.
To return to the Time mode at any point in the setting
procedure, press both buttons simultaneously.
How
to Set
the Watch
Polar Pacer has two watch functions: alarm clock and time of
day. In the setting functions you have first the alarm clock
function and thereafter the time of day function.
Start the watch settings by pressing both buttons simultaneously
in the Time mode. In case you do not want to set the alarm
clock, you can skip to the time of day settings by pressing
the left button five times.
To return to the Time mode at any point in the watch setting
procedure, and to interrupt the watch settings, press both
buttons simultaneously.
You can distinguish the mode you are in from the display:
• The heart symbol will be displayed in the Time mode
but not in the setting modes.
• The alarm clock function displays no seconds whereas
the time of day function includes the seconds.
SETTING THE ALARM CLOCK
12
Pacer.manual GBR/E 18/12/00, 9:4312-13
1. With display showing time of day, press both
buttons simultaneously.
Alarm signal symbol starts flashing.
2. Press the right button to set the alarm clock on/off.
3. Press the left button to lock your selection.
AM/PM starts flashing.
4. Press the right button to select AM or PM for the alarm
clock time. AM = before 12 o’clock, PM = after 12 o’clock.
13
Page 7

5. Press the left button to lock your selection.
The first digits representing the hours start flashing.
6. Press the right button to select the desired hour.
The digits run faster if you press and hold the right
button. Release the button at the desired value.
7. Press the left button to lock your selection.
The digit representing the tens of
minutes starts flashing.
8. Press the right button to select
the desired tens of minutes.
Left Button:
LOCK YOUR
SELECTION
Right Button:
SELECT
9. Press the left button to lock your selection.
The digit representing the minutes starts flashing.
10. Press the right button to select the desired minutes.
11. Press the left button to lock your selection.
You enter the time of day setting mode.
AM/PM starts flashing.
SETTING THE TIME OF DAY
1. In the Time mode, press both buttons simultaneously.
You enter the alarm clock setting mode.
Alarm symbol starts flashing.
2. Press the left button five times to skip the alarm clock setting.
AM/PM for time of day is flashing.
3. Press the right button to select AM or PM for the time of day.
4. Press the left button to lock your selection.
The first digits representing the hours start flashing.
5. Press the right button to select the desired hour.
The digits run faster if you press and hold the right
button. Release the button at the desired value.
6. Press the left button to lock your selection.
The digit representing the tens of minutes starts flashing.
7. Press the right button to select the desired tens of minutes.
8. Press the left button to lock your selection.
The digit representing the minutes starts flashing.
9. Press the right button to select the desired minutes.
10. To lock your selection and to restart the seconds press
the left button. You will then return to the Time mode.
Alternatively, to return to the Time mode without
restarting the seconds press both buttons simultaneously.
12. To return to the Time mode, press both buttons
simultaneously. To set the time of day continue
from Setting time of day, step 3.
When the alarm comes on it will sound for one minute.
You can turn the alarm off by pressing any of the two
buttons.
14
Pacer.manual GBR/E 18/12/00, 9:4314-15
You may also use Polar Pacer as an ordinary watch
without a Transmitter.
15
Page 8

Exercising with Your
Polar Heart Rate
Monitor
Regular exercise helps you to sustain and improve your health
and fitness, as well as feel better. Exer cising has also other
great benefits, you can reduce stress, learn to know your body’s
reactions and optimise your training time. Whether you are about
to start a regular exercise program or you already do sports
training, a Polar Heart Rate Monitor will help you to achieve your
personal fitness goals in less time, with greater safety .
GENERAL EXERCISE RECOMMENDATION
American College of Sports Medicine (ACSM 1990,1995)
defines a recommended exercise dose for developing and
maintaining cardiovascular fitness in healthy adults as follows:
Intensity of training: 60-90% of the maximum heart rate
Duration of training: 20-60 minutes of continuous
aerobic activity
Frequency of training: 3-5 days a week
Mode of activity: Any mode which uses large
muscle groups
INTENSITY OF EXERCISE
The effect of your exercise program depends on four factors:
• Intensity of exercise
• Duration of exercise
• Frequency of exercise
• Mode of activity
Exercise may include some risk, especially for those who have
been sedentary. To minimise possible risks consider the
following advice.
Before beginning a regular exercise program consult your
doctor
• if you are over 35 years of age
• if you have not been following a regular
exercise program during the past 5 years
• if you smoke
• if you have high blood pressure
• if you have high blood cholesterol
• if you have any signs or symptoms of any disease
• if you are recovering from a serious illness
or a medical treatment e.g. surgery
• if you use a pacemaker or another implanted
electronic device.
16
Pacer.manual GBR/E 18/12/00, 9:4316-17
Heart rate is proved to be an excellent indicator of exercise
intensity. Heart rate tells you the exertion level of your body
during physical or mental loading. With the Polar Heart Rate
Monitor you are able to follow the intensity of your exercise
easily, keep yourself in the right heart rate Target Zone and
stay motivated as you see the improvement. Changes in the
heart’s beating rate can be followed with a Polar Heart Rate
Monitor wirelessly, continuously and ECG accurately.
Define your exercise intensity according to your target. When
you exercise within the defined Target Zone, you ensure the
right intensity of your workout.
Any physical activity that increases heart rate above the
resting heart rate may provide health benefits, but only greater
increments above resting heart rate are associated with both
health and fitness benefits. This is why you should define your
personal Target Zone.
If you are a beginner, sedentary or overweight, a recommended
target is to exercise at light or light to moderate intensity.
At this target, the exercise is easy-paced and causes only
slight breathlessness and sweating.
17
Page 9

If you aim for improved fitness or exercise for competitive
reasons your exercise intensity is moderate or heavy paced,
and it causes clear breathlessness and sweating.
However, when planning your personal exercise dose, you
can vary the workout intensity e.g. if there is a change in your
physical condition or feelings.
Target zones are calculated using the person’s maximum
heart rate as a reference. The most reliable way to determine
your individual Target Zone is to have your maximum heart
rate measured at an exercise stress test. For more information
on an exercise stress test, consult your physiologist or doctor.
However, according to ACSM most people can estimate their
maximum heart rate by the formula:
220 - Age = Maximum Heart Rate
For example a 35-year old person’s Maximum
Heart Rate would be: 220 - 35 = 185 beats per minute
The following Target Range Chart helps you find the right Target
Zone for your needs. The percentages for the Target Zones are
counted from the maximum heart rate (measured or predicted).
Measured HR
Bpm
max
190 1 85 180 175 170 165 1 60 155 150
200
180
H
eavy Intensity 85-100%
160
140
120
100
Moderate Intensity 70-85%
Light to M
L
oderate Intensity 60-70%
ig
h
t In
ten
sity 5
0
-6
0%
80
Age
How to find your personal Target Zone ?
1. Locate one of the four intensity targets, which would be
2. Locate your age on the down axis or your measured
3. Read up from your age / read down from your measured
25 30 35 40 45 50 55 60 6520 70
If you have had your maximum heart rate measured at
an exercise stress test, use the upper axis for
measured HR
your Target Zone. In case you do not know your exact
. This gives you the precise values for
max
maximum heart rate, use the lower axis for age.
most suitable for you. Each target is shaded differently.
maximum heart rate on the upper axis.
maximum heart rate to the target you chose.
18
Pacer.manual GBR/E 18/12/00, 9:4318-19
4. Draw a straight line from the upper edge of the target to the
left and you will find the Upper Limit of your Target Zone.
5. Then draw another straight line from the lower edge of the
target to the left and you will find the Lower Limit for your
Target Zone.
6. You have now found your Target Zone. As you exercise,
make sure that your heart rate stays within your personal
Target Zone (between the Lower and the Upper Limit) to
get the maximum benefit from your workout.
19
Page 10

Example 2
Example 1
Bpm
25 30 35 40 45 50 55 6020
Age
Measured HR
max
200
180
160
140
120
100
80
190 185 180 175 170 165 160 1
Upper Limit
Lower Limit
Upper Limit
Lower Limit
See the examples above:
1. A person, whose maximum heart rate has been measured
max
at an exercise stress test. His HR
goal is to exercise for health at Light to Moderate Intensity.
is 170 bpm and his
The Target Zone limits are 102-119 bpm.
max
2. A person, who does not know his HR
. He is 35 years old
and his goal is to improve fitness at Moderate Intensity.
The Target Zone limits are 130 - 157 bpm.
FREQUENCY OF TRAINING
It is recommended that you exercise 3-5 times a week.
You can improve your performance by increasing the
frequency of training. Remember to let your body recover
properly between the training sessions.
STRUCTURE OF AN EXERCISE SESSION
Begin each workout slowly and give your body a chance to
warm up for at least for 5 minutes so that your heart rate is
below the selected Target Zone. Gradually increase the
intensity of your exercise until you are in your Target Zone.
Remain in your Target Zone for the desired time. After that,
gradually reduce the intensity of your exercise and let your
heart rate fall below the Target Zone with a 5 minute cooldown period.
For an example of an exercise session for a 35-year-old
person with ‘Improved Fitness’ as a target, please see the
following chart.
Heart Rate/Beats Per Minute
150
TARGET
ZONE
130
Warm
Resting
up
5-10 min 5-10 min
Target Zone
30-60 min
Minutes of exercise
cool
down
Resting
MODE OF ACTIVITY
Select activities that you enjoy and vary your exercise modes.
To build a solid base for your aerobic conditioning, choose
continuous activities such as jogging, running, walking,
swimming, bicycling, rowing and cross-country skiing.
To improve your muscular endurance and strength as well as
flexibility choose intermittent activities such as tennis, badminton,
football, ice hockey, resistance training and gymnastics.
20
Pacer.manual GBR/E 18/12/00, 9:4420-21
REFERENCES
American College of Sports Medicine. Position Stand. The Recommended
Quantity and Quality of Exercise for Developing and Maintaining
Cardiorespiratory and Muscular Fitness in Healthy Adults. Med Sci
Sports Exerc 22: 265-274, 1990.
American College of Sports Medicine. ACSM’s Guidelines for Exercise
Testing and Prescription. Williams & Wilkins, 1995.
Jackson, A.S., Blair, S.N., Mahar, M.T., Wier, L.T., Ross, R.M. and Stuteville,
J.E. Prediction of functional aerobic capacity without exercise testing.
Med Sci Sports Exerc 22: 863-870, 1990.
21
Page 11

Quick guide for
exercising
Which alternative best describes your general activity level
for the previous month?
A beginner who does not participate regularly in
programmed recreational sports or heavy physical activity.
Avoid walking or exertion whenever possible.
❑
Before beginning, you should ask yourself two key questions:
• What is the amount of my physical activity at the moment?
• What are my goals?
The following steps help you answer the two questions, get
the most out of your Polar Heart Rate Monitor, and achieve
your personal exercise goals.
1. DEFINE THE AMOUNT OF YOUR
PHYSICAL ACTIVITY
You may have a clear understanding of your present physical
condition. In this case you can move to the next step to
specify your goals. You can also define the amount of your
physical activity by answering the questionnaire which is
modified from the “Code for Physical Activity” developed by
NASA/Johnson Space Center (Jackson et al. 1990).
The questionnaire is an easy and quick way to define whether
you are a beginner, a moderate exerciser, an active exerciser
or a serious exerciser. It is recommended to review the
questionnaire every 1-2 months and revise if the amount
of your physical activity has changed.
Walk for pleasure, routinely use stairs, occasionally
❑
exercise sufficiently to cause heavy breathing or
perspiration.
A moderate exerciser who participates regularly in
recreation or work requiring modest physical activity, such as
golf, gymnastics or yard work.
10 to 60 min. a week
❑
Over one hour a week
❑
An active exerciser who participates regularly in heavy
physical exercise such as jogging, swimming, cycling or
engages in vigorous aerobic activity type exercise such as
tennis.
Run less than 1 mile a week or spend less than 30 min. a
❑
week in comparable physical activity.
Run 1 to 5 miles a week or spend 30 to 60 min. a week in
❑
comparable physical activity.
A serious exerciser who participates in a regimented
workout program consisting of heavy physical exercise.
Run 5 to 10 miles a week or spend 1 to 3 hours a week in
❑
comparable physical activity.
Run over 10 miles a week or spend over 3 hours a week in
❑
comparable physical activity.
22
Pacer.manual GBR/E 18/12/00, 9:4422-23
23
Page 12

2. DETERMINE YOUR EXERCISE GOALS
Recommendation for an active exerciser:
It is easier to stay motivated when you determine your reason
for exercising and establish a goal. That is why you should
determine your personal goal very clearly. Your exercise goal
may be one of these:
• Get used to regular physical exercise
• Lose weight
• Maintain or improve health
• Maintain or improve fitness
• Compete with yourself
• Achieve competitive results
3. EXAMPLES OF EXERCISE RECOMMENDATIONS
Recommendation for a beginner:
Goal Duration in Times Intensity
Target Zone a week
Improve 15-40 min. 2-4 Light
fitness and at a time 1 Light to
well-being moderate
Recommendation for a moderate exerciser:
Goal Duration in Times Intensity
Target Zone a week
Maintain 20-40 min. 2-4 Light to
fitness at a time moderate
and
well-being 1 Moderate
Goal Duration in Times Intensity
Target Zone a week
Maintain 30-60 min. 2-4 Moderate
fitness at a time
and
well-being 1 Heavy
Improve 60-90 min. 2-4 Moderate
fitness at a time 2 Heavy
Recommendation for a serious exerciser: Have your
maximum heart rate measured and find your personal Target
Zone to get the best benefit of your training sessions.
For more information on heart rate monitoring Polar
products/Polar books and booklets.
Improve 30-60 min. 2-4 Light to
fitness at a time moderate
and
lose weight 2 Moderate
24
Pacer.manual GBR/E 18/12/00, 9:4424-25
25
Page 13

BATTERIES
Care and
Maintenance
Your Polar Heart Rate Monitor is a high-tech instrument of
superior design and workmanship and should be treated with
care. The suggestions below will help you fulfill the warranty
obligations and enjoy this product for many years to come.
TAKING CARE OF YOUR
POLAR HEART RATE MONITOR
• Wash the Polar Transmitter regularly after use with a mild
soap and water solution. Rinse with pure water. Dry
carefully after washing.
• Never store the Polar Transmitter wet. Sweat and moisture
can keep its electrodes wet and the Polar Transmitter
activated, which shortens the battery life.
• Store your Polar Heart Rate Monitor in a cool and dry place.
• Do not bend or stretch the Polar Transmitter. This may
damage the electrodes.
• Keep your Polar Heart Rate Monitor out of extreme cold
(below -10
• Do not expose the Polar Heart Rate Monitor to direct
sunlight for extended periods, such as by leaving it in a car.
O
C / 14 OF) and heat (above 50 OC / 122 OF).
POLAR TRANSMITTER
The estimated average battery life of the Polar Transmitter is
2500 hours of use. Contact your distributor/dealer for a
Transmitter replacement.
See Service for detailed instructions.
Polar recycles used Transmitters.
POLAR WRIST RECEIVER
The estimated average battery life of the Polar Wrist Receiver
is 1 year in normal use (2h/day, 7 days a week). However,
because the battery is inserted at the factory, the actual life of
your first battery once in your possession may be less than the
estimated battery life. Note also that an excessive use of the
backlight and the beep signal will shorten the battery life
more rapidly.
Do not open the Polar Wrist Receiver yourself. To ensure the
water resistance properties and the use of qualified
components, the Wrist Receiver battery should be replaced
only by a person authorised by Polar Electro Oy. At the same
time a full periodic check of the Polar Heart Rate Monitor will
be done. Service for detailed instructions.
26
Pacer.manual GBR/E 18/12/00, 9:4426-27
27
Page 14

Precautions
USING A POLAR HEART RATE MONITOR
IN A WATER ENVIRONMENT
Polar Heart Rate Monitors are water resistant to 20 meters.
To maintain the water resistance, do not operate the buttons of
the Polar Wrist Receiver under water. The pressure may cause
the Receiver to leak.
Heart rate measurement in a water environment is technically
demanding for the following reasons:
• Pool water with a high chlorine content and seawater may
be very conductive and therefore short circuit the ECG
signal so that it cannot be detected by the Transmitter unit.
• Jumping into the water or strenuous muscle movement
during competitive swimming may cause water resistance
that shifts the Transmitter on the body to a location where it
is not possible to pick up ECG signal.
• The ECG signal strength varies depending on the individual’s
tissue composition and the percentage of people who have
problems in heart rate measuring is considerably higher in
a water environment than in other use.
POLAR HEART RATE MONITOR AND INTERFERENCE
ELECTROMAGNETIC INTERFERENCE
Disturbances may occur near high voltage power lines,
televisions, cars, bike computers, some exercise equipment or
cellular phones.
CROSSTALK
The non-coded Polar Wrist Receiver picks up transmitter
signals within 1 metre/ 3 feet. Therefore, when you are using
your Polar Heart Rate Monitor make sure no other transmitter
is within that range. Signals from more than one transmitter
picked up simultaneously can cause an incorrect readout.
EXERCISE EQUIPMENT
Several pieces of exercise equipment with electronic or electrical
components such as LED displays, motors and electrical
brakes may cause interfering stray signals. To try to tackle
these problems, relocate the Polar Wrist Receiver as follows:
1. Remove the Polar Transmitter from your chest and use the
exercise equipment as you would normally.
2. Move the Receiver around until you find an area in which it
displays no stray reading or flashing of the heart symbol.
Interference is often worst right in front of the display panel
of the equipment, while the left or right side of the display is
relatively free of disturbance.
3. Put the Transmitter back on the chest and keep
the Receiver in this interference free area.
4. If the Polar Heart Rate Monitor still does not work with the
exercise equipment, this piece of equipment may be too
noisy electrically for wireless heart rate measurement.
28
Pacer.manual GBR/E 18/12/00, 9:4428-29
Notice for persons with pacemakers
Persons who have a pacemaker use the Polar Heart Rate
Monitor at their own risk. Before starting use, we always
recommend an exercise test under doctor’s supervision. The
test is to ensure the safety and reliability of the simultaneous
use of the pacemaker and the heart rate monitor.
29
Page 15

Frequently
Asked
Questions
WHAT SHOULD I DO IF...
...THERE IS NO HEART RATE READING?
1. Check that the elastic strap is snug enough.
2. Check that the electrodes of the Polar Transmitter are
moistened and that you are wearing it as instructed.
3. Check that you have kept the Polar Transmitter clean.
Care and maintenance.
4. Check that there are no sources of electromagnetic
radiation in the close vicinity of the Polar Wrist Receiver,
such as TV sets, cellular phones, CRT monitors etc.
Precautions.
5. Have you had a cardiac event which may have altered your
ECG waveform? In this case consult your physician.
...HEART RATE READING BECOMES ERRATIC OR
EXTREMELY HIGH (OVER 200 BPM)?
You may have come within range of strong electromagnetic
signals which cause erratic readings on the Receiver display.
Check your surroundings and move further away from the
source of disturbance. Precautions.
...THERE ARE NO REACTIONS TO ANY BUTTONS?
Reset the Polar Heart Rate Monitor. Resetting clears all
memory values and settings will return to the default settings.
1. Wear the Polar Transmitter as described earlier in this manual.
2. Simultaneously press both buttons and hold the Polar logo
of the Wrist Receiver to the Polar logo of the Polar Transmitter.
Display becomes full of digits.
3. Press either the right or the left button once.
You hear a long beep.
Polar Pacer enters the Time mode.
...THE DISPLAY IS BLANK OR FADING?
Usually the first sign of a discharged battery is disappearing
of the digits when using the backlight. Have the batteries
checked. Service.
...HEART SYMBOL FLASHES IRREGULARLY?
1. Check that your Polar Wrist Receiver is inside the
transmission range and not further that 1 metre/ 3 feet from
the Polar Transmitter you are wearing.
2. Check that the elastic strap has not become loose during
exercise.
3. Make sure that the electrodes of the Transmitter are
moistened.
4. Make sure that there is no other heart rate transmitter within
the reception range (1 metre/ 3 feet). Precautions/
Crosstalk.
5. Cardiac arrythmia may cause irregular readings. In this
case consult your physician.
30
Pacer.manual GBR/E 18/12/00, 9:4430-31
...THE BATTERY OF THE WRIST RECEIVER
MUST BE REPLACED?
We recommend having all service done by authorised Polar
Service. Especially during the warranty period this is
necessary to keep the warranty of the whole Polar Heart Rate
Monitor valid. Polar Service will test your Wrist Receiver for
water resistance after battery replacement and make a full
periodic check of the complete Polar Heart Rate Monitor.
Care and Maintenance/Batteries and Service.
31
Page 16

Technical
Polar books
Specifications
Polar Heart Rate Monitor is designed to indicate the level of
physiological strain and intensity in sports and exercise. No
other use is intended or implied. Heart rate is displayed as
number of heart beats per minute (bpm).
POLAR TRANSMITTER
Battery type: Built-in Lithium Cell
Battery life: Average 2500 hours of use
Operating temperature: 14
POLAR WRIST RECEIVER
Battery type: CR 2032
Battery life: Average 1 year (2h/day , 7 days/week)
Operating temperature: 14
Water resistancy: to 20 metres
Accuracy of heart rate
measurement: ±1% or ±1 beats per minute,
Upper Limit: 100
Lower Limit: 60
Time of day: 10.00 AM
O
F to 122 OF / -10 OC to +50 OC
O
F to 122 OF / -10 OC to +50 OC
whichever larger, definition applies to
steady state conditions
DEFAULT SETTINGS
and accessories
POLAR BOOKS AND BOOKLETS
Roy Benson, MPE: ................. Precision Running
Dr. Matthew Brick:..................Precision Multisport
Edmund R. Burke, Ph.D.: ....... Precision Cycling
Neil Craig ............................... Scientific Heart Rate Training
Sally Edwards: ....................... The Heart Rate Monitor Book
Mark Fenton and
Dave McGovern: .................... Precision Walking
Ute Haas, M.Sc.,
Tarja Suomi, M.Sc. and
Dr. Raija Laukkanen, Ph.D.: ... Precision Aerobics
Dr. Peter J.G.M. Janssen: ...... Training, Lactate, Pulse Rate
Dr. Katriina Kukkonen-Harjula,
MD and Dr. Raija Laukkanen,
Ph.D. ...................................... Precision Weight Management
Dr. Raija Laukkanen, Ph.D ..... Research Index
Yvonne Lin: ............................ Precision Sports Aerobics
Dr. James M. Rippe: .............. Target Your Fitness and
Weight Management Goals
Dr. Jamer M. Rippe:............... The Polar Fat Free and Fit
Forever Program
POLAR ACCESSORIES
• Polar Bike Mount for all bikes and Polar Heart Rate Monitors
• Elastic straps of different lengths
• Extra Transmitter for other family members
• Polar Heart Bra for women
• Test handle for groups and trainers
32
Pacer.manual GBR/E 18/12/00, 9:4432-33
Ask your local dealer or
distributor for more details.
33
Page 17

Service
Polar Service will help you get the most out of your Polar Heart
Rate Monitor. Should your Polar Heart Rate Monitor need
service, please follow the instructions:
CHECK LIST
SENDING INSTRUCTIONS
1. Pack the product carefully to avoid further damage.
2. Include all the parts of the Polar Heart Rate Monitor. A full
periodic check will be done on the whole product.
3. Include proof of purchase (a receipt or its photocopy) if the
product is under warranty.
4. Include a detailed description of the problem. Use the
return sheet of the Customer Care Charter.
5. Include your name, return address and daytime telephone
number.
6. Ship postage prepaid to your dealer or distributor. For
contact details see the Customer Care Charter.
Before you return your Polar Heart Rate Monitor for service,
please check the following:
1. IS THE TRANSMITTER BEING WORN CORRECTLY?
The Polar logo should be right side up and the T ransmitter
flat against the skin. The elastic strap should be adjusted for
a snug and comfortable fit.
2. ARE THE ELECTRODES MOIST ON THE TRANSMITTER?
It is important that the electrodes are wet during the heart
rate measurement.
3. IS THE TRANSMITTER CLEAN?
Regular washing with mild soap and water solution and
thorough dry afterwards will ensure that good conductivity
remains.
4. ARE YOU HAVING DISTURBANCES CAUSED BY OTHER
PEOPLE WITH HEART RATE MONITORS OR EXERCISE
EQUIPMENT?
Precautions/Polar Heart Rate
Monitor and interference for more details.
34
POLAR’S SERVICE PROCEDURE
Any service is recommended to be done by authorised Polar
service personnel. Our standard test and check procedure will
be performed to all Polar Heart Rate Monitors. The test
includes following elements:
POLAR TRANSMITTER
1. Visual inspection
2. Check of the transmission range
3. Check of electrode conductivity
4. Wash and clean if necessary
POLAR WRIST RECEIVER
1. Visual inspection
2. Check of battery voltage
3. Check and cleaning of case contacts
4. Re-assembly, including seal renewal if necessary
5. Water resistance test
6. Operational test
Water resistance cannot be guaranteed after
unauthorised service.
35
Pacer.manual GBR/E 18/12/00, 9:4434-35
Page 18

Limited Polar
Warranty
• Polar Electro Oy warrants to the original consumer/
purchaser of this heart rate monitor that the product will be
free from defects in material or workmanship for one year
from the date of purchase. Please keep the receipt which is
your proof of purchase!
• Warranty does not cover receiver battery, damage due to
misuse, abuse, accidents or negligence of the precautions;
improper maintenance, commercial use, cracked or broken
cases.
• Warranty does not cover damage or consequential damage
caused by service not authorised by Polar Electro.
• During the warranty period the product will be either
repaired or replaced at an authorised service centre free of
charge.
• This warranty does not affect the consumers statutory rights
under applicable national or state laws in force, or the
consumers rightsagainst the dealer arising from their sales/
purchase contract.
Copyright © 1997, 2000
Polar Electro Oy, FIN-90440 KEMPELE, Finland
All rights reserved. No part of this manual may be used or reproduced in any
form or by any means without prior written permission of Polar Electro Oy.
Polar logotype and Polar Pacer are registered trademarks
of Polar Electro Oy.
Disclaimer
This product is protected by one or several of the following
patents: FI 88223, DE 4215549, FR 92.06120, GB 2257523,
HK 113/1996, SG 9591671-4, US 5491474, FI 88972,
FR 92.09150, GB 2258587, HK 306/1996, SG 9592117-7,
US 5486818, FI 96380, US 5611346, FI 68734, DE 3439238,
GB 2149514, HK 812/1989, US 4625733, FI 100924.
The material in this manual is for informational purposes only.
The products it describes are subject to change without prior
notice, due to the manufacturer’s continuous development
program.
Polar Electro Oy makes no representations or warranties with
respect to this manual or with respect to the products described
herein. Polar Electro Oy shall not be liable for any damages,
direct or incidental, consequential or special, arising out of, or
related to, the use of this material or the products described
herein.
This CE marking shows compliance of this product with Directive 93/42/EEC.
36
Pacer.manual GBR/E 18/12/00, 9:4436-37
37
Page 19

Notes
38
Pacer.manual GBR/E 18/12/00, 9:4438-39
39
Page 20

GBR
Manufactured by:
Polar Electro Oy
Professorintie 5
FIN-90440 KEMPELE
Finland
Tel. +358-8-520 2100
Fax +358-8-520 2300
Polar Pacer
Heart Rate Monitor
User’s Manual
Recyclable material. Graphic design CIS, Kajaani, Finland
®
www.polar.fi
178241 GBR F
40
Pacer.manual GBR/E 18/12/00, 9:4440-41
 Loading...