

Pogo Radio YourWay LX 128MB, Radio YourWay LX Quick Start Manual
QUICK START GUIDE
1
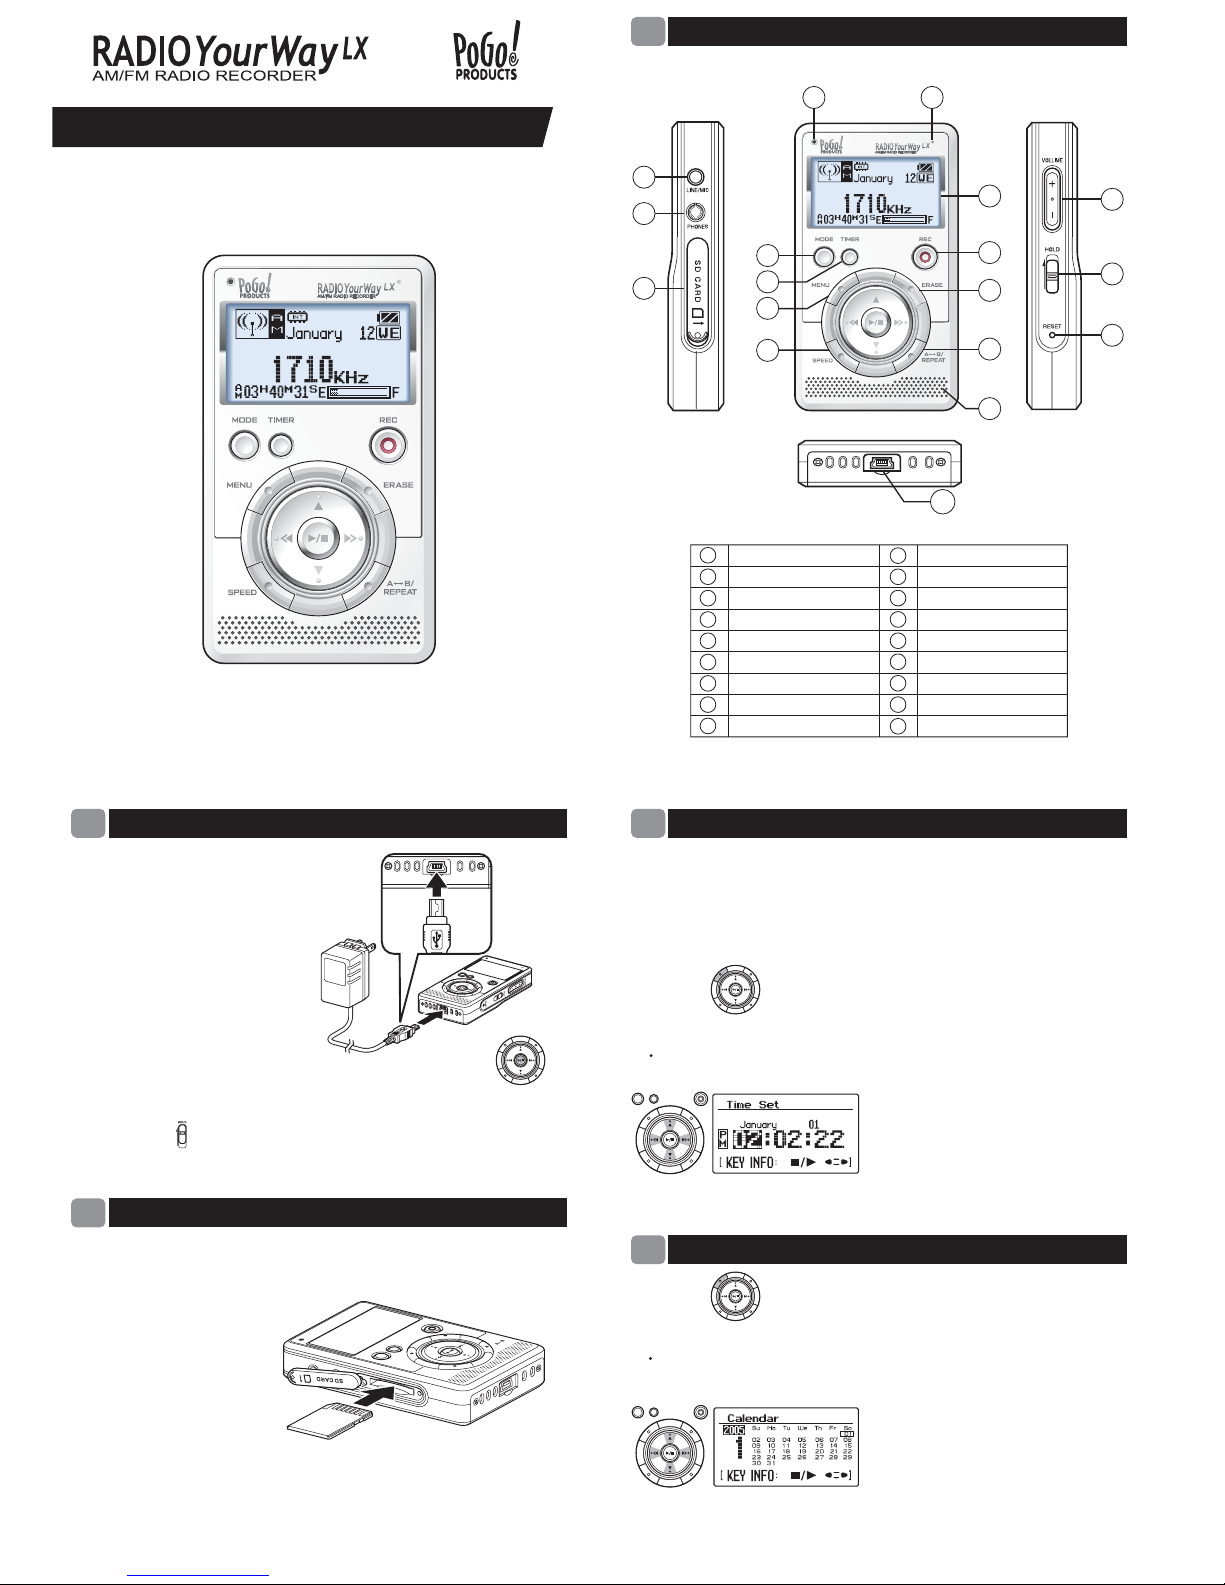
Component and LCD Display
12
3
4
5
6
7
8
18
9
10
11
12
13
14
15
16
17
1
2
3
4
5
6
7
8
9
18
10
11
12
13
14
15
16
17
Internal Microphone MENU
LED SPEED
LCD External Speaker
REC USB/POWER Terminal
ERASE Volume +/-
A B/Repeat
↔
HOLD
MODE RESET
TIMER LINE IN
SD/MMC Card Slot Earphone Jack
2
Charging The Battery
3
Using a Memory Card
Please fully charge the battery
prior to using Radio YourWay LX.
The battery can be charged using
the AC adaptor, or by making
a USB connection with a PC or
MAC. It takes approximately
4hrs to fully charge the battery
using either method.
To Power on the unit, hold the PLAY button for 1-2 seconds.
☞If the HOLD switch is in the ON position, all buttons are disabled and
the power on/off function will NOT work. In this case, slide the
HOLD switch off.
When inserting a
memory card
in the unit, carefully
insert the memory
card properly (as shown
in the diagram taking
note of the correct
side up) or you may
damage the card
and/or Ext card slot.
☞You may need to format the memory card to the FAT file system prior
to using it. Please refer the user manual for more information.
LINE/MIC
PHONES
4
Setting Time
5
Setting Date
Press MENU & select SYSTEM using ◀▶ (left/right),next
select CALENDAR using ▲▼ (up/down) and push ▶/ ■ (PLAY).
You will now see a similar screen as the one shown below.
To move between the Year/Month/Date fields, use ▲▼ (up/down).
To change the Year/Month/Date, use
◀▶ (left/right). Push ▶/ ■ (PLAY) to
confirm when you are finished.
☞In order for timer recordings to function properly, the correct time and
date MUST be set.
☞Make sure you always have enough battery power. After 1 or 2 hours
of the battery being fully discharged the year/day/hour settings are all
lost and must be set again.
Press MENU & select SYSTEM using ◀▶(left/right), next
select TIME SET using ▲▼(up/down) and push ▶/ ■(PLAY).
You will now see a similar screen as the one shown below.
To change the Hour/Minute,
use ▲▼ (up/down)
To move between the Hr/Min fields,
use ◀▶(left/right). Push ▶/ ■(PLAY)
to confirm when you are finished.
6
-
1
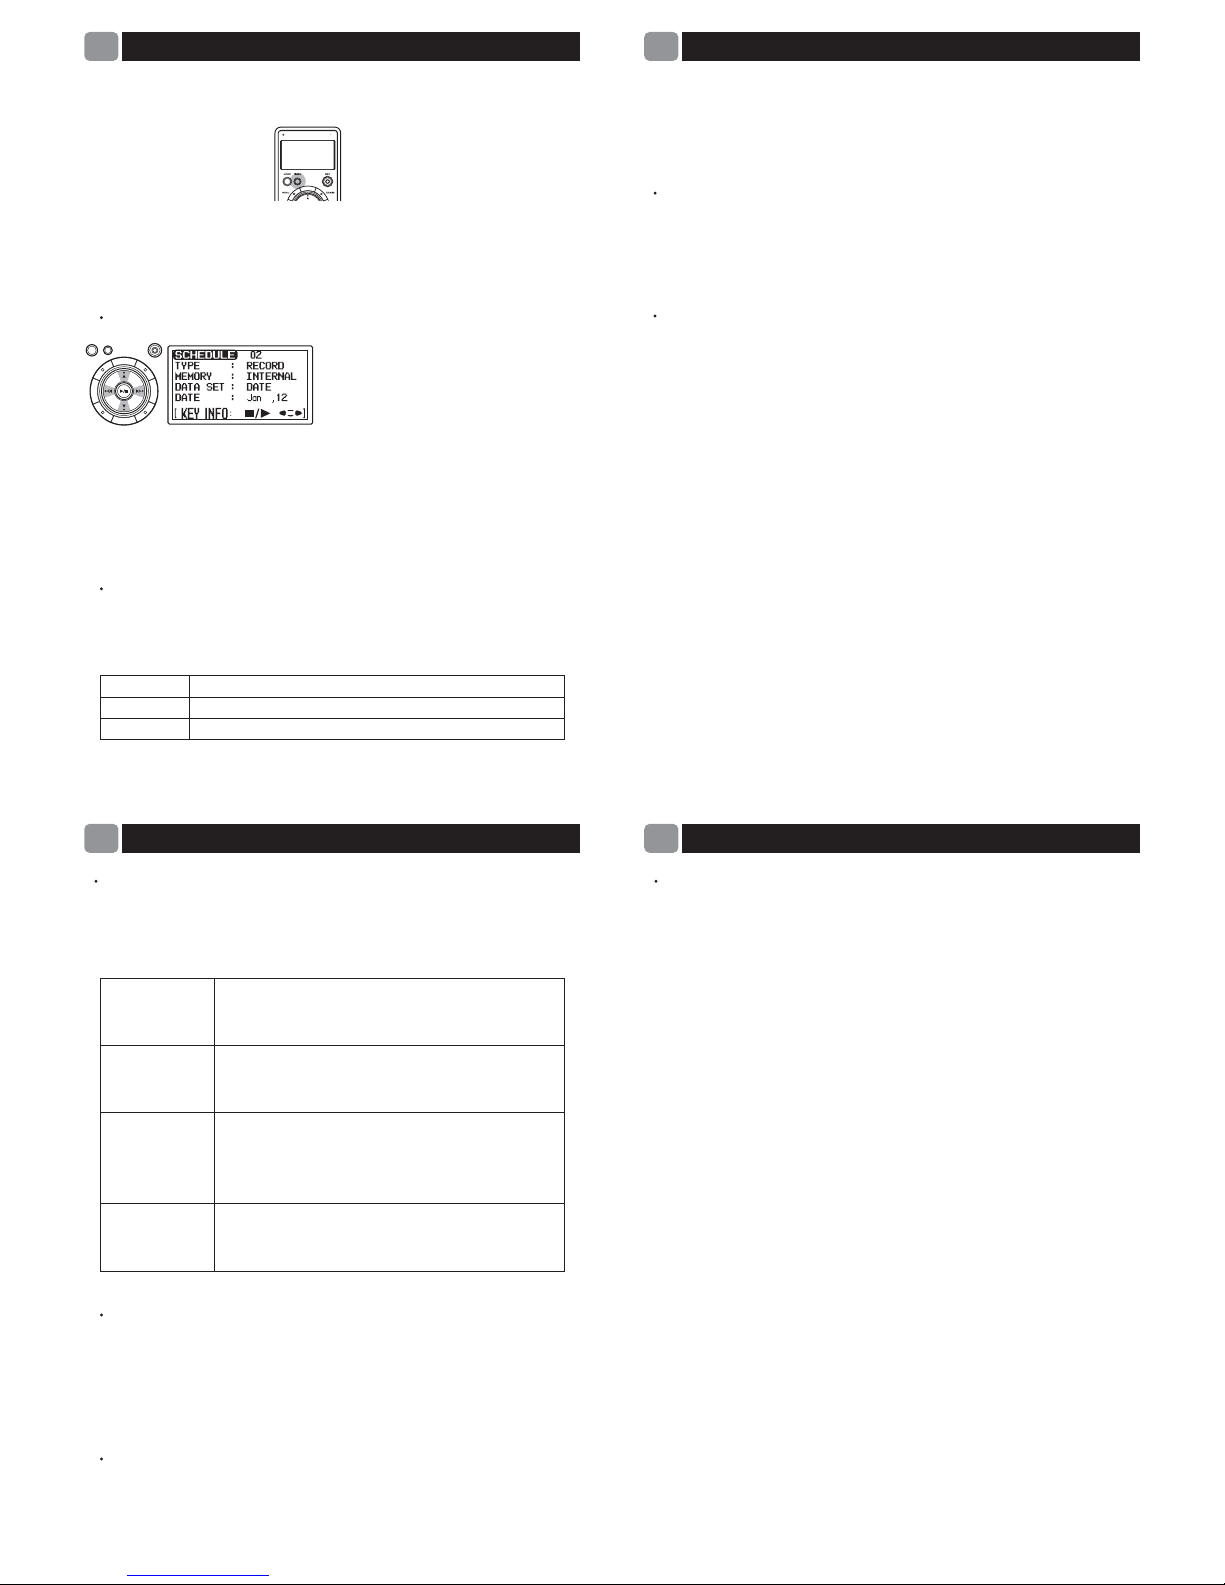
Timer Recording
You can program the unit to automatically record radio broadcasts via
a daily or weekly timer-function; totally unattended.
1. Press and hold the TIMER button 2 or 3 seconds to
initiate the timer recording screen.
☞
☞
You can not set a timer recording when the unit is playing back a file,
recording or in the menu mode.
You will now see a similar screen as shown below
2.Select a Timer Schedule Slot (1-20)
using ◀▶(left/right).
☞The file recorded by a TIMER RECORDING is saved in its BOX folder
(No01 will go in BOX01, No02 in BOX02 etc) File(s) recorded in
BOX01-20 are available in VOICE mode only.
3.You will see many items in the timer recording screen. Select different
items using ▲▼ (Up/down).
The first item is TYPE. Use ▼ (down) to highlight TYPE and ◀▶
(left/right) to select between RECORD, PLAY or DISABLE
(refer to note on page 6-2 for more disable info) & ▼ (down) to move
to next item.
DISABLE
Select to Cancel a TIMER-RECORDING & Release the timer slot
RECORD Start Recording on a set time/ date(Timer-Recording)
PLAY Play music/radio on a set time/date(Alarm Function)
6
-
2
Timer Recording
Note: Make sure you select the correct schedule that you want to disable.
After selecting the disable option (from a previously saved schedule),
press ▶/ ■ (PLAY) and then highlight YES using ◀▶(left/right) and
press ▶/ ■ (PLAY) again to confirm. This will release the timer slot.
The next item is MEMORY. Use ◀▶ (left/right) to select between
INTERNAL or EXTERNAL & ▼ (down) to move to next item.
☞External Memory option will only be available if there is an external
memory card inside the external card slot.
The next item is DATE SET use ◀▶ (left/right) to select WEEK or
DATE & ▼ (down) to move to next item.
☞Date is only used to set a SPECIFIC date in the future for a ONE
TIME recording. The most common setting used to record radio
shows is WEEK because the unit will turn on EVERY WEEK on
that DAY per the setting.
If you select DATE
a. Highlight DATE and select Month using ◀▶ (left/right).
b. Next move to day field using ▼ (down) and select a day of the
month using ◀▶ (left/right).
c. Once you set the Month and day, use ▼ (down) to move to
another setting.
If you select WEEK (most common setting)
a. Highlight DATE and select MON-FRI (for everyday/weekday recording)
or M,T,W,TH,F,S,SU (for specific days) using ◀▶ (left/right).
b. Once you set the desired day(s) to record, use ▼ (down) to move to
the next setting.
6
-
3
Timer Recording
The next item is SOURCE, Use ◀▶ (left/right) to select between AM,
FM, MIC or LINE setting & ▼ (down) to move to the next item. The next
item will be FREQ if SOURCE is AM/FM and/or BIT RATE if SOURCE is
MIC/LINE. Please read chart below for more information.
The next item is Bit Rate Use ▼ down to highlight BIT RATE and ◀▶
(left/right) to select between 32, 64, 96,128,192 and 256 & ▼ (down) to
move to next item.
☞ The higher the bit rate the better quality the recording will be. However,
the recording will use more memory space. For AM recording, we
recommend 32kbps for FM recording 64kbps.
The next item is START. Use this to set the STARTING TIME of your timer
recording. Use ▲▼ (up/down) to select START, ◀▶ (left/right) to change
hour ▼ (down) to select minute, ◀▶ (left/right) to change minute & ▼
(down) to move last item.
SOURCE AM
Use ▲▼ to select FREQ, press ◀▶ to select preset,
or ▼ and then ◀▶ to select a station and ▼ to finalize
selection.
Use ▲▼ to select FREQ, press ◀▶ to select preset,
or ▼ and then ◀▶ to select a station and ▼ to finalize
selection.
Record using the microphone (Ext or Int) a certain day/
time per WEEK/DATE setting. External Microphone
has priority.
- Bit rate: 32, 64, 96,128,192 and 256 selectable
Record from external device a certain day/time per
WEEK/DATE setting; even if external device is not connected
.
Bit rate: 32, 64, 96,128,192 and 256 selectable
SOURCE FM
SOURCE MIC
SOURCE LINE-IN
6
-
4
Timer Recording
The next item is END Use this to set the ENDING TIME of your timer
recording. Use ▲▼ (up/down) to select END, ◀▶ (left/right) to change
hour ▼ (down) to select minute, ◀▶ (left/right) to change minute.
4.Finally press ▶/ ■ (play) and use ◀▶ (left/right) to select "YES" and
press ▶/ ■ (play) again to save and confirm all settings.
☞To view a saved timer, press (don't hold) the timer button one time and
use right/left to choose a schedule number to view and up/down to view
more setting information.
☞Once a timer is saved, the only way to release the timer slot is to select
the schedule (1-20) and choose the disable option (under TYPE) refer
to page 6-2 of the quick start guide for more information.
☞Hitting the ERASE KEY will show you a "cancel" message that is not
the same as the DISABLE setting. This cancel setting only applies to
a non-saved timer and allows you to exit the timer setting quickly. It will
not release a previously saved timer.
For more information, please refer to the user manual.
Thank you!
The Radio YourWay LX Team
PoGo! Products, Inc.
www.pogoproducts.com
 Loading...