

Plantronics Habitat Soundscaping Installation Manual

Enclosed Waterfall Installation Guide
INSTALLATION + MAINTENANCE

Enclosed Waterfall
What you need for installation 3
What’s in the box 3
Uncrate the waterfall 4
Waterfall overview 5
Installation 6
First-time operation 9
Lighting operation (optional) 11
General operation: Valve overview 12
Troubleshooting 13
Surface cleaning and maintenance 14
Quarterly water maintenance 15
6-Month water maintenance 15
Yearly water maintenance 16
Yearly component replacement 17
Component replacement 18
Glossary 19
Specications 20
Safetycertications 21
CAUTION: WHEN SERVICING YOUR WATER FEATURE MAKE SURE THAT YOU DISCONNECT ALL ELECTRICAL AND LIGHTING.
Midwest Tropical Inc • 3420 West Touhy Ave • Skokie, IL 60076 USA • Phone: (847)679-6666 • Fax: (847)679-6669
Revision date: 6.27.18
2

Enclosed Waterfall
What you need for installation
• 4 people to help move and position waterfall
• Distilled water
• 14 gallons of distilled water for 8 x 4 ft. waterfall
• 18 gallons of distilled water for 9 x 5 ft. and 10 x 5 ft. waterfalls
Distilled water is absolutely required no tap water,
REQUIRED
• Safety gloves
• Latex gloves (optional)
• Electric drill
• No. 2 Phillips bit
• Bit holder
• Pair of platform dollies
• Liquid level
• Ladder or scissor lift
• Phillips screw driver
• Tablespoon measuring spoon
• Access to 120VAC 20 AMP Duplex outlet (US Standard outlet)
• Extension cord (optional)
• Rubber mallet
no spring water.
What’s in the box
Standard
Components
Optional
components
Waterfall
Oase® water pump (assembled)
UV (Ultraviolet) sterilizer
UV bulb and sleeve
Plastic funnel
Fill insert
Tubing
Weimans® stainless steel wipes
Novus acrylic cleaner
Plumber tape
Leveling shims
Power strip
Suction cup glass holders
Microfiber cloth
Robelle Oxidizing Shock & Swim Monopersulfate (1 lb. bag)
39” LED lighting fixture
Remote control with batteries
CAUTION: WHEN SERVICING YOUR WATER FEATURE MAKE SURE THAT YOU DISCONNECT ALL ELECTRICAL AND LIGHTING.
Midwest Tropical Inc • 3420 West Touhy Ave • Skokie, IL 60076 USA • Phone: (847)679-6666 • Fax: (847)679-6669
3

Uncrate the waterfall
Enclosed Waterfall
Uncrate the
shipping
container
Your waterfall ships inside of a wooden crate to protect the waterfall
from damage.
Your container indicates which side is the front of the waterfall.
1. Position the package so that the front is facing towards the ceiling.
2. Starting with the front panel of the shipping container, use the
drill with the No. 2 Phillips bit to remove all of the screws.
3. Remove the cardboard. The waterfall is wrapped in plastic and
surrounded by protective insulation foam. Remove the top layer
of insulation foam, but do not throw it away. You can reuse the
foam to protect the stainless steel while you move it into its final
position.
4. Remove the remaining wooden panel pieces and cardboard from
the shipping container.
5. Once all of the wood is removed, lift the waterfall to a standing
position. Leave the metal header off until the waterfall is in its
final position.
CAUTION Because the waterfall is very heavy, it is best to use
four people to move and position it.
6. Use the platform dollies to move the waterfall near its final
location, if necessary.
• To position the dollies under the base, tip the base on one
of the short edges. Roll one of the platform dollies under the
lifted base edge. Lower the base onto the platform dolly and
carefully tilt the waterfall so that the other dolly can be rolled
underneath the opposite side. Move the waterfall nearest to the
final location as possible.
• To remove from dollies, lift one side of the waterfall, remove
a dolly then rest the base onto the floor. Do the same for the
other side.
CAUTION: WHEN SERVICING YOUR WATER FEATURE MAKE SURE THAT YOU DISCONNECT ALL ELECTRICAL AND LIGHTING.
Midwest Tropical Inc • 3420 West Touhy Ave • Skokie, IL 60076 USA • Phone: (847)679-6666 • Fax: (847)679-6669
4

Waterfall overview
Enclosed Waterfall
HEADER
Drain valve
Fill valve
Quick disconnects
WATERFALL PANEL
Primary control
valve (intensity)
Spray bar
Water pump valve
Water pump
LED light fixture
VIEW FROM TOP
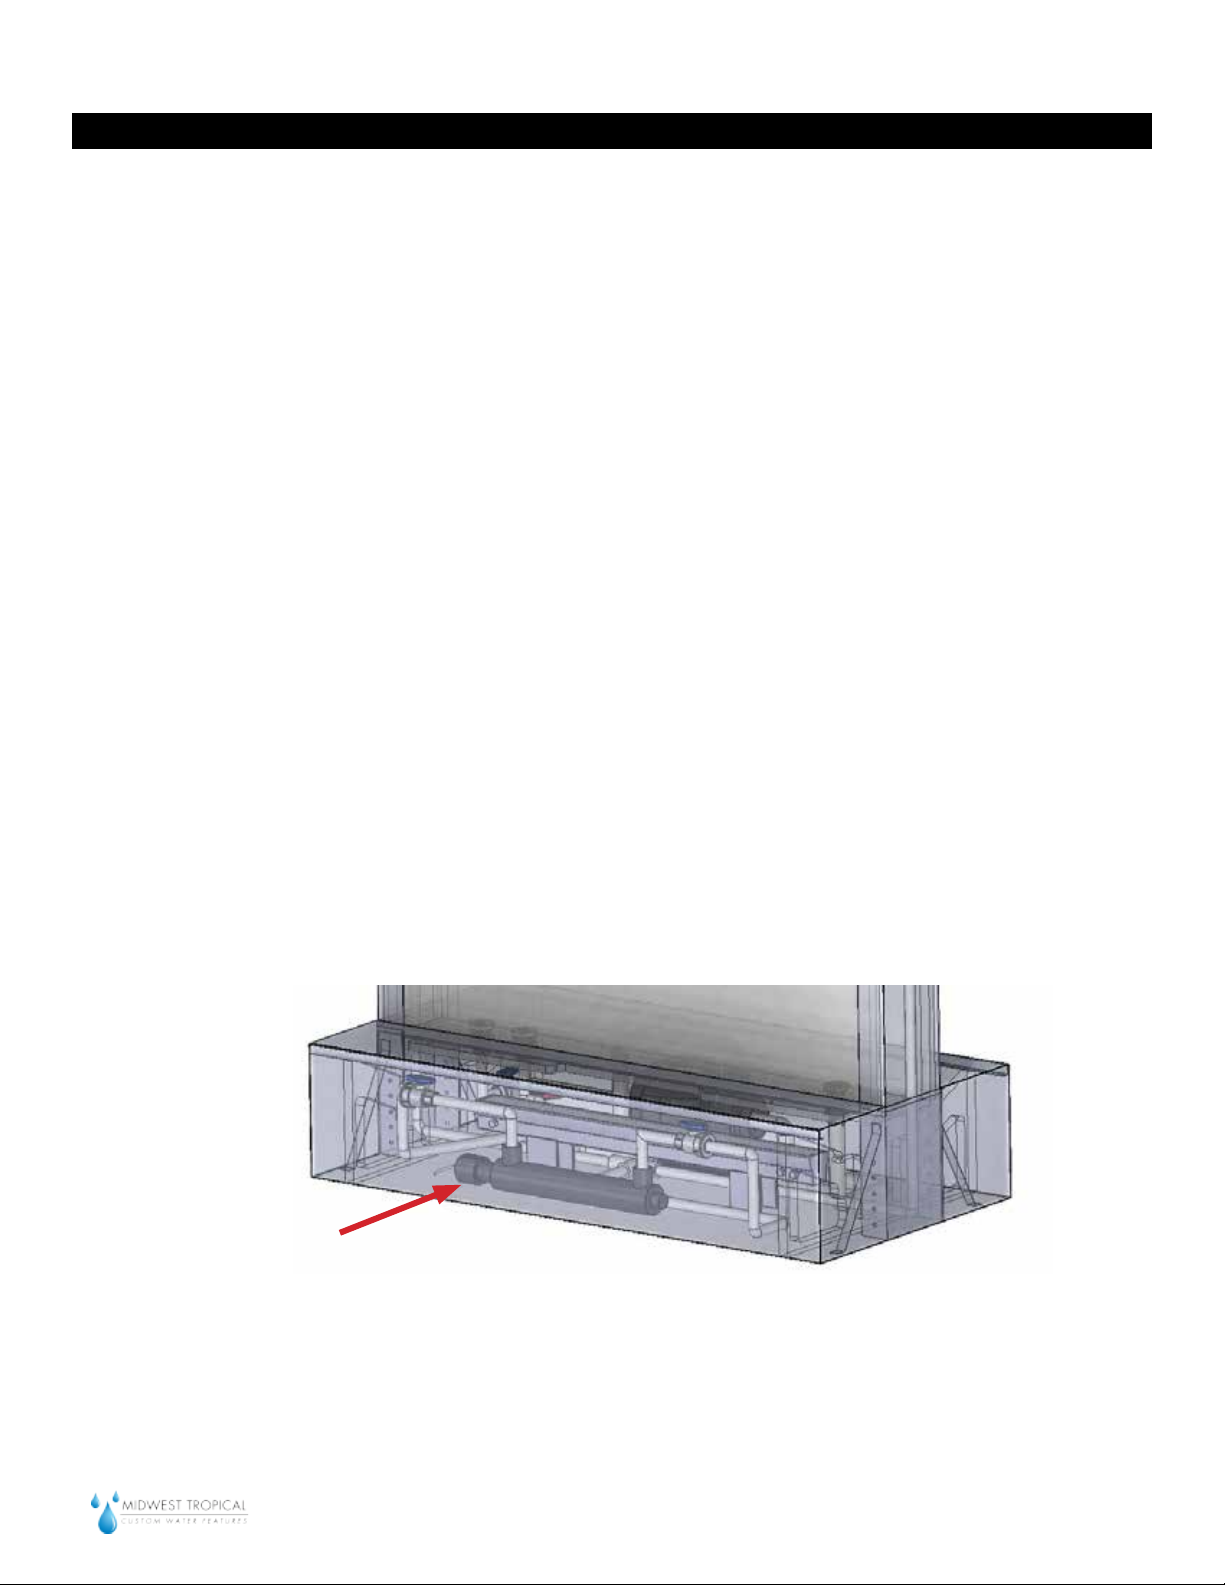
UV sterilizer lamp housing
UV inlet valveUV outlet valve
CAUTION: WHEN SERVICING YOUR WATER FEATURE MAKE SURE THAT YOU DISCONNECT ALL ELECTRICAL AND LIGHTING.
Midwest Tropical Inc • 3420 West Touhy Ave • Skokie, IL 60076 USA • Phone: (847)679-6666 • Fax: (847)679-6669
BASE
5
Installation
Enclosed Waterfall
Position the
waterfall
Level the
waterfall
Use a platform dolly under each end of the waterfall to move the
waterfall into position easily. Take the waterfall off the dollies and
slide into its final position.
If the waterfall is not level, use shims to level the waterfall.
1. Placing the level on the waterfall base lid, slightly tilt the waterfall
and insert the thinnest end of a shim between the floor and the
bottom of the waterfall unit. Check the level again. Use a mallet to
tap the shim further into the underside of the base, if necessary.
Repeat the process until the base is level on all sides.
2. Once the base is level, break off or cut the exposed ends of the
shims.
3. Place the header on top of the water fall.
NOTE Because the header is heavy, it is best to use two people to
move and position it.
Install bulb in UV
Using the suction cup glass holders, remove the base lids. Remove
all packaging inside the base. The waterfall ships with the plumbing
installed except the UV bulb and bulb sleeve to prevent damage
during transit.
1. To install the bulb and sleeve, unscrew the ballast from the lamp
housing.
Ballast
CAUTION: WHEN SERVICING YOUR WATER FEATURE MAKE SURE THAT YOU DISCONNECT ALL ELECTRICAL AND LIGHTING.
Midwest Tropical Inc • 3420 West Touhy Ave • Skokie, IL 60076 USA • Phone: (847)679-6666 • Fax: (847)679-6669
6
Installation
Enclosed Waterfall
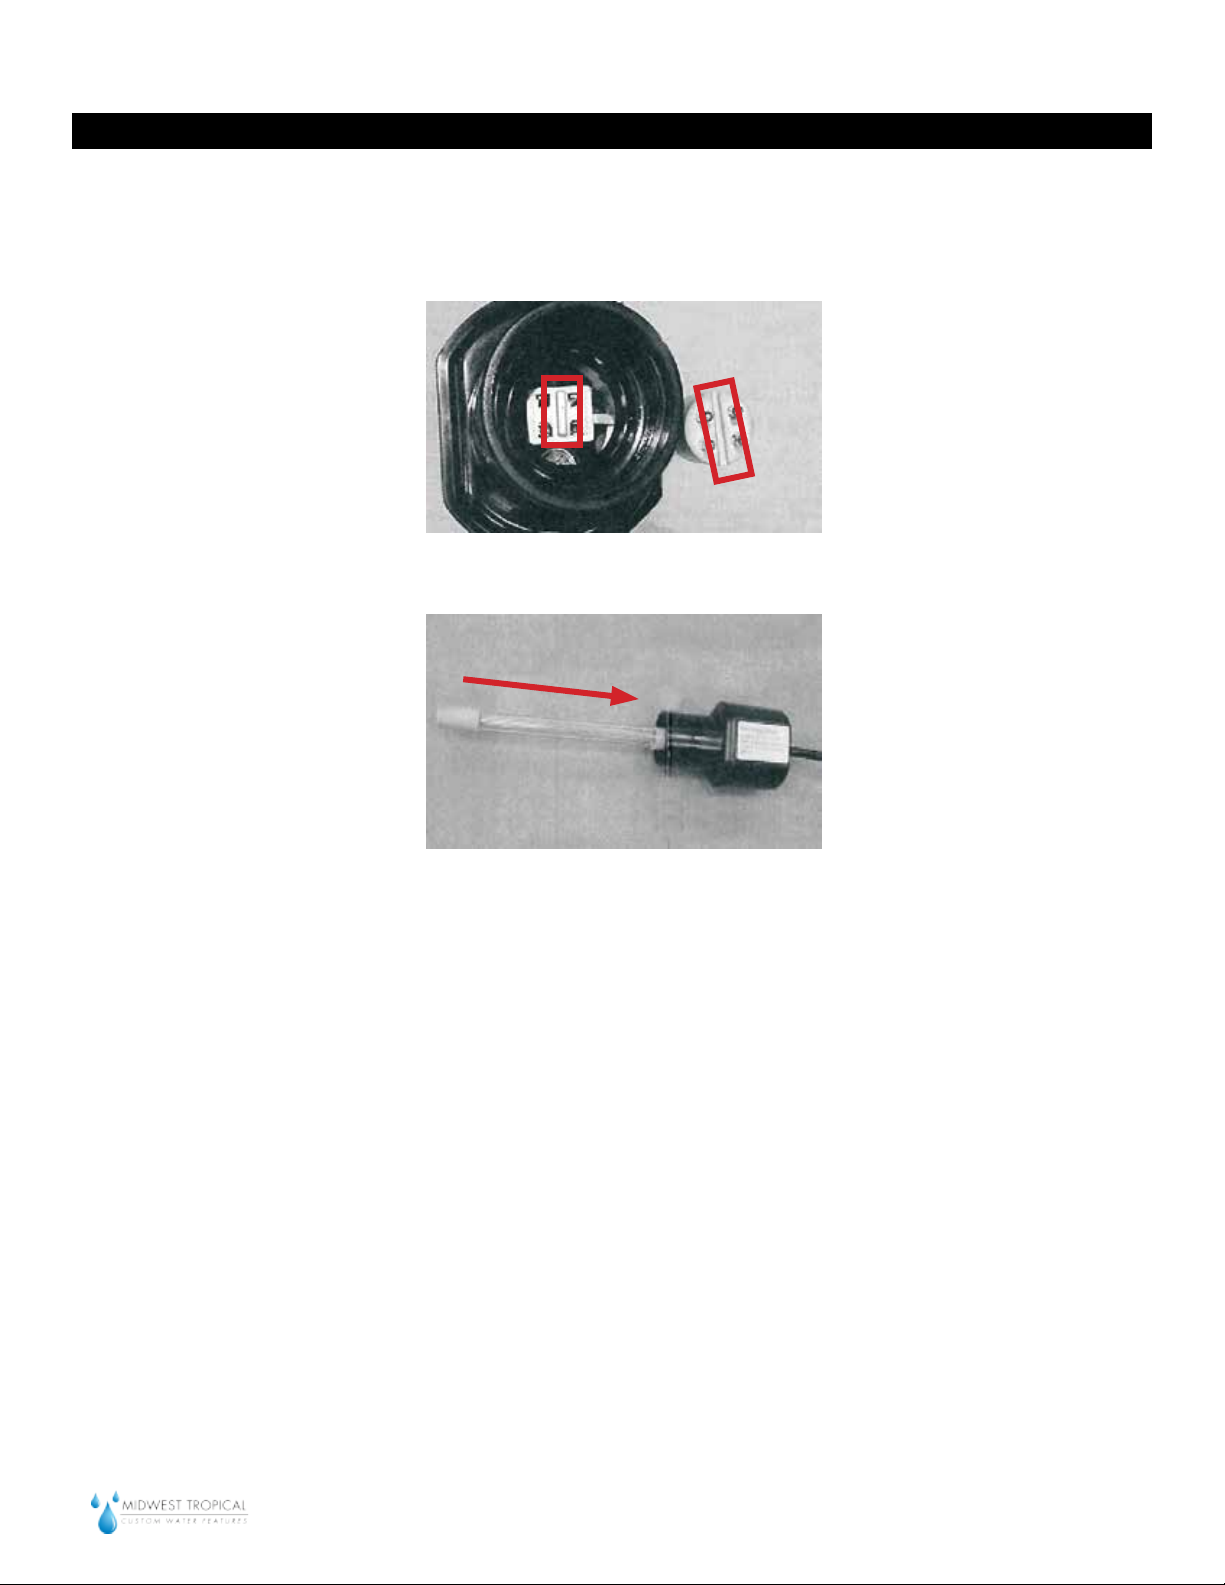
2. Wearing gloves or holding the bulb with a cloth (avoid touching
the bulb; oils from your skin will reduce the bulb lifespan), align
the center groove on the bulb with the pin on the inside of the
ballast.
3. Push the bulb in firmly.
Chase cables to
power
4. Slide the bulb sleeve over the bulb until the rubber ring touches
the ballast housing.
5. Slide the bulb into the lamp housing. Screw the ballast back into
the lamp housing until it is hand tight. Do not overtighten!
6. Screw the lamp housing back into the base plumbing.
7. Do a quick check to make sure the UV light powers on. Look for
the three translucent rings to light up. Do not leave the light on
for more than 10 seconds. If it doesn’t illuminate, unscrew the
ballast and check to make sure the sleeve and bulb are correctly in
place.
Chase or run the cables for the water pump, UV sterilizer, and
lighting fixture (if purchased) out of the small hole on the side/back
of the waterfall base. Ensure the cords reach the outlet. If the cords
don’t reach, use a power strip and an extension cord.
CAUTION Do not plug in any components until you’ve filled the
panel with water.
CAUTION: WHEN SERVICING YOUR WATER FEATURE MAKE SURE THAT YOU DISCONNECT ALL ELECTRICAL AND LIGHTING.
Midwest Tropical Inc • 3420 West Touhy Ave • Skokie, IL 60076 USA • Phone: (847)679-6666 • Fax: (847)679-6669
7
 Loading...