

Planet WAP-2000 User Manual

T
Thhee 1111
M
Mbbppss
W
Wiirreelleessss
L
L
A
A
N
N
A
Acccceessss
P
Pooiinntt
WAP-2000 User’s Guide

FCC Information
This equipment has been tested and found to comply with the limits for a Class A digital devices
pursuant to part 15 of the FCC Rules. These limits are designed to provide reasonable
protection against harmful interference when the equipment is operated in a commercial
environment.
This equipment generates, uses, and can radiate radio frequency energy and, if not installed and
used in accordance with the instruction manual, may cause harmful interference to radio
communication.
Operation of this equipment in residential area is likely to cause harmful interference in which
case the user will be required to correct the interference at this own expense.
The user should not modify or change this equipment without written approval from company
name. Modification could void authority to use this equipment.
For the safety reason, people should not work in a situation which RF Exposure limits be
exceeded. To prevent the situation happening, people who work with the antenna should be
aware of the following rules:
1. Install the antenna in a location where a distance of 20 cm from the antenna may be
maintained.
2. While installing the antenna in the location, please do not turn on the power of wireless card.
3. While the device is working, please do not contact the antenna.

Copyright
Copyright © 2000 PLANET Technology Corp., all rights reserved. No part of this
publication may be reproduced, adapted, stored in a retrieval system, translated into any
language, or transmitted in any form or by any means without the written permission of
PLANET, Inc.
Trademarks
WireFree and PLANET are trademarks of PLANET, Inc., all other trademarks throughout
this manual are the property of their respective companies.
Limited Warranty
In no event will PLANET be liable for any damage, including loss of data or profits, cost of
cover, or other incidental, consequential or indirect damages arising from the installation,
maintenance, use, performance, failure or interruption of PLANET’s products, whatever
caused and on any theory of liability. This limitation will apply even if PLANET has
been advised of the possibility of such damage.
CE Mark Warning
This is a Class A product. In a domestic environment, this product may cause radio interference,
in which case the user may be required to take adequate measures.
About This Manual
The purpose of this manual is for the setup of the 11Mbps Wireless LAN Access Point.
This manual, revised as version 1.0 in 2000, includes procedures assisting you in avoiding
unforeseen problems.
Revision
User’s guide for PLANET Wire Free Family –
For model: WAP-2000
Rev: 1.0 (July, 2000)
Part No.: EM-WAP2Kv1

Contents
Chapter 1 Introduction...................................................................................1
1-1 Features and Benefits................................................................................1
1-3 System Configurations...............................................................................3
Chapter 2 Hardware Installation...................................................................4
2-1 Product Kit................................................................................................4
2-2 System Requirements.................................................................................4
2-3 Mechanical Description.............................................................................5
Power Socket ...............................................................................................................5
Ethernet Ports .............................................................................................................5
RS-232 Port (Console Port) .........................................................................................6
2-4 Hardware Installation ...............................................................................6
Chapter 3 Configuring the Access Point ........................................................7
3-1 Using the Access Point Manager...............................................................7
3-2 Using the Console Mode .......................................................................... 15
Chapter 4 Troubleshooting...........................................................................24
Appendix A Network Configuration...............................................................26
Appendix B Specifications...............................................................................29
Appendix C Glossary.......................................................................................30

-1-
Chapter 1 Introduction
The WAP-2000, 11Mbps Wireless LAN Access Point is a high-speed wireless unit that
performs as a transparent Media Access Control (MAC) bridge between wired Local Area
Networks, and one or more wireless networks. It brings Ethernet-like performance to the
wireless realm. Placed anywhere along an Ethernet LAN, the WAP-2000 allows wireless
stations in their coverage area to transparently access the corporate network. Fully
compliant with the IEEE802.11(b) standard, the 11Mbps Wireless LAN Access Point also
provides powerful features such as the Windows-based configuration utility, WEP security,
SNMP and more. The 11Mbps Wireless LAN Access Point enables you to build a variety of
network configurations.
1-1 Features and Benefits
l Protocol-independent networking functionality
l Access for mobile users into the legacy wired Ethernet LAN.
l Seamless connectivity to wired Ethernet and PC network LAN’s augments existing
networks quickly and easily.
l Supports up to 11Mbps data rate: T-1 line alternative/replacement that
dramatically cuts costs.
l Wireless connection without the hassles and cost of cabling.
l Greater flexibility to locate or move networked PC’s

-2-
1-2 Applications
The 11Mbps Wireless LAN products offer a fast, reliable, cost-effective solution for wireless
client access to the network in applications like these:
1. Remote access to corporate network information
E-mail, file transfer and terminal emulation.
2. Difficult-to-wire environments
Historical or old buildings, asbestos installations, and open area where wiring is
difficult to deploy.
3. Frequently changing environments
Retailers, manufacturers and those who frequently rearrange the workplace and
change location.
4. Temporary LANs for special projects or peak time
C1- Trade shows, exhibitions and construction sites where a temporary network will
be practical. C2- Retailers, airline and shipping companies need additional
workstations during peak period. C3- Auditors requiring workgroups at customer
sites.
5. Access to database for mobile workers
Doctors, nurses, retailers, accessing their database while being mobile in the hospital,
retail store or office campus.
6. SOHO (Small Office and Home Office) users
SOHO users need easy and quick installation of a small computer network.
7. High security connection
The secure wireless network can be installed quickly and provide flexibility. (Please
refer to page 18 for encryption configuration.)

-3-
1-3 System Configurations
The 11Mbp Wireless Access Point can be configured in a variety of network system
configurations.
Wireless Infrastructure
In a wireless infrastructure, the 11Mbps Access Point acts as a bridge. The Access Point
connects the wireless clients together. The Access Point acts as a center point for all
wireless communications. This would increase efficiency of the communications since the
wireless adapters do not need to be within direct range of each other.
Wireless Infrastructure with Stations Attaching to a Wired LAN
The 11Mbps Wireless LAN Access Point will provide access to a your local LAN. An
integrated wireless and wired LAN is called an Infrastructure configuration. A group of
wireless LAN PC users and an Access Point construct a Basic Service Set (BSS). Each
wireless PC in this BSS can talk to any computer on your network via the Access Point.

-4-
Chapter 2 Hardware Installation
This chapter describes initial setup of the Access Point.
2-1 Product Kit
Before installation, make sure that you the following items:
u The 11Mbps Wireless LAN Access Point……………………x 1
u Quick Start Guide ……………………………….……………x 1
u Power Adapter……………………………………………..…..x 1
u Manual…………………………………………………………x 1
If any of the above items are not included or damaged, please contact your local dealer for
support.
2-2 System Requirements
Installation of the 11Mbps Wireless LAN Access Point requires:
1. An AC power outlet (100~240V, 50~60Hz) which supplies the power for the Access
Point.
2. A 10/100 Base-T (UTP) Ethernet cable drop.
Note: (Only if you want to re-configure the WAP-2000 Access Point instead of using
factory default configuration…) A PC with an available RS-232C port runs the
configuration program.
-5-
2-3 Mechanical Description
Top panel of the Access Point:
The following table provides an overview of each LED activity:
LED Definition Activity Description
PWR Continuous Green Power enabled
AP Continuous Green The Access Point is ready in service.
Off: No wireless activity
WLAN Flashing Green
Flashing: Wireless RX/TX activity
Off: No Ethernet traffic activity
LAN Flashing Green
Flashing: Wired LAN traffic activity
Off: no station connected to the Access Point
LINK Continuous Green
On: with one or more stations associated to the
Access Point
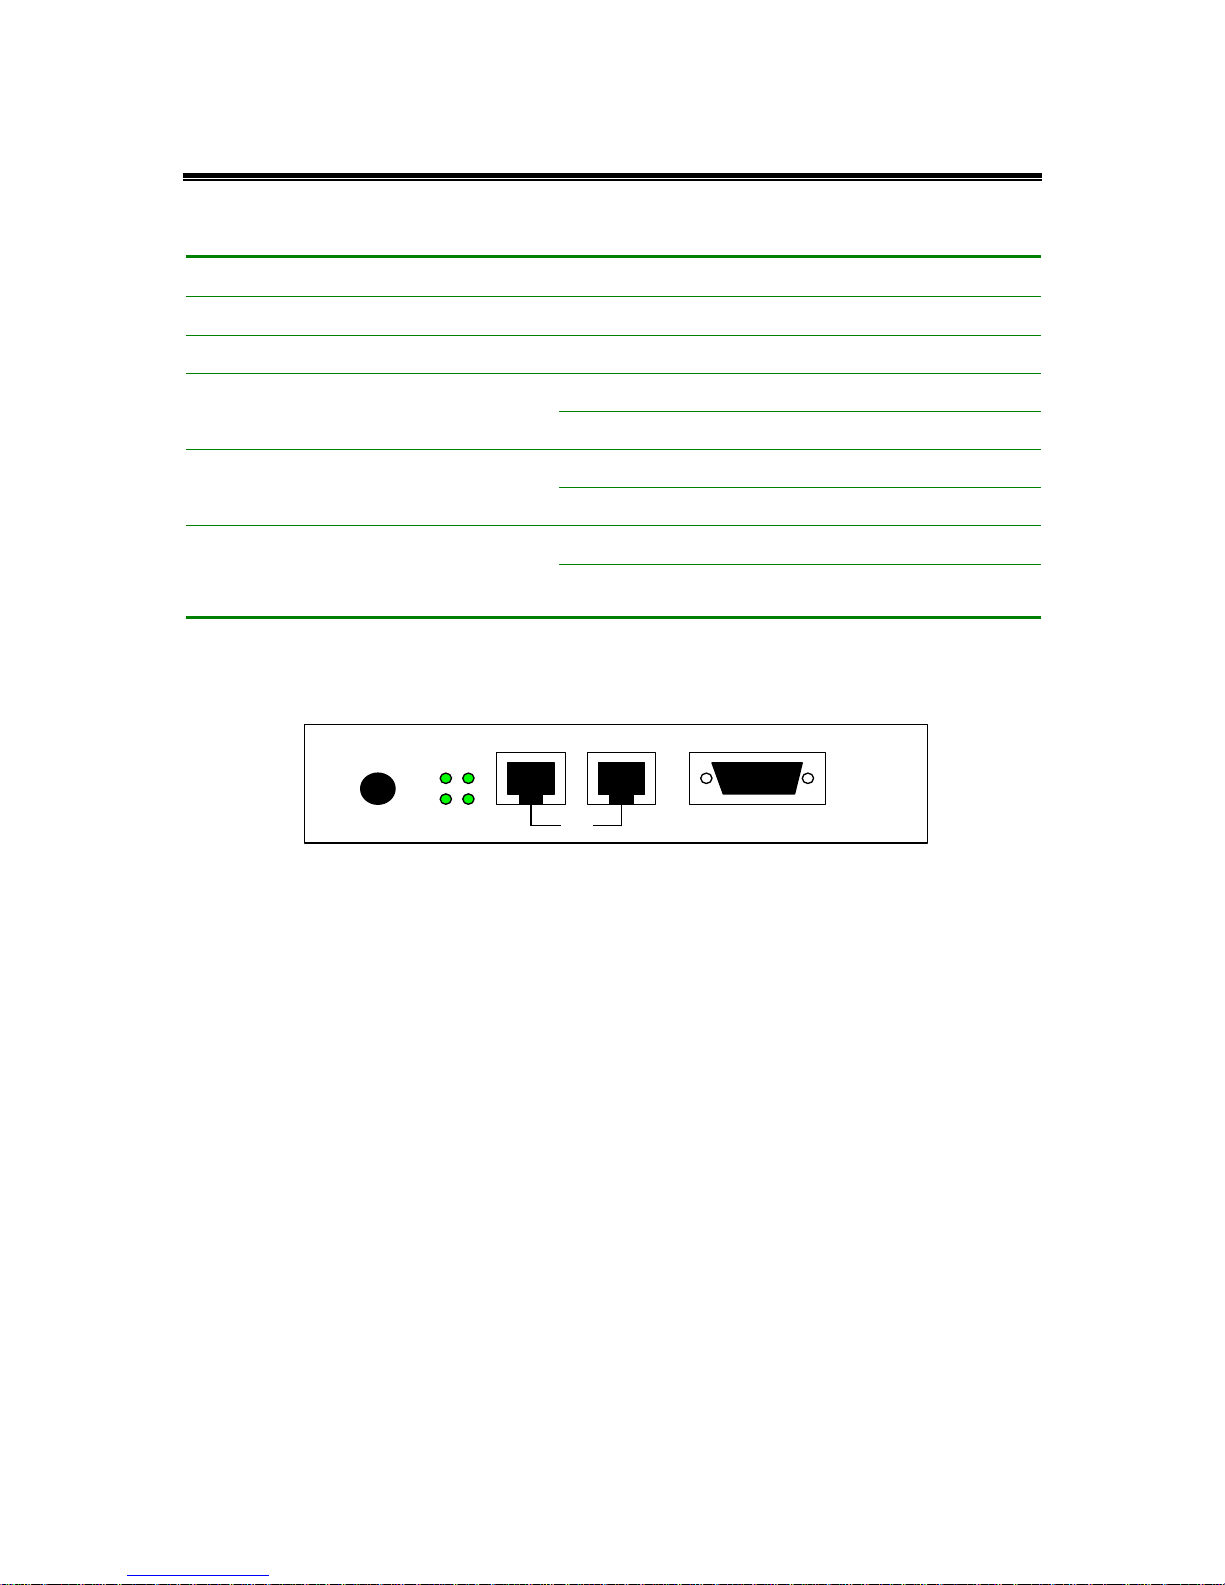
Back panel of the Access Point:
Power Socket
The power adapter plugs into the socket labeled “POWER”.
Ethernet Ports
The 11Mbps Wireless LAN Access Point supports two types of Ethernet ports: RJ-45 MDI
daisy-chain port (labeled “MDI”) and RJ-45 MDI-X station port (labeled “MDI-X”). To
connect the Access Point to a hub, use the MDI port; to connect the Access Point to a
computer/station, use the MDI-X port. Both connection ports are used with a straightthrough UTP cable. Please note that, these two RJ-45 ports cannot be used at the same time.
The four LEDs (100M/Link/Tx/Rx) next to the Ethernet ports indicate the Ethernet physical
link status. The ‘Link’ LED is a good indicator for to see if you have proper Ethernet
connection.
POWER MDI MDI-X RS-232
Link
OR
RX
100M TX

-6-
RS-232 Port (Console Port)
The RS-232 port is used for configuring the Access Point. Use a null-modem RS-232 cable
when you desire to configure the Access Point under console mode. See the section “Access
Point Console” on page 7 for detailed information.
2-4 Hardware Installation
Take the following steps to set up your Access Point.
n Site Selection
Before installation, determine the Access Point location. Proper placement of the Access
Point is critical to ensure optimum radio range and performance. You may use the Site
Survey and Access Points Browser utility (The utilities included with the wireless PC
Card) to choose a proper placement for your Access Point. Typically, the best location to
place your Access Point at your site is the center of your wireless coverage area. Try to
place your mobile stations within the line of sight. Obstructions may impede
performance of the Access Point.
n Connect the Ethernet Cable
The 11Mbps Wireless LAN Access Point supports 10/100M Ethernet connection.
Attach your UTP Ethernet cable to the RJ-45 connector on the Access Point. Then
connect the other end of the RJ-45 cable to a hub or a station. Please be aware that, use
the MDI port to connect the Access Point to a hub. Otherwise, please use the MDI-X
port to connect the Access Point to a computer/station.
n Connect the Power Cable
Connect the power adapter to the power socket on the Access Point, and plug the other
end of the power into an electrical outlet. The Access Point will be powered on and all
five indicators on the top panel will flash in sequence to test the functionality of the
indicators.
NOTE: ONLY use the power adapter supplied with the Access Point. Otherwise, the
product may be damaged.
-7-
Chapter 3 Configuring the Access Point
The 11Mbps Wireless LAN Access Point is shipped with default parameters, which will be
suitable for the typical infrastructure wireless LAN. Just simply install the Access Point,
power it on, and it is now ready to work. Nevertheless, you can still adjust configuration
settings depending on how you would like to manage your wireless network. The 11Mbps
Wireless Access Point allows for configuration either via the configuration utility, known as
Access Point Manager, console port connection, or anywhere through a TCP/IP (Telnet)
connection.
3-1 Using the Access Point Manager
Installed on your Windows 95/98/NT/2000 desktop computer, the Windows-based utility
“Access Point Manager” provides a user-friendly interface. The utility will enable you to
configure all of your Access Points on the network more easily than ever before. The
following gives instructions guiding you through the installations of the Access Point
Manager utility.
1. Insert the Software and Documentation CD into the CD-ROM drive, or the floppy disk that
came with your product kit into the floppy drive on your computer.
2. From the Start menu on the Windows desktop, choose Run.
3. In the Run dialog box, type the path where the utility is located, then click OK. For
floppy installation: A:\setup.
4. Follow the on-screen instructions to install the Access Point Manager.
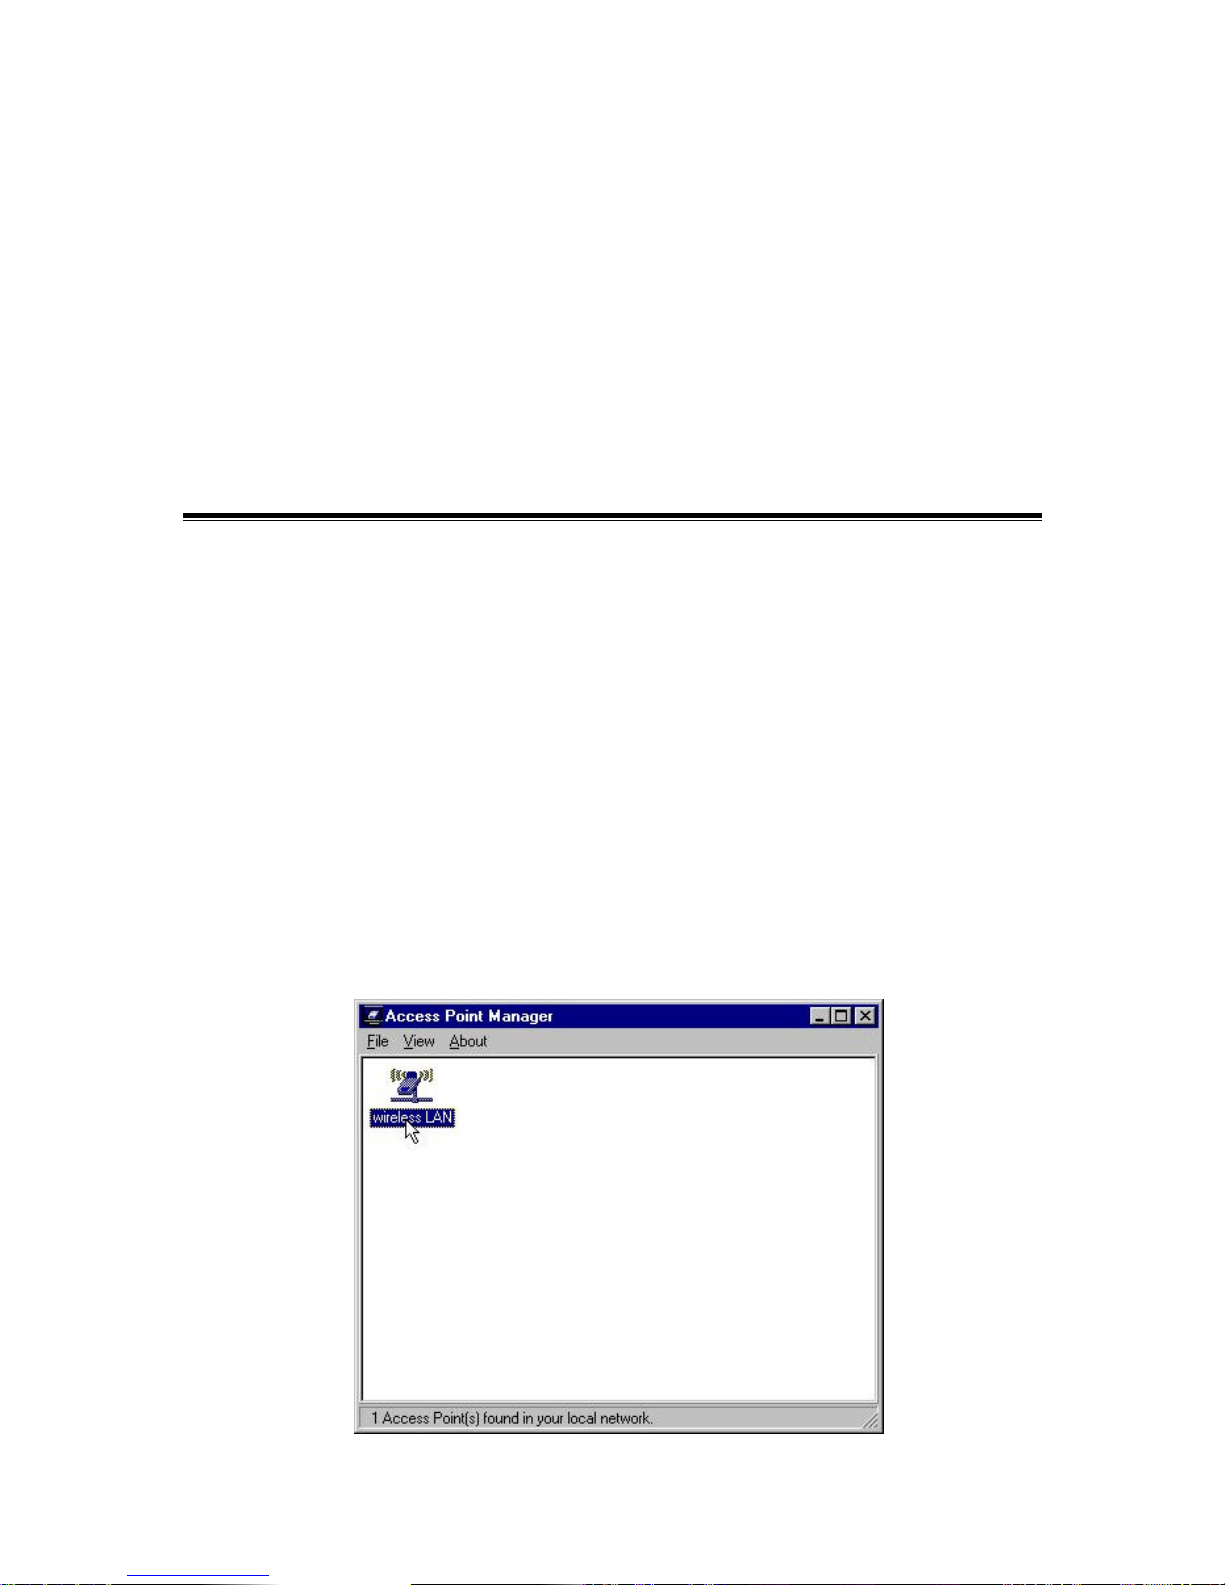
5. Upon completion, execute the Access Point Manager, and it will begin to browse all the
Access Points available on the network.
 Loading...