

Page 1

802.11n VPN/Firewall Router
VRT-402N
Quick Installation Guide
Page 2

Table of Contents
1. Before Starting Up ....................................................................................... 3
2. Quick Installation .
Further Information .
........................................................................................ 5
................................................................................... 7
Page 3
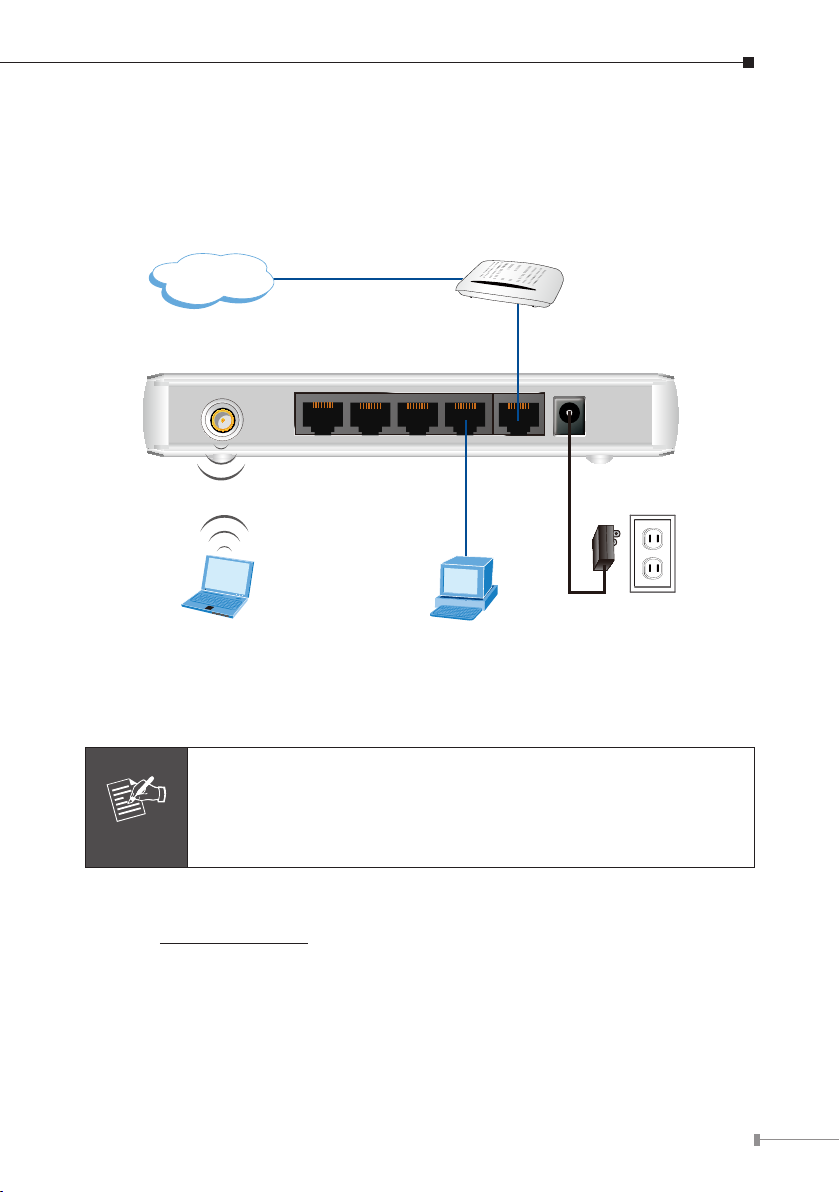
1. Before Starting Up
WAN PWR
WAN
WAN
PWR
PWR
1
2 3
4
1
2 3
4
1
2 3
4
Internet
NB PC
ADSL
LAN
Power Adapter
5V 2A
Note
This is a step-by-step instruction on how to start up the VRT-402N and get
connected to the Internet.
1) Setup your network as shown in the setup diagram below.
2) Then, you need to setup your LAN PC clients so that it can obtain an IP address
automatically. By default the VRT-402N’s DHCP server is enabled so that you can
obtain an IP address automatically.
Please make sure that the VRT-402N’s DHCP server is the only
DHCP server available on your LAN. If there is another DHCP on
your network, then you’ll need to switch one of the DHCP servers
off.
3) Once your PC has obtained an IP address from your router, enter the default IP
address 192.168.0.1 into your PC’s web browser and press <enter>. That is,
key in http://192.168.0.1 to the browser’s address eld.
4
) The login screen below will appear. Enter the “User Name” and “Password” and
then click <OK> to login.
3
Page 4

4
Note
By default the user name is “admin” and the password is
“admin”. For security reasons it is recommended to change the
password at the first login and memorize it.
Select the section you wish to congure and proceed to the corresponding chapter.
Use the selections on the web management’s to navigate around the web-based
management User Interface.
Page 5

2. Quick Installation
Note
This section intends to help you setup the VRT-402N as fast as possible. The setup
includes setup, and different type of Internet connection. For more information
about the settings, please also refer to the user’s manual in the CD-ROM.
In the Setup you are required to ll in only the information necessary to access the
Internet, you will see the screen below.
Step 1) Host Settings
Please choose the WAN Connection type, Gateway and DNS settings.
Step 2) WAN Settings
In this section you have to select one of these types of connections that you will
be using to connect your VRT-402N’s WAN port to your ISP (see screen below).
Different ISP’s require different methods of connecting to the
Internet, please check with your ISP as to the type of connection
it requires.
5
Page 6

6
Step 3) Wireless Settings
In this section you have to set VRT-402N’s Wireless SSID (see screen below).
Page 7

Further Information
If you still have any problem on connecting, please check user’s manual on the
bundled CD for detail conguration.
If you have any other questions, please contact the dealer where you purchased
this product or you can contact PLANET directly at the following email address:
support@planet.com.tw
7
Page 8

This page is intentionally left blank
 Loading...