

Page 1

PLANET VIP-101T Web Configuration Guide
WEB CONFIGURATION
Configuring and monitoring your VIP-101T from web browser
The VIP-101T integrates a web-based graphical user interface that can cover most configurations
and machine status monitoring. Via standard, web browser, you can configure and check machine
status from anywhere around the world.
Page 2

PLANET VIP-101T Web Configuration Guide
Table of Contents
Overview on the web interface of VIP-101T.................................................................................3
Preparation before beginning web administration on VIP-101T....................................................4
Checking TCP/IP settings on Windows 95/98......................................................................4
Checking TCP/IP settings on Windows NT..........................................................................6
Obtain an IP address from a DHCP Server.........................................................6
Checking TCP/IP Settings - Windows 2000:........................................................................9
Checking TCP/IP Settings - Windows XP..........................................................................11
Manipulation of VIP-101T via web browser........................................................................13
Network Configurations.....................................................................................................15
i. Network Interface...........................................................................................15
ii. PPPoE Configuration....................................................................................16
H.323 Configurations........................................................................................................18
i. H.323 Configuration.......................................................................................18
ii. Bureau Configuration....................................................................................21
iv. Phone Book.................................................................................................23
System Configurations......................................................................................................26
Tone Configuration...........................................................................................28
Password, Commit Data, Reboot, Version Information, and Firmware upgrade
Configurations...................................................................................................................29
Password Configuration....................................................................................29
Commit Data....................................................................................................29
Reboot.............................................................................................................30
Version Information...........................................................................................30
Firmware Upgrade............................................................................................31
Firmware upgrade in TFTP mode via web interface...........................................................32
Preparation on TFTP server side......................................................................33
Firmware upgrade steps on VIP-101T...............................................................33
- 2 -
Page 3

PLANET VIP-101T Web Configuration Guide
Overview on the web interface of VIP-101T
With web graphical user interface, you may have:
w More comprehensive setting feel than traditional command line interface.
w Provides user input data fields, check boxes, and for changing machine configuration set-
tings
w Displays machine running configuration
To start VIP-101T web configuration, you must have one of these web browsers installed on
computer for management
w Netscape Communicator 4.03 or higher
w Microsoft Internet Explorer 4.01 or higher with Java support
- 3 -
Page 4
PLANET VIP-101T Web Configuration Guide
Preparation before beginning web administration on VIP-101T
In this section, we’ll introduce steps of how to setup a PC to communicate with VIP-101T through
TCP/IP protocol configuration.
Before starting web browser to connect to VIP-101T, please check TCP/IP configurations on PC:
the PC must be configured either as a DHCP client and or fixed IP allocation on the intranet or
Internet. After ensuring TCP/IP configuration on the managing workstation, you may connect to
web administration page of VIP-101T either from intranet, or Internet
Following are guidelines of setting up TCP/IP configurations on different OS platform
Checking TCP/IP settings on Windows 95/98
If there is no TCP/IP installed on your Windows 95 or Windows 98, you must add the protocol and
change the settings on your PC.
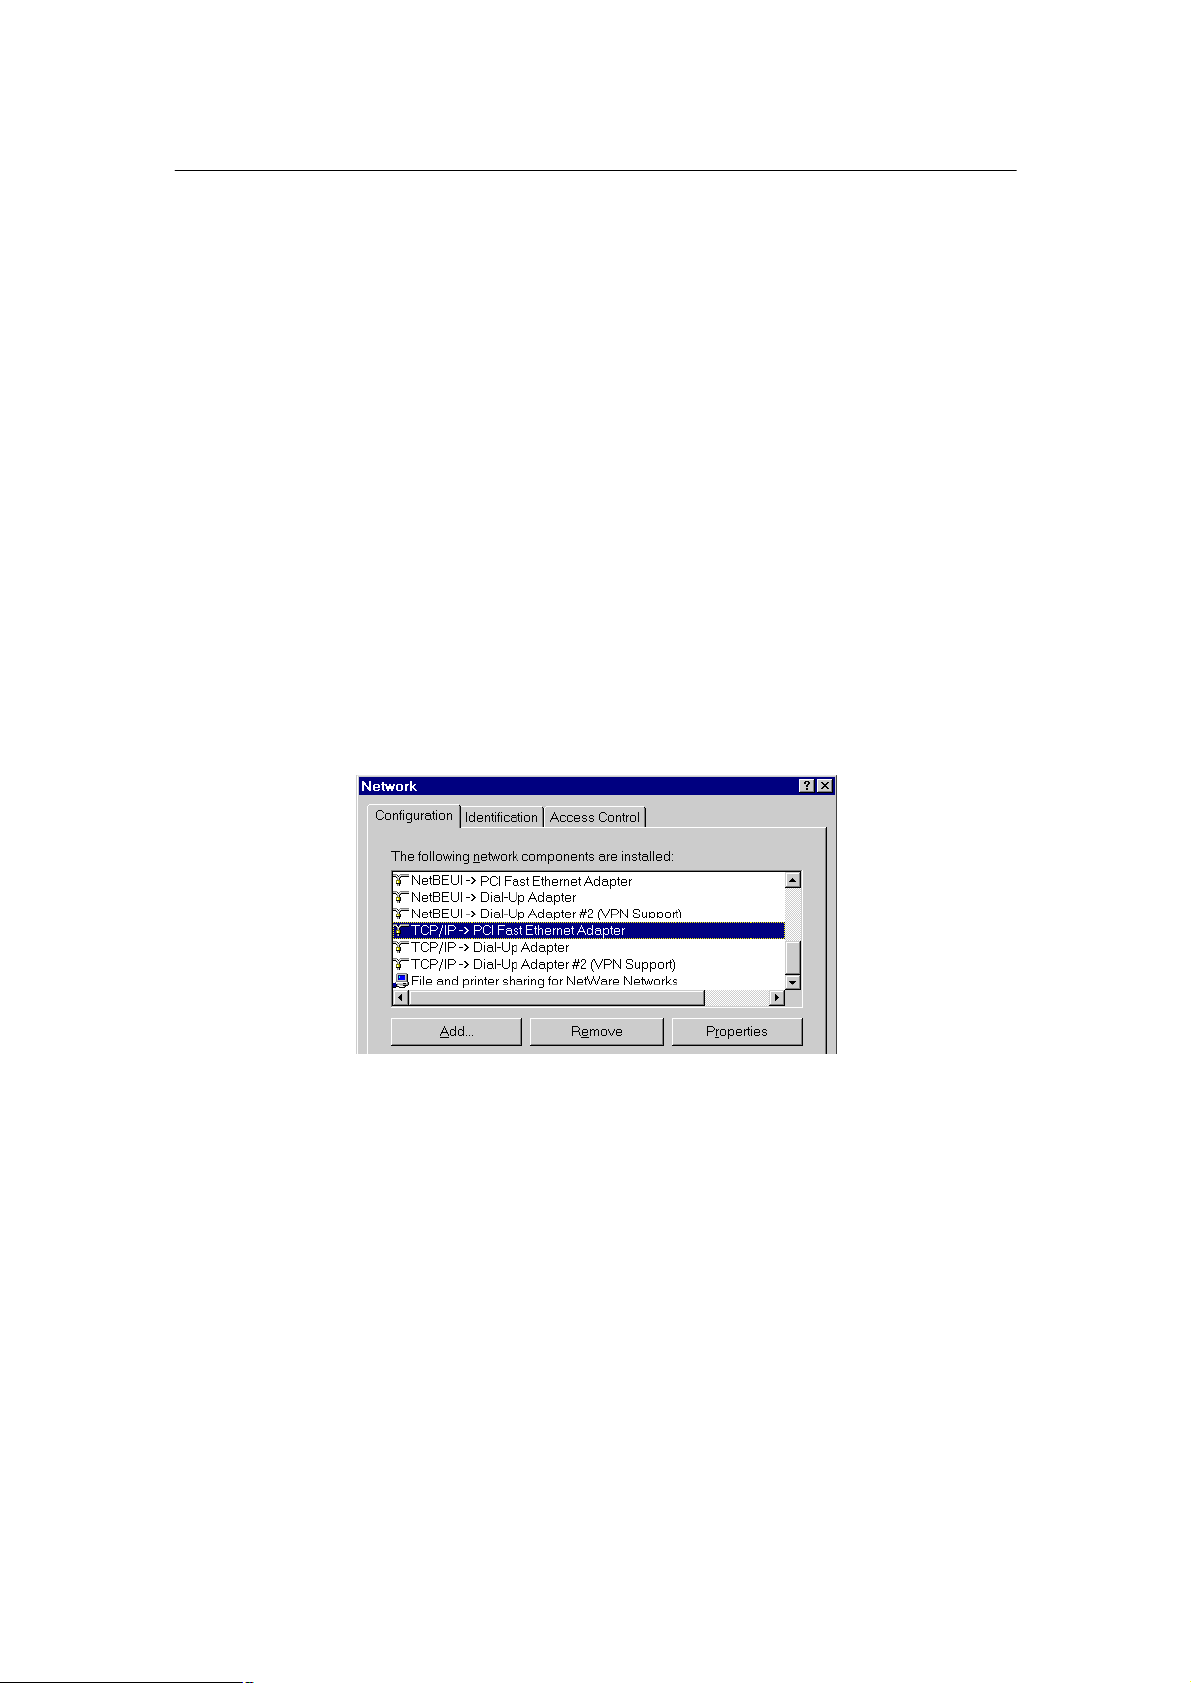
Step 1 Open the Control Panel, and double-click the Network icon. The Network window ap-
pears
Step 2 If TCP/IP protocol shown in the network window, please continue to the next step. If it
is not shown, please add TCP/IP protocol support as follows:
a. Click Add.
b. Double-click Protocol in the Select Network Component Type window, then
the Select Network Protocol window appears.
c. Choose Microsoft for the manufacturer.
d. Choose TCP/IP for the network protocol.
e. Click OK, and the Network window appears.
Step 3.1 Change the TCP/IP settings to use DHCP as follows (DHCP environment):
- 4 -
Page 5
PLANET VIP-101T Web Configuration Guide
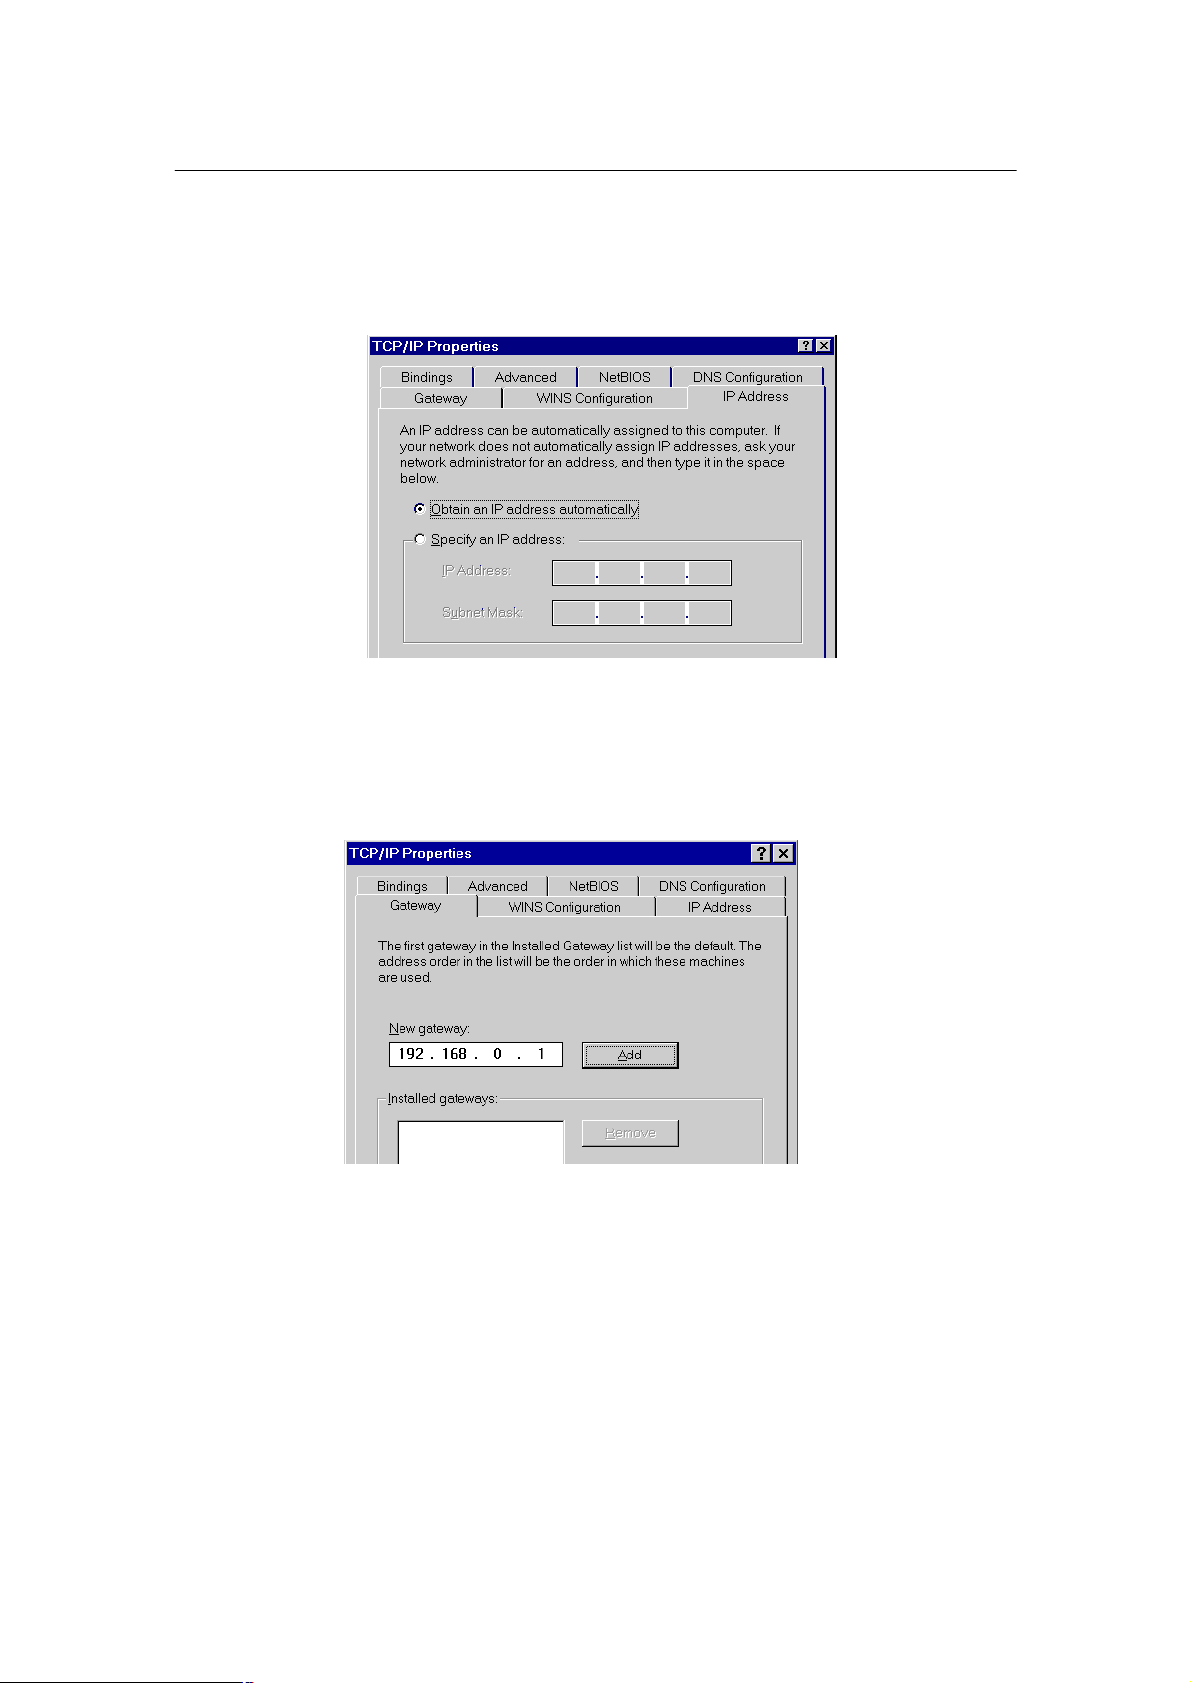
a. Double-click the first TCP/IP cable icon. The TCP/IP Properties window appears.
b. Verify that the IP Address tab has Obtain an IP address automatically selected
and that the IP Address and Subnet Mask fields are grayed out.
Step 3.2 Change the TCP/IP settings to use DHCP as follows (Fixed IP allocation):
If there is no DHCP server in your network, please consult your network administrator
the TCP/IP parameters of your PC, and insert the obtained data in IP address tab. To
access different IP segment (for example, from LAN to Internet), you will need to assign the gateway and DNS (for Internet access) in your PC.
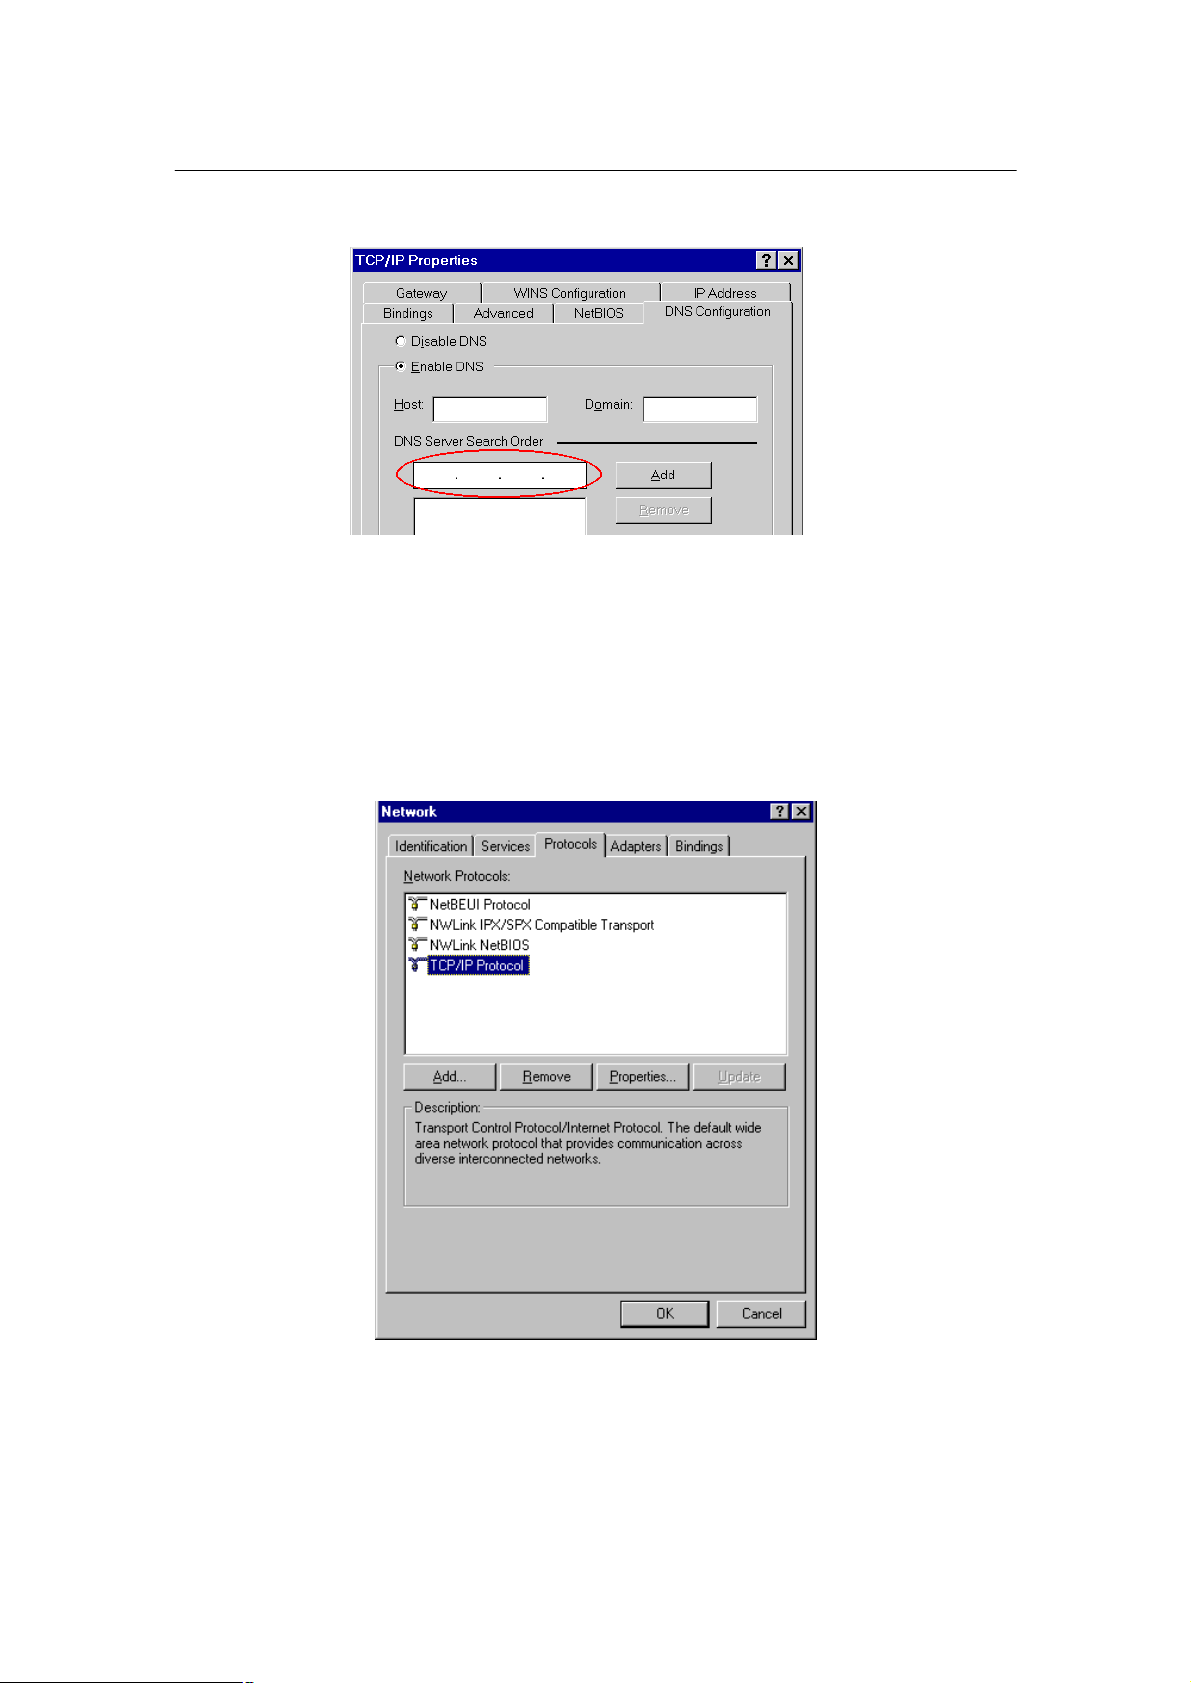
Step 5 Add the DNS server given to you by your ISP or network administrator:
a. Click the DNS Configuration tab.
b. Click Enable DNS.
c. Enter your host name in the Host field.
d. Enter your domain name in the Domain field.
e. Enter the IP address of the DNS server in the DNS Server Search Order field.
- 5 -
Page 6
PLANET VIP-101T Web Configuration Guide
f. Click Add. The IP address displays in the window below the field.
Step 5 Click OK, and reboot machine to make the modifications effective in your PC.
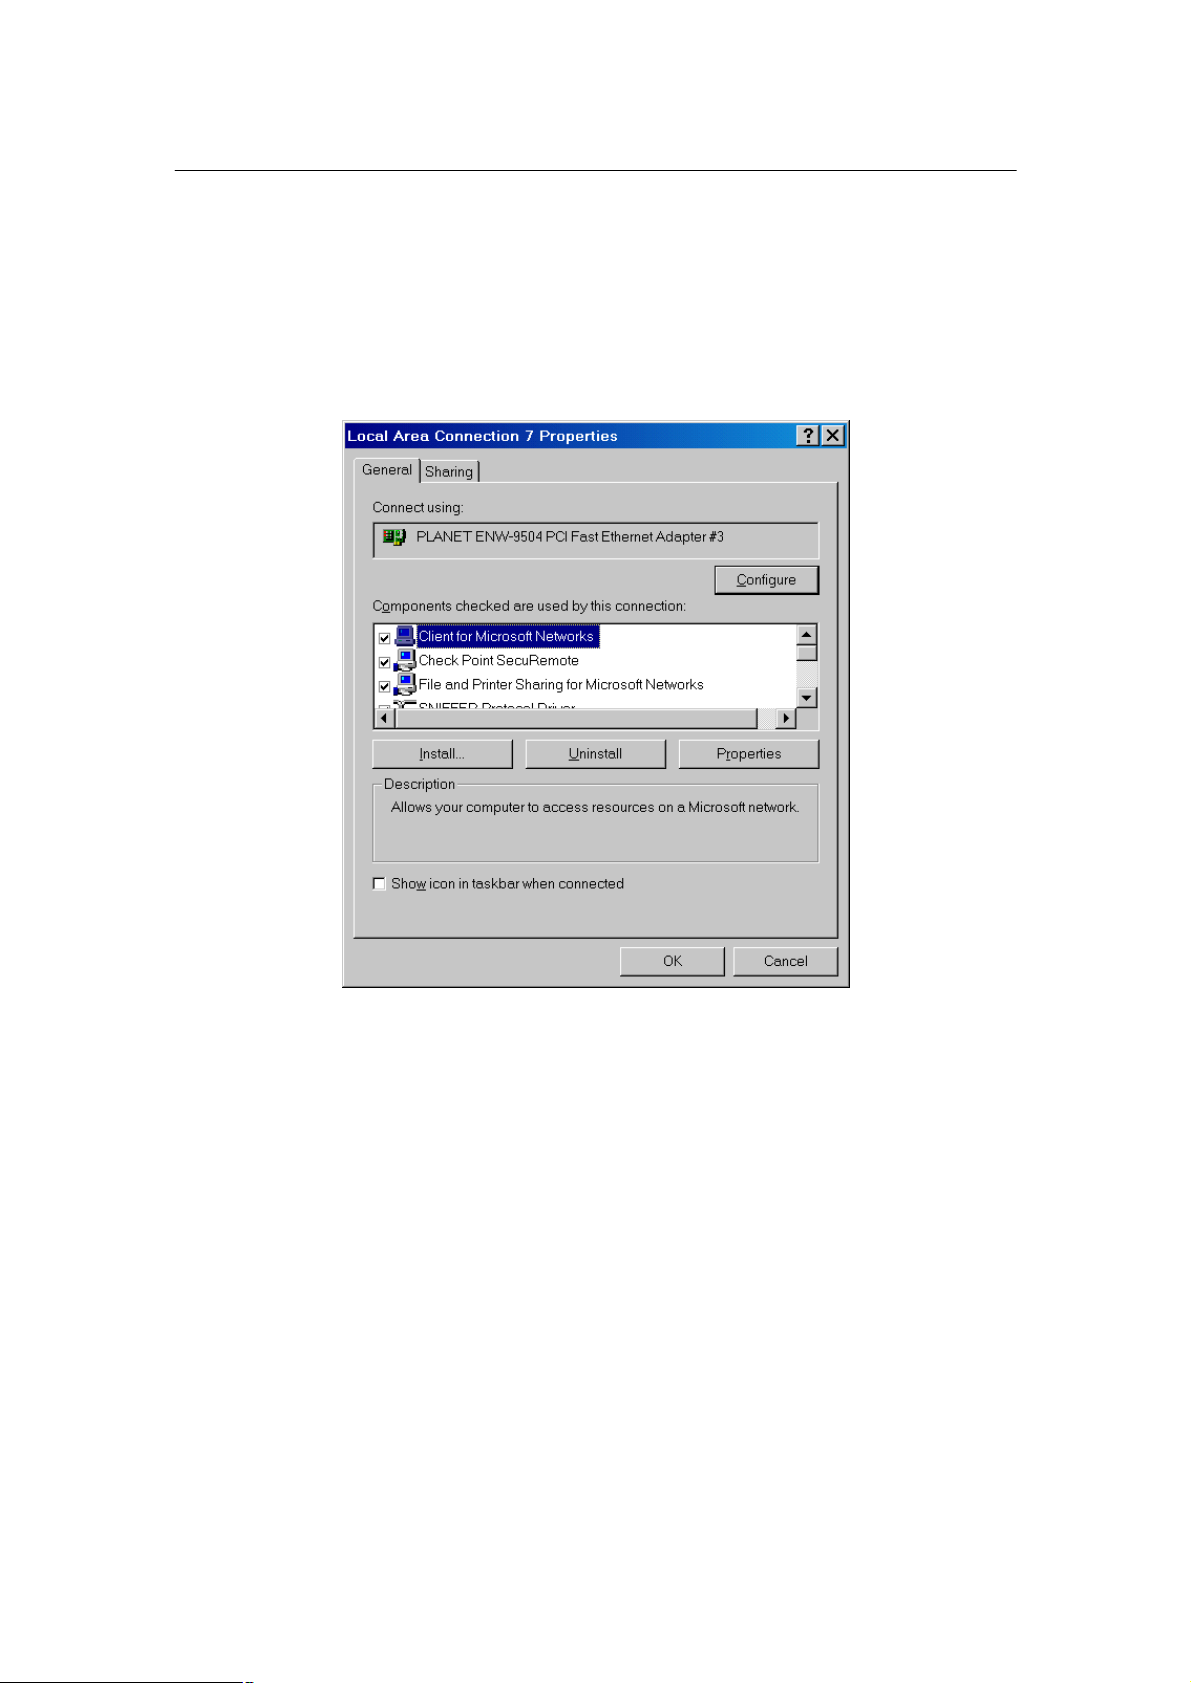
Checking TCP/IP settings on Windows NT
Obtain an IP address from a DHCP Server
Select Control Panel - Network, and, on the Protocols tab, select the TCP/IP protocol, as shown
below.
Windows NT4.0 - TCP/IP
a) Click the Properties button to see a screen like the one below.
- 6 -
Page 7
PLANET VIP-101T Web Configuration Guide
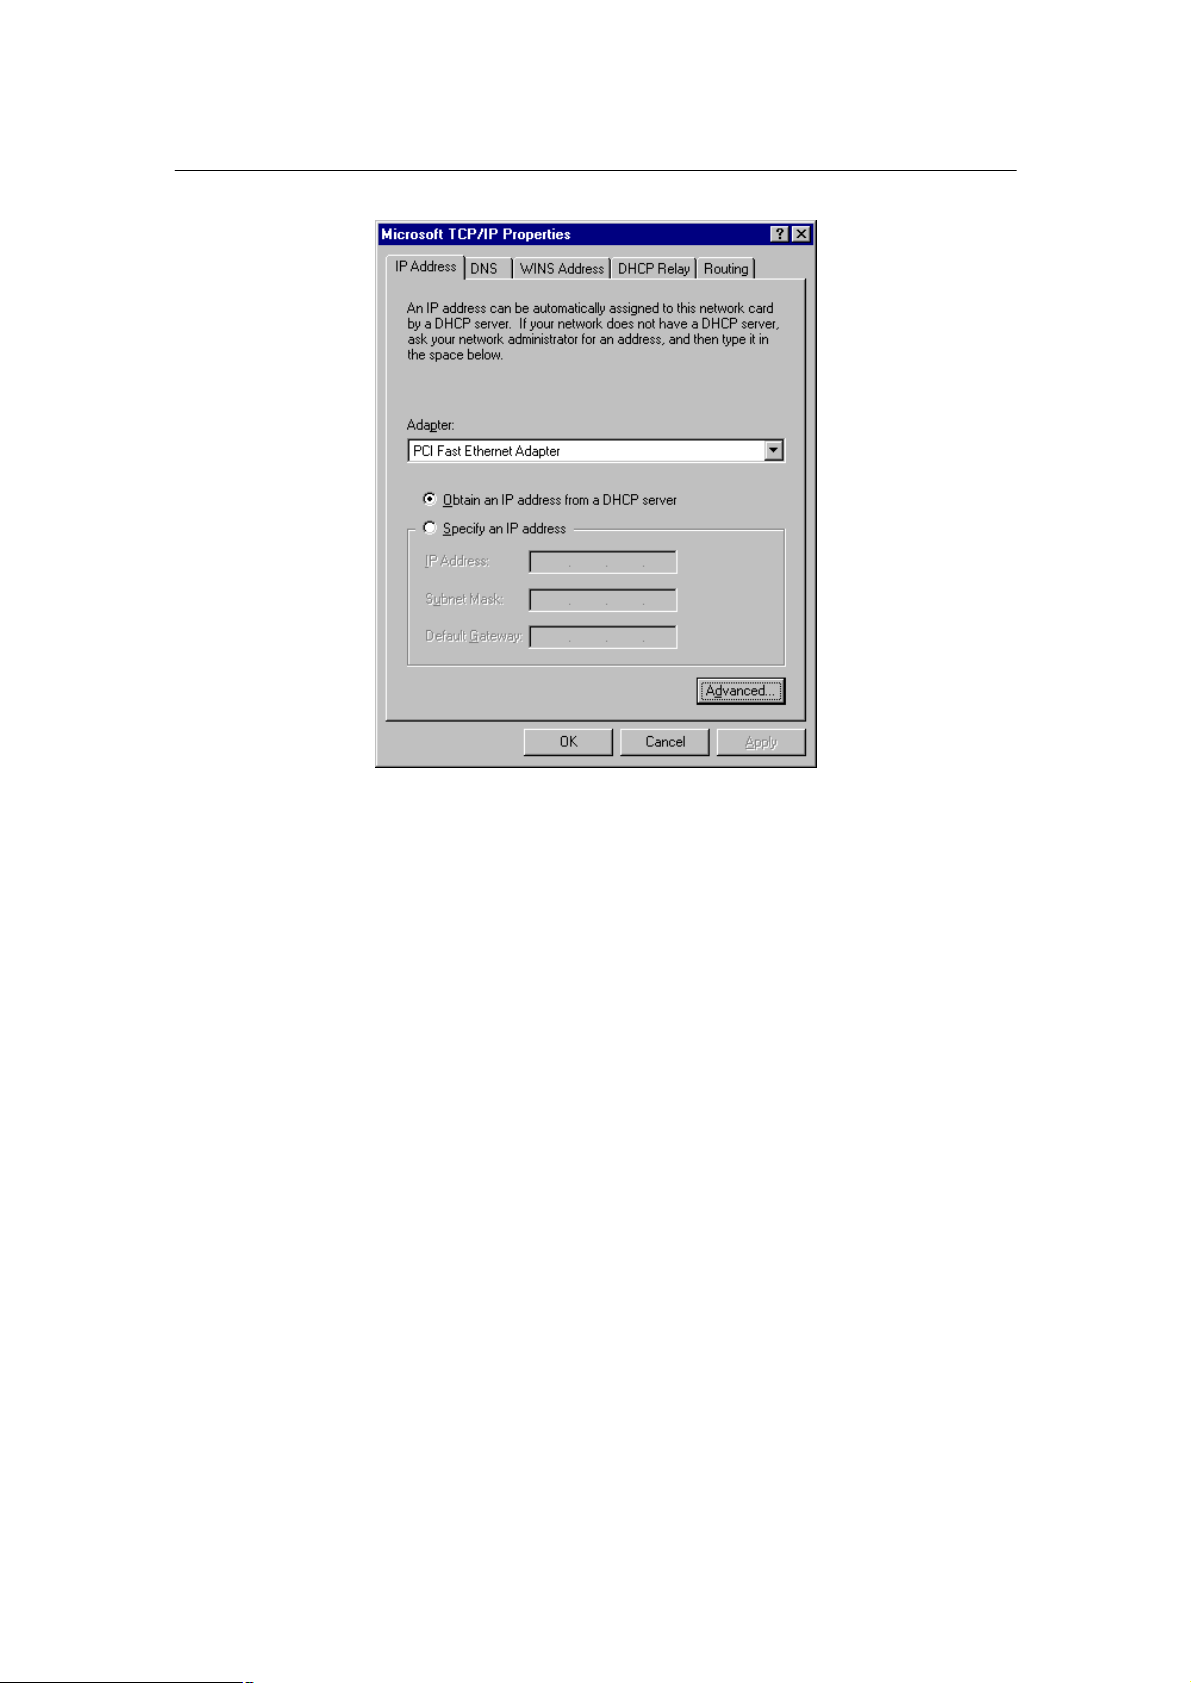
Windows NT4.0 - IP Address
b) Select the network card for your LAN.
c) Select the appropriate radio button - Obtain an IP address from a DHCP Server or Specify an IP
Address, as explained.
Specify an IP Address
If your PC is already configured with an IP address, check with your network administrator before
making the following changes.
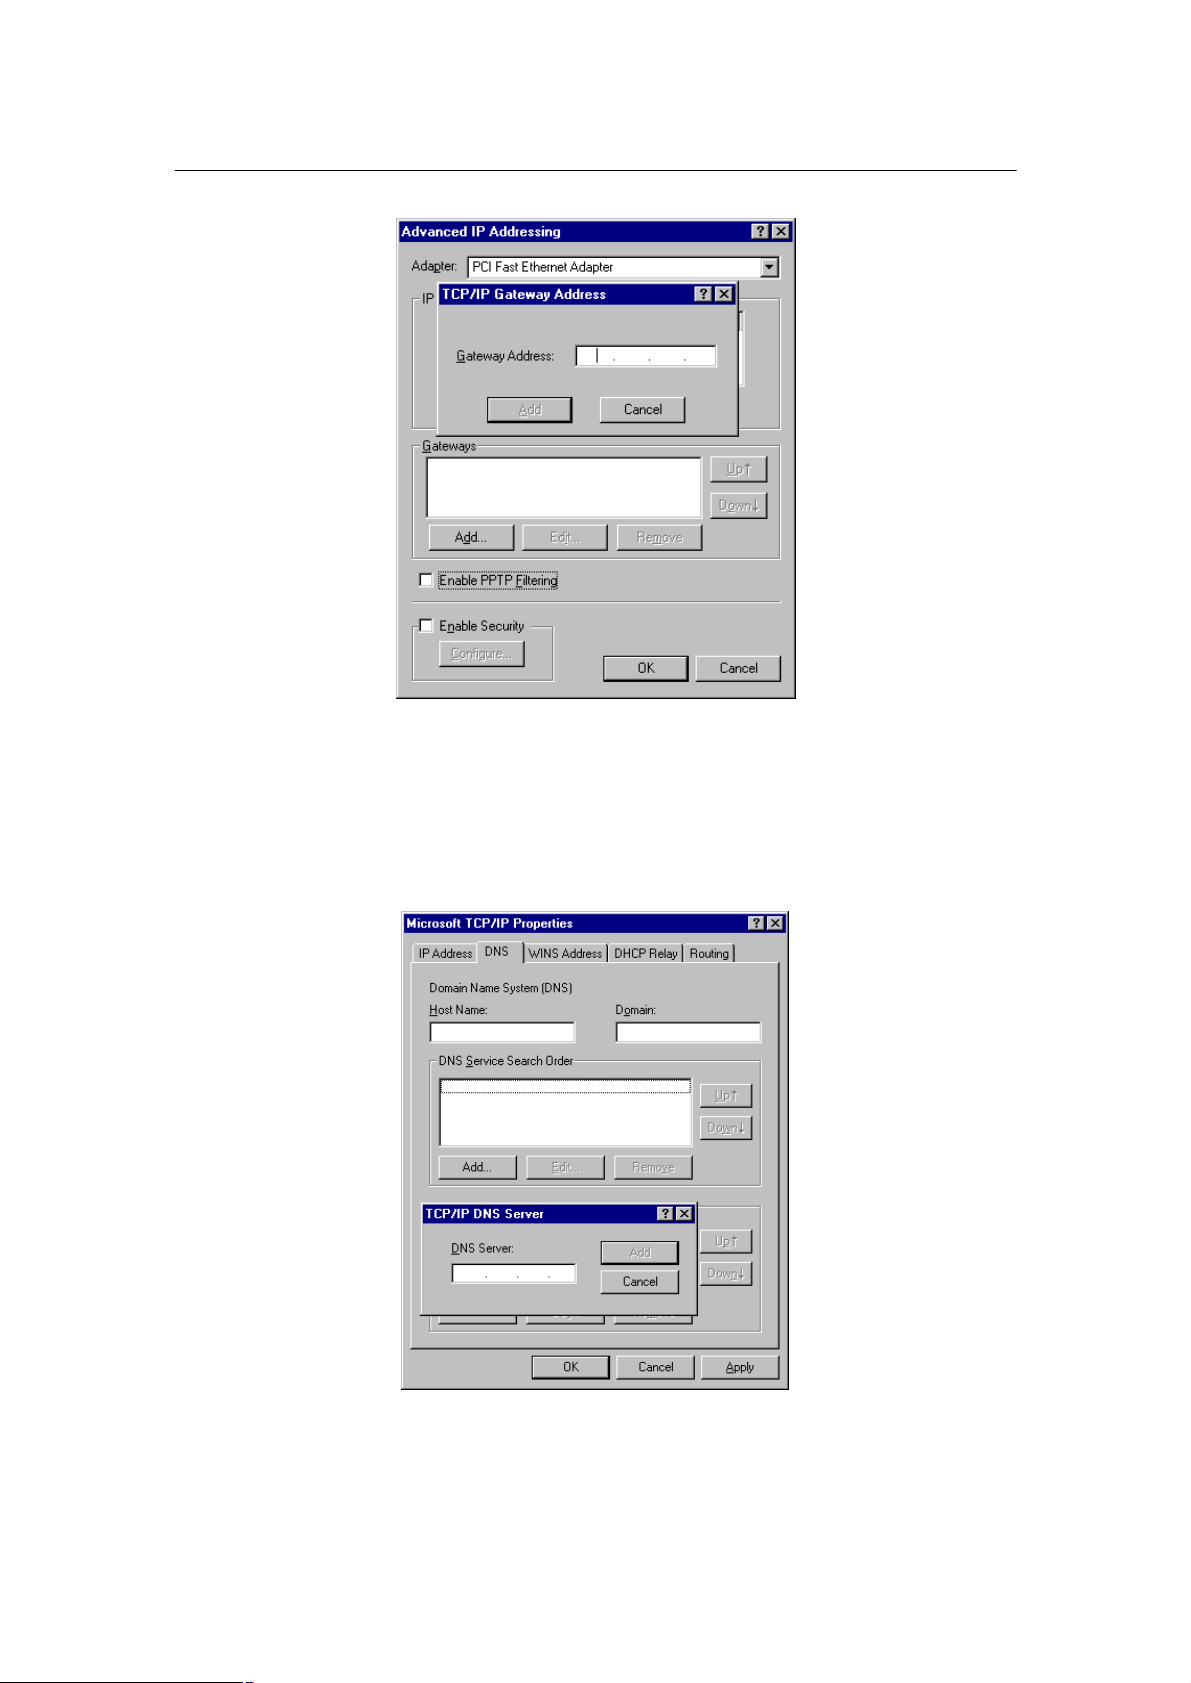
a) The Default Gateway must be set to match your network environment. To set this:
Click the Advanced button on the screen above.
•
• On the following screen, click the Add button in the Gateways panel, and enter gateway IP
address, as shown below.
• If necessary, use the Up button to make the inserted on the first entry in the Gateways list.
- 7 -
Page 8
PLANET VIP-101T Web Configuration Guide
Windows NT4.0 - Add Gateway
b) The DNS should be set to the address provided by your ISP, as follows:
• Click the DNS tab.
On the DNS screen, shown below, click the Add button (under DNS Service Search Order),
•
and enter the DNS provided by your ISP.
Windows NT4.0 - DNS
- 8 -
Page 9
PLANET VIP-101T Web Configuration Guide
Checking TCP/IP Settings - Windows 2000:
Select Control Panel - Network and Dial-up Connection.
a) Right - click the Local Area Connection icon and select Properties. You should see a
screen like the following:
Network Configuration (Win 2000)
b) Select the TCP/IP protocol for your network card.
c) Click on the Properties button. You should then see a screen like the following.
- 9 -
Page 10
PLANET VIP-101T Web Configuration Guide
-
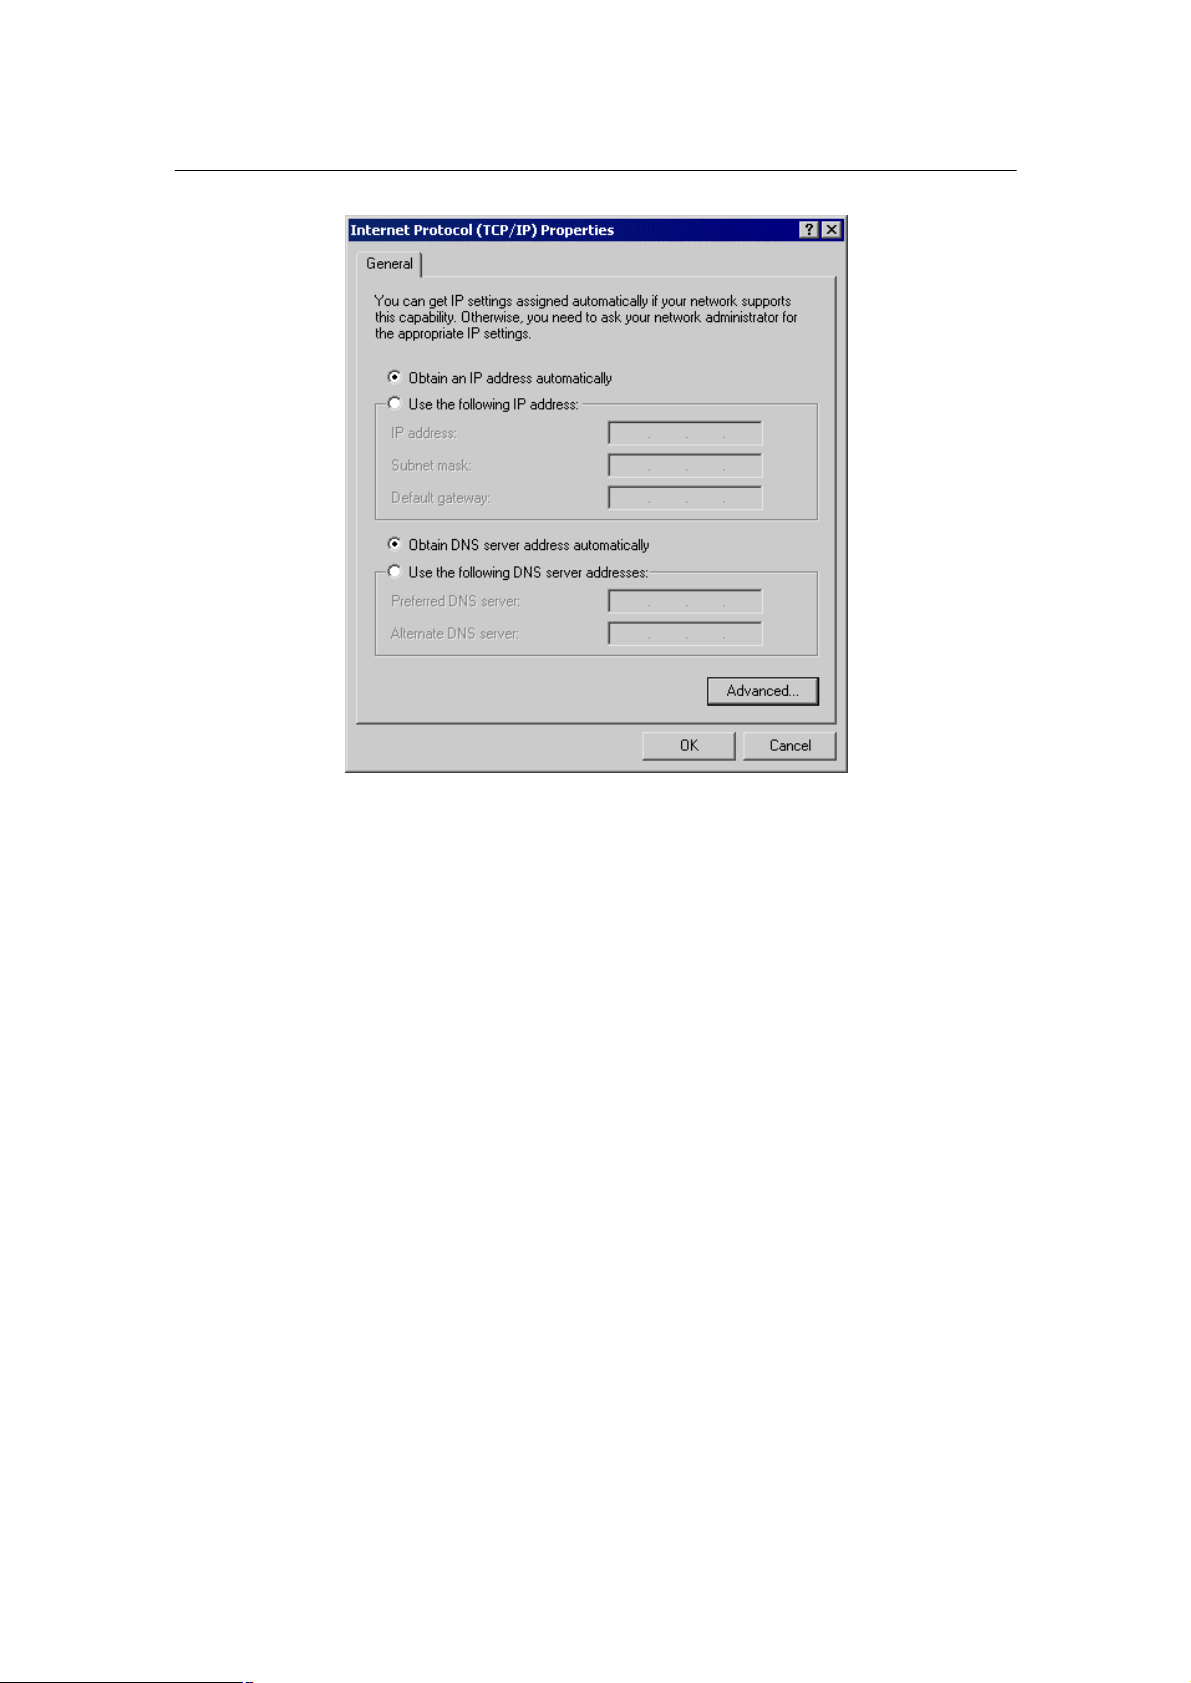
TCP/IP Properties (Win 2000)
Ensure your TCP/IP settings are correct with one of the following description.
Using DHCP
To use DHCP, select the radio button Obtain an IP Address automatically. This is the default
Windows setting. If your networking environment is a DHCP environment, Using this option is
recommended. Restart your PC to ensure it obtains an IP Address from DHCP server.
Using a fixed IP Address ("Use the following IP Address")
If your PC is already configured, check with your network administrator before making the following changes.
• Enter gateway IP address obtained from network administrator in the Default gateway field and
click OK. If the DNS Server fields are empty, select Use the following DNS server addresses, and
enter the DNS address obtained from network administrator or addresses provided by your
ISP, then click OK.
- 10
Page 11
PLANET VIP-101T Web Configuration Guide
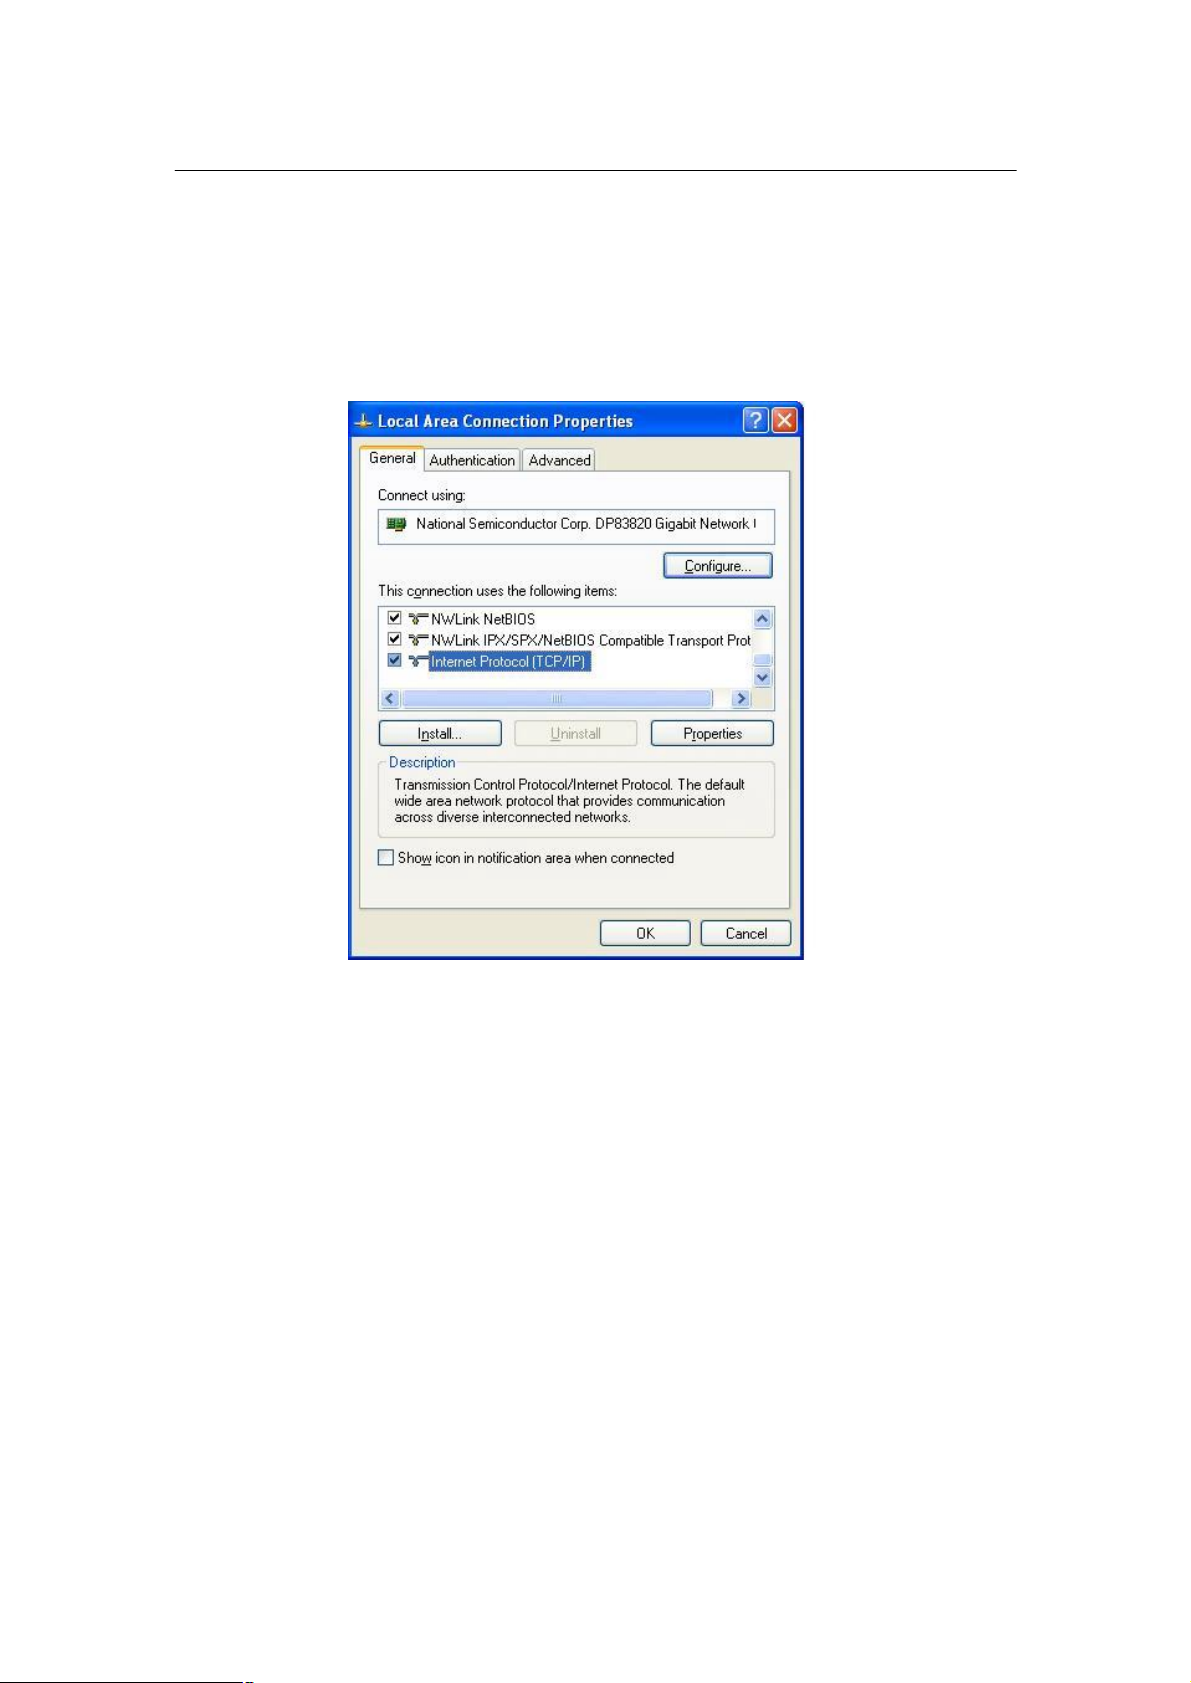
Checking TCP/IP Settings - Windows XP
Select Control Panel - Network Connection.
a) Right - click the Local Area Connection icon and select Properties. You should see a
screen like the following:
Network Configuration (Windows XP)
b) Select the TCP/IP protocol for your network card.
c) Click on the Properties button. You should then see a screen like the following.
- 11 -
Page 12

PLANET VIP-101T Web Configuration Guide
-
TCP/IP Properties (Windows XP)
Ensure your TCP/IP settings are correct with one of the following description.
Using DHCP
To use DHCP, select the radio button Obtain an IP Address automatically. This is the default
Windows setting. If your networking environment is a DHCP environment, Using this option is
recommended. Restart your PC to ensure it obtains an IP Address from DHCP server.
Using a fixed IP Address ("Use the following IP Address")
If your PC is already configured, check with your network administrator before making the following changes.
Enter gateway IP address obtained from network administrator in the Default gateway field and
click OK. If the DNS Server fields are empty, select Use the following DNS server addresses,
and enter the DNS address obtained from network administrator or addresses provided by your
ISP, then click OK.
- 12
Page 13

PLANET VIP-101T Web Configuration Guide
-
Manipulation of VIP-101T via web browser
Log on VIP-101T via web browser
After TCP/IP configurations on your PC, you may now open your web browser, and input
192.168.0.1 to logon VIP-101T web configuration page.
VIP–100T will prompt for logon username/password: root / null (without password)
VIP-101T logon page
Log on VIP-101T via username/password: root / null <without password>
VIP-101T main page
- 13
Page 14

PLANET VIP-101T Web Configuration Guide
-
Start administration
When you browse the left control panel in VIP-101T web configuration, the main function menus
are divided into three categories: Network Configurations, H.323 configurations, and System
configurations. These major configuration menus have related sub-menus and parameters, following sections will give you an overall illustration of the functionality in VIP-101T.
- 14
Page 15

PLANET VIP-101T Web Configuration Guide
-
i
Network Configurations
There are two sub configuration menus in this category:
i. Network Interface
The Network Interface configuration menu is used to configure and display TCP/IP related information in VIP-101T.
Parameter Description
DHCP Client Enable or disable DHCP client in VIP-101T
Default: DHCP client in VIP-101T is disabled
IP, Subnet Mask, Current active IP, subnet mask, gateway address in VIP-101T
Default Gateway
Default: IP (192.168.0.1), Mask (255.255.255.0), Gateway
(255.255.255.255)
Primary, secondary VIP-101T supports domain name resolution, you may configure DNS server
IP
DNS server address obtained from ISP or preferred DNS server. After configuring this,
you may now connect or register to H.323 gateway/terminal/gatekeeper
with easy-to-remember URL address instead of IP address.
Default: Primary DNS (168.95.1.1), Secondary DNS (168.95.192.1)
Hint
Please consult your network administrator or ISP personnel of DNS server
IP address for best performance in name resolution.
- 15
Page 16

PLANET VIP-101T Web Configuration Guide
-
SNTP Mode SNTP support in VIP-101T is able to retrieve time information from speci-
fied timeserver in machine.
Default: SNTP mode enabled, SNTP server IP address: 192.43.244.18
GMT Specify time zone in your area to display proper local time information.
Default: GMT +8
IP Sharing This parameter is used to co-work VIP-101T in a NAT environment, you
may enable IP sharing function and insert WAN IP address of the device to
prevents one-way communication in NAT environment.
Default: off
IP Sharing Server Specify the WAN side IP address of the IP sharing device in NAT environ-
ment.
Address Default: 255.255.255.255
ii. PPPoE Configuration
VIP-101T natively integrates with PPPoE client, this makes VIP-101T is able to establish Internet
connection via popular ADSL access. The PPPoE configuration menu is used to configure and
display PPPoE related information in VIP-101T.
Parameter Description
- 16
Page 17

PLANET VIP-101T Web Configuration Guide
-
PPPoE client Enable or disable PPPoE client in VIP-101T
Default: PPPoE client in VIP-101T is disabled
Username User name for PPPoE connection
Default: pppoe
Password Password for PPPoE connection
Default: pppoe
Reboot After If user enable this function, after PPPoE being disconnected unexpectedly,
Remote Host VIP-101T will automatically reboot to re-establish PPPoE connection.
Disconnection
Other PPPoE
Information Display overall PPPoE online status information. When PPPoE connection
(IP address, mask established, related information (IP, gateway ….etc.) will be displayed
, Gateway, DNS)
i
Hint
Please consult your ISP personnel to obtain proper PPPoE related infor-
mation, and input carefully.
If Internet connection cannot be established, please check the VIP-101T
LCD display or contact the ISP service staff for support information.
- 17
Page 18

PLANET VIP-101T Web Configuration Guide
-
H.323 Configurations
There are four sub configuration menus: H.323 configuration, Bureau setting, Misc Func-
tions, and Phone Book configurations in this category:
i. H.323 Configuration
VIP-101T H.323 configuration page is used to display or configure H.323 parameters, these parameters are designed to meet most calling environment. It is strongly recommended not to modify
these parameters on your own. If you met difficulty to establish communication toward destination
call party, please consult ITSP engineering staff, experienced personnel or local distributor support
staff for proper configuration.
- 18
Page 19

PLANET VIP-101T Web Configuration Guide
-
ct
Parameter Description
Operation Mode Select H.323 voice communication mode: Gatekeeper or Peer-to-Peer in
VIP-101T
Default: Peer-to-Peer mode
Gatekeeper & Specify the primary and secondary Gatekeeper IP address or URL for
VIP-101T to
2nd Gatekeeper register with.
IP address
Default: Null (This command has no default value.)
Gatekeeper ID Specify the GK ID of the destination Gatekeeper
Default: Null (This command has no default value.)
Please consult your ITSP personnel to obtain proper Gatekeeper registra-
i Hint
Gatekeeper Gatekeeper Discovery can be used to enable or disable auto discovery
Discovery 255.255.255.255, VIP-101T will co-work with command h323 -gkname to
Default: Null (This command has no default value.)
RAS Time To Live This parameter is used to set RAS TTL (time-to-live) time while machine
(TTL) registration toward Gatekeeper. Definable time range: 0-3600 second(s).
Default: 60 seconds
Gatekeeper This parameter is used to assign Gatekeeper discovery port number, deDiscovery Port
RAS Port This parameter is used to assign Gatekeeper RAS port, definable port
Default: 1719
E.164 Number Parameter E.164 is used to identify at least one number for VIP-101T to
tion information, and input carefully. If voice communication cannot be established in GK mode, please check the VIP-101T LCD display and conta
the ISP service staff for support information.
function in VIP-101T. If this function is enabled and IP address of Gatekeeper is set as
multicast searching a Gatekeeper on network segment with Gatekeeper
ID/name configured
performs
finable port range: 1024-65535.
Default: 1718
range: 1024-65535. The value should be adjusted to match the destination
Gatekeeper configuration.
- 19
Page 20

PLANET VIP-101T Web Configuration Guide
-
i
Hint
Token password can be used while:
(1)
(2)
ë
register with the destination Gatekeeper
(1 ~ 10) Default: E.164 number 1: 1001, others are disabled with “x” mark.
H.323 ID This parameter is used to identify H.323 ID for VIP-101T to register with
Default: VIP-101T+(last 6 digits of machine MAC address)
Token Password To co-work in a H.235 security environment, VIP-101T is implemented the
Default: x (lower case)
RTP Port This parameter is used to assign RTP port number for voice packet trans-
Default: 16384
Response This parameter is used to setup Max. waiting time for first response from
Timeout destination call party during call setup process. If this value expired, you will
Default: 5 seconds
Connection This parameter is used to setup Max. Waiting time for call establishment
Note
Please do not modify this parameter without assistance of a VoIP system
administrator or ITSP personnel to obtain proper Gatekeeper related information, and input with care.
Gatekeeper. Default H.323 ID is related to MAC address of VIP-101T, so
each VIP-101T has different alias, which can register with GK without conflict.
capability of sending RRQ/ARQ authentication token password to
destination Gatekeeper for authentication purpose.
LCD menu password: You may enter LCD system configuration by
key in this password and default value is lowercase “x.” (press
TRANSFER to switch lowercase and uppercase).
H.235 security: To set RRQ/ARQ authentication token password. If
VIP-101T wants to register to a Gatekeeper, which implement H.235
security token feature, VIP-101T has to set a RRQ/ARQ authentication token password, which is provided by Gatekeeper manager.
VIP-101T can’t work normally with this Gatekeeper unless Token
Password is set.
mission, definable port range: 1024-65535.
hear busy tone from the handset or speaker phone. Range: 1-200 seconds.
after
- 20
Page 21

PLANET VIP-101T Web Configuration Guide
-
i
Timeout receiving first response during call setup process, definable time range:
1-20000 seconds.
Default: 200 seconds
ii. Bureau Configuration
This parameter is used while other call party supports H.450 Hold feature. If this feature is enabled,
other call party will hear hold tone when “HOLD” button on VIP-101T keypad is pressed.
Parameter Description
Hold Tone Enable or disable H.450 hold function in VIP-101T
Generation
Default: H.450 hold feature in VIP-101T is enabled
Hint
Please make sure the destination call party support H.450 feature, so that
the Hold tone shall be heard while the HOLD key on VIP-101T keypad is
pressed.
- 21
Page 22

PLANET VIP-101T Web Configuration Guide
-
support features listed in Misc configuration page to prevent communication
i
iii. Misc Configurations
Parameters in Misc configuration page are used to adjust H.323 call setup related parameters.
Parameter Description
Fast start Enable or disable H.323 fast start mode. If you’d like to enable H.323 fast
start mode in VIP-101T, please make sure the destination call party supports
fast start mode as well.
Default: H.323 fast start mode is disabled.
H.245 Tunneling This parameter is used to enable or disable H.245 tunneling in VIP-101T.
H.245 Separate This parameter is used to setup if VIP-101T opens H.245 separate channel
Channel
Default: H.245 separate channel mode is enabled.
Hint
Default
after H.323 fast start mode.
Before applying the changes, please make sure the destination call party
failure.
: H.245 tunneling mode is disabled.
- 22
Page 23

PLANET VIP-101T Web Configuration Guide
-
iv. Phone Book
Phonebook in VIP-101T is the phone number database for connection toward other H.323 terminal/gateway. This page is provided for Peer-to-Peer Mode only to create a destination entry in
phone book table by give a name and e164 number for the remote H.323 Gateway/Terminal.
While machine is running in GK mode, dial-string will depends on the registration information provided by ITSP or assigned from GK administrator.
Parameter Description
Index number Index number in VIP-101T Phone Book is used for indexing on phone book
telephone numbers
Default: This parameter has no default value.
Name You may specify a name for each destination call party for easy memorizing.
Default: This parameter has no default value.
Destination The H.323 destination call party, you may insert IP address or URL in this
field.
Default: This parameter has no default value.
E.164 The actual dialed digits that will be sent to destination call party.
- 23
Page 24

PLANET VIP-101T Web Configuration Guide
-
i
i
Default: H.245 separate channel mode is enabled.
Hint
If you insert a URL to reach the destination call party, please be sure to
specify DNS server in Network Interface configuration menu.
Configuration example
A call setup example could be as like following:
Index number: 7 Destination Name: PLANET Office, Domain name: vip.planet.com.tw
E.164: 9. After clicking on “Add Entry”, you can just pick up the handset and dial 9 to connect to
the operator in PLANET office.
Hint
If calling destination is a URL, to reach the destination call party, please be
sure to specify DNS server in Network Interface configuration menu.
- 24
Page 25

PLANET VIP-101T Web Configuration Guide
-
1 9 2 1 6 8 0 * * 2 # * 2 0 3
Another method to establish the connection to a voice gateway is to dial the destination IP address
+ destination calling number.
For example, if you’d like to make calls from your VIP-101T to PLANET VIP-x00 voice gateway,
supposing there is a telephone set connected to FXS port 0 (default number is 203) on PLANET
VIP-400 (192.168.0.2). And you ‘d like to connect to this telephone, please dial the keypad in the
following sequence:
*
After these numbers, the telephone 203 on VIP-400 will ring, and you may start voice communication with the destination calling party.
- 25
Page 26

PLANET VIP-101T Web Configuration Guide
-
System Configurations
System configuration menu can display the system wide information and configuration.
Parameter Description
Keypad Type Keypad type option is used to setup DTMF transmission method. You may
select DTMF type in VIP-101T for DTMF receiving and transmitting activi-
ties.
Default: H.245 (Signal)
Dialstring Length You may specify total dialing digit length in this option. Maximum allowed
dialing length is 24 digits, if this parameter is set to zero, this indicates (not
limited, Max. allowed dialed digits count is 24.
Default: 0
Interval between You may specify the interval (in second) of two pressed digits, if there is no
action in this duration, VIP-101T will dial out the pressed numbers.
Dialstring Digits
Default: 5 seconds
Terminal Digit Terminal digit selection, once this specified digit is pressed on the keypad,
VIP-101T will send out the dialed digits.
Default: symbol “#”
H.450 Service This option can be used to enable or disable the H.450 features supported in
VIP-101T. H.450 service supported: call transfer, call on hold and call for-
ward.
Features
Default: on
- 26
Page 27

PLANET VIP-101T Web Configuration Guide
-
- 27
Page 28

PLANET VIP-101T Web Configuration Guide
-
In most circumstances, it is not necessary to adjust parameters in this page.
ë
400
Tone Configuration
In this tone configuration page, you may adjust Busy tone, reorder tone, ring tone and dial tone in
VIP-101T to have different kinds of voice play-out. Currently, only ring tone and dial tone is functional in VIP-101T, busy tone and reorder tone are reserved for future use.
Parameter Description
Tone Type Before adjusting these parameters, please consult your ITSP service staff or
and parameter
Default:
Note
Before applying any changes in this page, please make sure the data are
properly inserted.
related personnel to obtain proper information to input.
Busytone1: LowFreq
Dialtone: LowFreq 440
350
q
- 28
Page 29

PLANET VIP-101T Web Configuration Guide
-
Password, Commit Data, Reboot, Version Information, and Firmware upgrade Configurations
Password Configuration
You may specify the logon password of VIP-101T here. It is suggested to write down the password
and store in a safe place. If the password is forgotten, please contact ITSP related personnel, or
local distributor for support service.
There are two kinds of user privilege in VIP-101T administration mode: root, and administrator,
difference between root and administrator is root has the right to change configuration required
more privileges, such as restore system default, clean password.
Parameter Description
Current Password Insert the current active password in this field.
Default: null <without password>
New Password Preferred password for you to logon VIP-101T.
Default: This command has no default value.
Confirm Password Insert new password again for confirmation..
Default: This command has no default value.
Commit Data
Commit data page is used to apply the modifications you’ve done in VIP-101T.
- 29
Page 30

PLANET VIP-101T Web Configuration Guide
-
Please be sure to double confirm if the data are correctly input before commit your settings. After
committing your settings, please go to “Reboot” page to restart machine and make all the modifications effective.
Parameter Description
Commit Press COMMIT button to apply the changes in machine
Reboot
Reboot page is used to reboot machine and activate the settings you’ve done. If remote reboot is
executed, please make sure you’re able to re-connect to machine before rebooting.
Parameter Description
Reboot Press REBOOT button to restart VIP-101T, and the changes in machine
Version Information
You may check VIP-101T machine version information in this page, these information are important and necessary while inquiring technical support. Meantime, detail description, and LCD display on VIP-101T can clarify the status on your machine, and speed up support service.
- 30
Page 31

PLANET VIP-101T Web Configuration Guide
-
i
Parameter Description
Hardware VIP-101T Hardware version information
Default: null < This field has no default value.>
Boot Boot loader version VIP-101T.
Default: This field has no default value.
Application Application image version information of VIP-101T.
Default: This field has no default value.
DSP version DSP Image version information
Default: This field has no default value.
Firmware Upgrade
While you receive or download up-to-date firmware file from local distributor, you may open
Firmware upgrade page to load new firmware into VIP-101T to obtain latest add-on features or
maintenance service.
Hint
When download or receive firmware upgrade from your service provider, it
is required to perform a “flash -clean” to activate new configuration in
machine. <Machine default IP address: 192.168.0.1, Telnet logon username: root; password: <null>, press <Enter> to log in machine.
- 31
Page 32

PLANET VIP-101T Web Configuration Guide
-
VIP
Server (192.168.0.7)
Parameter Description
TFTP Firmware upgrade via TFTP server mode
Default: TFTP upgrade mode
FTP Firmware upgrade via FTP server mode
Default: disabled.
Server IP Address Specify the IP address of TFTP/FTP server, which contains the firmware
file.
Default: 192.168.0.2
FTP Login If FTP upgrade mode is used, please specify the username/password for
FTP server logon
Default: This field has no default value.
Target File Name Specify the firmware file name in TFPT/FTP server.
Default: This field has no default value.
Target File Type Select the firmware type you’d like to load into VIP-101T while performing
firmware upgrade.
Default: Application image.
Firmware upgrade in TFTP mode via web interface
Here we’ll introduce you how to load the new firmware file into VIP-101T via Firmware upgrade
configuration page.
Please prepare the TFTP server ready on the network, and the sample topology can be shown
below:
IP: 192.168.0.1
Network Segment
-101T
Computer equipped with TFTP
IP:
- 32
Page 33

PLANET VIP-101T Web Configuration Guide
-
Preparation on TFTP server side
1. Executing TFTP server program, assign firmware file location, and save the path if
necessary. (This part might vary depends on different kind of TFTP server
used.) (In this sample, the file is assigned in c:\)
2. Allocate VIP-101T firmware file in the directory.
Note: If a firmware upgrade is carried out in a NAT environment, it is required to reserve TCP
port 69 for TFTP access.
Firmware upgrade steps on VIP-101T
Log on VIP-101T via web browser by user name: root; password: null <without password>
(password may vary because of your machine configuration), and browse to the Firmware upgrade page, then insert related parameters (Server IP, file name, firmware type selection …).
After inserting these parameters, please click “Done” button to start file transmission.
- 33
Page 34

PLANET VIP-101T Web Configuration Guide
-
Please wait a moment till firmware file loaded into machine. When the process is done, VIP-101T
popup a message to remind you:
Please go to Reboot page to restart VIP-101T. Till now your machine firmware upgrade is completed.
- 34
 Loading...