

Page 1

85M Powerline Ethernet
Bridge
PL-201v2-EU/UK
User Manual
1
Page 2

Copyright
Copyright (C) 2008 PLANET Technology Corp. All rights reserved.
The products and programs described in this User’s Manual are licensed products of PLANET
Technology, This User’s Manual contains proprietary information protected by copyright, and this
User’s Manual and all accompanying hardware, software, and documentation are copyri ghted.
No part of this User’s Manual may be copied, photocopied, reproduced, translated, or reduced to
any electronic medium or machine-readable form by any means by electronic or mechanical.
Including photocopying, recording, or information storage and retrieval systems, for any purpose
other than the purchaser's personal use, and without the prior express written permission of
PLANET Technology.
Disclaimer
PLANET Technology does not warrant that the hardware will work properly in all environments
and applications, and makes no warranty and representation, either implied or expressed, with
respect to the quality, performance, merchantability, or fitness for a particular purpose.
PLANET has made every effort to ensure that this User’s Manual is accurate; PLANET disclaims
liability for any inaccuracies or omissions that may have occurred.
Information in this User’s Manual is subject to change without notice and does not represent a
commitment on the part of PLANET. PLANET assumes no responsibility for any inaccuracies that
may be contained in this User’s Manual. PLANET makes no commitment to update or keep
current the information in this User’s Manual, and reserves the right to make improvements to this
User’s Manual and/or to the products described in this User’s Manual, at any time without notice.
If you find information in this manual that is incorrect, misleading, or incomplete, we would
appreciate your comments and suggestions.
FCC Compliance Statement
This equipment has been tested and found to comply with the limits for a Class B digital device
pursuant to Part 15 of the FCC Rules. These limits are designed to provide reasonable
protection against radio interference in a commercial environment. This equipment can generate,
use and radiate radio frequency energy and, if not installed and used in accordance with the
instructions in this manual, it may cause harmful interference to radio communications. Operation
of this equipment in a residential area is likely to cause interference, in which case the user, at his
own expense, will b required to take whatever measure are necessary to correct the interference.
CE mark Warning
The is a class B device, In a domestic environment, this product may cause radio interference, in
which case the user may be required to take adequate measures.
WEEE
To avoid the potential effects on the environment and human health as a result of the
presence of hazardous substances in electrical and electronic equipment, end users of
electrical and electronic equipment should understand the meaning of the crossed-out
wheeled bin symbol. Do not dispose of WEEE as unsorted municipal waste and have
to collect such WEEE separately.
2
Page 3

Trademarks
The PLANET logo is a trademark of PLANET Technology. This documentation may refer to
numerous hardware and software products by their trade names. In most, if not all cases, these
designations are claimed as trademarks or registered tradem arks by their respective companies.
Revision
User’s Manual for PLANET 85M Powerline Ethernet Bridge
Model: PL-201v2-EU/UK
Rev: 1.0 (Feb. 2008)
Part No.: 2081-AE0130-002
3
Page 4

Table of Content
Chapter 1: Introduction......................................................................................5
Overview .........................................................................................................5
Features ..........................................................................................................5
Specification....................................................................................................6
System Requirements.....................................................................................6
Application Diagram ........................................................................................6
Panel...............................................................................................................7
LED definition..................................................................................................7
Package Contents...........................................................................................7
Chapter 2: Installation........................................................................................8
Running the InstallShield Wizard.....................................................................8
Chapter 3: Configuration..................................................................................12
3.1 Main Screen ............................................................................................12
3.2 Privacy .....................................................................................................14
3.3 Diagnostics..............................................................................................16
4
Page 5

Chapter 1: Introduction
Overview
Thank you for purchasing PLANET 85M Powerline Ethernet Bridge. With Planet
Powerline communication products, your power outlets are no longer to be
viewed only as power receptacles but also as network connection point. The PL201v2 is a Powerline to Ethernet Bridge with a RJ-45 Ethernet interface which
directly connecting to your computer’s network card. With multiple outlets in
almost every room, PL-201v2 allows you to use your existing electrical wiring to
give your entire household or Office access to your network connection without
the clutter of messy wiring around the house and Office.
By using Planet ‘s Powerline communication Products, you will not need to spend
time and money to install Ethernet Cable for sharing network, just simply by
plugging the PL-201v2 into the wall anywhere in the house or office. The 56-bits
DES data encryption improves the security and reliability, to protect the data
leaked by someone else, and you will not need to worry about the data will be
leaked; up to 85 Mbps data rate can provide you the higher speed in data
transferring. This product is cost-effective, easy to install and do not require any
new wired.
Features
Direct attached to power outlets
HomePlug Powerline Specification 1.0 Turbo compliant
Connect 10/100 Ethernet network to Powerline network
Up to 85Mbps data rate on the Powerline
Up to 200 meters between Powerline nodes
56-bits DES link Encryption for security and reliability
Throughout the whole house, just use your power circuit to access the
Internet or PC network
Orthogonal Frequency Division Multiplexing for high data reliability in noisy
media conditions
5
Page 6
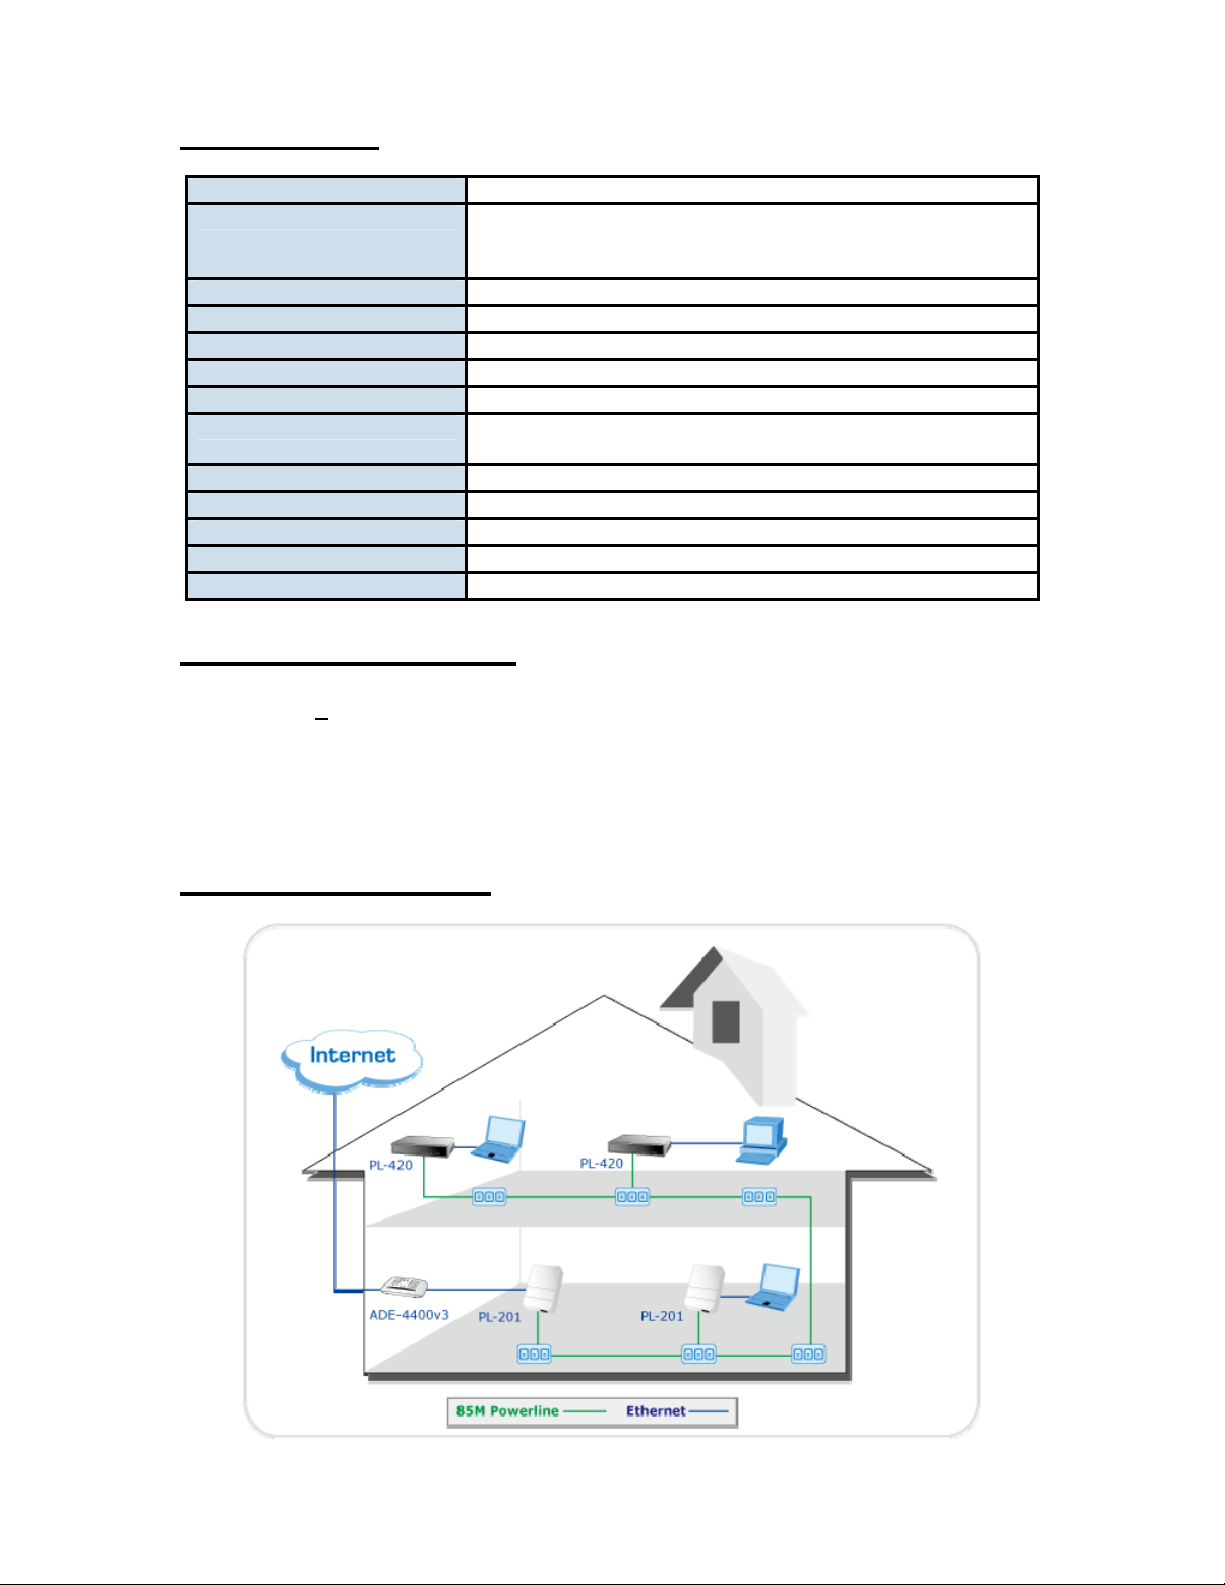
Specification
Model PL-201v2-EU/UK
Standard HomePlug Powerline Specification 1.0 Turbo compliant
IEEE802.3 10 Base-T
IEEE802.3u 100 Base-T
Ports One RJ-45 port
Speed UP to 85Mbps
Encryption 56-bits DES encryption
LED
Powerline Frequency Band 4Mhz to 21Mhz
Dimension (W x D x H) EU : 105 x 72 x 60 mm
Weight 130 g
Certifications CE, FCC
Operating Temp. 0~50 degree C
Operating Humidity 10~95% (non-condensing)
Input Voltage 100V~240V AC, 50~60Hz
Power, Ethernet, Data
UK : 105 x 72 x 70 mm
System Requirements
At least 2 Powerline devices
Available Ethernet port each computer or network
Available empty power outlet
Standard home power line wiring
CD-ROM Utility
Application Diagram
6
Page 7
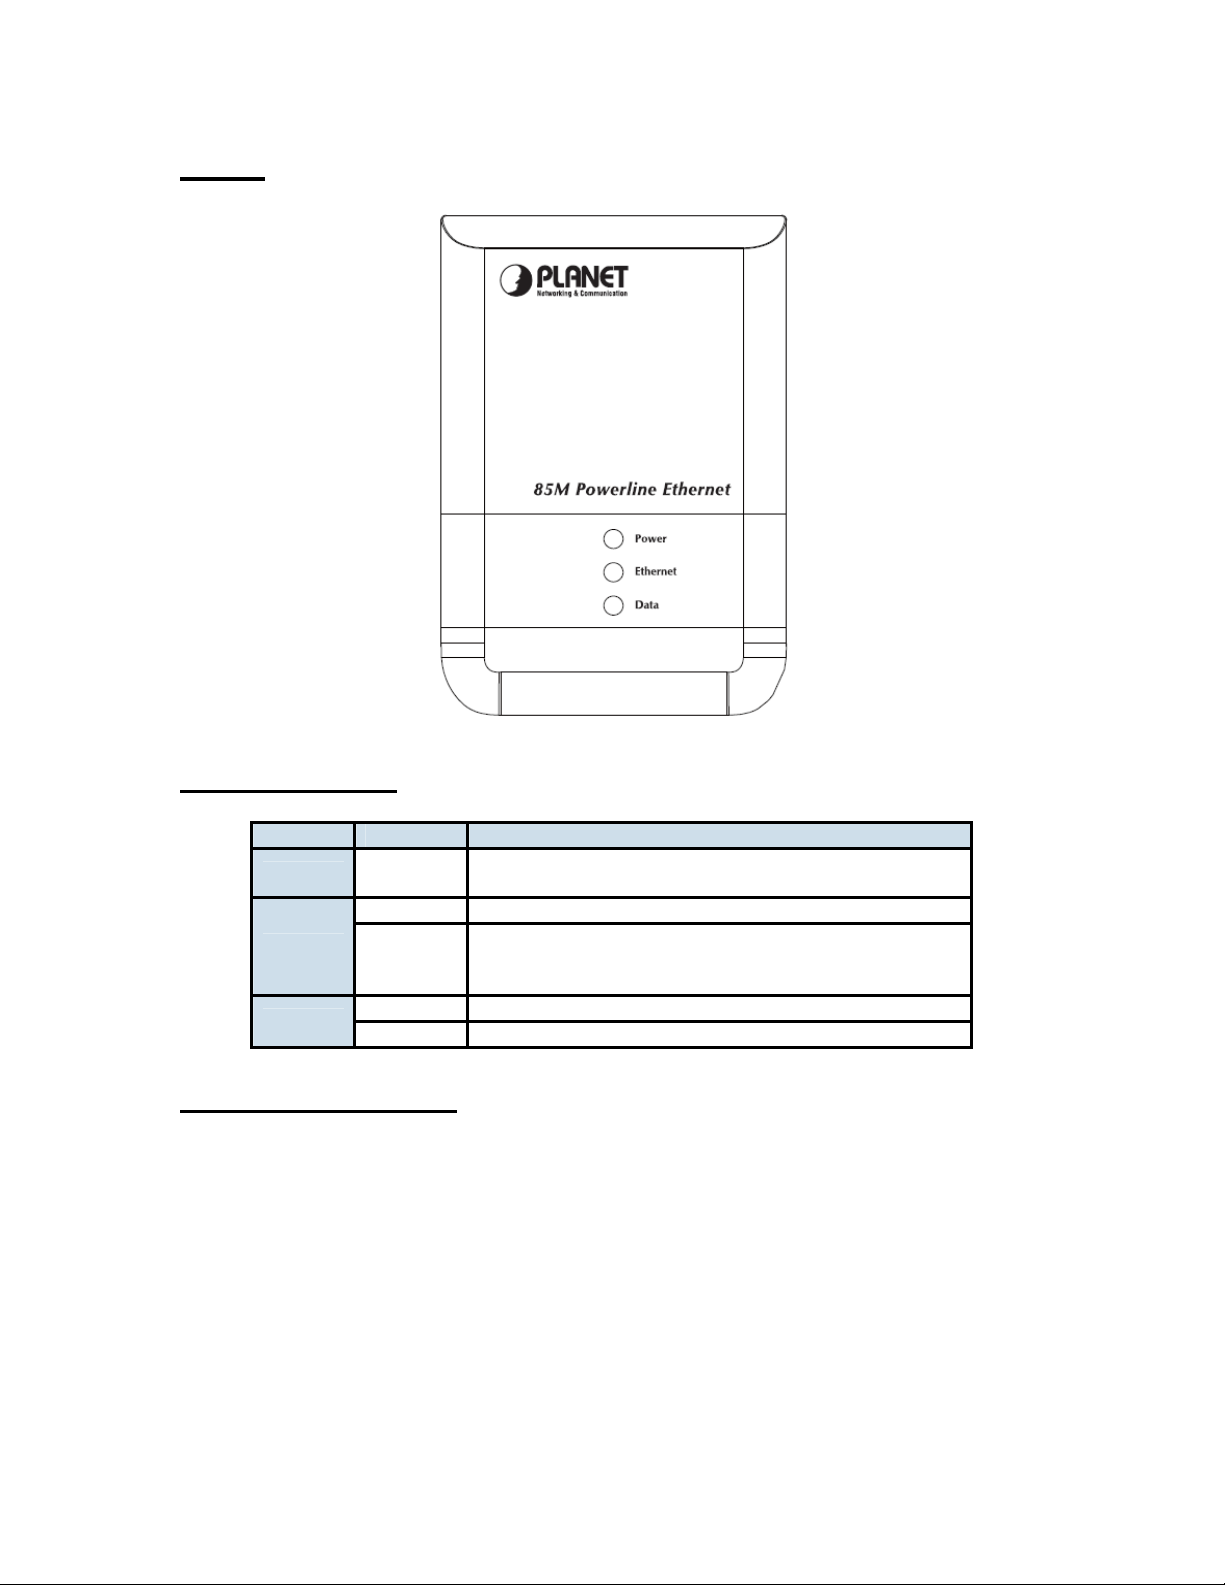
Panel
LED definition
LED Status Description
Power
Ethernet
Data
On
Blinking Blinking indicates the data are transferring
On
Blinking Data transferring in bridge mode
On Connected the other HomePlug devices
Steady on indicate the Powerline device connect to
the power outlet
Steady on indicates the RJ-45 port has correctly
connected to the network card of your PC or the
Ethernet network
Package Contents
PL-201v2 x 1
CD ROM x 1 (User’s manual, Quick Guide and Utility)
RJ-45 Ethernet Cable x 1
Quick Installation Guide x 1
7
Page 8
Chapter 2: Installation
Overview
The installation of 85M Ethernet Bridge will only take minutes. No need to set up
long wires through out the house, just simply install the utility, and physically plug
the unit into the wall outlet, then to connect RJ-45 to the computer. Users can
select to adjust its security functions and the platform of the network after the
installation. For further assistance, please read our Frequently Asked Questions
section.
Running the InstallShield Wizard
Please verify that no other Powerline Management Utilities are installed before
installing this product. If other Utilities were installed, uninstall them and restart
before installing this software.
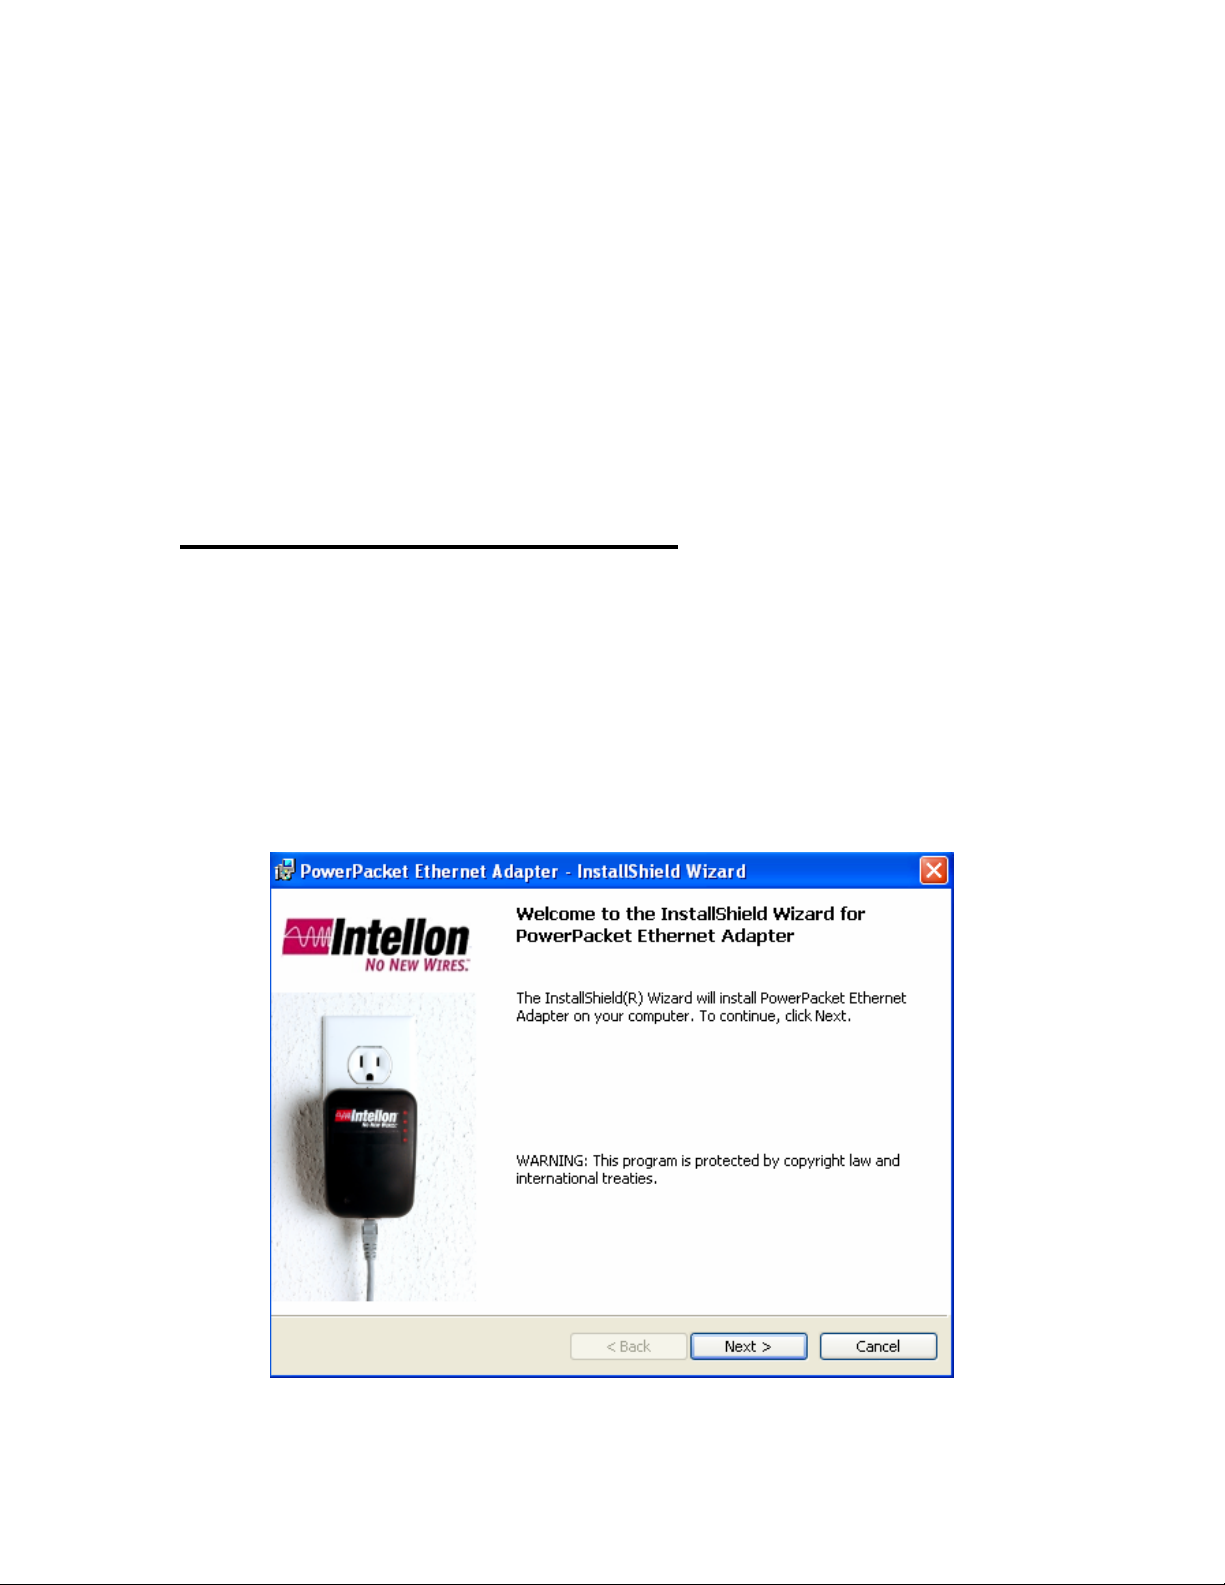
To install, insert the Windows OS Configuration Utility Setup utility CD into the
computer's CD-ROM drive. The main page shall pop up, then to press the link to
install the software. Alternatively this can also be done manually by double
clicking the setup.exe file on the CD.
Once the software is loaded it will display a dialog as following:
Please click on ‘Next’ to continue the installation.
8
Page 9
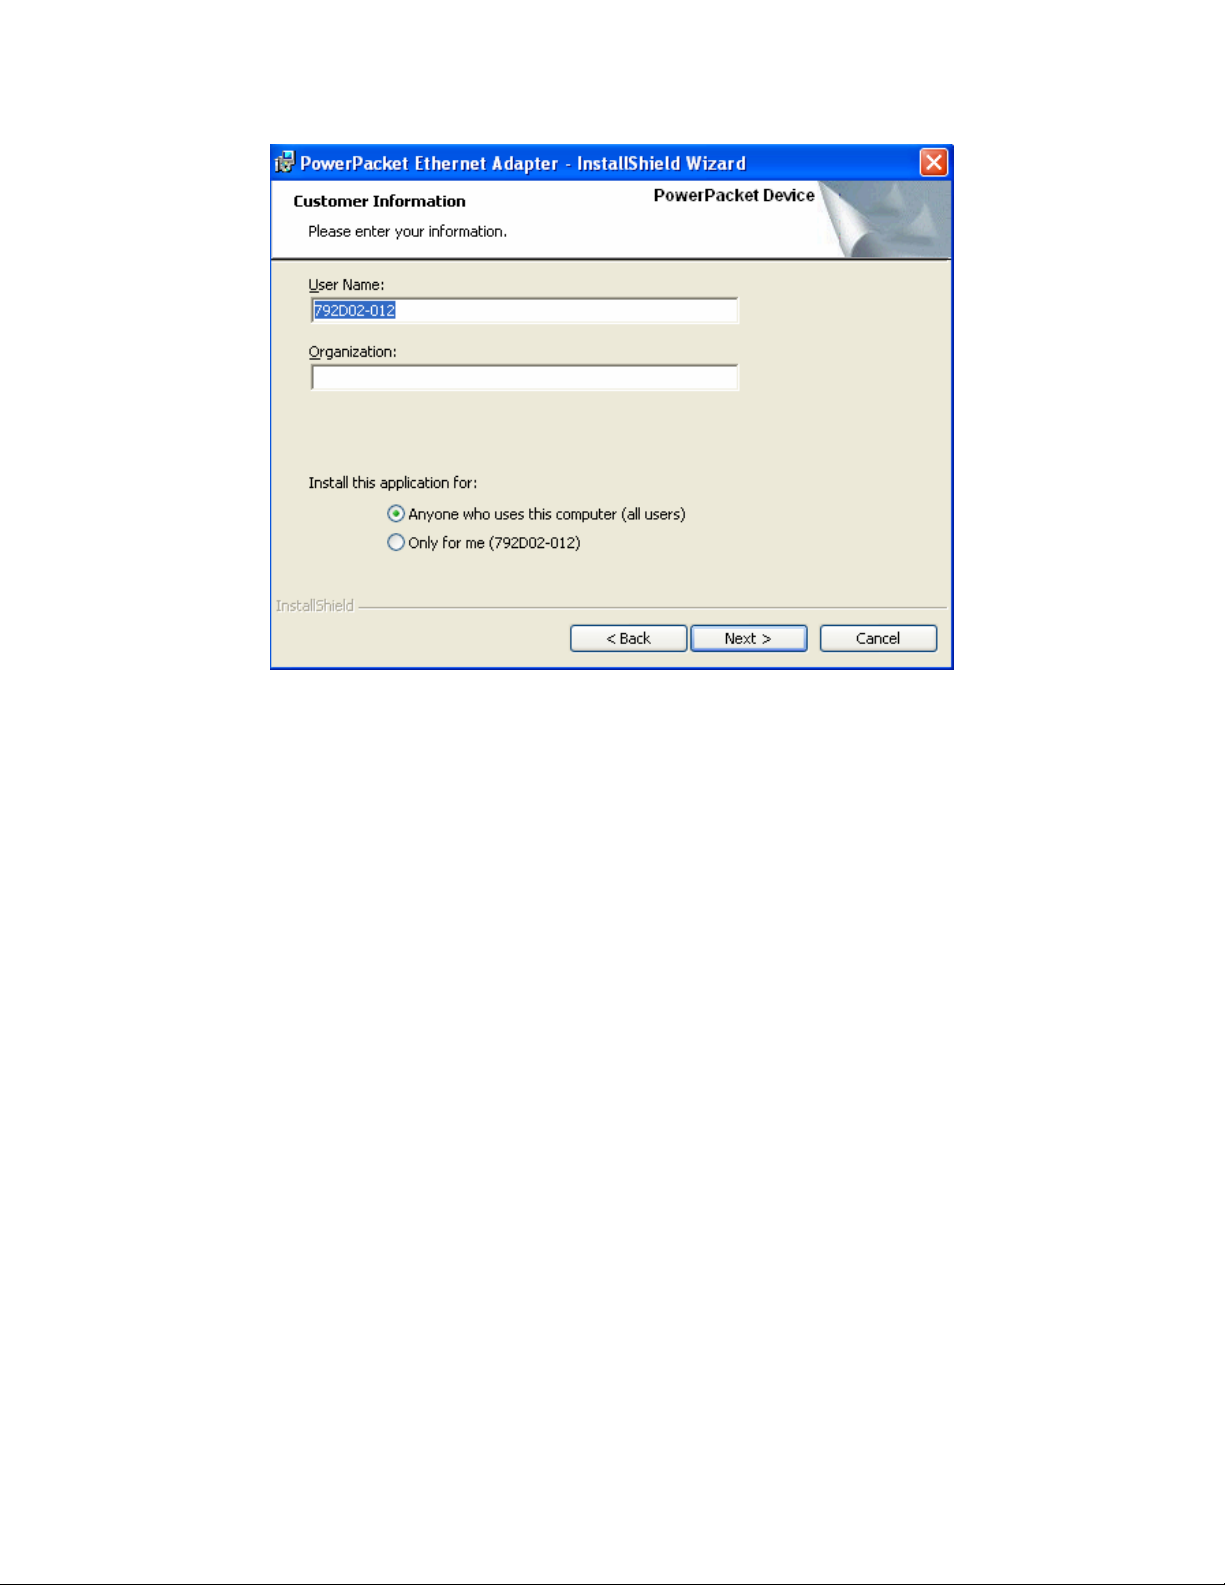
On this screen you will be asked to input the User Name and Organization. It is
not crucial to the device itself, so enter it as desired. The ‘Install this
application for’ will work under the circumstances which multiple logins are
applied. For example: If the user wishes only he/she can use the utility with that
particular account, then bubble in ‘Only for me’. For those without multiple
accounts or wishes to allow all users to access the utility choose ‘Anyone who
uses this computer (all users)’. When finished, click the ‘Next’ button to
continue.
9
Page 10
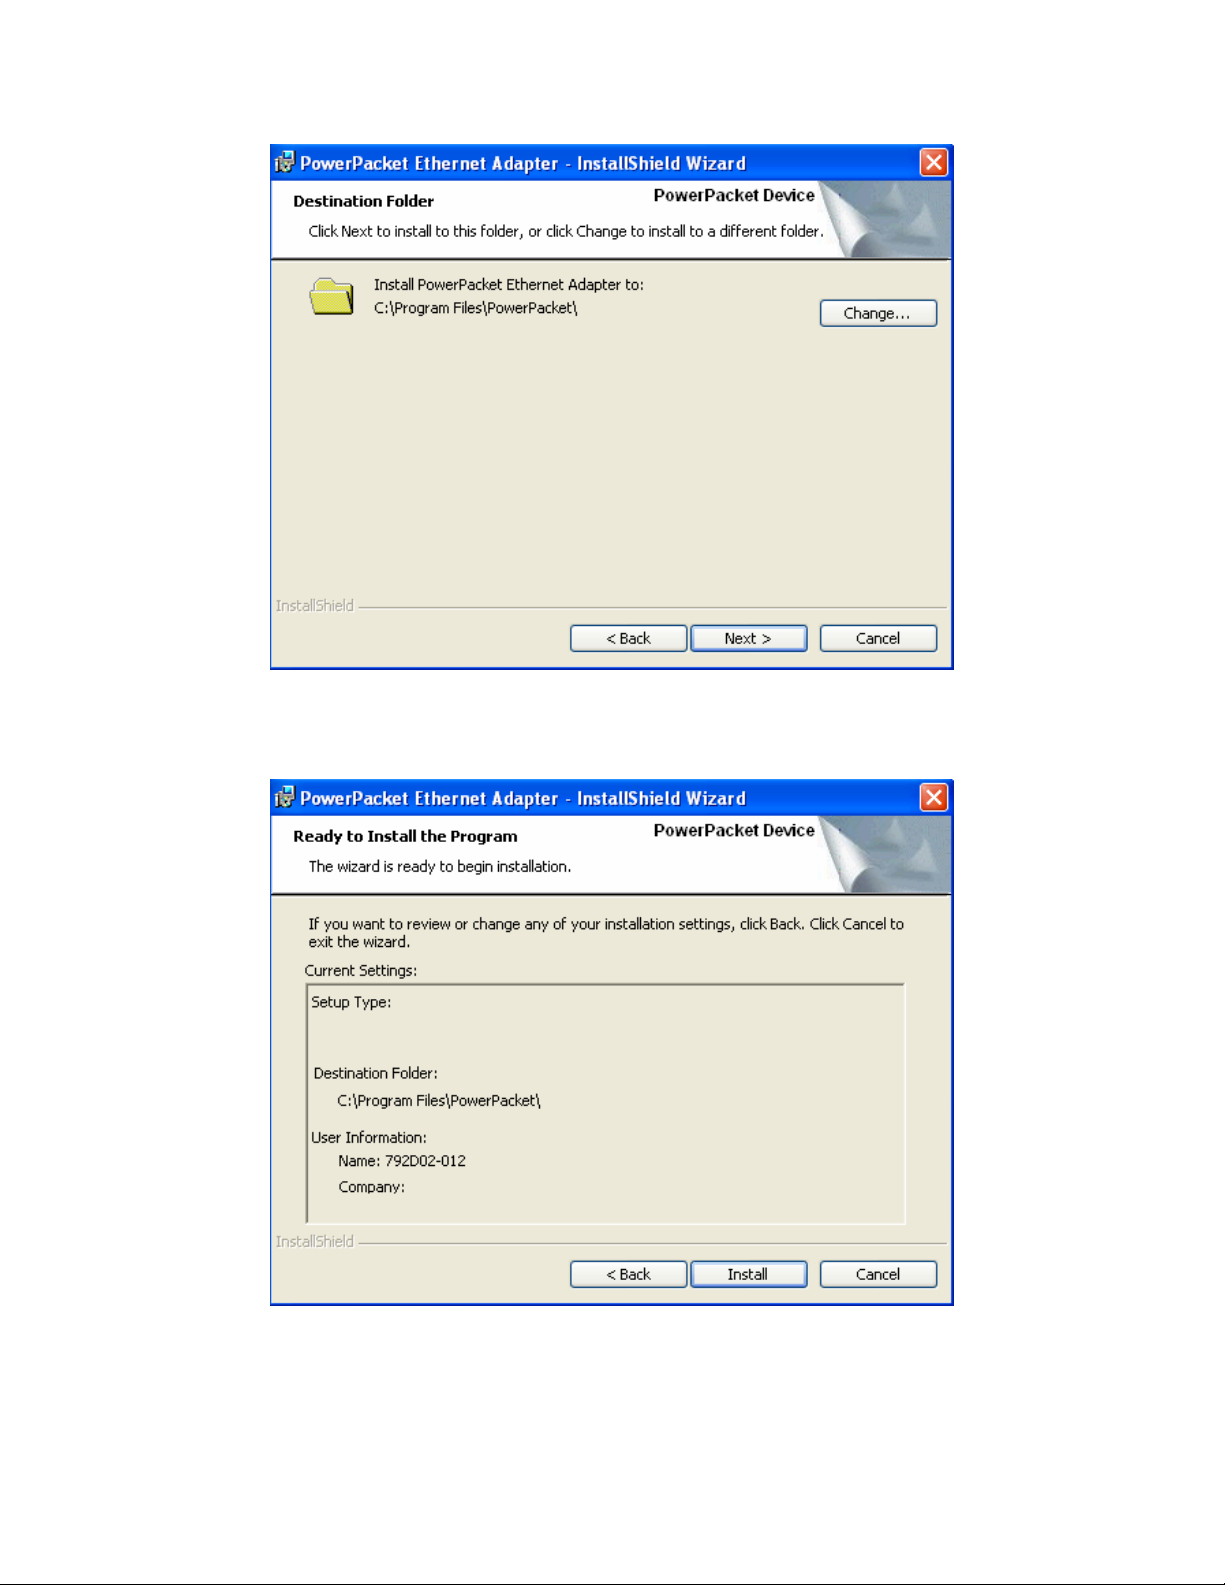
This section allows you to change the default directory where the program is
installed. If you don’t want to change it, click on Next to continue the installation.
This section allows a user to go ‘Back’ or ‘Install’ the utility. In case if the user
wishes to change the previous options then go ahead, click on ‘Back’ to change
the settings. If not, continue and click the ‘Install’ button.
10
Page 11
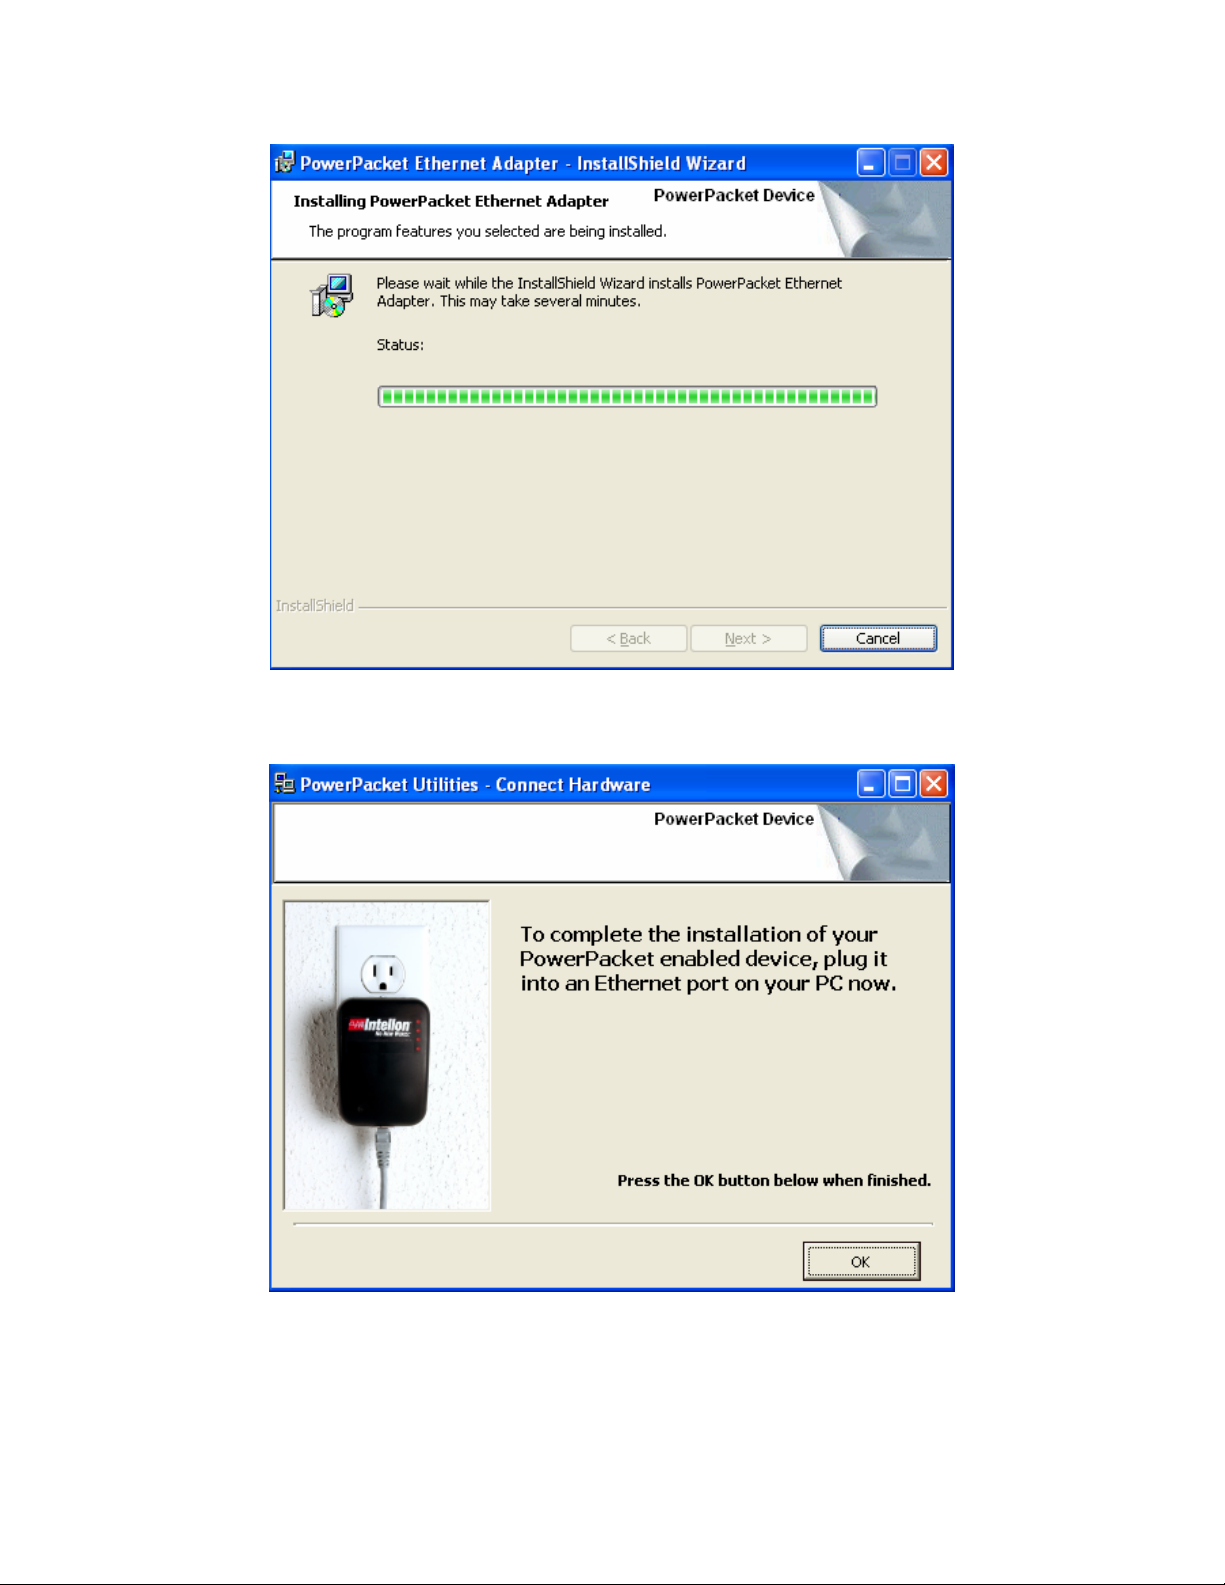
This screen shows the progress of the installation.
This screen shows that the installation was completed successfully. Click on
Finish to exit the wizard.
11
Page 12
Chapter 3: Configuration
Overview
The PL-201v2 uses 56-bit DES encryption to block outside access. The key is
set by using the Configuration Utility on the CD. By default, the protection is
enabled, however, it is recommended to change the default network password.
All your Powerline devices must use the same network password in order to be
connected together.
3.1 Main Screen
Part 1: Scan a Local Powerline device
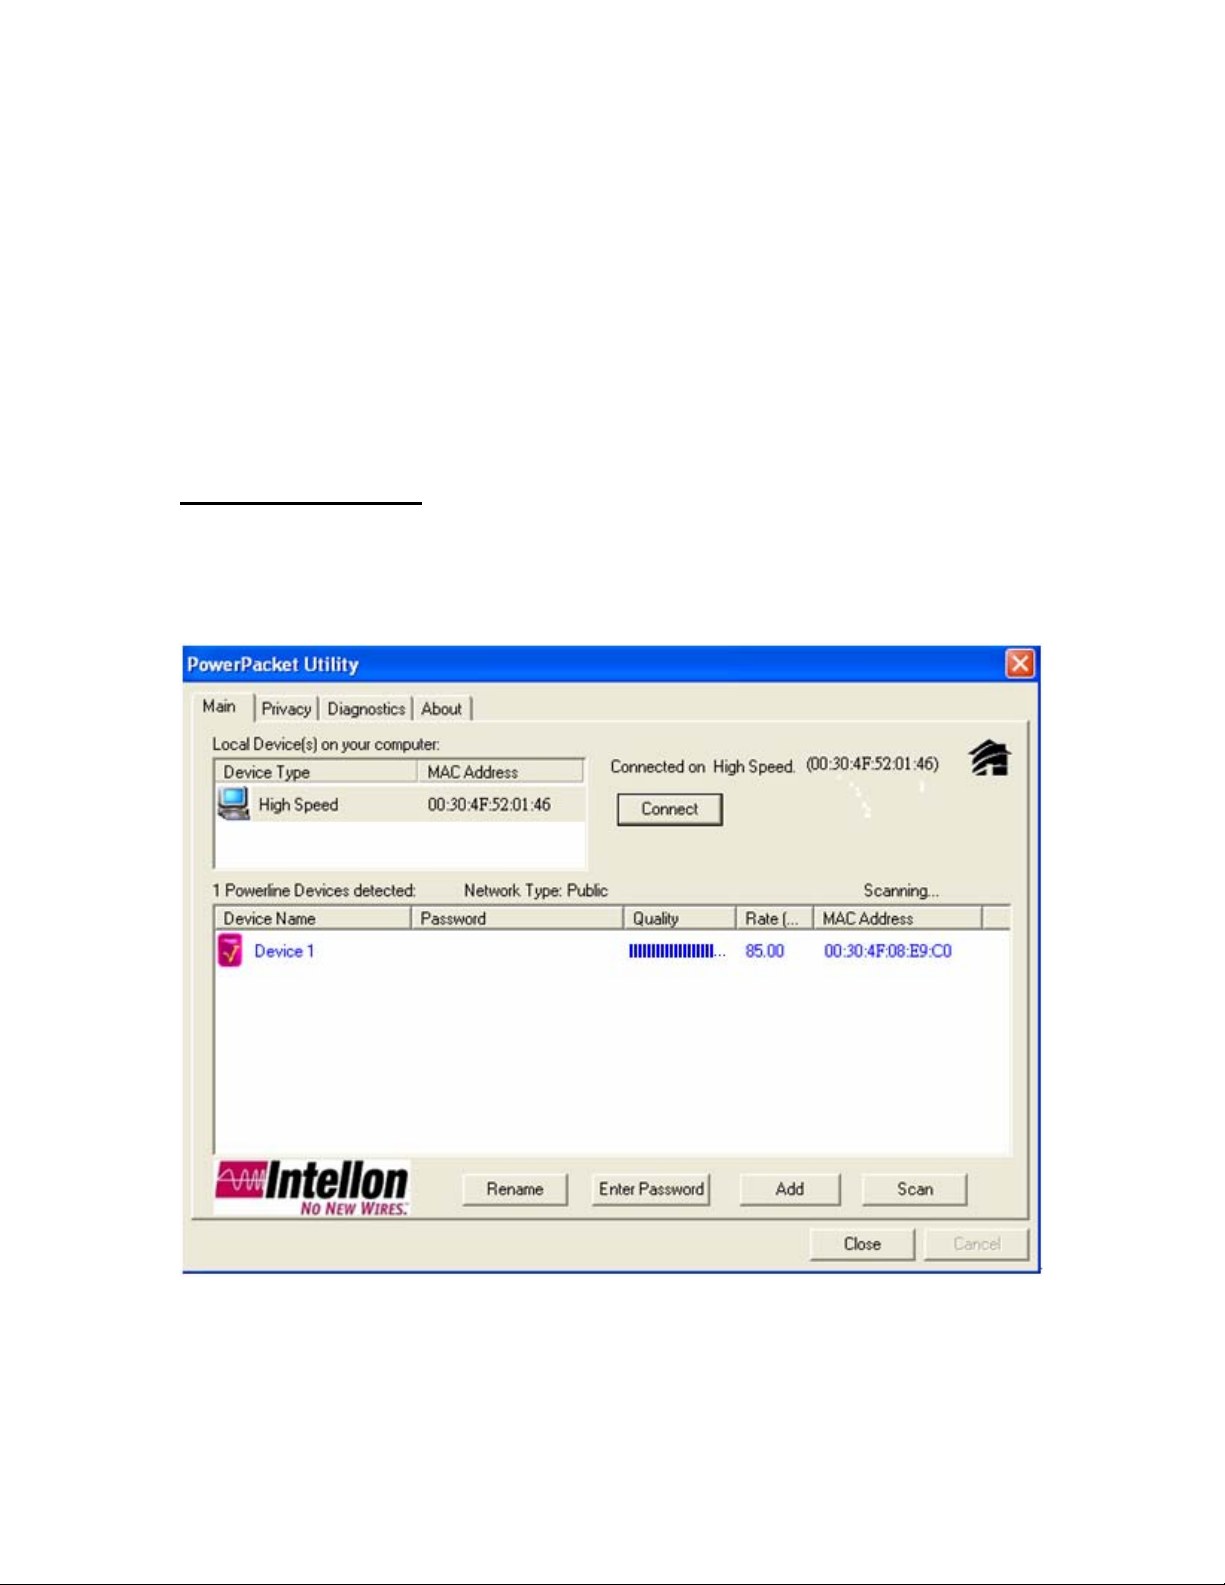
Double click the PowerPacket Utility icon on your desktop and utility screen will
show up as below:
The Main tab shows the Powerline units that are connected to the current
computer and other Powerline devices on the home network, and it will also
display Mac Address of each device.
12
Page 13
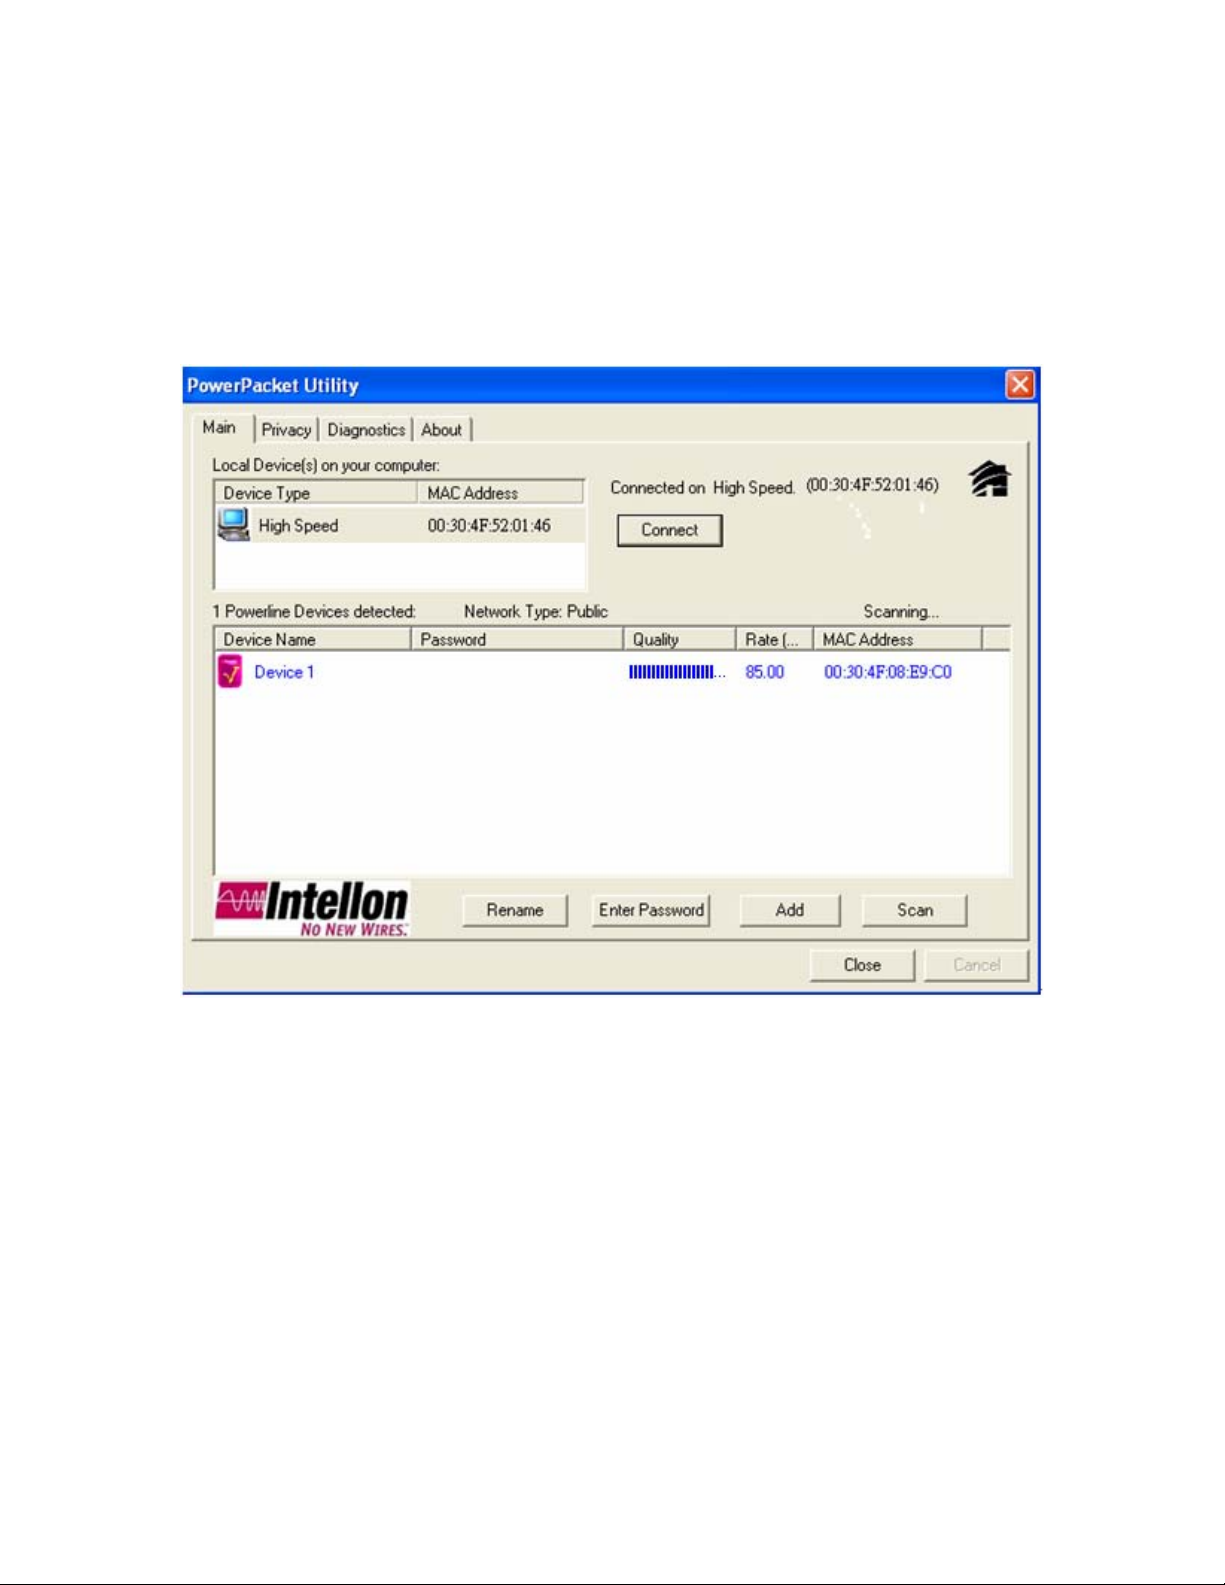
**Note** If you do not see ANY unit in the device status but the Powerline device
does exist, try to unplug all devices and plug them back. Meanwhile, please
make sure the cable is the right type and working correctly. If all seems to be
correct, and you still receive nothing in the Device window, try rebooting your
computer.
Part 2: Detect the Network Powerline device
The Main tab shows all the other Powerline units on your home network. It will
represent them by MAC Address, and will also show the available bandwidth to
each unit (Units farther away from another Powerline device might have a lower
Data Rate). If you add or remove units from your home network, click the “Scan”
button to re-scan the network, and refresh with any changes.
**Note** Only units with the same Network Password will be shown, (Password
case sensitive).
**Note** If a unit shows MAC Address of all 0’s, this unit might not have a solid
connection, or might not connect at all.
**Note** If there are units in the home network, but nothing displays in this
Network scan, try to unplug all devices, and plug them back (Only do this with the
units that you do not view in the network screen, you don’t have to do this with all
units.)
13
Page 14
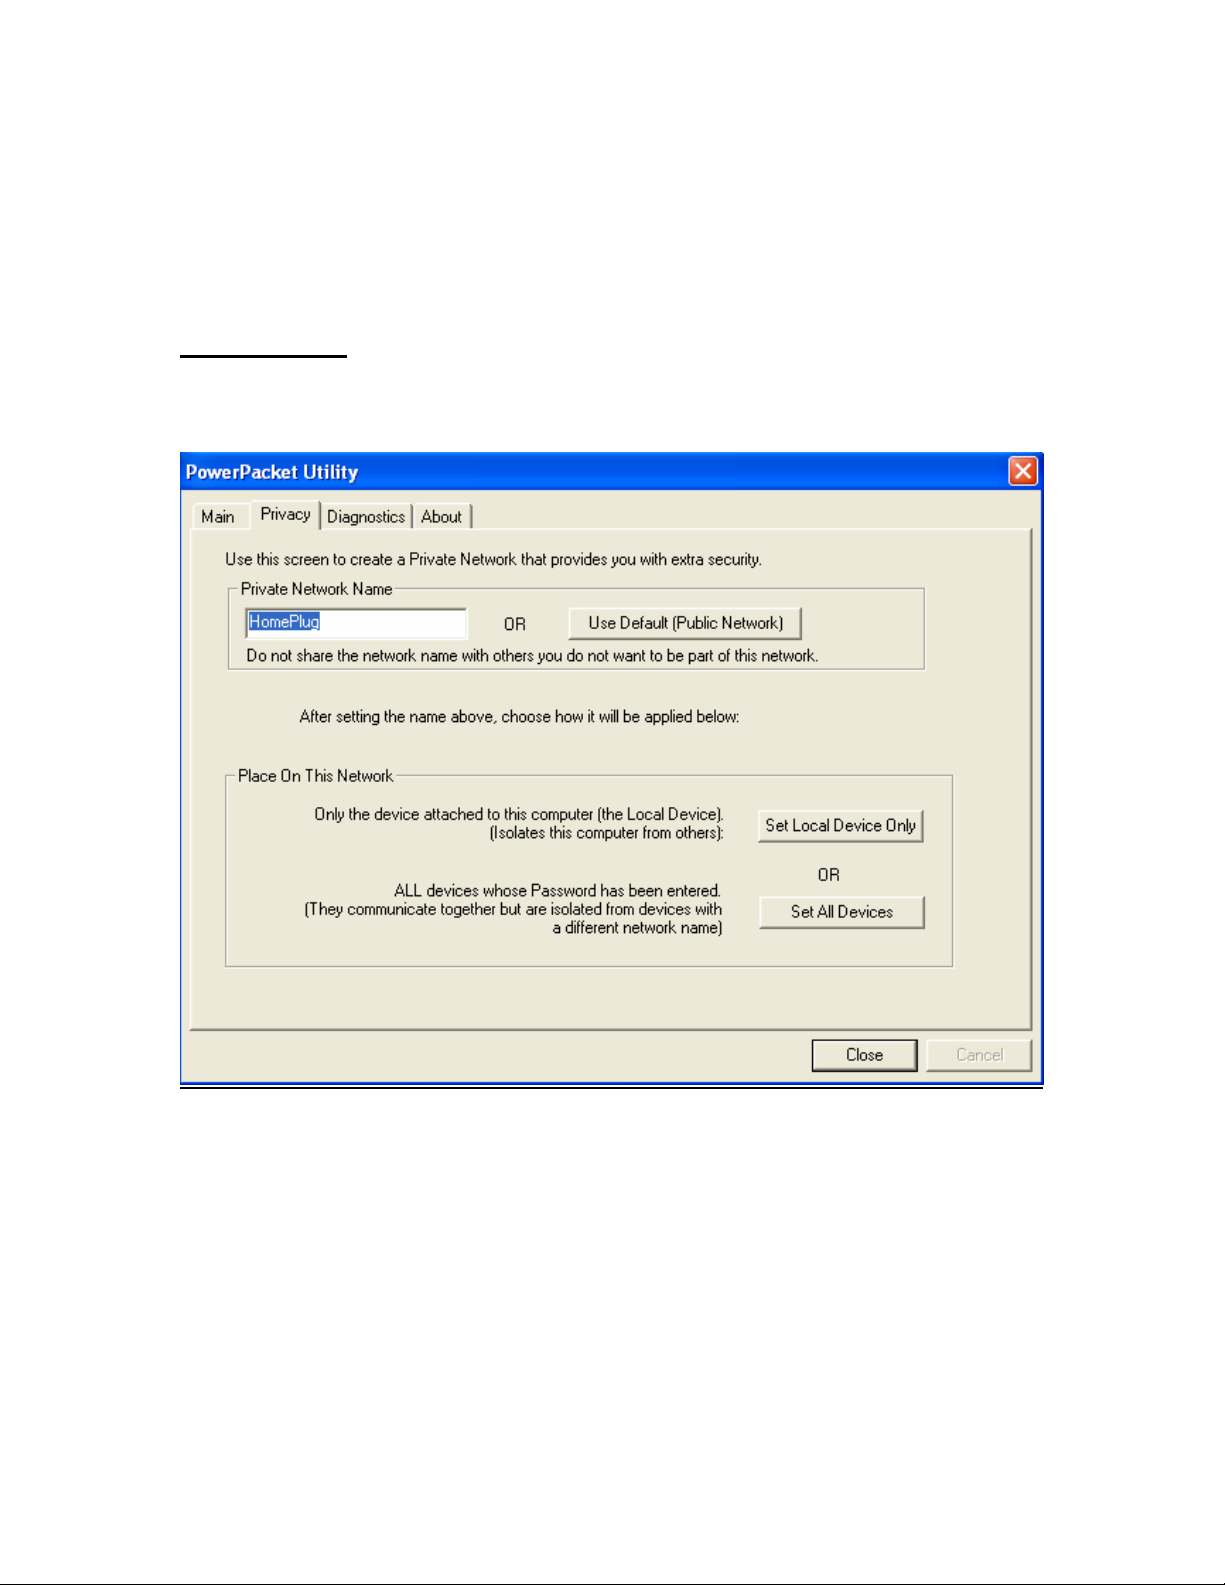
If the problem persists, try to move the unit closer to this current unit (adjacent
plugs on the same wall socket is most preferable). If the problem still persists
and that unit is still not shown on the network, then the unit might be defective
please contact technical support. Otherwise if you view the unit working, distance
might be the only issue.
3.2 Privacy
Setting Up Security on a Local Powerline device
The Privacy tab will allow you to change the Network Passw ord to the unit that
is currently connected to this computer. This network password encrypts all data
that is sent from this unit using
**Note** Every unit on your home network MUST have the same Network
Password for connectivity to be established throughout your home. The default
network password is “HomePlug”.
56-bit data encryption standard (DES).
14
Page 15
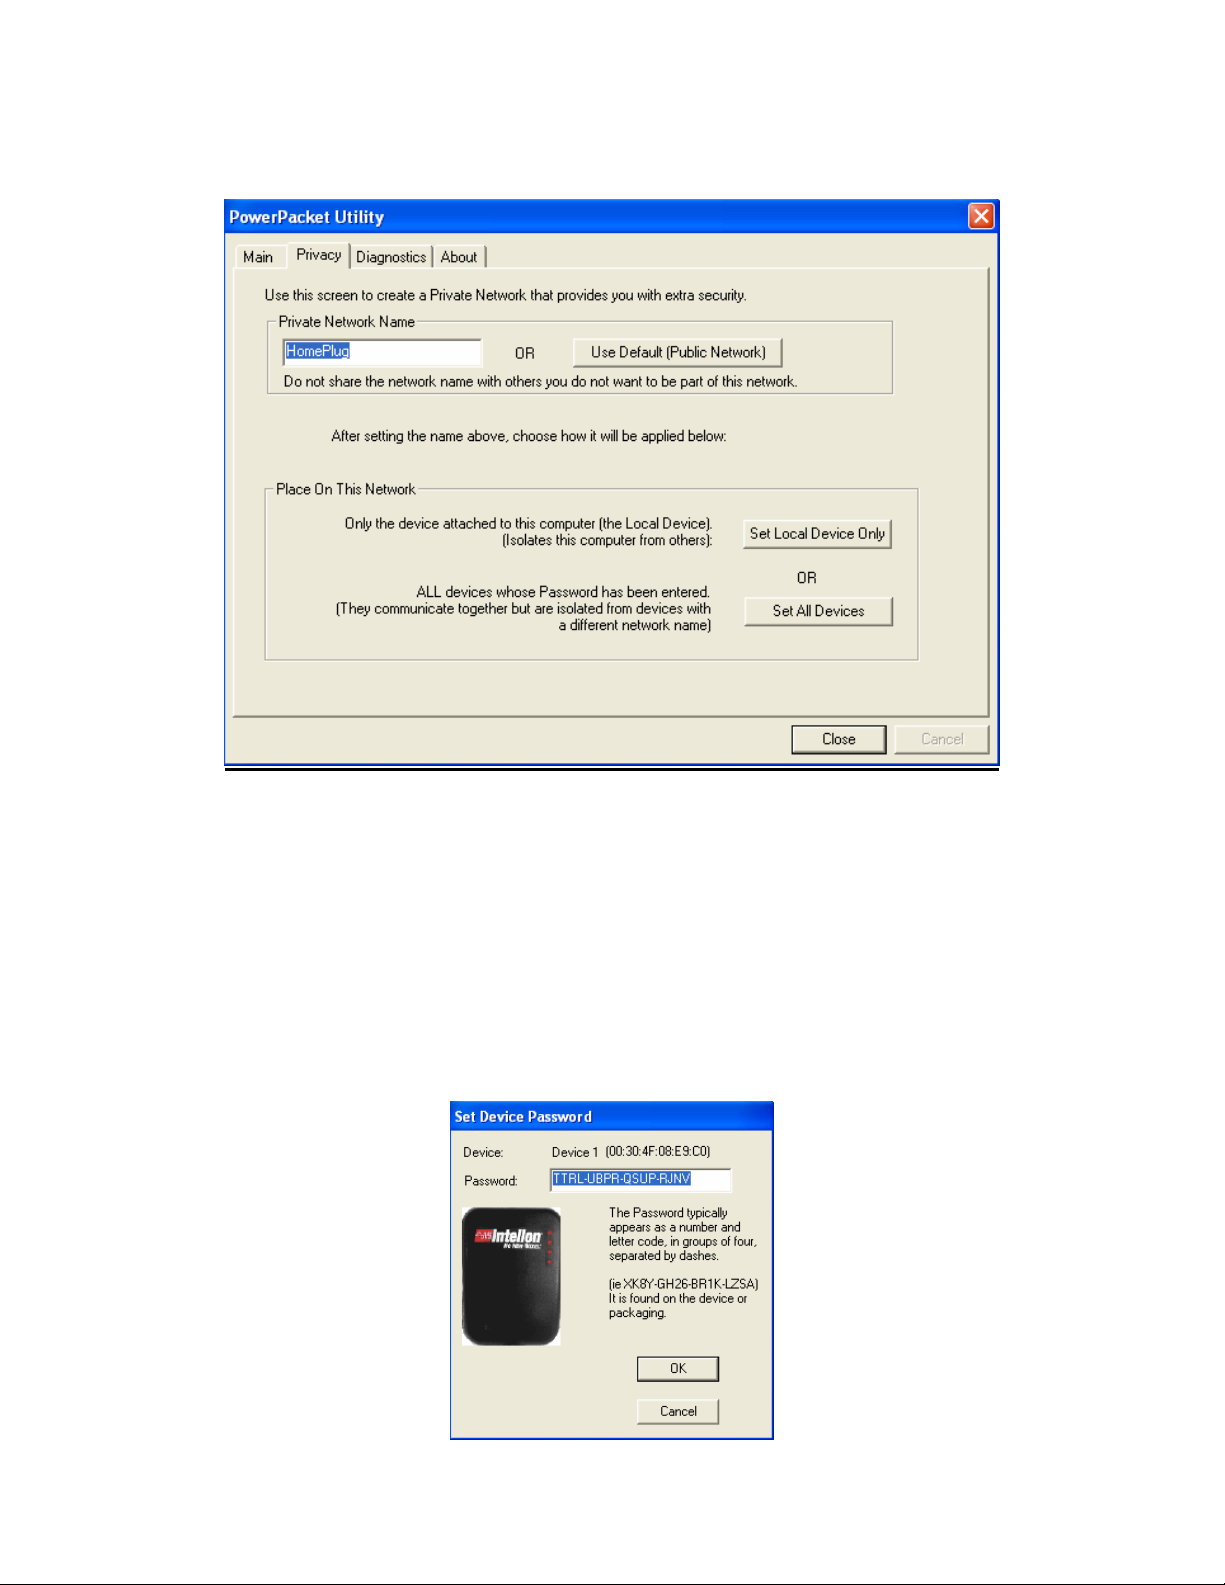
Setting Up Security on a Network Powerline device
The Privacy Tab will allow users to use one primary computer to control the
Network Password of all units on the home network.
You will have to go back to the Main Tab first then find the DEK (Device
Encryption Key) Key located on the bottom of each device. Enter this Key into
the Device Password area. Click Add. This Device Key will then appear in the
bottom window. Add all the DEK Keys for each unit in your house. You can now
go back to the Main Tab then change the password remotely from one computer.
This will allow you to change the password from one computer, instead of
changing the password individually.
15
Page 16
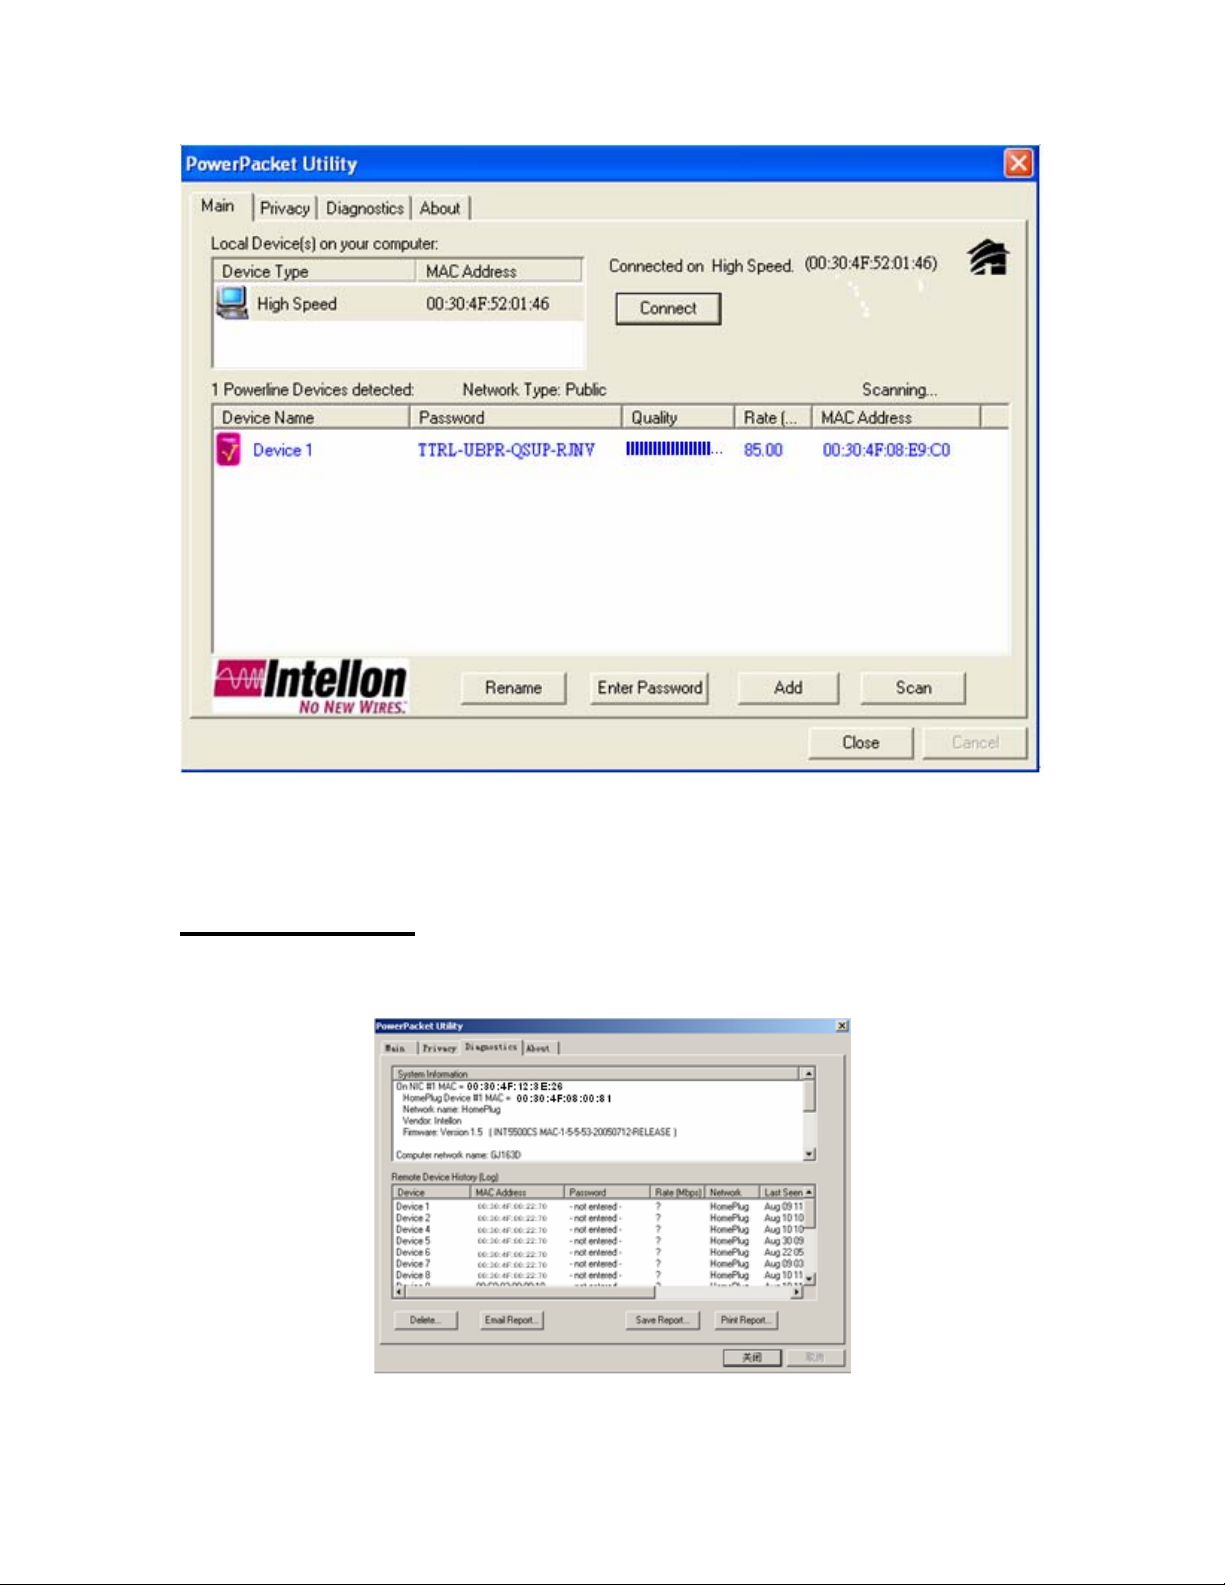
**Note** The DEK is unique for EACH Powerline device. To use this you
will need to input the DEK for each unit.
3.3 Diagnostics
The Diagnostics screen shows system information and a history of all devices
seen.
Diagnostics Screen
16
Page 17

The upper panel shows technical data concerning software and hardware on the
host computer used to communicate over HomePlug. It shall include the
following:
Operating System Type/Version
Host Network Name
User Name
MAC Address of all NICs (network interface card)
Chipset manufacturer name (Turbo Only devices)
Firmware Version (Turbo Only devices)
The lower panel contains a history of all remote devices.
Devices are shown here regardless of whether or not they are on the same
logical network.
Device Name
MAC Address
Password
Last known rate
Last Known Network
Chipset manufacturer name (Turbo Only devices)
Date device last scanned
17
 Loading...