

Page 1

USB 2.0 GDI Printer Server
FPS-1011
Quick Installation Guide
Page 2

Table of Centents
Package Content .............................................................................................. 3
Physical Installation ......................................................................................... 4
Print Server Setup ........................................................................................... 5
Administrator PC Setup .................................................................................... 6
GDI/Host-based Printer ...................................................................................14
Further Conguration ...................................................................................... 20
Page 3

This Quick Installation Guide contains brief instructions for the following
environments:
● Windows 95/98/Me/NT/2000/XP/Sever 2003
● Macintosh (AppleTalk)
For other environments, or any problems, please refer to the full User’s Manual in
the CD-ROM.
Package Content
1 x FPS-1011
1 x Quick Installation Guide
1 x Drivers and User’s Manual CD
1 x Power Adapter
Page 4

4
Physical Installation
1. Make sure the power is OFF then connect printer to the Print Server’s printer
port.
2. Connect the LAN cable to the proper connector of the Print Server.
3. Connect the other end of the LAN cable to a 10Base-T or 100Base-TX hub or
switch.
4. Connect the supplied Power Adapter.
5. Please make sure the POWER LED is light on.
Page 5

5
Print Server Setup
In the following situation, you do not need to congure the Print Server. Just follow
the procedures on section “Administrator PC Setup” to share your printer. If you
want to install print server to a client PC, you may refer to our manual in the
CD-ROM.
Windows users:
Already installed TCP/IP protocol.
Apple Macintosh users:
Already installed AppleTalk protocol.
Page 6
6
Administrator PC Setup
>> Windows
Install Print Server Driver
1. Insert Drivers and User’s Manual CD into the CD-ROM drive to initiate the
autorun program. Once completed a menu screen will appear.
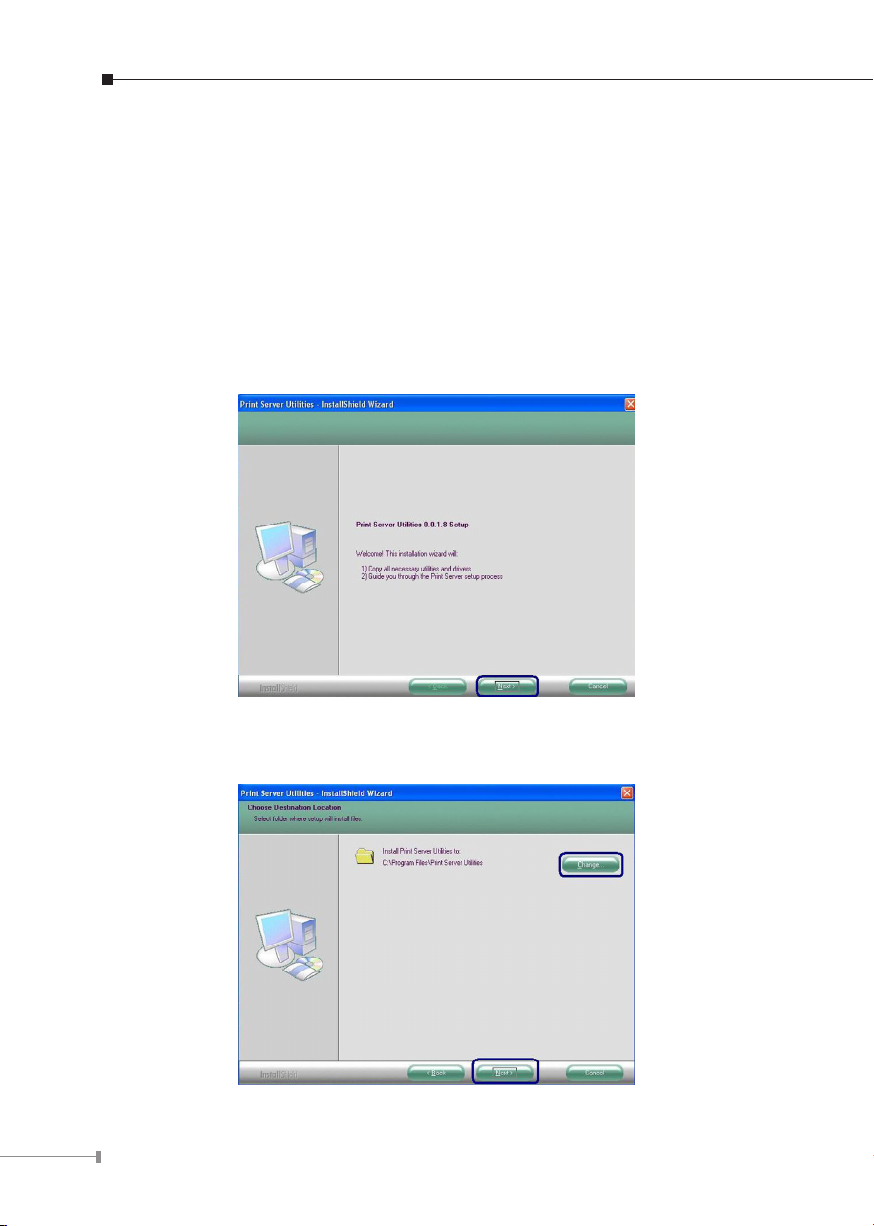
2. Click on “Administrator Installation” hyper link to initiate the installation. Or you
can click the “Start” button and choose “Run”. (Suppose “E” is your CDROM
drive). When the dialog box appears, enter “E:\Utility\Setup.exe” and press enter
key. You will see the dialog box as below. Please click “Next” to continue.
3. Click “Next” to install the Print Server utilities in the default folder or click
“Change” to specify the destination folder where you would like to install the
Print Server utilities.
Page 7
7
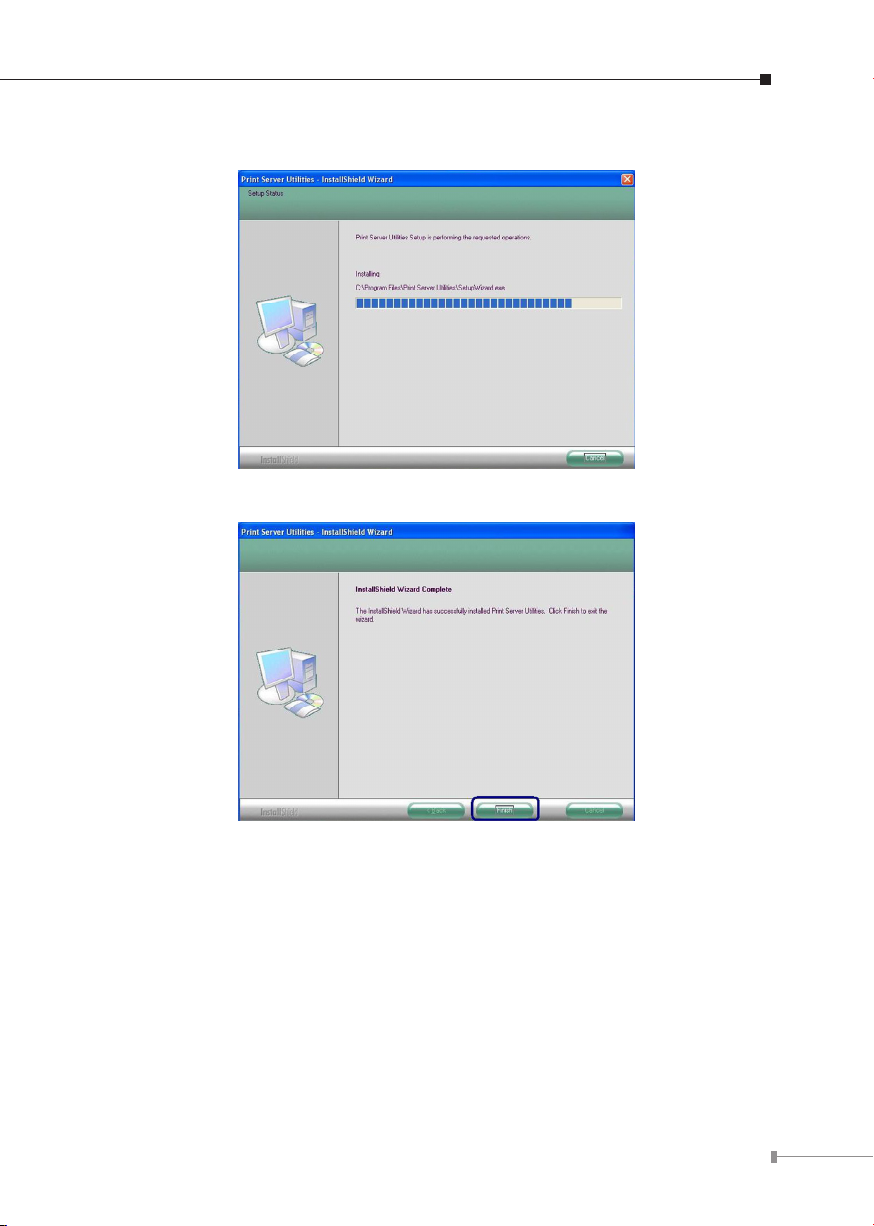
4. The system starts installing the Print Server Utilities
5. The utilities are all installed. Please click “Finish” to go to next step.
Page 8
8
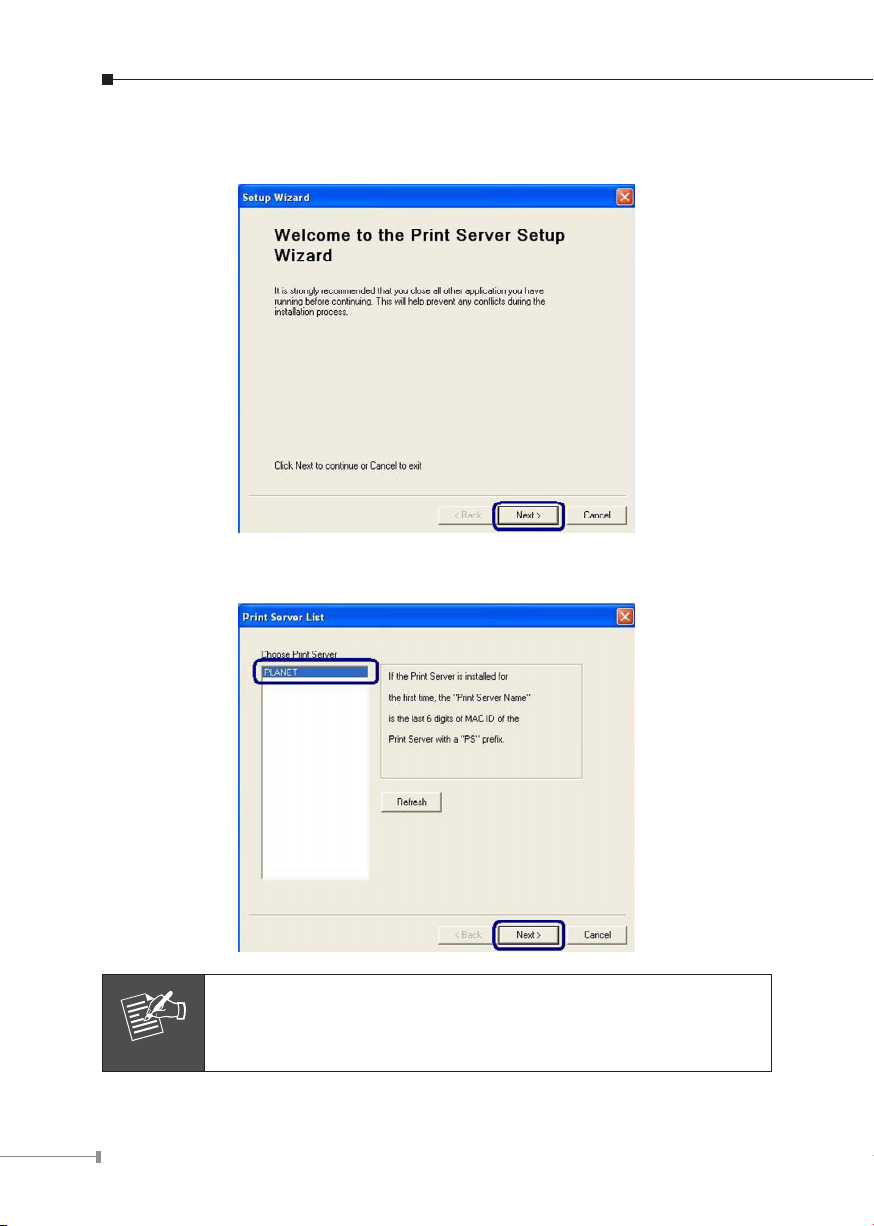
6. The Setup Wizard will be executed, it will guide you to congure the print server
Note
and install the printer with the print server to you computer. Please click “Next”.
7. The program will search the Print Server with in the network. Select the Print
Server you want to setup and click “Next” to continue.
If this is the first time you configure the print server, the “Print
Server Name” will the same as the “Device Name” printed at the
bottom of the print server.
Page 9

9
8. Please enter the “Password” of the Print Server you have selected to login the
Print Server for more settings. The default “User Name” is “admin”; default
“Password” is “admin”.
9. Set the “Alias Name” to the Print Server here. Click on “Next”.
Page 10

10
10. Please set the network setting for the Print Server Manually. By default, the
Note
network settings are as follow.
IP Address: 192.168.0.1 Subnet Mask: 255.255.255.0
If you have selected “DHCP”, the Print Server will try to determine your network
settings automatically. If a DHCP Server is present within the network, the Print
Server will automatically obtain and congure the network settings assigned by the
DHCP Server. The assigned IP Address will be shown in the IP Address elds. If
no DHCP Server is present within the network, please assign the network settings
of the Print Server manually. Please click “Next” once you have found appropriate
network settings for the Print Server. The conguration are nished. Please click
“Save” to apply new setting and restart the Print Server.
The Print Server IP Address must be set to the same network
segment within your network environment or connected computer.
If the network IP address settings are incorrect, then print server
will not be able to communicate throughout the network. The
message will be prompted to remind you after you click “Next”. If
you do not want to set it now, please click “Cancel” to finish the
installation.
You can then use the “Server Manager” utility to configure the Print
Server IP address.
Page 11

11
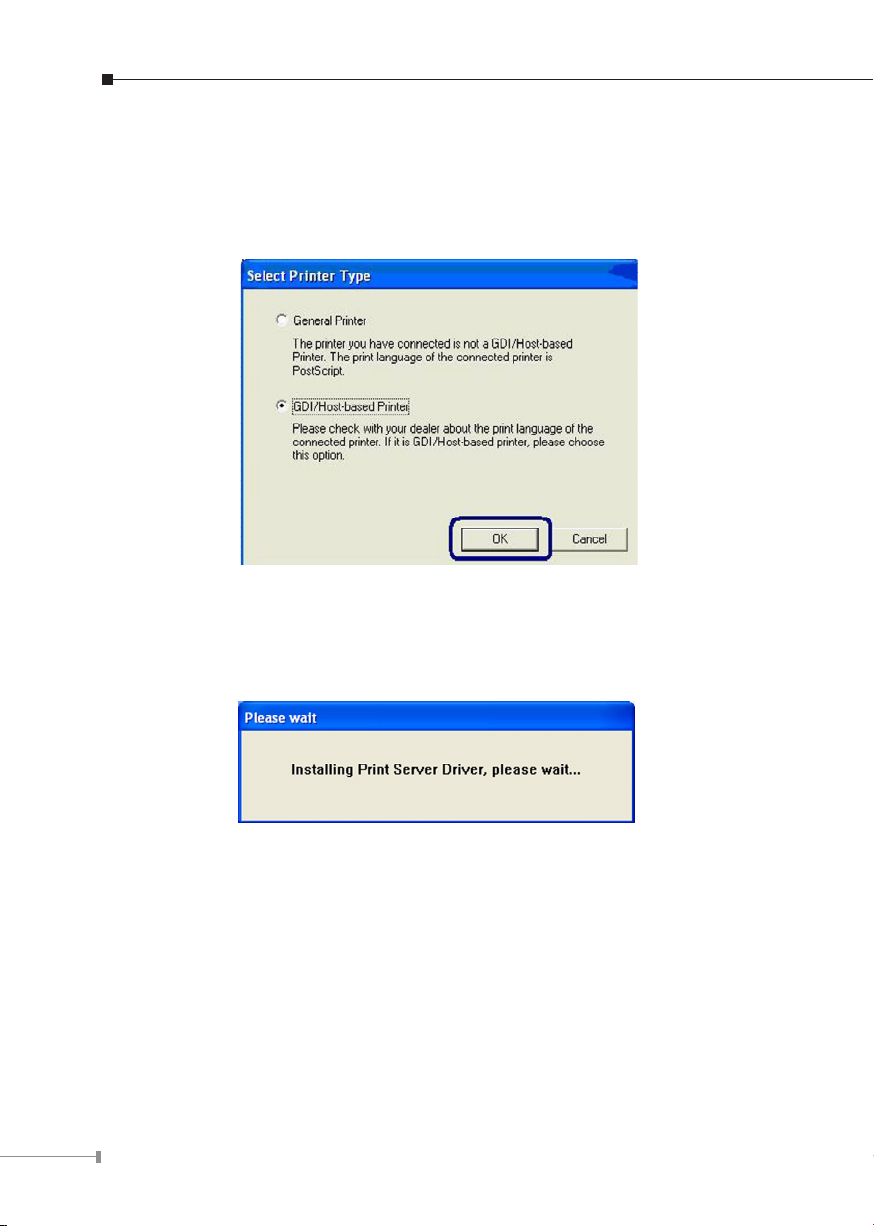
11. Please click “Install Printer” to start the installation.
Note
General Printer
Please check with your dealer about the printer type and base on
the information to select the the correct one. If you are not sure
the printer type, please select “General Printer”. Click “Ok” to
continue.
Following is the installation procedures for “General Printer” installation.
1. Select the “General Printer” and click “OK”.
Page 12

12
2. The “Install Printer” page is for you to search for the printer drivers. If you
want to manually designated the le path of the drivers, please put the printer’s
installation CD to your CD-ROM drive and click “Browse” to nd the drivers in
the CD.
You can also install the drivers the same as your pre-installed printer (The
printers in the “Printers and Faxes” will be displayed in below table).
3. Please select the driver les and the printer model you wish to install and then
click “Install”.
Page 13

13
4. After the drivers are installed completely. Your printer has been found with the
Print Server to your computer. Please click “Print Test Page” to conrm that you
can print through the network successfully.
5. If you have completed the print job successfully, please click “Yes”.
Page 14
14
GDI/Host-based Printer
Following is the installation procedures for “GDI/Host-based Printer” installation.
1. Select the “GDI/Host-based Printer” and click “OK”.
2. The program will start installing the Print Server Drivers automatically. You will
see several pop-up screens and some prompt messages in the system tray.
When the system stops prompting, the drivers are all installed. Please wait for a
moment.
3. When the Print Server Drivers are all installed, the following screen will
displayed. Before you click “Connect”, please put your GDI printer’s installation
CD to your CD-ROM drive and read the manual of the GDI printer carefully.
Some GDI printers require users to install the drivers/utilities before connecting
the GDI printer to your computer.
Some GDI printers require connecting the GDI printer to your computer during
the installation. Please refer to the below illustration which is the screen
displayed during the installation.
To connect the GDI printer to your computer through the Print Server just like
you have directly connected the GDI printer to your computer through the USB
Page 15

15
cable, you can click “Connect”.
4. The system starts to connect the printer that connected on print server and
automatically search and install the GDI printer’s drivers.
Page 16

16
5. You will see some prompt messages in the system tray. If there is driver needed
you to manually install. In the “Found New Hardware Wizard”, please select “No,
not this time” and click “Next” to continue.
6. Select “Install the software automatically (Recommended)” and click “Next”.
Page 17

17
7. Select the correct driver and click “Next”.
8. After the driver is installed, click “Finish”.
Page 18

18
9. After the driver installed completely (no more prompt message). Your GDI
printer has been found with the Print Server to your computer. Please click “Print
Test Page” to conrm that you can print through the network successfully.
10. If you have completed the print job successfully, please click “Yes”.
Page 19

19
11. Congratulations, the printer is installed successfully. The installed printer will be
Note
added to the “Printers & Faxes” in the Windows. If you want to print documents, please select “Printer Model Name(Network)”.
12. The following message will prompt you to restart your computer before start
using the network printer. Click “OK” and restart your computer then all installations are completed.
>> Macintosh (AppleTalk)
1. Click the Apple icon and then Control Panel - Network.
2. Ensure that EtherTalk is selected under AppleTalk Connection.
3. Click Chooser. The Chooser panel will open.
4. Click either the LaserWriter 8 icon (recommended) or the LaserWriter 7 icon.
5. Select a Print Server from the printer list. Print Server names appear in the form
PSxxxxxx (PS followed by 6 digits), as recorded on the base of the Print Server.
6. Click the Close box. Conguration is now complete.
If your printer is a host-base printer, please make it can work with
MAC system. Most of host-base printers are not support MAC OS.
Page 20

Further Conguration
If you want to congure more detail settings of FPS-1011, please refer to user’s
manual in the CD disk.
20
 Loading...