


PLANAR 20" LCD TV MANUAL
Contents
LCDTV
English
Safety P. 3 ~ 9
Accessary list P. 10
Feature P. 11
LCDTV front & rear P. 12 ~ 13
Remote controller P. 14
Preparing remote controller P. 15
Power in P. 16 ~ 17
Quick Start LCDTV P. 18 ~ 19
LCDTV menu P. 20
LCDTV menu loop P. 21
LCDTV menu structure P. 22
V-chip P. 23~25
Video rotation P. 26
VESA mount P. 27
Connectting P. 28 ~ 29
Closed Caption P. 30
Trouble shooting P. 31
Specifications P. 32
Page: 1
CAUTION
RISK OF ELECTRIC SHOCK
DO NOT OPEN
CAUTION: TO REDUCE THE RISK OF ELECTRIC SHOCK, DO
NOT REMOVE COVER (OR BACK).
NO USER-SERVICEABLE PARTS INSIDE
REFER SERVICING TO QUALIFIED SERVICE PERSONNEL
STOP
Page: 2
AVOID WATER DO NOT OPEN
MUST BE
UNPLUG QUICKLY
DO NOT PLUG
IN WHEN WET
SAFETY
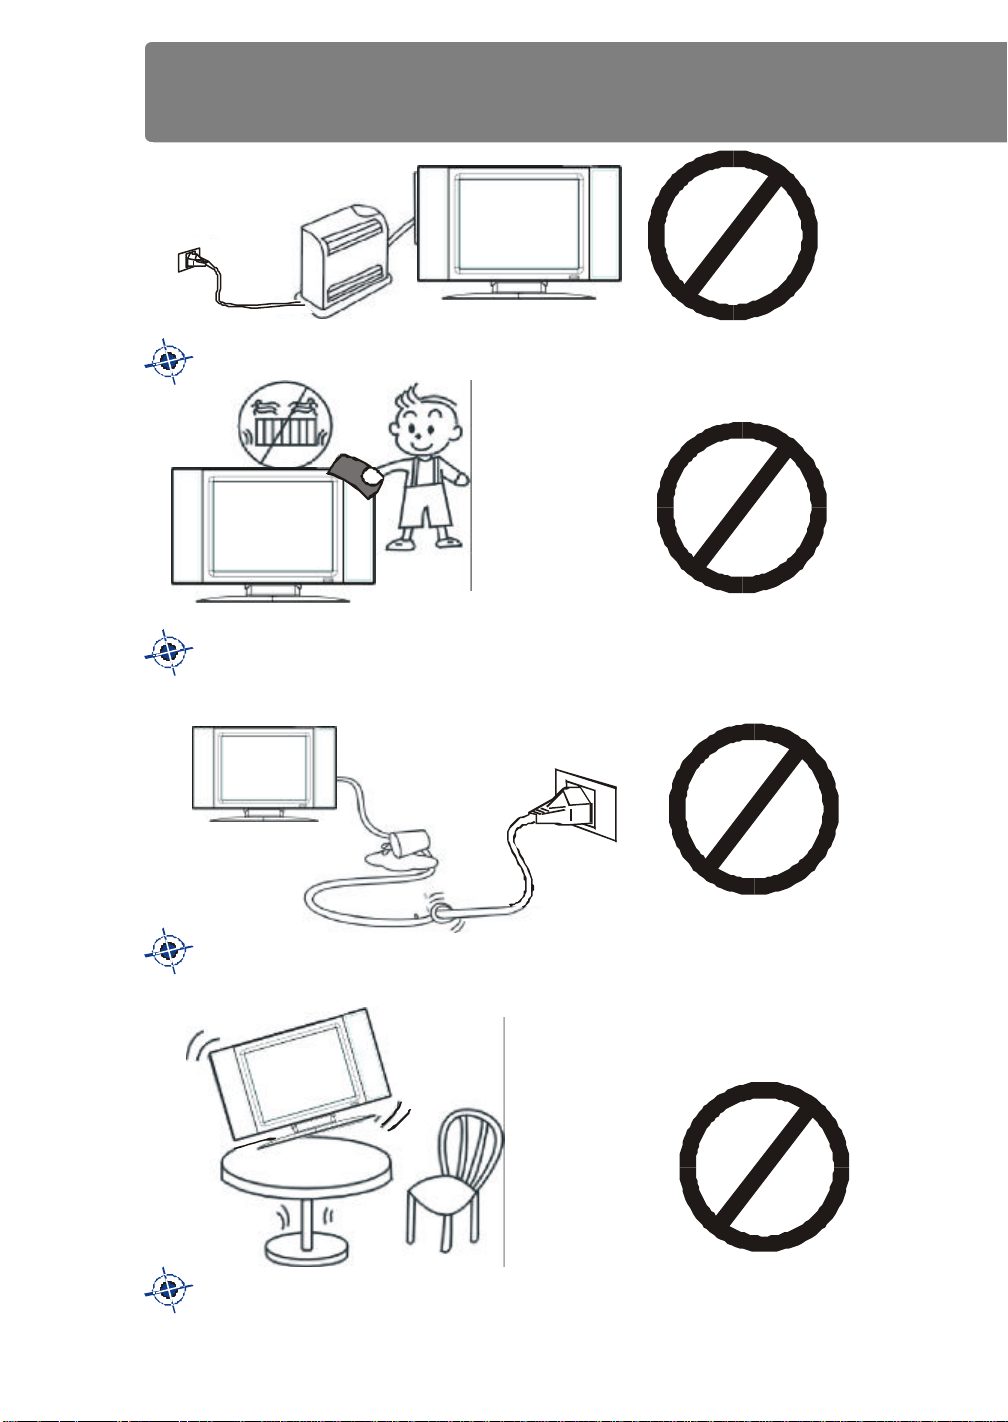
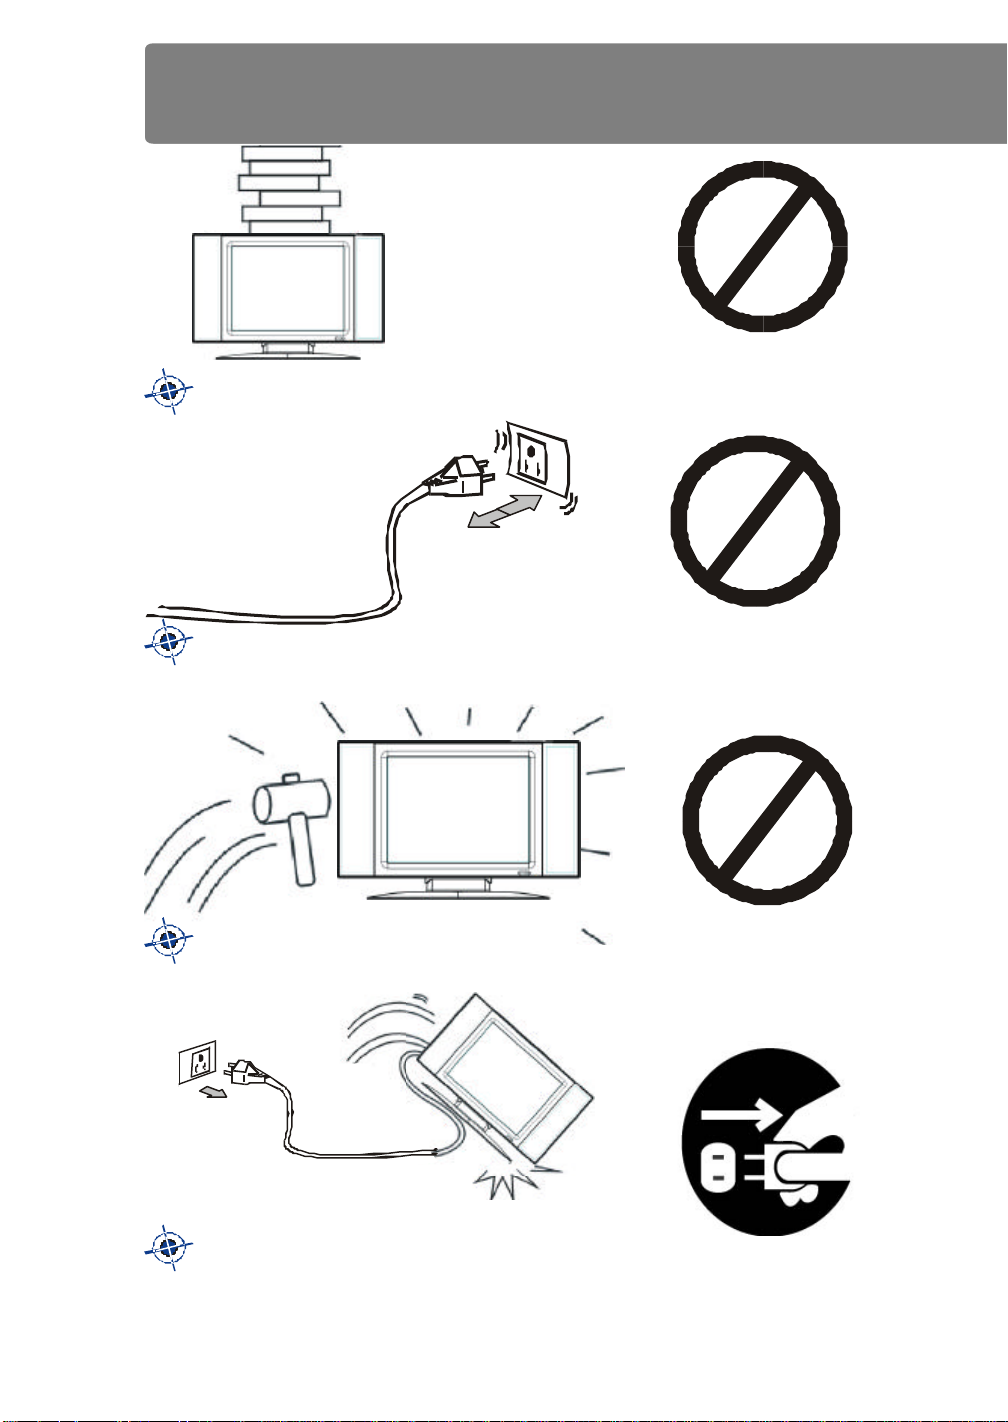
Do not place heavy objects on top of the LCD TV power cord.
Do not obstruct the heat vents on the LCD TV and make sure to
warn children to do the same.
Do not place the LCD TV on an uneven surface. Do not twist,
bend, break, or otherwise alter the power cord.
Do not place the LCD Digital TV on an uneven surface.
Page: 3
SAFETY
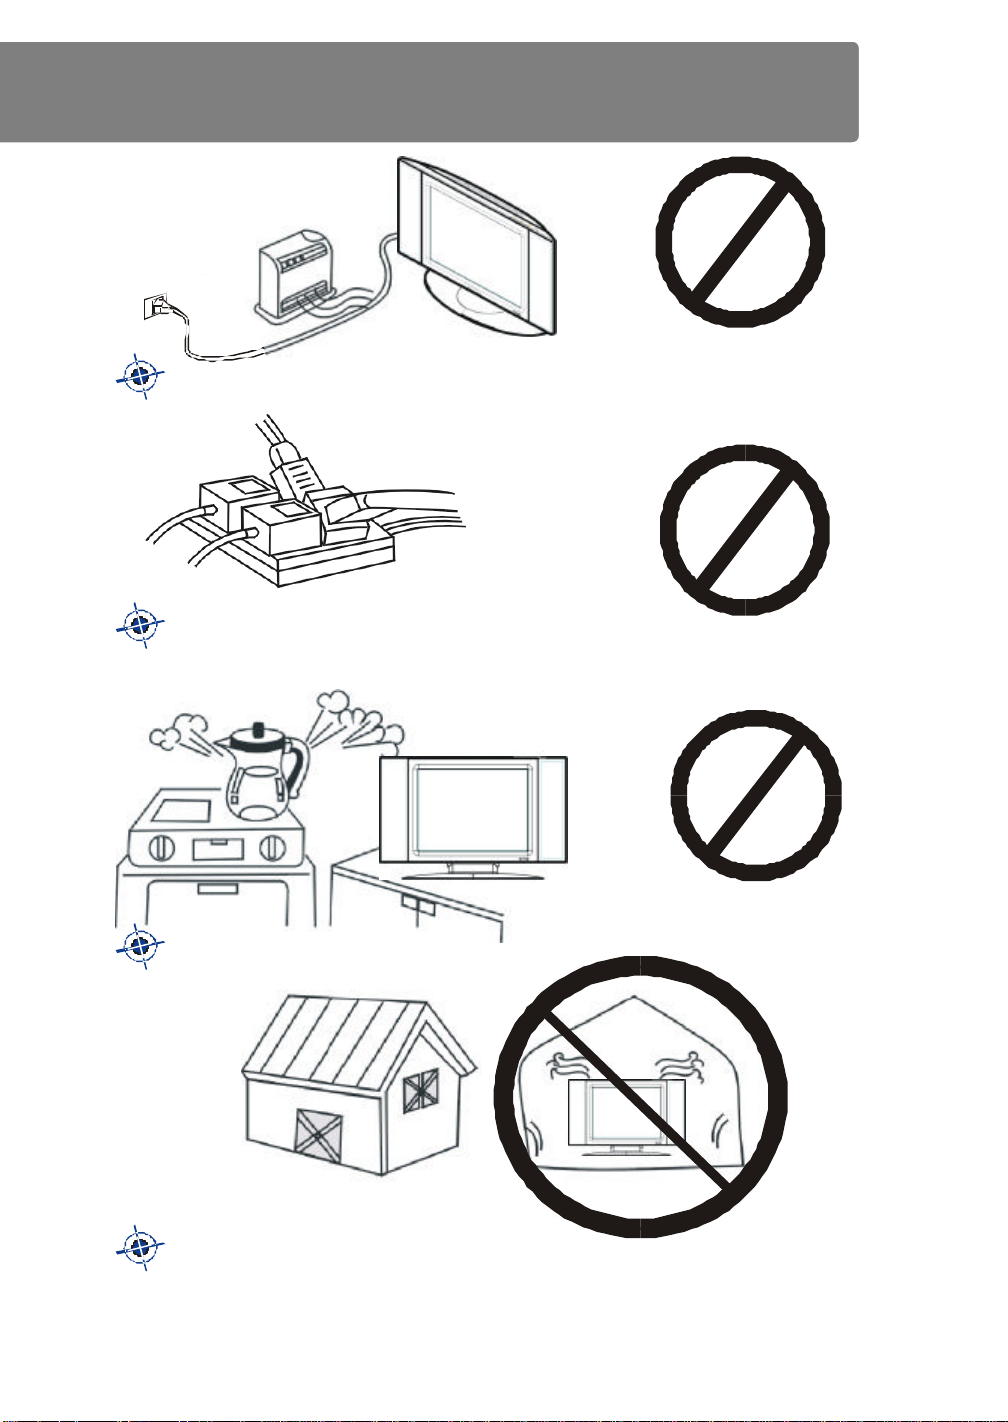
Keep the power cord clear of heating devices.
No other electrical device should be plugged into the same elec-
trical outlet that your LCD TV power cord is plugged into.
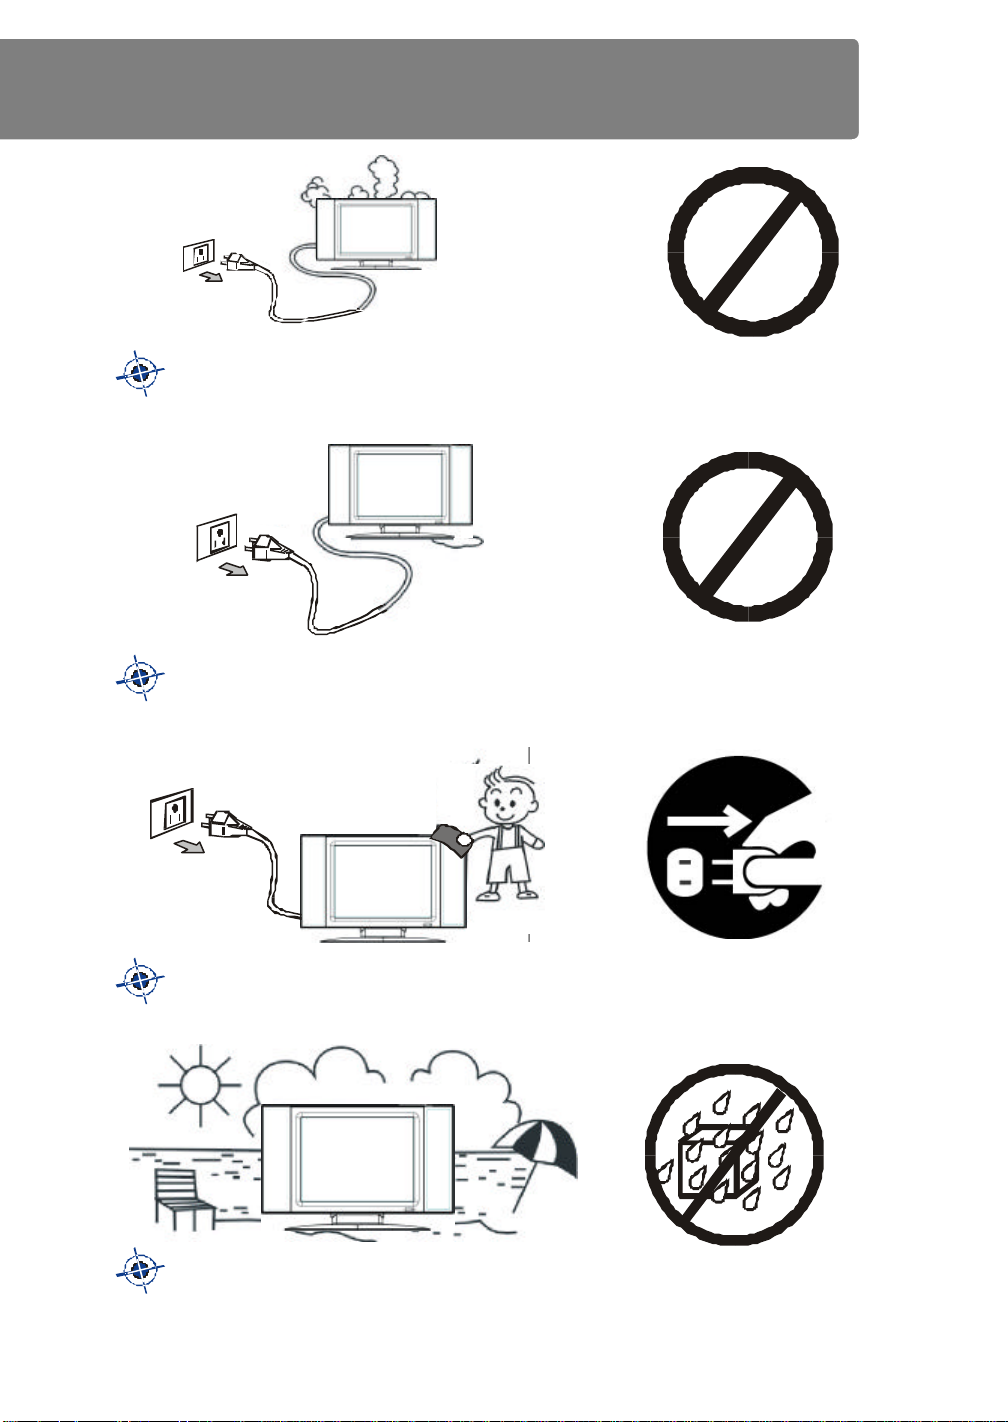
Do not place the LCD TV anywhere with excessive moisture,
soot, or steam.
Do not use the LCD Digital TV anywhere without proper ventila-
tion.
Page: 4
SAFETY
Do not place heavy objects on top of the LCD TV
Do not attempt to plug the power cord into a damaged or irregu-
larly shaped outlet.
Do not tap the LCD TV screen.
If the LCD TV is accidentally dropped, immediately unplug the
power cord to avoid accidental electrical discharges
Page: 5
SAFETY
If the LCD TV produces smoke or strange noises, unplug the
power cord immediately and take the unit back to the reseller.
If any strange material drips from the LCD TV, turn off the power
immediately and unplug the power cord.
When cleaning the LCD TV, or if the unit is not to be used for ann
extended period of time, please unplug the power.
Do not place the LCD TV in damp or humid places.
Page: 6
SAFETY
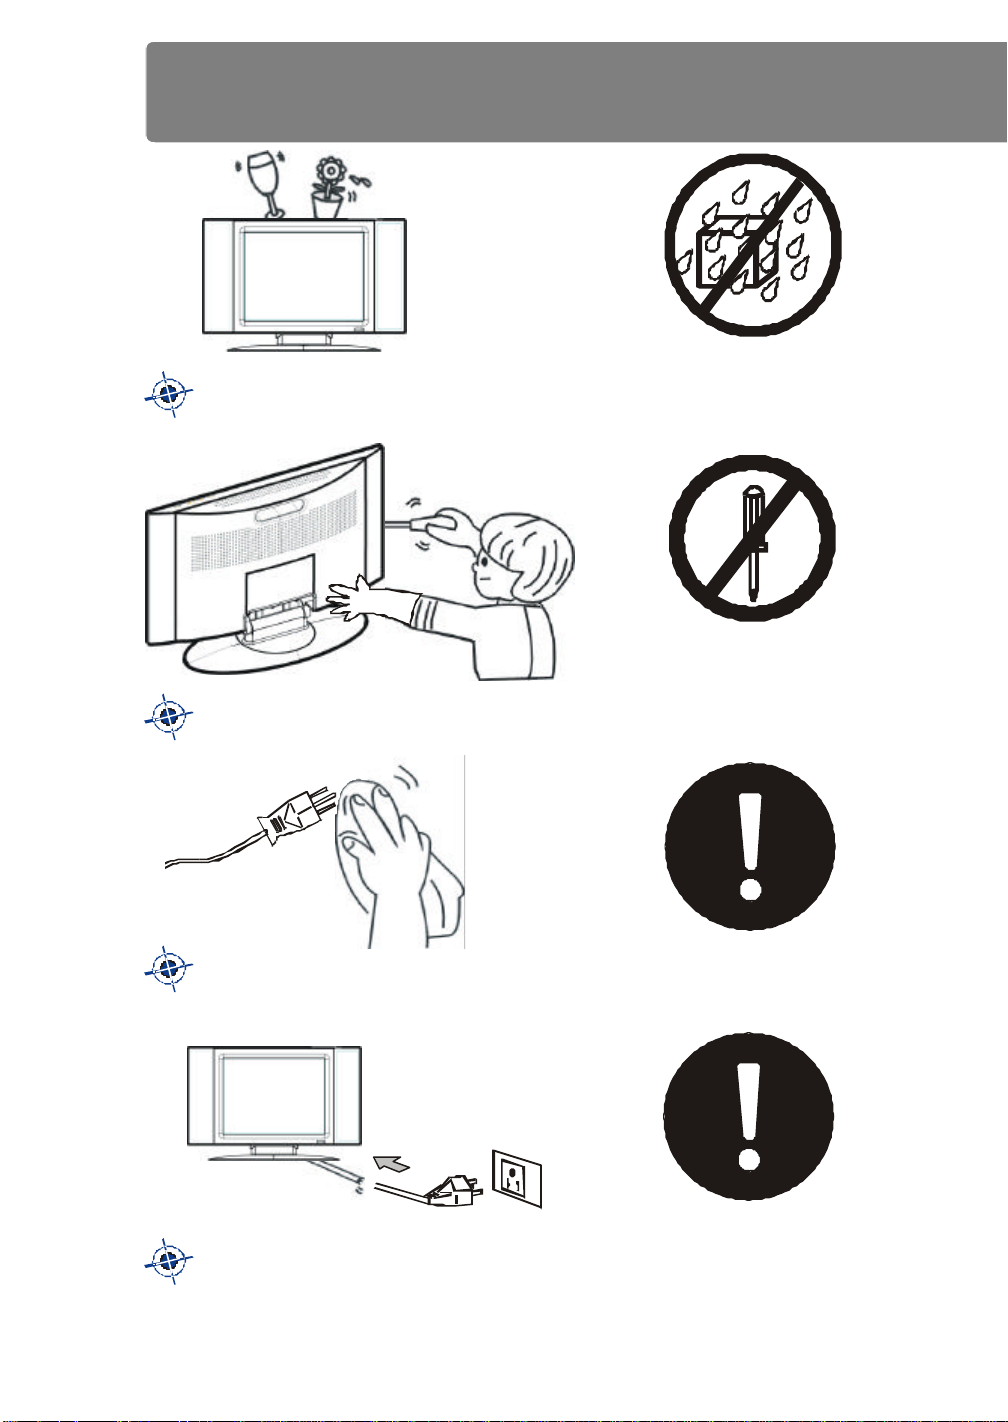
Please do not place vases or other decorative items on top of the
LCD TV
Do not open the LCD TV casing for any reason, as there may be
a risk of electrical shock.
Use only a dry cloth to remove dust from the exterior of the
power plug.
Make sure to unplug the power cord before attempting to move
the LCD TV
Page: 7
SAFETY
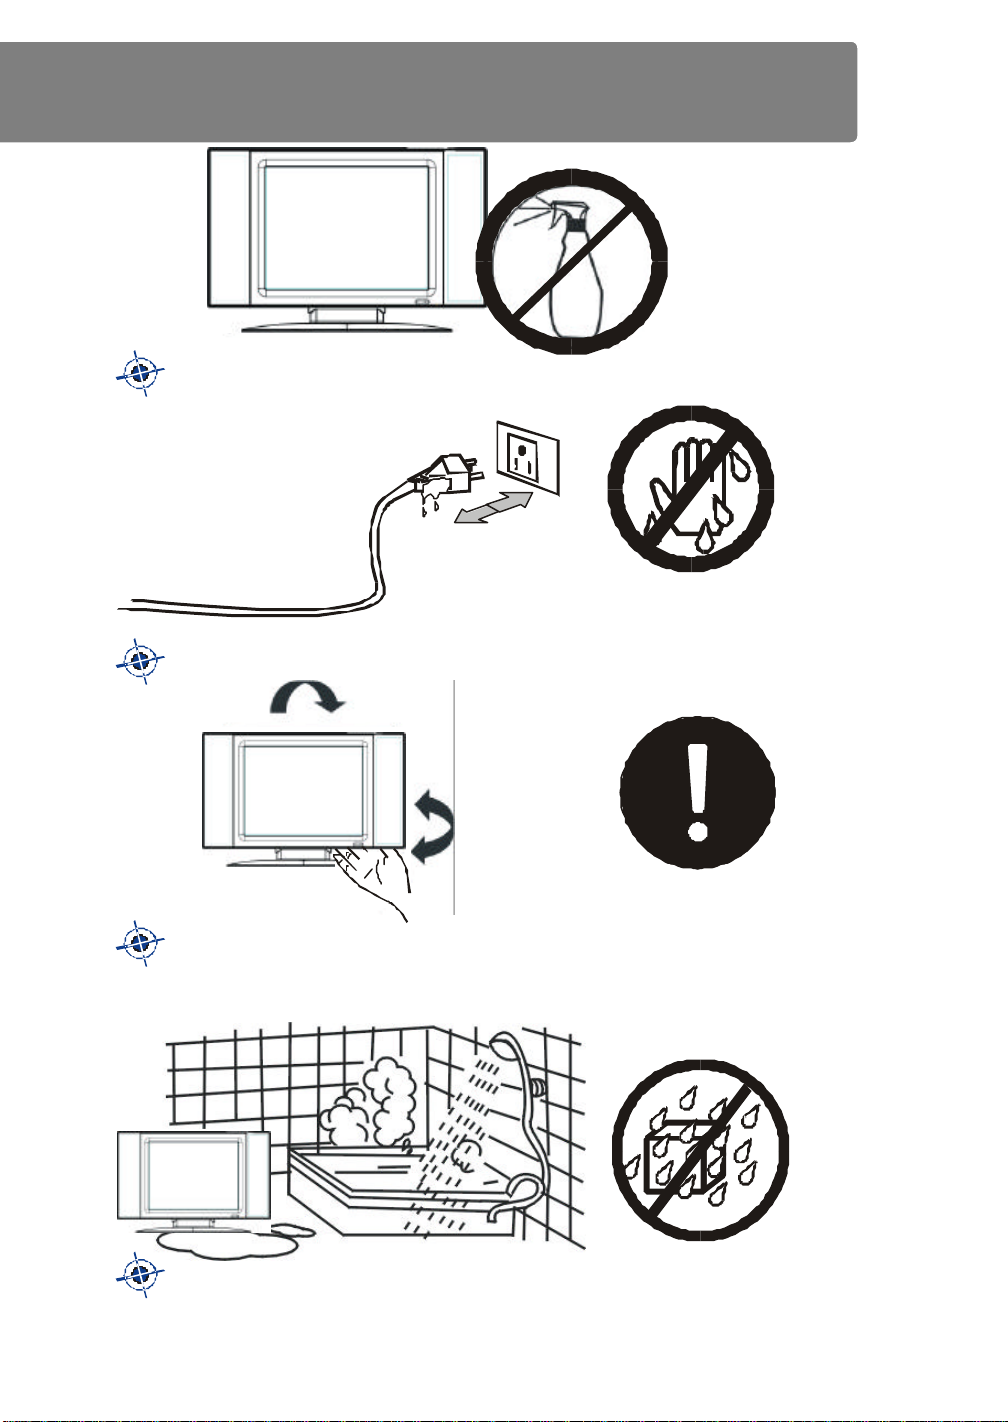
Do not use chemical compounds when cleaning the LCD TV..
Do not attempt to plug in the power cord when your hands are
wet.
When adjusting the angle of the screen, be careful not to get your
fingers caught in the rotating hinge.
Do not use the LCD TV in a restroom.
Page: 8
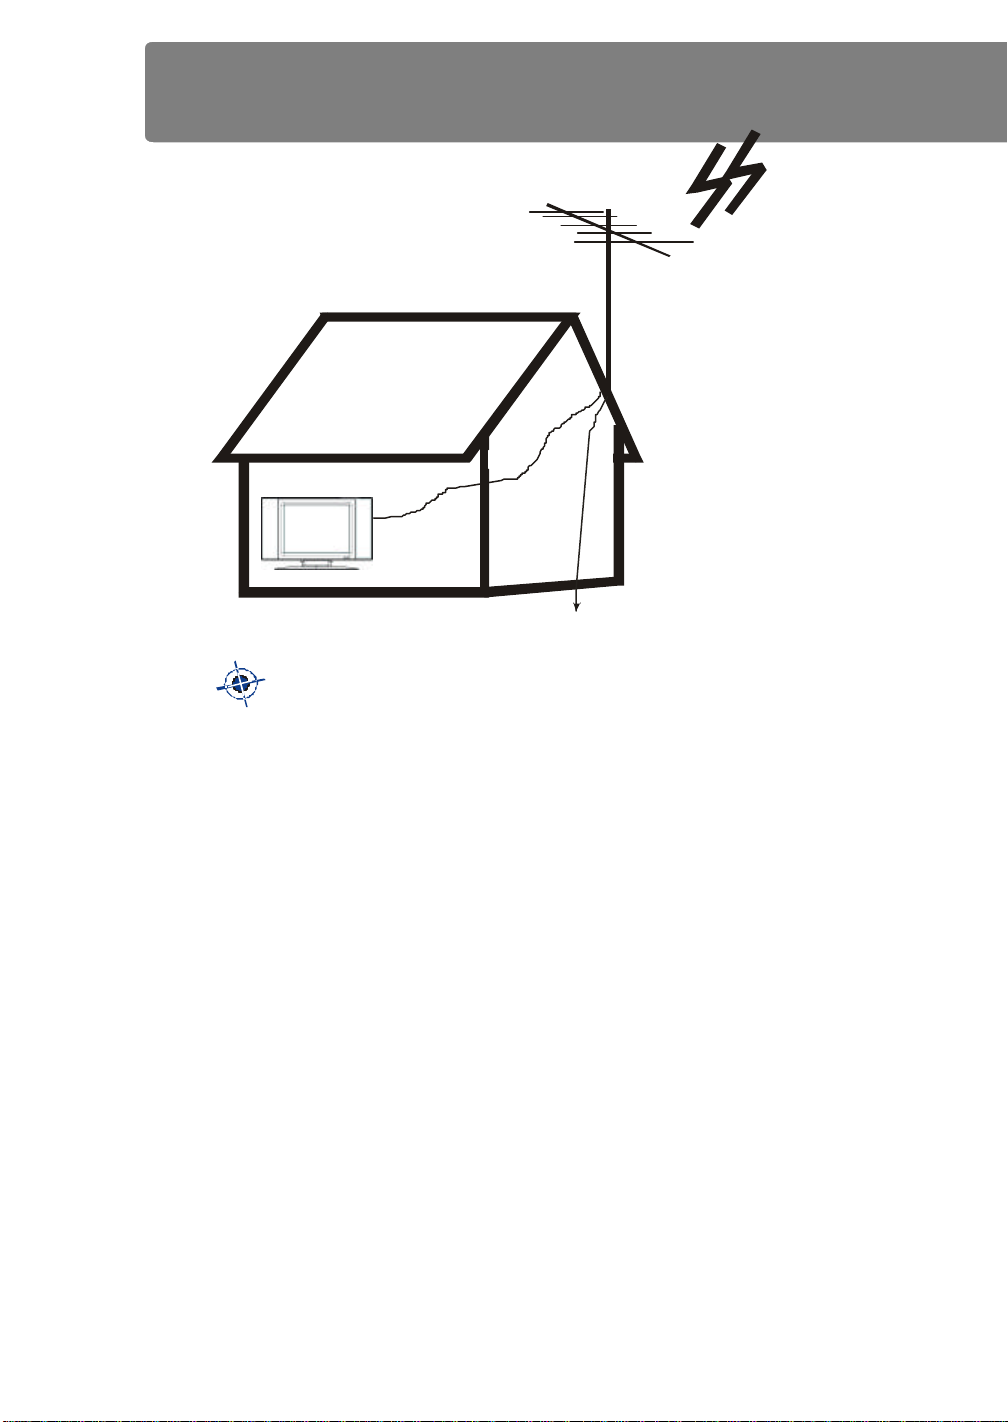
Ground
SAFETY
If an outside antenna or cable system is connected to the TV, be sure
the antenna or cable system is grounded so as to provide some protection
against voltage surges and built-up static charges.
Page: 9
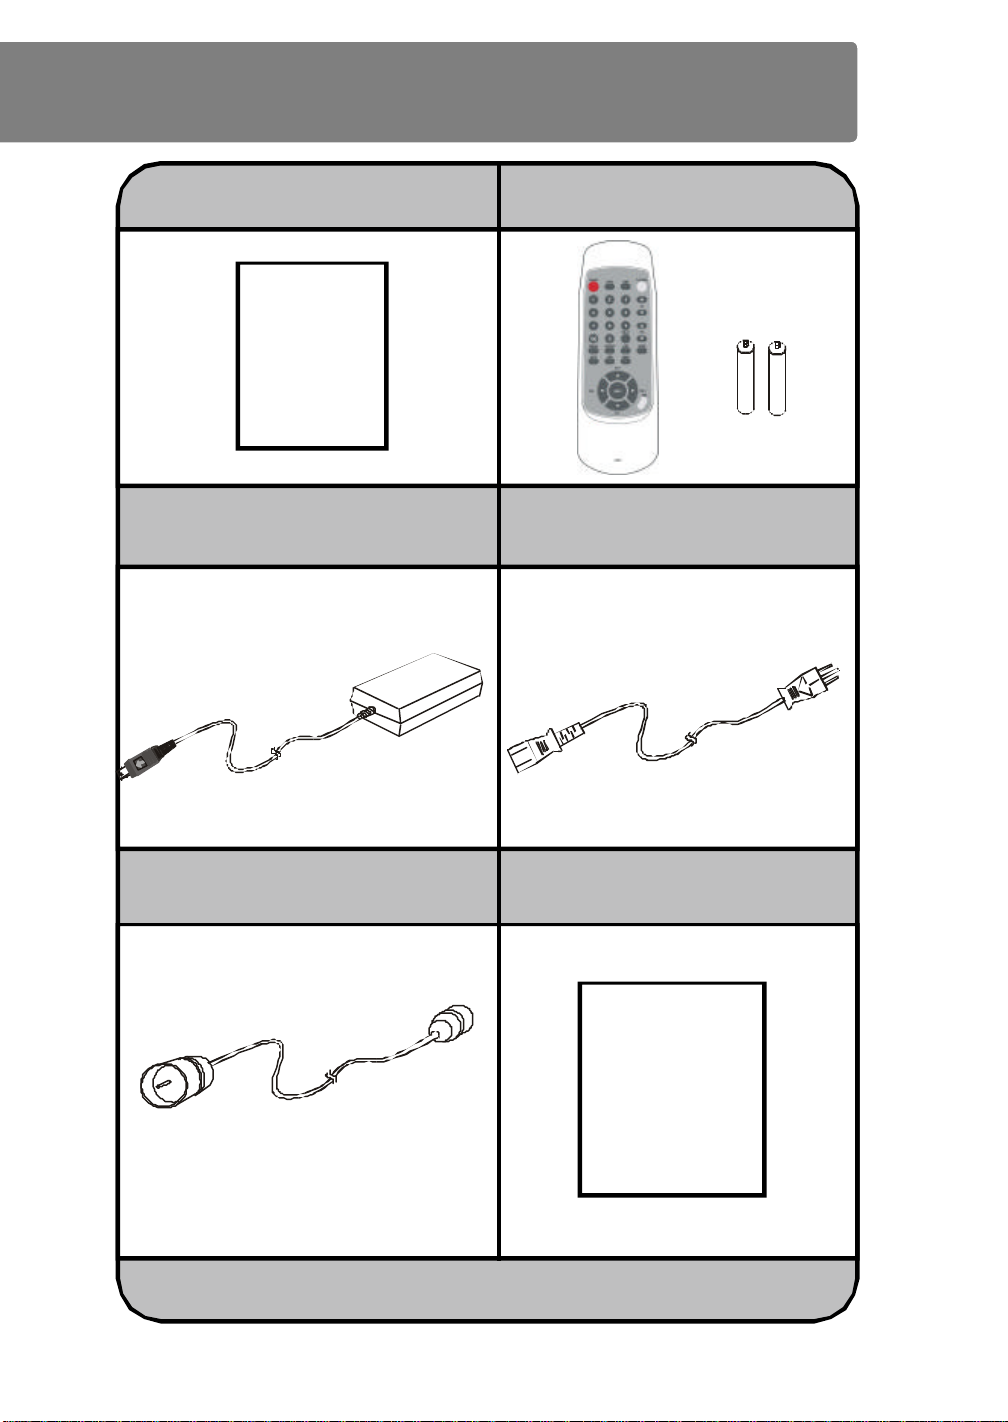
ACCESSARY LIST
USER MANUAL *1
MANUAL
AC/DC ADAPTER *1 POWER CORD *1
REMOTE CONTROLLER *1
BATTERY (AAA)*2
ANTENNA CABLE *1
Page: 10
WARRANTY CARD*1
Warranty card

FEATURE
Anti glare, low reflection
coating
High brightness,super
high contrast
New design with carrying
handle
60,000 hours long life
backlight
170o wide viewing angle
180o rotation function
Page: 11

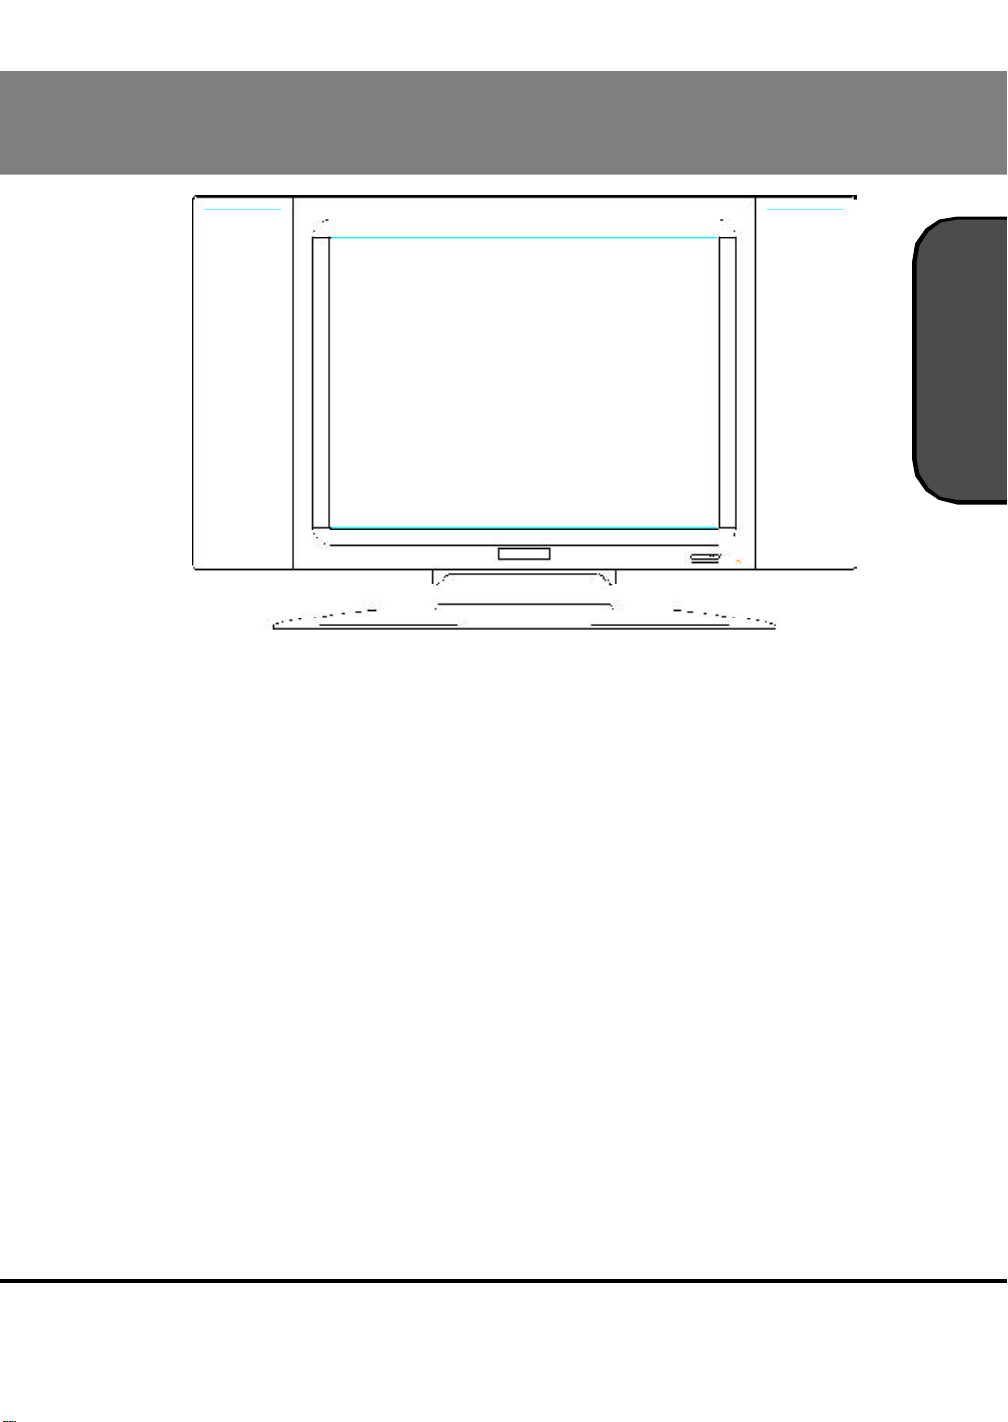
LCDTV FRONT
Speaker
(Left)
Power switch
Video input select
Mute on/off
Volume button
Channel button
Stand
Tile: 0o~20o, 90
Swivel:
R:15o~L:15
Page: 12
Speaker
(Right)
o
o
IR receiver
area
Earphone
output
TV power indicator
Green: Power On
Red: Stand By

LCDTV REAR
INPUT 1
S-Video 1
Composite1
Audio 1-right, left
COMPONENT
Component1
C. Audio -right, left
AV OUTPUT
Composite out
Audio out-right, left
INPUT 2
S-Video 2
Composite 2
Audio 2-right, left
Antenna/ Cable TV
Page: 13

REMOTE CONTROL
Mute
Power On/Off
Channel Number
Display Status
Second Language
Auto Programing
Add Channel
Menu/Enter
Sleeping setting
Video select
Channel Up/Down
Volume Up/Down
Previous Channel
Picture modes
Antenna/Cable TV
Erase Channel
Page: 14
Menu Select
Menu Exit

PREPARING REMOTE CONTROL
_
Slide the battery cover off in the back of reomte
control.
1
Install two batteries. (1.5V, UM-4, RO 3,
AAA)
2
3
_
Close battery cover.
+
+
Page: 15

POWER IN
Page: 16

Notice
Notice
1
2
Lock
Unlock
Page: 17

QUICK START LCDTV
Page: 18

1
Press power switch
n Power indicator (LED) turn to green.
*If LED is red then you can power on with
remote control!
2
3
Select channel
15
n Press Up/Down arrow, move channel
number to which you want!
n For quickly select, you can press
chanel number directly.
Adjust volume
n Press Up/Down arrow to adjust scale
to suitable volume!
VOL
VHS/DVD/Satellite
4
n Press TV/Video button to switch:
15
Component
Input 2
Input 1
Page: 19

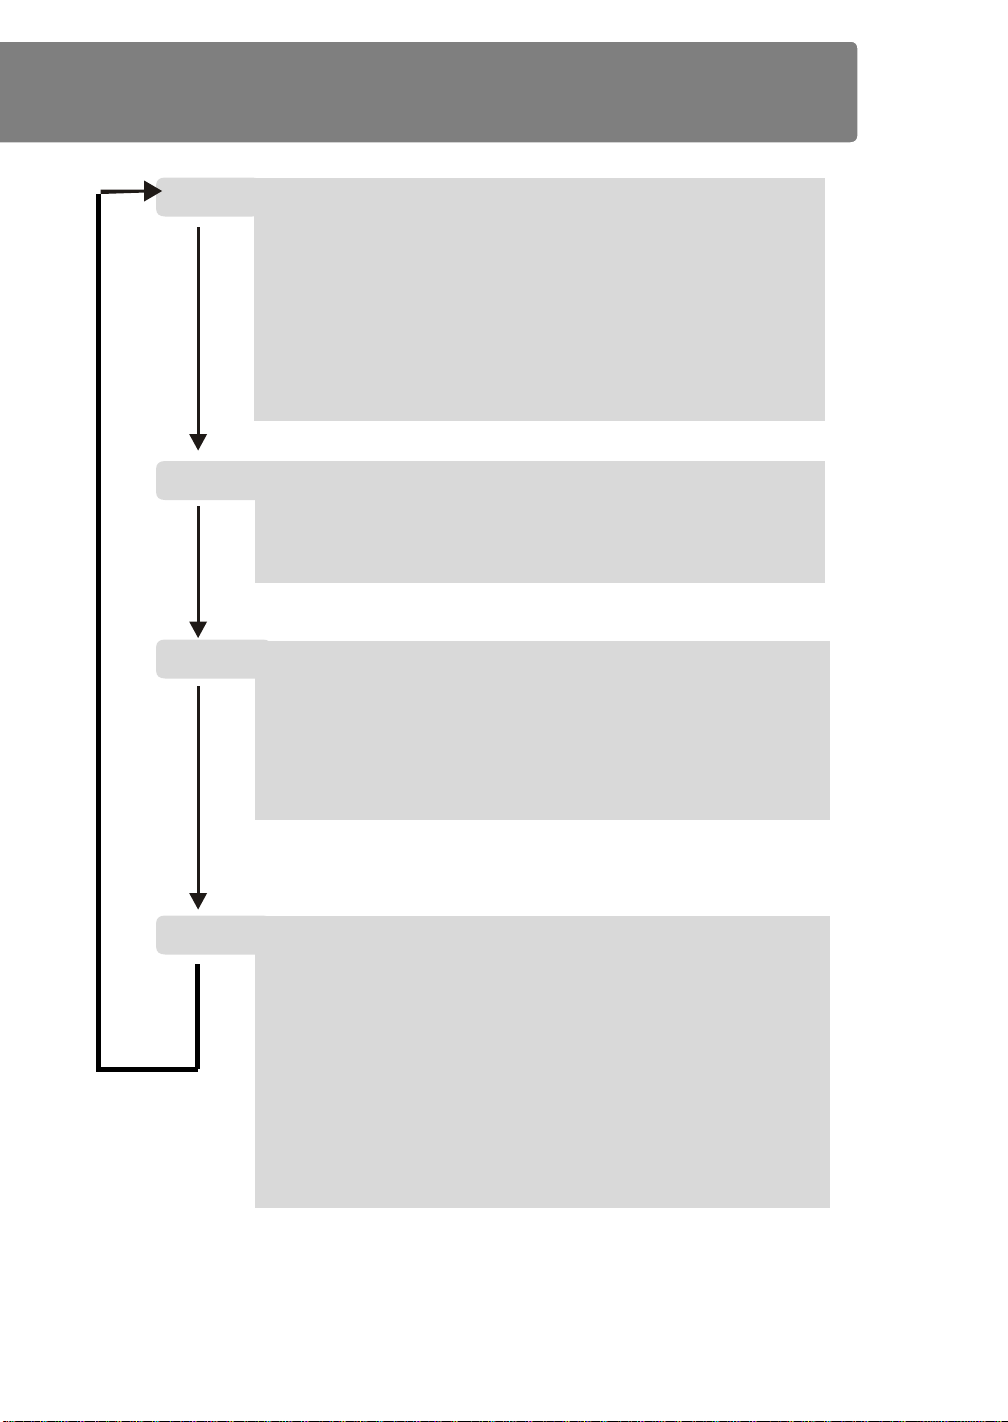
LCDTV Menu
LCDTV MENU
Press MENU to go to menu
setting.
1
2
3
Press Up/Down/Right/Left
arrow to select function
item.
Press MENU to enter setting.
Press Right/Left to adjust
scale or mode.
Press EXIT twice to quit menu
setting.
4
Page: 20

LCDTV MENU LOOP
Audio
Cinema
Audio
Stereo
Normal
Audio
Password: xxxx
Audio
Antenna
English
Picture
Modes
Contrast
Brightness
Color
Tint
Sharpness
Backlight
Picture
Chane Systeml
Language
Rotation
OSD transparency
Factory Default Reset
CH-Set
CH-Set
50
50
50
50
3
50
o
0
5
Enter
Setup
Setup
Picture
Picture
Mode
Treble
Balance
Chanel
Edit
Fine Tune
V-chip
CC mode
CH-Set Setup
16
CH-Set Setup
30
Add
50
TV
Page: 21
LCDTV MENU STRUCTURE
Picture Modes Cinema,Normal,User
Contrast Scale (0~100)
Brightness Scale (0~100)
Color Scale (0~100)
Tint Scale (0~100)
Sharpness Scale (1~5)
Backlight Scale (0~100)
Audio Mode Stereo, Mono
Treble Normal, Enhancement
Balance Scale (0~30)
CH-Set CHANNEL 1-125
Edit Add, Erase
Fine Tune -, 50, +
Setup Channel System Antenna
Page: 22
V-chip Password: XXXX
CC Mode TV,CC1,CC2,Text1,Text2
Cable
Language English
Spanish
French
Rotation 0, 180
OSD Transparency Opaque, Transparent
Factory Default Reset Enter

V-CHIP FUNCTION
<Enter>
<Enter>
<Enter>
MPAA rating
Some TV programs and movies include signals that classify the content of the program (violence, sex, dialog, language). The V-CHIP control feature in this LCDTV detects the
signals and blocks the programs according to your selections.
To use this feature, perform the following setup.
Selecting the V-chip menu:
1. Press MENU, press right/left to CH-
Enter Password
Ok Cancel
V-chip mode
V-chip lock
TV guideline
MPAA rating
New password
0 0 0 0 0 0
On
Set and press up/down arrow to V-chip
function.
2. Press MENU, press right/left to
display the pin code entering mode.
Press up/down at each code to get
number then press OK. (Choose OK
when you first time use this function)
3. Screen changes to the V-chip menu
as shown.
TV rating
TV-Y
TV-Y7
TV-G
TV-PG
TV-14
TV-MA
G
PG
PG-13
R
NC-17
X
NR
L:Lock U:Unlock
None
None
None
None
None
None
L
L
L
L
L
L
L
4. Press up/down to select item and
press menu.
V-chip lock:
Press right/left to select On or Off
Set TV Rating:
Press right/left to select.
Set MPAA Rating:
Press right /left to select Luck or
Unluck.
Page: 23

V-CHIP FUNCTION
<Enter>
<Enter>
<Enter>
V-chip mode
V-chip lock
TV guideline
MPAA rating
New password
Change Password
Old Password
0 0 0 0 0 0
New Password
0 0 0 0 0 0
Ok Cancel
Change password:
On
1. Press up/down arrow to
select New password item,
press MENU
2. Press up/down at each
code to get old password
and press up/down at each
code to select new password
then press Ok.
Page: 24

V-CHIP FUNCTION
About Rating:
TV RATING: Independent rating system for broadcasters
TV-Y: All Children (This program is designed to be
approprate for all children)
TV-Y7: Directed to Older Children (This program is designed
for children age 7 and above.)
TV-G: General Audience (Most parents would find this program
suitable for all ages.)
TV-PG: Parental Guidance Suggested (This program contains
material that parents may find unsuitable for younger children.)
D) Some suggestive dialog
L) Infrequent coarse languange
S) Some sexual situations
V) Moderate violence
TV-14: Parents Strongly Cautioned (This program contains
material that parents would find unsuitable for children under 14
years of age.)
D) Some suggestive dialog
L) Infrequent coarse languange
S) Some sexual situations
V) Moderate violence
TV-MA: Mature Audience Only (This program is specifically
designed to be viewed by adults and therefore may be unsuitable for children under 17.)
MPAA RATING: Independent rating system for movies
G: General Audience (Appropriate for all ages)
PG: Parental Guidance Suggested (Some material may not be
suitable for children)
PG13: Parents Strongly Cautioned (Some material may be
inappropriate for children under 13)
R: Restricted (Under 17 requires accompanying parent or adult
guardian.)
NC17: Not intended for anyone 17 and under
X: X-rated (For adults only)
Page: 25

VIDEO ROTATION
1
2
Press MENU then to select
to SETUP - Rotation.
Press MENU, the video will rotate 180
ABC
o
3
Page: 26
Press EXIT twice to quit menu
setting.

VESA MOUNT
1
2
Adjust screen 90
o
90
o
3
Move LCD TV to upright and screw.
Flat screw
VESA hole is on bottom of
stand.
Page: 27

CONNECTING
INPUT 1 INPUT 2 COMPONENT
S-VIDEO CABLE
*When S-VIDEO and VIDEO connect at same
time, then screen will display S-VIDEO first!
VIDEO & AUDIO CABLE
COMPONENT CABLE
DVD
VHS
TV GAME CAMCORDER
AUDIO CABLE
Page: 28

ANTENNA
CABLE TV LAN
ANTENNA CABLE
VHF/UHF
OUTPUT
VIDEO & AUDIO CABLE
CABLE BOX
SATELLITE BOX
VHS
TV/VIDEO DISPLAY
Page: 29

CLOSED CAPTION
Broadcasters can send either Standard or Test closed
captioning. Standard closed captioning follows the dialogue of the
characters on-screen and displays in a small section of the screen. Text
closed captioning often contains information such as weather or news
and covers a large portion of the on-screen program. This LCD TV can
decode two different standards and text closed captioning signals from
each TV station. However, each TV station may broadcast only one or
two closed captioning signals, or none at all.
Within CC mode, you can select Text1, Text2, CC1 or CC2.
Page: 30

TROUBLE SHOOTING
Problem Checks and Adjustments
TV will not turn on
n Make sure the power cord is plugged
in, then press POWER button.
n Check battery in the Remote. (Maybe
batteries are dead.)
No picture, no
sound
No sound, picture
OK
Poor recetion of
broadcast channels
Black box appears
on the screen
Cannot select a
certain channel
The Remote Control
does not operate
n Check antenna/cable connections.
n Maybe sound is muted. Try pressing
VOL+ button.
n Try another channel.
n Try another channel.
n Check antenna connections.
n If using VCR, check TV/VCR button.
n Captioning may be turned on
n That channel may be locked out with
BLOCK CHANNEL function, or erased
with the ASS/ERASE function.
n Maybe something is between the
remote and the remote sensor.
n Maybe batteries are dead. Try replacing batteries with new ones.
Page: 31

SPECIFICATION
Type 20" LCD Color TV
LCD Panel 20" Black TFT VGA
Brightness 450 cd/m2
Contrast 500:1
Viewing Angle H170o, V170o (CR>=10)
Color System PAL/NTSC/SCAM
Receiving System NTSC
Tuner VHF US2-US13ch
UHF US14-US69ch
CATV 1-125ch
Present Channel PLL181ch
Stereo System MTS/SAP
Speaker 5W*2
Power Adapter 12V, 75W
Closed Caption Yes
V-chip Yes
Tilt 0 o ~20 o, 90
Swivel R: 15 o, L: 15
Screen Rotation 180
o
o
o
Wall Mount Hale VESA Compatible
Carrying Handle Yes
AC Adapter 110V-240V, 50/60Hz
Terminals
Front Headphone *1 3.5mm
Rear Input 1 *1 CVBS, S-Video, Audio
Input 2 *1 CVBS, S-Video, Audio
Component *1 RCA, Audio
AV out *1 CVBS, Audio
DC Input *1 DC 12V
Page: 32

Customer Service
Tel: 1-866-PLANAR-1 (1-866-752-6271)
Hours: M - F, 7am - 6pm Pacific Time
 Loading...