

Page 1
System Requirements for best performance
Minimum recommended system configuration:
OS: Windows, Linux (32 or 64-bit)
RAM: 1 GB RAM
Hard drive space: 50 MB
Video: At least 64 MB
USB3.0 chipset: Renesas µPD720202 or
INTEL(Haswell, Ivy Bridge and etc.) based
USB3.0 chipset
See System Requirements to get detailed
information on recommended system configuration
for PixeLINK USB3.0 cameras.
Additional Information:
Need help with:
Please see….
Capture OEM
Knowledge base article on
Capture OEM
uScope Microscopy
software
Quick Start up Guide
PixeLINK SDK
Knowledge base article on
Software Development Kit
Trigger Application
Knowledge base article on
Trigger and GPOs
Thermal consideration
Knowledge base article on
Thermal Consideration.
Mechanical Drawings
PL-D Enclosed Mechanical
Drawings
Cleaning camera glass
Knowledge base article on
Protective Glass
.
All the parts that you need to set up your
new camera system
Basic components required for camera set up:
USB3.0 Interface card
USB3.0 cable
8-pin GPIO (Trigger) cable
C-Mount lens
Camera Driver (Capture OEM)
For ultimate performance and compatibility of
PixeLINK cameras, we hold most of these
components in stock. Please visit PixeLINK
Accessories to get the right accessory for your
camera.
LED Light Status:
PL-D Camera Quick
Start Guide
Looking for the right software for your
application
PixeLINK offers variety of software which fits your
needs.
Capture OEM: a real-time, interactive, easy-to-use
application for PixeLINK cameras.
uScope: For advanced Microscopy solutions and
great out of box experience.
PixeLINK SDK: Feel the need to create your own
application. PixeLINK SDK provides useful libraries
in C/C++, dotnet and VB to help you develop your
own application. For more information on PixeLINK
SDK please contact [email protected] or call
613-247-1211.
To download our drivers and microscopy software
please visit PixeLINK Software page.
Camera Interface: USB3.0
This line of PL-D cameras are all equipped with
USB3.0 Micro-B Male SMT Connector that is
responsible for both data transmission and power.
For more information on USB3.0 specification
please visit http://www.usb.org/developers/docs.
PixeLINK Support:
If you are experiencing any issues with PixeLINK
product, then please contact PixeLINK Support or
call 613-247-1211 and someone will be able to
assist you with your problem.
Page 2
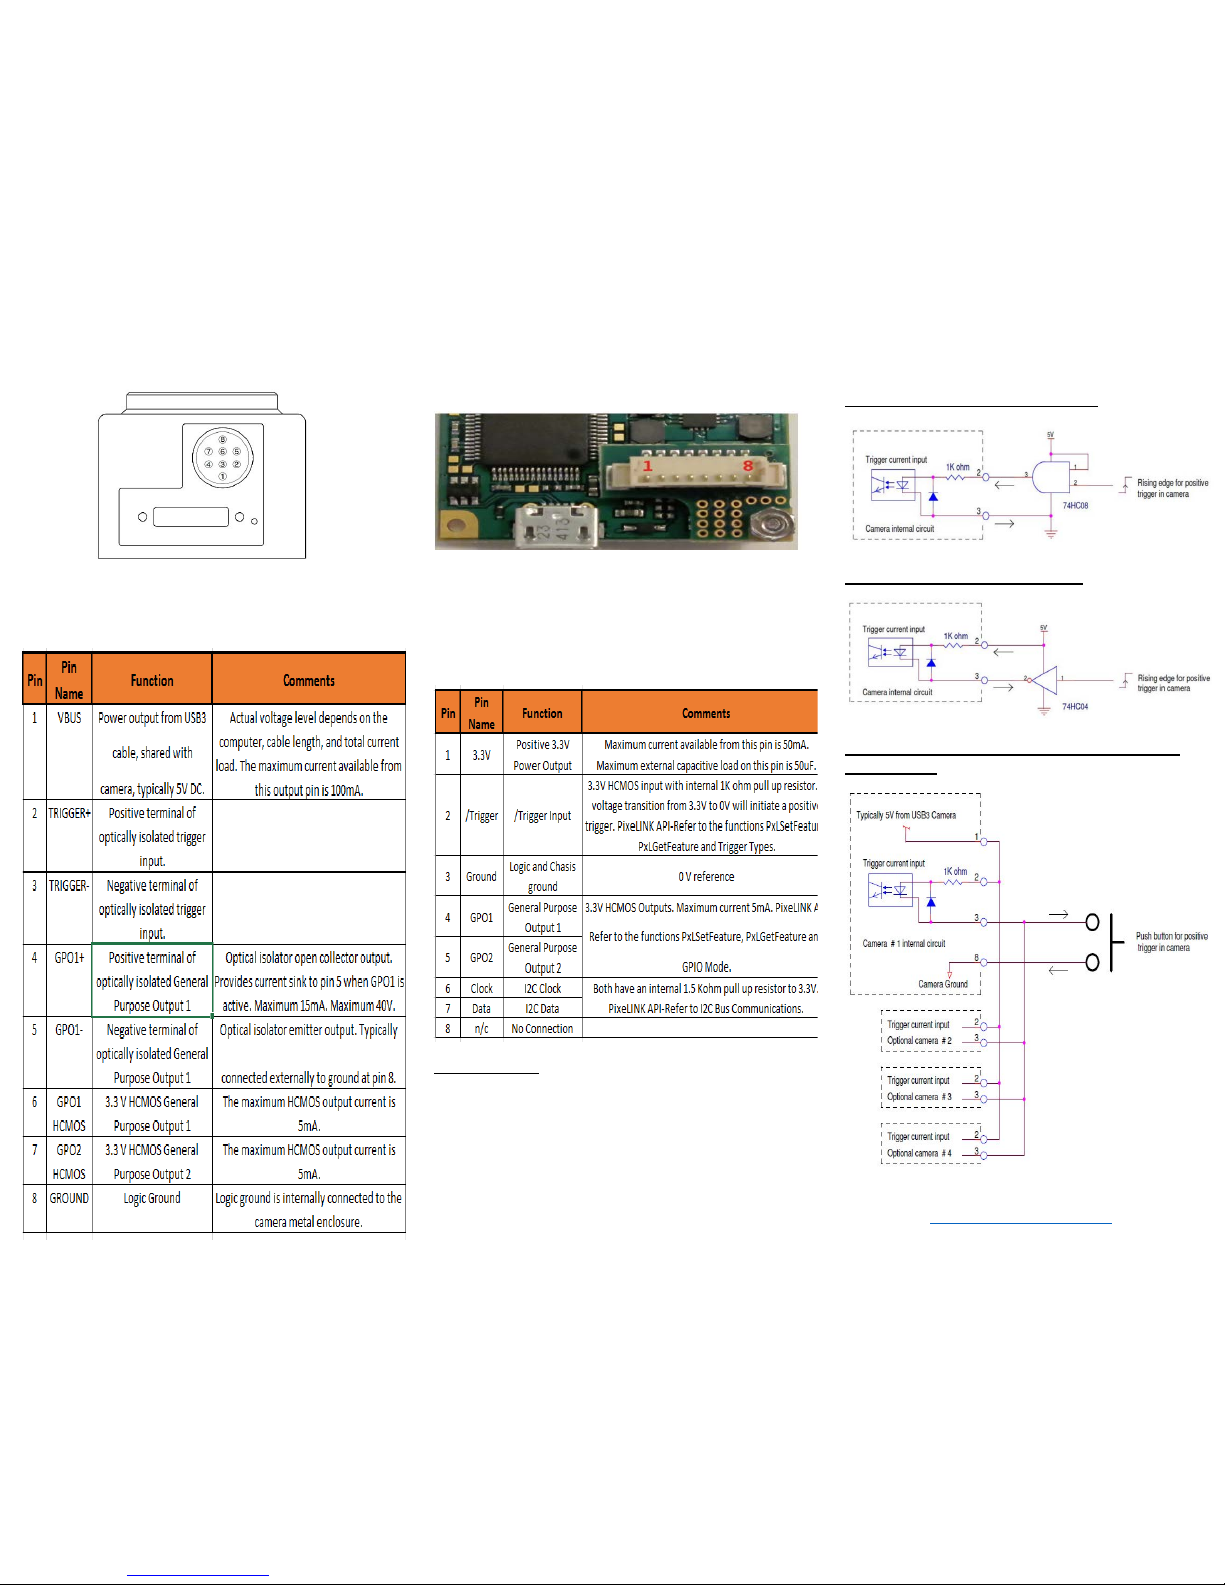
General Purpose I/O Connector: Enclosed
Camera
The mating connector is an 8-pin Hirose HR25A&P-8P cable plug with solder pins for 28 AWG
wires.
General Purpose I/O Connector: Board
level Camera
The connector is an 8-pin 1.25mm Molex connector
located on the interface board.
The mating connector is a Molex 51021-0800
receptacle with Molex 50079-8100 wire crimp
terminals.
Trigger Notes:
1. To initiate a positive trigger , apply a voltage
of between 5V and 12V (4-11mA) to the
optically trigger input terminals.
2. The optically isolated trigger input includes
an internal 1Kohm resistor.
3. When using a trigger voltag e hi gher than
12V, add an external series resistor with an
adequate power rating.
4. Debounce delay is 1 microseconds.
External Trigger Connection Examples
Some examples of external trigger setup.
Example 1: HCMOS Source trigger
Example 2: HCMOS Sink Trigger
Example 3: Synchronizing PL-D cameras with
Push Button
For detailed information on external trigger setup
please visit: External Trigger Examples
Page 3
Installing USB3.0 Interface card
PixeLINK recommends using a Renesas
uPD720202 or INTEL (Haswell, IVY Bridge and
etc.) based USB3.0 chipset.
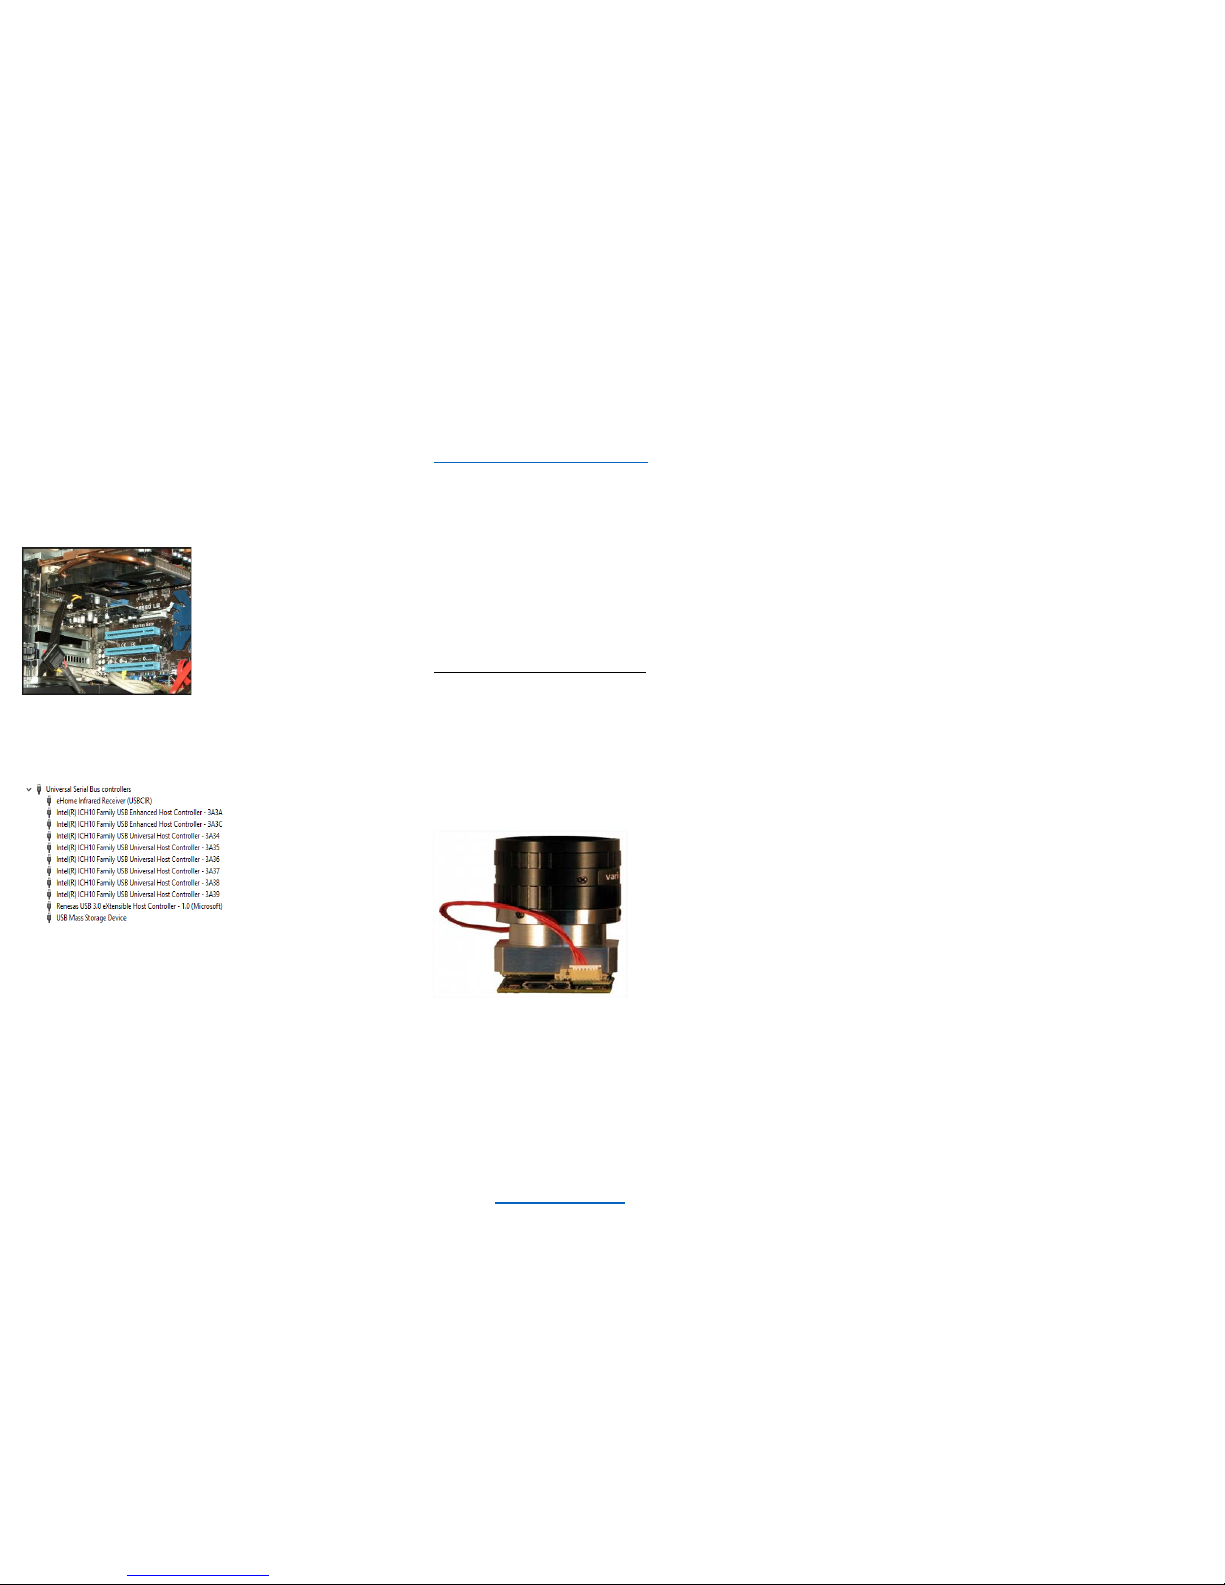
Start by locating a free PCI express slot on your
desktop computer’s motherboard. The PCI slots on
this ASUS motherboard is sky blue in colour. Install
your USB3.0 interface card on your PCI express
slot. Please make sure
that you install the
interface card according
to card manufacturer’s
instruction. Once the
card has been put in
place make sure that the
drivers are installed
properly. You can check the status of the card in
Windows device manager under Universal Serial
Bus controllers. For instance, a Renesas USB 3.0
has been installed in this motherboard. After
installation the
drivers were
loaded
successfully and
it was recognized
by device
manager as
Renesas USB3.0
eXtensible Host Controller – 1.0 (Microsoft)
under Universal Serial Host Controller.
Note:
1. Make sure that there is no ex clamation
mark beside the driver in Device manager.
This means that the driver was not installed
correctly.
2. Some USB3.0 adaptor cards may require
an external SATA power supply from the
motherboard. Refer to the manufacturer’s
specification.
Installing Software/Drivers for
your camera
To download PixeLINK, software please visit:
PixeLINK Software Downloads.
Please select Industrial Software/Drivers to install
PixeLINK Capture OEM and Microscopy
Software/Drivers to install PixeLINK uScope.
After the desired software has been downloaded
from our website open the .exe file to start the
installation process. A PixeLINK folder will be
created. You can locate this folder by browsing to
Start -> All Programs -> PixeLINK.
Notes for proper installation:
Before installing the PixeLINK uScope software
make sure that you have removed/uninstalled any
existing PixeLINK software (if any) from your PC.
Installing and operating your
Camera
Connect the USB3.0
cable that is
recommended by
PixeLINK to the
Micro-B female port
of the camera. The
other side of the
cable should be
connected to the
USB3.0 port/hub on your system. Once connected
successfully the camera’s LED should lit up. Check
the LED status table on the first page for more info.
Once the system recognizes the camera, the
camera’s LED will turn green. To check whether
the camera has been loaded with the proper driver,
go to Device Manager. The camera should be seen
under Imaging devices as OEM USB3 Camera or
PixeLINK camera release 4.
Contact PixeLINK support
if camera is not
recognized in device manager.
Recommendations for achieving
the best performance out of a
PixeLINK USB3.0 camera
1) Use PixeLINK recommended USB3.0
chipset that is Renesas uPD720202 or
Intel (Haswell, IVY Bridge and etc).
2) Use PixeLINK recommended USB3.0
cable. For ultimate performance do not use
an USB3.0 cable that is longer than 3
meters. The longer the cable the more the
resistance and data throughput will be
hampered.
3) Avoid using USB hubs or convertors if
speed is a priority. If you must use a USB
hub we recommend any hub using the
VL810 or VL812 chipset.
4) Always connect your camera to the back
USB3.0 port of your desktop computer.
 Loading...