

Page 1
Workstation w1110 Windows Installation Instructions for LAN
1/7
Pitney Bowes W1110 Windows Installation Instructions for LAN
1 2 3
4 5 6
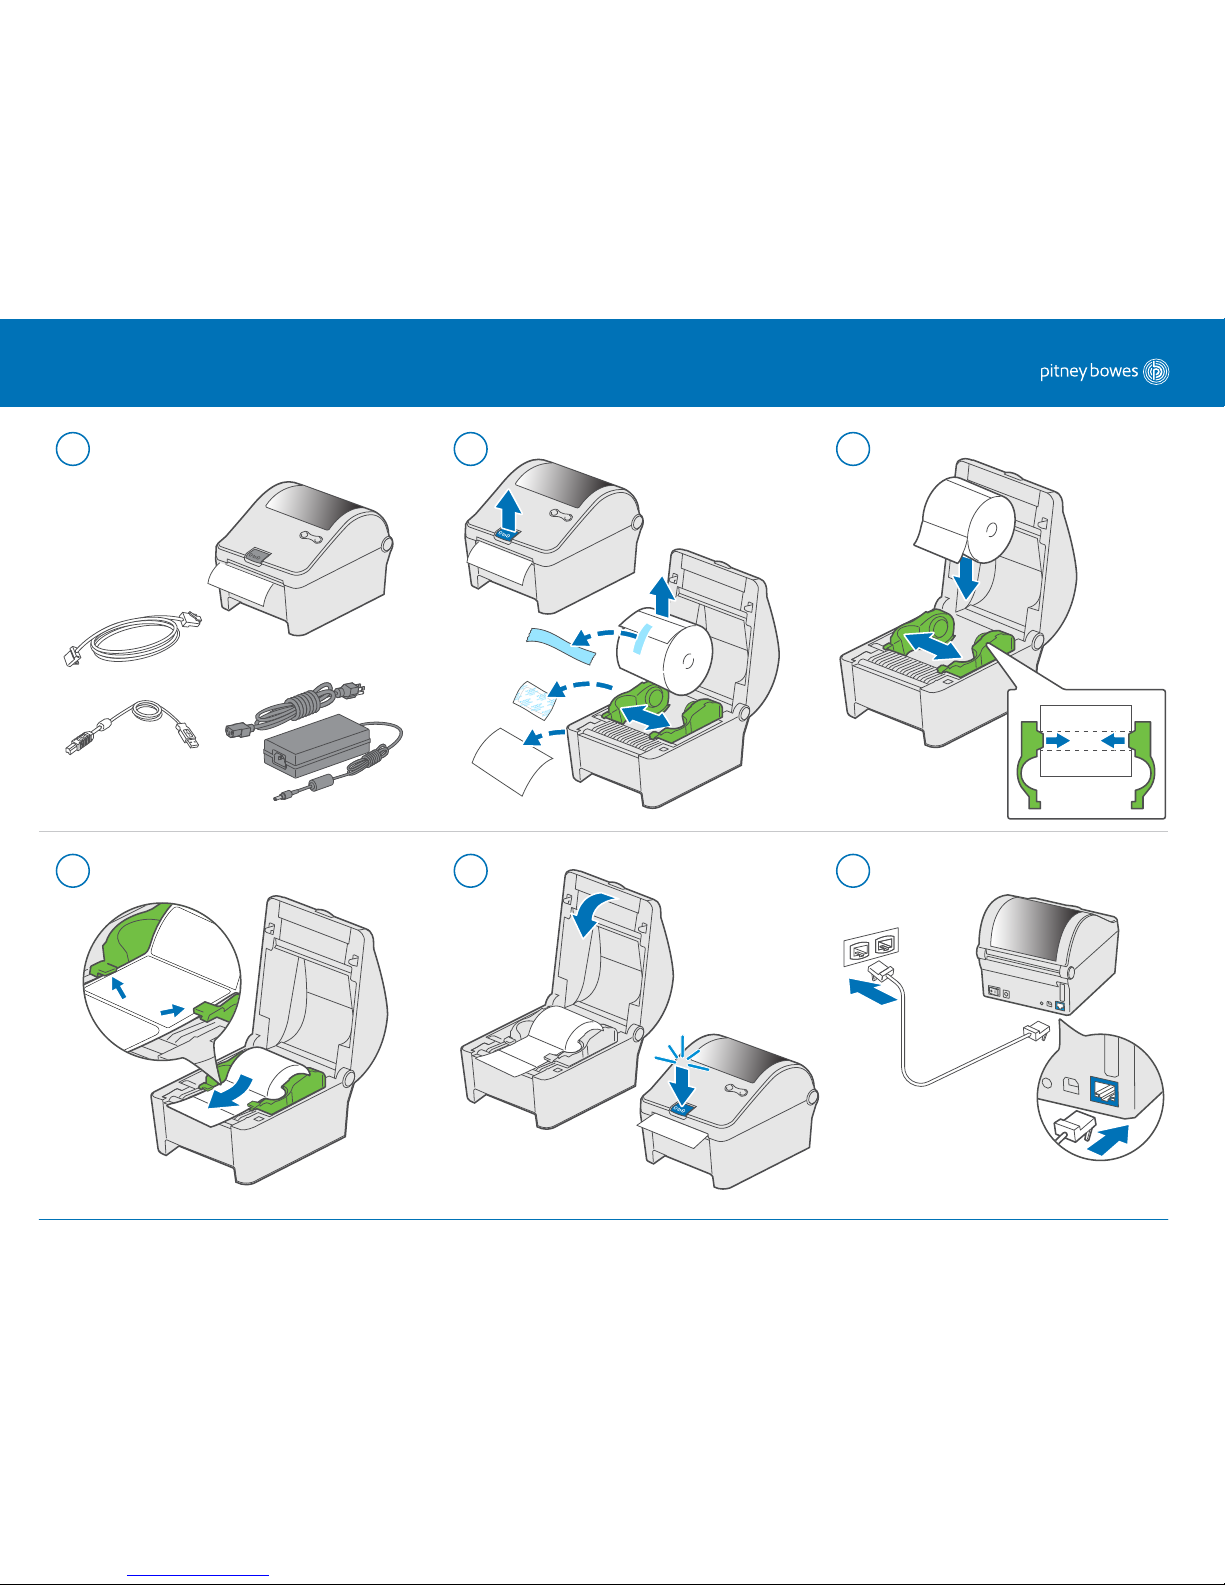
Unpack Items
USB cable is
not required
2
1
1
2
2
1
Page 2
7
10
8 9
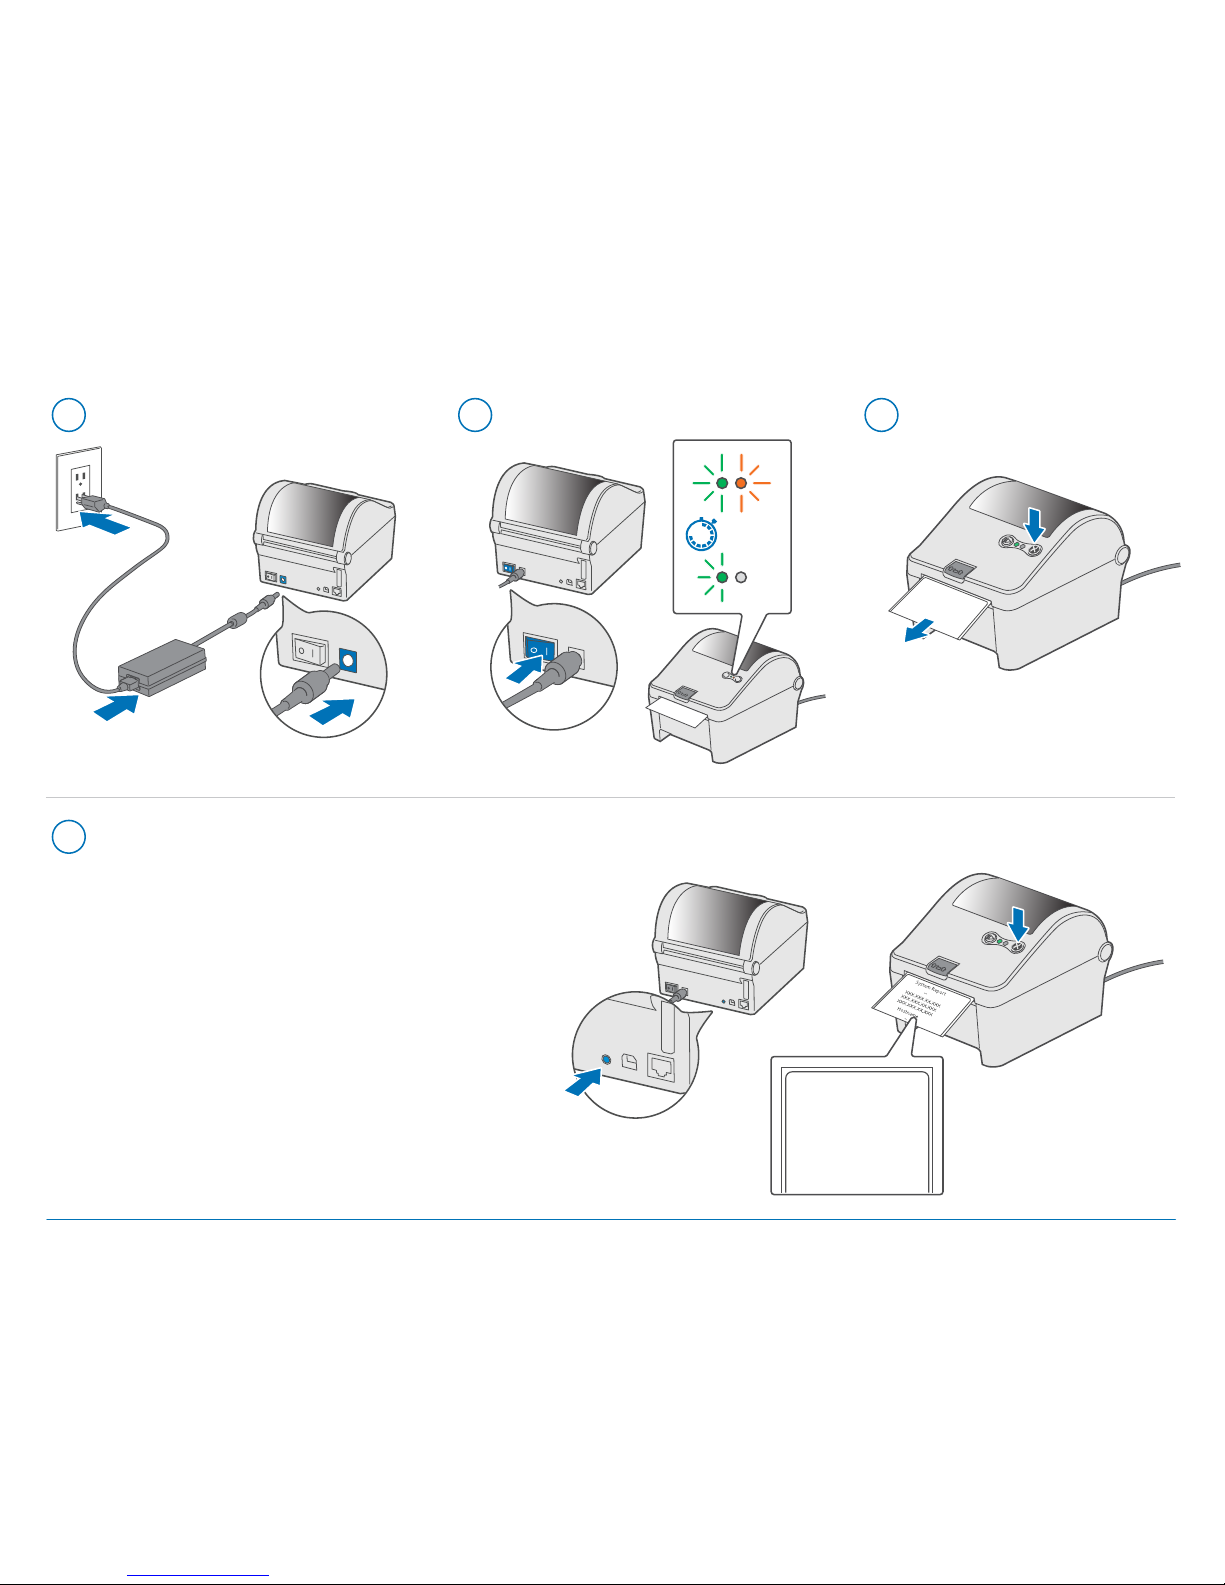
Print the System Report to obtain the IP address
assigned to the label printer.
a. To print the System Report, simultaneously press
and release the two buttons shown in illustrations.
b. Keep the printed report which will be needed later
in the installation process.
00:45
1
3
2
45
Pitney Bowes W1110 Windows Installation Instructions for LAN
2/7
System Report
...
Ethernet IP
Ethernet MAC
Ethernet DHCP
Hostname
Page 3
13
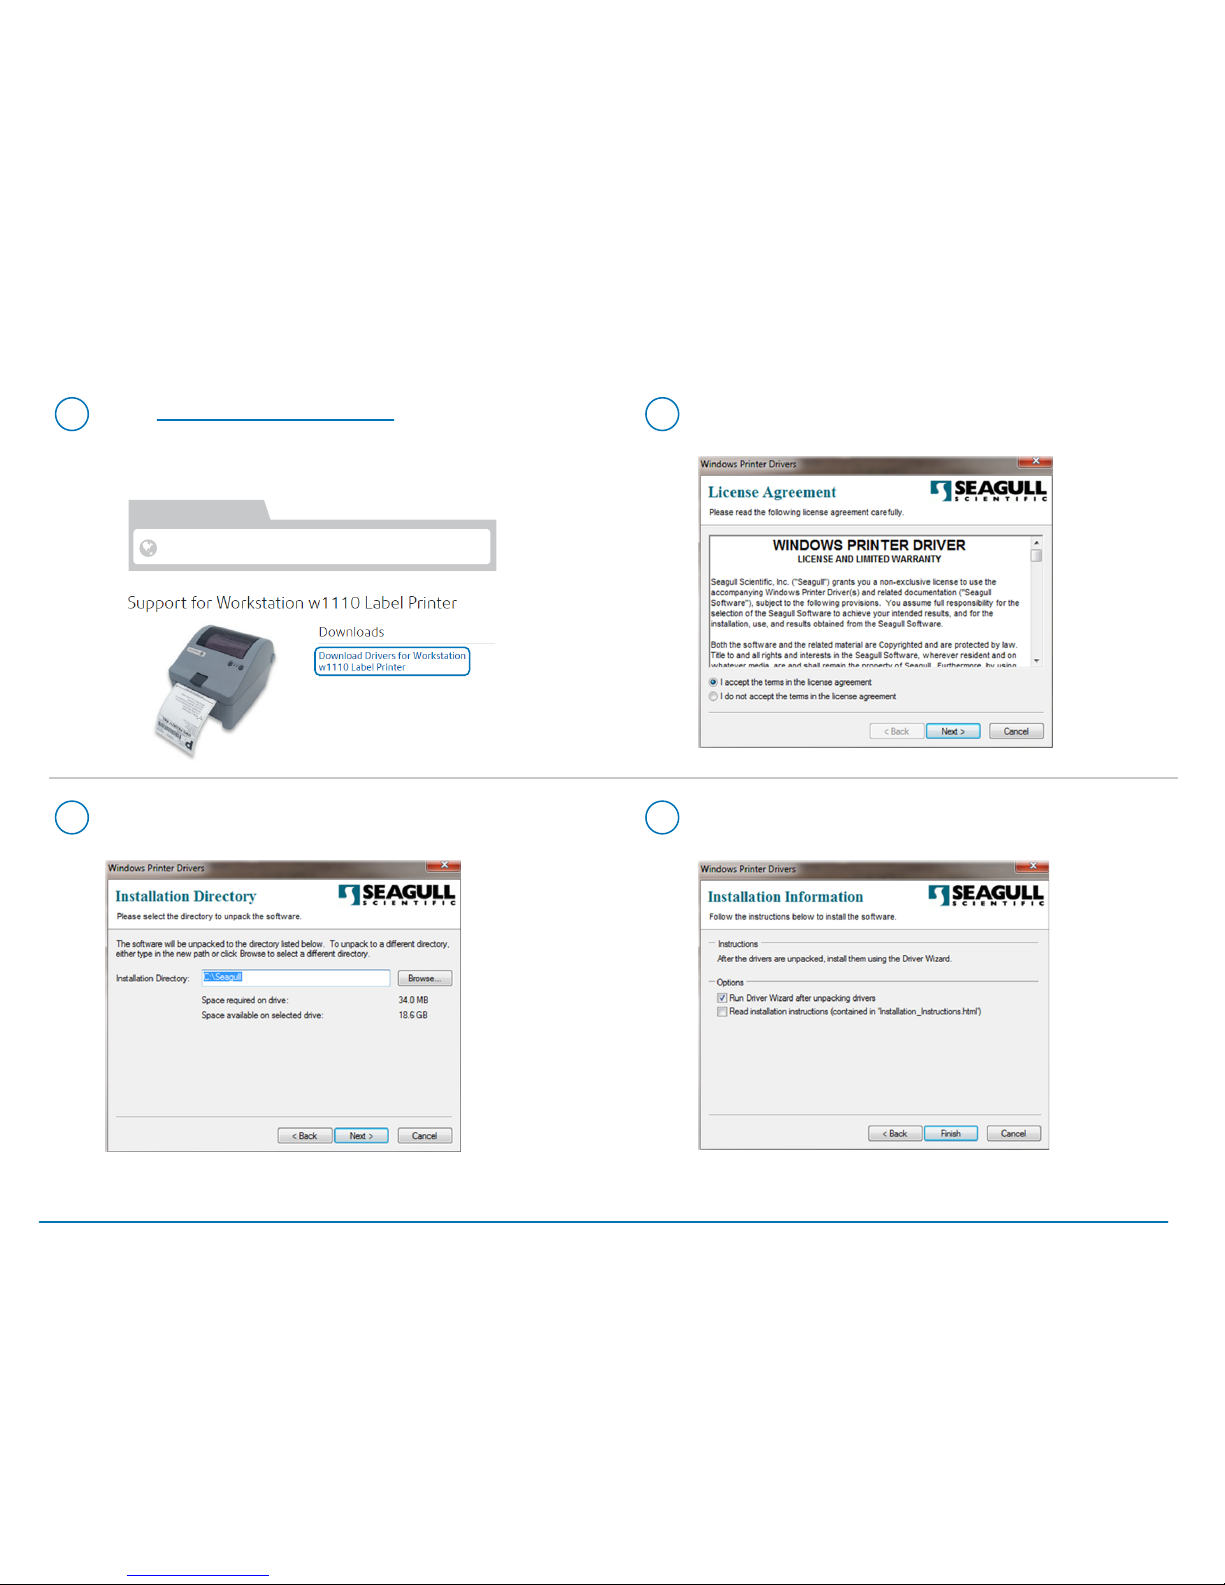
Select Next if default location for files is acceptable,
or browse and select alternate location.
14
Select Finish to run the Driver Wizard.
11
Go to support.pb.com/workstation to download the
Windows printer driver. Once downloaded, double click
on downloaded Setup.exe to run the Seagull Windows
Printer Driver for the Workstation w1110 printer.
12
Review and accept the license agreement,
and then select Next.
support.pb.com/workstation
Pitney Bowes W1110 Windows Installation Instructions for LAN
3/7
Page 4

17
Select Datamax-O’Neil w1110 printer model.
18
Select Create Port.
15
Select Next to install print driver.
16
Select Network and press Next.
Pitney Bowes W1110 Windows Installation Instructions for LAN
4/7
Page 5

21
Enter the Ethernet IP from the System Report printed
in Step 10b above and select Next.
Note: The Port Name will automatically be populated with a default value.
22
Windows Wizard will try to automatically find the device.
If not found, Select “Generic Network Card”from the
drop-down menu and select Next.
19
Select Standard TCP/IP Port and click New Port.
20
Select Next to run Printer Port Wizard.
Pitney Bowes W1110 Windows Installation Instructions for LAN 5/7
Page 6

25
The Wizard will return to the Specify Port screen.
Use the vertical scroll bar to view and confirm
the new port created is present, and then select Next.
26
Select Next to accept the default printer name.
23
Select Finish to complete the Printer Port Wizard
and return to driver installation.
Note: The Device and Port Name in the image below
will be the values from step 21 above.
24
Select Close.
Pitney Bowes W1110 Windows Installation Instructions for LAN
6/7
Page 7

AW31977- Rev B, March 2016
27
Select Finish to complete the Wizard and
begin using your printer.
Need Additional Assistance?
Visit support.pb.com/Workstation
Pitney Bowes W1110 Windows Installation Instructions for LAN
7/7
 Loading...