

Page 1
Integra™ Platform Scale 9K0U
Operator Guide
US English Version
Page 2

FCC Notice
This equipment has been tested and found to comply with the limits for a Class A
digital device, pursuant to Part 15 of the FCC rules. These limits are designed to
provide reasonable protection against harmful interference when the equipment
is operated in a commercial environment. This equipment generates, uses, and
can radiate radio frequency and energy and, if not installed and used in accordance with the instruction manual, may cause harmful interference to radio communications. Operation of this equipment in a residential area is likely to cause
harmful interference in which case the user will be required to correct the interference at their own expense.
CAUTION: Changes or modifications to this equipment not expressly approved
by the party responsible for compliance could void the user’s authority to operate
the equipment.
Shielded I/O cables must be used with this equipment to ensure compliance with
the limits. Use of unshielded cables is prohibited.
Integra
™
Platform Scale 9K0U
Operator Guide
SV61955 Rev. A
March 2007
©2007 Pitney Bowes Inc.
All rights reserved. This book may not be reproduced in whole or in part in any
fashion or stored in a retrieval system of any type or transmitted by any means,
electronically or mechanically, without the express, written permission of Pitney
Bowes.
We have made every reasonable effort to ensure the accuracy and usefulness of
this manual; however, we cannot assume responsibility for errors or omissions or
liability for the misuse or misapplication of our products.
Due to our continuing program of product improvement, equipment and material
specifications as well as performance, features are subject to change without notice.
Page 3

Contents
1 — INTRODUCTION
About the Integra
Sleep Mode ........................................................................... 1-2
Safety Precautions ......................................................................1-2
Scale & Keypad Identification ......................................................1-3
Making Connections ....................................................................1-4
Specifications ..............................................................................1-5
How to Use This Guide ................................................................1-6
Getting Help.................................................................................1-7
2 — GETTING ACQUAINTED
Navigating the Menus ..................................................................2-2
Entering Alphabetic Information...................................................2-2
Tailoring Setup Options ...............................................................2-3
Changing User Options ......................................................... 2-3
Entering the Supervisor Password ..............................................2-4
™
Model 9K0U Scale ........................................1-2
C
3— USING THE Integra
Calculating USPS
®
™
MODEL 9K0U SCALE
Postage ........................................................3-2
Examples ............................................................................... 3-2
First Class ....................................................................... 3-2
Entering ZIP/Zone Codes ............................................... 3-4
International .................................................................... 3-5
Charging Postage to a Specific Account in the Meter .................3-5
SV61955 Rev. A Integra™ Platform Scale 9K0U Operator Guide
i
Page 4

Contents
4 — BEYOND THE BASICS
Using Special Features ...............................................................4-2
Converting to Metric Weight .................................................. 4-2
Recalling a Fee ...................................................................... 4-2
Entering Weight Manually ..................................................... 4-2
Generating Multiple Tapes ..................................................... 4-3
Using the Scale to Count Like Parts ...................................... 4-3
Shopping for the Best USPS
Using the Weight Hold Feature ...................................................4-6
Additional Meter Features ...........................................................4-7
Funds ..................................................................................... 4-7
Account Status ...................................................................... 4-8
Printing Amounts That Exceed the Meter’s Printing Capacity .....4-8
5 — TROUBLESHOOTING
®
Rates ...........................................4-4
Clearing Error Messages .............................................................5-2
Diagnosing Problems ..................................................................5-2
6 — MAINTAINING THE Integra
™
MODEL 9K0U SCALE
Cleaning .....................................................................................6-2
Changing the Rate Card ..............................................................6-2
Calibrating the 9K0U Scale .........................................................6-3
APPENDIX A — DIMENSIONAL WEIGHT PRICING
Rectangular Shaped ................................................................... A-2
Dimensional Weight Pricing Criteria ......................................A-2
Determining Dimensional Weight Pricing .............................. A-2
Irregularly Shaped ...................................................................... A-3
Dimensional Weight Pricing Criteria ......................................A-3
Determining Dimensional Weight Pricing .............................. A-4
INDEX
ii
Integra™ Platform Scale 9K0U Operator Guide SV61955 Rev. A
Page 5

Integra™ Model 9K0U Scale Operator Guide
Chapter 1
Introduction
About The Integra™ Model 9K0U Scale .....................1-2
Sleep Mode ..........................................................1-2
Safety Precautions ....................................................1-2
Scale & Keypad Identification ....................................1-3
Making Connections ..................................................1-4
Specifications ............................................................1-5
How to Use This Guide ..............................................1-6
Getting Help...............................................................1-7
SV61955 Rev. A Integra™ Platform Scale 9K0U Operator Guide
Page 6

Chapter 1: Introduction
About The
™
Integra
Model
9K0U Scale
Sleep Mode
Safety Precautions
This user guide covers the operation of the 9K0U scale designed with a separate weighing platform and display unit.
The scale determines the weight of a mailpiece placed on the
platter or platform and calculate rates and fees based on selections made from the keypad. The scale can also interface
with and display a variety of information about Pitney Bowes
electronic postage meters.
The scale enters sleep mode if it remains inactive at zero
weight for more than five minutes. In this state, the display appears blank. Touch the weight platter/platform to activate the
display.
Follow the normal safety precautions for all office equipment
when using this scale.
• Use only the AC adaptor/power supply included with the
scale.
• To protect against electric shock, plug the AC adaptor into
a properly grounded wall outlet only.
• The wall outlet should be near the scale and easily accessible.
• Avoid using wall outlets controlled by wall switches or
shared with other equipment.
• Do not route the AC adaptor cable over sharp edges or
trap it between furniture.
• Do not disassemble the scale; if it has been dropped or
has otherwise had the enclosure stressed in any way, call
Pitney Bowes at 1-800-522-0020.
• Do not place lighted candles, cigarettes, cigars, etc., on the
scale.
• Use the equipment only for its intended purpose.
1-2
Integra™ Platform Scale 9K0U Operator Guide SV61955 Rev. A
Page 7
Integra™ Model 9K0U Scale Operator Guide
Integra™ Scales User Guide
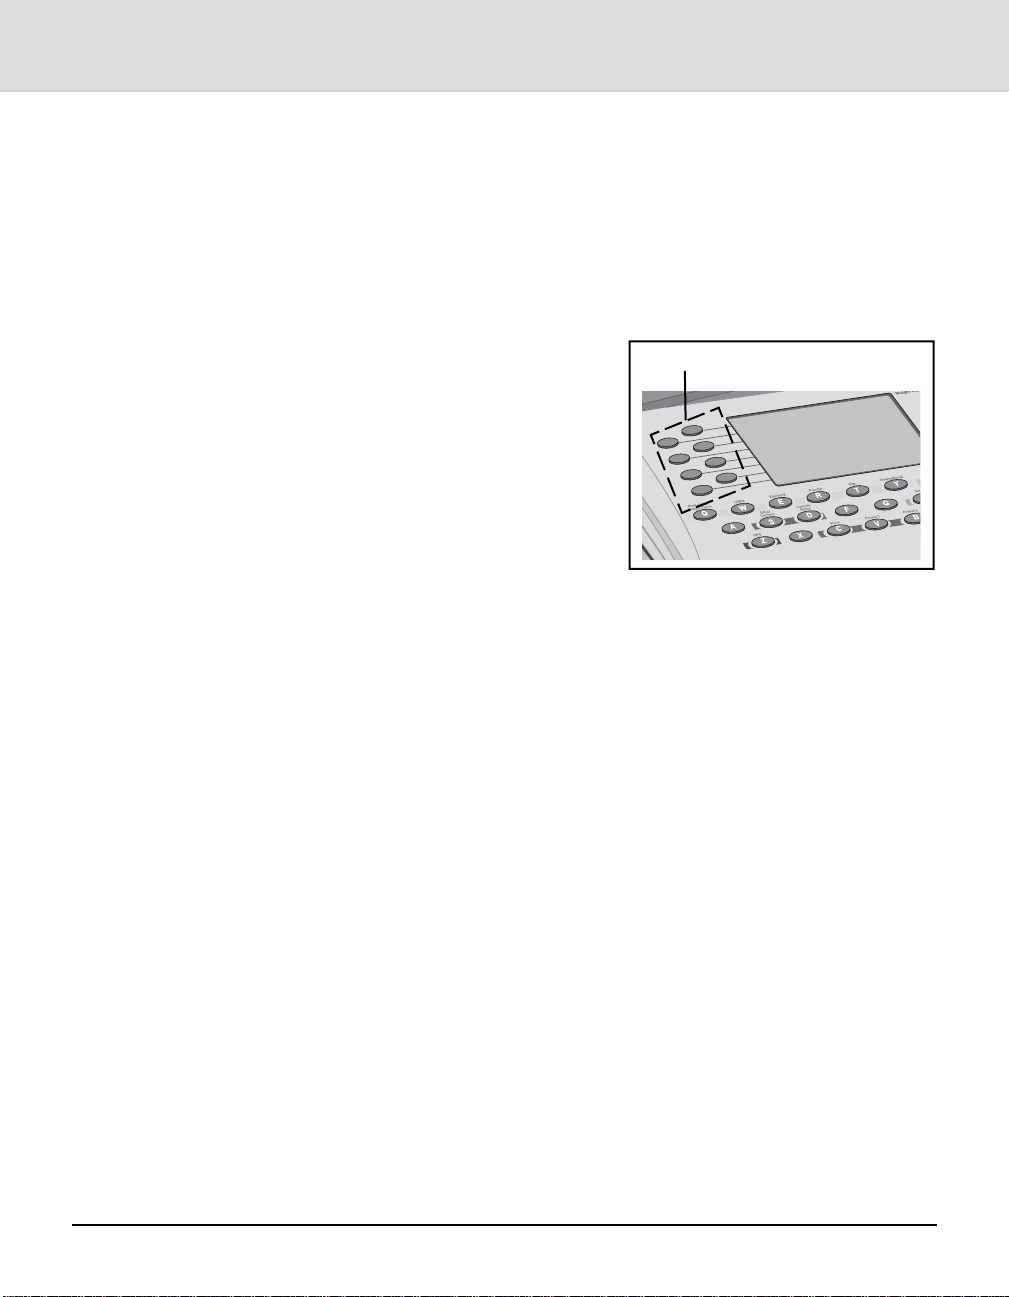
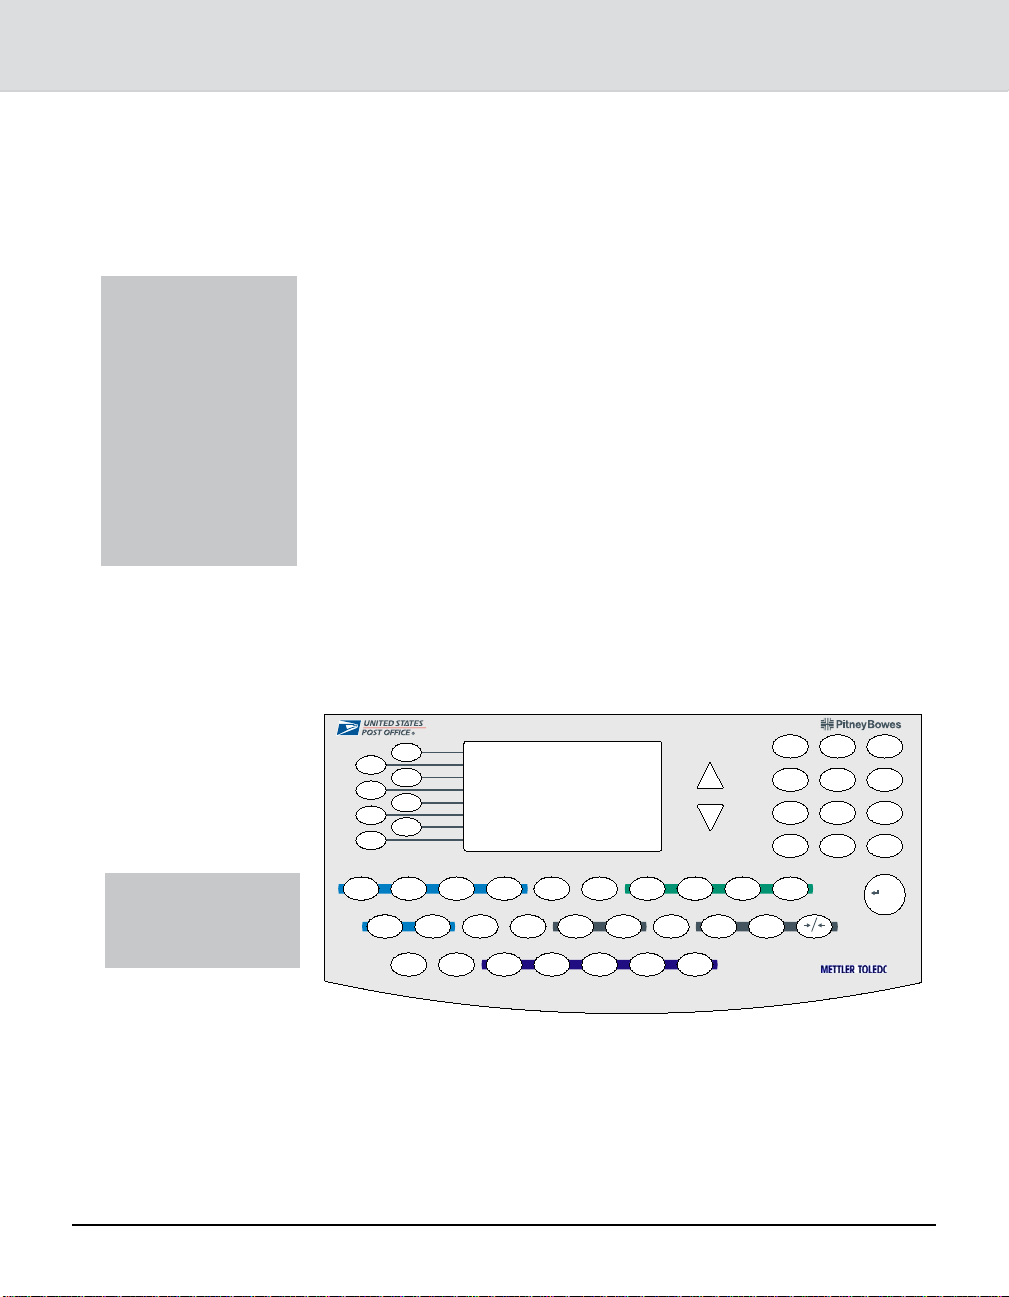
Scale & Keypad Identification
Scale Platform
Display
Menu Selection
Keys (Softkeys)
See the callouts on the Keyboard Display Module for keypad
explanation of all functions.
1
Rate Card
(under cover)
Scroll
Keys
Numeric
Keys
CE/C
Enter
Zero
Keyboard
Display
Module
SV61955 Rev. A Integra™ Platform Scale 9K0U Operator Guide
1-3
Alpha, Class, Special
Services, Scale & Meter
Control Keys
Page 8
Chapter 1: Introduction
Making Connections
1
2
Disconnect power at wall outlet before
inserting or removing rate card.
3
Connect power cord to
Keyboard Display Module.
5
Connect platform cord to
Keyboard Display Module.
4
Connect meter cord to Keyboard
Display Module using the indicated
port.*
6
1-4
Connect meter cable to meter.*
Integra™ Platform Scale 9K0U Operator Guide SV61955 Rev. A
Plug power cord into wall outlet.
*Optional
Page 9
Integra™ Model 9K0U Scale Operator Guide
Integra™ Scales User Guide
Specifications
Item Category Specifications
Power Supply Input 120 VAC, 60 + Hz
Output 9 VDC, 500 MA
Operating Temperature Range +10 C to +40 C
Weighing Specifications Max Weight Displayed 70 Pounds
0-7 lb x 0.05 oz
Increment
Compliance UL, FCC
Weights & Measures Meets or exceeds accuracy requirements of the National
Institute of Standards and Technology.
7-70 lb x 0.2 oz
1
SV61955 Rev. A Integra™ Platform Scale 9K0U Operator Guide
1-5
Page 10
Chapter 1: Introduction
How to Use This Guide
To help you follow the instructions in this book we have used a
number of writing conventions. They deal with how text is presented to guide you through the information and procedures.
• The word Press refers to the pressing of any character key.
For example, you might be instructed to press the Setup
(H) key or Rate Shop (K) key.
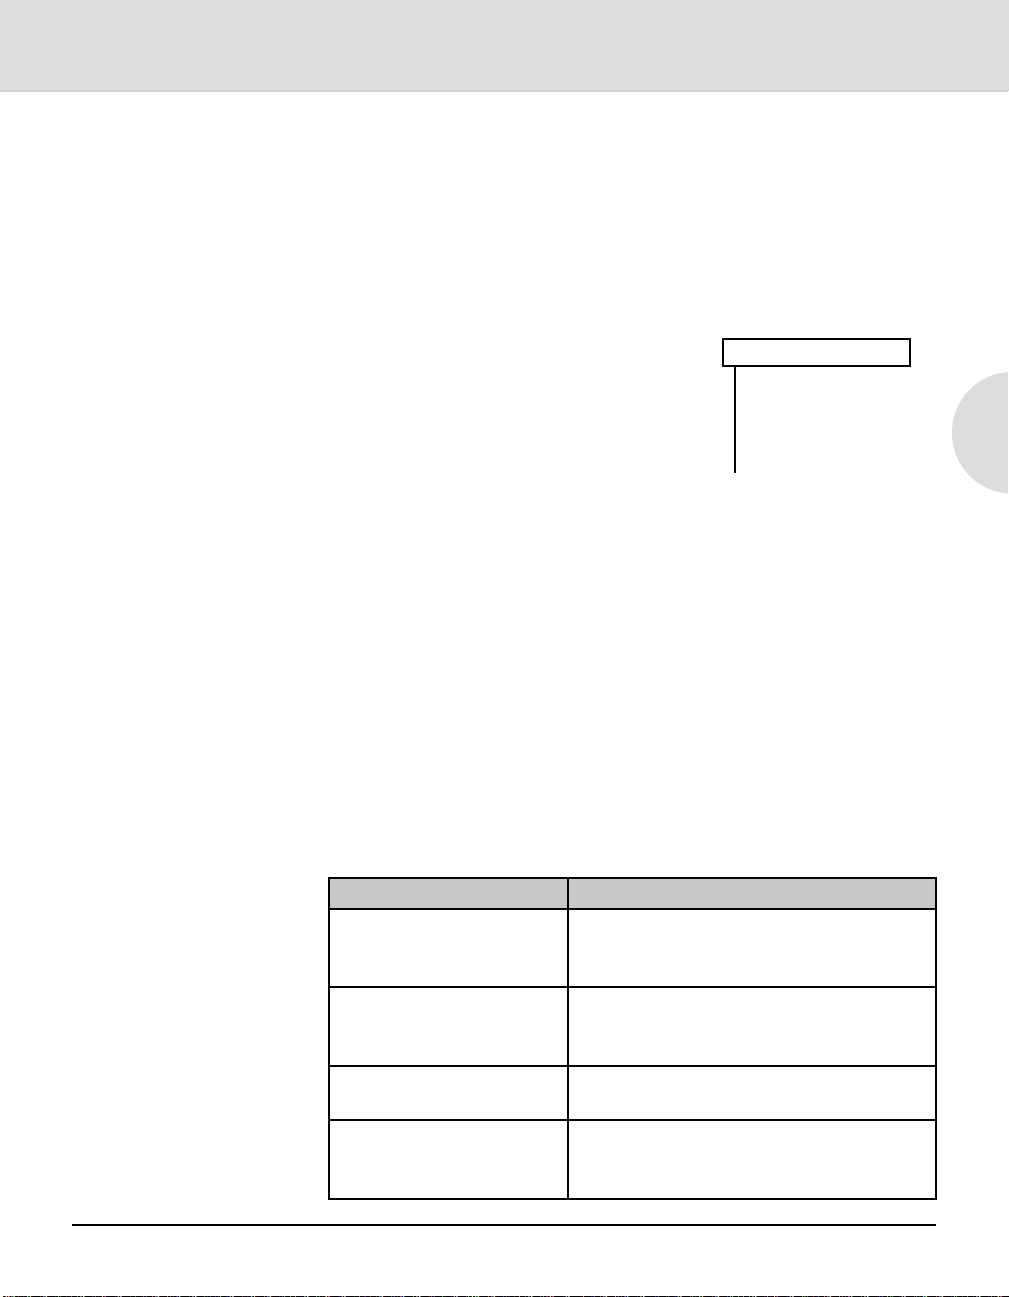
• The word Select refers
to the selecting of menu
Softkeys
items via the softkeys at
the left of the display (see
the drawing at right). For
example, you might be
instructed to select a class
from the menu list.
• Words in bold text after the
words Press or Select are
names of character keys or menu items.
• Notes consist of information that is useful but not critical to
operating the scale.
• Tips are presented between horizontal lines. They suggest
shortcuts or information safeguards.
1-6
Integra™ Platform Scale 9K0U Operator Guide SV61955 Rev. A
Page 11

Integra™ Model 9K0U Scale Operator Guide
Integra™ Scales User Guide
Getting Help
By Phone
On the
Internet
Direct questions and requests for service
to the Pitney Bowes Diagnostic Center at
1-800-522-0020.
Please be near your scale when you
call.
Representatives are available
Monday - Friday, 8:00 a.m. to 8:00 p.m.
Eastern time.
Visit our website for the latest updates
and frequently asked questions about
Integra
1. Go to http://support.pb.com
2. Click the Scales link.
3. Click Integra Series Mailing and
4. Click 9K0U.
™
scales:
Shipping Scales.
1
SV61955 Rev. A Integra™ Platform Scale 9K0U Operator Guide
1-7
Page 12

This Page Intentionally Blank
Page 13

Integra™ Model 9K0U Scale Operator Guide
Chapter 2
Getting Acquainted
Navigating the Menus ................................................2-2
Entering Alphabetic Information.................................2-2
Tailoring Setup Options .............................................2-3
Changing User Options ........................................2-3
Entering the Supervisor Password ............................2-4
SV61955 Rev. A Integra™ Platform Scale 9K0U Operator Guide
Page 14
Chapter 2: Getting Acquainted
Navigating the Menus
Note: Pressing the
CE/C key once,
while in a transaction, reverts to the
previous screen.
The second press of
CE/C clears the
transaction and
returns you to the
ready mode.
Entering Alphabetic Information
Note: England is
listed under U for
United Kingdom.
The scale’s easy-to-follow menu system guides you through
each transaction and applies the information and features you
select. Arrows appearing on the right-hand side of the screen
indicate the presence of more choices. Press the up ▲or down
▼scroll keys at the right of the display to view next or previous
choices.
When you select an item from the menu, the display registers
your selection and advances to the next menu screen if appropriate.
Use the alpha keys located across the bottom of the keypad to
enter information such as names of countries or passwords.
#APACITYLBXOZ
LBXOZ
7EIGHT#LASSIFIERFOR0OSTAL5SE
QWE R T Y U I OP
)NTERNATIONAL0OSTCARD
AS
ZX
%XPRESS
D
FGHJ
C
VBN
&ORQUESTIONSANDREQUESTSFORSERVICECALL
-ETER
2ATE
3HOP
KL
0RESET0RESET0RESET0RESET3TORE
M
12
45
78
CE/C
-ETER3ET4APE!CCOUNT&UNCTIONS0RIORITY 0ARCEL0OST&IRST#LASS
3CALE
:ERO3CALE&UNCTIONS3ETUP7EIGHT(OLD
SPACE
0
0
%NTER
Manufactured by
for Pitney Bowes
3
6
9
.
/+
2-2
For example, when sending mail to Spain, at the Enter Coun-
try prompt: Press the S key.
The scale displays the countries that begin with the letter S.
You may then either:
• Enter the second letter of the country name to narrow the
choices,
Integra™ Platform Scale 9K0U Operator Guide SV61955 Rev. A
Page 15
Integra™ Model 9K0U Scale Operator Guide
Entering
Alphabetic
Information
Tailoring Setup Options
Changing User Options
• Press the selection key adjacent to the country you want,
or
• Press the down arrow scroll key to see the entire list of
countries beginning with the letter S.
After installing your scale and becoming familiar with the location of the keys,
press the Setup key and review the list
of User Setup options. A diagram of the
setup menu is shown at right.
User Setup
-Exit
-On Autoclear Class
-On Clear Zone New Class
-Off Auto Weigh Hold
-Supervisor Setup
-Service Setup*
1. Press the Setup key.
2. Press the menu selection key next to the option you want
to change. The screen indicates your change.
3. Select Exit to leave this menu.
4. Select Save or Cancel to save or cancel your changes.
After exiting setup mode, the scale resets and returns to ready
mode.
2
Certain user options can be turned on or off. They concern
information you can retain from mailpiece to mailpiece and are
explained in the chart below.
Some options are password-protected for supervisory control.
Option Function
When on, class information clears
Autoclear Class
Autoclear Zone
(Displays only when
Autoclear Class is off)
Clear Zone New Class
Auto Weight Hold
2-3
SV61955 Rev. A Integra™ Platform Scale 9K0U Operator Guide
when the item is removed from the
scale
When on, zone information clears when
the item is removed from the scale
When on, the zone clears when a new
class is selected
When on, retains the weight of an item
for a brief time after the item is removed from the scale
Page 16
Chapter 2: Getting Acquainted
Entering the Supervisor Password
User Setup
-Exit
-On Autoclear Class
-On Clear Zone New Class
-Off Auto Weigh Hold
-Supervisor Setup
-Service Setup*
* Accessible by SERREP
password (not recommended).
You can access these options by pressing the Setup key and
selecting Supervisor Setup. Refer to the chart below, which
includes the options under Supervisor Setup.
Follow the steps below to access supervisor setup options:
1. Press the Setup key.
2. Select Supervisor Setup. The Enter Password prompt
displays.
3. Enter the supervisor password — M G R — on the alpha
keys; press Enter. The options Exit, Configure Scale, and
BMC Intra ZIP display. See the chart on the next page for
definitions of these functions. Pressing Exit returns you to
the User Setup screen.
4. Select the desired options and respond to the prompts.
5. When finished, select Exit until you exit the setup menus.
6. Select Save or Cancel to save or cancel your changes.
The scale resets and returns to the ready screen.
Supervisor Setup
-Exit
-Configure Scale
-BMC Intra ZIP
-Program Rate Shop
-Discount/Surcharge
-Program Carrier
Configure Scale
-Exit
-Install Scale
-Off Other Language
-Off Inscription
-Off Accounting
-Off Vibration Filter
-Off Discount/Surcharge
-Off Rate Shopping
2-4
Shaded options appear only if
turned ON under Configure Scale.
Integra™ Platform Scale 9K0U Operator Guide SV61955 Rev. A
Page 17

Integra™ Model 9K0U Scale Operator Guide
Note: Pressing Exit
while in a supervisor option returns
you to the previous
screen.
Supervisor Setup
Option Description
Configure Scale
Install Scale Used to enter the scale’s origin ZIP code
during the installation process
Other Language When ON, prompts display in Spanish
Inscriptions When ON, allows the user to choose an
inscription from those installed in a con-
nected meter
Accounting When ON, communicates with optional
connected mail data system about account
data. When OFF, communicates with op-
tional connected meter about account data.
Vibration Filter Use only in areas of excessive vibration to
aid the display of stable weights
Discount/Surcharge When ON, allows the user to adjust carrier
rates higher or lower than normal
BMC Intra ZIP
Create Intra ZIP Used to enter ranges of ZIP code locations
within a bulk mailing center
2
2-5
SV61955 Rev. A Integra™ Platform Scale 9K0U Operator Guide
Page 18

This Page Intentionally Blank
Page 19

Integra™ Model 9K0U Scale Operator Guide
Chapter 3
Using The Integra
Calculating USPS® Postage ......................................3-2
Examples ..............................................................3-2
First Class ......................................................3-2
Entering ZIP/Zone Codes ..............................3-4
International ...................................................3-5
Charging Postage to a Specific Account
in the Meter................................................................3-5
™
Model 9K0U Scale
SV61955 Rev. A Integra™ Platform Scale 9K0U Operator Guide
Page 20

Chapter 3: Using the Integra™ Model 9K0U Scale
Calculating
USPS
Note: If your scale
is connected to a
meter, the active
meter account appears at the bottom
of the screen. See
Applying Postage
to a Specific Account in this chap-
ter.
Examples
®
Postage
The following assumes you have completed the installation instructions included with your scale.
If not, please do so now.
When the scale is ready to weigh a
mailpiece, the display appears as
shown at right.
Refer to the examples below for
processing different classes of
mail.
First Class
With an item on the scale:
1. Select First Class, then select
Letter, Large Envelope, or
Package. The postage amount
displays and the fees menu
0 lb 0.0 oz >0<
Select Class
-First Class
-Priority
-Parcel Post
-Express
-Postcard
-International
0 lb 1.85 oz >0<
Select Class
-First Class
-Priority
-Parcel Post
-Express
-International
appears. Notice that the “Postcard” class disappeared as it is
not a valid class for this weight.
3-2
Note:
• If “First Class” is selected and the weight is over 3.5
oz, you will be prompted to enter whether the item is a
“Large Envelope: or a “Package:. Refer to the description chart on the next page.
• The First Class Mail - Single Piece Rates chart (pg.
3-3) is also on the back of the Quick Reference Guide
for easy reference.
• If “Priority” is selected, you will be prompted for “Flat
Rate Env”, “Flat Rate Box” or “Package”
• If “Package” is selected, you will then be prompted to
enter the destination ZIP code and then the dimensions. Refer to the description chart on the next page
for determining dimensions.
Integra™ Platform Scale 9K0U Operator Guide SV61955 Rev. A
Page 21

Integra™ Model 9K0U Scale Operator Guide
Single Piece Rates chart
3
SV61955 Rev. A Integra™ Platform Scale 9K0U Operator Guide
3-3
Page 22

Chapter 3: Using the Integra™ Model 9K0U Scale
Calculating
®
USPS
Examples
Note: When you
select a listed fee,
the dash alongside it changes
to a check mark
and your selection
appears above the
remaining unselected fees. Cancel
a checked fee by
pressing the fee
key a second time.
Note: To change an
incorrectly entered
ZIP Code or zone,
press CE/C once
to clear the number
field. Then enter the
new number and
proceed as usual.
Postage
2. If dimensional weight has been used for calculating the postage amount, a DW (
D
) will be displayed on the screen.
W
(Refer to Appendix A: Dimensional Weight Pricing in this
guide for more information.)
3. Either select a fee or ignore these choices. If you select a
fee, its cost is added to the postage amount and the new
total displays.
4. Press the Meter Set key to transfer postage to the meter,
OR
press the Tape key to generate a meter tape. To generate
more than one tape with the same postage amount, see
Generating Multiple Tapes in Chapter 4.
Entering ZIP/Zone Codes
When parcel post or priority mail is selected, the Select ZIP/
Select Zone prompt displays. Choose one option.
For ZIP: Enter the first five digits of the destination ZIP Code;
press Enter.
For Zone: If you know the destination zone, enter the zone
number and press Enter. You may be prompted to enter the
package size (Length, Width, Height) in inches. Once entered,
the software will determine if the rate is based on the dimensional weight (
displayed next to the weight. (Refer to Appendix A: Dimensional
Weight Pricing in this guide for more information.)
The ZIP Code or zone number, postage amount, and options
for more services display.
D
) or not. If it is, you will see the
W
D
symbol
W
3-4
Integra™ Platform Scale 9K0U Operator Guide SV61955 Rev. A
Page 23

Integra™ Model 9K0U Scale Operator Guide
Calculating
®
USPS
Postage
Examples
Charging Postage to a Specific Account in the Meter
(Not all meters support
this feature.)
International
To send an international letter by air:
With the scale in ready mode and weight on the scale,
1. Press the International key.
2. Select First Class.
3. The words Enter Country: appear on the display.
4. See Entering Alphabetic Information, page 2-2, to enter
the name of the country. A list of countries starting with the
letter you entered appears. (Enter the second letter of the
country in the same way to reduce the number of choices
that appear.)
Tip: You may select First Class (Q), Priority (W), Parcel Post
(E), Express (R), Postcard (A), and International (S) with their
own keys.
3
The Account feature allows you to charge postage to the accounts in your meter. Whenever you charge postage to an
account, the postage and piece information are updated in Account Status, which is accessed by pressing the Meter Functions key.
Tip: To access meter accounts, you must turn Accounting OFF
in Supervisor Setup/Configure Scale.
Follow the steps below to charge postage to a meter account
via the scale. Be sure your meter is on and connected to the
scale.
1. Press the Account key.
If the meter contains 10 accounts or less, the account
numbers display in list form. You may need to scroll to see
the entire list. Go to Step 2.
If the meter contains more than 10 accounts, the dis-
play prompts you to enter an account number. Go to Step
3.
2. Select the menu number of the account you want. The
number you select appears at the bottom of the display.*
SV61955 Rev. A Integra™ Platform Scale 9K0U Operator Guide
3-5
Page 24

Chapter 3: Using the Integra™ Model 9K0U Scale
Charging
Postage to a
Specific Account
in the Meter
(Not all meters support
this feature.)
3. Enter an account number.*
4. Place an item on the scale and select a class, etc., as usual.
5. Press Meter Set to transfer postage to the meter.
OR
press the Tape key to set the meter and generate a tape.
*If the account is password-protected in the meter, the scale
prompts you to Enter Account Password. Enter the four-digit
account password and press Enter. The account number dis-
plays. If you enter the wrong password, an error message dis-
plays. To clear the message, press CE/C to return to the ready
screen.
3-6
Integra™ Platform Scale 9K0U Operator Guide SV61955 Rev. A
Page 25

Integra™ Model 9K0U Scale Operator Guide
Chapter 4
Beyond the Basics
Using Special Features .............................................4-2
Converting to Metric Weight .................................4-2
Recalling a Fee .....................................................4-2
Weight Hold ..........................................................4-2
Entering Weight Manually ....................................4-2
Generating Multiple Tapes ....................................4-3
Using the Scale to Count Like Parts .....................4-3
Shopping for the Best USPS
Using the Weight Hold Feature .................................4-6
Additional Meter Features .........................................4-7
Funds ....................................................................4-7
Account Status .....................................................4-8
Printing Amounts That Exceed the Meter’s
Printing Capacity .......................................................4-8
®
Rates .........................4-4
SV61955 Rev. A Integra™ Platform Scale 9K0U Operator Guide
Page 26

Chapter 4: Beyond the Basics
Using Special Features
Converting to Metric Weight
Recalling a Fee
The scale has a number of
special features that help you
process mail quickly and efficiently. These features are
explained below and accessed
with the Scale Functions key or
by pressing a designated scale
control key.
With an item on the scale:
1. Select a class.
2. Add fees.
3. Press the Scale Functions key.
4. Select Metric Weight. The scale converts and displays the
weight of the item to metric (kg). The message “For Export
Forms” also displays.
5. Press CE/C once to return to scale functions.
6. Press CE/C again to return to the class display.
The Fee Recall option allows you to review the fees included
in the total postage amount. It also displays the item value for
verification.
For example, to recall insurance value with the total postage
amount displayed:
1. Press the Scale Functions key.
2. Select Fee Recall. The value of the item and the fees that
were applied to the postage amount display.
3. Select Exit to return to the transaction menu.
0 lb 0.0oz
Scale Functions
-Metric Weight
-Fee Recall
-Weight Hold
-Manual Weight Entry
-Parts Count
Weight Hold
Entering Weight Manually
4-2
Refer to the section Using the Weight Hold Feature, pg. 4-6.
This function allows you to enter the known weight of an item
without putting the item on the scale. You can then generate a
tape on the meter and apply it to the mailpiece.
Integra™ Platform Scale 9K0U Operator Guide SV61955 Rev. A
Page 27

Integra™ Model 9K0U Scale Operator Guide
Notes:
1. Scale must be
at zero weight
before selecting
Manual Weight
Entry.
2. The Manual
Weight feature
is limited to the
maximum the
scale will weigh
(as indicated by
the capacity on
the front of the
scale.)
Generating Multiple Tapes
(Not in menu list)
Follow the steps below to enter weight manually:
1. Select Manual Weight Entry.
2. When prompted, enter the weight. The numbers display
from right to left as on a calculator. For example:
• For 4 lb. 2 oz. enter 4 0 2 0; press Enter.
• For 3 lb. 2.5 oz., enter 3 0 2 5; press Enter.
The scale returns to the ready mode.
3. Select a class. The postage amount displays.
4. Add fees as necessary.
5. Transfer postage to the meter.
6. Generate a tape or print a tape strip.
7. Press the Zero key to exit manual weight mode.
With weight on the scale:
1. Select a class and apply fees if desired.
2. Type the number of tapes you want to print. Do not press
enter. If you do, the scale interprets the number you typed
as additional postage.
3. Press the Tape key. The meter sets and the mailing ma-
chine begins printing tapes.
4
Using the Scale to Count Like Parts
SV61955 Rev. A Integra™ Platform Scale 9K0U Operator Guide
4-3
With the Parts Count function, you can obtain a count of like
items based on the weight of a known quantity of those items.
The weight of the known quanity should be at least 2 ounces.
Depending on the shape and quantity of the parts you are
weighing, you may need to place them in a container. You can
deduct the weight of the container, and count and weigh the
parts at the same time. If you are not using a container, start
with Step 2 below.
1. Place an empty container on the scale. (The container
must weigh less than 7 lb. for 9K0U.)
2. Press the Scale Functions key and select Parts Count
from the menu. The scale re-zeros and prompts you to
place a counted sample on the scale.
Page 28

Chapter 4: Beyond the Basics
Note: All like Items
must be the same
individual weight.
Shopping for
the Best USPS
Rates
3. Place a known quantity
of like parts on the scale
(or in the container). The
scale prompts you to enter the number of parts in
the sample.
4. Enter the quantity via the
numeric keypad; press
Enter. The display shows
the total number of parts, their combined weight, and their
average individual weight. If you add or remove items,
parts and weight fields adjust accordingly.
To exit Parts Count, remove parts from scale and press
CE/C. If you used a container, remove it from the scale and
press the Zero key.
The Rate Shop function (K-key) allows you to compare
®
USPS
®
to ship an international package by air you could compare
prices without repeatedly entering the same information.
To use Rate Shopping, first make sure it’s turned on (under
Supervisor Setup Options) and then create a group consisting
of class/rate combinations you want to compare. You may create up to five groups.
To create a group, remove weight from the platter and follow the steps below:
1. Press Setup; select Supervisor Setup.
2. Enter the supervisor password; press Enter.
3. Select Program Rate Shop; select Create Group.
4. Enter a group name up to 10 characters; press Enter.
5. Select Edit Group Members;
6. Select Create Group Member.
rate and class combinations. For example, if you want
4-4
Integra™ Platform Scale 9K0U Operator Guide SV61955 Rev. A
Page 29

Integra™ Model 9K0U Scale Operator Guide
Shopping for
the Best USPS
Rates
7. Select a class and other shipping criteria as they appear.
®
The screen displays the selections you made.
8. Select Exit; select Create Group Member to add another
carrier to the group.
10. Repeat step 9 to create up to five members per group.
11. When finished, continue pressing Exit until Save Changes
displays.
12. Select Save Changes or Cancel all changes. If you can-
cel all changes, the group(s) you created will not be saved.
Tip: Record each group name and members on paper as a
reminder of what the combinations are.
To compare rates, place an item on the scale and follow
the steps below:
1. Choose a rate as you would normally. Just make sure that
the rate combination you choose is a member of a rate
shopping group. (Adding fees of any kind prevents use of
Rate Shopping.) The screen displays the postage amount.
2. Press the Rate Shop (K) key. The rates for the other group
members display next to the member names.
3. Select one of the other rates OR press CE/C to use the
original rate.
4
To delete a group:
1. Press Setup; select Supervisor Setup.
2. Enter the supervisor password; press Enter.
3. Select Program Rate Shop.
4. Select the group name you want to delete.
5. Select Delete Group.
SV61955 Rev. A Integra™ Platform Scale 9K0U Operator Guide
4-5
Page 30

Chapter 4: Beyond the Basics
Using the Weight Hold Feature
The weight hold feature is useful when weighing large envelopes that block the display, if the keyboard-display module
is located near the platform and being blocked. This feature
retains the weight reading for a brief time after you remove
an item from the scale. It allows you to continue selecting
class and fees even though the item is no longer on the scale.
Pressing any key (for example, to select a class or fee) other
than zero extends the weight hold time for that transaction.
You may activate weight hold mode in two ways: manually
with the Scale Functions key or automatically through setup.
To use the manual weight hold feature (for one transaction):
1. Use one of the following methods (with no weight on the
scale):
Method Result
Press the Weight Hold key (G).
Press the Scale Functions key
and select Weight Hold from
the list of features.
W
displays to the right of the
H
weight field.
Same.
4-6
2. Place a mailpiece on the scale and wait two seconds to
make sure the weight registers before removing it.
Result: The weight reading is retained for a brief period.
3. Select the class and any desired fees. (Any key press
other than zero extends the weight hold time for that transaction.)
4. When finished with your selections, transfer postage to the
meter in the usual way.
To exit manual weight hold, wait a few seconds until the hold
feature times out or press Zero or, to cancel the entire transaction, press CE/C.
Integra™ Platform Scale 9K0U Operator Guide SV61955 Rev. A
Page 31

Integra™ Model 9K0U Scale Operator Guide
Using the
Weight Hold
Feature
Additional Meter Features
Note: Your meter
must be on to access these features.
To enable automatic weight hold feature for every transac-
tion:
1. Press the Setup key.
2. Select Auto Weigh Hold to turn the feature on.
3. Select Exit.
4. Select Save changes (or to exit without saving, select
Cancel all changes).
Result: The scale reinitializes and returns to ready mode.
No indication of the weight hold feature displays. Thereafter, whenever you place an item on the scale, its weight will
be retained briefly when you remove it from the platter.
To disable weight hold, repeat the above steps, noting that selecting Auto Weigh Hold in Step 2 results in Off displaying next
to the feature.
™
The Integra
B700, B900, F800, and F900. Depending on the features
available with your meter, you can initiate and display the meter functions described below via the scale by pressing the
Meter Functions key.
scale interfaces with postage meter models
4
Funds
SV61955 Rev. A Integra™ Platform Scale 9K0U Operator Guide
4-7
Select Funds to read the amount of funds available/used and
the total number of mailpieces processed. Press CE/C to return to the Meter Functions screen.
Page 32

Chapter 4: Beyond the Basics
Additional Meter
Features
Account Status
Note: Your meter’s
operating guide
provides more
details on these
features.
Printing Amounts That Exceed the Meter’s Printing Capacity
4-8
0 lb 0.0oz
Account: 2
Value: 18.960
Pieces 15
-Clear Account
-Select Account
Select Account Status to view the status of the account to
which the meter is set. It displays the account number, the
amount of money in the account, and the number of pieces
processed against that account. See the example below.
Select Clear Account to clear value and pieces information at
the end of a reporting period.
Select Select Account to pick from available account numbers.
Press CE/C to exit Account Status.
Press CE/C again to exit meter functions.
Some meters are limited to a postage printing capacity of
$99.99. However, this doesn’t prevent you from mailing a
package whose postage exceeds the maximum printing capacity. By using the feature called Currency Breakdown, you
can generate multiple tapes to equal the needed postage
amount.
Follow the steps below to generate tapes equalling a postal amount greater than the meter’s printing capacity:
1. Be sure the scale is displaying the postage amount you
want to transfer to the meter.
2. Press the Meter Set key. The Currency Breakdown mes-
sage appears on the scale. See the sample at right.
3. Press the scale’s Tape key;
the meter produces a tape
in the print amount. (If your
meter or mailing machine
doesn’t have automatic trip
capability, press the scale’s
Meter Set key and run a tape
through the meter or manually trip the mailing machine.)
Integra™ Platform Scale 9K0U Operator Guide SV61955 Rev. A
Xlb X.Xoz $XXX.XX
Currency Breakdown
Press Meter Set/Tape
Remaining: $XXX.XX
Print Amount: $XX.XX
Page 33

Integra™ Model 9K0U Scale Operator Guide
Printing Amounts
that Exceed the
Meter’s Printing
Capacity
4. Repeat Step 3 as necessary to print the total postage
amount. When finished, the total amount of postage appears on the scale.
5. Remove the item from the scale or press CE/C twice to return to ready mode.
6. To cancel the currency breakdown feature, press CE/C
twice any time during the transaction.
4
SV61955 Rev. A Integra™ Platform Scale 9K0U Operator Guide
4-9
Page 34

This Page Intentionally Blank
Page 35

Integra™ Model 9K0U Scale Operator Guide
Chapter 5
Troubleshooting
Clearing Error Messages ...........................................5-2
Diagnosing Problems ...............................................5-2
SV61955 Rev. A Integra™ Platform Scale 9K0U Operator Guide
Page 36

Chapter 5: Troubleshooting
Clearing Error Messages
Diagnosing Problems
Occasionally, error messages display on the screen. Sometimes they identify an incorrect entry and indicate corrective
action. To clear most errors:
1. Press CE/C to return to previous menu.
2. Press CE/C a second time to return to the beginning of the
transaction.
If the error does not clear, call the Pitney Bowes Diagnostic
Center at 1-800-522-0020.
You may be able to diagnose and correct problems yourself by
referring to the symptoms vs. recommendations chart on the
next page. If performing the suggested action is not successful, call the Pitney Bowes Diagnostic Center.
5-2
Integra™ Platform Scale 9K0U Operator Guide SV61955 Rev. A
Page 37

Integra™ Model 9K0U Scale Operator Guide
Symptom Probable Cause Recommendation
1. Sleep Mode Touch the Zero, Enter, or CE/C key, or
touch the weight platter.
Blank Screen
Scale does not return to
Zero
Scale displays Zero
weight only
Scale display does not
reach weight capacity
Inconsistent weights
2. Scale power supply
unplugged
3. Rate card not firmly
in slot/inserted backwards
Interference with scale
platter
Out of calibration or mechanical interference
Platter incorrectly
seated or mechanical
interference
1. Air currents moving
across platter
2. Platter or item being
weighed touching
another object
3. Vibrations affecting
scale
Check power supply is firmly connected
at each end. Remove plug from wall
outlet, wait 10 seconds; reconnect.
Disconnect power, remove card, rub a
pencil eraser over the gold contacts to
clean them, insert card as illustrated in
Chapter 6, reconnect power.
Check the area around the scale to
ensure that nothing is touching the
scale platter by either leaning against
it or pressing up on the platter. Press
Zero key.
Check for foreign matter under scale
platter. Call the Diagnostic Center.
Ensure platter is correctly seated.
Check for foreign matter under scale
platter.
Move scale to another location.
Clear the area around the scale.
Turn on vibration filter.
5
5-3
SV61955 Rev. A Integra™ Platform Scale 9K0U Operator Guide
Page 38

This Page Intentionally Blank
Page 39

Integra™ Model 9K0U Scale Operator Guide
Chapter 6 Maintaining
™
The Integra
Cleaning ....................................................................6-2
Changing the Rate Card ...........................................6-2
Calibrating the 9K0U Scale ......................................6-3
Model 9K0U Scale
SV61955 Rev. A Integra™ Platform Scale 9K0U Operator Guide
Page 40

Chapter 6: Maintaining The Integra™ Model 9K0U Scale
Cleaning
Changing the Rate Card
Your scale requires very little maintenance. Simply keep it
clean by wiping it off with a soft dry cloth. Do not use harsh
chemical cleaners. To properly clean your scale, call the PB
Supply Line
USPS
Bowes sends you an updated rate card containing the revised
rates. Although complete installation instructions accompany
any new rate card, you may refer to the following basic steps.
To change the rate card:
1. Disconnect the power supply at the wall outlet.
2. Remove the cover from the top rear of the display module
and set aside.
™
(800-243-7824) and request cleaning kit 901-4.
®
rates change periodically. When this occurs, Pitney
6-2
3. Remove the old rate card.*
4. Slide the new card into the slot with the unlabeled side facing you. Press it firmly until it snaps into place.
5. Replace the cover on the display module.
6. Plug the power supply into the wall outlet.
*Return old rate cards to Pitney Bowes according to in-
structions received with new cards.
Integra™ Platform Scale 9K0U Operator Guide SV61955 Rev. A
Page 41

Integra™ Model 9K0U Scale Operator Guide
Calibrating the 9K0U Scale
(20 lb. Calibration
Weight Required)
NOTE: The scale must be installed according to the installation instructions accompanying the scale before performing the calibration procedure here. It is recommended
that you check accuracy of the scale every three months
with a known weight (for example, 5 lb.). The weight
displayed should be the weight applied minus the maintenance tolerance.
To check accuracy (Weight Classifier mode; default for
USPS) perform one of the following tests:
• Place a 5 lb. Test Weight on scale platter. The weight
should read 4 lb. 15.80 oz. If the weight reads less
than 4 lb. 15.6 oz. or greater than 5 lb. 0.00 oz. then the
scale is out of tolerance and must be recalibrated.
• Place a 10 lb. Test Weight on scale platter. The weight
should read 9 lb. 15.8 oz. If the weight reads less than
9 lb. 15.4 oz. or greater than 10 lb. 0.00 oz. then the
scale is out of tolerance and must be recalibrated.
• Place a 20 lb. test weight on scale platter. The weight
should read 19 lb. 15.6 oz. If the weight reads less
than 19 lb. 15.2 oz. or greater than 20 lb. 0.00 oz. then
the scale is out of tolerance and must be recalibrated.
It is recommended that calibration be performed once a
year.
Contact your local District to obtain a 20 lb. calibration weight
or contact your Pitney Bowes Customer Service Representative to have the scale calibrated.
To calibrate your scale:
1. The scale should be level and powered up a minimum of
ten (10) minutes prior to calibration.
2. Press the Setup key. The scale displays the user setup
menu.
3. Select Service Setup from the menu. At the Enter Pass-
word prompt, enter the following key sequence:
SERREP
SV61955 Rev. A Integra™ Platform Scale 9K0U Operator Guide
6-3
6
Page 42

Chapter 6: Maintaining The Integra™ Model 9K0U Scale
Calibrating the
9K0U Scale
(20 lb. Calibration
Weight Required)
4. Press Enter and the Service Setup menu appears.
5. Press the down cursor key to advance to the next page of
the Service Setup menu, and select Metrology Setup. The
Metrology Setup menu appears.
6. Select Scale Calibration and follow the prompts displayed
on the scale. When you are done, the Metrology Setup
menu reappears in the display.
7. Select Exit, Exit, Exit, then select Save Changes. The
scale resets and is now calibrated. If you place the 20
lb. weight on the scale, “19 lb. 15.8 oz.” or “20 lb. 0.0 oz”
should appear in the display.
6-4
Integra™ Platform Scale 9K0U Operator Guide SV61955 Rev. A
Page 43

Integra™ Model 9K0U Scale Operator Guide
Appendix A
Dimensional Weight Pricing
Rectangular Shaped ................................................. A-2
Dimensional Weight Pricing Criteria .................... A-2
Determining Dimensional Weight Pricing ............ A-2
Irregularly Shaped .................................................... A-3
Dimensional Weight Pricing Criteria .................... A-3
Determining Dimensional Weight Pricing ............ A-4
SV61955 Rev. A Integra™ Platform Scale 9K0U Operator Guide
Page 44

Appendix A: Dimensional Weight Pricing
Rectangular Shaped
Dimensional Weight Pricing Criteria
Determining Dimensional Weight Pricing
NOTE: Most packages will not be measured since they will
not meet the below criteria.
Here are the criteria for dimensional weight pricing:
• Priority Mail
• Measures more than one cubic foot (1,728 cubic inches)
• Item is destined for Zone 5 through 8
• Regular Shaped
To determine dimensional weight pricing:
1. Weigh the item (round any fraction of a pound to the next
whole pound).
2. Determine if measurements are required (use a measurement template if available).
3. If needed, measure the length, width, and height (round
off individual measurements to the nearest inch) and enter
measurements into the electronic scale.
Dimensional weight will be calculated by the electronic
scale or can be manually calculated in the following steps.
A-2
4. Multiply the length by the width by the height. This figure
is the cubic capacity. If the result is 1,728 cubic inches or
less, dimensional pricing does not apply. Postage will be
based on the scale weight and the appropriate zone.
5. RECTANGULAR SHAPED PACKAGE: If the result from
#4 above is more than 1,728 cubic inches, divide it by 194
to determine the dimensional weight. Round up any fraction of a pound to the next whole pound. The applicable
postage is based on the scale weight or the dimensional
weight, whichever is greater, and the appropriate zone.
Integra™ Platform Scale 9K0U Operator Guide SV61955 Rev. A
Page 45

Integra™ Model 9K0U Scale Operator Guide
Rectangular
Shaped
Irregularly Shaped
Dimensional Weight Pricing — Rectangular Shaped
Width = 20”
Height = 20-1/4”
Length = 20-3/4”
Example: 21” x 20” x 20” = 8,400 cubic inches / 194 = 43.29
pounds, which is rounded up to 44 pounds.
NOTE: Most packages will not be measured since they
will not meet the below criteria.
Dimensional Weight Pricing Criteria
SV61955 Rev. A Integra™ Platform Scale 9K0U Operator Guide
A-3
Here are the criteria for dimensional weight pricing:
• Priority Mail
• Measures more than one cubic foot (1,728 cubic inches)
• Item is destined for Zone 5 through 8
• Irregularly Shaped
A
Page 46

Appendix A: Dimensional Weight Pricing
Irregularly
Shaped
Determining Dimensional Weight Pricing
To determine dimensional weight pricing:
1. Weigh the item (round any fraction of a pound to the next
whole pound).
2. Determine if measurements are required (use a measurement template if available).
3. If needed, measure the length, width, and height (round
off individual measurements to the nearest inch) and enter
measurements into the electronic scale.
Dimensional weight will be calculated by the electronic
scale or can be manually calculated in the following steps.
4. Multiply the length by the width by the height. This figure
is the cubic capacity. If the result is 1,728 cubic inches or
less, dimensional pricing does not apply. Postage will be
based on the scale weight and the appropriate zone.
5. IRREGULARLY-SHAPED PACKAGE: If the result from
#4 is more than 1,728 cubic inches, multiply by the 0.785
adjustment factor, divide it by 194 to determine the dimensional weight. Round up any fraction of a pound to the
next whole pound. The applicable postage is based on
the scale weight or the dimensional weight, whichever is
greater, and the appropriate zone.
A-4
Dimensional Weight Pricing — Irregularly-Shaped Items
Height = 9-1/4”
Length = 29-3/4”
Width = 18-1/4”
Example: 30” x 18” x 9” = 4,860 cubic inches x 0.785
= 3,815.1 / 194 = 19.67 pounds, which is rounded up to 20
pounds.
Integra™ Platform Scale 9K0U Operator Guide SV61955 Rev. A
Page 47

Integra™ Model 9K0U Scale Operator Guide
Index
SV61955 Rev. A Integra™ Platform Scale 9K0U Operator Guide
Page 48

Index
A
account
charging postage to specific account in meter
3-5
Accounting supervisor setup option
description 2-5
Account Status feature
description 4-8
alphabetic
entering alphabetic information 2-2
Autoclear Class
description 2-3
Autoclear Zone
description 2-3
Auto Weight Hold
description 2-3
C
calculating USPS® postage
examples
entering ZIP/Zone codes 3-4
First Class 3-2
international 3-5
calibrating your scale 6-3
CE/C key
functionality 2-2
cleaning your scale 6-2
Clear Zone New Class
description 2-3
connecting your scale 1-4
Create Intra ZIP
description 2-5
D
diagnosing problems 5-3
dimensional weight pricing
irregularly shaped
criteria A-3
determining A-4
rectangular shaped
criteria A-2
determining A-2
Discount/Surcharge
description 2-5
E
error messages
clearing 5-2
F
FCC compliance
specifications 1-5
fee
recalling a fee 4-2
First Class postage
calculating 3-2
single-piece rates
illustrated chart 3-3
Funds feature
available/used 4-7
H
help
via internet 1-7
via phone 1-7
I
inactive scale
sleep mode 1-2
Inscriptions
description 2-5
Install Scale
description 2-5
international postage
calculating 3-5
irregularly shaped packages
dimensional weight pricing A-3
K
keypad
identification of components 1-3
I-2
Integra™ Platform Scale 9K0U Operator Guide SV61955 Rev. A
Page 49

Integra™ Model 9K0U Scale Operator Guide
L
like items
using scale to count like parts 4-3
limits
printing amounts that exceed meter’s capac-
ity 4-8
M
menu
navigating the menus 2-2
meter
charging postage to specific account in meter
3-5
printing amounts that exceed meter’s capac-
ity 4-8
metric
converting to metric weight 4-2
O
Other Language
description 2-5
P
Parts Count
using scale to count like parts 4-3
password
account password 3-6
supervisor
entering 2-4
postage
calculating
examples
entering ZIP/Zone codes 3-4
First Class 3-2
international 3-5
charging postage to specific account in meter
3-5
printing amounts that exceed meter’s capac-
ity 4-8
shopping for best rates 4-4
power supply
specifications 1-5
pricing
weight pricing
irregularly shaped
criteria A-3
rectangular shaped
criteria A-2
determining A-2
weight pricing
irregularly shaped
determining A-4
printing
amounts that exceed meter’s capacity 4-8
problems
diagnosing 5-3
R
rate card
changing 6-2
rates
rate card
changing 6-2
rate shop function 4-4
recalling a fee 4-2
rectangular shaped packages
dimensional weight pricing A-2
S
safety precautions 1-2
scale
calibrating 6-3
cleaning 6-2
identification of components 1-3
making connections 1-4
setup options
supervisor
accessing 2-4
tailoring or modifying 2-3
shopping for best rates 4-4
single-piece rates
First Class postage
illustrated chart 3-3
sleep mode
description 1-2
6
SV61955 Rev. A Integra™ Platform Scale 9K0U Operator Guide
I-3
Page 50

Index
special features, using
converting to metric weight 4-2
generating multiple tapes 4-3
recalling a fee 4-2
entering weight manually 4-2
weight hold 4-2
using scale to count like parts 4-3
specifications 1-5
supervisor
password
entering 2-4
setup options
accessing 2-4
support
via internet 1-7
via phone 1-7
T
tapes
generating multiple tapes 4-3
technical support
via internet 1-7
via phone 1-7
temperature range, operating
specifications 1-5
troubleshooting 5-3
W
weighing
specifications 1-5
weight
converting to metric weight 4-2
entering manually 4-2
hold 4-2
pricing
irregularly shaped
criteria A-3
determining A-4
rectangular shaped
criteria A-2
determining A-2
weight hold feature 4-6
weights and measures
specifications 1-5
Z
ZIP/Zone codes
entering 3-4
U
UL compliance
specifications 1-5
user options
changing 2-3
USPS® postage
calculating
examples
entering ZIP/Zone codes 3-4
First Class 3-2
international 3-5
V
Vibration Filter
description 2-5
I-4
Integra™ Platform Scale 9K0U Operator Guide SV61955 Rev. A
Page 51

Integra™ Model 9K0U Scale Operator Guide
This Page Intentionally Blank
SV61955 Rev. A Integra™ Platform Scale 9K0U Operator Guide
I-5
6
Page 52

1 Elmcroft Road
Stamford, Connecticut 06926-0700
www.pb.com
For Service or Supplies
PB Form SV61955 Rev. A 3/07
© 2007 Pitney Bowes Inc.
All Rights Reserved
Printed in the USA
Printed on recyclable paper
*sv61955revA*
 Loading...