

Page 1

9930 Operators Guide - Quick Reference List
ACCOUNT CODES 118
AUTODIAL JOBS 78
AUTODIAL JOBS - EDITING 88
MAILBOXES 120
MEMORY SET PROGRAMMING 112
MODEM START SPEED 139
ONE TOUCH PROGRAMMING 75
OPERATOR PANEL 19
OPTION SET PROGRAMMING 109
OPTIONAL FEATURES 144
P-KEYS PROGRAMMING 93
PBX ACCESS CODES 114
POLLING 58
POWER SAVER PROGRAMMING 139
PROBLEM SOLVING AND MAINTENANCE
RECEIVING A DOCUMENT 51
RELAY FUNCTIONS 130
REPORTS AND FORMS 96
SAFETY AND OZONE EMISSION INFO 164
SECURE ACCESS 141
SENDING A DOCUMENT 40
SPECIFICATIONS 162
SPEED DIAL PROGRAMMING 71
SUB-ADDRESSING 142
SYSTEN SETUP PROGRAMMING 102
TERMINOLOGY 38
Page 2
Operator's Guide
Model 9930
Page 3

TABLE OF CONTENTS
SECTION . . . . . . . . . . . . . . . . . . . . . . . . . . . . . . . . . . . . . . . . . . . . . . . . . .Page
1. QUICK REFERENCE CHART . . . . . . . . . . . . . . . . . . . . . . . . . . . . . .vi
2. INTRODUCTION . . . . . . . . . . . . . . . . . . . . . . . . . . . . . . . . . . . . . . . . . 1
2.1 Recycling . . . . . . . . . . . . . . . . . . . . . . . . . . . . . . . . . . . . . . . . . . . . .2
2.2 Nickel Cadmium Battery . . . . . . . . . . . . . . . . . . . . . . . . . . . . . . . . .2
2.3 Energy StarSM . . . . . . . . . . . . . . . . . . . . . . . . . . . . . . . . . . . . . . . . .3
3. BEFORE OPERATIONS . . . . . . . . . . . . . . . . . . . . . . . . . . . . . . . . . . .4
3.1 Name of Parts . . . . . . . . . . . . . . . . . . . . . . . . . . . . . . . . . . . . . . . . .4
3.2 Operator Panel . . . . . . . . . . . . . . . . . . . . . . . . . . . . . . . . . . . . . . . .7
3.3 Main Unit and Accessories . . . . . . . . . . . . . . . . . . . . . . . . . . . . . .13
3.3.1 Installing the Accessories . . . . . . . . . . . . . . . . . . . . . . . . .13
3.3.2 Accessory Part Numbers and Supply Item #s . . . . . . . . .14
3.4 Telephone Handset . . . . . . . . . . . . . . . . . . . . . . . . . . . . . . . . . . . .15
3.5 Imaging Cartridge . . . . . . . . . . . . . . . . . . . . . . . . . . . . . . . . . . . . .16
3.5.1 Low Toner and No Toner Receiving . . . . . . . . . . . . . . . . .17
3.6 Loading Paper . . . . . . . . . . . . . . . . . . . . . . . . . . . . . . . . . . . . . . . .19
3.7 Memory Features . . . . . . . . . . . . . . . . . . . . . . . . . . . . . . . . . . . . .21
3.7.1 Standard Memory (Internal) . . . . . . . . . . . . . . . . . . . . . . .21
3.7.2 Optional Memory . . . . . . . . . . . . . . . . . . . . . . . . . . . . . . .22
3.7.3 Optional Battery Backed-Up Memory . . . . . . . . . . . . . . . .22
3.8 Documents . . . . . . . . . . . . . . . . . . . . . . . . . . . . . . . . . . . . . . . . . .23
3.8.1 Acceptable Size and Thickness . . . . . . . . . . . . . . . . . . . .23
3.8.2 Acceptable Number of Documents . . . . . . . . . . . . . . . . . .23
3.8.3 Image Quality (Mode Key) . . . . . . . . . . . . . . . . . . . . . . . .23
3.8.4 Contrast (Original Key) . . . . . . . . . . . . . . . . . . . . . . . . . . .24
3.8.5 Working with a Photo . . . . . . . . . . . . . . . . . . . . . . . . . . . .24
3.8.6 Automatic Reduction . . . . . . . . . . . . . . . . . . . . . . . . . . . .24
3.8.7 Effective Printing Area . . . . . . . . . . . . . . . . . . . . . . . . . . .25
3.8.8 Copying a Document . . . . . . . . . . . . . . . . . . . . . . . . . . . .25
4. BASIC OPERATION . . . . . . . . . . . . . . . . . . . . . . . . . . . . . . . . . . . . . . .26
4.1.Turning on the Power . . . . . . . . . . . . . . . . . . . . . . . . . . . . . . . . . .26
4.2 Terminology . . . . . . . . . . . . . . . . . . . . . . . . . . . . . . . . . . . . . . . . . .26
4.2.1 "Help" Key . . . . . . . . . . . . . . . . . . . . . . . . . . . . . . . . . . . .26
4.2.2 "Priority Interrupt" Feature . . . . . . . . . . . . . . . . . . . . . . . .26
4.2.3 Automatic Daylight Time Shift . . . . . . . . . . . . . . . . . . . . . .27
4.2.4 Multiple Selectable Transmit IDs (1-24) . . . . . . . . . . . . . .27
4.2.5 Remote Retrieval . . . . . . . . . . . . . . . . . . . . . . . . . . . . . . .27
4.3 System Set Up . . . . . . . . . . . . . . . . . . . . . . . . . . . . . . . . . . . . . . .28
i
Page 4

ii
TABLE OF CONTENTS
SECTION . . . . . . . . . . . . . . . . . . . . . . . . . . . . . . . . . . . . . . . . . . . . . . . . . .Page
4.4 Sending a Document . . . . . . . . . . . . . . . . . . . . . . . . . . . . . . . . . .28
4.4.1 Dialing through the Numeric Keypad . . . . . . . . . . . . . . . .29
4.4.2 Dialing with a Speed Dial Number . . . . . . . . . . . . . . . . . .30
4.4.3 Dialing with a One Touch Key . . . . . . . . . . . . . . . . . . . . .31
4.4.4 Dialing with P-Keys . . . . . . . . . . . . . . . . . . . . . . . . . . . . .32
4.4.5 Dialing by Pressing the Delayed Send Key . . . . . . . . . . .33
4.4.6 Dialing by Programming an Auto Dial Job . . . . . . . . . . . .34
4.4.7 Dialing Manually from 9930 Telephone Handset . . . . . . .37
4.4.8 Voice Request Dialing . . . . . . . . . . . . . . . . . . . . . . . . . . .37
4.5 Receiving a Document . . . . . . . . . . . . . . . . . . . . . . . . . . . . . . . . .39
4.5.1 Receiving to Memory . . . . . . . . . . . . . . . . . . . . . . . . . . . .41
4.5.2 Out of Paper Receive . . . . . . . . . . . . . . . . . . . . . . . . . . . .42
4.5.3 Low Toner and No Toner Receiving . . . . . . . . . . . . . . . . .43
4.5.4 Receiving Manually . . . . . . . . . . . . . . . . . . . . . . . . . . . . .45
4.6 Polling . . . . . . . . . . . . . . . . . . . . . . . . . . . . . . . . . . . . . . . . . . . . . .46
4.6.1 Preparing a Document to be Polled (Simple Polling) . . . .47
4.6.2 Editing "To Be Polled" Jobs . . . . . . . . . . . . . . . . . . . . . . .48
4.6.3 Polling Another Machine (Simple Polling) . . . . . . . . . . . . .50
4.6.4 Bulletin Board/Unlimited Polling . . . . . . . . . . . . . . . . . . . .51
4.6.5 Sequential Polling . . . . . . . . . . . . . . . . . . . . . . . . . . . . . . .51
4.6.6 Turnaround Polling . . . . . . . . . . . . . . . . . . . . . . . . . . . . . .53
4.6.7 Polling a Mailbox . . . . . . . . . . . . . . . . . . . . . . . . . . . . . . .54
5. FUNCTIONS SELECTION . . . . . . . . . . . . . . . . . . . . . . . . . . . . . . . . . .56
5.1 Storing Speed Dial Numbers . . . . . . . . . . . . . . . . . . . . . . . . . . . .59
5.1.1 Creating or Adding a Speed Dial Number . . . . . . . . . . . .60
5.1.2 Changing or Deleting a Speed Dial Number,
Telephone Number or Name . . . . . . . . . . . . . . . . . . . .62
5.2 Storing One Touch Keys . . . . . . . . . . . . . . . . . . . . . . . . . . . . . . . .63
5.2.1 Programming a One Touch Key . . . . . . . . . . . . . . . . . . . .64
5.2.2 Deleting a Speed Dial Number from a One Touch Key . .65
5.3 Programmable AutoDial Jobs . . . . . . . . . . . . . . . . . . . . . . . . . . . .66
5.3.1 Sending Documents with Programmable AutoDial Jobs .68
5.3.2 Polling with Programmable AutoDial Jobs . . . . . . . . . . . .69
5.3.3 Entering a Relay Programmable AutoDial Jobs . . . . . . . .70
5.3.4 Sending/Receiving with Programmable AutoDial Jobs . . .72
5.3.5 Sending to a Mailbox with Programmable AutoDial Jobs .74
5.4 Editing AutoDial Jobs . . . . . . . . . . . . . . . . . . . . . . . . . . . . . . . . . .76
5.4.1 Adding Pages . . . . . . . . . . . . . . . . . . . . . . . . . . . . . . . . . .77
5.4.2 Editing Destinations
(Changing or Deleting Telephone Numbers) . . . . . . . . . .78
Page 5

TABLE OF CONTENTS
SECTION . . . . . . . . . . . . . . . . . . . . . . . . . . . . . . . . . . . . . . . . . . . . . . . . .Page
5.4.3 Deleting a Job . . . . . . . . . . . . . . . . . . . . . . . . . . . . . . . . .79
5.4.4 Repeating a Job . . . . . . . . . . . . . . . . . . . . . . . . . . . . . . . .79
5.4.5 Changing a Time . . . . . . . . . . . . . . . . . . . . . . . . . . . . . . .80
5.4.6 Print Document . . . . . . . . . . . . . . . . . . . . . . . . . . . . . . . . .81
5.5 Programming P-Keys (One Touch Programmable Keys) . . . . . . .81
5.5.1 Storing P-Keys . . . . . . . . . . . . . . . . . . . . . . . . . . . . . . . . .82
5.5.2 Editing or Deleting the Program from a P-Key . . . . . . . . .83
5.6 Printing Reports and Forms . . . . . . . . . . . . . . . . . . . . . . . . . . . . .84
5.6.1 Printing a Report On Demand . . . . . . . . . . . . . . . . . . . . .85
5.6.2 On Demand Reports . . . . . . . . . . . . . . . . . . . . . . . . . . . .86
1. Memory Management Report . . . . . . . . . . . . . . . . . . . . .86
2. Speed Dial Directory . . . . . . . . . . . . . . . . . . . . . . . . . . . .86
3. One Touch Directory . . . . . . . . . . . . . . . . . . . . . . . . . . . .86
4. One Touch Directory Sheet . . . . . . . . . . . . . . . . . . . . . . .86
5 Program Key (P-Key) Directory . . . . . . . . . . . . . . . . . . . .86
6. System Set-Up Report . . . . . . . . . . . . . . . . . . . . . . . . . . .87
7. Cartridge Order Form . . . . . . . . . . . . . . . . . . . . . . . . . . . .87
5.6.3 Transaction Journal (Communications Report) . . . . . . . .87
5.6.4 Verification Reports . . . . . . . . . . . . . . . . . . . . . . . . . . . . .88
1. Transmit Status Report . . . . . . . . . . . . . . . . . . . . . . . . . .88
2. Job Confirmation Report . . . . . . . . . . . . . . . . . . . . . . . . .88
3. Mailbox Directory . . . . . . . . . . . . . . . . . . . . . . . . . . . . . . .89
4. Mailbox Confirmation . . . . . . . . . . . . . . . . . . . . . . . . . . . .89
5. Mailbox Delivery Report . . . . . . . . . . . . . . . . . . . . . . . . . .89
6. Relay Confirmation Report . . . . . . . . . . . . . . . . . . . . . . . .89
7. Power Fault Report . . . . . . . . . . . . . . . . . . . . . . . . . . . . .89
5.7 Setting Up The System . . . . . . . . . . . . . . . . . . . . . . . . . . . . . . . . .90
5.7.1 Changing or Programming the Set-Up Definitions . . . . . .90
5.8 Setting System Options . . . . . . . . . . . . . . . . . . . . . . . . . . . . . . . . .97
5.8.1 Changing the Model 9930 System Options . . . . . . . . . . .97
5.9 Setting the Memory Options . . . . . . . . . . . . . . . . . . . . . . . . . . . .100
5.9.1 Changing the Model 9930 Memory Options . . . . . . . . . .100
6. SPECIAL FEATURES AND FUNCTIONS . . . . . . . . . . . . . . . . . . . . .102
6.1 PBX Access Codes . . . . . . . . . . . . . . . . . . . . . . . . . . . . . . . . . . .102
6.1.1 PBX Access Codes ON . . . . . . . . . . . . . . . . . . . . . . . . .103
6.1.2 Programming AutoDial Jobs
PBX Access Codes ON . . . . . . . . . . . . . . . . . . . . . . . . . . .104
6.1.3 Polling - PBX Access Codes ON . . . . . . . . . . . . . . . . . .105
iii
Page 6

TABLE OF CONTENTS
SECTION . . . . . . . . . . . . . . . . . . . . . . . . . . . . . . . . . . . . . . . . . . . . . . . . .Page
6.2 Account Codes . . . . . . . . . . . . . . . . . . . . . . . . . . . . . . . . . . . . . .106
6.3 Mailbox Access . . . . . . . . . . . . . . . . . . . . . . . . . . . . . . . . . . . . . .108
6.3.1 Setting up Mailboxes . . . . . . . . . . . . . . . . . . . . . . . . . . .109
6.3.2 Printing a Mailbox Directory . . . . . . . . . . . . . . . . . . . . . .110
6.3.3 Printing Mail Stored in a Mailbox . . . . . . . . . . . . . . . . . .111
6.3.4 Storing Mail Locally in Your Model 9930 Mailbox . . . . . .113
6.3.5 Sending Mail to a Remote Location Mailbox . . . . . . . . .114
6.3.6 Sending to Your Mailbox(es) from Remote Locations . .115
6.3.7 Polling a Remote Mailbox to Receive Mail . . . . . . . . . . .117
6.3.8 Polling Your Mailbox from Remote Locations . . . . . . . . .117
6.4 Relay Functions . . . . . . . . . . . . . . . . . . . . . . . . . . . . . . . . . . . . . .118
6.4.1 Single Node Relay (Simple Relay & Dual Node Relay ) 118
6.4.2 Single Node Relays from Your Unit . . . . . . . . . . . . . . . .119
6.4.3 Dual Node Relays from Your Unit . . . . . . . . . . . . . . . . .124
6.5 Programmable Power Saver . . . . . . . . . . . . . . . . . . . . . . . . . . . .127
6.5.1 Programmable Power Saver Feature (Heater Timer) . . .127
6.6 Modem Start Speed . . . . . . . . . . . . . . . . . . . . . . . . . . . . . . . . . .127
6.7 Secure Access . . . . . . . . . . . . . . . . . . . . . . . . . . . . . . . . . . . . . .129
6.8 Set-Up Passcode . . . . . . . . . . . . . . . . . . . . . . . . . . . . . . . . . . . .129
6.9 Sub-Addressing . . . . . . . . . . . . . . . . . . . . . . . . . . . . . . . . . . . . . .130
6.9.1 General Description . . . . . . . . . . . . . . . . . . . . . . . . . . . .130
6.9.2 Programming a Sub-Address into a Speed Dial # . . . .131
7. OPTIONAL FEATURES . . . . . . . . . . . . . . . . . . . . . . . . . . . . . . . . . . .132
7.1 Print Driver . . . . . . . . . . . . . . . . . . . . . . . . . . . . . . . . . . . . . . . . .132
7.2 HydraFax Lite . . . . . . . . . . . . . . . . . . . . . . . . . . . . . . . . . . . . . . .132
7.3 AutoDial Programming . . . . . . . . . . . . . . . . . . . . . . . . . . . . . . . .132
8. PROBLEM SOLVING AND MAINTENANCE . . . . . . . . . . . . . . . . . . .133
8.1 Problem and Probable Cause . . . . . . . . . . . . . . . . . . . . . . . . . . .133
8.2 Display Messages . . . . . . . . . . . . . . . . . . . . . . . . . . . . . . . . . . . .135
8.3 Replacing Recording Paper . . . . . . . . . . . . . . . . . . . . . . . . . . . .136
8.4 Clearing a Recording Paper Jam . . . . . . . . . . . . . . . . . . . . . . . .136
8.5 Clearing a Misfed Original . . . . . . . . . . . . . . . . . . . . . . . . . . . . . . . . .140
8.6 Imaging Cartridge Maintenance . . . . . . . . . . . . . . . . . . . . . . . . .141
8.6.1 Replacing the Imaging Cartridge . . . . . . . . . . . . . . . . . .142
8.6.2 Cleaning the Printer . . . . . . . . . . . . . . . . . . . . . . . . . . . .144
8.7 Ordering Supplies and Accessories . . . . . . . . . . . . . . . . . . . . . .146
8.7.1 General Ordering Information . . . . . . . . . . . . . . . . . . . . .146
8.7.2 Imaging Cartridges . . . . . . . . . . . . . . . . . . . . . . . . . . . . .148
iv
Page 7

TABLE OF CONTENTS
SECTION . . . . . . . . . . . . . . . . . . . . . . . . . . . . . . . . . . . . . . . . . . . . . . . .Page
8.7.3 Recording Paper . . . . . . . . . . . . . . . . . . . . . . . . . . . . . .148
8.7.4 Document Carriers . . . . . . . . . . . . . . . . . . . . . . . . . . . . .148
8.7.5 Paper Cassettes . . . . . . . . . . . . . . . . . . . . . . . . . . . . . . .148
8.8 If You Need Service . . . . . . . . . . . . . . . . . . . . . . . . . . . . . . . . . .149
8.9 Model 9930 Specifications . . . . . . . . . . . . . . . . . . . . . . . . . . . . .150
8.10 Safety and Ozone Emission Information . . . . . . . . . . . . . . . . . .152
8.10.1 Safety Information . . . . . . . . . . . . . . . . . . . . . . . . . . . .152
1. Laser Safety . . . . . . . . . . . . . . . . . . . . . . . . . . . . . . . . . .152
2. CDRH Regulations . . . . . . . . . . . . . . . . . . . . . . . . . . . .152
8.10.2 Ozone Information . . . . . . . . . . . . . . . . . . . . . . . . . . . .153
1. UL Standards for Ozone . . . . . . . . . . . . . . . . . . . . . . . .153
2. Model 9930 Ozone Emission Levels . . . . . . . . . . . . . . .153
3. Employer Responsibilities . . . . . . . . . . . . . . . . . . . . . . .153
8.10.3 Toner Safety and Care . . . . . . . . . . . . . . . . . . . . . . . . .154
9. NOTICE FOR U.S.A USERS . . . . . . . . . . . . . . . . . . . . . . . . . . . . . . .154
FCC REQUIREMENTS . . . . . . . . . . . . . . . . . . . . . . . . . . . . .155
FCC WARNING . . . . . . . . . . . . . . . . . . . . . . . . . . . . . . . . . . .156
10. NOTICE TO CANADIAN USERS . . . . . . . . . . . . . . . . . . . . . . . . . . .157
11. INFORMATION FOR U.K. USERS . . . . . . . . . . . . . . . . . . . . . . . . . .159
11.1 BABT Information for Model 9930 . . . . . . . . . . . . . . . . . .159
1. Warning . . . . . . . . . . . . . . . . . . . . . . . . . . . . . . . . . . . . .159
2. Points pertinent to PSTN Connection . . . . . . . . . . . . . .159
3. Installation of Associated Telephone (Optional) . . . . . . .161
4. Points on Pitney Bowes HS1 Handset (Optional) . . . . .161
TO THE USER . . . . . . . . . . . . . . . . . . . . . . . . . . . . . . . . . . . .162
INDEX . . . . . . . . . . . . . . . . . . . . . . . . . . . . . . . . . . . . . . . . . . . . . . . . . . .163
v
Page 8

1. QUICK REFERENCE CHART
A. GETTING STARTED
Your Model 9930 can be used as soon as it's unboxed, plugged into a power
outlet, and connected to an analog telephone line. APitney Bowes Customer
Service Representative should have already done this for you, as well as set
basic system parameters (e.g., the time and date that appear in the display,
etc.). If your machine has already been installed, you can begin transmissions
as soon as you turn on the power. Refer to Section 4 for instructions on Basic
Operation and 4.4 for Sending a Document.
If you need to move the system, or in the unlikely event that a Customer
Service Representative is unavailable, you can begin to use the system by following these steps:
1. Plug the power cord into a wall outlet.
2. Insert Recording Paper in the Paper Cassette. Refer to Section 3.6
for the procedures.
3. Connection to telephone equipment:
(U.S. Version)
a. Connect the LINE cord that came with the machine.
One end goes into the RJ-11 telephone jack on the wall. The
other end goes into the back of the Model 9930 jack labeled
LINE. (
See NOTE 1.
There is no need to provide any other
telephone.)
b. To install the Telephone Handset:
• Plug one end of the coiled Telephone Handset Cord into
the Telephone Handset.
• Plug the other end of the coiled Telephone Handset Cord
into the jack on the Telephone Handset Base.
(U.K. Version)
a. Connect the line telephone cord to wall socket.
b. Plug handset into rear socket marked TEL.
4. Turn on the power and begin a transmission. Refer to Section
4.4 to Send a Document.
vi
Page 9

NOTES:
1. BEFORE PLUGGING THE MODEL 9930 INTO THE TELEPHONE LINE,
CHECK WITH YOUR PHONE COMPANY OR SUPPLIER TO BE SURE
THAT NO DAMAGE MAY RESULT TO THE PHONE SYSTEM. INFORM
THEM YOU ARE INSTALLING A GROUP 3 FACSIMILE MACHINE. THE
MODEL 9930 REQUIRES AN ANALOG TELEPHONE LINE. THE FCC
REGISTRATION NUMBER AND RINGER EQUIVALENCY NUMBERS ARE
ALL ON ADATA PLATE ON THE REAR OFTHE MODEL 9930
2. Refer to Section 3.1, for illustration of the back of the Model 9930 for
assistance with Steps 3a and 3b (outlined above).
3. If desired, you can follow the procedures in Sections 5.7 through 5.9 —
"Setting Up the System," "Setting System Options," and "Setting Memory
Options." However, these procedures are not needed to begin a basic or
single transmission.
B. FUNCTION SELECTION PROCESS
The Function categories and the selections possible under each are briefly
described below for your convenience. For a more detailed description refer
to Section 5, Function Selections, or to the specific Sections mentioned for
each Function below:
There are eleven main Functions in your Model 9930. Functions can be
selected by either:
• pressing the FUNCTION Key + the desired Function number + YES
(twice)
or
• repeatedly pressing the FUNCTION Key until you reach the desired
Function, then press YES.
The majority of the Functions relate to storing phone numbers and
programming AutoDial Jobs. Before you store phone numbers and begin
to program AutoDial Jobs, you should consider your communications
needs and write a list of phone numbers and groups of phone numbers
you want to store.
SET MAILBOX ACCESS Function is described in the Special Features and
Functions Section of this Guide (see Sections 6).
The CLEAN PRINTER Function is reviewed in the Problem Solving and
Maintenance Section (see Section 8.6.2).
vii
Page 10

The Function categories and the selections possible under each are briefly
described below for your convenience.
#1 AUTO DIAL ( (See Section 5.3 for procedures)
To store Jobs to send or receive single or multiple documents at a specific time to
specific locations.
• 1=SND (send)
• 2=RCV (receive or polling)
• 3=RELAY
• 4=SND/RCV (turnaround polling)
• 5=MAILBOX
• 6=POLL
#2 PRINT REPORTS ( (See Section 5.6 for procedures)
To print Administrative Reports and Forms.
• MEMORY MANAGER
• SPEED DIAL DIRECTORY
• ONE TOUCH KEY DIRECTORY
• P-KEY DIRECTORY
• SYSTEM SET-UP
• CARTRIDGE ORDER FORM
• ONE TOUCH SHEET
#3 MAILBOX ACCESS ( (See Section 6.3 for procedures)
To define and use various Mailbox Feature selections.
• PRINT
• STORE
• SET-UP(Mailbox numbers, Security Codes, Mailbox Name)
• DIRECTORY
#4 EDIT AUTO DIAL JOBS ( (See Section 5.4 for procedures)
To change or delete AutoDial Jobs.
• 1=ADD PGS (Add Pages)
• 2=EDIT DEST (add or delete telephone number[s] or destination[s])
• 3=DELETE
• 4=REPEAT(repeating incomplete Jobs)
• 5=CHANGE TIME
• 6=PRINT DOCUMENT
#5 SET SPEED DIAL ( (See Section 5.1 for procedures)
To store a frequently dialed number as a three-digit code. ASpeed Dial number is
an abbreviated way of entering and dialing a phone number.
• SET SPEED DIAL #
• ENTER TEL #
• ENTER NAME
• RELAYSTATION? (Only if selection is set in Service Mode)
viii
Selections
Selections
Selections
Selections
Selections
Page 11

#6 SET ONE TOUCH ( (See Section 5.2 for procedures)
One T ouch Keys allow you to send a document to one or several locations by pressing only one Key.
• SELECT ONE TOUCH KEY
• ENTER NAME
• ENTER SPEED DIAL # (or numbers)
• ADD ANOTHER NUMBER TO THIS KEY?
#7 SET PROGRAM KEYS ( (See Section 5.5 for procedures)
For permanent storage of frequently used AutoDial Jobs.
• PRESS DESIRED P-KEY
• ENTER NAME
• 1=SND (send)
• 2=RCV (receive)
• 3=RELAY
• 4=SND/RCV (turnaround polling)
• 5=MAILBOX
• 6=POLL
#8 SET-UP SYSTEM ( (See Section 5.7 for procedures)
Defines system standards.
• 01 DATE/TIME
• 02 MACHINE ID SET UP
—
TRANSMIT ID
—FAX TELNUMBER
—POLLING PASSCODE
• 03 JOURNAL SET UP
—JNL DISPLAY
—JNL ID FIELD
—JNL PRINT TIME
— JOURNAL SEND
• 04 TEL LINE SET UP
— RING PATTERN
1=ALL
2=SINGLE
3=DOUBLE
4=TRIPLE 1
5=TRIPLE 2
— RING DETECT COUNT
— AUTO RECEIVE
— REDIAL COUNT
— REDIAL INTERVAL
• 05 PRINTAUTO REDUCTION
• 06 BEEP VOLUME
• 07 MONITOR VOLUME
ix
Selections
Selections
Selections
Page 12

#9 SET OPTIONS ( (See Section 5.8 for procedures)
To define specific optional features and reports you want to print.
• AUTOMATIC REPORTS
— TX STATUS REPORT(Transmit Status Report)
— JOB CONF. REPORT (Job Confirmation Report)
• SECURE ACCESS
• POWER SAVER
• AUTO COVER SHEET
• AUTO DOCUMENT SEPARATION (if additional cassette installed)
• INDEX MARK
#10 SET-UP MEMORY ( (See Section 5.9 for procedures)
Defines how Internal Memory should be configured and used. May require a
PASSCODE.
• MEMORY SAVE
• REMOTE RETRIEVAL
• RECEIVE TO MEMORY (May be PASSCODE protected)
• AUTO STORE TO MEMORY
#12 CLEAN PRINTER ( (See Section 8.6.2 for procedures)
To clean the Model 9930 each time a new Imaging Cartridge is installed.
• PLEASE WAIT FOR TEST CHARTS
• LOAD CHARTS IN UPPER CASSETTE FACE UP
• CLEANING PRINTER
x
Selections
Selections
Selections
Page 13

2. INTRODUCTION
Congratulations on your selection of the Pitney Bowes Model 9930 facsimile
system.
The Model 9930 will help you keep communication costs down while giving you
sophisticated transmission capabilities with one of the fastest transmission
speeds in the industry.
This Operator's Guide will help you learn your Model 9930 quickly and easily . The
Quick Reference Chart, Table of Contents and Index will serve to make
information on every feature available instantly. Since the Model 9930 performs
many different functions, not everyone will need to learn every feature. You may
wish to read only the Sections that contain the feature(s) you are interested in.
This Guide describes the Model 9930 and explains how to set up and use the
system. The Guide is divided into eight other sections:
• Quick Reference Chart - lists all of the Functions selectable from the Model
9930 Main Level Menu. The Function categories and each of the selections
possible under them are briefly described in this chart.
• Before Operations - describes the Model 9930 Operator's Guide and
explains how to use it.
• Basic Operation - describes the basic use of the system for those who will
use the system for occasional transmissions.
• Function Selections - describes the features that allow you to store phone
numbers, create and edit AutoDial Jobs, set up the system, and print reports.
These features are the ones that allow you to customize the system.
• Special Features and Functions - describes high level facsimile capabilities,
such as PBX Access Codes, Account Codes, Mailbox Access, Relay and many
more. These are powerful, standard features that save time and provide real
cost savings and a high degree of system and network security.
• Optional Features - describes options which enable the Model 9930 to
perform computer-based fax/scan/print and AutoDial programming functions.
• Problem Solving and Maintenance - describes the routine procedures you'll
need to replace the Recording Paper and Imaging Cartridge, solve problems
or order new supplies.
• Information for U.K. Users - contains all information pertinent to use of the
Model 9930 within the U.K.
1
Page 14

2
2.1 Recycling
Pitney Bowes is concerned about issues that affect our environment.
Properly handled, all parts from our Imaging Cartridges can be recycled in some
way rather than taking up additional space in our country's landfills.
To make this easier, Pitney Bowes has set up a program to provide trouble free
recycling for the Model 9930's Imaging Cartridges in the U.S. Enclosed with each
Imaging Cartridge is a prepaid postage return label and a strip of adhesive tape.
Simply pack the used Cartridge in the same box that contained its replacement.
Seal the box with the tape, apply the return label and mail back to us with your
regular mail. You may want to keep a copy of the label in the event you misplace
the original. As long as it is a clear copy, the Post Office will honor the copied
label.
A recycling program is currently under review in the U.K.
In Canada, a Purolator slip is enclosed with each cartridge. Attach the slip to the
box and call the Purolator telephone number indicated on the slip for pick up of a
used cartridge.
2.2 Nickel-Cadmium Batteries
Your machine contains nickel-cadmium rechargeable batteries and they must be
recycled or disposed of properly. The batteries are charged automatically while
the power is turned "ON." At the end of your machine's useful life, under various
country, state and local laws, it is illegal to dispose of the batteries into municipal
waste landfills.
If you are not trading your facsimile in for a new model, please contact your local
Pitney Bowes Service Technician to remove the Ni Cad battery before disposing
of the facsimile.
Page 15

2.3 Energy Star
SM
Pitney Bowes' desire to advise customers about the energy efficiency of our
equipment not only includes the bottom lin2e savings but also evaluating our
equipment's impact on the environment. Office equipment is the fastest growing
electricity load in the world.
The U.S. Environmental Protection Agency (EPA) promotes energy efficiency
because electricity generation contributes to air pollution, including 35 percent of
all U.S. emissions of carbon dioxide. It also accounts for 75 percent and 38
percent of all U.S. emissions of sulfur dioxides and nitrogen oxides, respectively.
By using more energy-efficient equipment like the new Pitney Bowes Model 9930
facsimile, we can reduce this pollution, while saving money.
Printers and fax machines are typically left on 24 hours a day, but are active only
a small percent of the time. This means conventional printers and fax units can
waste a lot of energy and money but the Pitney Bowes Model 9930 automatically
powers down to save energy when not being used. This "sleep" feature can cut
the unit's annual electricity use by over 65 percent.
As an ENERGY STAR
SM
partner, Pitney Bowes Inc. has determined that the
Model 9930 meets the ENERGY STARSMguidelines for energy efficiency.
Look for the following ENERGY STARSMlogo on the front of the Model 9930.
3
Page 16
3. BEFORE OPERATIONS
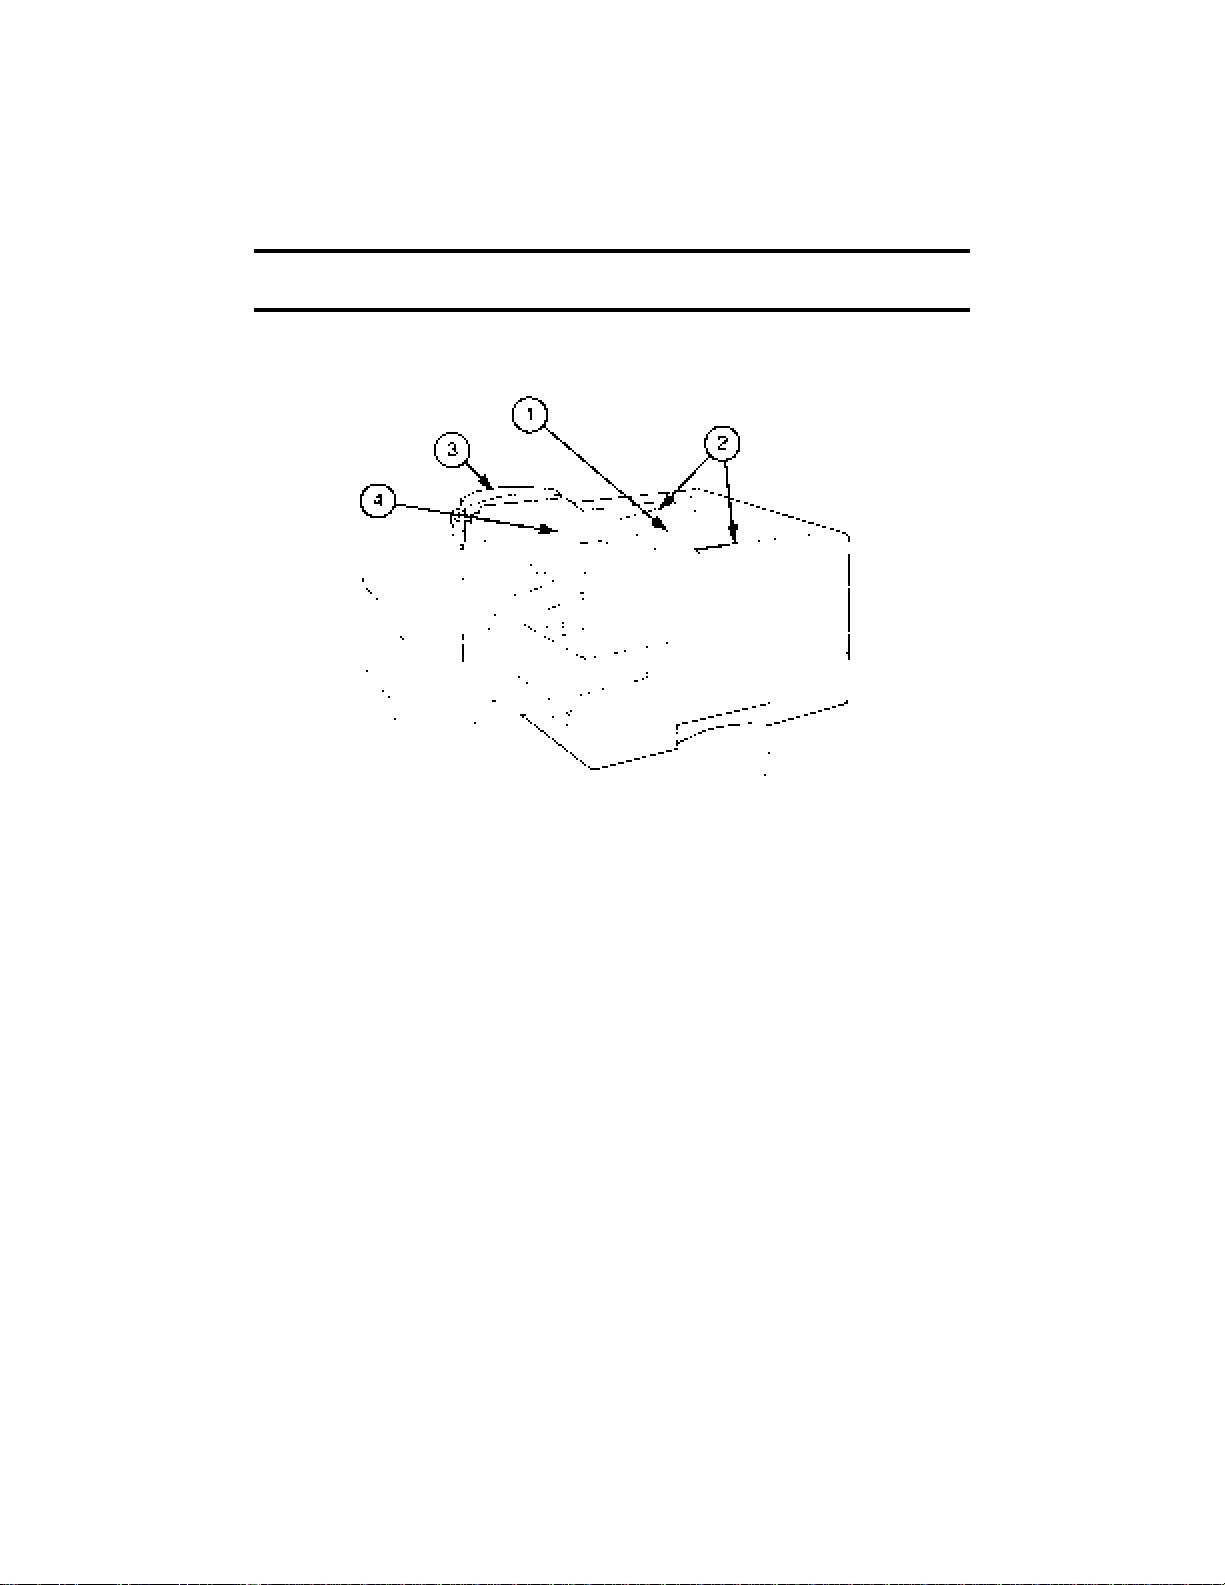
3.1 Names of Parts
The Model 9930 has the following main components.
(1) Automatic Document Feeder (ADF) - Set the documents you want to
transmit face down on the Automatic Document Feeder. You can have up
to 50 pages in the ADF at one time.
(2) Document Guides - You can adjust the Document Guides to allow you to
position different size documents in the Feeder. Standard size indications
(A4, 8-1/2", B4 and 11") are printed between the Document Guides.
(3) Telephone Handset - Can be used for placing outbound calls or answering
incoming calls. Refer to Section 3.4 for more information on the Telephone
Handset.
(4) Operator Control Panel (Top Cover) - The Operator Control Panel Keys
and display allow you to rapidly program the Model 9930 with a high degree
of logic and ease.
4
Page 17
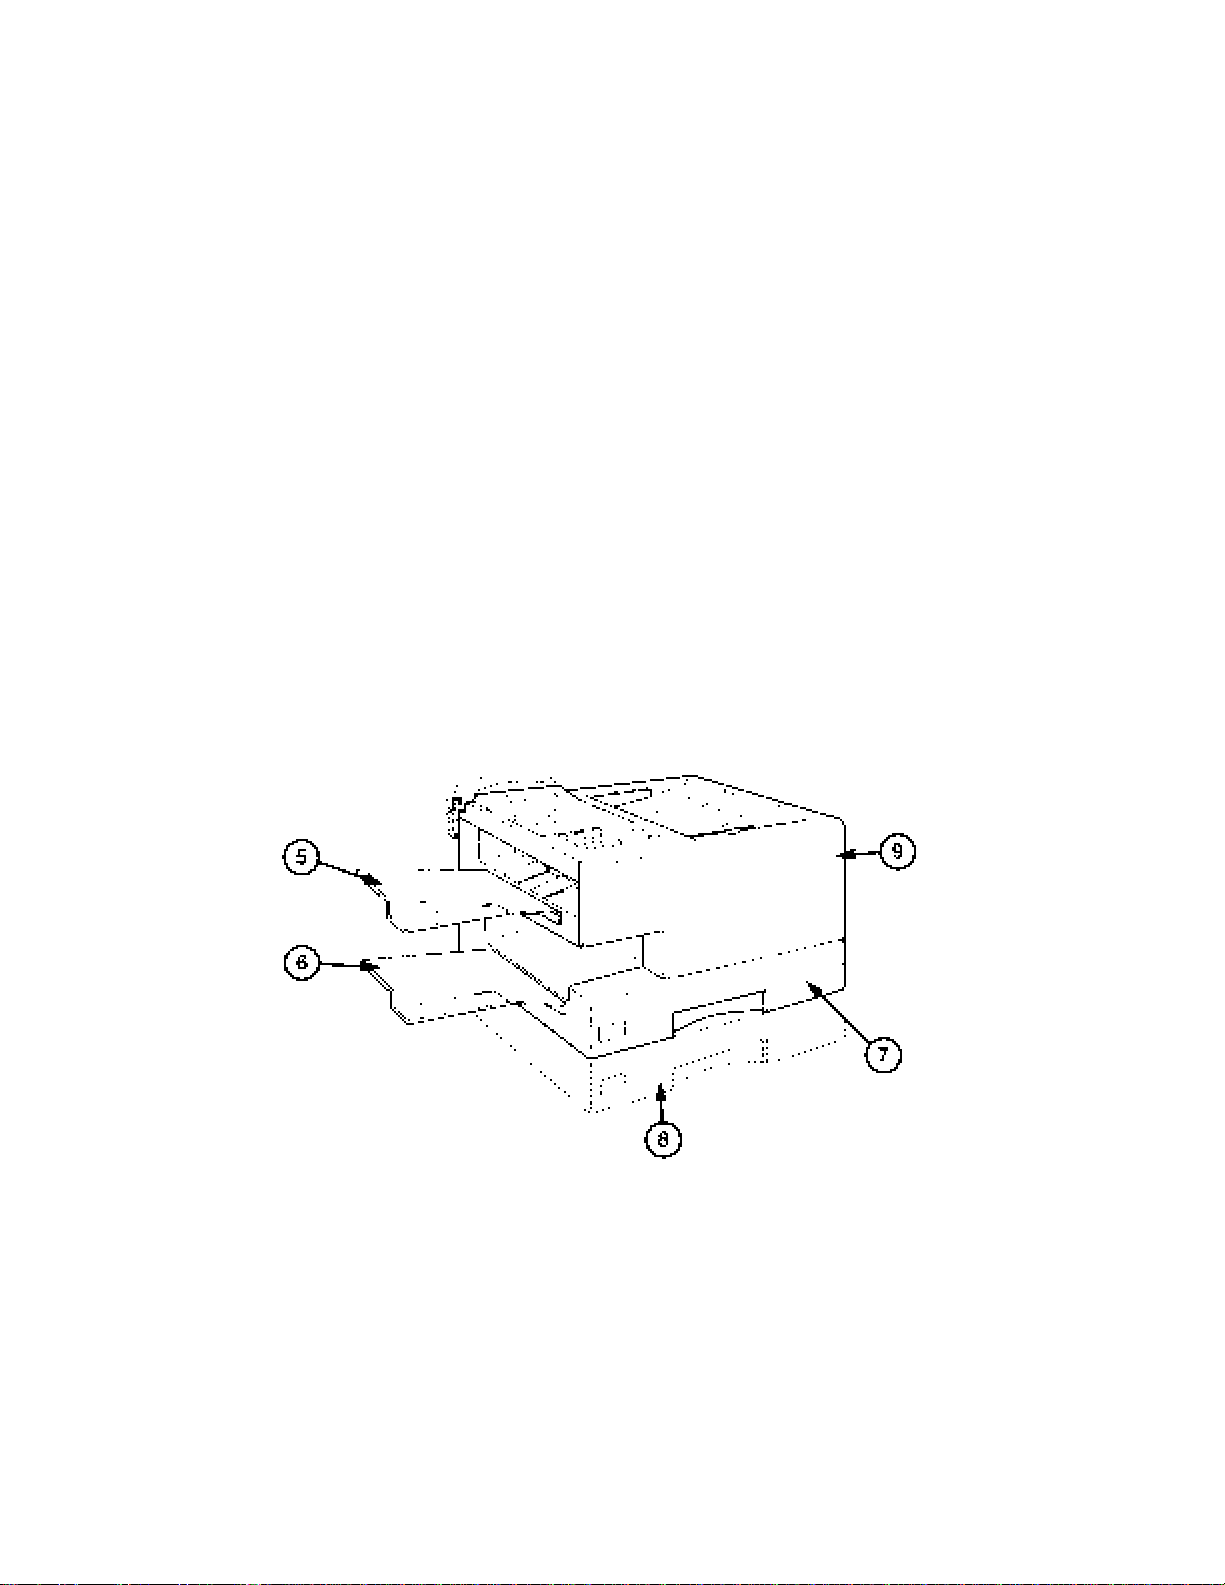
(5) Original Document Return Tray - Once an original document moves
through the Document Feeder, it is stacked on this top tray. Received
documents stack on the Paper Receive Tray below.
(6) Paper Receive Tray - Received documents are presented to the operator
here after the printing process has been completed.
(7) Main Front Loading Paper Cassette - Holds approximately 250 sheets of
paper and is located under the machine. The maximum thickness of a stack
of Recording Paper in the Main Cassette is 1.25" (31.7mm). You can remove
this Cassette by pulling it towards you.
(8) Optional Paper Supply Trays - Located under the Main Paper Cassette, two
more paper trays can be added which will hold approximately 250 sheets of
paper each, or a 500 sheet paper tray can be added alone, or with a 250
sheet paper tray.
(9) Printer Cover Release Button - Press this release button on the right side
of the unit to open the Printer Cover for Imaging Cartridge and paper path
access.
5
Page 18
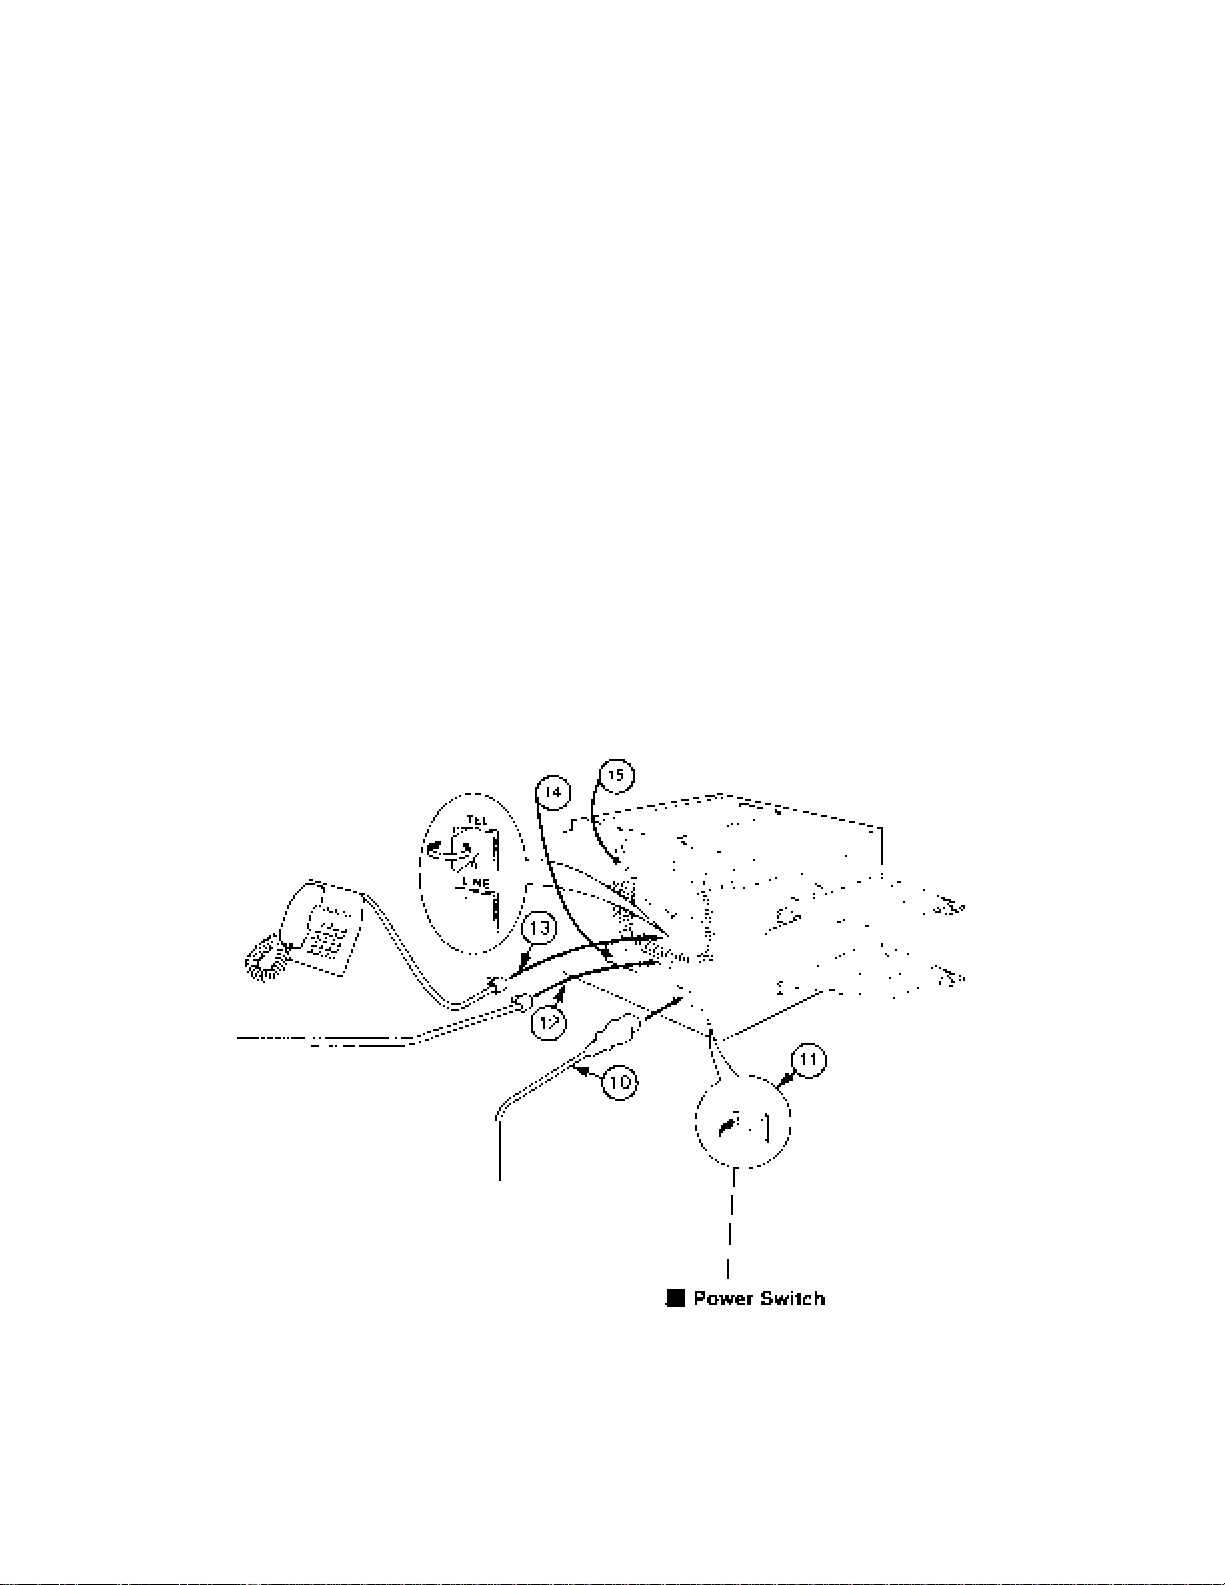
(10) AC 120V Power Outlet - for attachment of the Model 9930 AC Power Cord.
The Power Cord must be plugged into a wall outlet to power the system.
(Note for U.K.: This is 240VAC.)
(11) ON/OFF Switch - Located at the lower right rear of the unit, this powers
the Model 9930 unit ON or OFF.
(12) RJ-11 Telephone Line Jack - A Telephone line cord connects this jack to
a similar wall jack for attachment to a phone line. (Not applicable in U.K.)
(13) RJ-11 Telephone Jack (for an extension telephone) - Used for
attachment of a customer-provided telephone. (Not applicable in U.K.)
(14) Optional V.24 Port - This port is used to connect cables if the Printer
Driver and/or HydraFax options are installed. (Call your local Pitney
Bowes Office)
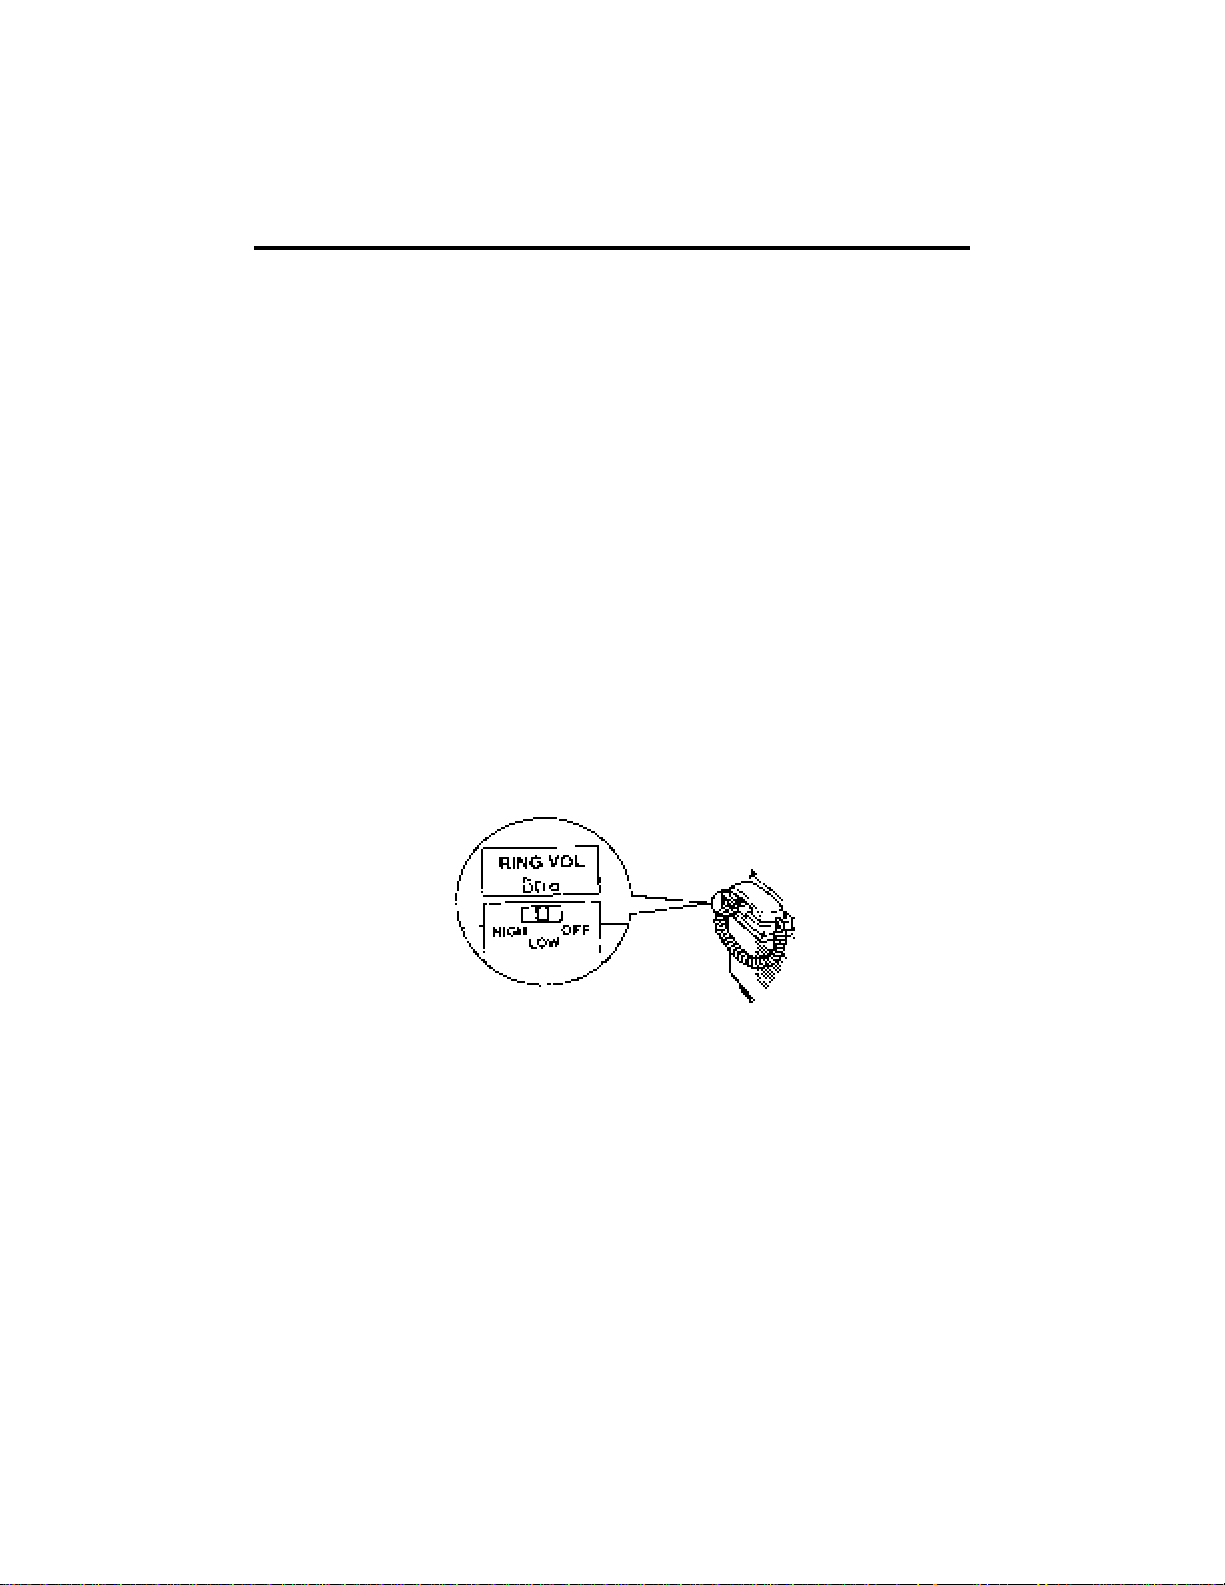
(15) Ringer Volume Switch -• The three-position Ringer Volume Switch allows
you to adjust the loudness of the rings generated from your unit when
someone calls it. Moving the Switch increases and decreases the volume.
(Not applicable in U.K.)
6
Page 19
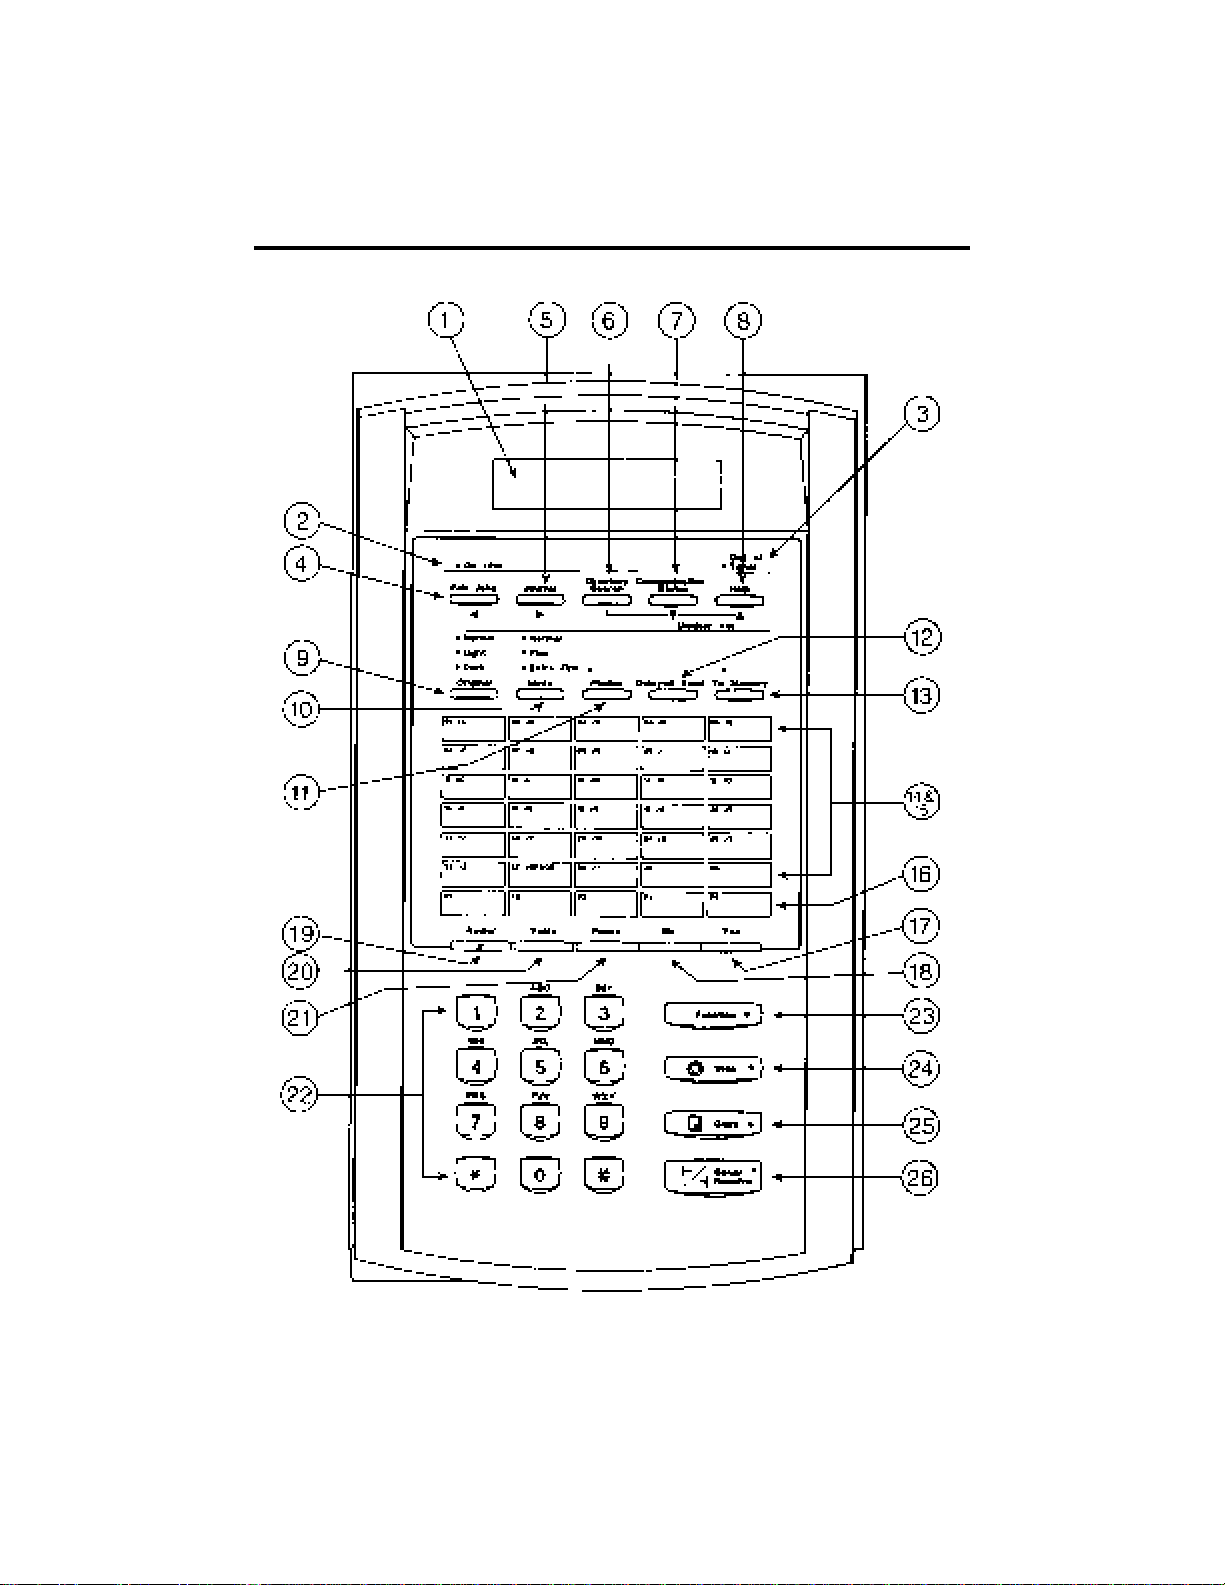
3.2 Operator Control Panel
7
Page 20

1) Display Area
The two-line display has space for up to 20 characters per line. Messages that
appear in the display confirm the date and time, or the current operation.
When POWER is on, the display will indicate the system status. If the display
is blank, check power switch and power plug.
If ▼ or ▲ are shown in the display. Pressing the ▼ or ▲ key will shift back and
forth between the previous and next screens.
2) On Line Light
Indicates that communications are occurring. The display will remain in the
"System Ready" mode.
3) Out of Toner Light
The OUT OF TONER indicator will illuminate when low or out of toner.
4) Edit Jobs Key
The EDIT JOBS Key* is used to gain direct access to the Edit Jobs function.
Once pressed, following selections appear on the display. 1=Add Pg, 2=Edit
Dest., 3=Delete, 4=Repeat, then press NO to view 5=Change Time, 6=Print
Document. These functions are used to view or modify an AutoDial Job.
*Also used as the left CURSOR Key.
5) Journal Key
Press the JOURNAL Key* to print a copy of the Communication Transaction
Report or to view recent transactions on the display.
*Also used as the right CURSOR Key.
6) Directory Search Key
DIRECTORY SEARCH Key allows you to look up any one of the 200 Speed
Dial numbers with a minimum of effort. Use of this feature employs three Keys
— the DIRECTORY SEARCH Key, and the two Search (or scrolling) Keys,
which on the Model 9930 are the COMMUNICA TION STA TUS and HELPKeys.
1. Press DIRECTORY SEARCH to access the Directory Search
Function.
8
Page 21

2. After pressing the Alphabetical One Touch Keys to specify the
alphabetical group desired, pressing the Comm Stat Key ▼ or the
Help Key ▲ will cursor to the location ID. You can enter as many
letters as you want to help define the name and reduce the
amount of scrolling with the ▼ or ▲ Keys.
3. Once the proper location is displayed, pressing the SEND/RECEIVE
Key will initiate communication.
7) Communication Status Key
The display can be switched by pressing and releasing the COMMUNICATION
ST ATUS Key once for the Mode Speed, Remote ID or twice for Job # and Page
#, to allow for monitoring of the transmission in progress (on line). Even if the
document is being received while copying is in progress, the state of reception
can be verified. The display will revert to "System Ready" after 5 seconds.
After pressing the VOICE Key, press the COMMUNICATION STATUS Key to
raise the volume of the Monitor (Speaker).
8) Help Key
Press to print a brief explanation of any Key or Function you need help with.
Press VOICE Key then this key to lower the volume of the Monitor (Speaker).
9) Original Key (Normal, Light, Dark)
Press the ORIGINALKey when you want to adjust for the contrast of the original
document. If a document is present in the Document Feeder, each time you
press the button, the display will indicate the selection.
10) Mode (Resolution) Key
Press the MODE Key when you need to adjust the transmission for a higher
than normal resolution. If a document is present in the Automatic Document
Feeder, each press of this button advances the display that will indicate the
selection. You can also press MODE when you are programming an ID to
change to symbols.
11) Photos Key
Press the PHOTOS Key when you want to send a document that contains a
half-tone image (photo). An indicator will illuminate on the Control Panel.
9
Page 22

12) Delayed Send Key
Press the DELAYED SEND Key to set up transmission jobs for delayed or
immediate transmissions, to single or multiple destinations. Up to 30 jobs can
be stored in the Model 9930.
13) To Memory Key
The TO MEMORY Key is used to store documents when setting up
transmission jobs. Documents will be stored into memory before transmission
when green LED is on.
14) Character Keys
The One Touch Keys serve as alphabetic input Keys which are used to record
alphabetic position (A-Z, space and hyphen) of TTI, ID of list name, Speed Dial
number names, P-Key names, etc.
15) One Touch Keys (01-30)
Press any of the 30 ONE TOUCH Keys to:
• send a document to one or more locations stored in that Key.
• poll from one or more locations stored in that Key.
• program alphabetical portion (A-Z, space and hyphen) of TTI, ID of list name,
Speed Dial number names, P-Key names, etc.
16) Programmable One Touch Keys (P-Keys)
You use the last five ONE TOUCH Keys (P1, P2, P3, P4, P5) to:
• program an AutoDial job that you use frequently.
Once programmed, P-Keys are usually used for convenient execution of
complex or repetitive jobs.
10
Page 23

17) Yes Key
Press YES to:
• answer "Yes" to a prompt while you are programming
• confirm a program selection you want to enter into memory
• select a Speed Dial number for communications
• any machine function which requires the YES Key to complete the activity
18) No Key
Press NO to:
• answer "No" to a prompt while you are programming
• backspace and erase an incorrect character or number while you are
programming
19) Redial Key
The Model 9930 will remember the last random telephone number entered
through the Numeric Keypad or dialed automatically by the machine. Press the
REDIAL Key to immediately redial the last number called or to override an
existing redial wait period. The last number dialed includes any single
destination voice or fax call or the last destination of a broadcast or Program
Key Job. This feature is useful in the event of busy signals or no answer.
20) Voice Key
Press the VOICE Key during a transmission when the transmitting or receiving
operator wants to speak to the remote operator. After the Model 9930 transmits
the last page, if the remote operator picks up his/her telephone handset, the
Model 9930 will beep. When you hear the beep:
• with telephone handset, pick up handset and talk to the remote operator.
• without handset, pick up the extension phone and press the VOICE Key.
The VOICE Key is also used for On-Hook Voice Mode. This allows you to call
a random non-fax telephone number or non-fax Speed Dial number or non-fax
telephone number stored as a One Touch Key.
• press VOICE Key.
• enter telephone number, Speed Dial number or One Touch Key.
You will hear the remote location answer through the Model 9930 Monitor
Speaker. Pick up the telephone handset or the extension phone and talk to the
remote operator.
Press VOICE Key then COMM STAT Key to lower or HELP Key to raise the
MONITOR VOLUME.
11
Page 24

21) Pause Key
Press PAUSE to:
• temporarily interrupt a broadcast transmission so you can use the Model 9930
to do something else
• insert a 1- to 10- second delay in a dialing sequence while you are
programming or dialing a telephone number. The Model 9930 is usually
programmed for a 5-second hesitation per pause entry. The length of each
pause can be changed by calling the Pitney Bowes Facsimile Diagnostic
Center listed in the back of this Guide. This feature can be changed over the
phone and does not require a service call.
22) Numeric Keys
The Numeric Keys are multifunctional. That is:
• during Speed Dial Set-Up, they are used to program Speed Dial numbers
• they are to be pressed when you want to enter a phone number or Speed Dial
number from the Numeric Keypad
• certain functions will prompt you to enter a numbered response to a question
in the display
• to select Functions of the machine
• they can function as a normal telephone keypad
• when the Model 9930 is set for Pulse Dialing, the Pound Key (#) can be
pressed to temporarily switch from Pulse Dialing to Tone Dialing.
23) Function Key
Press FUNCTION to access different programmable operations from the Main
Menu: AutoDial, Print Reports, Mailbox Access, Edit Jobs, Set Speed Dial, Set
One Touch Keys, Set Program Keys, Set-Up System, Set Options, Set-Up
Memory, and Clean Printer. These Functions are explained in detail in Section
5 and 6. You can also refer to the Quick Reference Chart in Section 1.
24) Stop Key
Press STOP to:
• cancel a transmission that is in progress
• cancel a programming action
• clear an error alarm/display
• discontinue a printing operation
• eject pages from feeder
• STOPKey will effect current job that is displayed. If transmission is occurring
from memory while "System Ready" is displayed, COMM STAT Key must be
pressed before STOP Key will be effective.
12
Page 25

Pressing STOP does not:
• stop the receiving process during a reception
• effect transmission if Auto Storage is turned on
• If Auto Storage is Off, pages are sent from ADF . Pressing STOP will interrupt
the transmission and disconnect the telephone connection. If STOP is
pressed again, remaining pages will eject from the ADF.
25) Copy Key
Press the COPY Key, enter the number of copies (up to 99) and then press the
YES Key to make copies or to verify the quality of an original.
26) Send/Receive Key
Press Send/Receive when you are ready to begin a transmission/reception.
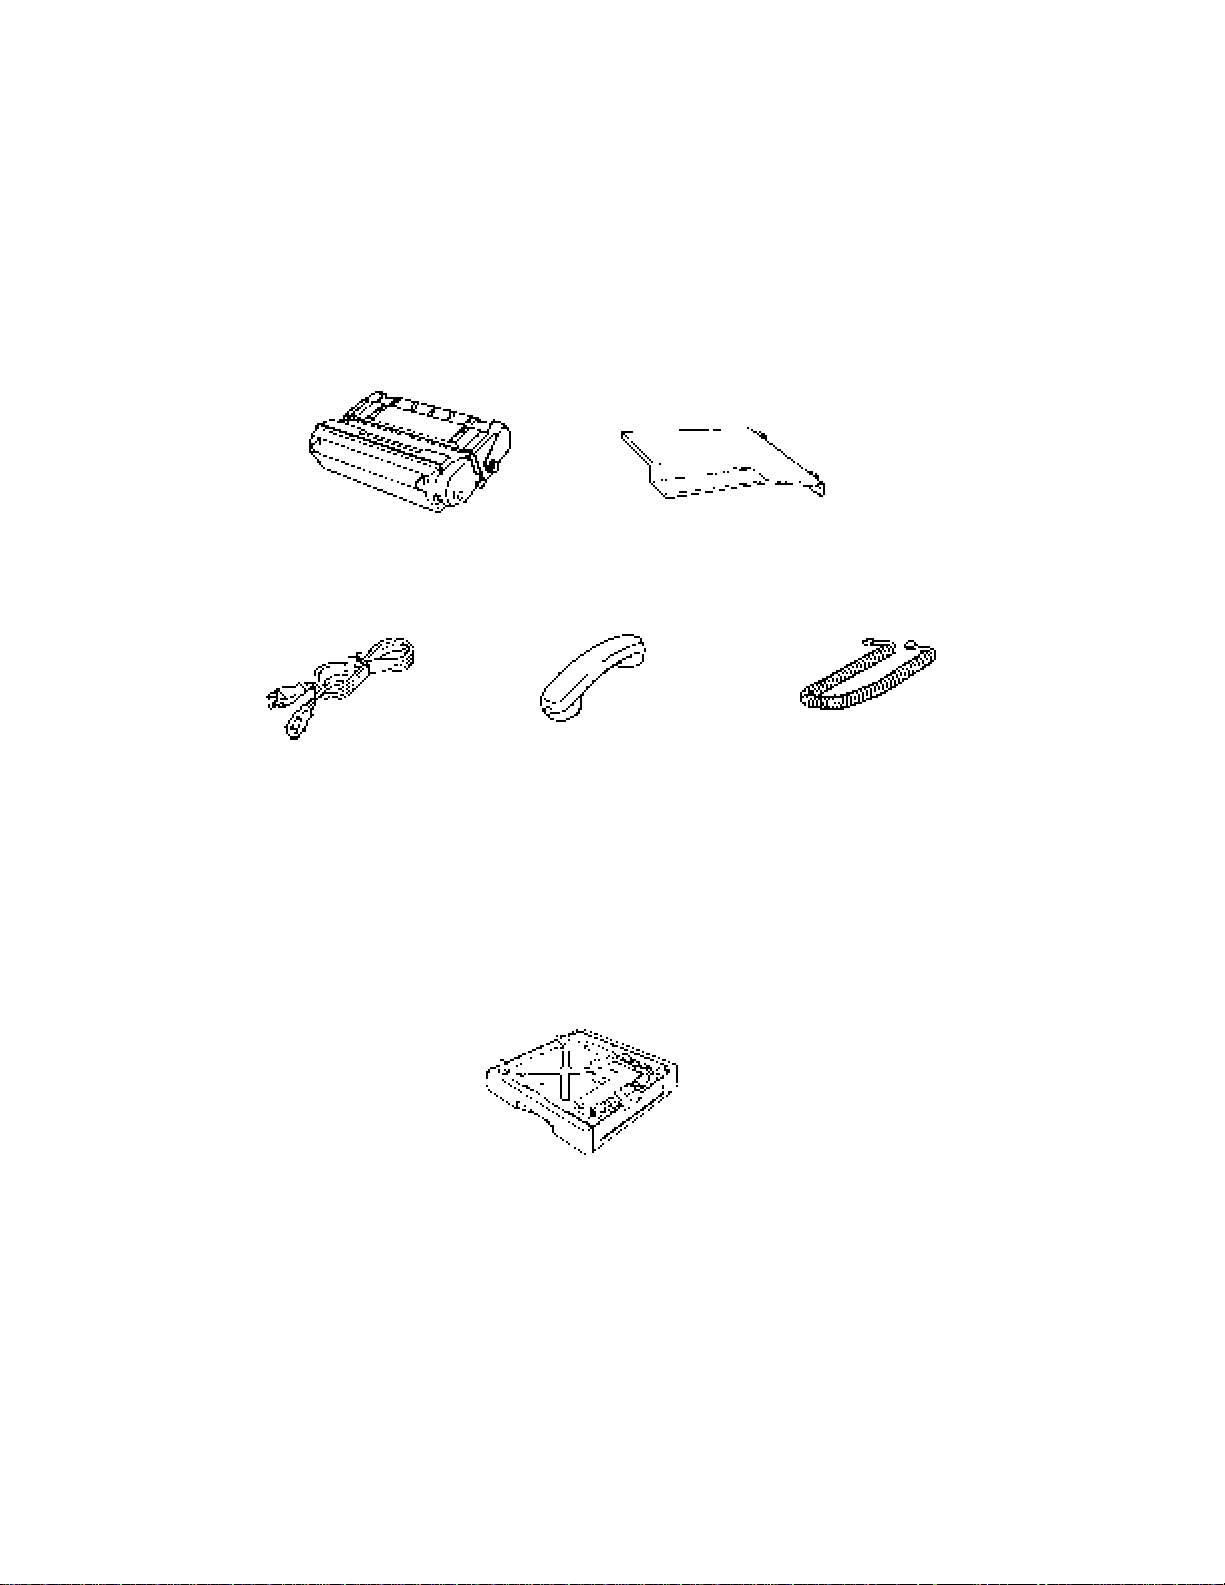
3.3 Main Unit and Accessories
Unpack the Model 9930 and check that you have the following components:
1. Imaging Cartridge 6. Operator's Guide
2. Document Tray (2) 7. Speed Dial Directory
3. Telephone Line Cord* 8. Document Carrier
4. Telephone Handset & Curly Cord* 9. Supply & Paper Cassette Labels
5. Power Cord
*Not available in U.K.
3.3.1 Installing the Accessories
1. Handset and Curly Cord: Connect curly cord to handset and plug other
end into the cradle. Place handset in cradle. (Not available in U.K.)
2. Original Document Return Tray: Hook the projections into the square
holes at the top left side of the machine.
3. Received Document Tray: Hook the projections into the square holes at
the bottom left side of the machine.
13
Page 26
3.3.2 Accessory Part Numbers and Supply Item Numbers
The following accessories/supplies are available for the Model 9930. Listed are
the Part Numbers for ordering through your local Pitney Bowes branch office. For
General Ordering Information, refer to Section 8.7.1.
812-0 812-4
Imaging Cartridge Document TX/RX Tray
6435221 6433813 6436089
Power Cord Telephone Handset* Telephone Handset Cord*
6429678 or 6429679
Optional 250 Sheet or 500 Sheet Cassette
*Not available in the U.K.
14
Page 27
3.4 Telephone Handset (not available in the U.K.)
Your Model 9930 is equipped with a built-in Telephone Handset that enables the
unit to be used as a combination facsimile machine and telephone.
The Model 9930 is designed to be used on its own telephone line or it can be
attached to your normal voice line and used as a desk telephone as well as an
Auto Receive fax. This means that you can actually (in most cases) eliminate
your existing desktop single line telephone set and replace it with the Model 9930.
If you intended to use the Model 9930 as your primary telephone, you may or may
not want the machine set up for automatic receiving. It can be set up either way
depending upon your needs.
If you would like to be able to answer an incoming call before the Model 9930
answers, you can configure your system for Delayed Answer Mode. This allows
you to determine how quickly the fax unit will answer after the phone begins to
ring.
Ring Detect Count is the number of rings before the Model 9930 answers. The
facsimile is able to answer after one to 9 rings. The Ring Detect Count should
have been set at the time that your system was installed. If not, or if you wish to
change it, it can be changed in the SET-UPSYSTEM Function (see Section 5.7).
If you always want the Model 9930 to answer, the number of rings (Ring Detect
Count) should be set at 1. In this case the Model 9930 will answer immediately
after the first ring. You may always want to answer incoming calls and never have
the Model 9930 answer automatically. In this case, you can configure your
system for Manual Receive. This is also changed in the SET-UP SYSTEM
Function (see Section 5.7). The display will indicate Manual Receive once it is
configured this way. All incoming calls must then be answered by picking up the
Telephone Handset. If the incoming call is a facsimile transmission, then press
the SEND/RECEIVE Key on the Operator Control Panel.
15
Page 28

3.5 Imaging Cartridge
The printing system employed by the Model 9930 drastically reduces operator
involvement and service calls. Except for Recording Paper, the Imaging Cartridge
is the only other supply you'll ever need.
The imaging technology is extremely reliable. Each time you replace the Imaging
Cartridge, you actually are replacing the whole printing mechanism. There is no
chance for system wear or deterioration.
A. The transmission settings of the sending machine
Mode = Normal/Fine/Extra Fine
Original = Normal/Dark/Light
Photos = On/Off
The transmission settings are actually determined by the sending machine. For
example, if the document is sent in the Normal Mode, it will be received in Normal
Mode on your machine, and so on. If documents are sent to you in the Fine or
Extra Fine Modes, the resolution will be higher and more toner will be used.
Likewise, if the sending machine is set for a Normal Original, your unit will receive
in the same manner. If the sender changes the Original setting of the
transmission, your received copies may be darker. This would also result in your
machine using more toner.
When a sending machine transmits pictures or graphics to you in the Photos
Mode, your Model 9930 will also use more toner than normal.
Since your unit is not able to control any of these Modes while receiving, the
amount of toner you use is therefore somewhat controlled by the sending
machine(s).
B. The type of document(s) being transmitted to you
The Imaging Cartridge yield of approximately 10,000 copies may actually vary
according to the print density of the documents being received. Pages that
contain more data or black coverage will result in fewer pages per Imaging
Cartridge.
16
Page 29

3.5.1 Low Toner and No Toner Receiving
This feature allows the Model 9930 to guard against lost pages or documents if
toner runs low. In most cases, this guarantees that all pages sent to your machine
will be either printed or saved in memory for printing at a later time.
The machine actually senses low toner well in advance of complete toner
depletion and the unit will let you know when toner is needed in two ways:
1) Aform is automatically printed when toner becomes low. Fill out the form and
either fax or call the number listed in Section 8.7. This form may also be printed
by following directions Section 5.6.1 (Printing a Report on Demand). (Not
available in U.K.)
2) Additionally, as soon as a low toner condition is detected, the Toner Indicator
near the display on the Operator Control Panel will begin blinking. Enough toner
still remains in the Imaging Cartridge to print approximately 250 pages. Aspecial
sensor automatically sends incoming pages to memory when the toner out
condition is detected. Conveniently, in the U.S. and Canada, the Pitney Bowes
toll free supply line telephone number is displayed when the toner becomes
depleted. In the U.K. a number to call is listed. The following messages will
appear in the display:
The Toner Indicator light will continue to blink.
After the Model 9930 prints another 250 copies (approximate), the Toner Indicator
will remain steadily lit. If the Model 9930 detects this secondary low toner
situation while printing a page from memory, the rest of the document will either
remain in memory or continue to be received into memory. Likewise, all
subsequent documents will be received into memory.
All documents in memory will be automatically printed when the Imaging
Cartridge is replaced.
If the Toner Indicator remains steadily lit, it means the unit is completely out of
toner and the following messages will appear in the display:
17
TONER ALMOST EMPTY
XXX PRINTS REMAIN
FOR REPLACEMENT
CALL SUPPLY NUMBER
DATE/TIME
SYSTEM READY
TONER EMPTY
PRINTER NOT USEABLE
FOR REPLACEMENT
CALL SUPPLY NUMBER
DATE/TIME
SYSTEM READY
Page 30

NOTES:
1. Multitasking lets the Model 9930 answer the telephone even while the unit is
printing from memory. Incoming documents can be temporarily received into
memory for printing as soon as printing of the current document is complete.
2. If the secondary low toner situation occurs and the remaining pages and
future documents are then received into memory, there may not be enough
available memory to receive the entire transmission. The Model 9930 will
receive until memory becomes full and then the telephone connection will
automatically disconnect. The Model 9930 will then not be able to receive until
the Imaging Cartridge is replaced. If this occurs frequently, you should consider
upgrading to one of the other Memory Options available from Pitney Bowes (see
Section 3.7.2). Should you feel that it is necessary to upgrade the Memory size
of your Model 9930, please call your Pitney Bowes Sales Representative to
place an order for the appropriate size.
3. A72-hour Battery Back-up Option is available for the Model 9930 (see Section
3.7.3).
18
Page 31
3.6 Loading Paper
Anyone can add paper to the front loading, easy to access paper cassette(s) of
the Model 9930 with minimal effort. Installation of one or two different sizes
and/or quantities of paper is a simple procedure. If receiving volumes increase
over time, add another cassette.
With possibly three cassettes present, there is no receiving guesswork. Once the
machine is set up and the paper is installed in the cassettes, the Model 9930
decides whether reduction is necessary to fit onto any letter-size paper. Or, if
legal paper is installed, in the second or third cassette, the unit may decide that a
received image might be best suited to print on legal size if too big for letter-size.
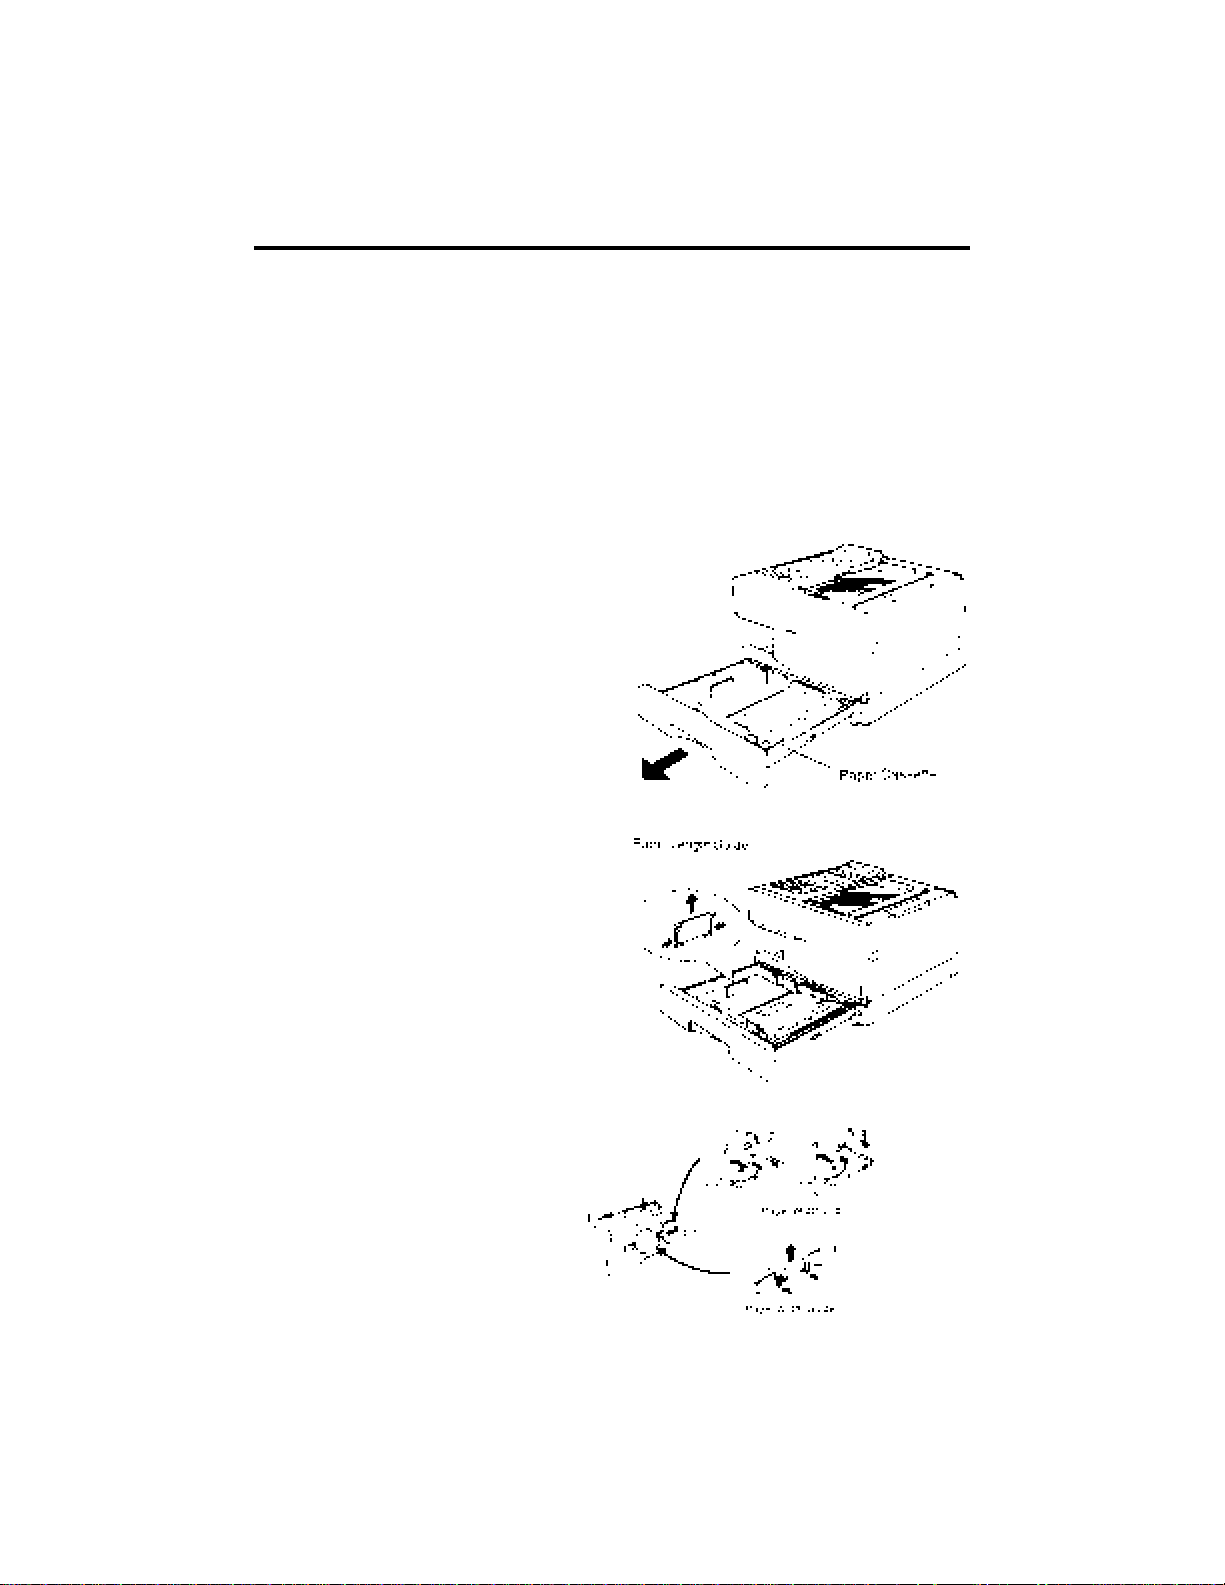
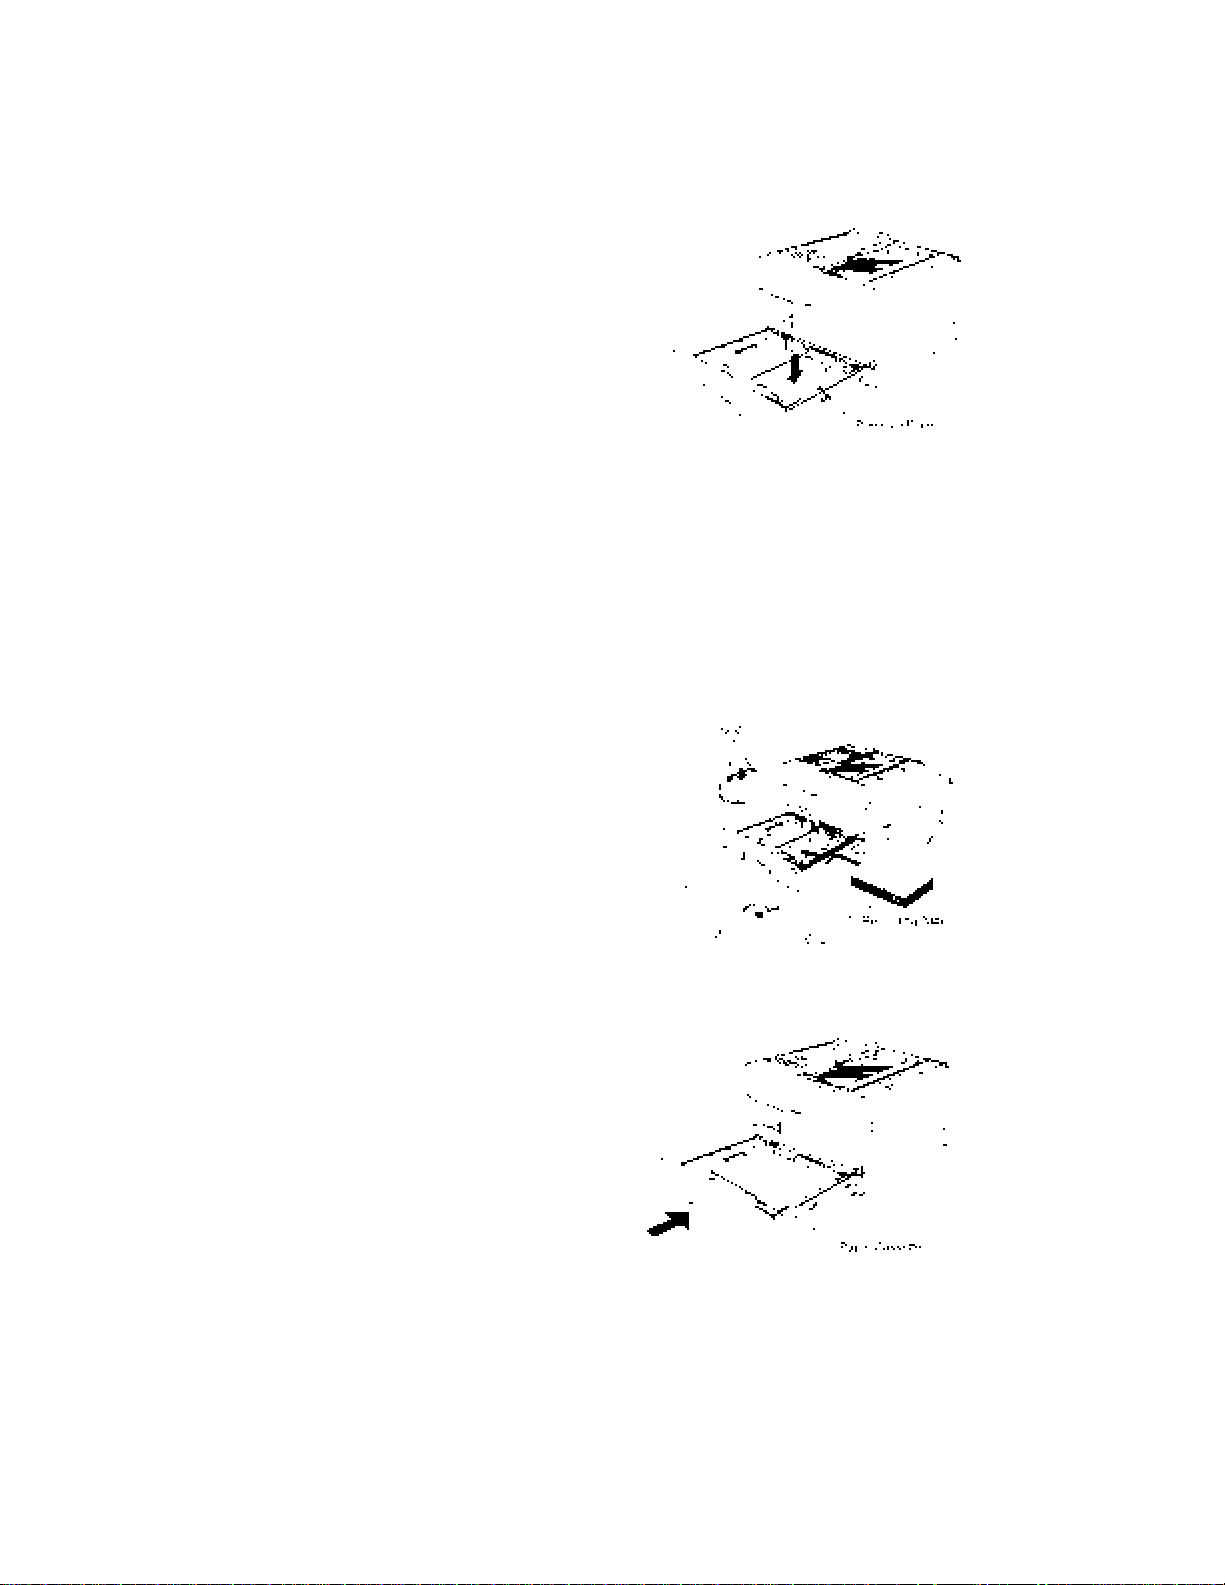
To load the Main Paper Cassette:
1. Pull the Cassette completely out from
underneath the front of the fax unit.
2. Select a supply of approximately 250
sheets of paper (maximum) to install
in the Main Paper Cassette. Then,
while holding the stack loosely, tap
the edge of the stack against a flat
surface to align the edges.
3. Adjust the paper length guide.
4. Adjust the paper width guide.
19
Page 32
5. Push the pressure plate until it is locked down.
6. (1) Slide the paper stack into the cassette from
the front.
CAUTION: Make sure that the paper is set
under the clips and does not extend over the
full indication line on the Paper Width guide.
Capacity is 250 sheets of 20 lb. paper. For
paper specifications, refer to Section 3.8.1.
(2) Place the proper paper size label (LTR,
LGL, A4) onto the front of the cassette.
7. Firmly, but gently, reinstall the cassette into the
machine.
20
Page 33

3.7 Memory Features
3.7.1 Standard Memory (Internal Memory)
The standard one megabyte (1 MB) Internal Memory of the Model 9930 can store
approximately 70 pages. The Model 9930 uses this memory to store pages for
such capabilities as broadcasting to multiple locations, receiving documents into
memory, as well as Mailbox and Relay Functions.
The Model 9930 has another type of memory called "System Memory." This is a
standard feature on all Pitney Bowes fax machines. System Memory retains all
of the programmable system configuration information in the event of power
failure. System Memory will hold all configurations for a minimum of 72 hours. In
most cases it can actually hold information for several weeks or months.
This means that if you should have to disconnect your machine from the electric
supply for any reason, you should not have to reprogram Speed Dial numbers,
One Touch Key (List) numbers, Time, Date, Names, etc.
Internal Memory allows your fax unit to perform many very sophisticated
functions, such as:
• Receive to Memory
• Out of Paper Receive
• Low Toner Receive
• Transmission from Memory (to single or multiple locations, either
immediately or delayed)
• Multitasking
• Automatic Reduction of Received Documents
• Delayed Communications (sending and polling)
• Private Mailboxing
• Making Multiple Copies
The first three memory functions listed above allow you to receive all or part of a
document into memory when the paper supply is empty or when the toner supply
is low.
Y ou're always assured of receiving a document even if your supplies (toner and/or
paper) have become depleted.
Internal Memory also allows the Model 9930 to perform multiple tasks at the same
time. As an example, you can scan a document to memory and receive a
document at the same time. This multitasking eliminates the need for operators
to wait by the machine, reduces input bottlenecks and increases throughput.
21
Page 34

NOTE: Feature performance is dependent on the amount of available memory.
Actual page capacity may vary according to document density. Number of pages
is based upon ITU-T Test Chart #1.
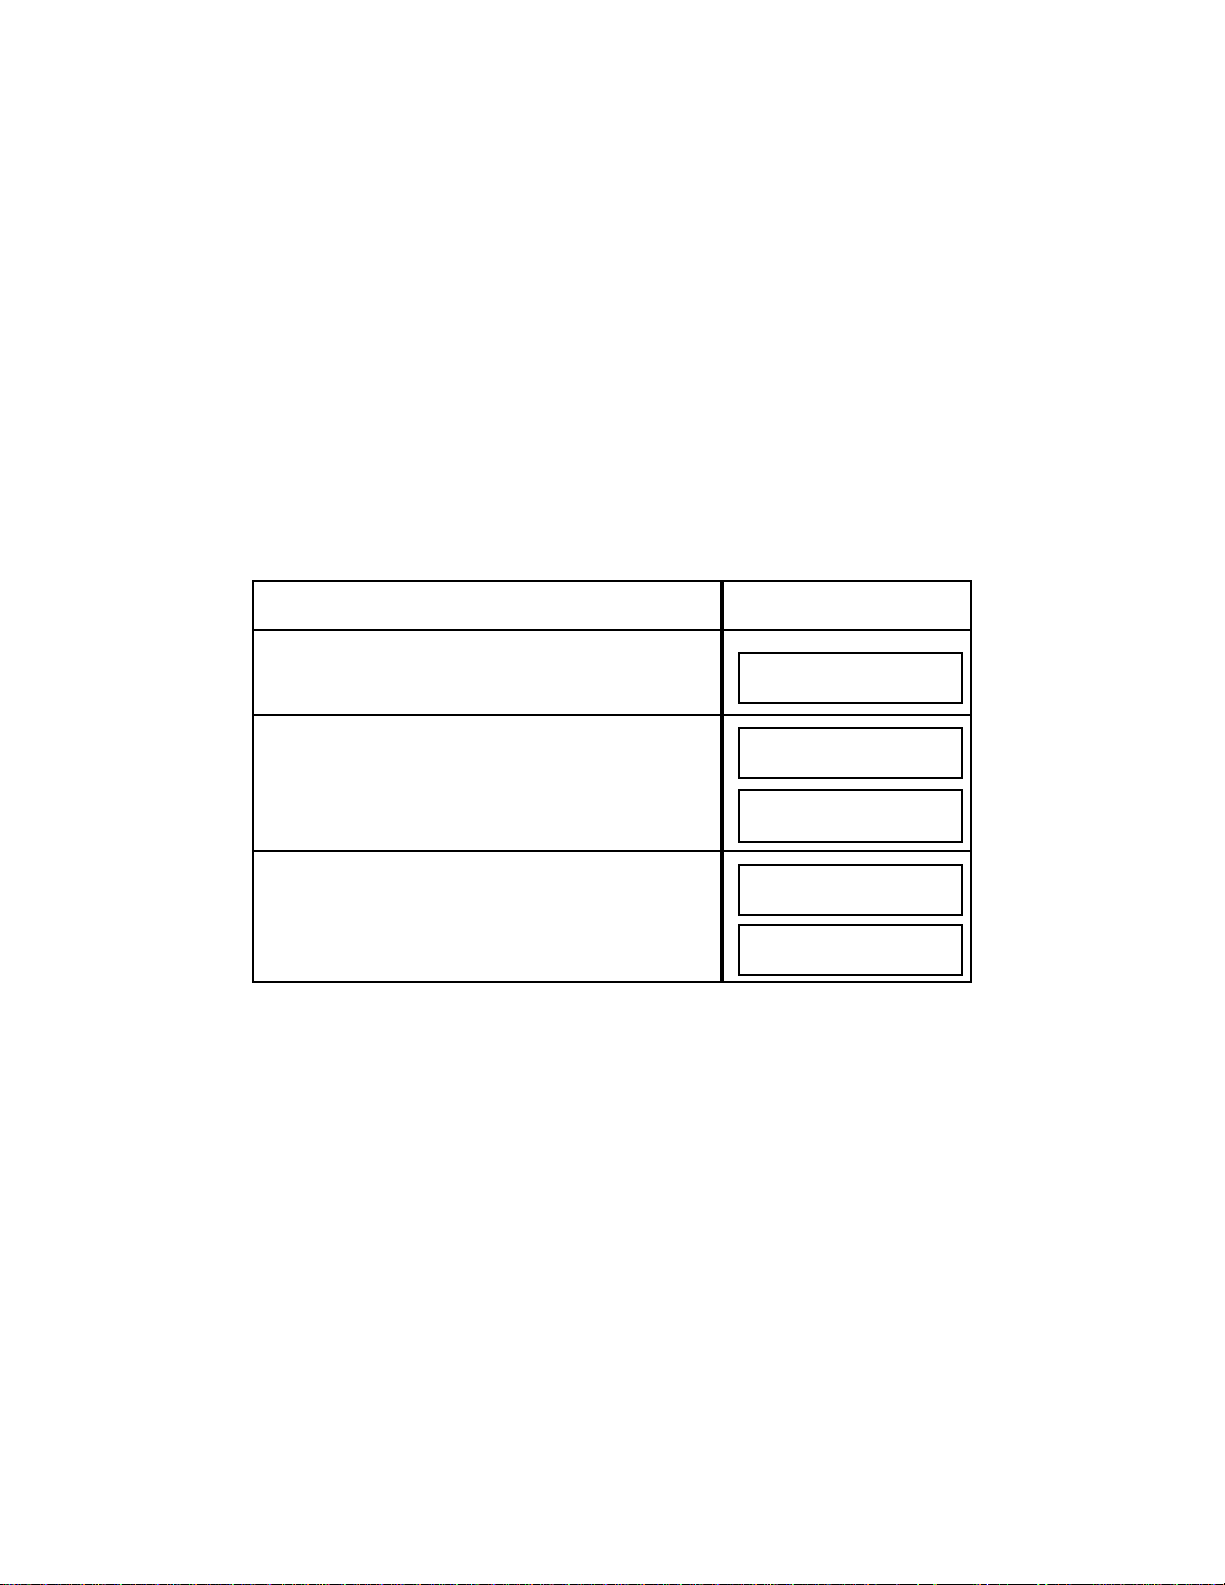
3.7.2 Optional Memory
Additional Memory Options are available for the Model 9930, including the
following:
Your unit may have been ordered with one of these Memory Options. You can
also quickly determine the size of your installed Memory Options (if any) by
printing a System Set-Up Report (see Section 5.6.1 for instructions on printing this
report).
Once you have printed a System Set-Up Report, check the first line item under
the MEMORY SET section (Memory Set line item #01.) Should you feel that it is
necessary to upgrade the memory size of your Model 9930, please call your
Pitney Bowes Sales Representative to place an order for the appropriate size.
3.7.3 Optional Battery Backed-Up Memory
A 72-hour battery back-up option is available for the Model 9930.
Should you feel it is necessary to upgrade your unit with this amount of battery
back-up protection, please call your Pitney Bowes Sales Representative to place
an order.
Once you have ordered this Option, Pitney Bowes will install it in your fax unit and
verify that it is working properly.
22
Additional Memory
Card Size
Additional Number
of Pages
Total Number
of Pages
1 megabyte
2 megabytes
4 megabytes
8 megabytes
85
165
335
670
155
235
405
740
Page 35

3.8 Documents
3.8.1 Acceptable Size and Thickness
3.8.2 Acceptable Number of Documents
A maximum of 50 documents can be set on the Automatic Document Feeder at
one time. Adjust the Document Guide to make sure the document is centered in
the ADF.
NOTES:
1. Transmission time is increased on documents with pictures or large dark
areas
2. Make sure that correction fluid has dried before transmitting or copying.
3. If using "Post It" notes or the like, make sure the glued edge is being fed into
the fax unit first.
4. Printing outside the prescribed range may not be transmitted successfully.
5. Do not use paper that is pressure sensitive, glossy, wrinkled, curled or folded
too thin (onionskin, airmail), too thick, smaller than 5"x5"(127mm x 127mm),
cloth or metal. Make a photo copy first and then send the copy or place
original in a Document Carrier. Document Carriers should be sent one at a
time.
3.8.3 Image Quality (Mode Key)
Pressing the MODE Key on the Operator Control Panel sets the mode or image
resolution. Since most documents can be sent in NORMAL mode, NORMAL will
always appear in the display whenever a document is first placed in the ADF. You
can select FINE or EXTRA FINE Mode (by pressing the MODE key) before you
send a document in order to improve the appearance of the transmitted page.
23
Maximum Width/Length:
Minimum Width/Length:
Thickness:
Effective Scanning Area
Effective Printing Width:
11.75" x 78.7" (297 mm x 2,000 mm)
5.8" x 5" (148 mm x 128 mm)
Single Page: 12 to 30 lbs.
0.0024"to 0.006" (0.06mm to 0.015mm)
Multiple Pages: 12 lbs. to 20 lbs.
0.0024" to 0.0048" (0.06mm to 0.012mm)
9.92" (252 mm)
8.20" (208 mm) (A4: 202mm)
Page 36

NORMAL: For documents with standard size characters.
FINE: For documents with relatively small characters or thin lines.
EXTRA FINE: For documents with detailed lines and characters. The receiving
party must possess Extra Fine capabilities (Pitney Bowes proprietary and/or
ITU-T standard) in order to benefit from this mode's feature. If not, the reception
will be accomplished in the Fine Mode. If it is necessary to receive in ITU-T
Extrafine, call the Pitney Bowes Diagnostic Center to have this feature turned
on. Installation of 2MB, 4MB or 8MB memory is necessary. The standard 1MB
Memory Card is not sufficient.
The selected transmission Mode also determines the speed at which the page is
sent. The finer the Mode, the longer it will take to transmit a page.
3.8.4 Contrast (ORIGINAL Key)
When transmitting dark documents, selecting DARK will allow the received copy
to be printed lighter than the original. When transmitting light documents,
selecting LIGHT will allow the received copy to be printed darker than the original.
Place the document in the ADF face down then press the ORIGINAL Key. The
indicator corresponding to the selected level of contrast will illuminate.
3.8.5 Working with a Photo
The Model 9930 has a 64-shade gray scale scanning capability, providing high
quality halftone reproduction print quality. What is sent is what is received. You
can send or copy a document that contains a photograph (or halftone) by pressing
the PHOTOS Key on the Operator Panel. When the PHOTOS Key is selected,
the Mode indicator will automatically advance to FINE. To enhance image quality ,
you may press the MODE Key if you desire higher or lower image resolution.
3.8.6 Automatic Reduction
The Model 9930 was shipped with a 250-sheet universal paper cassette
adjustable for letter, legal or A4 paper and the Print Auto Reduction ON. Each
page of a received document is first stored in memory. Based on the document
length the Model 9930 will then automatically calculate the suitable Reduction
Ratio to enable the entire document to print on a single page. It will reduce only
the amount necessary for everything to print. If you turn the Auto Reduction OFF
(see Section 5.7.1, Step #44) all documents will be received at their full size and
no reduction will occur.
24
Page 37

3.8.7 Effective Printing Area
The Model 9930, like all plain paper imaging products (copiers, laser printers,
laser fax units, and ink jet printers), contains certain borders or print margins
where no printing can occur. The Effective Printing Area is therefore somewhat
smaller than the actual size of the Recording Paper loaded in the Model 9930.
There are some special applications which may require setting the Reduction
Ratio to a lower amount than 100%. In the event you notice that your machine is
consistently losing information along the page edges because of the above
margin requirements and Effective Printing Area, the Reduction Ratio can be
changed from 100% to some lower percentage. Please consult your local service
representative or call the Diagnostic Center (refer to Section 8.8).
3.8.8 Copying a Document
You can use the Model 9930 to make convenience copies of a document. You
should also make a copy of a document that is of questionable quality to verify
what the reception quality will be before you send it.
To copy a document:
NOTES:
1. If you wish to make a single copy, you can just press YES or COPY a second
time during Step #3 above instead of entering 1 on the Numeric Keypad. If you
follow this procedure, the document will not be sent to memory first.
2. If you are making several copies of a multi-page document, the display will
inform you of the copying status. The page being printed and the document
number being copied will be displayed.
3. Making multiple copies is dependent upon available memory.
25
Do This T h i s
Happens
1. Insert the document face down in the Document
Feeder.
2. Press COPY
MODE/NORMAL
ORIGINAL/NORMAL
HOW MANY COPIES?
MAX (99) __ __
COPY
PAGE.1
Page 38

4. BASIC OPERATION
This Section describes the basic operating instructions of the system. It also
describes the procedures an occasional Model 9930 user needs to send, receive
or poll documents.
4.1 Turning on the Power
Once the Model 9930 has been set up, you should check the display on the
Operator Control Panel to be sure SYSTEM READY is displayed. If it's not, press
the ON/OFF switch at the lower right rear of the system. You should keep the
power ON at all times.
When the system is waiting to be used, you'll see the current date and time in the
display. This is called the System Ready Mode.
System Ready Mode
You'll see an indication of the amount of memory that is available when you load
a page in the Automatic Document Feeder.
4.2 Terminology
4.2.1 "Help" Key
The Model 9930 has an industry first - a unique HELP Key which is located below
the display on the Operator Control Panel.
Whenever this key is pressed, the user will be prompted by a display message to
press the Key or enter the Function they need assistance with. After pressing the
desired Key or reaching the desired Function, the Model 9930 will print an
explanation of the Key, feature or Function in question. The printed material
contains descriptive information as well as important programming guidelines.
4.2.2 "Priority Interrupt" Feature
The Model 9930 allows an operator to immediately interrupt any transmission in
progress. Perhaps a more important document must take priority, or a
transmission in progress was inadvertently programmed with the incorrect
destinations or maybe the wrong document is being sent. Whatever the reason,
rather than waiting until the end of the current transmission, the user can quickly
interrupt any transmission with ease.
26
JAN 15 1998 10:00
SYSTEM READY
JAN 15 1998 10:00
MEMORY AVAILABLE 100%
Page 39

First, to stop a transmission, the COMMUNICATIONS STATUS Key must be
pressed to verify that the current transmission is the one that should be halted.
Then, following the prompts, the user presses the STOP Key (and then confirms
by pressing YES). The transmission is halted and the interrupted document is
then deleted from memory, unless the 9930 is programmed to save stopped
transmissions. (Call the Diagnostic Center if you wish to save the stopped
transmission in memory.) The remote receiving machine is also notified that the
sender pressed the STOP Key. If the 9930 is set to save stopped or incomplete
transmissions, incorrect jobs can be deleted or corrected (refer to Section 5.4 to
Edit Jobs).
The Pause key can be used also to temporarily interrupt a transmission. By
pressing the Pause key while a transmission is in progress, the display will read,
"Pause Request." "Paused" will show on the display once the transmission has
been paused. During this time a priority transmission can be sent. The paused
transmission will resume automatically after 5 minutes or if STOP is pressed.
4.2.3 Automatic Daylight Time Shift (Not available in U.K.)
The automatic daylight/standard time shift is a newly added feature to the Pitney
Bowes Facsimile machines. You will not have to be concerned with changing the
time on your unit. The yearly time shifts will be consistent at least through the
year 2005. It will occur on the first Sunday of April (one hour ahead) and the last
Sunday of October (one hour back). This feature can be disabled by your Service
Representative or the National Diagnostic Center for states or countries that do
not comply.
4.2.4 Multiple Selectable Transmit IDs
The 9930 allows you to set up to 25 different Transmit IDs. A user's personal ID
can be chosen while setting up a document transmission. The machine's default
ID is used if one is not selected. The ID is used in the traditional "FROM" section
of the identification banner at the top of each transmitted page. It is also used in
the "FROM" box on the Automatic Cover Sheet (if this feature is activated).
Multiple IDs provides a personal touch to the Model 9930 if it is shared by
numerous users in an office or department. See Section 5.7.1.
4.2.5 Remote Retrieval
This feature allows you to retrieve documents received into the 9930's memory
(except Mailboxes and pending jobs) from a remote fax. If turned on in the Set Up
Memory Function (see Section 5.9), all documents will be received into memory.
To retrieve them you must know the 9930's polling passcode (see Section 5.7.1,
Step #17, Setting Up the System). The passcode is used for securing the remote
retrieval feature. You must have Touch Toneô service. Call your 9930 and
immediately after the receive tone stops; enter #**#XXXX* (XXXX is polling
passcode) from the keypad. After the solid ready tone, press Send/Receive to
receive the documents from the 9930. All documents in the 9930's memory will
be erased after being received by the remote facsimile.
27
Page 40

4.3 System Set-Up
Since a Pitney Bowes Customer Service Representative probably unboxed and
installed your Model 9930, your basic System Set-Up Definitions should have
already been programmed for you. If your machine has already been installed,
you can begin transmissions as soon as you turn on the power. Refer to Section
4.4 for instructions on Sending a Document.
If the Pitney Bowes Customer Service Representative has not programmed these
Set-Up Definitions for you, you may want to program them before sending a
document. This is not necessary to begin a transmission, but if it is done prior to
any sending and receiving, the Model 9930 can help you keep records of all
documents from the very beginning.
For example, the built-in clock keeps the exact date and time, and your Transmit
ID (TTI) and Fax Telephone Number help identify you when you send or receive
documents.
The System Set-Up Definitions that can be addressed in the System Set-Up
Function are:
• DATE & TIME • RING PATTERN
• TRANSMIT ID (TTI) • RING DETECT COUNT
• FAX TEL NUMBER • AUTO RECEIVE
• POLLING PASSCODE • REDIAL COUNT
• JOURNAL DISPLAY • REDIAL INTERVAL
• JOURNAL ID FIELD • AUTO REDUCTION
• JOURNAL PRINTING TIME • BEEP VOLUME
• JOURNAL SEND • MONITOR VOLUME
Take a few moments to refer to Section 5.7 - Setting Up the System - to configure
the above definitions if they have not been configured already.
4.4 Sending a Document
The Model 9930 provides you with ten different methods of sending a document.
For single transmissions, you can:
• dial through the Numeric Keypad, also referred to as on-hook dialing
• enter a Speed Dial number through the Numeric Keypad
• press a One Touch Key
• dial with a Programmable One Touch Key (P-Key)
• press the Delayed Send Key
• program an AutoDial Job
• dial manually from an extension telephone (off-hook dialing)
• dial manually from the Model 9930 Telephone Handset (off-hook dialing)
• Voice Request Dialing
28
Page 41

Each of these methods is described here. Your Model 9930 is configured with
memory. When sending a document by any of the above methods (with the
exception of sending by Dialing Manually and Voice Request Dialing), all pages
are automatically sent to memory before being transmitted. The "Auto Storage"
memory option can be deactivated by you. Refer to Section 5.9.
4.4.1 Dialing through the Numeric Keypad (also referred to as on-hook
dialing)
To dial through the Model 9930 Numeric Keypad:
29
Do This
1. Insert the document face down in the Automatic
Document Feeder.
2. Enter the phone number by touching the Keypad Keys.
Example: Enter 555 3495.
NOTE: If your phone system requires an access number
to reach an outside line, enter it first, followed by a pause
(press the Pause Key represented by a "-" in the phone
number). Example: 9-555 3495.
3. Press SEND/RECEIVE.
If multiple IDs have been programmed, enter ID (1-24)
otherwise the Default ID will be used.
If the line is busy, the Model 9930 will automatically redial
the destination. This display appears between redial
attempts (alternates with the System Ready display). You
may override an existing redial wait period by pressing the
"Redial Key".
This Happens
The numbers appear in the
display.
If no connection is made after all
redial attempts, the following
message will appear briefly in
the display:
Then an Incomplete Dial
message automatically prints.
The LINE BUSY display returns
until an operator presses the
STOP Key.
MODE/NORMAL
ORIGINAL/NORMAL
555-3495
SELECT TRANSMIT ID
ENTER # OR ▼▲
CMD #001 TO MEMORY
PAGE 1
(DATE/TIME)
LINE BUSY
INC. DIAL MESSAGE
PRINTING NOW
Page 42

NOTES:
1. The Model 9930 was set at 3 redials at 3 minute intervals when the machine
was shipped. If you want to change the number of redials (0-15 attempts) or the
interval between redial attempts (1-10), refer to Section 5.7.1, Step #40.
4.4.2 Dialing with a Speed Dial Number
A Speed Dial Number is an abbreviated way of entering a phone number. If you
frequently send documents to the same location, you can store the number as a
three-digit Speed Dial number, and simply enter the Speed Dial Number from the
Numeric Keypad. Each number you store can be up to 36 digits including pauses.
A total of 200 Speed Dial numbers may be programmed. See Section 5.1 for
procedures to store a Speed Dial number.
To dial using a previously stored Speed Dial number through the Keypad:
The system will automatically begin sending after a 5-second pause. This pause
can be eliminated by pressing SEND/RECEIVE Key immediately after YES in
Step #2.
You will hear the dialing sequence and answer tone through the Monitor Speaker.
When the remote fax is detected the Monitor will turn off and the document will be
sent to the Speed Dial location. If the line is busy, the Model 9930 will
automatically redial the destination. The Model 9930 is set at 3 redials at 3minute intervals. If you want to change the number of redials (0-15 attempts) or
the interval between redial attempts (1-10) refer to Section 5.7.1, Step #40. If no
connection is made after all redial attempts a Tx Status Report automatically
prints.
30
Do This
1. Insert the document face down in the Automatic
Document Feeder.
2. Enter the 3-digit Speed Dial number from Numeric
Keypad. If a mistake is made, press NO to backspace
and erase incorrect digits or use the Cursor Keys to
move the cursor to the incorrect digit and simply enter
the correct digit. Press YES. If multiple IDs have been
programmed, enter ID (1-24) otherwise Default ID will
be used.
This Happens
MODE/NORMAL
ORIGINAL/NORMAL
120
Page 43

4.4.3 Dialing with a One Touch Key
The 35 One Touch Keys on the Operator Panel allow you to store and use any
combination of Speed Dial numbers that you need to use on a regular basis. You
can store multiple Speed Dial numbers (or just one number) in each One Touch
Key. One Touch Keys allow you to send a document to numerous locations by
pressing only one Key. See Section 5.2 for the procedures to store a One Touch
Key.
To dial using a previously stored One Touch Key:
Since Auto Storage defaults to ON, the document is sent to memory first. If you
do not wish to have documents sent to memory before being transmitted, refer to
Section 5.9.1, Step #5. If Auto Storage is OFF and multiple destinations are
programmed in One Touch, the document will store to memory.
If the line is busy, and the One Touch Key is only programmed with one Speed
Dial Number, the Model 9930 will automatically redial the destination.
When multiple destinations are programmed in the One Touch Key, the Model
9930 will begin dialing the first number on the list. If there are additional
destinations programmed, the Model 9930 will dial the next telephone number on
the list, even if the first destination number was busy . After all numbers have been
called, all incomplete stations will be redialed.
31
Do This
1. Insert the document face down in the Automatic
Document Feeder.
2. Press the appropriate One Touch Key containing the
destination you want to send the document to.
The 5-second pause can be eliminated by pressing
SEND/RECEIVE Key immediately.
3. If Multiple ID # has been turned on , scroll to desired ID
#01 to 24. Press YES. Otherwise the Default ID # will be
used. See Section 5.7.1 for programming information.
This Happens
MODE/NORMAL
ORIGINAL/NORMAL
#01: MARKETING
SELECT TRANSMIT ID
ENTER # OR ▼ ▲
CMD #09 TO MEMORY
PAGE.1
TX STATUS REPORT
PRINTING NOW
Page 44
(Not in the U.K. version.) The Model 9930 is set at 3 redials at 3-minute intervals.
If you want to change the number of redials (0-15 attempts) or the interval
between redial attempts (1-10) refer to Section 5.7.1, Step #40. If no connection
is made after all redial attempts a Transmit Status report automatically prints.
4.4.4 Dialing with P-Keys
The five P-Keys (Numbers P1, P2, P3, P4 and P5) on the Model 9930 allow you
to store a frequently used AutoDial job. Once programmed, you can enter the job
by pressing the P-Key. P-Keys can be reprogrammed with new sets of jobs any
time and can perform other functions as well as sending to one or several
locations. See Section 5.5 for procedures to program a P-Key.
To dial with a previously programmed P-Key.
32
Do This
1. Insert the document face down in the Automatic
Document Feeder.
2. Press the appropriate P-Key, Example: Press P3.
3. If Multiple ID has been turned ON, scroll to desired
ID #01 to 24. Press YES. Otherwise Default ID will
be used. See Section 5.7.1 for programming
information.
This Happens
MODE/NORMAL
ORIGINAL/NORMAL
PK3: REGIONS
JOB#09 TO MEMORY
PAGE.1
TX STATUS REPORT
PRINTING NOW
SELECT TRANSMIT ID
ENTER # OR ▼ ▲
Page 45

4.4.5 Dialing by Pressing the DELAYED SEND Key (Quick AutoDial)
The Model 9930 has a DELA YED SEND Key for setting up delayed or immediate;
single or multiple transmission jobs. On the Model 9930, up to 30 jobs can be
entered through the DELA YED SEND Key. You can program delayed jobs by any
one of the following methods:
• random phone number entered by touching Numeric Keypad Keys
• previously stored Speed Dial number from Numeric Keypad
• press previously programmed One Touch Key
To program a job using the DELAYED SEND Key:
33
Do This
1. Insert the document face down in the Automatic
Document Feeder.
2. Press the DELAYED SEND Key.
3. Enter a destination by either entering a phone number
from the Numeric Keypad or entering a previously
stored Speed Dial number; or pressing a previously
programmed One Touch Key.
If a mistake is made, press NO to backspace and erase
incorrect digits or use the Cursor Keys to move the
cursor to the incorrect digit and simply enter the
correct digit.
4. Press YES (press YES a second time if you entered a
Speed Dial destination).
5. Press YES and enter another number. Repeat until all
destinations are entered. Press NO to go on.
This Happens
MODE/NORMAL
ORIGINAL/NORMAL
ENTER DESTINATION #
ENTER DESTINATION
01:MARKETING
ANOTHER NUMBER?
ENTER TIME
_ _:_ _
Page 46

If the line is busy, and the DELAYED SEND Key is only programmed with one
destination, the Model 9930 will automatically redial the destination.
When multiple destinations are programmed, the Model 9930 will begin dialing
the first number on the list. If there are additional destinations programmed, the
Model 9930 will dial the next telephone number on the list, even if the first
destination number was busy. After all numbers have been called, all incomplete
stations will be redialed.
The Model 9930 is set at 3 redials at 3-minute intervals. If you want to change
the number of redials (0-15 attempts) or the interval between redial attempts (1-
10) refer to Section 5.7.1, Step #40. If no connection is made after all redial
attempts a Tx Status Report automatically prints.
4.4.6 Dialing by Programming an AutoDial Job
A programmable AutoDial job is a transmission (or polling) instruction you enter
from the Operator Control Panel. Although this dialing method can be used for
single facsimile transmissions, it is typically used for more complex jobs to
transmit (or poll) a document to one or more locations at any specified time within
a 24-hour period.
On the Model 9930, as with the DELAYED SEND Key, up to 30 jobs can be
entered by the AutoDial method. Refer to Section 5.3 for the procedures to enter
other types of Programmable AutoDial Jobs.
34
Do This
6. Enter the time to send the document by pressing the
appropriate Numeric Keypad numbers, using the 24hour time clock, and then press YES. Or just press
YES to begin sending immediately.
7. If multiple ID is turned on, select Transmit ID: 01 to 24 .
Otherwise Default ID will be used. See Section 5.7.1
for programming direction.
This Happens
ENTER TIME
10:45
SELECT TRANSMIT ID
ENTER # OR ▼ ▲
JOB# __TO MEMORY
PAGE.1
Page 47

35
Do This
1. Insert the document face down in the Automatic
Document Feeder. Then press FUNCTION twice.
2. Press YES.
If Polling is desired,
Press ▼ or Number 6 to select POLL.
3. Press 1, then press YES.
4. Enter one of the following: a phone number (up to 32
random numbers) from the Numeric Keypad; a Speed
Dial number; or a One Touch Key. If a mistake is made
while entering a number from the Keypad, press NO to
backspace and erase digits or use Cursor Key to move
to the incorrect digit and simply enter the correct digit.
5. Press YES after checking that your entry is correct (if
you entered a Speed Dial number, press YES a second
time).
6. Press YES and enter another number by one of the
methods mentioned in Step #4 above. Repeat until all
numbers are entered. Then press NO to continue with
the rest of the programming procedure.
7. Enter the number of pages then press YES, or just
press YES to send all the pages in the Feeder.
8. Enter the number corresponding to the correct Mode
and then press YES. Or just press YES for Normal
Mode.
9. This feature is defaulted OFF on the 9930, the Diagnostic
Center will turn it on if you wish. If you would like the
remote fax to print more than one copy and that location
has multicopy capabilities, press YES. Enter the number
the remote fax should make and press YES, or press NO
for no copies.
This Happens
The appropriate telephone
number, Speed Dial number
or One Touch Key number
appears in the display.
AUTO DIAL?
ENTER YES OR NO
1=SND 2=RCV 3=RELAY
4=SND/RCV 5=MAILBOX
6=POLL
ENTER DESTINATION #
ANOTHER NUMBER?
HOW MANY PAGES?
__ __
1=NORMAL 2=FINE
3=EXTRA FINE
REMOTE MULTI-COPY?
# COPIES, MAX 10
ENTER TIME
_ _:_ _
Page 48

NOTES:
1. If multiple destinations (Speed Dial numbers) are programmed in the AutoDial
job, the Model 9930 Series will begin dialing the first Speed Dial number on the
list. If there are additional destinations programmed, the Model 9930 will dial the
next telephone number on the list, even if the first destination number was busy.
After all numbers have been called all incomplete stations will be redialed.
2. The Model 9930 was set at 3 redials at 3 minute intervals when the machine
was shipped. If you want to change the number of redials (0-15 attempts) or the
interval between redial attempts (1-10), refer to Section 5.7.1, Step #40.
3. Refer to Section 5.4 for procedures to cancel or edit an AutoDial Job.
36
Do This
10. Enter the time to send the document and then press
YES. Or just press YES to begin sending now.
11. If multiple ID is turned ON, enter the Transmit ID
number you wish document sent from or scroll up or
down to select appropriate ID previously
programmed. Press YES. The Default ID will be
used if no action is taken within 5 seconds.
NOTES:
1. If the line is busy, and the AutoDial Job is only
programmed with one destination, the Model 9930 will
automatically redial the destination.
2. If no connection is made after all redial attempts a Tx
Status Report automatically prints.
This Happens
SELECT TRANSMIT ID
ENTER # OR ▼ ▲
JOB #01 TO MEMORY
PAGE.1/20
TX STATUS REPORT
PRINTING NOW
Page 49

4.4.7 Dialing Manually from the Model 9930 Handset (off-hook dialing)
You can use the Model 9930 Telephone Handset to dial manually according to the
following instructions:
4.4.8 Voice Request Dialing
Although these optional dialing methods can be used for facsimile transmission,
they are typically used for placing Voice calls.
37
Do This
1. Insert the document face down in the Automatic
Document Feeder.
2. Lift the Telephone Handset.
3. Enter the phone number by pressing the Numeric
Keypad Keys. Example: Enter 5553495
NOTE: If your phone system requires an access number
to reach an outside line, enter it first, followed by a pause
(press the Pause Key — represented by a "-" in the phone
number). Example: 9-5553495.
4. When you hear the answer tone, press SEND/RECEIVE
and then hang up the Telephone Handset.
NOTE: If the line is busy, hang up the Telephone Handset.
Try again several minutes later by pressing the REDIAL
Key.
This Happens
The numbers appear in the
display. The 9930 will automatically dial the destination.
The document is sent to the
destination shown in the
display.
MODE/NORMAL
ORIGINAL/NORMAL
(DATE/TIME)
PHONE OFF HOOK
5553495
Page 50
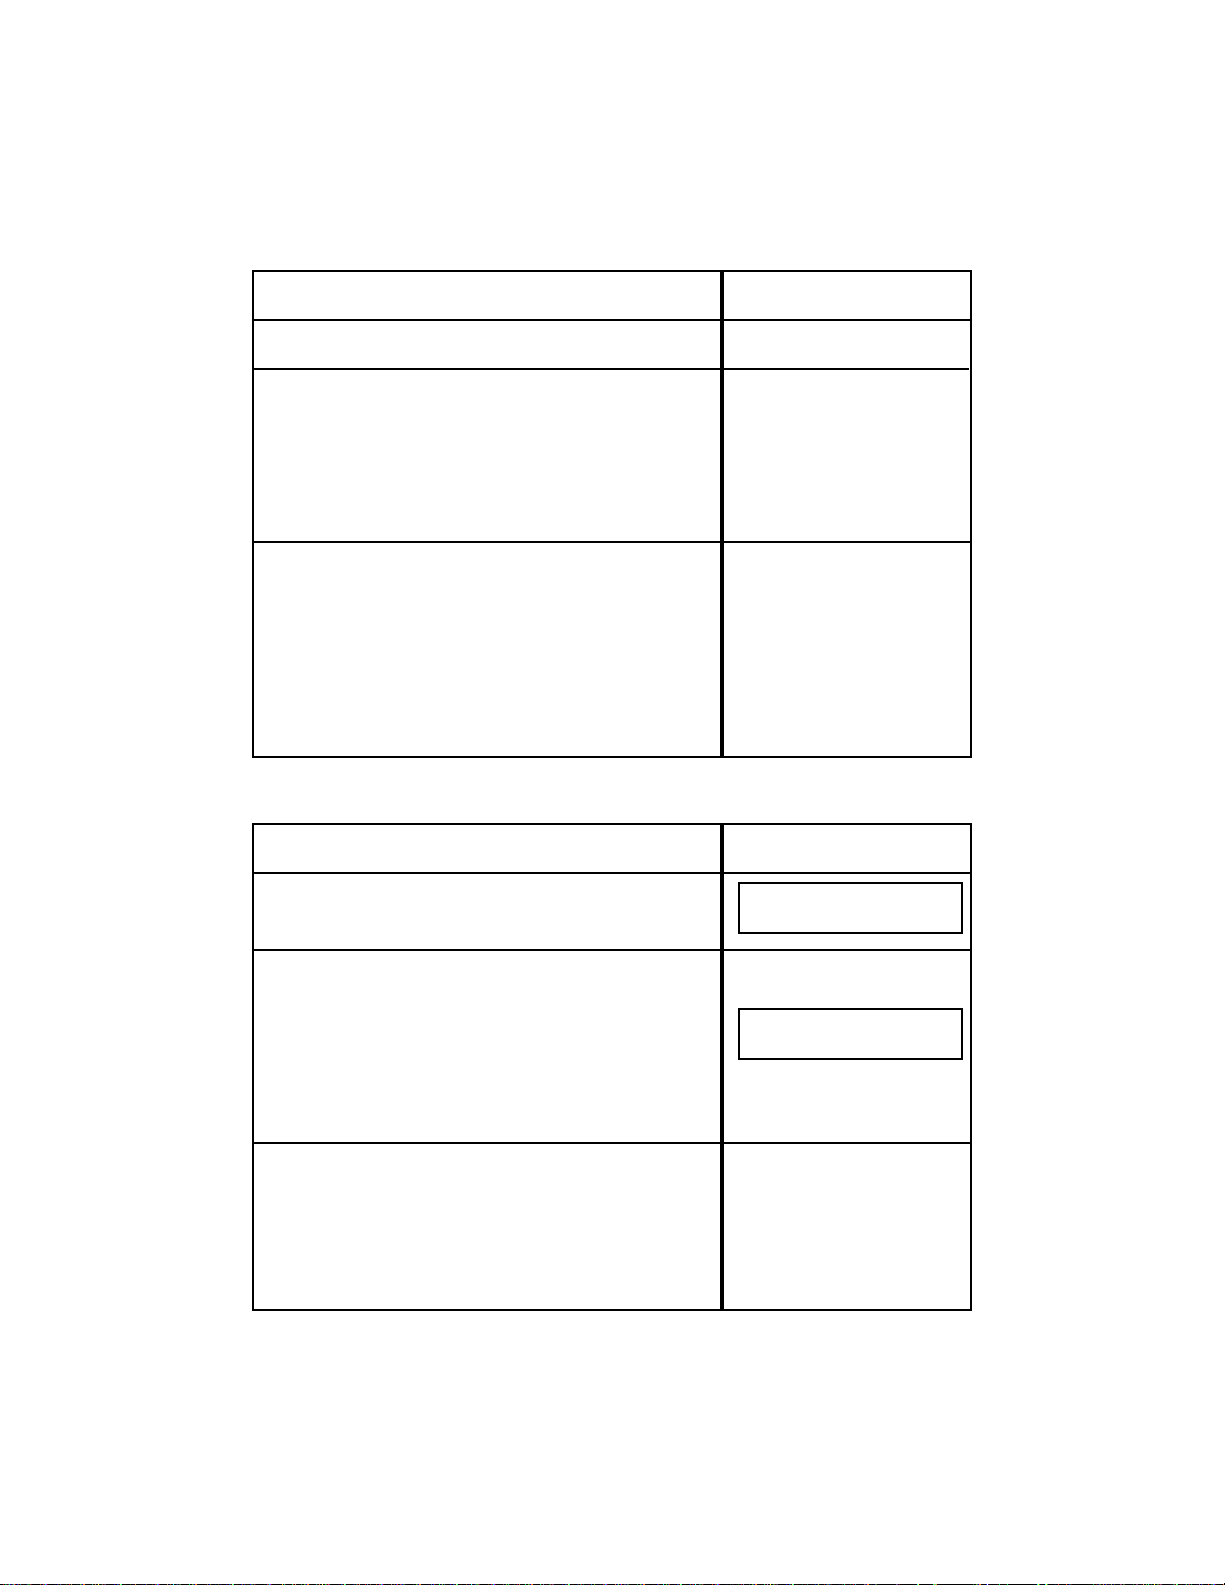
A. For dialing with the Model 9930 Telephone Handset OFF-HOOK.
B. For Voice Communication with the Telephone Handset ON-HOOK.
38
Do This
1. Pick up the Model 9930 Telephone Handset.
2. Dial the telephone number from the Model 9930 Numeric
Keypad.
3. After the conversation, hang up the T elephone Handset,
or begin a fax communication by pressing
SEND/RECEIVE and hanging up.
After pressing SEND/RECEIVE, if pages are set in the
Feeder, the Model 9930 will begin sending when the
remote fax machine's Ready Tone is detected. If there
are no pages in the Feeder, the Model 9930 will attempt
to poll (receive).
This Happens
You hear a dial tone.
The telephone number
appears in the display as it is
entered. Dialing will take
place exactly like a regular
phone (there is a slight delay
before the dialing sequence
and tones are heard).
Do This
1. Press the VOICE Key.
2. Enter the destination by either entering a phone number
from the Numeric Keypad or entering a previously
stored Speed Dial number; or pressing a previously
programmed One Touch Key. Press SEND/RECEIVE
Key.
When dialing begins, you hear the dialing sequence
through the Monitor Speaker
3. When you hear the party answer, lift the Model 9930
Telephone Handset and begin talking. If facsimile
communication is desired after the conversation, press
the SEND/RECEIVE Key. When you hear the remote fax
machine's Ready Tone, then hang up.
This Happens
The number appears.
If the remote handset is not
picked up within five
minutes, the Model 9930 will
automatically disconnect the
line.
VOICE MODE
ENTER TEL. #
DIALING NOW
5553495
Page 51

NOTES:
1. If an error is made in entering telephone numbers (when using on-hook
dialing), corrections can be made by pressing NO to backspace and delete, or by
using the Cursor Keys to move the cursor to the incorrect digit. When the cursor
is in the position at the point of error, simply enter the correct digit(s) and press
SEND/RECEIVE.
2. If there is no answer or the line is busy, the Model 9930 will remember the last
number dialed. To call the last telephone number dialed, simply press the
REDIAL Key.
3. Y ou can press the VOICE Key during transmission or reception when you want
to speak to the remote operator. When the sending or receiving is completed,
both fax machines (yours and the remote one) will beep continually. If you and
the other operator each lift the Telephone Handset you may speak to each other
without placing another call. When the conversation has ended, hang up the
Telephone Handset(s).
4. In the U.K., the telephone can be used for dialing as well as the numeric
keypad on the facsimile machine.
4.5 Receiving a Document
Receiving a document on your Model 9930 is a simple procedure. Different steps
may have to be followed depending upon your unit's receive configuration.
The following configuration choices are available to you.
1. Auto Receive Fax (This is the way your Model 9930 was configured when it
was shipped to you):
Configuration:
System Set-Up Definition — Auto Receive — YES (or ON)
System Set-Up Definition — Ring Detect Count — 1
If you have a phone line dedicated to the fax and you keep the unit on Automatic
Receive, when receiving, your unit will automatically answer all incoming calls
after the first ring. It will act as though all incoming calls are fax calls. All
documents will automatically be received to memory before printing. Additionally,
if the Model 9930 Series paper supply runs out, the remainder of any document
being received will automatically be received into memory for printing at a later
time. Subsequent documents will also be received into memory until memory
becomes full or until the paper supply is replenished.
39
Page 52

2. Delayed Answer Mode:
Configuration:
System Set-Up Definition — Auto Receive —YES (or ON)
System Set-Up Definition — Ring Detect Count — 2, 3, or up to 9
If you would like to be able to answer an incoming call before the Model 9930
answers, you can change the Ring Detect System Set-Up Definition and
configure the Model 9930 for Delayed Answering. The Ring Counter can be set
at any number from 1 through 9. Setting it at a higher number than 1 will instruct
the Model 9930 as to how many rings it will wait before answering incoming calls.
The Ring Counter on your Model 9930 should have been set at 1, which means
that it will answer after the first ring. Refer to Section 5.7.1, Step #36 for
procedures to change this System Set-Up Definition.
If you answer the call before the Model 9930 answers, you can speak to the
person if it is a voice call. If it is an incoming fax call and you hear a fax sending
tone on the line when you pick it up, you can still receive a fax by first removing
any pages from the Automatic Document Feeder and then pressing the
SEND/RECEIVE Key.
If you do not answer the call by the number of rings you select in the Ring Detect
Count, the Model 9930 will answer the call and assume that it is an inbound fax
call. Just as with the original settings, all calls will be received into memory first
and Out of Paper Receive and Out of Toner will still work.
3. Manual Receive Mode:
Configuration:
System Set-Up Definition — Auto Receive — NO (or OFF)
System Set-Up Definition — Ring Detect Count — Selectable (1 through 9)
You may want to answer all incoming calls and never have the Model 9930
answer automatically. In this case, you can configure your system for Manual
Receive by turning the Auto Receive System Set-Up Definition OFF (or changing
it from YES to NO). The display will indicate Manual Receive. Refer to Section
5.7.1, Step #39 for procedures to change this System Set-Up Definition.
If and when you press the SEND/RECEIVE Key to receive a fax on your Model
9930, the document can still be received into memory before printing.
Additionally , if you step away from the machine while it is receiving and it runs out
of paper, the rest of the document will be received into memory for printing at a
later time.
40
Page 53

4.5.1 Receiving to Memory
70 pages of Internal Memory (1MB) is standard on the 9930 See Section 3.7.2
for Memory Upgrade Options.
There are two methods of Receiving to Memory . The normal "Automatic" method
enables Automatic Reduction to occur. The other method enables the unit to
"Receive to Memory" exclusively.
A. Automatic Receive to Memory:
The Model 9930 normally receives all documents into memory automatically
before printing. This allows your machine to determine the length of each
incoming page so it can be reduced to fit onto a single page whenever possible.
B. Receive to Memory Exclusively:
You may want to configure your Model 9930 to automatically receive all
documents into memory to print at a later time or to Poll the documents from
another location. Printing may also be secured by PASSCODE. This is a simple
operation which is done by selecting the SET-UP MEMORY Function. Refer to
Section 5.9.1, Step #5 for procedures to activate the Receive to Memory Feature.
If you configure your Model 9930 to always Receive to Memory, the following
occurs:
41
Do This
1. All documents received are stored in memory and will
only be printed when you wish to.
2. To print the documents stored in memory, press COPY.
3. If SECURE ACCESS CODE & Secure Printing is turned
on, only one PASSCODE is required, enter it first. If
SECURE ACCESS CODE is turned on, press YES after
entering Passcode, then COPY again. If Secure Printing
only is turned on, press YES after entering passcode for
printing to start. All documents will then be printed if there
is an adequate supply of paper in the machine.
This Happens
If documents have been
received into memory, this
prompt will appear in the
display.
PRINTING NOW
PAGE.1/1
ENTER ACCESS CODE
__ __ __ __
MESSAGE IN MEMORY
PRESS COPY TO PRINT
Page 54

4.5.2 Out of Paper Receive
The Model 9930 normally receives onto the Recording Paper (after temporarily
receiving to memory and determining whether reduction is required).
If the 9930's paper supply runs out while receiving, the remainder of the current
document being received will automatically be received into memory for printing
at a later time. Subsequent documents will also be received into memory until
memory becomes full or until the paper supply is replenished.
NOTES:
1. If Memory becomes "FULL" while printing pages or documents from memory,
the Model 9930 will not be able to answer the telephone. Incoming calls will
usually receive a busy signal ("UNABLE TO RX") until the 9930 has finished
printing all pages.
2. If there is not enough available memory to receive the entire transmission, the
Model 9930 will receive until memory becomes full and then the telephone
connection will automatically disconnect. The Model 9930 will then not be able to
receive until the paper supply is replenished. If this occurs frequently, you should
consider upgrading to one of the other Memory Options available from Pitney
Bowes (see Section 3.7.2 for more information on available Internal Memory
Options). Should you feel that it is necessary to upgrade the Memory size of your
Model 9930, please call your Pitney Bowes Sales Representative to place an
order for the appropriate size.
3. A 72-hour Battery Back-up Option is available (see Section 3.7.3).
42
Do This
The Model 9930 automatically detects when the paper
supply becomes depleted.
If the Model 9930 paper supply runs out, while receiving,
an Alarm will sound and the display will read.
The next page, and all remaining pages of the document,
will be received into memory for printing at a later time.
Replenish paper and the display will read:
This Happens
JAN 15 1998 10:00
PAPER EMPTY
PRINTING NOW
PAGE.3/7
Page 55

4.5.3 Low Toner and No Toner Receiving
This feature allows the Model 9930 to guard against lost pages or documents if
toner runs low. In most cases, this guarantees that all pages sent to your machine
will either be printed or saved in memory for printing at a later time.
The machine actually senses low toner well in advance of complete toner
depletion. As soon as a low toner condition is detected, the Toner Indicator near
the display on the Operator Control Panel will begin blinking. Enough toner still
remains in the Imaging Cartridge to print approximately 250 additional pages. At
this point a Toner Cartridge Order form will automatically print. You can telephone
or fax your order to the numbers listed. The following messages will also appear
in the display: (Not available in U.K.).
The Toner Indicator light will continue to blink.
After the Model 9930 prints another 250 copies (approximate), the following
messages will appear in the display and the Toner Indicator will remain steadily
lit.
If the Model 9930 detects this secondary low toner situation while printing a page
from memory, the rest of the document will either remain in memory or continue
to be received into memory . Likewise, all subsequent documents will be received
into memory until memory becomes full.
All documents in memory will be automatically printed when the Imaging
Cartridge is replaced.
43
TONER ALMOST EMPTY
XXX PRINTS REMAIN
FOR REPLACEMENT
CALL SUPPLY NUMBER
DATE/TIME
SYSTEM READY
TONER EMPTY
PRINTER NOT USEABLE
FOR REPLACEMENT
CALL SUPPLY NUMBER
DATE/TIME
SYSTEM READY
Do This
1. Replace the Imaging Cartridge with a new one (see
Section 8.6.1 for instructions).
If additional pages or documents are still in the Model
9930 memory, these will be automatically printed when
the Imaging Cartridge is replaced. While printing these
pages or documents, the display will read:
This Happens
After replacing the Imaging
Cartridge, the display will
read:
PLEASE WAIT!
PRINTING NOW
PAGE.1/10
Page 56

NOTES:
1. Multitasking lets the Model 9930 answer the telephone even while the unit is
printing from memory. Incoming documents can be temporarily received
into memory for printing as soon as printing of the current document is
complete.
2. If the secondary low toner situation occurs and the remaining pages and
future documents are then received into memory, there may not be enough
available memory to receive the entire transmission. The Model 9930 will
receive until memory becomes full and then the telephone connection will
automatically disconnect. The Model 9930 will then not be able to receive
until the Imaging Cartridge is replaced. If this occurs frequently, you should
consider upgrading to one of the other Memory Options available from Pitney
Bowes (see Section 3.7.2 for more information on available Memory
Options). Should you feel that it is necessary to upgrade the Memory size of
your Model 9930, please call your Pitney Bowes Sales Representative to
place an order for the appropriate size.
3. A 72-hour Battery Back up Option is available (see Section 3.7.3).
44
Page 57
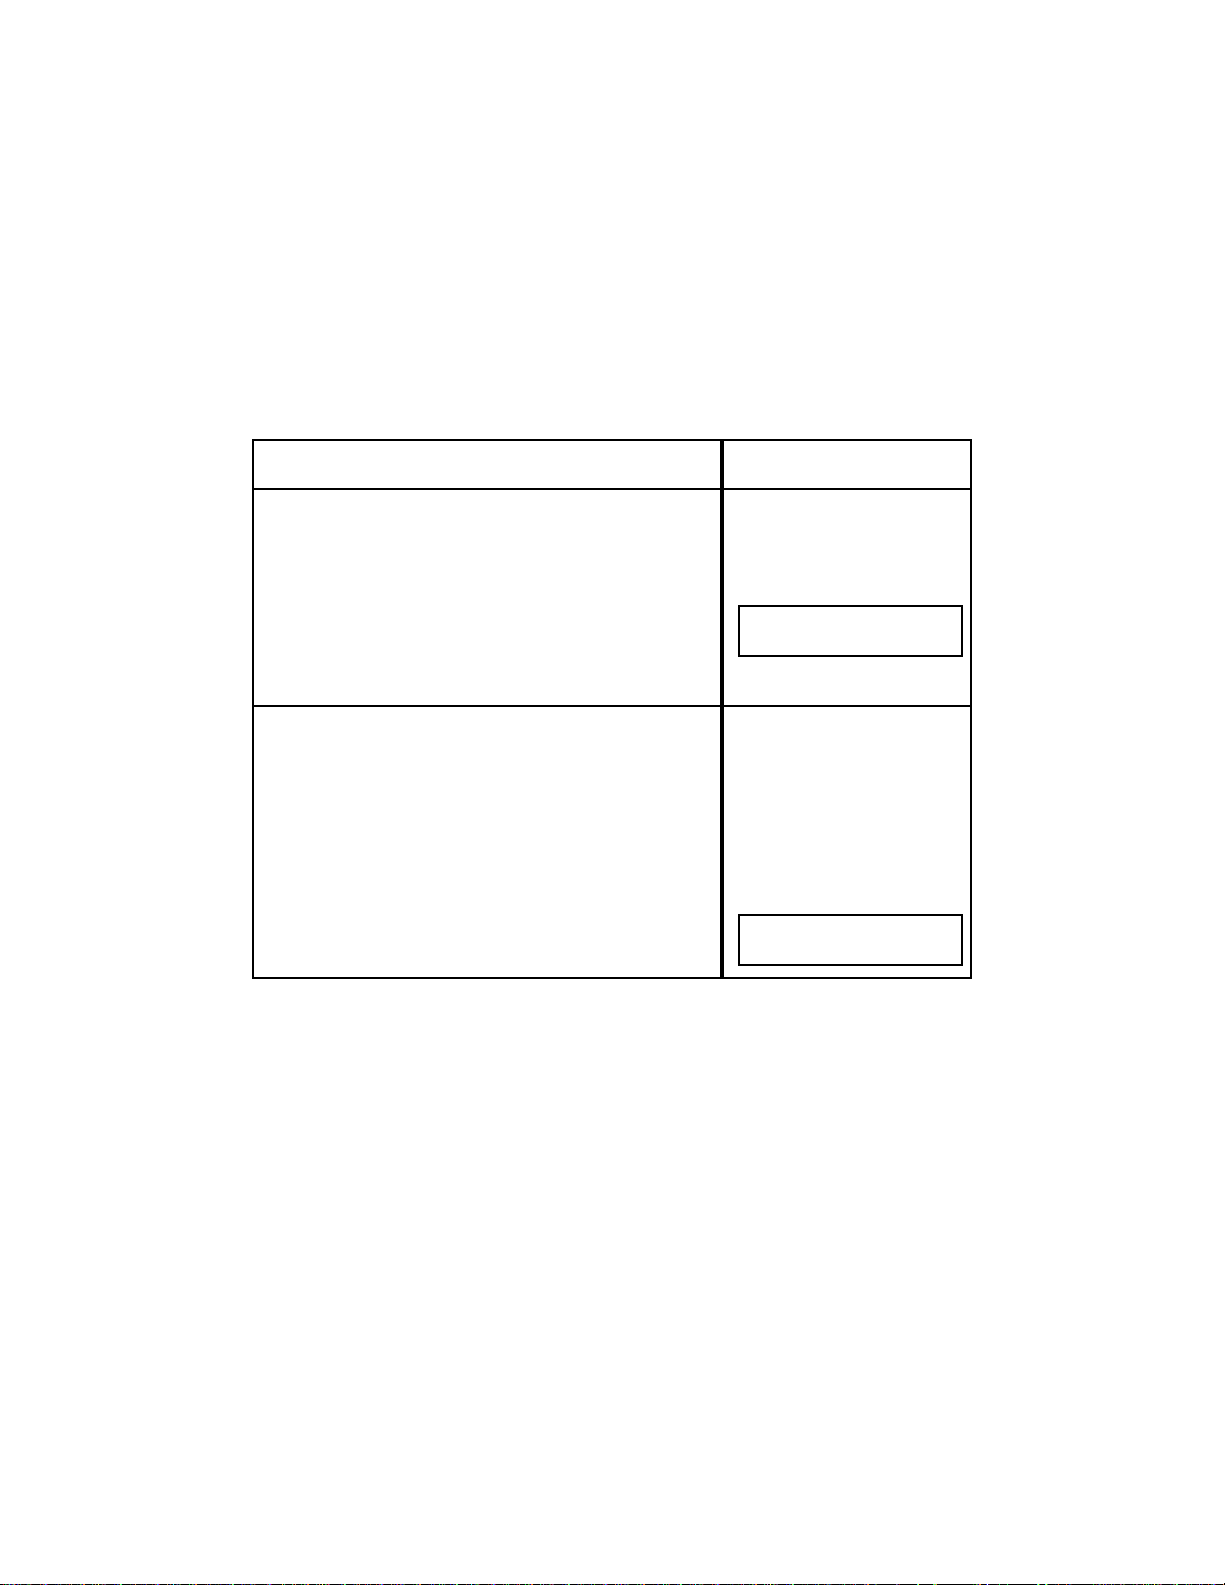
4.5.4 Receiving Manually
If you wish to configure the Model 9930 in the Manual Receive Mode, this can be
done by selecting the SET-UPSYSTEM Function. This means that you will have
to answer all incoming calls because the Model 9930 will not be able to
automatically receive. Refer to Section 5.7.1, Step #38 for the procedures to
change Auto Receive from ON (YES) to OFF (NO). If you configure the Model
9930 to receive manually, this is how you would receive a document:
NOTES:
1. While printing pages or documents from memory, if another call comes in,
since the Model 9930 is in Manual Receive the phone will ring and you can
answer the call. If it is a voice call, you can begin the conversation as you would
on a normal telephone. If it is a fax call, you will not be able to press
SEND/RECEIVE until the Model 9930 has finished printing all pages.
45
Do This
1. A phone call has come in to the Model 9930. Lift the
Telephone Handset.
If you hear another person, it is a voice call and you can
continue your conversation as you would on a normal
telephone. Or, it may be a voice call after which the
caller wants to send you a fax.
If the call is from a facsimile unit, you will hear a send tone.
2. If you hear a send tone when you lift the Telephone
Handset or you wish to receive a fax after a con-
versation, remove any document currently in the
Automatic Document Feeder and press SEND/RECEIVE
Key. This will send a Ready Tone to the other
fax unit. Then hang up the Telephone Handset.
This Happens
Whether the call is a voice or
fax call, while the Telephone
Handset is off hook, the
display will read:
Voice connection is broken.
The other fax machine begins
sending the document and
your 9930 Series will begin to
receive.
The following message
appears in the display (if from
another 33,600 bps unit):
JAN 15 1998 10:00
PHONE OFF HOOK
RCV ULTRAFAST 33,600
(IDENTIFICATION)
Page 58

4.6 Polling
The Polling feature allows you to call another Pitney Bowes facsimile machine
and receive a document, or allows another machine to call and receive
documents from your machine.
You may want to establish an extra level of security if you have sensitive
documents that will be polled from your Model 9930. The Model 9930 lets
you establish a four digit polling Passcode through the SET-UP SYSTEM
Function. (Refer to Section 5.7.1, Step #17 for procedures to enter this fourdigit code).
If you enter a polling Passcode, only Pitney Bowes machines with a
matching Passcode will be able to poll your machine.
Similarly, if you will be polling other Pitney Bowes facsimile machines, you
must make sure that your Passcode matches the others. If the polled
machines have Passcodes, this is the only way you can successfully poll
and receive documents from them.
NOTES:
1. If none of the Pitney Bowes fax units you communicate with have polling
Passcodes and you do not wish to establish one on your unit, non-secure polling
can take place. (The polling Passcode for none-secure polling is "0000.")
2. If your unit has been configured with PBX Access Codes ON, the Model 9930
will ask you to enter a PBX Access Code for all polling transactions. The display
will read "ENTER PBX CODE" after entering either a phone number from the
Numeric Keypad, a Speed Dial number, or a One Touch Key. You can either enter
a PBX Access Code or press NO if your PBX does not require a code to dial this
destination. Before proceeding, refer to Section 6.1 for more information if PBX
Access Codes is ON.
3. There is no universal polling standard. Attempts to poll non-Pitney Bowes
machines may not work.
There are several polling methods available on the Model 9930.
• simple polling - another fax can poll your Model 9930 and receive documents
from your unit; or you can poll another fax unit and receive documents from that
remote unit.
• bulletin board - this describes the Model 9930 feature which allows you to place
a document in memory to be polled by more than one machine a specified
number of times before being deleted. The Model 9930 allows for infinite
polling.
46
Page 59

• sequential polling - you can poll a group or list of numbers by using One Touch
Keys, Programmable One Touch Keys (P-Keys) or programmed AutoDial jobs.
• turnaround polling - used to send to a location and then receive a fax from the
same location during the same phone call.
• polling a mailbox - this allows you to poll and receive a document from the
Mailbox of another Pitney Bowes fax machine. It also enables any other Group
3 machine to poll documents that you have stored in a Mailbox of your Model
9930 but you must use a "DTMF" (Touch-Tone) phone.
• Remote Fax retrieval - allows you to retrieve (poll) documents received into the
9930 memory from a remote facsimile.
4.6.1 Preparing a Document to be Polled (Simple Polling)
To prepare a document for polling:
47
Do This
1. If you want to establish a polling Passcode, refer to
Section 5.7.1, Step # 17 for instructions.
2. Insert the document face down in the Automatic
Document Feeder.
3. Use the MODE and ORIGINAL Keys, if necessary, to
change the Mode and Contrast.
4. Press FUNCTION twice.
5. Press YES.
6. Press 6
This Happens
AUTO DIAL?
ENTER YES OR NO
MODE/NORMAL
ORIGINAL/NORMAL
1=SND 2=RCV 3=RELAY
4=SND/RCV 5=MAILBOX ▼
6=POLL ▲
Page 60

4.6.2 Editing "To Be Polled" Jobs (Overwrite, Delete and Append Polling)
The 9930 allows you to edit an existing "To Be Polled" job waiting in memory. You
can overwrite the page(s) of the job with new pages, you can delete the existing
job, or you can add pages to the existing job.
To Overwrite Existing Pages, the documents to be stored must be placed in the
document feeder.
48
Do This
7. Press YES.
8. Enter number of times (up to 99) then press YES.
This Happens
Once the document is in
memory the display
indicates:
When the remote system
polls your Model 9930, the
docu-ment(s) will be sent.
HOW MANY TIMES?
__ __
JOB #01 TO MEMORY
PAGE.1
JAN 15 1998 10:00
WAITING TO BE POLLED
Do This
1. Press FUNCTION key twice.
2. Press YES.
3. Press 6.
4. Press YES.
5. Press 1.
This Happens
AUTODIAL?
ENTER YES OR NO
1=SND 2=RCV 3=RELAY
4=SND/RCV 5=MAILBOX ▼
6=POLL ▲
1=OVERWRITE 2=DELETE
3=ADD PAGE
JOB #078 TO MEMORY
PAGE.1
Page 61

To Delete a "To Be Polled" job.
To Add Pages (Append) to a "To Be Polled" job (documents to be added must
be placed in the document feeder):
49
Do This
1. Press FUNCTION key twice.
2. Press YES.
3. Press 6.
4. Press YES.
5. Press 2.
This Happens
The polled job is now erased
from memory.
AUTODIAL?
ENTER YES OR NO
1=SND 2=RCV 3=RELAY
4=SND/RCV 5=MAILBOX ▼
6=POLL ▲
1=OVERWRITE 2=DELETE
3=ADD PAGE
POLL JOB DELETED
Do This
1. Press FUNCTION key twice.
2. Press YES.
3. Press 6.
4. Press YES.
5. Press 3.
This Happens
The page(s) are added to the
existing pages.
AUTODIAL?
ENTER YES OR NO
1=SND 2=RCV 3=RELAY
4=SND/RCV 5=MAILBOX ▼
6=POLL ▲
JOB #078 TO MEMORY
PAGE.1
Page 62
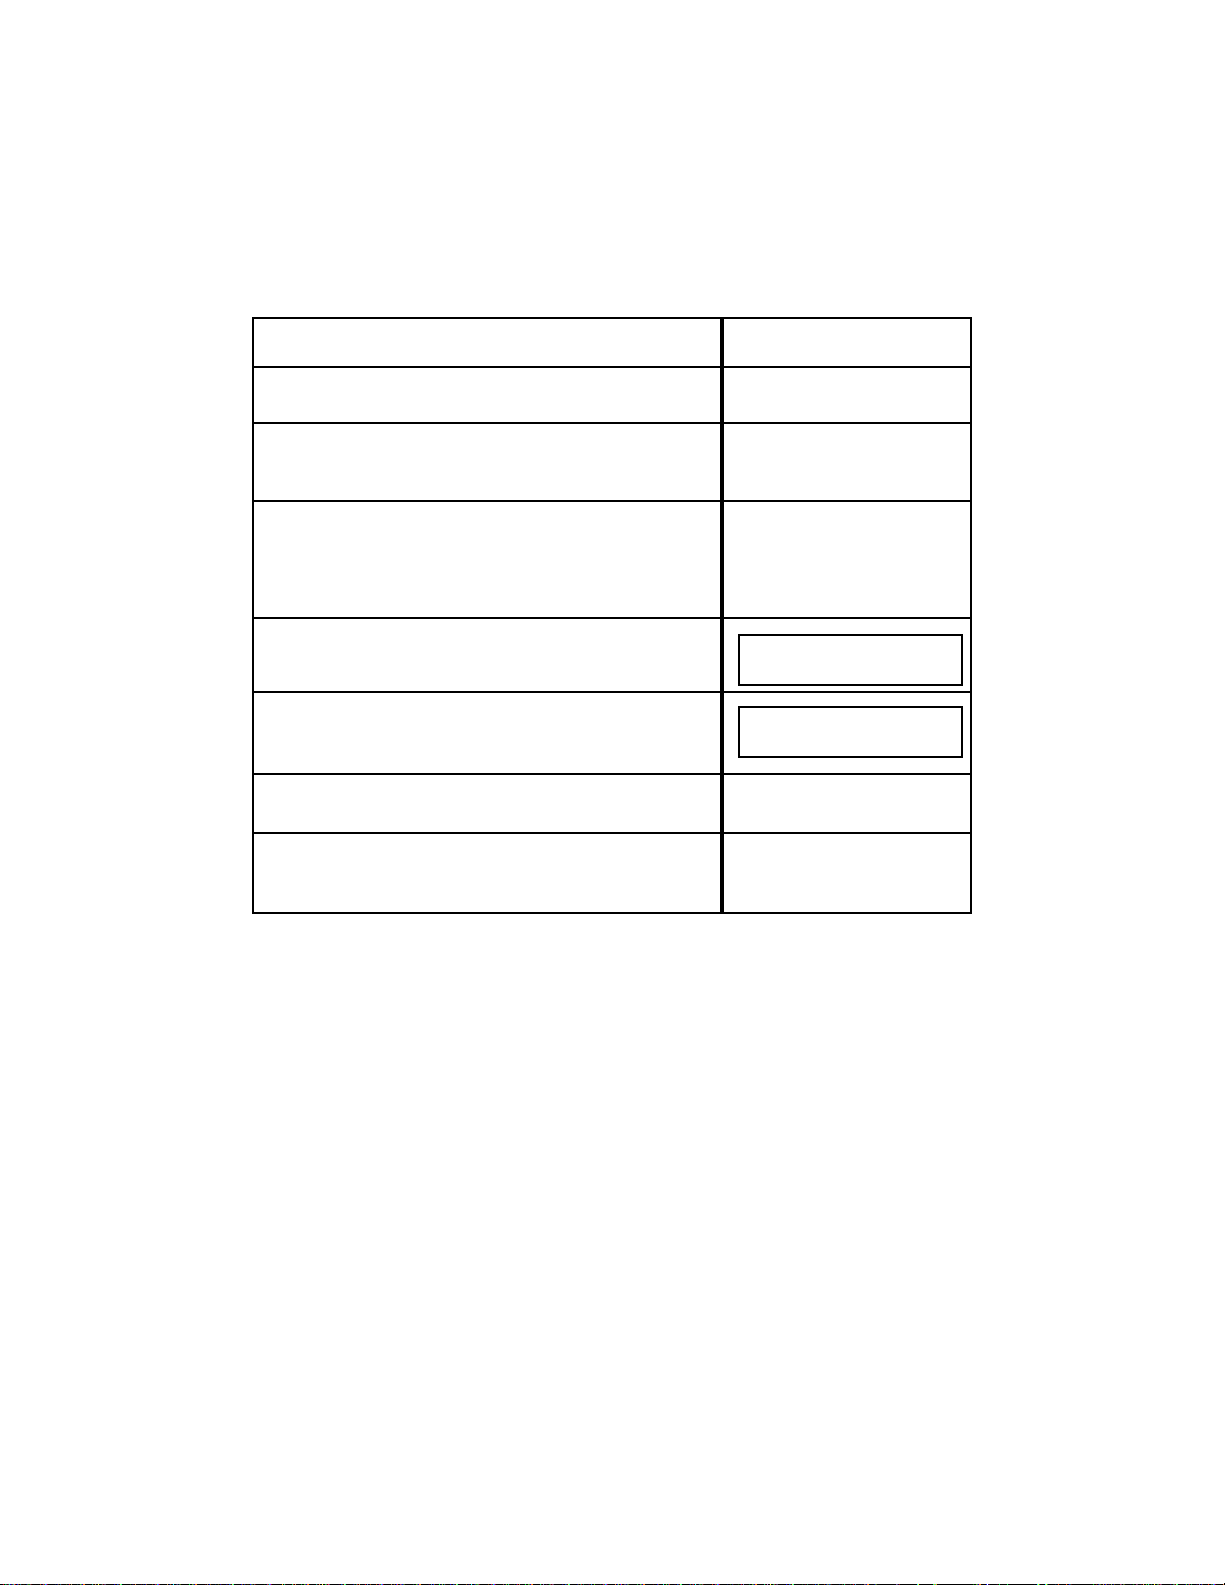
4.6.3 Polling Another Machine (Simple Polling)
To poll a document from another fax unit:
NOTES:
1. To use an AutoDial job or P-Key to poll after hours, see Section 5.3.2 (Polling
with Programmable AutoDial Jobs) for the procedures to poll using these
methods.
2. If you attempt to poll with pages loaded in the Feeder, the machine will switch
into the Send Mode. Pages should only be loaded in the Feeder if you intend to
Turnaround Poll or Send. Refer to Section 4.6.6 (Turnaround Polling) for
instructions on performing this Function.
3. There is no universal polling standard. It may not be possible for your Model
9930 to poll certain non-Pitney Bowes machines.
50
Do This
1. If you need to establish a polling Passcode, refer to
Section 5.7.1, Step #17 for instructions.
2. Check to be sure no documents are inserted in the
Model 9930 Automatic Document Feeder (unless you
are Turnaround Polling).
3. Dial the remote system by either entering a phone
number from the Numeric Keypad, selecting a Speed
Dial Number, pressing a One Touch Key, or pressing a
P-Key.
4. Press SEND/RECEIVE.
5. Press YES
6. Enter the Passcode, if required by the fax unit you are
polling.
7. Press YES after entering the four-digit Passcode or NO
if a Passcode is not required.
This Happens
The Number appears in the
display.
DO YOU WISH TO POLL?
ENTER PASSCODE
IF NEEDED __ __ __ __
Page 63

4. If a Delayed AutoDial Send job is stored in the memory, there may not be
enough memory to poll an entire page into memory before printing. In this case,
the Model 9930 will automatically poll directly to paper.
5. If the remote station you are polling does not have a polling Passcode, you can
still poll the other machine even if you have programmed a polling Passcode in
your Model 9930. If the remote station you are polling does have a polling
Passcode, your polling Passcode must match for the poll to be successful.
4.6.4 Bulletin Board/Unlimited Polling
1. Your Model 9930 is equipped with a Bulletin Board Feature. This allows a
document to be placed in memory and then polled a specified number of times
before being automatically erased. When you request POLL, this prompt will
appear: "HOW MANY TIMES?". For the 9930, you can enter up to 99 and then
press YES or just press YES (to poll once).
The System will erase a polling job after the specified number of pollings. You
may press "00" for unlimited Poll times.
2. You can still receive another fax in the usual manner even if you have
programmed a document to be polled.
3. You can still send a document if you have programmed a document to be
polled from memory.
4. There is no universal polling standard. It may not be possible for certain nonPitney Bowes machines to poll your machine or Bulletin Board.
4.6.5 Sequential Polling
The Model 9930 allows you to poll a group or list of numbers, one at a time, by
using previously stored One Touch Keys and P-Keys. If you wish to sequentially
poll a group of numbers containing previously stored Speed Dial numbers or
random telephone numbers, this can be done with a programmable AutoDial Job
(up to 30). See Section 5.3.2 (Polling With Programmable AutoDial Jobs) for the
procedures to poll using this method.
51
Page 64

To create a list for sequential polling:
NOTES:
1. All remote fax units on the created list to be sequentially polled must have the
same Passcodes or require no Passcode at all.
2. If one of the dialed numbers in the Sequential Polling List is busy or does not
answer, that number will move to the "bottom" of the polling list. And the next
number on the list will be dialed. The busy or no answer numbers will be retried
until the "redial count" is exhausted.
3. T o use an AutoDial job or a P-Key to poll after hours, see Section 5.3.2 (Polling
with Programmable AutoDial Jobs) for the procedures to poll using these
methods.
4. If you attempt to poll with pages loaded in the Feeder, the machine will switch
into the Send Mode. Pages should only be loaded in the Feeder if you intend to
Turnaround Poll or Send. Refer to Section 4.6.6 (Turnaround Polling) for
instructions on performing this Function.
52
Do This
1. If you need to set a polling Passcode, refer to Section
5.7.1, Step #17 for instructions.
2. Make sure no documents are inserted in the Model
9930 Automatic Document Feeder (unless you are
Turnaround Polling). Press the appropriate One Touch
Key(s) to create your group or list for sequential
polling. Example: create a group from One Touch Keys
#01, #02, #06, #10, #22.
3. Press SEND/RECEIVE.
4. Press YES and then enter the four-digit Passcode if
required by fax unit you are polling.
5. Press YES after entering the four-digit Passcode or NO
if no Passcode is required.
This Happens
After each One Touch Key is
pressed, the associated
number and name will
appear in the display.
The Model 9930 will dial the
first telephone number of the
first One Touch Key you
selected for creating your
group or list.
DO YOU WISH TO POLL?
ENTER PASSCODE
IF NEEDED __ __ __ __
Page 65

5. There is no universal polling standard. It may not be possible for your Model
9930 to poll certain non-Pitney Bowes machines.
6. If a Delayed AutoDial Send job is stored in the memory, there may not be
enough memory to poll an entire page into memory before printing. In this case
the Model 9930 will automatically poll directly to paper.
7. If the remote station you are polling does not have a polling Passcode, you can
still poll the other machine even if you have programmed a polling Passcode in
your Model 9930. If the remote station you are polling does have a polling
Passcode, your polling Passcode must match for the poll to be successful.
4.6.6 Turnaround Polling
There may be occasions when you have information to send to a location and you
know that the same location has information for you. In such a situation you can
save money by Turnaround Polling.
Turnaround Polling allows you to send pages and then receive pages from the
remote site on the same phone call. Follow instructions below or refer to Section
5.3.4, Sending and Receiving with Programmable AutoDial Jobs.
To Turnaround Poll:
53
Do This
1. If you need to set a polling Passcode, refer to Section
5.7.1, Step #17 for instructions.
2. Load pages you wish to send into the Document
Feeder face down.
3. Press the VOICE Key and dial the remote fax by either
entering a phone number from the Numeric Keypad
selecting a Speed Dial number, or pressing a One
Touch key. See NOTE #3 on next page.
NOTE: You can only press a One Touch Key if it has one
destination programmed. This will not work properly if
multiple destinations have been programmed for a One
Touch Key.
4. Press SEND/RECEIVE.
5. After hearing the remote fax Ready Tone, press
SEND/RECEIVE twice.
This Happens
The number appears in the
display.
MODE/NORMAL
ORIGINAL/NORMAL
Page 66

NOTES:
1. If a Passcode is required by the remote fax, you must be sure that the
Passcode of your machine matches that of the remote machine or you will not be
able to receive from the other unit. When T urnaround Polling, your machine uses
the polling Passcode which is programmed in the SET-UP SYSTEM Function.
2. Turnaround Polling may or may not work with non-Pitney Bowes machines.
3. You may also Turnaround Poll using a programmable AutoDial job or by using
a P-Key. (Refer to Section 5.3.4, Sending and Receiving with Programmable
AutoDial Jobs.) This method will allow you to Turnaround Poll to more than one
telephone number, to Speed Dial numbers, to One Touch Keys or to any
combination of the above.
4. Your Model 9930 was installed with Auto Storage ON. Auto Storage forces all
documents to be sent or polled from your unit into memory before the phone call
is made. The instructions above apply if Auto Storage is ON. If Auto Storage is
turned OFF, you may T urnaround Poll by entering destinations by any of the usual
dialing methods and pressing SEND/RECEIVE twice.
5. If the line is busy, the Model 9930 will automatically redial the destination. If
no connection is made after all redial attempts, a Tx Status Report message will
print automatically.
6. The Model 9930 was set for 3 redials at 3-minute intervals when the machine
was shipped. If you want to change the number of redials (0-15 attempts), or the
interval between redial attempts (1-10), refer to Section 5.7.1, Step #40.
7. There is no universal polling standard. It may not be possible for your Model
9930 to poll certain non-Pitney Bowes machines.
4.6.7 Polling a Mailbox
Several Pitney Bowes facsimile units allow operators to assign private mailboxes
to the fax users. The Mailbox is a storage space in memory that only the
authorized user can then access. This allows the user to place confidential
documents into the Mailbox for retrieval at a later time by authorized individuals.
Normally, only the user can access and print these documents.
And, if the user is out of the office he/she can poll a document from a remote
location.
For more information on setting up Mailboxes, refer to Section 6.3, Mailbox
Access.
54
Page 67

If the proper mailbox security access and procedures are followed, your fax can
poll the remote fax Mailbox of any Pitney Bowes machine with the Mailbox
feature.
To poll a remote Pitney Bowes fax Mailbox to receive mail:
NOTES:
1. If you hear a broken NOT READY tone or a high pitched fluttering tone, there
either is no mail in the remote fax Mailbox or the Security Code for the mailbox
was incorrect. Hang up and try again.
2. The Mailbox Security Code takes priority over the Polling Passcode when you
are polling a Mailbox.
3. If you attempt to poll a remote fax Mailbox with pages loaded in your Automatic
Document Feeder, the machine will switch into the Send Mode. Pages should
only be loaded in the Feeder if you intend to Turnaround Poll or Send. Refer to
Section 4.6.6 (Turnaround Polling) for instructions on performing this Function.
55
Do This
1. Pick up your Model 9930 Telephone Handset or the
handset of your extension telephone and dial the remote
fax through the Numeric keypad.
2. After hearing the remote fax receive tone through the
9930 or through the Telephone Handset, enter the
following: #, Mailbox number, #, Security Code, * from the
Numeric Keypad.
For example, enter #01#1234* for Mailbox #1 with a
Security Code of 1234.
3. After hearing the solid Ready Tone, press the
SEND/RECEIVE Key once.
This Happens
The connection is made.
You'll hear a solid Ready
Tone through the Telephone
Handset.
The document(s) in the
remote Mailbox are sent to
your Model 9930. Then, the
document is erased from the
remote fax's Mailbox
memory.
Page 68

5. FUNCTIONS SELECTIONS
This Section describes all of the Functions selectable from the Model 9930 Main
Level Menu.
There are eleven main Functions in your Model 9930. Functions can be selected
by either:
• pressing the FUNCTION Key + the desired Function number + YES
(twice)
or
• repeatedly pressing the FUNCTION Key until you reach the desired
Function, then press YES.
The majority of the Functions relate to storing phone numbers and programming
AutoDial jobs. Before you store phone numbers and begin to program AutoDial
jobs, you should consider your communications needs and write a list of phone
numbers and groups of phone numbers you want to store.
SET MAILBOX ACCESS Functions are described in the Special Features and
Functions Section of this Guide (see Section 6).
The CLEAN PRINTER Function is described in the Problem Solving and
Maintenance Section of this Guide (See Section 8.6.2).
The Function categories and the selections possible under each are briefly
described below for your convenience.
#1 AUTO DIAL — (See Section 5.3 for procedures)
To store Jobs to send or receive single or multiple documents at a specific
time to specific locations.
• 1=SND (send)
• 2=RCV (receive or polling)
• 3=RELAY
• 4=SND/RCV (turnaround polling)
• 5=MAILBOX
• 6=POLL
#2 PRINT REPORTS — (See Section 5.6 for procedures)
To print Administrative Reports and Forms.
• MEMORY MANAGER
• SPEED DIAL DIRECTORY
• ONE TOUCH DIRECTORY
• P-KEY DIRECTORY
• SYSTEM SET-UP
• CARTRIDGE ORDER FORM
• ONE TOUCH SHEET
56
Selections
Selections
Page 69

#3 MAILBOX ACCESS — (See Section 6.3 for procedures)
To define and use various Mailbox Feature selections.
• PRINT
• STORE
• SET UP (Mailbox numbers, Security Codes, Mailbox Name)
• DIRECTORY
#4 EDIT
AUTO DIAL JOBS — (See Section 5.4 for procedures)
To change or delete AutoDial jobs.
• 1=ADD PGS (Add Pages)
• 2=EDIT DEST (add/delete telephone number(s) or destination(s)
• 3=DELETE
• 4=REPEAT (repeating incomplete jobs)
• 5=CHANGE TIME
• 6=PRINT DOCUMENT
#5 SET SPEED DIAL — (See Section 5.1 for procedures)
To store a frequently dialed number as a three-digit code. A Speed Dial
number is an abbreviated way of entering and dialing a phone number.
• SET SPEED DIAL #
• ENTER TEL #
• ENTER NAME
• RELAY STATION? (Only if selection is set in Service Mode)
#6 SET ONE TOUCH — (See Section 5.2 for procedures)
One Touch Keys allow you to send a document to one or several locations by
pressing only one Key.
• SELECT ONE TOUCH KEY
• ENTER NAME
• ENTER SPEED DIAL # (or numbers)
• ADD ANOTHER NUMBER TO THIS KEY?
#7 SET PROGRAM KEYS — (See Section 5.5 for procedures)
For permanent storage of frequently used AutoDial Jobs.
• PRESS DESIRED P-KEY
• ENTER NAME
• 1=SND (send)
• 2=RCV (receive)
• 3=RELAY
• 4=SND/RCV (turnaround polling)
• 5=MAILBOX
• 6=POLL
57
Selections
Selections
Selections
Selections
Selections
Page 70

#8 SET UP SYSTEM — (See Section 5.7 for procedures)
Defines system standards.
• 01 DATE/TIME
• 02 MACHINE ID SET UP
— TRANSMIT ID
— FAX TEL NUMBER
— POLLING PASSCODE
• 03 JOURNAL SET UP
— JNL DISPLAY
— JNL ID FIELD
— JNL PRINT TIME
— JOURNAL SEND
• 04 TEL LINE SET UP
— RING PATTERN
1=ALL
2=SINGLE
3=DOUBLE
4=TRIPLE 1
5=TRIPLE 2
— RING DETECT COUNT
— AUTO RECEIVE
— REDIAL COUNT
— REDIAL INTERVAL
• 05 PRINT AUTO REDUCTION
• 06 BEEP VOLUME
• 07 MONITOR VOLUME
#9 SET OPTIONS — (See Section 5.8 for procedures)
To define specific optional features and reports you want to print.
• AUTOMATIC REPORTS
— TX STATUS REPORT (Transmit Status Report)
— JOB CONF. REPORT (Job Confirmation Report)
• SECURE ACCESS
• POWER SAVER
• AUTO COVER SHEET
• AUTO DOCUMENT SEPARATION (if additional cassette installed)
• INDEX MARK
#10 SET UP
MEMORY — (See Section 5.9 for procedures)
Defines how Internal Memory should be configured and used.
• MEMORY SAVE
• REMOTE RETRIEVAL
• RECEIVE TO MEMORY (may be PASSCODE protected)
• AUTO STORE TO MEMORY
#12 CLEAN PRINTER — (See Section 8.6.2 for procedures)
To clean the Model 9930 each time a new Imaging Cartridge is installed.
• PLEASE WAIT FOR TEST CHARTS
• LOAD CHARTS IN UPPER CASSETTE FACE UP
58
Selections
Selections
Selections
Selections
Page 71

5.1 Storing Speed Dial Numbers (Function #5)
A Speed Dial number is an abbreviated way of entering a phone number. If you
frequently send documents to the same location, there's no need to enter the
complete number; you can store the number as a three-digit Speed Dial number
and then simply enter the Speed Dial number from the Numeric Keypad whenever
you need it. Each number you store can be up to 36 digits, including pauses. On
the Model 9930, you can store up to 200 phone numbers as Speed Dial numbers
001-200.
When programming Speed Dial numbers, the Model 9930 prompts you to specify
the Speed Dial number, telephone number, Speed Dial name and whether or not
the destination will be a Relay Station:
• SET SPEED DIAL #
• ENTER TEL #
• ENTER NAME
• RELAY STATION? (Only if selected in Service Mode)
NOTES:
1. Pauses are entered by pressing the PAUSE Key on the Operator Control
Panel. Pauses are useful and often required when your phone system hesitates
a few seconds in between dial tones or when accessing overseas telephone lines.
Entering a pause (-) at the appropriate place within a phone number compensates
for any phone line access delay and automates the dialing process for you.
You may want to include one or more pauses at the end of international telephone
numbers to allow for the longer connect time that usually occurs during these
calls. You may also place pauses before a telephone number if there is normally
a delay in getting a dial tone from your telephone system.
2. Dial pauses are variable in length. The standard Model 9930 is configured with
a pause length of five seconds. Each time you place a pause (-) in a phone
number, the Model 9930 will wait for five seconds before dialing continues. You
may enter multiple pauses to increase the pause time, which will be in multiples
of five seconds. For example, two pauses will provide ten seconds of pause time;
three pauses will result in a pause time of 15 seconds. If you would like to change
the length of each pause, please call the Pitney Bowes Facsimile Diagnostic
Center listed in Section 8.8. This feature can be changed over the phone.
59
Prompts
Page 72

5.1.1 Creating or Adding a Speed Dial Number
To store a telephone number as a Speed Dial number, or to add a Special Dial
number:
60
Do This
1. Press FUNCTION.
2. Enter 5 and then YES.
3. Press YES.
4. Use the Numeric Keypad to enter the Speed Dial number
you want from 001 to 200. YES must be pressed if Speed
Dial number is 2 digits.
Enter the number, up to 36 characters. Use the Cursor
Keys to move left or right if corrections are necessary,
or press NO to backspace and erase incorrect digits.
NOTES:
1. If your phone system requires an access number to
reach an outside line, enter it first followed by a pause
(press the Pause Key( represented by "-" in the phone
number. Example: 9-5557069.
2. To add a five-second delay anywhere in the dialing
sequence, press PAUSE. Each pause(-) counts as a
character.
3. Press SPACE on the Numeric Keypad to enter a space
between area code and number to make it easier to read
in the display (i.e., 9-555 7069). Example: Enter 9-555
7069.
5. Press YES.
This Happens
The number appears in the
display.
FUNCTION SELECT?
ENTER FUNCTION # _
SET SPEED DIAL?
ENTER YES OR NO
ENTER SPEED DIAL #
■ =
ENTER TEL NUMBER
001=
ENTER TEL NUMBER
001=95557069
ENTER NAME
001=
Page 73

61
Do This
6. Enter a name for the Speed Dial number, (up to 16
characters total). If you don't want to name the Speed
Dial number, press NO and to go Step #8 below. The
Speed Dial name can be either alphabetical, numerical,
or special symbol characters, or a combination of all
three. Use the alphabetical One Touch Keys to enter A-
Z characters. Use the Numeric Keypad to enter
numerical characters.
Example: ATLANTA
Press the MODE Key if you want to select extra
symbols. Use the Cursor Keys to place the cursor over
the desired symbol, then press YES. To return to
alphabetical and numerical characters, press MODE
once again.
NOTE: A "NAME" could be a company name, a
department name or an individual's name. When you
program a name, it will appear at the top of all transmitted
pages. This allows you to send a personalized TO/FROM
header with all transmissions.
7. Press YES when the "NAME" is complete
8. Press YES if the fax number you entered will be a Relay
Station or NO if you want to enter another Speed Dial
number.
NOTE: See Section 6.4 for information on Relay
Functions.
9. Press YES if you want the system to update the Speed
Dial entries that you have stored in a One Touch Key or
P-Key. If not, press NO. (See Section 5.2 to set One
Touch Keys).
NOTE: If NO is pressed, the number will be deleted from
any One Touch Key in which it was previously stored.
This Happens
This display will not appear
unless the selection has
been set to ON in the Service
Mode.
The display only appears if
the Speed Dial number is
already resident in one or
more One Touch Keys (List).
ENTER NAME
001=ATLANTA
+=><!@*^&(),:-/#?
001=ATLANTA
RELAY STATION?
UPDATE ONE TOUCH?
ENTER YES OR NO
ENTER SPEED DIAL #
■ =
Page 74

5.1.2 Changing or Deleting A Speed Dial Number, Telephone Number, Or
Name:
62
Do This
1. Press FUNCTION.
2. Enter 5 and then YES.
3. Press YES.
4. Enter the Speed Dial number you wish to change using
the Numeric Keypad.
If you wish to completely delete the old TEL # and NAME
of a Speed Dial number, press NO after Step #4 above.
Then press NO again. Press NO a third time to generate a
new Speed Dial directory, or return to Step #1 to change or
delete another Speed Dial number.
5. Enter the new number over the old one (or NO to delete
it) or the Cursor Keys to move to the digit you need
to change.
6. Press YES when the new number has been correctly
entered.
7. Press YES to keep the existing name or press NO to
delete it, then enter the new ID or name (ALBANY) or
use the Cursor Keys to move to the digit you need
to change.
8. Press YES after entering the new name
The following display will not appear unless the
selection has been set to ON in the Service Mode.
9. Press YES if the number will be a Relay Station or NO if
you want to access another Speed Dial number.
This Happens
This display only appears if
the Speed Dial number is
already resident in one or
more One Touch Keys
(Lists).
FUNCTION SELECT?
ENTER FUNCTION #_
SET SPEED DIAL?
ENTER YES OR NO
ENTER SPEED DIAL #
■ =
ENTER TEL NUMBER
001=555-1010
ENTER TEL NUMBER
001=5557484
ENTER NAME
001=ATLANTA'S FAX
ENTER NAME
001=ALBANY
RELAY STATION?
UPDATE ONE TOUCH?
ENTER YES OR NO
Page 75

5.2 Storing One Touch Keys (Function #6)
The One Touch Keys (#01-30) on the Operator Panel allows you to store and use
any combination of Speed Dial numbers that you need to use on a regular basis.
You can store multiple Speed Dial numbers (or just one) in each One Touch Key.
When One Touch Keys have been programmed, they can be thought of as
Lists
of Speed Dial numbers. One Touch Keys allow you to send a document to
numerous locations by pressing only one Key. Or, you may wish to use One
Touch Keys for single destinations that you communicate with most frequently.
When you have stored all of the One Touch Keys, you should print a One Touch
sheet which will be labeled with the One Touch Key names.
1. If desired, print a One Touch Directory Sheet by pressing FUNCTION Key,
2, YES twice, then cursor up. When the display reads: "One Touch Sheet,"
press YES.
2. Cut along the dotted line and place under the plastic overlay covering the
One Touch Label sheet (in the middle of the Model 9930 Operator Panel).
63
Do This
10. If you want the system to update the Speed Dial entries
stored in a One Touch Key or P-Key, press YES. If not,
press NO. See Section 5.2 to set One Touch Keys.
NOTE: If NO is pressed, the number will be deleted from any
One Touch Key in which it was previously stored.
11. Enter another Speed Dial number or press NO. Repeat
from Step #1 to change or delete another Speed Dial
number, etc.
12. Press 1 to have Directory printed in numerical order or
2 to have it printed alphabetically, then press YES.
This Happens
ENTER SPEED DIAL #
■ =
SPEED DIAL DIRECTORY
1=NUMERIC 2=ALPHA
SPEED DIAL DIRECTORY
PRINTING NOW
Page 76

5.2.1 Programming a One Touch Key
To store Speed dial numbers in a One Touch Key:
64
Do This
1. Press FUNCTION.
2. Enter 6 and then YES.
3. Press YES.
4. Press the One Touch Key you want to work with.
Example: Press 06.
5. Enter the One Touch Key or the List name as you
would a Speed Dial name (See Section 5.1.1, Step #6).
The One Touch Key name can be either alphabetical,
numerical or special symbol characters or a
combination of all three. Enter up to 16 characters
total. If you do not want to name the One Touch Key,
press NO and go to Step #7 below.
NOTE: If you are only going to store a single Speed Dial
number in a One Touch Key, there is no need to enter a
Name. The Speed Dial number’s name will automatically
be assigned to the One Touch Key.
6. When you finish entering the List name, press YES.
7. Enter the Speed Dial number you want in the list, then
press YES. Press YES again if Speed Dial number is
entered as two digits or less.
8. Press YES if you want to enter another Speed Dial
number in this List.
9. Repeat Steps #7 and #8 until all Speed Dial numbers
you want in the list have been entered. Then Press
NO.
This Happens
FUNCTION SELECT?
ENTER FUNCTION #_
SET ONE TOUCH?
ENTER YES OR NO
SELECT ONE TOUCH KEY
ENTER NAME
#06:
ENTER NAME
#06: WESTERN REGION
ENTER SPEED DIAL #
■
SELECT ONE TOUCH KEY
ENTER SPEED DIAL #
■
ENTER SPEED DIAL #
107: ATLANTA
ADD ANOTHER NUMBER
TO THIS KEY?
Page 77

5.2.2 Deleting/Adding a Speed Dial Number from a One Touch Key
If you want to delete the Speed Dial numbers stored in a One Touch Key:
65
Do This
10. Select another One Touch Key to work with and follow
from Step #4, or press NO.
After pressing NO, a One Touch Directory will print
automatically and the display will return to:
This Happens
ONE TOUCH DIRECTORY
PRINTING NOW
JAN 15 1998 10:00
SYSTEM READY
Do This
1. Press FUNCTION.
2. Enter 6 and then YES.
3. Press YES.
4. Press the One Touch Key you want to delete Speed
Dial numbers from. Example: 08.
5. Press NO.
NOTE: Be careful. If you press YES at this point, all Speed
Dial numbers stored under this One Touch Key will be
deleted.
6. Press YES and scroll (using COMM STAT Key) to
specify the Speed Dial number you wish to delete from
this One Touch Key. Example: 60
7. Press YES.
8. Press YES to delete this number.
This Happens
The number is deleted.
FUNCTION SELECT?
ENTER FUNCTION #_
SET ONE TOUCH?
ENTER YES OR NO
SELECT ONE TOUCH KEY
DELETE?
#08: SOUTHERN REGION
ENTER NAME
#08: SOUTHERN REGION
ENTER SPEED DIAL #
060:NEW ORLEANS
DELETE?
060:NEW ORLEANS
ADD ANOTHER NUMBER
TO THIS KEY?
Page 78

5.3 Programmable AutoDial Jobs (Function #1)
The single transmission procedures described earlier in Section 4.4 are only a
small part of the Model 9930 transmission capabilities. The additional
transmission power is from the programmable AutoDial Jobs. Programmable
AutoDial Jobs are entered through the AUTODIAL Function.
Y ou can program up to 30 AutoDial Jobs using the AutoDial Function on the Model
9930. Since all pages associated with an AutoDial Job are sent to memory,
remember that your Model 9930 can store 70 pages.
A programmable AutoDial Job is a transmission instruction you enter from the
Operator Control Panel. Examples of when you would use programmable
AutoDial Jobs include:
• sending a document after hours to multiple destinations
• polling after hours (simple, sequential, etc.)
• serial broadcasting (sending to multiple locations,also called Group Dialing)
• sending to a Relay Station
• sending to a private Mailbox
• instructing the remote machine to print multiple copies
• turnaround polling
66
Do This
9. If you wish to delete another number, press YES. If
not, press NO.
10. Repeat Steps #6-9 to delete other Speed Dial
numbers. After you have answered "yes" or "no" to
all Speed Dial numbers in the list, this prompt
appears:
11. You can enter a new Speed Dial number to store in
this One Touch Key. Remember to press YES to
confirm the number after you enter it.
12. When you finish deleting Speed Dial numbers from
One Touch Keys and the "SELECT ONE TOUCH KEY"
prompt appears, press NO or STOP.
When you finish programming One Touch Keys and the
"SELECT ONE TOUCH KEY" prompt appears, the system
will automatically print a List (One Touch) Directory if you
press NO. If you press STOP, no report will be printed.
This Happens
A One Touch Directory will
print automatically and the
display will return to:
ENTER SPEED DIAL #
■
ONE TOUCH DIRECTORY
PRINTING NOW
JAN 15 1998 10:00
SYSTEM READY
Page 79

You can program the following selections from the AutoDial Function Menu:
• 1=SND — Sending
• 2=RCV — Receiving or polling
• 3=RELAY — For Relaying
• 4=SND/RCV — Turnaround Polling
• 5=MAILBOX — To send to Mailboxes of a remote machine
• 6=POLL — Allows other machines to call and receive documents
stored in units' memory
The Model 9930 really provides two types of Delayed communications jobs, the
AutoDial Jobs (reviewed in this Section) and those stored in Programmable One
Touch Keys (P-Keys are reviewed in Section 5.5). The difference between these
two types of Delayed Job Communications features is as follows:
• With a programmable AutoDial Job, once it has been completed it does not
exist in memory any longer. A new job would have to be entered the next time
you wish to communicate with the same locations.
• With a programmable One Touch Key (P-Key), you can store a Delayed (or
immediate) Communication job permanently. The job programmed in the PKey will be repeated each time you press that P-Key. If you call the same
location on a regular basis, you may want to store the jobs permanently in a
One Touch Program Key. The Model 9930 has 5 dedicated One Touch Keys
(P1, P2, P3, P4, P5). Refer to Section 5.5 for information on Program Keys.
NOTES:
1. If your unit has been configured with PBX Access Codes ON, the Model 9930
will ask you to enter a PBX Access Code while programming an AutoDial Job.
The display will read "ENTER PBX CODE" before entering any number. You can
either enter a PBX Access Code or press NO if your PBX does not require a Code
to dial this particular destination.
Before proceeding, refer to Section 6.1 for more information if PBX Access Codes
is ON.
Because of the variety of ways you can use the AutoDial feature, each procedure
is described on the next page.
67
Page 80

5.3.1 Sending a Document with Programmable AutoDial Jobs
To send a document with a Programmable AutoDial Job:
68
Do This
1. Insert the document face down in the Automatic
Document Feeder. Use the ORIGINAL Key, if
necessary, to change the contrast. You can either
change the Mode at this time or wait until the AutoDial
job asks you to change it later (see Step #8 below).
Then press FUNCTION twice.
2. Press YES.
3. Press 1, then press YES.
4. Enter one of the following, a phone number from the
Numeric Keypad; a Speed Dial number; or a One Touch
Key.
To erase a mistake, press NO on the Numeric Keypad
to backspace or cursor to the incorrect digit and
simply enter the correct digit.
5. Press YES after checking that your entry is correct. (If
you entered a Speed Dial number, press YES a second
time).
6. Press YES and enter another number by one of the
methods mentioned in Step #4 above. Repeat until all
numbers are entered. Then press NO to continue with
the rest of the programming procedure.
NOTE: 32 random phone numbers can be entered from
the 9930 Numeric Keypad.
7. Enter the number of pages then press YES, or just
press YES to send all the pages in the Feeder.
8. Enter the number corresponding to the correct MODE
and then press YES. Or just press YES for selected
mode.
This Happens
The number appears in the
display.
AUTO DIAL?
ENTER YES OR NO
1=SND 2=RCV 3=RELAY
4=SND/RCV 5=MAILBOX ▼
6=POLL ▲
ENTER DESTINATION #
■
ANOTHER NUMBER?
ENTER DESTINATION #
HOW MANY PAGES?
_ _
1=NORMAL 2=FINE
3=EXTRA FINE
REMOTE MULTI COPY?
#COPIES, MAX 10
Page 81
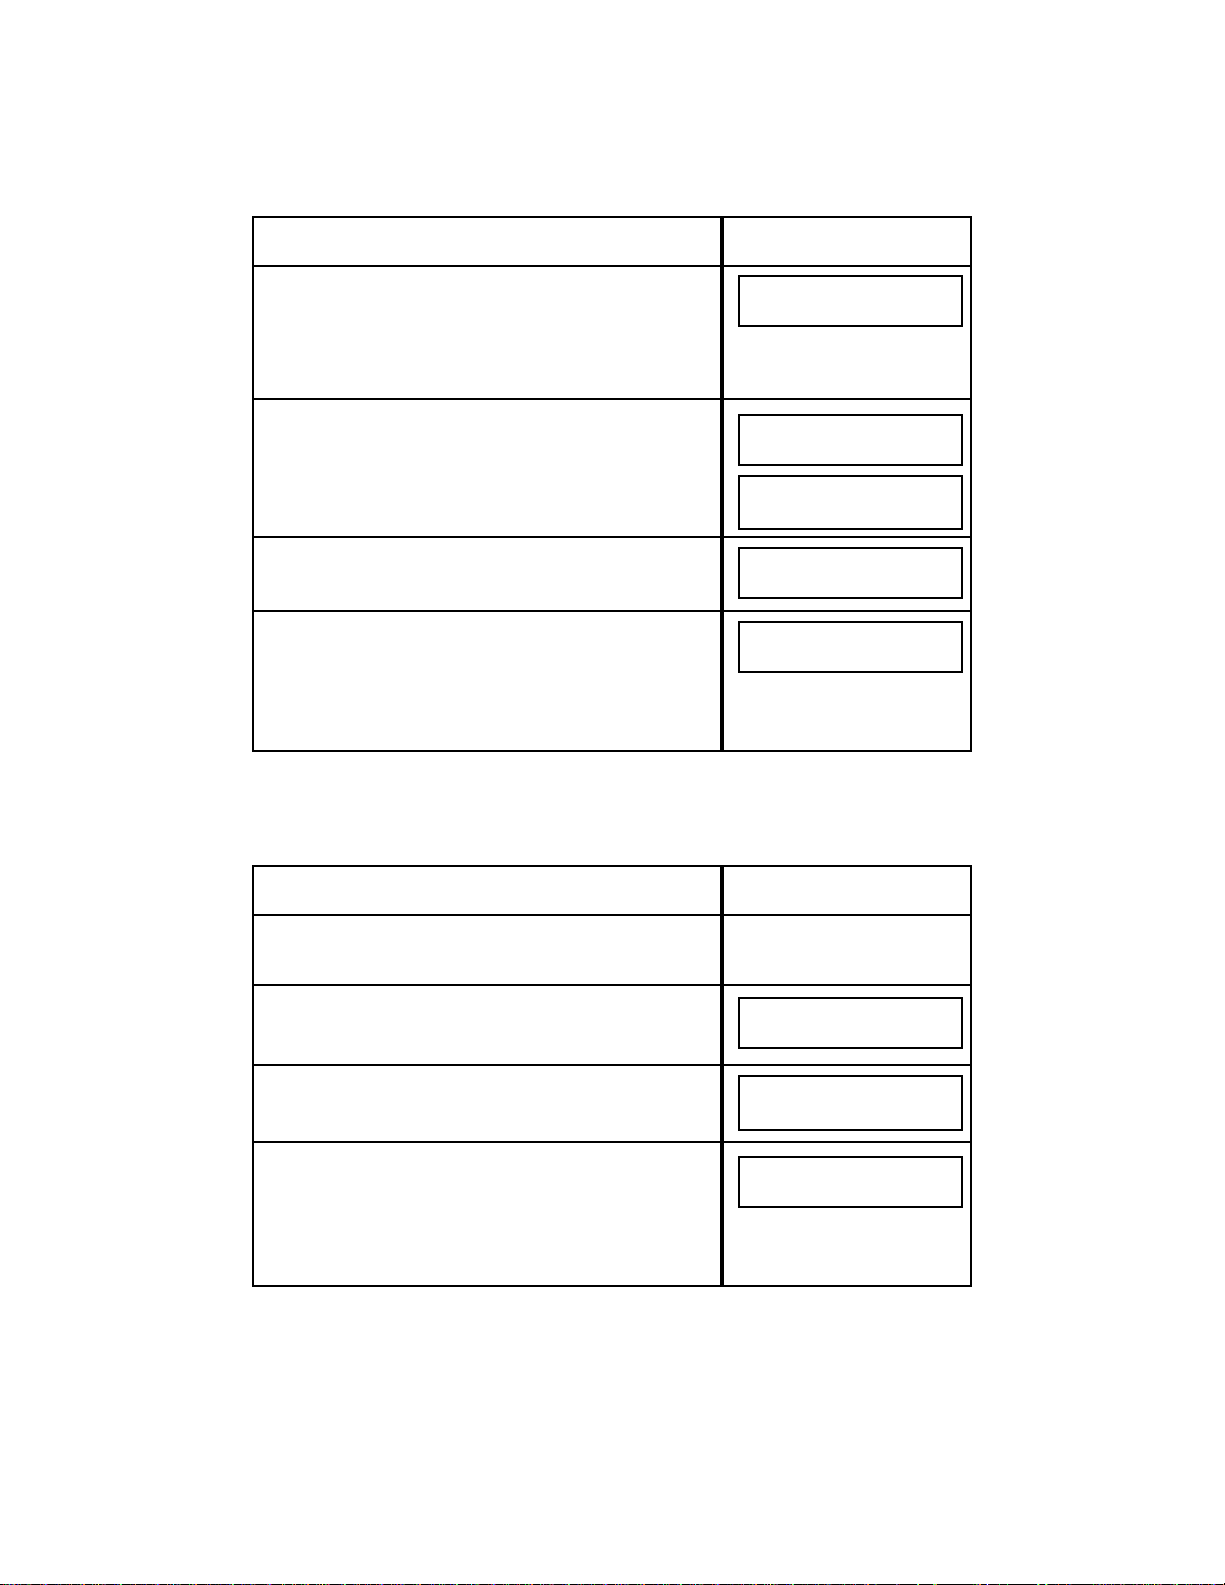
5.3.2 Polling with Programmable AutoDial Jobs
To Poll (Receive) with a Programmable AutoDial Job:
69
Do This
9. This feature is defaulted OFF on the 9930, the
Diagnostic Center will turn it on if you wish. If you
would like the remote fax to print more than one copy
and that location has multicopy capabilities, press
YES. Enter the number the remote fax should make
and press YES, or press NO for no copies.
10. Enter the time to send the document and then press
YES. Or just press YES to begin sending now.
11. If multiple IDs have been programmed, enter ID (1-24),
YES. Otherwise the default ID will be used after a 5
second pause.
12. To print out a Tx Status Report for this job, press YES.
NOTE: This question will come up in the display only if Tx
Status Report is set for "on demand" in System Options
(Function #9).
This Happens
ENTER TIME
10:45
JOB #009 TO MEMORY
PAGE.1/1
SELECT TRANSMIT ID
ENTER # OR ▼ ▲
TX STATUS REPORT?
YES OR NO
JOB #009 TO MEMORY
PAGE.1/1
Do This
1. Check to be sure no documents are inserted in the
Automatic Document Feeder. If polling, you may need
a Passcode.
2. Press FUNCTION twice.
3. Press YES.
4. Press 2, then press YES. (Since there are no pages in
the Automatic Document Feeder, the cursor will
already be at #2, and you can just press YES).
This Happens
1=SND 2=RCV 3=RELAY
4=SND/RCV 5=MAILBOX ▼
ENTER DESTINATION#
AUTO DIAL?
ENTER YES OR NO
Page 82

NOTES:
1. If you are polling several locations during one AutoDial Job, all remote fax units
to be polled during that job must have the same Passcodes or require no
Passcode at all. Each time a remote fax unit requires a different Passcode, press
NO during Step #8 and create a new AutoDial Job.
2. There is no universal polling standard. It may not be possible for your Model
9930 to poll certain non-Pitney Bowes machines.
5.3.3 Entering a Relay Programmable AutoDial Job
The Model 9930 allows you to set up a single-node relay AutoDial Job (through
one remote machine or group of remote machines — a "broadcast relay") to one
or several final destinations. Or you can relay a document via a dual-node relay
(first through one machine — or group of machines — then through another
machine or group of machines) to the final destinations. (NOTE: Remote
machines are referred to as relay stations).
70
Do This
5. Enter one of the following: a phone number from the
Numeric Keypad; a Speed Dial number(s); or a One
Touch Key.
To erase a mistake on the Numeric Keypad, press NO
to backspace.
6. Press YES after entering the number (If you entered a
Speed Dial number, press YES a second time).
7. If you’re polling several locations, press YES and enter
another number. (NOTE: 32 random phone
numbers can be entered from the 9930 Numeric
Keypad). Repeat Steps #5 through #7 until all numbers
are entered. Then press NO to continue
8. If the remote location requires a Passcode, enter the
correct four-digit Passcode, then press YES or you will
not be able to receive from the other unit. Press NO if
a Passcode is not required.
9. Enter the time to dial the remote station, and then
press YES. Or just press YES to begin polling now.
This Happens
The number appears in the
display
ANOTHER NUMBER?
ENTER PASSCODE
IF NEEDED _ _ _ _
ENTER TIME
_ _:_ _
JAN 15 1998 10:00
SYSTEM READY
Page 83

To enter a Relay Programmable AutoDial Job:
71
Do This
1. Insert the document face down in the Automatic
Document Feeder and press FUNCTION twice.
2. Press YES.
3. Press 3, then press YES
4. Press NO for Single Node Relay.
5. Enter the Relay Station Speed Dial number or One
Touch Key followed by YES.
6. If you entered a Speed Dial number, press YES a second
time.
7. If you are setting up a broadcast relay press YES and
repeat Steps #5 and #6 until all numbers are entered.
Then press NO to continue with the rest of the
programming procedure.
8. Enter the number of pages and then press YES. Or, just
press YES and send all the pages in the Feeder.
9. Enter the number corresponding to the correct Mode
and then press YES. Or, just press YES for Normal
Mode.
This Happens
The number appears in the
display.
AUTO DIAL?
ENTER YES OR NO
1=SND 2=RCV 3=RELAY
4=SND/RCV 5=MAILBOX ▼
DUAL NODE RELAY?
ENTER YES OR NO
ENTER RELAY STATION#
■
ANOTHER NUMBER?
HOW MANY PAGES?
__ __
1-NORMAL 2=FINE
3=EXTRA FINE
ENTER FINAL DEST.#
Page 84

5.3.4 Sending and Receiving with Programmable AutoDial Jobs
To send and receive with a Programmable AutoDial Job (Turnaround Polling):
72
Do This
10. Enter the Speed Dial number or One Touch number to
which the Relay Station should send the document.
The Speed Dial numbers or the One Touch numbers
you select must already be stored in the Relaying fax
unit. You can specify many locations here. If the
destinations are stored as One Touch Keys, just keep
pressing the appropriate Keys until you have
specified all destinations. However, you must press
YES after each new Speed Dial number. Press NO
when you finish entering all numbers.
11. Enter the time for the Relay to begin, then press YES or
just press YES to begin transmission now.
This Happens
The document(s) is scanned
to memory and is automatically
sent at the time(s) specified (or
immediately if no time was
specified).
ENTER TIME
_ _:_ _
Do This
1. If you need to set a polling Passcode, refer to Section
5.7.1, Step #17 for instructions.
2. Load pages you wish to send into the Automatic
Document Feeder face down, then press FUNCTION
twice.
3. Press YES.
4. Press 4, then press YES.
This Happens
1=SND 2=RCV 3=RELAY
4=SND/RCV 5=MAILBOX ▼
ENTER DESTINATION#
AUTO DIAL?
ENTER YES OR NO
Page 85

73
Do This
5. Enter one of the following: a phone number from the
Numeric Keypad; a Speed Dial Number; or a One
Touch Key.
6. Press YES after entering the number. (If you entered a
Speed Dial number, press YES a second time).
7. Press YES to enter another number by one of the
methods mentioned in Step #5 above. Repeat Steps
#5-7 until all numbers are entered. Then press NO to
continue.
NOTE: 32 random numbers can be entered from the
Numerical Keypad.
8. Enter the number of pages and then press YES or just
press YES to send all the pages.
9. Enter the number corresponding to the correct MODE
and then press YES. Or, press YES for selected mode.
10. If the remote location requires a Passcode, enter the
correct four-digit Passcode, then press YES. Press
NO if a Passcode is not required.
11. This feature is defaulted OFF on the 9930, the
Diagnostic Center will turn it on if you wish. If you
would like the remote fax to print more than one copy
and the remote fax location has multicopy capability,
press YES. Enter the number of additional copies (up
to 10) the remote location should make and then press
YES. Or, press NO for no remote copies.
12. Enter the time to begin the transmission, then press
YES. Or just press YES to begin the transmission
now.
13. If multiple IDs have been programmed, enter ID (1-24),
YES. Otherwise the default ID will be used after a 5
second pause.
The document(s) is scanned into memory and automatically sent at the time(s) specified (or immediately if no
time was specified). After pages are sent, the pages from
the remote fax are automatically received during the same
telephone call.
This Happens
The number will appear in
the display.
HOW MANY PAGES?
_ _
1=NORMAL 2=FINE
3=EXTRA FINE
ENTER PASSCODE
IF NEEDED_ _ _ _
REMOTE MULTI-COPY?
#COPIES, MAX 10
ENTER TIME
_ _:_ _
SELECT TRANSMIT ID
ENTER # OR ▼ ▲
JOB #086 TO MEMORY
PAGE.1/1
ANOTHER NUMBER?
Page 86

5.3.5 Sending to a Mailbox with Programmable AutoDial Jobs
A Mailbox is a storage space in the memory that only an authorized user can
access. If the proper Mailbox Security Access and procedures are followed, your
Model 9930 can send documents to another Pitney Bowes Group 3 fax machine
Mailbox. For more information on setting up Mailboxes, refer to Section 6.3,
Mailbox Access, for all associated procedures.
To send a document to a Mailbox using a Programmable AutoDial Job:
74
Do This
1. Insert the document face down in the Automatic
Document Feeder and press FUNCTION twice.
2. Press YES.
3. Press 5, then press YES
4. Enter the Mailbox number and then press YES.
5. Enter one of the following: a phone number from the
Numeric Keypad; a Speed Dial Number; or a One
Touch Key for the machine with the Mailbox. Then
press YES. (If you entered a Speed Dial number, press
YES a second time).
6. Press YES to add another number by one of the
methods mentioned in Step #5 above. Repeat #5-7 until
all numbers are entered.
7. The Model 9930 lets you request that a Mailbox
Delivery Report be faxed to a third location from the
unit to which you are sending mail. Press NO if you do
not want a third fax unit to receive a Send Delivery
Report. Press YES if you want a Mailbox Delivery
Report to be faxed to a third location. See Note 1
below. See Section 6.3, Mailbox Access, for
complete information on Mailboxes. Ex.: Press NO.
8. Enter the number of pages then press YES, or just
press YES to send all the pages in the Feeder.
This Happens
The number will appear in
the display.
AUTO DIAL?
ENTER YES OR NO
1=SND 2=RCV 3=RELAY
4=SND/RCV 5=MAILBOX ▼
ENTER MAILBOX #_ _
ENTER DESTINATION#
ANOTHER NUMBER?
SEND DELIVERY REPORT?
ENTER YES OR NO
HOW MANY PAGES?
_ _
1=NORMAL 2=FINE
3=EXTRA FINE
Page 87

NOTES:
1. If you answer YES in Step #7 above, the system will ask for the destination(s).
They must be either Speed Dial numbers or One Touch Keys that are already
stored in the fax machine to which you are sending mail. See Section 6.3 for
more information on Mailboxes.
2. You can program a P-Key to send to a Mailbox if you regularly send materials
to the same location’s Mailbox. Refer to Section 5.5 for more information on
programming a One Touch Program Key.
3. A Job Confirmation Report will print after each AutoDial job you enter, if you
selected this option from the SET OPTION Function.
4. If you need to temporarily interrupt an AutoDial job while it is in progress, press
PAUSE. The system will complete the current transmission, then it will wait five
minutes before continuing the transmission. Y ou can send or receive a document
during this time. The programmable AutoDial job will resume after this
transmission/reception.
5. If multiple destinations (Speed Dial numbers) are programmed in the AutoDial
job, the Model 9930 will begin dialing the first Speed Dial number on the list. If
there are additional destinations programmed, the 9930 will dial the next
telephone number on the list, even if the first destination number was busy. After
all numbers have been called all incomplete stations will be redialed.
6. The Model 9930 was set at 3 redials at 3 minute intervals when the machine
was shipped. If you want to change the number of redials (0-15 attempts) or the
interval between redial attempts (1-10), see Section 5.7.1.
7. Refer to Section 5.4 for procedures to cancel or edit an AutoDial Job.
75
Do This
9. Enter the number corresponding to the correct Mode
and then press YES. Or just press YES for Normal
Mode.
10. Enter the time to send the document and then press
YES. Or just press YES to begin transmission
immediately.
11. If multiple IDs have been programmed, enter ID (1-24),
YES. Otherwise the default ID will be used after a 5
second pause.
This Happens
The document is scanned into
memory and automatically
sent at the time specified (or
immediately if no time was
specified).
ENTER TIME
_ _:_ _
SELECT TRANSMIT ID
ENTER # OF ▼ ▲
Page 88

5.4 Editing AutoDial Jobs (Function #4)
All AutoDial Jobs are stored in the Model 9930 memory until transmission is
complete. At times, you may need to modify an AutoDial Job while the job is still
in memory. The quickest way is to press the "Edit Jobs" key on the Operator
Panel. You may also use the EDIT JOBS Function #4 Menu to:
• 1=ADD PGS (add pages to an existing job)
• 2=EDIT DEST (add telephone number[s] or destination[s] to an existing job)
• 3=DELETE (delete jobs)
• 4=REPEAT (repeat incomplete job[s])
• 5=CHANGE TIME (of a pending job)
• 6=PRINT DOCUMENT(pages of job)
To edit an AutoDial Job:
76
Do This
1. Print a copy of the Memory Management Report (Press
Function then #2, and YES three times) to determine
the job number you want to edit.
2. Press EDIT JOBS Key and skip to Step #5 or
3. Press FUNCTION 4, then press YES.
4. Enter YES.
Pressing ▼ will display 5 and 6.
5. Enter the number of the action you want: #1 to add
pages; #2 to edit the destinations, or add telephone
numbers; #3 to delete a job; #4 to repeat a job; #5 to
change time or #6 to print document.
This Happens
The Memory Management
Report prints.
EDIT JOBS?
ENTER YES OR NO
1=ADD PGS 2=EDIT DEST
3=DELETE 4=REPEAT ▼
5=CHANGE TIME ▲
6=PRINT DOCUMENT
FUNCTION SELECT
ENTER YES OR NO
Page 89

Now follow the appropriate Steps in Section 5.4.1 through 5.4.6 for whatever
selection you wish to make (1-6).
5.4.1 Adding Pages
To add pages to an existing AutoDial Job:
NOTE: When you select #1 to Add Pages, you must have the extra pages you
wish to add in the Automatic Document Feeder or the display will read "PLEASE
SET DOCUMENT."
77
Do This
6. Insert pages to be added face down in the document
feeder. Continuing from the preceding Section, Step #5,
press 1 and then press YES.
7. Enter the number of the AutoDial Job you want to change
or scroll to job #, then press YES. The pages in the
Feeder will be automatically counted and the # reflected
in display on second line.
8. If you wish to edit another AutoDial Job, press YES.
Continue with Step #6 until you have edited all jobs.
Or press NO.
This Happens
After pressing NO the
following displays appear in
sequence:
When you have finished
editing the job, the system
prints a Memory Management
Report and returns to System
Ready.
ENTER JOB # _ _ _
OR ▼ ▲
JOB #135 TO MEMORY
PAGE.1
EDIT ANOTHER JOB?
EDIT COMPLETE
MEMORY MANAGER
PRINTING NOW
Page 90

5.4.2 Editing Destinations (Changing or Deleting Telephone Numbers)
78
Do This
6. Continuing from Section 5.4, Step #5, press 2 and then
press YES.
7. Enter the number of the AutoDial Job you want to
change or scroll to job #, then press YES.
8. Enter the Speed Dial, One-Touch or random number
that you want to change or delete, then press YES.
9. Press YES to delete the phone number. If you do not
want to delete this number, press NO.
10. Press YES, if you want to program another phone
number in place of the one just deleted or to delete
another number. Otherwise, press NO and skip to
Step #13. Example: Press YES.
Note: If the number deleted in Step #9 was the only
number in that job, the command will be deleted if NO is
pressed. "Job(s) Deleted" will show in the display.
11. Enter a new number by using the Speed Dial, One-
Touch or random numbers, then press YES.
12. Press YES to add or delete additional numbers to the
same job or press NO. Example: Press NO.
13. Press YES if you wish to edit another job and go back
to Step #5 in Section 5.4.
A new Memory Manager Report will print automatically if
commands still exist in memory.
This Happens
ENTER JOB # _ _ _
OR ▼ ▲
ENTER DESTINATION#
■
DELETE?
123-4567
ANOTHER NUMBER?
ENTER DESTINATION#
ANOTHER NUMBER?
EDIT ANOTHER JOB?
EDIT COMPLETE
MEMORY MANAGER
PRINTING NOW
Page 91

5.4.3 Deleting a Job
To delete an existing AutoDial Job:
NOTE: AMemory Management Report will not be printed if you have deleted the
last AutoDial Job in Memory.
5.4.4 Repeating a Job
The Model 9930 is equipped with a Memory Save feature. If Memory Save is
turned on, whenever a transmission is incomplete because the job was
interrupted or the remote location did not answer (e.g., was busy or encountered
a communication error), the job (and document) is saved in memory . The system
will print an Tx Status Report that identifies the incomplete job number(s) and
verifies that the document is still in memory . In addition, this message will appear
in the display:
You can either delete the job (See preceding Section 5.4.3) or instruct the system
to repeat the incomplete part of the job.
79
Do This
6. Continuing from Section 5.4, Step #5, press 3 and then
press YES.
7. Enter the number of the AutoDial Job you want to
delete or scroll to job #, then press YES.
8. Press YES to delete the job.
Press NO, if done editing jobs. Otherwise, press YES and
go back to Step #5 in Section 5.4.
This Happens
If there are other existing
AutoDial Jobs in memory,
the following display will
appear.
If there are no other existing
AutoDial Jobs in memory, the
System will return to System
Ready.
ENTER JOB # _ _ _
OR ▼ ▲
DELETE JOB #029?
JOB(S) DELETED
EDIT ANOTHER JOB?
EDIT COMPLETE
INCOMPLETE JOB
CHECK MEMORY MANAGER
Page 92

To repeat the incomplete part of an AutoDial Job:
5.4.5 Changing a Time
To change a communication time of an existing AutoDial Job:
80
Do This
6. Continuing from Section 5.4, Step #5, press 4 and
then press YES.
7. Enter the job number you want to repeat or scroll to
job #. Then press YES.
8. Enter the time you want the job repeated. Then press
YES. Or, just press YES to repeat the job now.
9. If you wish to edit another job, press YES. Continue
with Step #6 until you have edited all necessary jobs.
Or, press NO.
When you have finished editing the job, the system prints
the Memory Management Report. If the job should be
repeated now, the transmission begins. If not, the system
returns to System Ready Mode.
This Happens
After pressing NO, the
following displays appear in
the sequence:
ENTER JOB # __ __ __
OR ▼ ▲
ENTER TIME
_ _ :_ _
EDIT ANOTHER CMND?
EDIT COMPLETE
MEMORY MANAGER
PRINTING NOW
Do This
6. Continuing from Section 5.4, Step #5, press 5 and then
press YES.
7. Enter the job number in which you want to change the
time. Then press YES.
8. The old time will appear on the display. Enter the
desired time. Then press YES.
9. If you wish to edit another job, press YES. Continue
with Step #6 until you have edited all necessary jobs.
Or, press NO.
This Happens
ENTER JOB # __ __
OR ▼ ▲
ENTER TIME
_ _:_ _
EDIT ANOTHER JOB?
MEMORY MANAGER
PRINTING NOW
Page 93

5.4.6 Print Document (Only if Delayed Send Documents Are Still in Memory)
5.5 Programming P-Keys (One-Touch Programmable
Keys Function #7)
On the Model 9930, the last five numbers (P1 to P5) are dedicated as P-Keys.
Once programmed, you can enter the job by pressing the One Touch Program
Key.
If you were to use an AutoDial Job instead of a programmed P-Key, once an
AutoDial Job has been completed it does not exist in memory any longer. A new
job would have to be entered the next time you wish to communicate with the
same locations. Using a One-Touch Program Key saves you the time of entering
the AutoDial Job each time you need to transmit to the same locations.
Programmable One Touch Keys can be reprogrammed with new sets of jobs any
time.
81
Do This
6. Continuing from Section 5.4, Step #5, press 6 and then
press YES.
7. Enter the job number you want printed. Press YES.
Note: Documents are still retained in memory after
printing.
This Happens
ENTER JOB #__ __
OR ▼ ▲
JOB #001 PRINTING
PAGE .1/20
JAN 15 1998 10:00
SYSTEM READY
Page 94
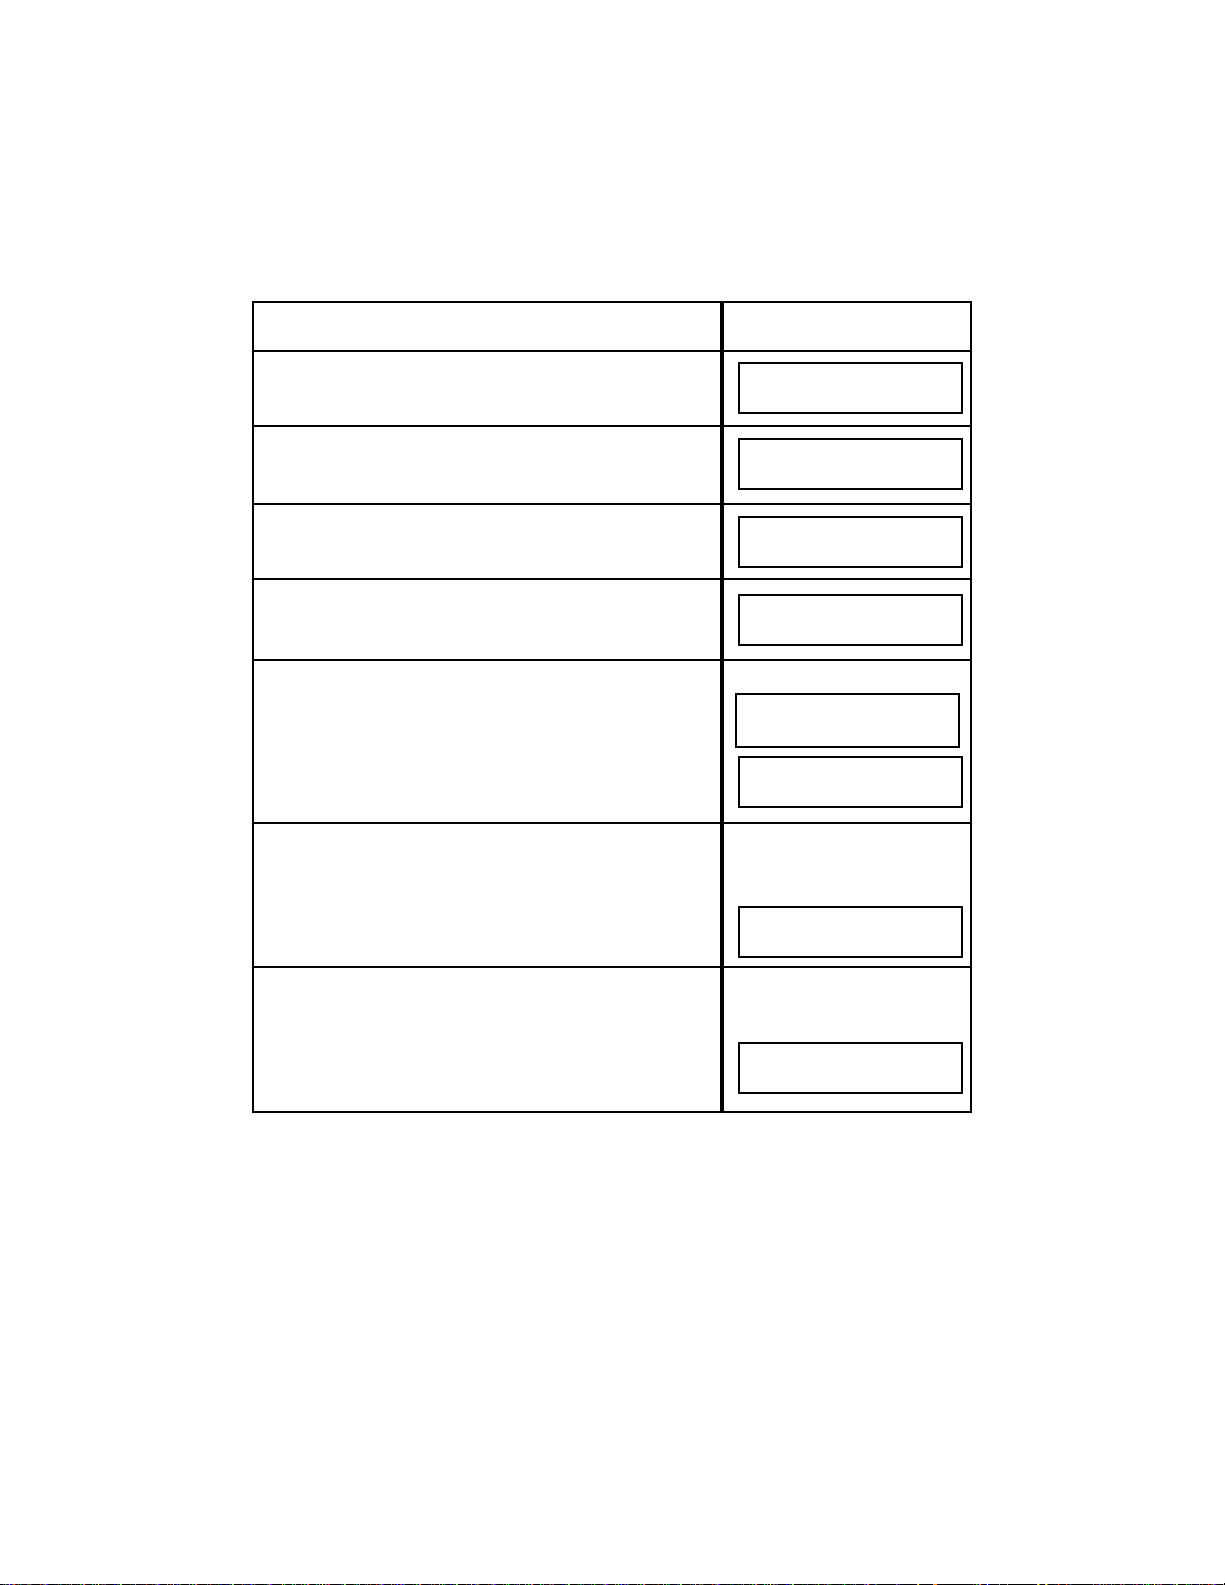
5.5.1 Storing P-Keys
To store an AutoDial Job in a One Touch Program (P-Key):
82
Do This
1. Press FUNCTION.
2. Enter 7 and then YES.
3. Press YES.
4. Press one of the last 5 One Touch Keys (31-35).
Example: Press "P1".
5. Enter a name for the P-Key as you would a Speed Dial
name, then press YES. (See Section 5.1.1, Step #6).
Example: Enter "BRANCHES", then YES. The P-Key
name can be either alphabetical, numerical or special
symbol characters, or a combination of all three. Enter
up to 16 characters total. If you do not want to name the
P-Key, press NO.
6. At this point enter the job as you would another
AutoDial Job. Refer to Section 5.3, Programmable
AutoDial Jobs. Follow the appropriate directions for
Programming: Send, Receive, Relay, Turnaround Poll
or Mailboxes.
7. Repeat Steps #4 through #6 to store another AutoDial
Job in another Program Key. Or, press NO.
This Happens
When you have finished
programming the P-Key, the
following display appears:
The system prints a Program
Key Directory and returns to
System Ready.
FUNCTION SELECT?
ENTER FUNCTION #_ _
SET PROGRAM KEYS?
ENTER YES OR NO
PRESS DESIRED P-KEY
ENTER NAME
PK1:__
1=SND 2=RCV 3=RELAY
4=SND/RCV 5=MAILBOX ▼
6=POLL ▲
PRESS DESIRED P-KEY
P-KEY DIRECTORY
PRINTING NOW
Page 95
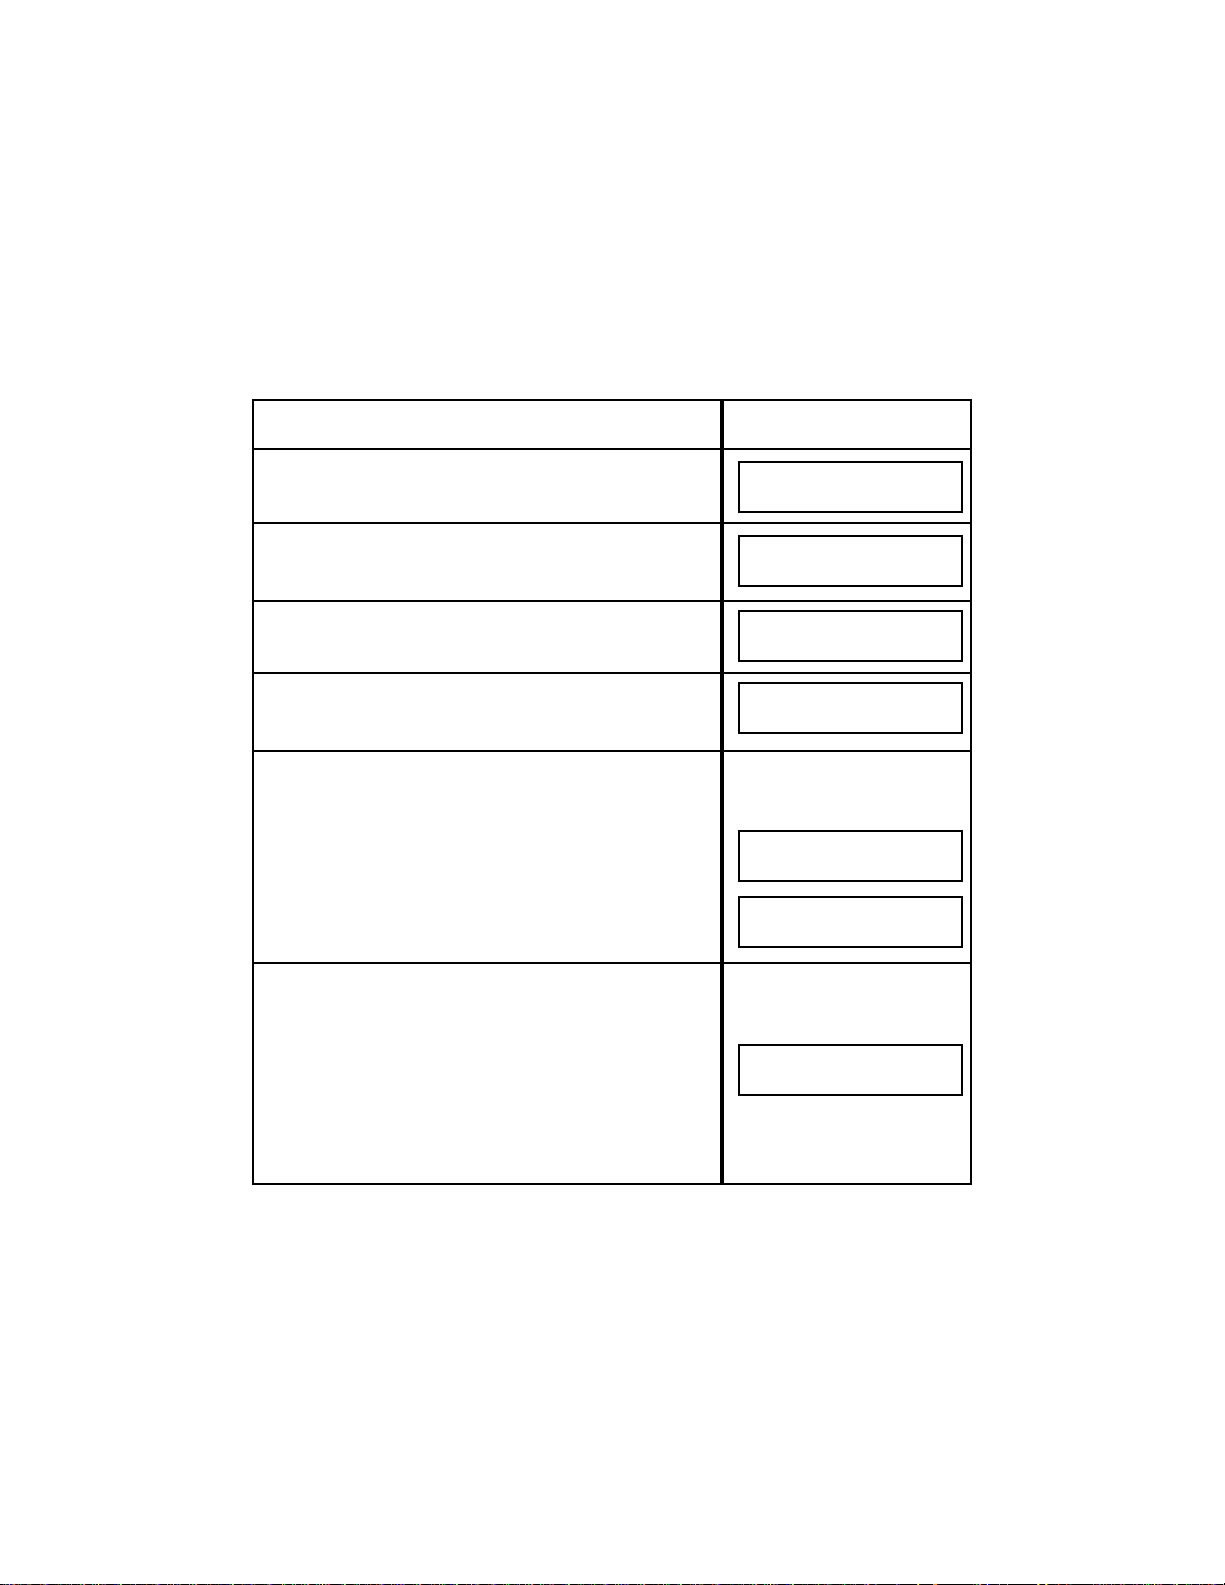
5.5.2 Editing or Deleting the Program from a P-Key
The lists of destinations and any associated program jobs are permanently stored
in P-Keys until they are edited, modified, or deleted. Changes or deletions can
be made at any time.
To modify or delete the programmed contents of a P-Key:
83
Do This
1. Press FUNCTION.
2. Enter 7 and then YES.
3. Press YES.
4. Press the P- Key you want to edit.
5. Press YES to delete the entire P-Key or press NO to
change the P-Key name or destination.
6. To change name press NO. To keep name and edit
destination press YES.
This Happens
If NO is pressed, the
following displays appear in
sequence:
After pressing NO to press
the desired P-Key, the
following display appears:
The System prints a Program
Key Directory and returns to
System Ready.
FUNCTION SELECT?
ENTER FUNCTION # __
SET PROGRAM KEYS?
ENTER YES OR NO
PRESS DESIRED P-KEY
DELETE?
PK1:BRANCHES
ENTER NAME
PKI: BRANCHES
ENTER DESTINATION#
P-KEY DIRECTORY
PRINTING NOW
Page 96

5.6 Printing Reports and Forms (Function #2)
With the Model 9930, you can print a variety of reports, many of the reports can
be printed on demand or programmed to print automatically. The following
reports are accessed through the Print Reports Function described in Section
5.6.1.
• Memory Management Report
• Speed Dial Directory
• One Touch Directory
• One Touch Directory Sheet
• Program Key (P-Key) Directory
• System Set-Up Report
• Cartridge Order Form
Methods for accessing the following reports are discussed in Sections 5.6.3 and
5.6.4.
• Transaction Journal Report (Communications Report)
• Transmit Status Report
• Job Confirmation Report
• Mailbox Directory
• Mailbox Confirmation
• Relay Confirmation Report
• Power Fault Report
84
Do This
7. Scroll (▼ or ▲) to destination you want to delete and
press YES or to add a destination merely enter the new
destination speed dial number and press YES.
8. If you would like to modify or delete another P-Key,
press YES and follow from Step #4 above, or press NO.
Example: Press NO.
This Happens
After pressing NO, the
following display appears:
The System prints a Program
Key Directory and returns to
System Ready.
DELETE?
01: ATLANTA
02: BOSTON
P-KEY DIRECTORY
PRINTING NOW
Page 97

5.6.1 Printing a Report on Demand
You may want to print one of the reports, forms or directories accessible through
the Print Report Function to:
• verify pending AutoDial jobs (Memory Management Report)
• check what Speed Dial numbers are available (Speed Dial Directory)
• check what One Touch Keys are available (One Touch Directory)
• verify the organization of the system e.g., to check how it was
programmed (System Set-Up Report)
• order cartridges (Cartridge Order Form)
• revise One Touch destinations (One-Touch Directory Sheet)
The Transaction Journal Report can be printed by pressing Journal Key on
Operator Panel.
To print any one of the above reports on demand:
85
Do This
1. Press FUNCTION 3 times.
2. Press YES.
3. Use ▼ and ▲ keys to scroll to report name.
Or press NO until the report name you want to print
appears in the display: Speed Dial Directory, One
Touch Directory, P-Key Directory, System Set-Up
Report or Cartridge Order Form. When the report
name you want appears, press YES.
4. The system will automatically return to SYSTEM
READY.
This Happens
PRINT REPORTS?
ENTER YES OR NO
PRINT REPORTS
MEMORY MANAGER?
(REPORT NAME)
PRINTING NOW
Page 98

5.6.2 On Demand Reports
(1) Memory Management Report
The Memory Management Report contains information on the amount of memory
available in your system. It also lists the number of pages in the Send Memory,
the Receive Memory as well as those pages stored in Mailbox(es). Additionally
all pending AutoDial jobs, including Job Time and Date, are itemized for your
review.
You can print the Memory Manager on demand, but it also prints each time you
edit an AutoDial job (see Section 5.4, Editing AutoDial Jobs).
(2) Speed Dial Directory
The Speed Dial Directory itemizes the telephone numbers and names which you
have programmed as three-digit Speed Dial numbers. It may be printed in
Numeric telephone order or alphabetically. It also indicates which locations you
have programmed as Relay Stations (see Section 6.4 for information on
Relaying). There are a total of 200 possible Speed Dial numbers on the Model
9930.
You can print the Speed Dial Directory on demand but it also prints each time you
enter or change any Speed Dial number or name. See Section 5.1 for instructions
on programming Speed Dial numbers.
(3) One Touch Directory
The One Touch Directory identifies the One Touch Key (List #) and name
associated with it along with the Speed Dial number(s), telephone number(s) and
name(s) that are stored in that One Touch Key. You can print the One Touch
Directory on demand, but it also prints automatically whenever you enter or
change a One Touch Key . See Section 5.2 for procedures to Program One Touch
Keys.
(4) One Touch Directory Sheet
After programming a One Touch Key, you can print out the Directory Sheet which
includes the first 12 characters of each destination name. Cut along the dotted
line and place it over the One Touch keys under the Directory Sheet Cover. To
print out a Directory Sheet, press the FUNCTION Key, 2, YES twice and cursor
up. When the display reads: "ONE TOUCH SHEET," press YES.
(5) Program Key (P-Key) Directory
This report describes the contents of the Programmable One Touch Key (P-Keys)
by printing a Program Key Directory.
86
Page 99

A Program Key Directory is automatically printed each time you program or
change a P-Key. See Section 5.5 for procedures to Program a P-Key.
(6) System Set-Up Report
The System Set-Up Section of this report includes the current date and time; your
Model 9930 transmit IDs and fax phone number; a polling Passcode (if you use
one); the Journal format; the time to print the Transaction Journal and where to
fax it (if specified); whether a Ring Detect timer should be set for delayed answer;
whether the Model 9930 is in Auto or Manual Receive; the number of times the
Model 9930 will redial a location that is busy or doesn't answer; ring pattern;
number of minutes between redial attempts; whether the machine is configured
for Automatic Reduction; the beep volume and also monitor volume. (See Section
5.7 to change the System Set-Up Functions).
The report also describes Set-Up Options features that are activated, including
the Transmit Status Report; the Job Confirmation Report; the System Access
Code; the Programmable Power Saver Setup and whether a Cover Sheet will
automatically be sent. Refer to Section 5.8 for more information on Setting
System Options.
Under the Set-Up Memory section, you can see how much memory is in the
system; whether Memory Save is on; whether all documents will be received into
memory; whether the Model 9930 will store all documents into memory before
automatic dialing begins; whether you may remotely retrieve documents in
memory; whether your unit will still receive if it's out of paper; and a look at your
system's private Mailbox configuration. Refer to Section 5.9 for more information
on Setting Memory Options.
You can print the System Set-Up Report on demand. It also prints automatically
whenever you make a change to either the Set-Up Functions, the Option Set-Up
Functions or the Memory Set-Up Functions.
7) Cartridge Order Form
You can print a form to be used in ordering toner cartridges for your 9930. This
form can be telephoned or faxed to the numbers listed on the form. This form will
also print automatically when the machine senses low toner.
5.6.3 Transaction Journal (Communications Report)
The Model 9930 Transaction Journal gives details of all transmissions and
receptions. You can print out the Journal anytime you need one. Simply press
the JOURNAL Key on the Operator Control Panel to print a copy or to view the
recent transaction on the display. After it is chosen, two numbered selections
appear on the display (1=PRINT, 2=VIEW). Press 1, then "Yes," to obtain a
printed Communications Report. Press 2, then "Yes," to view each transaction on
87
Page 100

the display. Use the up or down cursor keys to scroll through the list of
transactions. The communications you want to see on the display may be
selected on the Journal setup of System Set Function (See Section 5.7). You may
choose 1=Originated Call Only or 2=All.
The Model 9930 memory allows the Journal to store 32 transmit or receive
transactions before becoming full.
If you wish, you can program the Model 9930 to automatically print a Journal once
a day, at the same time everyday. Refer to SET-UP SYSTEM Functions (Section
5.7) for instructions on how to program your system to print a Journal everyday.
When the Journal is printed automatically each day, the
information is erased
from memory
and a new Journal is started. If you have configured the system to
print a Journal each day, and there has been no activity since the last time the
Journal printed and erased, "NO TRANSACTIONS" will appear in the display and
nothing will print.
5.6.4 Verification Reports
Y our Model 9930 is capable of printing various Verification Reports. Most of these
are generated automatically . Some can be turned ON or OFF. Collectively, these
reports provide immediate feedback about transmissions, receptions, jobs,
Mailboxes, Relays and other important functions.
1. Transmit Status Report
This report prints immediately following each transmission, even after your unit
has been polled by another machine. The information is identical to a line item
on the Transaction Journal (Communication Report). See Section 5.6.3 for more
information.
You may choose to have the 9930 automatically print out the Transmit Status
Report after each transmission or you may choose: 1=Off, 2=On, 3=Inc, or 4=On
Demand. If you select 3 (Defaulted to 3), a report will print only if transmission is
unsuccessful. If 4 is selected, you can choose to print a report while setting up a
transmission. See Setting System Options (Section 5.8) for details on setting up
this feature.
2. Job Confirmation Report
This type of report prints automatically each time you enter or edit a
programmable AutoDial job. See Section 5.3 for more information on AutoDial
jobs. The Job Confirmation Report was OFF when your Model 9930 was
installed. If you wish, you can turn it ON by accessing the SET OPTIONS
Function (see Section 5.8 for further details).
88
 Loading...