

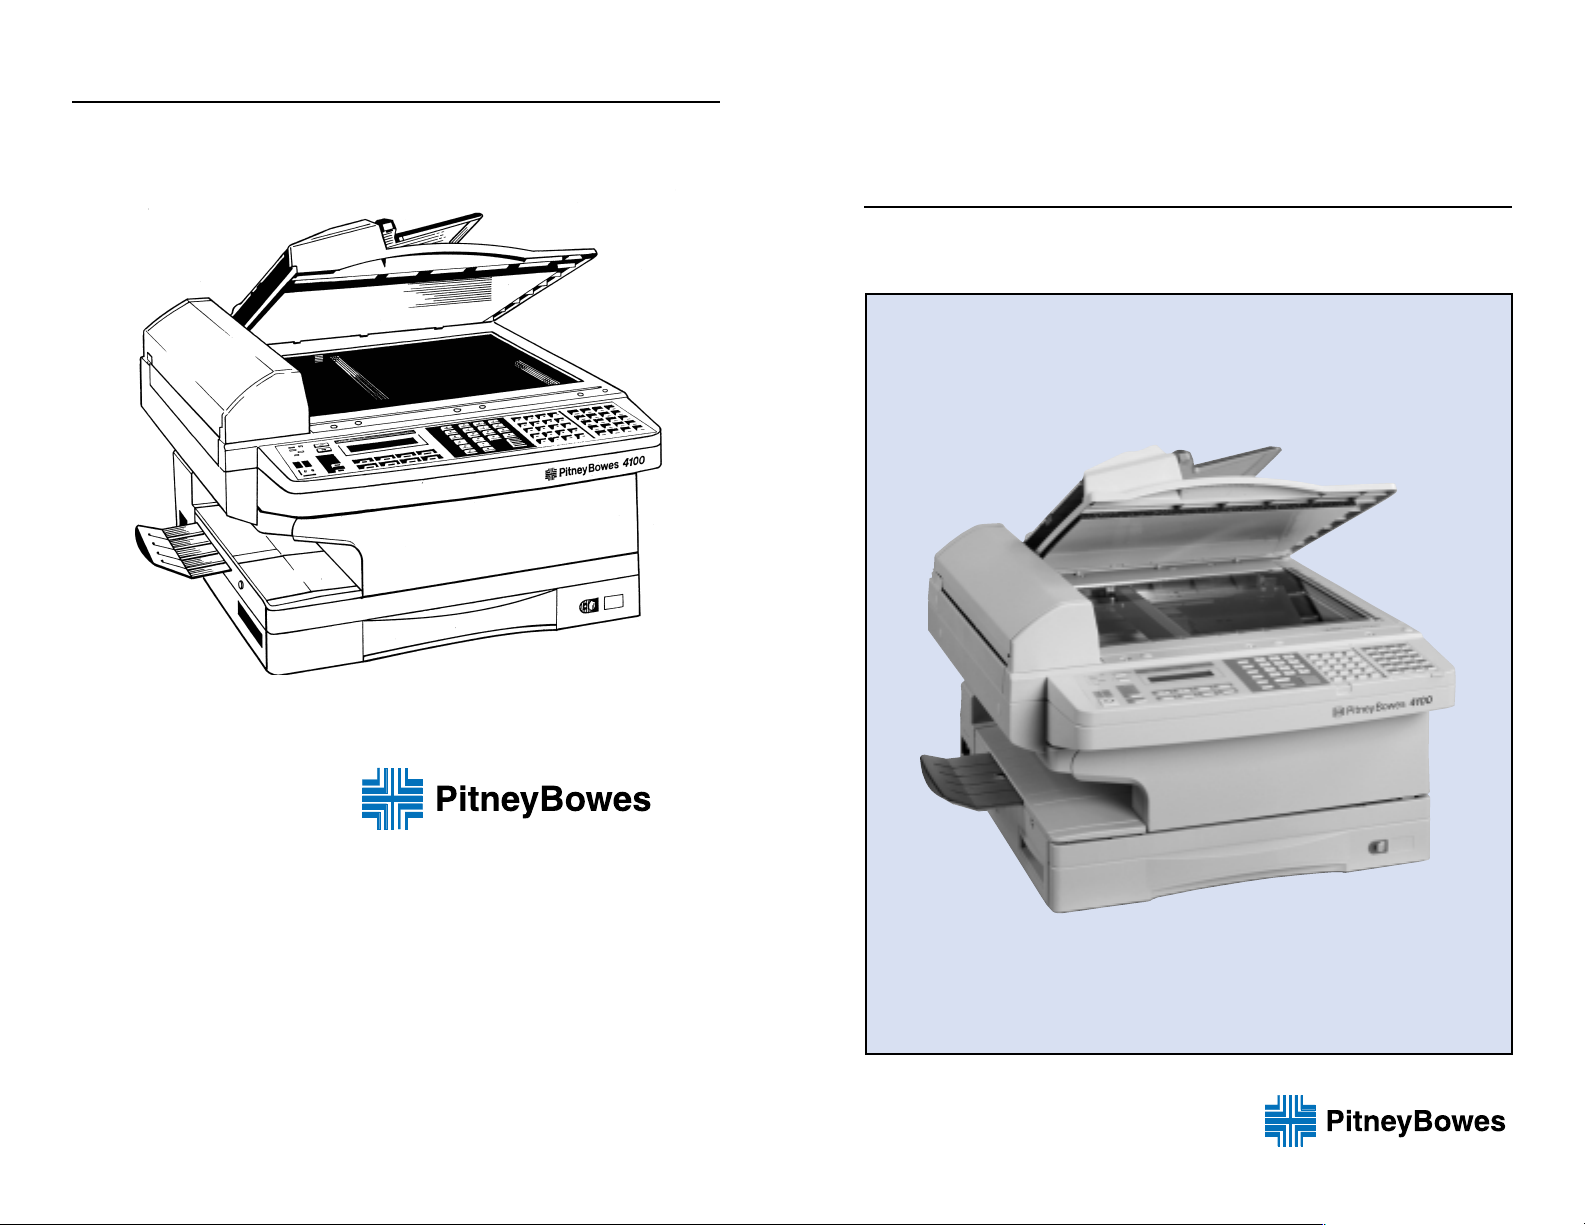
PITNEY BOWES 4100 Multifunctional Fax/Copier
Return to 4100 OPG
QUICK REFERENCE GUIDE
Pitney Bowes 4100
Multifunctional Fax/Copier
E Recyclable
FX15159
Copyright 1998, Pitney Bowes Inc.
Printed in USA, 12/98
United States:
100 Oakview Drive
Trumbull, Connecticut 06611
Canada:
1595 - 16th Avenue, 2nd Floor
Richmond Hill, Ontario
L4B 3V3
United Kingdom:
The Pinnacles
Harlow, Essex
CM19 5BD

VIII. PITNEY BOWES OPTIONS AND SUPPLIES
Supply Line Phone Numbers:
United States Canada
1-800-462-6797 1-800-263-4660
1-800-832-1869 (Fax) 1-905-420-7707 (Fax)
PITNEY BOWES 4100
QUICK REFERENCE GUIDE
Pitney Bowes 4200 Multifunctional Fax/Copier Options and Supplies:
Item Reorder No. Description
Supplies:
䡲 T oner Cartridge #812-8 1 cartridge, fuser roller cleaner
(yield: approx. 7,000 pages)
䡲 Drum Cartridge #812-9 1 cartridge
(yield: approx. 21,000 pages)
䡲 Recording Paper
Letter-size plain paper #471-1 8.5” x 11” (case: 10 reams)
Legal-size plain paper #462-1 8.5” x 14” (case: 6 reams)
Ledger-size plain paper #479-1 11” x 17” (case: 5 reams)
䡲 OK Stamp #813-3 Indicates successful transmission
䡲 OK Stamp Ink #813-2 Refill bottle
䡲 Document Tray #813-4 Paper receive tray
䡲 One T ouch Labels #813-5 Replacement labels
Options:
䡲 300-Sheet Cassette* 6429684 Universal paper cassette
䡲 Internal Memory Card* 6429685 2 MB (160 pages)
䡲 Second Phone Line* 6429687 33.6 Kbps modem (doubles fax
transmit/receive capacity)
䡲 Connectivity:
Printer Driver with
bidirectional parallel port* 6429686 Enables PC fax/scan/print
LAN Interface* 6429689 Windows-based LAN printing
Cabinet Stand #813-0 For 2 cassette configuration
Cabinet Stand #813-1 For 3 or 4 cassette configuration
ALARM AUTO ANSWER
COMMUNICATION
MEMORY
RECEIVE
FAX
COPY
B
A
03
02
01
J
I
11
10
09
R
Q
19
18
17
Z
Y
27
26
25
)
(
35
34
33
OPERATOR PANEL
MONITOR/CALL
HOLD
DARK
NORM
LIGHT
HALFTONE
RESOLUTIONCONTRAST
S-FINE
NORM
MINIMUM
50%
11" X 17" 8.5" X 11"
8.5" X 14"
8.5" X 11"
64%
78%
REDUCTION
MENU
FINE
PROGRAM
ENLARGEMENT
8.5" X 14" 11" X 17"
8.5" X 11" 11" X 17"
MAXIMUM
121%
129%
200%
11
D
C
04
05
L
K
12
13
T
S
20
21
.
,
28
29
-
+
36
37
07
G
06
F
E
15
O
14
N
M
23
W
V
22
U
&
31
'
30
:
39
38
/
41
08
H
>
52
=
51
<
50
;
49
16
P
]
60
[
59
@
58
?
57
24
X
68
67
}
66
{
65
32
SPACE
76
75
74
73
40
CODEALPHABET
%
44
$
43
"
42
!
Flip Tab A Flip Tab B
BROADCAST
COMMUNICATION
OPTIONS
GROUP DIAL
SPEED DIAL/
TEL INDEX
MEMORY
TRANSMIT
STAMP
45
53
61
69
77
qz abc def
ghi jkl mno
prs tuv wxy
oper
CLEAR ALL
STOP/CLEAR
47
46
55
54
63
62
71
70
79
78
START
48
56
64
72
80
CODE
* Order through your local Pitney Bowes Sales Branch
20
1

PITNEY BOWES 4200
QUICK REFERENCE GUIDE
INTRODUCTION
This Quick Reference Guide is a summary of the most commonly used
features of the Pitney Bowes 4200 and assumes that basic machine setup is complete. You’ll notice that each feature appears with a crossreference page number in parentheses. Please refer to that page in the
4200 Operator’s Guide if you need additional details regarding a
particular feature.
PITNEY BOWES DIAGNOSTIC CENTER
VII. PITNEY BOWES SERVICE
Service on Pitney Bowes facsimile products is available throughout the
United States and Canada. In case of a malfunction, or for additional
information, please call your Pitney Bowes F acsimile Diagnostic Center .
Supplies for the 4200, including toner, can be ordered through the Pitney
Bowes National Supply Line (see next page).
Country Diagnostic Number
United States:
100 Oakview Drive 1-800-243-5556
Trumbull, Connecticut
06611
For detailed information, refer to the Pitney Bowes 4200 Operator’s
Guide, or call the Pitney Bowes Diagnostic Center at 1-800-243-5556.
In Canada, please call the Canadian Pitney Bowes Diagnostic Center
at toll free 1-800-668-9194 (English); or 1-800-387-0185 (French). Refer
to the back of this guide for additional service and supply information.
Canada:
1595 - 16th Avenue, 2nd Floor 1-800-668-9194 (English)
Richmond Hill, Ontario 1-800-387-0185 (French)
L4B 3V3
When calling for service or supplies you must provide your:
Model number:
Serial number:
Customer account number:
Company name:
Machine phone number:
2
19

VI. MANAGEMENT REPORTS
The 4200 prints a wide variety of reports, including the following:
• One-T ouch Directory (Operator’ s Guide – P age 82): To print a
list of stored One-Touch numbers,
1. Press PROGRAM, Enter.
2. Highlight “List” using or . Press Enter.
• Speed Dial Directory (Operator’s Guide – Page 92): To print a
list of Speed Dial numbers,
1. Press PROGRAM, B, Enter.
2. Highlight “List” using or . Press Enter.
• Group Directory (Operator’s Guide – Page 93): This lists all
the stored Autodialer numbers by Location ID and indicates to
which of the 32 possible Call Groups each belongs.
To print a Group List:
1. Press PROGRAM, H, Enter.
• Activity Journal (Operator’s Guide – Page 125): The 4200 will
print an Activity Journal automatically after approximately
50 transmit/receive transactions.
To print the Activity Journal manually:
1. Press PROGRAM, G, Enter.
2. “List” is highlighted. Press Enter.
Note: To toggle printing of the Activity Journal ON/OFF,
see Operator’s Guide – page 126.
• User Settings List (Operator’s Guide – Page 70): With this list
you can quickly confirm that all settings are as you want, without
having to go back and check them on the machine.
To print the User Settings:
1. Press PROGRAM, I, Enter.
2. Press Enter repeatedly until the display reads: Print
Settings.
3. Press Enter to print the settings list.
PITNEY BOWES 4200
QUICK REFERENCE GUIDE
TABLE OF CONTENTS Page
I. PROGRAM LIST OVERVIEW
Chart listing main system programming functions 4
II. PROGRAMMING, EDITING AND ERASING
A. Change Date, Time, TTI, etc. 5
B. One-Touch Keys (01-72) 5
C. Speed Dial Numbers (001-120) 7
D. Programmable One-Touch Keys (73-80) 9
• Programming a Delayed Transmission 9
• Programming a Broadcast 10
III. BASIC FAX OPERATION
A. Sending a Fax 12
B. Canceling a Transmission 13
C. Receiving a Document 13
IV. ADVANCED FAX OPERATION
A. Delayed Transmission 14
B. Broadcasting 15
V. MAKING COPIES 17
VI. MANAGEMENT REPORTS 18
18
VII. PITNEY BOWES SERVICE 19
VIII. PITNEY BOWES OPTIONS AND SUPPLIES 20
3

I. PROGRAM LIST OVERVIEW (Operator’s Guide – Page 70)
V. MAKING COPIES (Operator’s Guide – Page 57)
The Pitney Bowes 4200 has thirteen main program functions. They are
selected in the following manner:
• Press PROGRAM; enter the desired alphabetic function (shown
below) via the One-Touch Keypad.
Note: To print a Program List, press PROGRAM, *, 8.
PITNEY BOWES 4200 PROGRAM LIST
A. OneTouchDial (Operator’s Guide – Page 72), Enter or change
One-Touch numbers.
B. Speed Dial (Operator’s Guide – Page 82), Enter or change Speed
Dial numbers.
C. P One-T ouch (Operator’s Guide – P age 141), Program keys 73-
80 to perform repetitive jobs, e.g., delayed transmit, broadcast,
polling, etc.
D. Polling (Operator’s Guide – Page 131), Store/print/erase a
document for regular or database (memory) polling.
E. SecureMail (Operator’s Guide – Page 164), Create, modify or
clear a SecureMail mailbox.
F. Commands (Operator’s Guide – Page 108), Print a delayed
Command List or produce a printout of a document stored for
delayed transmission.
G. Journal (Operator’s Guide – Page 125), Print the activity
journal, toggling the journal on/off or selecting TCR/RCR.
H. Group List (Operator’s Guide – Page 93), Print a Call Group
Directory which lists all the stored autodialer numbers by
Location ID.
I. Installation (Operator’s Guide – P age 34), Program date/time ,
subscriber ID, TTI, phone type (tone/pulse) and print User
Settings.
J. User Settings (Operator’s Guide – Page 61), Program scan and
print parameters, Redial, Security Tx, Memory Tx, etc.
K. Cover P age (Operator’s Guide – P age 121), Program cover page
to send at the beginning of each outgoing fax and store short
message.
L.
Department (Operator’s Guide – Page 177), Set up to 50 different
Department Codes for tracking of transactions by department.
M. Batch Send (Operator’s Guide – Page 110), Program all
functions related to batch mailboxes (up to 5). Enables multiple
documents to be stored in memory and then transmitted at the
designated time/date.
1. Press COPY/FAX to change to copy mode, if necessary.
2. Place document in the feeder face up (e.g., multi-page original)
or on the flat bed scanner face down (e.g., non-standard paper
sizes or bound original).
3. You can make adjustments, if necessary:
Press CONTRAST (select “Dark” to darken original, “Light”
➠
to lighten original)
Press RESOLUTION (select “Halftone” for photos,
➠
otherwise copy mode defaults to “S-Fine”)
Press “Sort” (select ON to sort output [1,2,3…1,2,3] or Sort
➠
Off to stack output [1,1,1,2,2,2,3,3,3])
Press “Paper” (select cassette 1 or 2, or the multipurpose
➠
tray)
Press “Reduce” (select preset reduction/enlargement or
➠
enter desired zoom range [50% to 200%] and press Enter)
4. For one (1) copy, press START, otherwise…
5. Enter desired number of copies (1-99).
6. Press START.
4
17

•
Delayed Broadcast (continued)
II. PROGRAMMING, EDITING AND ERASING
3. “Delayed” is highlighted. Press Enter.
4. Use the numeric keypad to enter the day of the month
and the time when you want the 4200 to perform the
delayed broadcast (e.g., on the 11th at 11:05 p.m. is entered
as “11/23:05*.”
5. Press Enter.
6. Enter the first fax number** via One-Touch, Speed Dial,
Call Group or Numeric Keypad.
7. To add successive fax numbers (when entered via numeric
keypad), press BROADCAST. This inserts a comma. Do
not insert a comma after the last fax number.
8. After all fax numbers are entered, press START. The
document is scanned into memory (provided “MEMORY
TRANSMIT” is on). The word “Reserved” will appear in
the display.
*Note: If corrections are needed, press STOP/CLEAR to erase
the entire date/time. T o erase one c haracter at a time, press
to move the cursor left, or to move the cursor right and key
over the incorrect digit.
**Note: If corrections are needed, press STOP/CLEAR to
erase entries/characters to the left. T o erase One-Touch, Speed
Dial or Call Group(s), position the cursor over the entry by
pressing to move the cursor left, or pressing to move the
cursor right and press STOP/CLEAR. To erase one or more
characters of a Random Dial number, press STOP/CLEAR to
erase characters to the left. To erase one character at a time,
position the cursor over the entry (outlined above) and press
STOP/CLEAR.
A. Change Date, Time, TTI, etc. (Operator’ s Guide – Page 34)
1. Press PROGRAM, I, Enter.
2. Use the numeric keypad to enter the correct date and time,
using a YYMMDD format for the date and 24-hour (“military”)
format for the time (e.g., if it’s 3:30 p .m. on J anuary 15, 1998,
press: 9801151530). Display would show:
Enter Time
‘98 01/15 15:30
Note: To correct one character at a time, press to move
cursor right, or to move cursor left and key over incorrect
digit(s).
3. Press Enter to save clock settings.
4. Enter the 4200’s fax number (up to 20 characters) via the
numeric keypad. This is what will appear on the remote unit’s
displays and printouts and is called the Subscriber ID.
5. Press Enter to save the number.
6. Enter the name (up to 22 characters) via the One-Touc h keys.
This too will print as the header on the remote unit’s received
faxes and is called the TTI (Transmit Terminal Identifier).
7. Press Enter to save the setting.
8. The display now indicates the type of dialing, “Tone” or
“Pulse.” If the highlighted setting is acceptable, proceed to
Step #10. Otherwise, proceed to Step #9.
• Broadcasting via Programmed One-Touch Key
(Operator’s Guide – Page 145)
1. Place document in the feeder or on flat bed scanner.
2. Press the programmed One-Touc h key* (e.g., 74).
The document is automatically stored into memory. If the
broadcast was delayed, “Reserved” appears in the display and
the broadcast will take place at the designated time. If the
broadcast is immediate, the 4200 dials the remote locations in
sequence.
*Note: See P age 10 of this guide , “Programming a One-Touch
Key for a Broadcast.”
16
9. Press or to highlight the desired setting.
10. Press Enter.
11. If you would like to print a list of settings, press Enter.
Otherwise…
12. Press STOP/CLEAR.
B. One-Touch Keys (Operator’s Guide – Page 72)
One-Touch keys (01-72) allow you to store your most frequently
called phone and fax numbers for instant recall. A One-Touch
number is called by pressing the keys marked 01-40 (flip tab a)
and 41-72 (flip tab b) on the right side of the control panel.
5

• Entering or Changing a One-Touch Key
1. Press PROGRAM, Enter.
2. “Set” is highlighted. Press Enter.
3. Press the desired One-Touch key (e.g., 01). Press Enter.
4. Enter the desired fax number*. Press Enter.
5. “Name” is highlighted. Press Enter.
6. Enter the Location ID (Name)*, up to 24 characters total,
using the One-Touch keys for letters (or press Enter if you
do not want to name the destination and go to Step #8).
7. Press Enter to save the setting.
8. Y ou may now enter an Alternate Number (Alt.No .) or press
CLEAR ALL to end this One-Touch setting.
9. Highlight “Alt.No.” using or . Press Enter. The 4200
will automatically dial the alternate number if the primary
number is busy.
10. Enter the Alternate Number using the numeric keypad. Press
Enter.
11. Y ou may now enter this One-T ouch number in a Call Group
or press CLEAR ALL to end this One-Touch setting.
12. Highlight “GroupNo.” using or . Press Enter. You
can designate up to 32 Call Groups (1-32) to which this
number will belong. This enables, for example, broadcast
operations.
13. Enter the Call Group number (1-32). T o assign this One-T ouch
number to more than one Call Group, press “Comma (,)” after
each number (except the last one), e.g., 3,6,7. To assign this
One-Touch number to all 32 Call Groups, enter 0 (zero).
14. Press Enter to save the setting.
15. If you wish to enter another One-Touch number, select “End”
and go back to Step #3. If not…
16. Press CLEAR ALL to finish.
*Note: If corrections are needed, press STOP/CLEAR to erase
characters to the left. To erase one character at a time, press
to move the cursor left, or to move the cursor right and press
STOP/CLEAR to erase.
• Delayed Transmission via Programmed One-T ouch Key
(Operator’s Guide – Page 142)
1. Place document in the feeder or on flat bed scanner.
2. Press the programmed One-Touc h key* (e.g., 73).
The document is automatically stored into memory. The word
“Reserved” appears in the display. The transmission will take
place at the designated time.
*Note: See Page 9 of this guide, “Programming a One-Touch
Key for a Delayed Transmission.”
B. Broadcasting
• Immediate Broadcast (Operator’s Guide – Page 97)
The fastest way to send one document to multiple recipients is
broadcasting. In an ordinary broadcast, you enter up to 197
numbers (5 random-dial numbers [from the keypad], plus 192
numbers from the autodialer). (T o program a key for broadcasting
whenever the key is pressed, see “Programming a One-Touch
Key for a Broadcast,” Page 10.) To program a “one-time”
broadcast, proceed as follows:
1. Place document in the feeder or on flat bed scanner.
2. Press the BROADCAST key.
3. Enter the first fax number* via One-Touch, Speed Dial,
Call Group or Numeric Keypad.
4. To add successive fax numbers (when entered via numeric
keypad), press BROADCAST. This inserts a comma. Do
not insert a comma after the last fax number.
5. After all numbers are entered, press START.
*Note: If corrections are needed, press STOP/CLEAR to erase
entries/characters to the left. To erase One-Touch, Speed Dial
or Call Group(s), position the cursor over the entry by pressing
to move the cursor left, or pressing to move the cursor
right and press STOP/CLEAR. To erase one or more
characters of a Random Dial number, press STOP/CLEAR to
erase characters to the left. To erase one character at a time,
position the cursor over the entry (outlined above) and press
STOP/CLEAR.
See Page 12 of this guide for instructions on sending a fax using a
One-Touch key.
6
• Delayed Broadcast (Operator’s Guide – Page 98)
1. Place document in the feeder or on flat bed scanner.
2. Press the COMMUNICATION OPTIONS key.
15

IV. ADV ANCED OPERATIONS
• Erasing a One-Touch Key (Operator’s Guide – Page 80)
A. Delayed Transmission
• Delayed Transmission: One-Time Event
(Operator’s Guide – Page 104)
To take advantage of lower evening and weekend long-distance
rates, program the 4200 with up to 70 Delayed Commands,
each of which can be programmed up to 31 days in advance.
Once the delayed transmission takes place, the document is
cleared from memory. (To program a key for delayed transmission whenever it is pressed, see “Programming a One-Touch
Key for a Delayed Transmission, ” Page 9.) T o program a “onetime” delayed transmission, proceed as follows:
1. Place document in the feeder or on flat bed scanner.
2. Press COMMUNICATION OPTIONS key.
3. “Delayed” is highlighted. Press Enter.
4. Current date/time appears in the display . Use the numeric
keypad to enter the day of the month and the time when
you want the 4200 to perform the delayed transmission
(e.g., on the 11th at 11:05 p.m. is entered as “11/23:05*.”
5. When the date and time is as you wish, press Enter.
6. Enter the fax number** via One-Touch, Speed Dial, Call
Group or Numeric Keypad.
7. Press START. The document is stored in memory. The
word “Reserved” will appear in the display.
*Note: If corrections are needed, press STOP/CLEAR. Date/
time reverts back to system settings. Rekey desired date/time.
To correct one character at a time , press to move the cursor
left, or to move the cursor right and enter correct number(s).
**Note: If corrections are needed, press STOP/CLEAR to
erase entries/characters to the left. T o erase One-Touch, Speed
Dial or Call Group(s), position the cursor over the entry by
pressing to move the cursor left, or pressing to move the
cursor right and press STOP/CLEAR. To erase one or more
characters of a Random Dial number, press STOP/CLEAR to
erase characters to the left. To erase one character at a time,
position the cursor over the entry (outlined above) and press
STOP/CLEAR.
1. Press PROGRAM, Enter.
2. Highlight “Erase” using or . Press Enter.
3. Press the desired One-Touch key (e.g., 01).
4. Press “Erase.” Press “Erase” again to confirm.
5. To erase another number, repeat Steps #3 and #4.
6. Press CLEAR ALL to finish.
C. Speed Dial Numbers (Operator’s Guide – Page 82)
A Speed Dial number is a quick way to dial frequently used phone
numbers. You can store the number as a three-digit Speed Dial
number and then simply press the “Speed Dial/Tel Index” key and
enter the Speed Dial number (from the Numeric Keypad) whenever
you need it. On the 4200, you can store up to 120 phone numbers
as Speed Dial numbers 001-120.
• Entering or Changing a Speed Dial Number
1. Press PROGRAM, B, Enter.
2. “Set” is highlighted. Press Enter.
3. Enter the desired Speed Dial number (e.g., 003). Press Enter.
4. Enter the desired fax number*. Press Enter.
5. “Name” is highlighted. Press Enter.
6. Enter the Location ID (Name)*, up to 24 characters total using
the One-Touc h keys for letters (or press Enter if you do not
want to name the destination and go to Step #8).
7. Press Enter to save the setting.
8. You may now enter an Alternate Number (Alt.No.) or press
CLEAR ALL to end this Speed Dial setting.
9. Highlight “Alt.No.” using or . Press Enter. The 4200
will automatically dial the alternate number if the primary
number is busy.
10. Enter the Alternate Number using the numeric keypad. Press
Enter.
11. You may now enter this Speed Dial number in a Call Group
or press CLEAR ALL to end this Speed Dial setting.
14
7

•
Entering or Changing a Speed Dial Number (continued)
B. Canceling a Transmission (Operator’s Guide – Page 52)
12. Highlight “GroupNo.” using or . Press Enter. You
can designate up to 32 Call Groups (1-32) to which this
number will belong. This enables, for example, broadcast
operations.
13. Enter the Call Group number (1-32). To assign this Speed
Dial number to more than one Call Group, insert a comma
after each number, except the last one (e.g., 3,6,7). To assign
this Speed Dial number to all 32 Call Groups, enter 0 (zero).
14. Press Enter to save the setting.
15. If you wish to enter another Speed Dial number , select “End”
and go back to Step #3. If not…
16. Press CLEAR ALL.
*Note: If corrections are needed, press STOP/CLEAR to erase
characters to the left. To erase one character at a time, press
to move the cursor left, or to move the cursor right and press
STOP/CLEAR to erase.
See Page 12 of this guide for instructions on sending a fax using a
Speed Dial number.
•
Erasing a Speed Dial Number (Operator’s Guide – P age 91)
1. Press PROGRAM, B, Enter.
2. Highlight “Erase” using or . Press Enter.
3. Enter the desired Speed Dial number (e.g., 003).
4. Press “Erase.” Press “Erase” again to confirm.
5. To erase another number, repeat Steps #3 and #4, or press
CLEAR ALL to finish.
• Programmed Transmission: When the 4200 stores a
document in memory , e.g., to transmit at a later time (delayed),
it automatically assigns a Command Number to the document,
e.g., “Comm. No.:00.” The “Review Commands” feature allows
you to check on (review) each command currently pending in
the system’s memory. It is also possible to cancel a command.
To review/cancel pending commands,
1. Press Comm.Clr.
2. The display shows the first command, indicated by its
command number and the phone number the command
will dial/redial.
3. If this is the command you want to cancel, press STOP/
CLEAR. If not, press or to scroll through other
pending commands.
4. When the command you wish to cancel appears, press
STOP/CLEAR.
• Transmission in Progress: On occasion, it may be necessary
to cancel a transmission in progress. To do so,
1. Press Comm.Clr.
2. Press STOP/CLEAR.
The document is automatically cleared from memory.
C. Receiving a Document (Operator’s Guide – Page 54)
When the 4200 is installed on a dedicated phone line, the control
panel “ A UTO ANSWER” light should be turned on. This allows the
4200 to automatically answer/receive incoming fax calls/messages.
These messages are received into the 4200’s document memory
and then printed.
If your machine runs out of paper or toner , received documents are
automatically stored in memory for later printing. This will continue
until memory becomes full or until paper or toner is replenished at
which time the document(s) will print.
8
13

III. BASIC OPERATION
A. Sending a Fax
The fax transmission methods described below assume that
“MEMORY TRANSMIT” is ON (the control panel light is
illuminated). Thus, all pages of a fax document are automatically
scanned to memory before being sent out.
• Sending via the Automatic Document Feeder
(Operator’s Guide – Page 46)
1. Place document in the document feeder face up.
2. Enter the fax number via one or more of the following:
One-Touch: Press One-Touch key.
➠
Speed Dial: Press SPEED DIAL/TEL INDEX key,
➠
the Speed Dial number (001-120), then START.
Call Group: Press GROUP DIAL key, the number
➠
(1-32), then START.
D.
Programmable One-T ouch Keys (Operator’s Guide – P age 141)
The programmable One-Touch keys 73-80 simplify complex fax
operations by performing repetitive functions at the touch of a
button (e.g., delayed transmission, broadcasting, polling and
confidential transmission [called SecureMail]). When programming
a One-Touch key, you tell the 4200 four things:
How – The key you’re programming
➠
Who – The number(s) the machine should dial
➠
What – The operation it should perform
➠
When – The date(s) and time(s) you want it to perform
➠
•
Programming a One-T ouch Key for a Delayed Transmission
(Operator’s Guide – Page 142)
1. Press PROGRAM, C , Enter.
2. “Set” is highlighted. Press Enter.
3. Turn the flip tab to see keys 73-80. Press the desired OneTouch Program Key. Press Enter.
the operation
Numeric Keypad: Enter fax number, then START.
➠
• Sending via the Flat Bed Scanner
(Operator’s Guide – Page 47)
1. Place the document on the flat bed scanner face down.
2. Enter the fax number via One-Touch, Speed Dial, Call
Group or Numeric Keypad (see Step #2 above). The
document is scanned into memory.
3. Place the next document on the FBS and press START.
4. If you want to send yet another page, repeat Step #3.
5. If you do not wish to send any more pages, press End and
transmission takes place.
4. Enter the desired fax number*. Press Enter.
5. “Delayed” is highlighted. Press Enter.
6. Instruct the 4200 to do one of the following:
a. Perform the delayed transmit once: Enter, e.g.,
30/23:30**, and the 4200 will perform the operation on
the 30th at 11:30 p.m. or
b. Perform the delayed transmit every day that you press
the key: Enter, e.g., 00/23:30**, and the 4200 will
perform the operation at 11:30 p.m., if required.
7. After entering the above (via the numeric keypad), press
Enter.
8. Press CLEAR ALL to finish.
*Note: If corrections are needed, press STOP/CLEAR to erase
characters to the left. To erase one character at a time, press
to move the cursor left, or to move the cursor right and press
STOP/CLEAR to erase.
**Note: If corrections are needed, press STOP/CLEAR to erase
the entire date/time. T o erase one c haracter at a time, press to
move the cursor left, or to move the cursor right and key over
the incorrect digit(s).
See Page 15 of this guide for instructions on sending a delayed
fax using a programmed One-Touch key.
12
9

•
Programming a One-Touch Key for a Broadcast
(Operator’s Guide – Page 145)
1. Press PROGRAM, C , Enter.
2. “Set” is highlighted. Press Enter.
3. Turn the fliptab to see keys 73-80. Press the desired OneTouch Program Key. Press Enter.
4. Use the keys listed below to enter up to 197 numbers – any
combination of One-Touch keys, Speed Dial, Call Group
numbers and up to 5 Random-Dial numbers.
Important: Do not press Enter after entering a random
number , press BROADCAST to enter a comma. Also , do not
insert a comma after the last number . The display shows , for
example:
P76:
Enter Fax Number:
05, S006, G5, 911234567890
A B C D
A. One-Touch: Press previously programmed One-Touch
key*.
B. Speed Dial: Press SPEED DIAL/TEL INDEX and
previously programmed Speed Dial number (001-120)*.
C. Call Group: Press GROUP DIAL key and the
previously programmed Group number (1-32)*.
D. Random-Dial number: Enter digits via numeric
keypad*.
*Note: If corrections are needed, press STOP/CLEAR to erase
entries/characters to the left. To erase One-Touch, Speed Dial or
Call Group(s), position the cursor over the entry by pressing
to move the cursor left, or pressing to move the cursor right
and press STOP/CLEAR. To erase one or more characters of a
Random Dial number, press STOP/CLEAR to erase characters
to the left. To erase one character at a time, position the cursor
over the entry (outlined above) and press STOP/CLEAR.
5. After all numbers are entered correctly, press Enter.
6. If you want the broadcast to begin immediately every time
you press the key, skip to Step #10. If you want to delay the
broadcast (to take advantage of lower phone rates), proceed
to Step #7.
7. “Delayed” is highlighted. Press Enter.
•
Programming a One-T ouch Key for a Broadcast (continued)
8. Instruct the 4200 to do one of the following:
a. Perform the delayed transmit once: Enter, e.g.,
30/23:30**, and the 4200 will perform the operation on
the 30th at 11:30 p.m. or
b. Perform the delayed transmit every day that you press
the key: Enter, e.g., 00/23:30**, and the 4200 will
perform the operation at 11:30 p.m., if required.
9. After entering one of the above (via the numeric keypad),
press Enter.
10. Press CLEAR ALL to finish.
**Note: If corrections are needed, press STOP/CLEAR to erase
the entire date/time. T o erase one c haracter at a time, press to
move the cursor left, or to move the cursor right and key over
the incorrect digit.
See Page 16 of this guide for instructions on broadcasting a fax
using a programmed One-Touch key.
•
Erasing a Programmable One-Touch Key
(Operator’s Guide – Page 162)
1. Press PROGRAM, C , Enter.
2. Highlight “Erase” using or . Press Enter.
3. Press the One-Touch key you’d like to erase (e.g., 73).
4. Press “Erase.” Press “Erase” again to confirm.
5. Repeat Steps #3 and #4 to erase another programmed OneTouch or…
6. Press CLEAR ALL to finish.
•
Programming a One-Touch Key for Relay Broadcast
(see Operator’s Guide – Page 99)
•
Programming a One-Touch Key for Polling
(see Operator’s Guide – Page 131)
•
Programming a One-Touch Key for SecureMail
(see Operator’s Guide – Page 164)
10
11
 Loading...