

Page 1

SPH-PF97BT
RDS AV RECEIVER
English
Operation Manual
Page 2
Contents
Thank you for buying this Pioneer product.
Please read through these instructions so you will know how to operate your model
properly. After you have finished reading the instructions, keep this document in a safe
place for future reference.
Important
The screen shown in the examples may differ from actual screens, which may be
changed without notice for performance and function improvements.
■Precaution ................................................................................... 4
■Parts and controls....................................................................... 8
■Basic operation ........................................................................... 9
■Bluetooth®................................................................................. 17
■Wi-Fi® ......................................................................................... 24
■AV source................................................................................... 25
■Radio.......................................................................................... 26
■USB............................................................................................. 28
■WebLink® ................................................................................... 32
■AppleCarPlay............................................................................ 35
■AndroidAuto™ .......................................................................... 38
■AUX ............................................................................................ 41
■Camera View.............................................................................. 42
■Vehicle equipment information .............................................. 43
■Settings...................................................................................... 44
Displaying the setting screen ..................................................................................................................... 44
System Settings................................................................................................................................................ 44
Display Settings ............................................................................................................................................... 4 8
Audio & EQ Settings ....................................................................................................................................... 49
Camera settings ............................................................................................................................................... 52
Phone Connectivity Settings....................................................................................................................... 55
English
- 2 -
Page 3

■Other functions......................................................................... 56
■Appendix ................................................................................... 59
English
- 3 -
Page 4

Precaution
Certain country and government laws may prohibit or restrict the placement and use of this product
in your vehicle. Please comply with all applicable laws and regulations regarding the use, installation
and operation of this product.
Important safety information
WARNING
• Do not attempt to install or service this product by yourself. Installation or servicing of this product by
persons without training and experience in electronic equipment and automotive accessories may
be dangerous and could expose you to the risk of electric shock, injury or other hazards.
• Do not allow this product to come into contact with liquids. Electrical shock could result. Also,
damage to the product, smoke, and overheating could result from contact with liquids.
• If liquid or foreign matter should get inside this product, park your vehicle in a safe place, turn the
ignition switch off (ACC OFF) immediately and consult your dealer or the nearest authorised Pioneer
Service Station. Do not use this product in this condition because doing so may result in a fire, electric
shock, or other failure.
• If you notice smoke, a strange noise or odour from this product, or any other abnormal signs on the
LCD screen, turn off the power immediately and consult your dealer or the nearest authorised Pioneer
Service Station. Using this product in this condition may result in permanent damage to the system.
• Do not disassemble or modify this product, as there are high-voltage components inside which may
cause an electric shock. Be sure to consult your dealer or the nearest authorised Pioneer Service
Station for internal inspection, adjustments or repairs.
Before using this product, be sure to read and fully understand the following safety
information:
• Do not operate this product, any applications, or the rear view camera option (if
purchased) if doing so will divert your attention in any way from the safe operation of
your vehicle. Always observe safe driving rules and follow all existing traffic
regulations. If you experience difficulty in operating this product, pull over, park your
vehicle in a safe location and apply the handbrake before making the necessary
adjustments.
• Never set the volume of this product so high that you cannot hear outside traffic and
emergency vehicles.
• To promote safety, certain functions are disabled unless the vehicle is stopped and the
handbrake is applied.
• Keep this manual handy as a reference for operating procedures and safety
information.
• Do not install this product where it may (i) obstruct the driver’s vision, (ii) impair the
performance of any of the vehicle’s operating systems or safety features, including air
bags or hazard lamp buttons or (iii) impair the driver’s ability to safely operate the
vehicle.
English
- 4 -
Page 5

• Please remember to fasten your seat belt at all times while operating your vehicle. If
you are ever in an accident, your injuries can be considerably more severe if your seat
belt is not properly buckled.
• Never use headphones while driving.
To ensure safe driving
WARNING
• LIGHT GREEN LEAD AT POWER CONNECTOR IS DESIGNED TO DETECT PARKED STATUS AND
MUST BE CONNECTED TO THE POWER SUPPLY SIDE OF THE HANDBRAKE SWITCH. IMPROPER
CONNECTION OR USE OF THIS LEAD MAY VIOLATE APPLICABLE LAW AND MAY RESULT IN
SERIOUS INJURY OR DAMAGE.
• To avoid the risk of damage and injury and the potential violation of applicable laws, this
product is not for use with a video image that is visible to the driver.
• In some countries the viewing of video image on a display inside a vehicle even by persons other
than the driver may be illegal. Where such regulations apply, they must be obeyed.
If you attempt to watch video image while driving, the warning “Viewing of front seat
video source while driving is strictly prohibited.” will appear on the screen. To watch
video image on this display, stop the vehicle in a safe place and apply the handbrake.
Please keep the brake pedal pushed down before releasing the handbrake.
When using a display connected to the video
output terminal
The video output terminal is for connection of a display to enable passengers in the rear
seats to watch video images.
WARNING
NEVER install the rear display in a location that enables the driver to watch video images while driving.
To avoid battery exhaustion
Be sure to run the vehicle engine while using this product. Using this product without
running the engine can drain the battery.
WARNING
Do not install this product in a vehicle that does not have an ACC wire or circuitry available.
Rear view camera
With an optional rear view camera, you are able to use this product as an aid to keep an
eye on trailers or back into a tight parking spot.
English
- 5 -
Page 6

WARNING
• SCREEN IMAGE MAY APPEAR REVERSED.
• USE INPUT ONLY FOR REVERSE OR MIRROR IMAGE REAR VIEW CAMERA. OTHER USE MAY RESULT IN
INJURY OR DAMAGE.
CAUTION
The rear view mode is to use this product as an aid to keep an eye on the trailers, or while backing up.
Do not use this function for entertainment purposes.
Handling the USB connector
CAUTION
• To prevent data loss and damage to the storage device, never remove it from this product while data
is being transferred.
• Pioneer cannot guarantee compatibility with all USB mass storage devices and assumes no
responsibility for any loss of data on media players, iPhone, smartphone, or other devices while using
this product.
• It may not be recognised properly by this product if a USB device that had been incorrectly
disconnected from the computer is connected.
In case of trouble
Should this product fail to operate properly, contact your dealer or nearest authorised
Pioneer Service Station.
Visit our website
Visit us at the following site:
https://www.pioneer-car.eu/eur/
• Register your product. We will keep the details of your purchase on file to help you
refer to this information in the event of an insurance claim such as loss or theft.
• We offer the latest information about PIONEER CORPORATION on our website.
• Pioneer regularly provides software updates to further improve its products. Please
check the support section of the Pioneer website for all available software updates.
English
About this product
The RDS (Radio Data System) function operates only in areas where these signals are
broadcast.
• The Pioneer CarStereo-Pass is for use only in Germany.
- 6 -
Page 7
Protecting the LCD panel and screen
• Do not expose the LCD screen to direct sunlight when this product is not used. This
may result in LCD screen malfunction due to the resulting high temperatures.
• When using a mobile phone, keep the aerial of the mobile phone away from the LCD
screen to prevent disruption of the video in the form of spots, coloured stripes, etc.
• To protect the LCD screen from damage, be sure to touch the touch panel keys only
with your finger and do so gently.
Notes on internal memory
• The information will be erased by disconnecting the yellow lead from the battery (or
removing the battery itself).
• Some of the settings and recorded contents will not be reset.
About this manual
This manual uses diagrams of actual screens to describe operations. However, the
screens on some units may not match those shown in this manual depending on the
model used.
Meanings of symbols used in this manual
This indicates to touch the appropriate soft key on the touch screen.
This indicates to touch and hold the appropriate soft key on the touch screen.
English
- 7 -
Page 8
Parts and controls
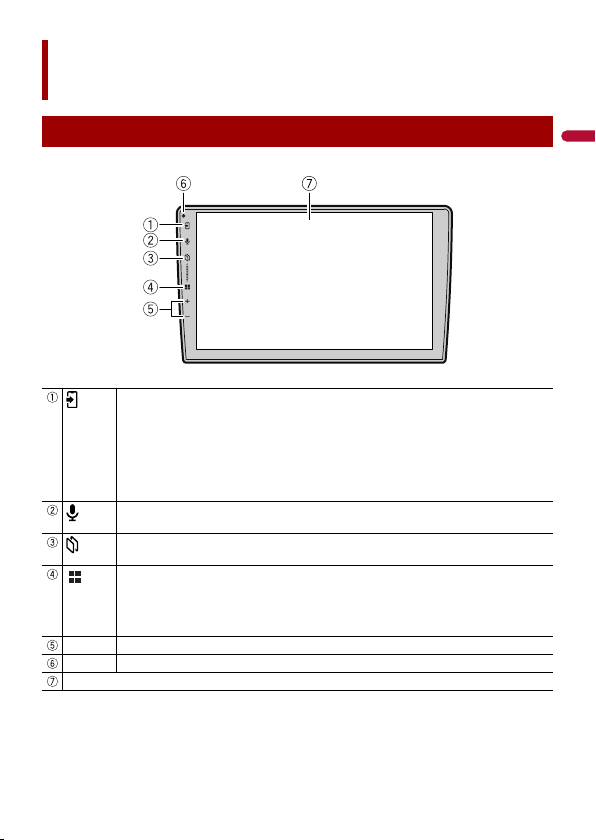
Main unit
Touch to display the AppleCarPlay phone screen when AppleCarPlay is activated.
Touch to display the phone menu screen when AndroidAuto or hands-free phoning is activated.
Touch to start the searching screen when the device is not connected.
Touch to go to the device select screen when the device is already connected.
TIP
If there is no connected device, the illumination colour of this button differs from the
colour of other buttons.
Touch to activate the voice recognition mode.*1
Touch and hold to display the device search or select screen.*2
Touch to display the application screen.*3
Touch to display the device search or select screen.*2
Touch to display the home menu screen.
Touch and hold to power off. To power back on, touch any button.
TIP
If you power the unit off, you can turn off almost all functions.
VOL (+/-) Touch to adjust the volume.
RESET Press to reset the microprocessor (page 10).
LCD screen
*1 This function is available when AppleCarPlay or AndroidAuto is activated, or an iPhone is
connected to this product via Bluetooth.
*2 This function is not available when AppleCarPlay or AndroidAuto is activated.
*3 This function is available only when AppleCarPlay or AndroidAuto is activated.
English
- 8 -
Page 9
Basic operation
Starting up the unit
1
Start the engine to boot up the system.
NOTE
From the second time on, the screen shown will differ depending on the previous conditions.
2
Select the language.
3
Touch .
4
Select the speaker mode.
[Standard Mode]
4-speaker system with front and rear speakers, or a 6-speaker system with front and
rear speakers and subwoofers.
[Network Mode]
3-way system with a high range speaker, middle range speaker and subwoofer (low
range speaker) for reproduction of high, middle and low frequencies (bands).
NOTE
Once the speaker mode is set, the setting cannot be changed unless this product is restored to the
default settings (page 58).
WARNING
Do not use the unit in Standard Mode when a speaker system for 3-way Network Mode is
connected to the unit. This may cause damage to the speakers.
5
Touch [OK].
6
Set the CAN bus interface.
Select the corresponding CAN bus interface brand and the car category that your car
belongs to.
If [None] is selected, the above setting is not performed and the screen will
transition to the Initial Legal Disclaimer screen.
7
Touch [Connect].
Initial Legal Disclaimer screen appears.
8
Set the Steering Wheel Control (CANBUS).
Assign functions to each button of the Steering Wheel Control.
9
Touch [OK].
English
- 9 -
Page 10
The message for the Bluetooth connection appears.
10
Turn on the Bluetooth function on your device to connect your device to this
product via Bluetooth.
Follow the on-screen instructions to finish the initial setup.
TIPS
• Select [Skip] to finish the initial setup without connecting the Bluetooth device. You can make
the Bluetooth connection later (page 17).
• Connecting the Bluetooth device during the initial setup process is recommended to easily start
using hands-free phoning, AppleCarPlay or AndroidAuto wirelessly.
Resetting the microprocessor
CAUTION
• Pressing the RESET button restarts this product. In that case, some of the settings and recorded
contents are reset to the factory settings.
– Do not perform this operation when a device is connected to this product.
• The microprocessor must be reset under the following conditions:
– If this product fails to operate properly.
– If there appears to be problems with the operation of the system.
1 Press RESET with a pen tip or other pointed tools.
Settings and recorded contents are reset to the factory settings.
English
- 10 -
Page 11
Using the touch panel
video folder
abcdefghi
abcdefghi
abcdefghi
USB
abcdefghi
#
A
G
S
M
Z
.
.
.
Y
.
.
.
You can operate this product by touching the keys on the screen directly with your
fingers.
NOTE
To protect the LCD screen from damage, be sure to touch the screen only with your finger gently.
Common touch panel keys
: Returns to the previous screen.
: Close the screen.
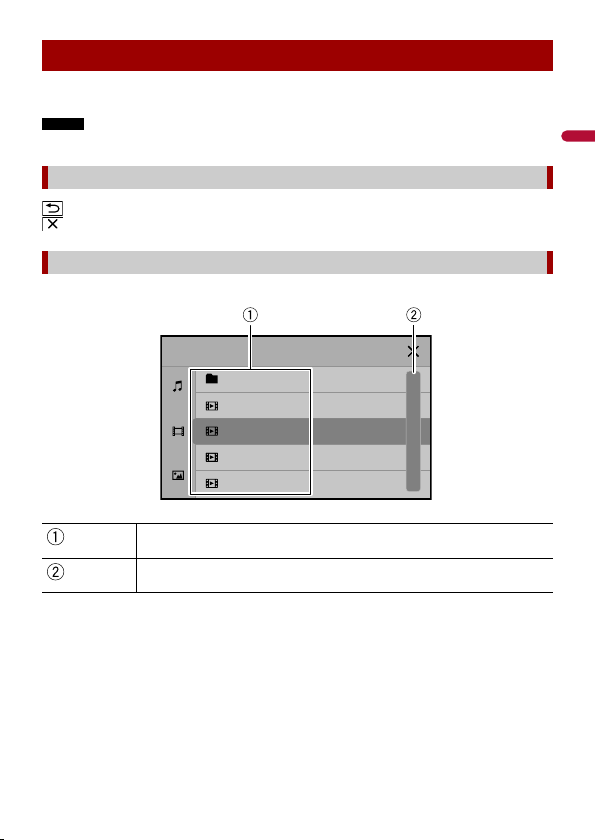
Operating list screens
Touching an item on the list allows you to narrow down the options and
proceed to the next operation.
Appears when items cannot be displayed on a single page.
Drag the side bar or the initial search bar to view any hidden items.
English
- 11 -
Page 12
Operating the time bar
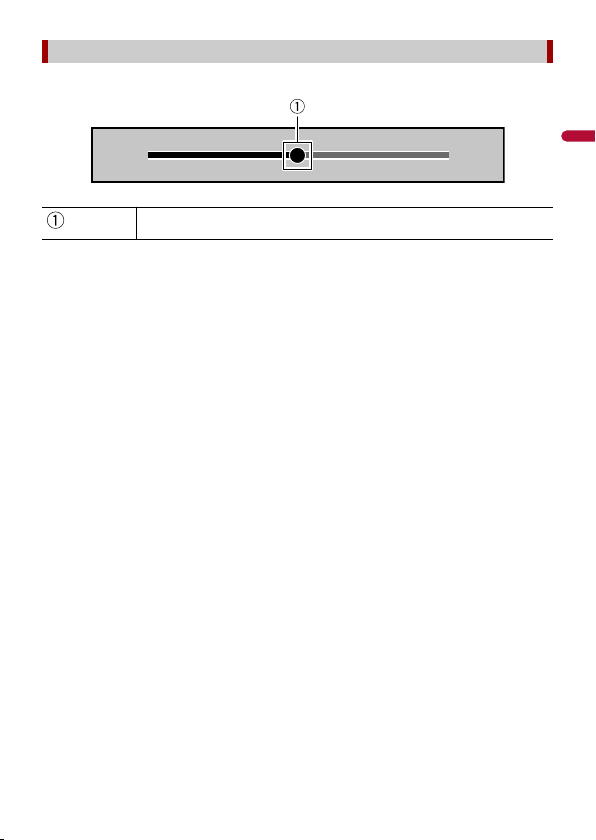
25:00 50:00
You can change the playback point by dragging the key.
English
- 12 -
Page 13
Home menu screen
Abcdefg
Apple CarPlay
Sources
Edit
1/3
Android Auto Settings
Radio
Bluetooth
Audio
YouTube
6/10
Sun
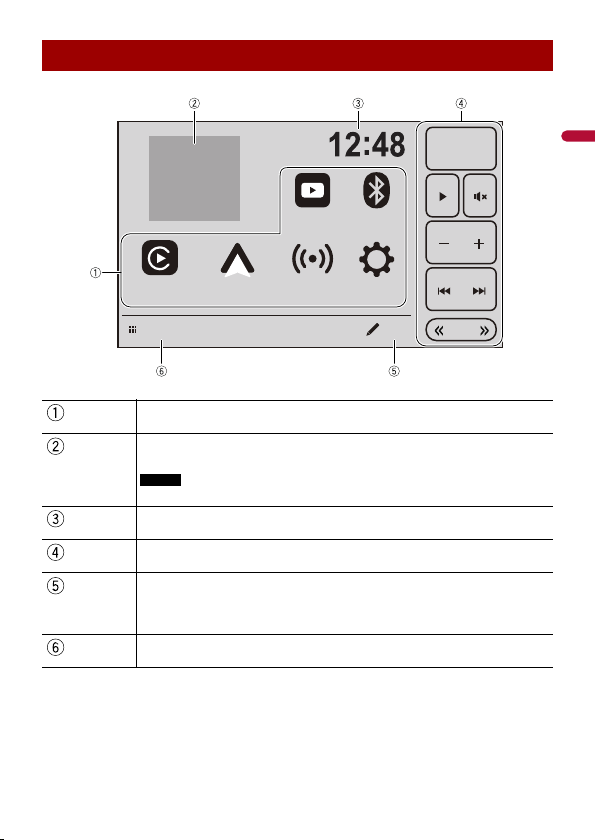
Favourite source/application area
Touch to see the selected source/application.
Album art
The artwork of the audio currently being played is displayed.
NOTE
The artwork may not be displayed depending on some audio sources.
Current time
Touch to set the clock display (page 56).
Shortcuts
Functions frequently used are preset (page 14).
Edit
• Changing the home menu screen layout (page 15).
• Rearranging the displayed icons in the favourite source/application area
(page 15).
Sources
Touch to display all sources/applications.
TIP
[Reconnect] is displayed on the home menu screen only when the Wi-Fi connection (Wireless
AppleCarPlay or AndroidAuto) has failed or been disconnected automatically (page 58).
English
- 13 -
Page 14
Shortcuts
FM
FM
FMFM
12
34
SW
3/3
25.5
Abcdefg
Powerful
Custom1
EQ
Flat
Rear
2/3
1/3
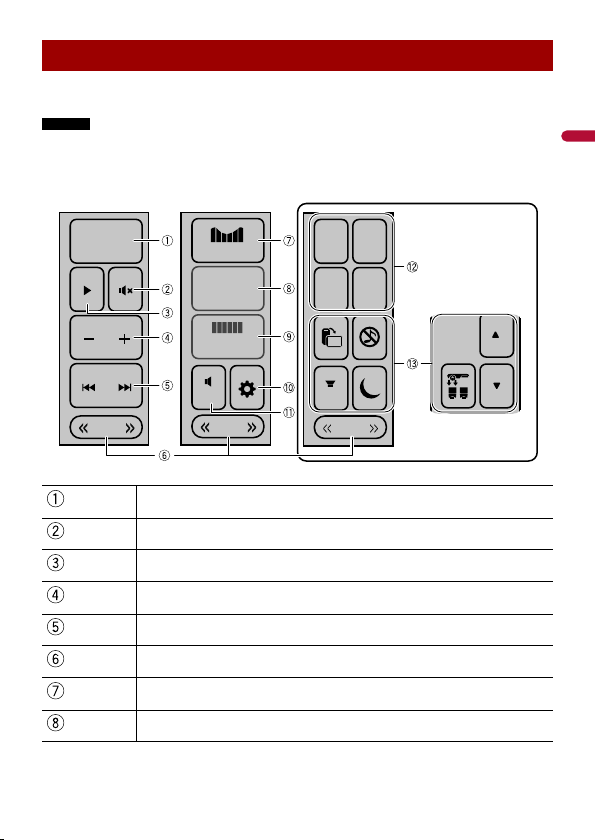
Shortcuts enable you to easily operate frequently used functions on the home menu
screen.
NOTES
• The position of the shortcuts on the home menu screen depends on the driving position setting
(page 45).
• Some of the shortcut keys become unavailable depending on the source.
Touch to display the operation screen of each AV source.
Touch to mute. Touch again to cancel mute.
Touch to switch between playback and pause.
Touch to adjust the volume.
Touch to skip files forwards or backwards.
Touch to display the next or previous page of the shortcuts.
Touch to set the equaliser curve to “Powerful” (page 51).
Touch to set the equaliser curve to “Custom1” (page 51).
- 14 -
English
Page 15
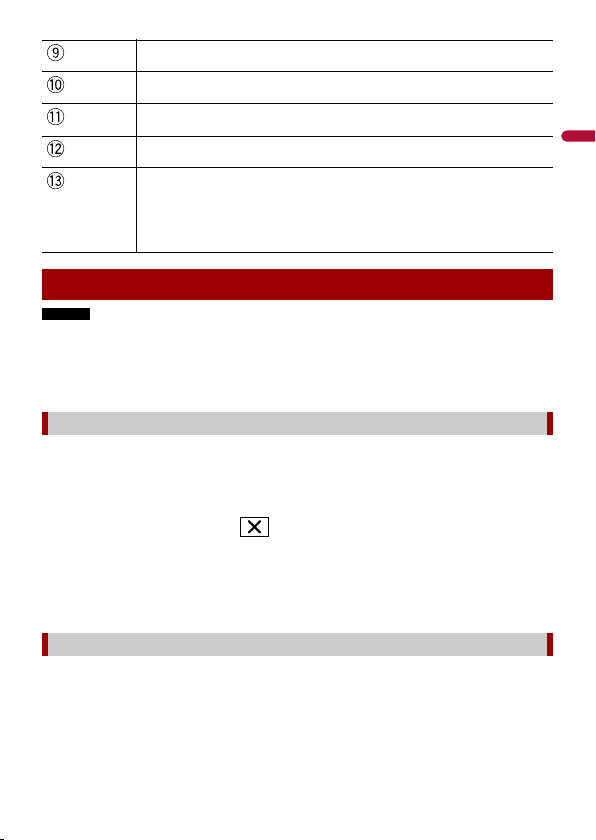
Touch to set the equaliser curve to “Flat” (page 51).
Touch to display the setting screen.
Touch to turn the rear speaker output on or off.
Touch to recall the preset channel stored to a key from memory.
Touch to adjust the climate setting or various settings such as WebLink® Cast,
Source OFF, Subwoofer on/off, or Dimmer on/off.
TIP
The climate setting is available only when the input signal is received by the
Vehicle Bus adapter.
Customising the home menu screen
NOTES
• This function is available only when you stop your vehicle in a safe place and apply the handbrake.
• The [AppleCarPlay] icon, the [AndroidAuto] icon and the [Settings] icon cannot be removed from the
favourite source/application area.
• The [AndroidAuto] icon may not be displayed on the home menu screen depending on the Phone
Connectivity Settings (page 55).
Adding the source icons to the favourite source/application area
1 Touch [Edit].
2 Touch [Add].
3 Touch the icon you want to add to the favourite source/application area.
When you finish adding, touch .
TIPS
• The clock and the artwork can also be set to be shown or hidden.
• If the area is full, remove unneeded icons, the clock, or the artwork first.
4 Touch [Done].
English
Removing the displayed icons from the favourite source/application area
1 Touch [Edit].
2 Touch [Delete].
3 Touch the icon you want to remove from the favourite source/application area.
When you finish removing, touch [Done].
- 15 -
Page 16

TIP
The clock and the artwork can also be removed from the favourite source/application area.
4 Touch [Done].
Rearranging the icons in the favourite source/application area
1 Touch [Edit].
2 Drag the icon to the desired position.
TIP
The clock and the artwork cannot be moved.
3 Touch [Done].
English
- 16 -
Page 17
Bluetooth®
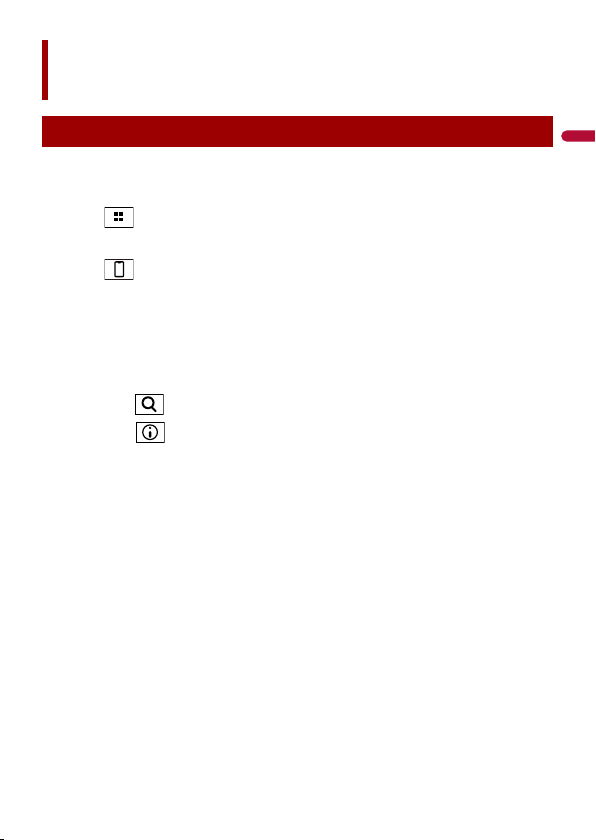
Bluetooth connection
1 Turn on the Bluetooth function on the device.
2 Display the connected Bluetooth device list screen on the device.
3 Touch .
4 Touch [Sources].
5 Touch .
6 Touch [Yes] to start searching.
TIP
If another device is already connected to the unit, skip this step.
7 Touch a desired device on the screen.
TIPS
• If you touch , the unit starts to search for available devices, then displays them in the device
list.
• If you touch , the device name and address of the Bluetooth device on this product are
displayed.
• A pop-up message may appear if another device is already connected to the unit. Touch [OK] on
the message.
8 Touch [Yes] to pair with the device.
9 Perform the pairing operation by operating the device.
After the device is successfully registered, a Bluetooth connection is established by
the system. Once the connection is established, the device name is displayed on the
list.
TIPS
• You can register up to five Bluetooth devices on this product.
• Once an AppleCarPlay or AndroidAuto compatible device is connected via Bluetooth, the device
may be automatically connected with Wireless AppleCarPlay or AndroidAuto at the timing of
Bluetooth reconnection such as by turning the ignition switch to on (ACC ON).
• Two mobile phones can be connected to this product at the same time.
• If you try to connect an unconnected mobile phone while two mobile phones are already connected,
the first one of the two connected mobile phones will be disconnected and the unconnected mobile
phone will be connected instead.
English
- 17 -
Page 18
NOTES
• If five devices are already paired, the message confirming whether to delete the registered device is
displayed. If you want to delete the device, touch [Agree]. If you want to delete other device, touch
[Go To DeviceList] and delete the devices manually.
• If your device supports SSP (Secure Simple Pairing), a six-digit number appears on the display of this
product. Make sure that the six-digit number matches the one that is displayed on the mobile device
before touching [Yes] to pair the device.
Bluetooth Settings
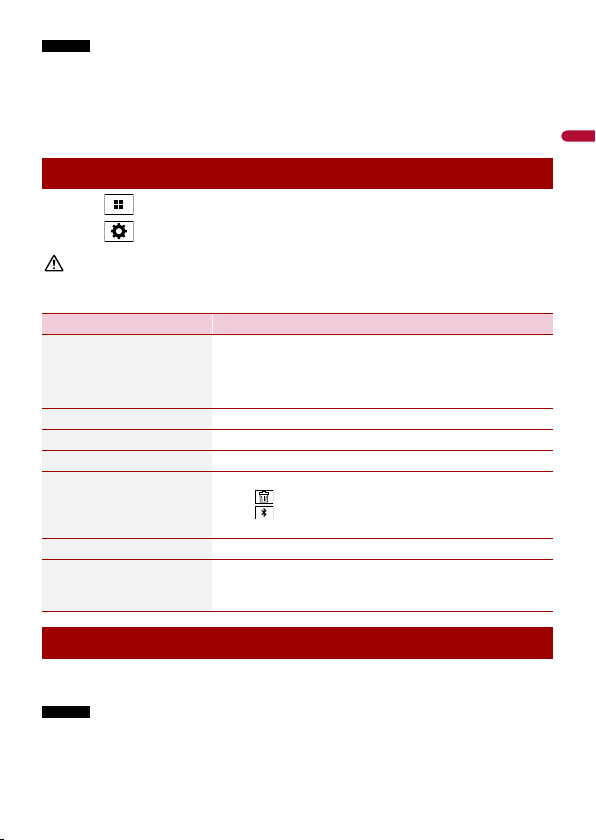
1 Touch .
2 Touch then [Bluetooth Settings].
CAUTION
Never turn this product off and disconnect the device while the Bluetooth setting operation is being
processed.
Menu Item Description
[Connection]
[On] [Off ]
[Auto Answer] (page 20)
[Search] Search for available devices.
[Bluetooth Memory Clear] Touch [OK] to clear the Bluetooth memory.
[Bluetooth Paired Device
List]
[Bluetooth Device Info] Displaying the device name of this product.
[Sound Quality Settings]
[Connectivity] [Quality]
Setting Bluetooth function activation.
TIP
Activate to connect the last connected Bluetooth device
automatically.
Display the paired device list.
Touch to delete registered device.
Touch to activate/deactivate hands-free phoning or
Bluetooth audio.
Select [Connectivity] to prioritise the Bluetooth
connection.
Select [Quality] to prioritise the Bluetooth sound quality.
English
Hands-free phoning
To use this function, you need to connect your mobile phone to this product via
Bluetooth in advance (page 17).
NOTES
• You can connect one of the registered devices to this product. In cases where the registered device is
equipped with a phone function, a total of two devices can be connected at the same time when
- 18 -
Page 19
using the phone function. If two of the five registered devices are already connected, the first one of
Abcdefg
the two connected devices will be disconnected when you connect the remaining third device to use
the audio function.
• The icon for the mobile phone currently being used is displayed on the phone menu screen. If you
connect two mobile phones to this product at the same time, you can switch between the mobile
phones using the switch devices key. The contents of the phone menu are memorised for each
connected mobile phone (page 19).
CAUTION
For your safety, avoid talking on the phone as much as possible while driving.
Making a phone call
1 Touch .
2 Touch [Sources].
3 Touch .
The phone menu screen appears.
TIP
You can also start this function by touching the button.
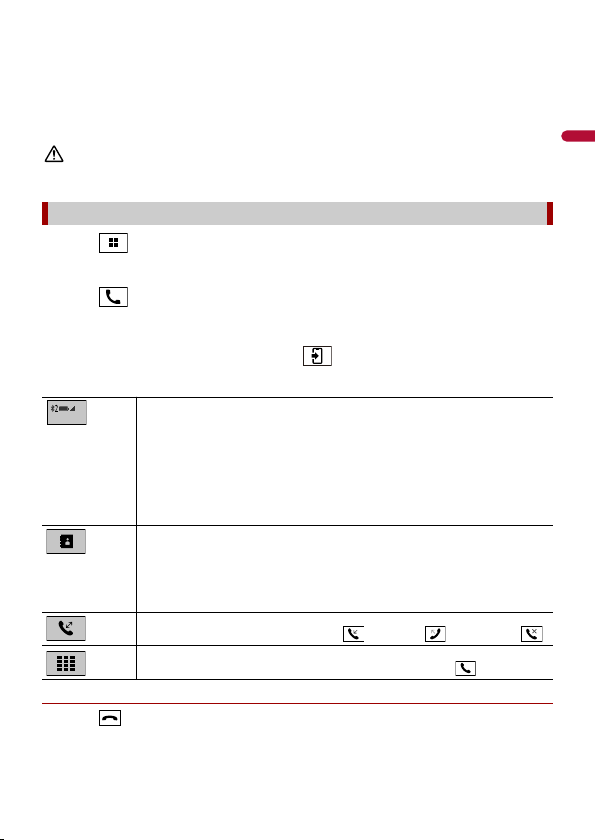
4 Touch one of the call icons on the phone menu screen.
The following items are displayed.
• Name of the current mobile phone
• Reception status of the current mobile phone
• Battery status of the current mobile phone
• List number of the current mobile phone
TIP
If you connect two mobile phones to this product at the same time, you can switch
between the mobile phones using this key.
Using phone book
Select a contact from the phone book. Touch the desired name on the list then
select the phone number.
TIP
The contacts on your phone will be automatically transferred to this product.
Using call history
Make a phone call from the received call , dialled call , or missed call .
Direct phone number input
Touch the number keys to enter the phone number then touch to make a call.
▶To end the call
1 Touch .
English
- 19 -
Page 20
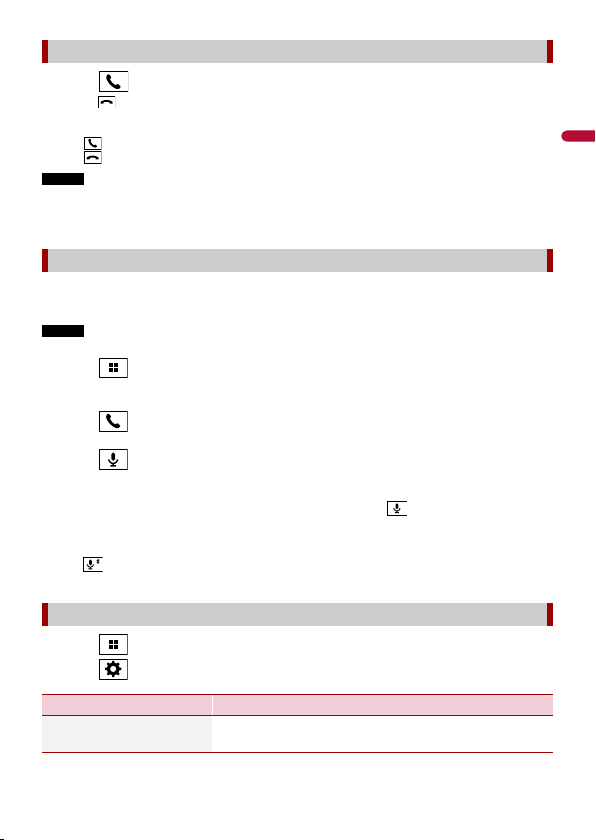
Receiving a phone call
1 Touch to answer the call.
Touch to end the call.
TIPS
• Touch while getting a call waiting, switch to the talking person.
• Touch while getting a call waiting to reject the call.
NOTE
When two phones are connected at the same time, if an incoming call is received on the second phone
while you are talking on the first phone, the dial confirmation screen for the second phone will be
displayed.
Voice recognition function (for iPhone)
By connecting your iPhone to this product, you can use the voice recognition function
(Siri Eyes Free Mode) on this product.
NOTE
When an iPhone is used, Siri Eyes Free Mode is available with this product.
1 Touch .
2 Touch [Sources].
3 Touch .
The phone menu screen appears.
4 Touch .
TIPS
• You can also launch the voice recognition function by touching the button (page 8).
• If two mobile phones are automatically connected to this product with the Bluetooth device auto
connect function, the voice recognition function (Siri Eyes Free Mode) will be set on the first phone.
• If you want to use the voice recognition function (Siri Eyes Free Mode) on another connected iPhone,
touch with numbered to the other iPhone. The iPhone that you switch to will be set as the
current device.
Phone settings
1 Touch .
2 Touch then [Bluetooth Settings].
Menu Item Description
[Auto Answer]
[On] [Off ]
Activate to answer an incoming call automatically.
English
- 20 -
Page 21

Adjusting the other party’s listening volume
This product can be adjusted to the other party’s listening volume.
1 Touch to switch between the three volume levels.
Notes for hands-free phoning
▶General notes
• Connection to all mobile phones featuring Bluetooth wireless technology is not
guaranteed.
• The line-of-sight distance between this product and your mobile phone must be 10
metres or less when sending and receiving voice and data via Bluetooth technology.
• With some mobile phones, the ring sound may not be output from the speakers.
• If private mode is selected on the mobile phone, hands-free phoning may be disabled.
▶Registration and connection
• Mobile phone operations vary depending on the type of mobile phone. Refer to the
instruction manual that came with your mobile phone for detailed instructions.
• When phone book transfer does not work, disconnect your phone and then perform
pairing again from your phone to this product.
▶Making and receiving calls
• You may hear a noise in the following situations:
– When you answer the phone using the button on the phone.
– When the person on the other end of the line hangs up the phone.
• If the person on the other end of the line cannot hear the conversation due to an echo,
decrease the volume level for hands-free phoning.
• With some mobile phones, even after you press the accept button on the mobile
phone when a call comes in, hands-free phoning may not be performed.
• The registered name will appear if the phone number is already registered in the
phone book. When multiple names are registered for the same phone number, the
names are displayed in the same order as in the phone book.
▶The received call and dialled number histories
You cannot make a call to the entry of an unknown user (no phone number) in the
received call history.
▶Phone book transfers
• If there are more than 1 000 phone book entries on your mobile phone, not all entries
may download completely.
• Depending on the phone, this product may not display the phone book correctly.
• If the phone book in the phone contains image data, the phone book may not be
transferred correctly.
• Depending on the mobile phone, phone book transfer may not be available.
English
- 21 -
Page 22
Bluetooth audio
Bluetooth
25:00 50:00
Abcdefghi
Abcdef
Abcdefghijk
Before using the Bluetooth audio player, register and connect the device to this product
(page 17).
NOTES
• Depending on the Bluetooth audio player connected to this product, the available operations with
this product may be limited to the following two levels:
– A2DP (Advanced Audio Distribution Profile): Only playing back songs on your audio player is
possible.
– A2DP and AVRCP (Audio/Video Remote Control Profile): Playing back, pausing, selecting songs, etc.,
are possible.
• Depending on the Bluetooth device connected to this product, the available operations with this
product may be limited or differ from the descriptions in this manual.
• While you are listening to songs on your Bluetooth device, refrain from operating the phone function
as much as possible. If you try operating, the signal may cause noise for song playback.
• When you are talking on the Bluetooth device connected to this product via Bluetooth, it may pause
playback.
1 Touch .
2 Touch [Bluetooth Audio].
The Bluetooth audio playback screen appears.
TIP
If [Bluetooth Audio] is not available, try the following:
• Pull out the USB cable from the mobile phone.
• Confirm whether Bluetooth audio is activated.
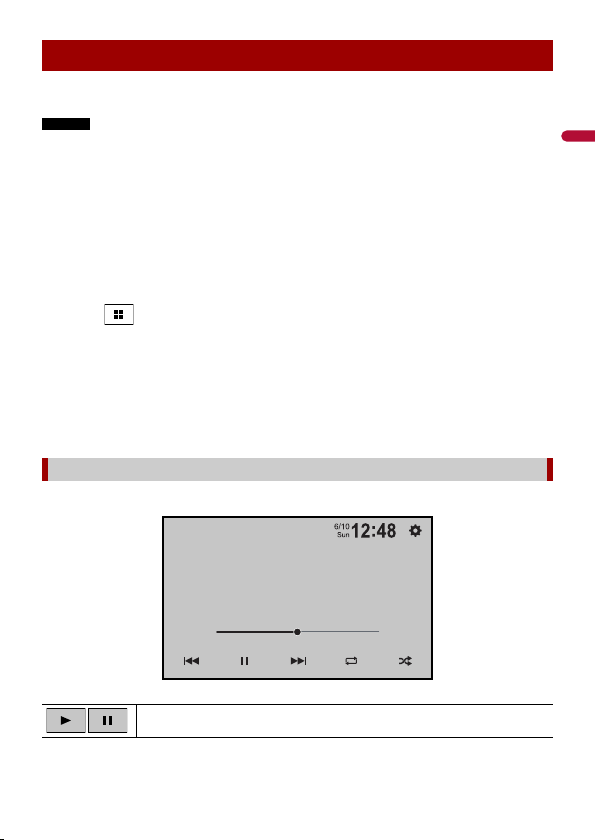
Basic operation
English
Switches between playback and pause.
- 22 -
Page 23

Skips files forwards or backwards.
Sets a repeat play range.
Plays files in random order.
English
- 23 -
Page 24
Wi-Fi®
By connecting your Wi-Fi certified mobile device to this product via Wi-Fi connection,
you can use AppleCarPlay or AndroidAuto wirelessly.
Wi-Fi connection
See the following chapters for the procedure on how to make a Wi-Fi connection for
each application.
• AppleCarPlay (page 35)
• AndroidAuto (page 38)
Wi-Fi Settings
1 Touch .
2 Touch .
3 Touch [Wi-Fi Settings].
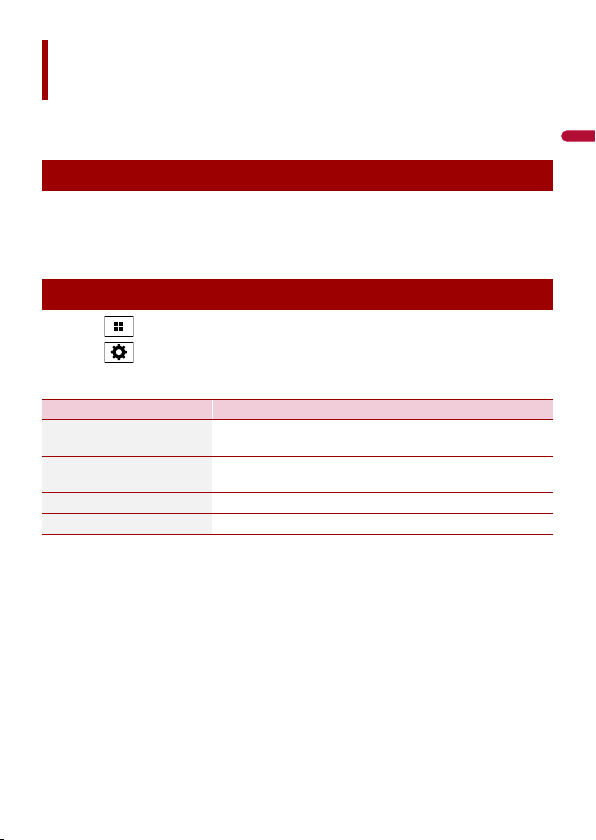
Menu Item Description
[Wi-Fi]
[On] [Off ]
[Device Information] Displays the network name and MAC address of this
[Password] Displays a Wi-Fi connection password.
[Password reset] Touch to reset the Wi-Fi connection password.
Switches Wi-Fi connection on or off.
product.
English
- 24 -
Page 25

AV source
Supported AV source
You can play or use the following sources with this product.
• Radio (page 26)
The following sources can be played back or used by connecting an auxiliary device.
• AppleCarPlay (page 35)
• AndroidAuto (page 38)
• YouTube™ *
• Web Browser *
• WebLink® (page 32)
• Bluetooth Audio (page 22)
• USB (page 28)
• AUX (page 41)
• Car Features (page 43)
• Camera View (page 42)
* This content is available via WebLink® (page 32).
Selecting a source
1 Touch .
2 Touch [Sources].
3 Touch the source icon.
TIP
You can display the hidden source icons by swiping left on the screen.
NOTES
• When you select [Source OFF], the AV source is turned off.
• When you select [Display OFF], the display is turned off. Touch anywhere on the screen to turn it back
on.
• When you select [Power OFF], almost all functions are turned off. Touch any button to power back on.
English
- 25 -
Page 26
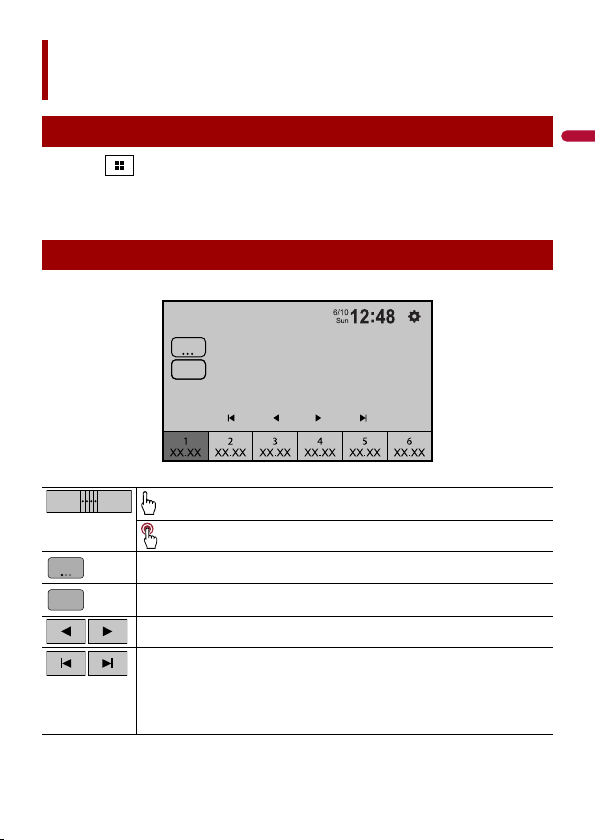
Radio
Radio
BSM
FM1
XXX
MHz
BSM
Abcdefghi
Abcdefghi
XX.XX1XX.XX
6
FM1
BSM
Starting procedure
1 Touch .
2 Touch [Radio].
The Radio screen appears.
Basic operation
Recalls the preset channel stored to a key from memory.
Stores the current broadcast frequency to a key.
Selects the FM1, FM2, FM3, AM1 or AM2 band.
Performs BSM (best stations memory) function (page 27).
Manual tuning
Seek tuning
Skips to the nearest station from the current frequency.
TIP
When [RDS] is set to on, FM seek tuning step changes to 100 kHz, and when [RDS]
is set to off, the step changes to 50 kHz (page 27).
English
- 26 -
Page 27
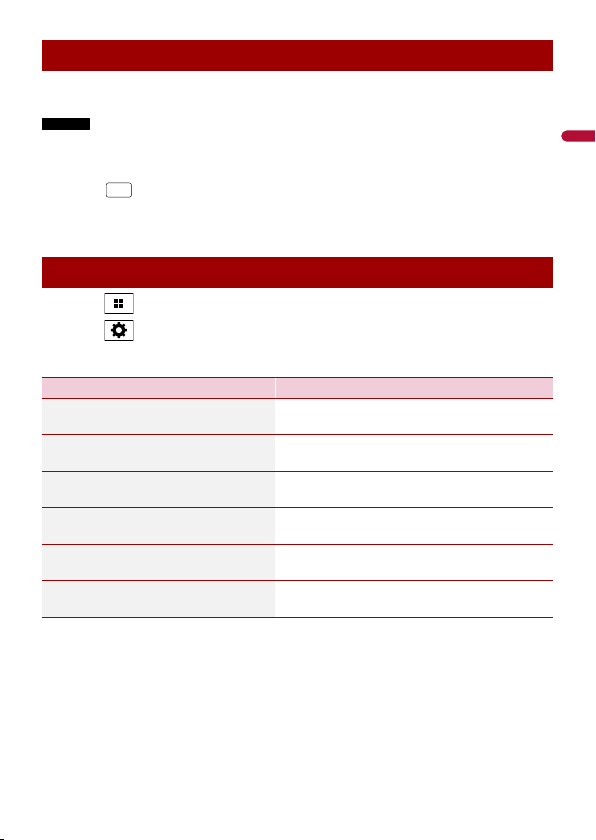
Storing the strongest broadcast frequencies (BSM)
BSM
The BSM (best stations memory) function automatically stores the six strongest
broadcast frequencies under the preset channel keys [1] to [6].
NOTES
• Storing broadcast frequencies with BSM may replace those you have already saved.
• Previously stored broadcast frequencies may remain stored if the number of frequencies stored has
not reached the limit.
1 Touch to begin search.
While the message is displayed, the six strongest broadcast frequencies will be
stored under the preset channel keys in the order of their signal strength.
Radio settings
1 Touch .
2 Touch then [System Settings].
3 Touch [Radio settings].
Menu Item D escription
[Local]
[On] [Off ]
[RDS]
[On] [Off ]
[AF]
[On] [Off ]
[TA Interrupt]
[On] [Off ]
[NEWS Interrupt]
[On] [Off ]
[AM Step]
[9kHz] [10kHz]
Local seek tuning allows you to only tune into
radio stations with sufficiently strong signals.
Set on to enable the RDS function.
Allow the unit to retune to a different frequency
providing the same station.
Receives the traffic announcement, interrupting
the other sources.
Interrupt the currently selected source with
news programmes.
You can switch the seek/manual tuning step for
the AM band.
English
- 27 -
Page 28
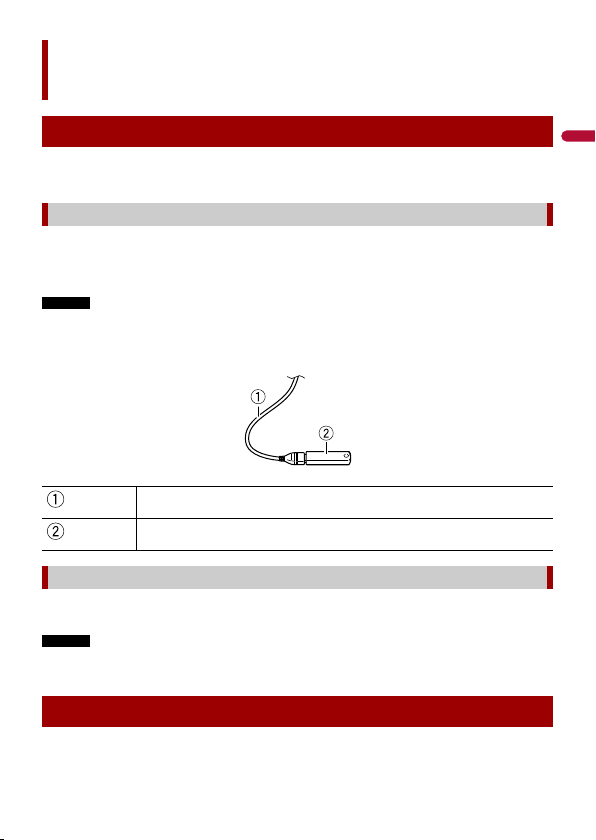
USB
Plugging/unplugging a USB storage device
You can play compressed audio, compressed video, or still image files stored in an
external storage device.
Plugging a USB storage device
1 Pull out the plug from the USB port of the USB cable.
2 Plug a USB storage device into the USB cable.
NOTES
• This product may not achieve optimum performance with some USB storage devices.
• Connection via a USB hub is not possible.
• A USB cable is required for connection.
USB cable
USB storage device
Unplugging a USB storage device
1 Pull out the USB storage device from the USB cable.
NOTES
• Check that no data is being accessed before pulling out the USB storage device.
• Turn off (ACC OFF) the ignition switch before unplugging the USB storage device.
English
Starting procedure
1 Plug the USB storage device into the USB cable.
- 28 -
Page 29
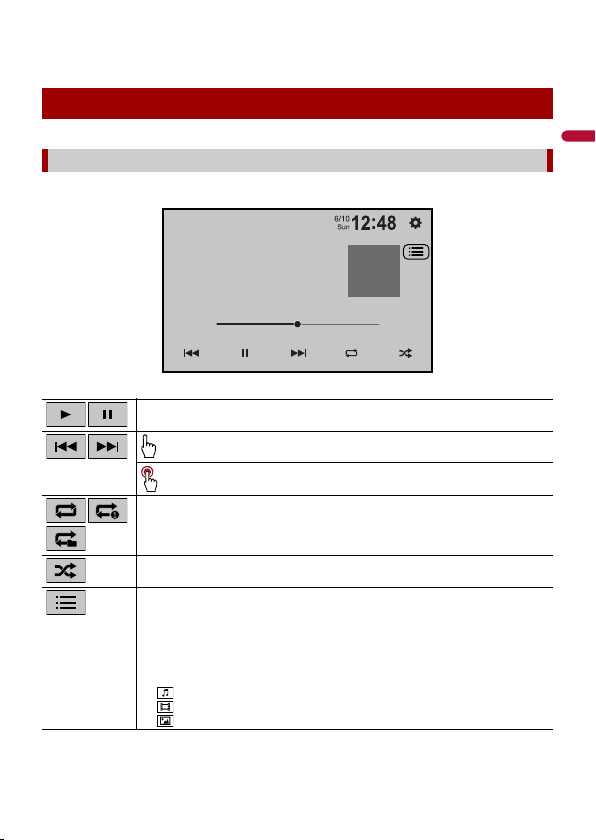
TIP
USB
25:00 50:00
99/99
Abcdefghi
Abcdef
Abcdefghijk
You can also start this source by touching [USB] on the source screen.
Basic operation
Audio source
Switches between playback and pause.
Sets a repeat play range for all files/the current folder/the current file.
Switches between random and normal file playback order.
Selects a file from the list.
Touch a file on the list to playback.
TIPS
• Touching a folder on the list shows its contents. You can play a file on the list by
touching it.
• You can switch the following media file types.
– : Compressed audio files
– : Compressed video files
– : Image files
English
Skips files forwards or backwards.
Performs fast forwards or fast reverse.
- 29 -
Page 30
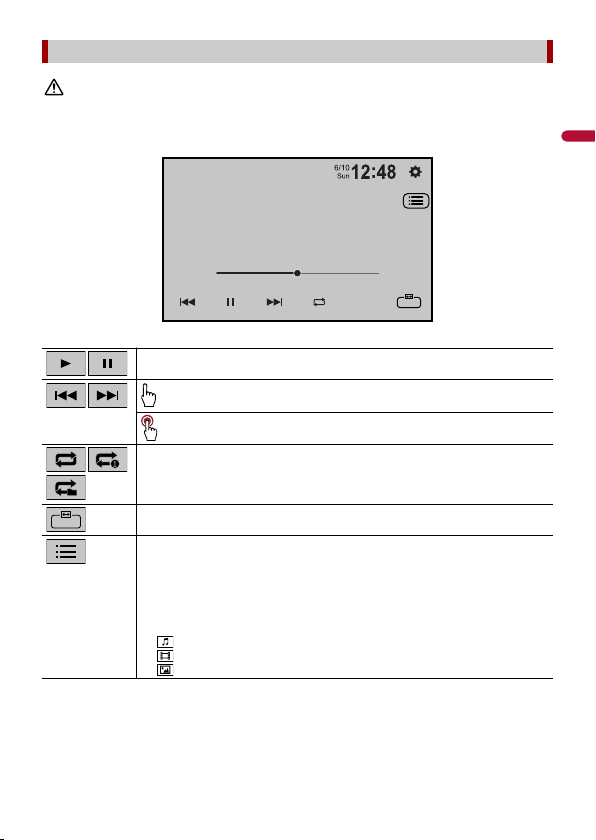
Video source
USB
25:00 50:00
ROOT
99/99
Abcdefghijk
Full
CAUTION
For safety reasons, video images cannot be viewed while your vehicle is in motion. To view video
images, stop in a safe place and apply the handbrake.
Switches between playback and pause.
TIP
You can hide the touch panel keys by touching the screen. To display the keys again, touch anywhere
on the screen.
Skips files forwards or backwards.
Performs fast forwards or fast reverse.
Sets a repeat play range for all files/the current folder/the current file.
Sets the screen mode for the video image (page 57).
Selects a file from the list.
Touch a file on the list to playback.
TIPS
• Touching a folder on the list shows its contents. You can play a file on the list by
touching it.
• You can switch the following media file types.
– : Compressed audio files
– : Compressed video files
– : Image files
- 30 -
English
Page 31
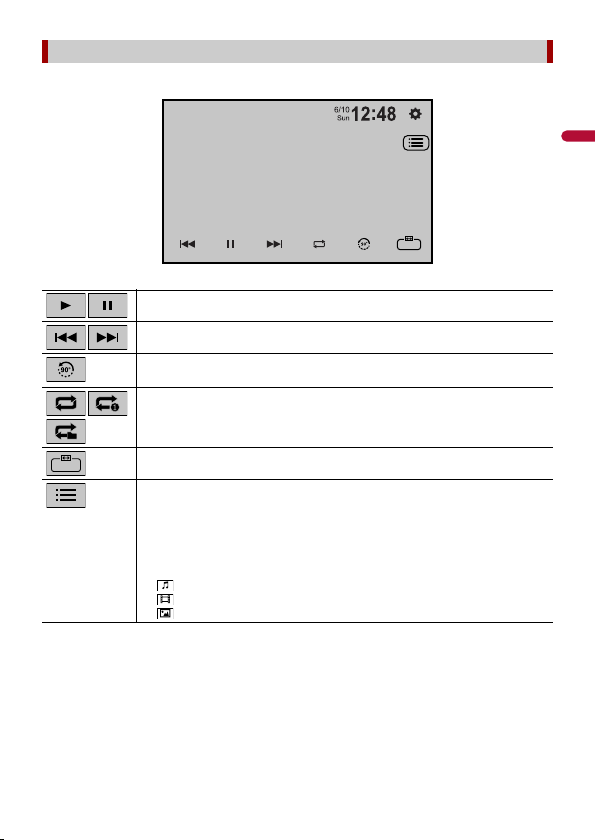
Still image source
USB
ROOT
99/99
Abcdefghijk
Normal
Switches between playback and pause.
Skips files forwards or backwards.
Rotates the displayed picture 90° anticlockwise.
Sets a repeat play range for all files/the current folder/the current file.
Sets the screen mode for the still image (page 57).
Selects a file from the list.
Touch a file on the list to playback.
TIPS
• Touching a folder on the list shows its contents. You can play a file on the list by
touching it.
• You can switch the following media file types.
– : Compressed audio files
– : Compressed video files
– : Image files
TIP
You can hide the touch panel keys by touching the screen. To display the keys again, touch anywhere
on the screen.
- 31 -
English
Page 32
WebLink®
You can operate WebLink® compatible applications with finger gestures such as tapping,
dragging, scrolling or flicking on the screen of this product.
NOTES
• The supported finger gestures may vary depending on the WebLink® compatible application.
• To use WebLink®, you must first install the WebLink® Host app on the iPhone or smartphone. For
details about the WebLink® Host app, visit the following site: https://helloweblink.com/
• Be sure to read Using app-based connected content (page 66) before you perform this operation.
• Copyright protected files such as DRM cannot be played.
WARNING
Certain uses of the iPhone or smartphone may not be legal while driving in your jurisdiction, so you
must be aware of and obey any such restrictions. If in doubt as to a particular function, only perform it
while the vehicle is parked. No feature should be used unless it is safe to do so under the driving
conditions you are experiencing.
Using WebLink®
Important
• Pioneer is not responsible for content or functions accessed via WebLink®, which are the
responsibility of the application and content providers.
• Availability of non-Pioneer content and services, including apps and connectivity, may change or
discontinue without notice.
• When using WebLink® with the Pioneer product, available content and functions will be limited while
driving.
• WebLink® allows access to applications other than those listed, subject to limitations while driving.
Starting procedure
For iPhone users
System requirement
For the latest OS support information, please visit HelloWebLink.com.
1 Unlock your iPhone and connect it to this product via USB.
TIP
A screen other than WebLink® may appear after the USB connection.
2 Touch .
3 Touch [Sources].
English
- 32 -
Page 33
4 Touch [WebLink].
NOTE
For USB connection, refer to the Quick start guide.
For smartphone (Android™) users
System requirement
For the latest OS support information, please visit HelloWebLink.com.
NOTE
The video playback capability depends on the connected Android device.
1 Unlock your smartphone and connect it to this product via USB.
TIP
A screen other than WebLink® may appear after the USB connection.
2 Touch .
3 Touch [Sources].
4 Touch [WebLink].
NOTES
• For USB connection, refer to the Quick start guide.
• Make sure that file transfer mode for USB connection is enabled on your smartphone if WebLink®
does not start automatically.
Basic operation
Touch the desired application icon after the WebLink® app is launched. The desired
application is launched, and the application operation screen appears.
Displays the main menu of the WebLink® source screen.
TIPS
• If you connect your device to this product while a WebLink® compatible application is already
running, the application operation screen will appear on this product.
• When the volume of WebLink® is low, adjust the volume on your device. If you increase the volume on
this product, the volume of the AV source may be too high when you switch to other AV sources.
• Check the Bluetooth connection between the mobile device and this unit if there is no sound output
from this unit (page 17).
• If the WebLink® app is launched, the Bluetooth audio connection will switch to the device used for
launching.
• If you start WebLink®, the Bluetooth connection with the mobile phone will be established. The first
one of the two already connected mobile phones will be disconnected and the other mobile phone
used for WebLink® will be connected via Bluetooth instead.
English
- 33 -
Page 34
Using WebLink® Cast
You can project your iPhone or smartphone screen onto the screen of this product and
operate the projected screen with finger gestures.
NOTE
The supported finger gestures may vary depending on the WebLink® Cast compatible application.
1 Start WebLink®.
2 Touch .
Follow the instructions on the display when the message appears on your connected
iPhone or smartphone.
TIPS
• You can also start WebLink® Cast by touching from the shortcuts (page 14).
• is displayed on the shortcuts only when the Vehicle Bus adapter (sold separately) is not
connected.
English
- 34 -
Page 35

AppleCarPlay
You can operate iPhone applications with finger gestures such as tapping, dragging,
scrolling, or flicking on the screen of this product.
Compatible iPhone models
For details about compatibility of iPhone models, refer to the following website.
https://www.apple.com/ios/carplay
NOTE
The compatible finger gestures vary depending on the application for the iPhone.
WARNING
Certain uses of the iPhone may not be legal while driving in your jurisdiction, so you must be aware of
and obey any such restrictions. If in doubt as to a particular function, only perform it while the vehicle is
parked. No feature should be used unless it is safe to do so under the driving conditions you are
experiencing.
Using AppleCarPlay
Important
AppleCarPlay may not be available in your country or region.
For details about AppleCarPlay, visit the following site:
https://www.apple.com/ios/carplay
• The content and functionality of the supported applications are the responsibility of the App
providers.
• In AppleCarPlay, usage is limited while driving, with availability of functions and content determined
by the App providers.
• AppleCarPlay allows access to applications other than those listed that are subject to limitations
while driving.
• PIONEER IS NOT RESPONSIBLE AND DISCLAIMS LIABILITY FOR THIRD PARTY (NON-PIONEER) APPS
AND CONTENT, INCLUDING WITHOUT LIMITATION ANY INACCURACIES OR INCOMPLETE
INFORMATION.
• Before using AppleCarPlay, make sure the GPS aerial and speed cable are properly connected and
installed, and the unit angle is properly set. For details, refer to the Quick start guide.
Setting the driving position
To achieve optimum usability of AppleCarPlay, set the driving position setting correctly
according to the vehicle. The setting will be applied the next time an AppleCarPlay
compatible device is connected to this product.
1 Touch .
2 Touch .
English
- 35 -
Page 36
3 Touch [System Settings].
4 Touch [Driving Position].
[Left]
Select for a left-hand drive vehicle.
[Right]
Select for a right-hand drive vehicle.
Starting procedure
Wired connection
1 Connect an AppleCarPlay compatible device to this product via USB.
The application screen appears.
TIP
You can start this source by touching then touching [AppleCarPlay] if a screen other than
AppleCarPlay appears after the USB connection.
Wireless connection
Before using AppleCarPlay wirelessly, perform the following:
• Attach the GPS aerial to this product.
• Turn on AppleCarPlay in the setting menu of your iPhone.
1
Turn on the Wi-Fi function and the Bluetooth function on the device.
2
Display the Bluetooth setting menu on the device.
3
Touch .
4
Touch [Sources].
5
Touch .
6
Touch [Yes] to start searching.
TIP
Touch if another device is already connected to the unit.
7
Touch a desired device on the screen.
TIP
A pop-up message may appear if another device is already connected to the unit. Touch [OK] on
the message.
English
- 36 -
Page 37

8
Touch [Yes] to pair with the device.
9
Perform the pairing operation by operating the device.
10
Touch [Yes] to activate the AppleCarPlay function.
Follow the on-screen instructions on the device to start the application.
TIPS
• When the USB connection with the other device has been made, the message that shows that the
new device is available will appear. If you want to switch from the current device to the new one for
use in the application, touch the pop-up message.
• You can use the Siri function by touching the button once AppleCarPlay is activated.
NOTES
• For details on USB connection, refer to the Quick start guide.
• If five devices are already paired, the message confirming whether to delete the registered device is
displayed. If you want to delete the device, touch [Agree]. If you want to delete other device, touch
[Go To DeviceList] and delete the devices manually.
• If an AppleCarPlay compatible device has been connected and another screen is displayed, touch
[AppleCarPlay] on the home menu screen to display the application screen.
• Hands-free phoning via Bluetooth wireless technology is not available while AppleCarPlay is on. If
AppleCarPlay is turned on during a call on a mobile phone other than an AppleCarPlay compatible
device, the Bluetooth connection will be terminated after the call ends.
• The Bluetooth connection will be terminated automatically if AppleCarPlay is turned on.
English
- 37 -
Page 38
AndroidAuto™
You can operate Android applications with finger gestures such as tapping, dragging,
scrolling, or flicking on the screen of this product.
Compatible Android devices
For details about compatibility of Android models, refer to the following website.
https://support.google.com/androidauto
Compatible Android phone and compatible active data plan required.
NOTE
The compatible finger gestures vary depending on the application for the smartphone.
WARNING
Certain uses of the smartphone may not be legal while driving in your jurisdiction, so you must be
aware of and obey any such restrictions. If in doubt as to a particular function, only perform it while the
vehicle is parked. No feature should be used unless it is safe to do so under the driving conditions you
are experiencing.
Using AndroidAuto
Important
AndroidAuto may not be available in your country or region.
For details about AndroidAuto, please refer to the Google support site:
https://support.google.com/androidauto
• The content and functionality of the supported applications are the responsibility of the App
providers.
• In AndroidAuto, usage is limited while driving, with availability of functions and content determined
by the App providers.
• AndroidAuto allows access to applications other than those listed that are subject to limitations
while driving.
• PIONEER IS NOT RESPONSIBLE AND DISCLAIMS LIABILITY FOR THIRD PARTY (NON-PIONEER) APPS
AND CONTENT, INCLUDING WITHOUT LIMITATION ANY INACCURACIES OR INCOMPLETE
INFORMATION.
• Before using AndroidAuto, make sure the GPS aerial and speed cable are properly connected and
installed, and the unit angle is properly set. For details, refer to the Quick start guide.
Setting the driving position
To achieve optimum usability of AndroidAuto, set the driving position setting correctly
according to the vehicle. The setting will be applied the next time an AndroidAuto
compatible device is connected to this product.
1 Touch .
English
- 38 -
Page 39
2 Touch .
3 Touch [System Settings].
4 Touch [Driving Position].
[Left]
Select for a left-hand drive vehicle.
[Right]
Select for a right-hand drive vehicle.
Starting procedure
Wired connection
1 Connect an AndroidAuto compatible device to this product via USB.
The application screen appears.
TIP
You can start this source by touching then touching [AndroidAuto] if a screen other than
AndroidAuto appears after the USB connection.
Wireless connection
1
Turn on the Wi-Fi function and the Bluetooth function on the device.
2
Display the connected Bluetooth devices list screen on the device.
3
Touch .
4
Touch [Sources].
5
Touch .
6
Touch [Yes] to start searching.
TIP
Touch if another device is already connected to the unit.
7
Touch a desired device on the screen.
TIP
A pop-up message may appear if another device is already connected to the unit. Touch [OK] on
the message.
8
Touch [Yes] to pair with the device.
English
- 39 -
Page 40

9
Perform the pairing operation by operating the device.
10
Touch [Start] to start AndroidAuto.
The unit configures the connection then starts the application.
TIP
You can use the voice recognition function by touching the button once AndroidAuto is activated.
NOTES
• For details on USB connection, refer to the Quick start guide.
• If five devices are already paired, the message confirming whether to delete the registered device is
displayed. If you want to delete the device, touch [Agree]. If you want to delete other device, touch
[Go To DeviceList] and delete the devices manually.
• If AndroidAuto is turned on during a call on a mobile phone other than the AndroidAuto compatible
device, the Bluetooth connection will switch to the AndroidAuto compatible device after the call.
• The Bluetooth connection for the phone function with a device other than the device used for
AndroidAuto will be terminated automatically if AndroidAuto is turned on.
• The Bluetooth audio connection with the device used for AndroidAuto will be terminated
automatically if AndroidAuto is turned on.
English
- 40 -
Page 41
AUX
You can display the video image output by the device connected to video input.
CAUTION
For safety reasons, video images cannot be viewed while your vehicle is in motion. To view video
images, stop in a safe place and apply the handbrake.
NOTE
A Mini-jack AV cable (sold separately) is required for connection. For details, refer to the Quick start
guide.
Starting procedure
1 Touch .
2 Touch [Sources].
3 Touch [AUX].
The AUX screen appears.
TIPS
• You can hide the touch panel keys by touching the screen. To display the keys again, touch
anywhere on the screen.
• You can set the screen mode for the video image (page 57).
English
- 41 -
Page 42
Camera View
You can display the video image output by the device connected to video or camera
input. For details, refer to the Quick start guide.
Starting procedure
1 Touch .
2 Touch [Sources] then swipe left on the screen.
3 Touch [Camera View] for connected camera view.
The video image is displayed on the screen.
Displaying 2nd camera view
1 Touch .
2 Touch .
3 Touch [Camera settings].
4 Touch [2nd Camera Input] to activate the 2nd camera.
5 Touch .
6 Touch [Sources] then swipe left on the screen.
7 Touch [Camera View] for connected camera view.
The video image is displayed on the screen.
8 Touch to switch the camera view.
The 2nd camera video footage is displayed on the screen.
English
- 42 -
Page 43
Vehicle equipment
information
Using the Vehicle Bus adapter
By connecting the Vehicle Bus adapter (sold separately), you can display the operation
status such as gauges, vehicle information, climate control and parking assist.
Important
• For information on installing the Vehicle Bus adapter, see the operating manual of the Vehicle Bus
adapter.
• After installing the Vehicle Bus adapter, be sure to check operations.
Limitation
The data is transmitted to this product from your vehicle system via the connected
Vehicle Bus adapter. Therefore, the actual data contents displayed on your product may
differ from the contents on the screen described in this manual.
Starting procedure
1 Connect the Vehicle Bus adapter cable (sold separately) to the Vehicle Bus
conversion input on the rear panel.
For details about the Vehicle Bus conversion input, refer to the Quick start guide.
2 Touch .
3 Touch [Sources] then swipe left on the screen.
4 Touch [Car Features].
The menu screen appears.
NOTE
This function is available only when the input signal is received by the Vehicle Bus adapter.
English
- 43 -
Page 44
Settings
You can adjust various settings in the main menu.
Displaying the setting screen
1 Touch .
2 Touch .
3 Touch one of the following categories, then select the options.
System Settings (page 44)
Display Settings (page 48)
Audio & EQ Settings (page 49)
Wi-Fi Settings (page 24)
Bluetooth Settings (page 18)
Camera settings (page 52)
Phone Connectivity Settings (page 55)
System Settings
Menu Item Description
[Choose Language] Select the system language.
NOTES
• If the embedded language and the selected language setting
are not the same, the text information may not display properly.
• Some characters may not be displayed properly.
[Date & Time] Setting or adjusting the following time and clock display.
[Beep Tone]
[On] [Off]
• Date display format:
day-month-year, month-day-year or year-month-day
• Time display format:
[12hour] or [24hour]
• U TC (Universal Time Coordinated) time zone difference:
UTC-12.00h to UTC+14.00h
• Day-light saving time:
[On] or [Off]
Set off to disable the beep sound when the button is
touched or the screen is touched.
English
- 44 -
Page 45

Menu Item Description
[Steering Wheel Control]
[With Adapter]
[W/o Adapter]
[Safe Mode]
[On] [Off]
[Demo Mode]
[On] [Off]
[Driving Position]
[Right] [Left]
Select [With Adapter] or [W/o Adapter] according to your
wired remote control.
NOTES
• This setting is available only when you stop your vehicle in a safe
place and apply the handbrake.
• Depending on your vehicle, this function may not work
properly. In this case, contact your dealer or an authorised
PIONEER Service Station.
• Please use a PIONEER wiring harness for each vehicle model
when [With Adapter] mode is engaged, otherwise select [W/o
Adapter].
Set to [Off] to enable the operation of certain functions
that are restricted while driving.
Setting the demo mode.
Setting the driving position.
• A ppleCarPlay (page 35)
• A ndroidAuto (page 38)
NOTE
The position of the shortcuts on the home menu screen depends
on the driving position setting (page 14).
[Radio settings] (page 27)
[ACC ON settings]
[Previous Source]
[Power Off]
[Dimmer Settings]
[Dimmer Trigger] Setting the dimmer brightness.
[Day/Night] Setting the dimmer duration by day or night.
Setting the condition of the power off mode on the next
startup.
• [Previous Source]: The last used source screen will be
shown after turning on the ignition switch (ACC ON).
• [Power Off ]: The power off mode will be kept after
turning on the ignition switch (ACC ON).
NOTE
This setting is available only when you stop your vehicle in a safe
place and apply the handbrake.
• [Auto]: Switches the dimmer to on or off automatically
according to your vehicle’s headlight turning on or off.
• [Manual]: Switches the dimmer to on or off manually.
You can use this function when [Dimmer Trigger] is set to
[Manual].
English
- 45 -
Page 46
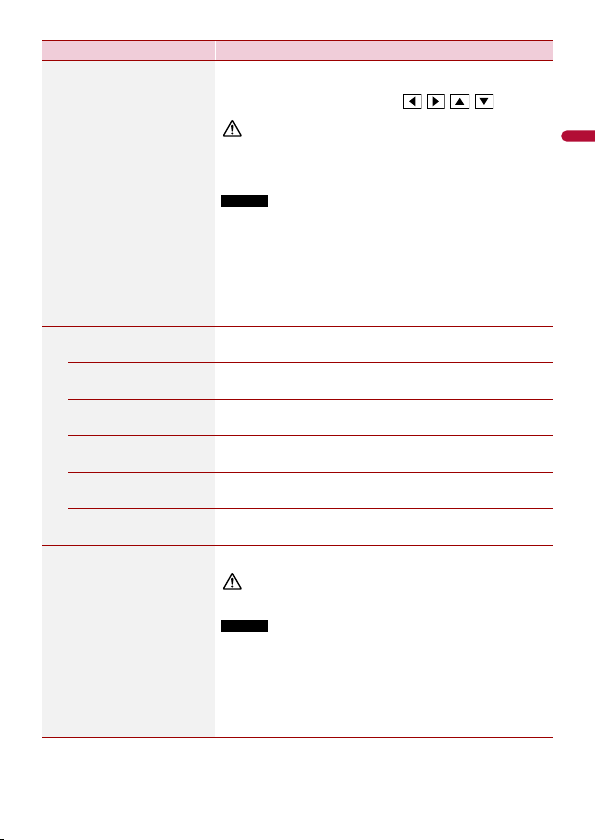
Menu Item Description
[Picture Adjustment] You can adjust the picture for each source, rear view
camera.
To adjust following menu, touch , , , to adjust.
CAUTION
For safety reasons, you cannot use some of these functions while
your vehicle is in motion. To enable these functions, you must
stop in a safe place and apply the handbrake.
NOTES
• The adjustment settings of [Dimmer] for when your vehicle’s
headlights are off (daytime) and on (nighttime) are stored
separately.
• The value of [Dimmer] is switched automatically depending on
the setting of [Dimmer Settings].
• The picture adjustment may not be available with some rear
view cameras.
• The setting contents can be memorised separately.
[Brightness]
[-10] to [+10]
[Contrast]
[-10] to [+10]
[Colour]
[-10] to [+10]
[Hue]
[-10] to [+10]
[Dimmer]
[0] to [+8]
[Temperature]
[-3] to [+3]
Adjust the black intensity.
Adjust the contrast.
Adjust the colour saturation.
Adjust the tone of colour (which colour is emphasised, red
or green).
Adjust the brightness of the display.
Adjust the colour temperature, resulting in a better white
balance.
[Factory Reset] Touch [OK] to restore the settings to the default settings.
CAUTION
Do not turn off the engine while restoring the settings.
NOTES
• This setting is available only when you stop your vehicle in a safe
place and apply the handbrake.
• The source is turned off and the Bluetooth connection is
disconnected before the process starts.
• Before starting the restore process, disconnect any device that is
connected to the USB port. Otherwise, some settings may not
be restored correctly.
English
- 46 -
Page 47

Menu Item Description
[Connection Status] Check that the leads are properly connected between this
[GPS Antenna] Displays the connection status of the GPS aerial ([OK] or
[Positioning Status] Displays the positioning status (3D positioning, 2D
[Installation] Indicates whether the inertial navigation is successfully
product and vehicle.
[NOK]) and the reception sensitivity.
NOTE
If reception is poor, change the installation position of the GPS
aerial.
positioning, or no positioning), the number of satellites
used for positioning (orange), and the number of satellites
that have received signals (yellow). If signals from more
than six satellites are received, the current location can be
measured.
learned. If the learning is successful, [OK] will appear. If the
learning is not successful or due to failure after the
learning is successful, [NOK] will appear.
NOTE
If this product is not firmly fixed into place or the speed pulse wire
is not connected or properly connected, [NOK] is displayed due to
the learning failure.
[Speed Pulse] The speed pulse value detected by this product is shown.
NOTE
Check that the speed pulse wire is properly connected if [0] is still
displayed while driving.
[Back Signal] When the gear stick is shifted to “R” (reverse position), the
signal switches to [High] or [Low]. The signal displayed
varies depending on the vehicle.
[System Information] Displaying the firmware version.
English
- 47 -
Page 48
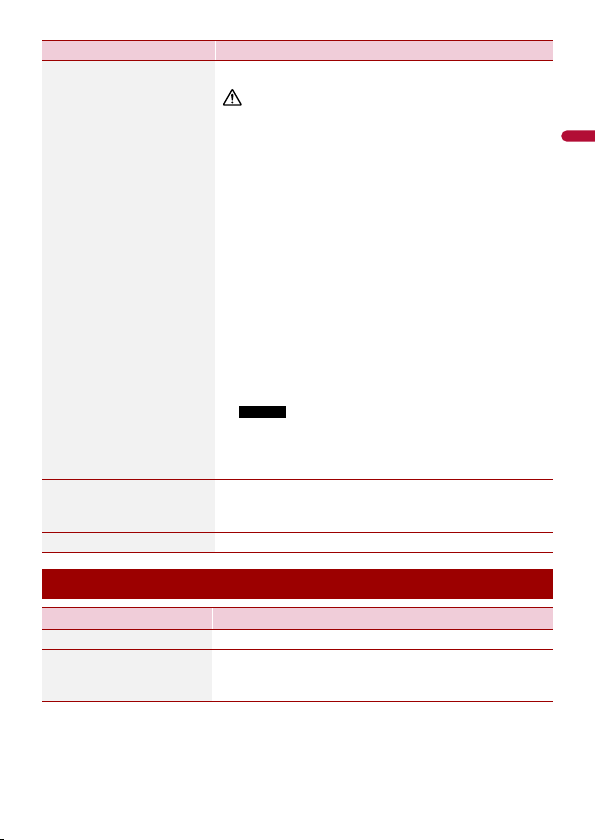
Menu Item Description
[Firmware Update] Updating the firmware version.
CAUTION
• The USB storage device for updating must contain only the
correct update file.
• Never turn this product off, disconnect the USB storage device
while the firmware is being updated.
• You can only update the firmware when the vehicle is stopped
and the handbrake is engaged.
1 Download the firmware update files into your
computer.
2 Connect a blank (formatted) USB storage device to
your computer then locate the correct update file and
copy it onto the USB storage device.
3 Connect the USB storage device to this product
(page 28).
4 Display the [System Settings] screen (page 44).
5 Touch [Firmware Update].
New firmware version information is displayed.
6 Touch [Update].
Follow the on-screen instructions to finish updating the
firmware.
NOTES
• This product will restart automatically after the firmware
update is completed if the update is successful.
• If an error message appears on the screen, touch the
display and perform the above steps again.
[CAN bus interface]
[Hiworld] [Raise]
[SimpleSoft] [None]
Setting CAN bus interface activation and selecting the
corresponding CAN bus interface brand and the car
category that your car belongs to.
[Licence] Displaying the open-source licence.
Display Settings
Menu Item Description
[Illumination] Select an illumination colour from the preset list.
[Background] Touch the wallpaper from the preset items in this product
or original pictures via the external device and touch
[Apply].
English
- 48 -
Page 49
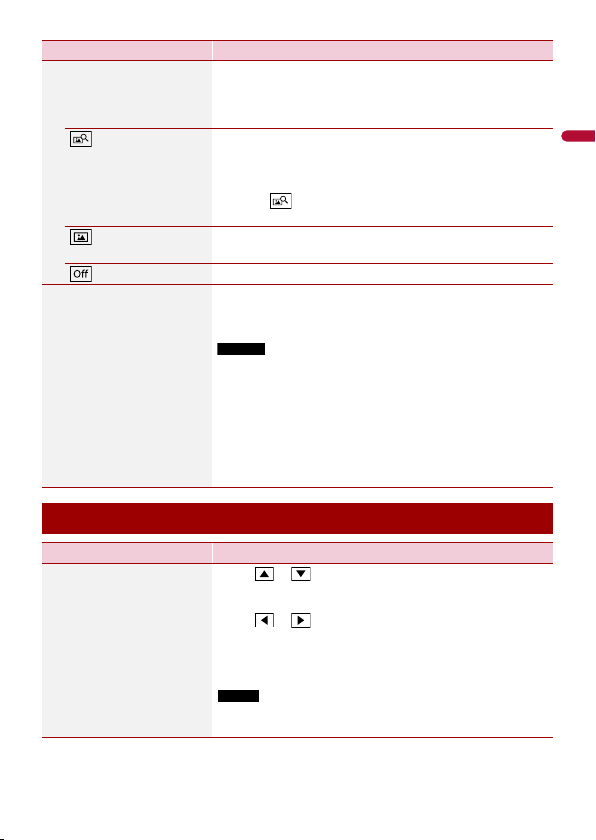
Menu Item Description
Preset Display Select the desired preset background display.
(custom) Displays the background display image imported from the
You can set your favourite screen from the connected USB
device by touching and sliding the bottom of screen to the
right.
Select the background display image of the connected USB
storage device.
1 Connect the USB storage device to this product
(page 28).
2 Touch .
3 Select the desired image.
USB storage device.
(off) H ides the background display.
[Splash screen]
[Import] [Restore]
Select [Import] to change the image on the opening screen
to the one imported from the connected USB device.
Select [Restore] to restore the default image.
NOTES
• The image files that can be imported are as follows:
– Format: BMP and JPEG
– Data size: 6 MB or less (for both BMP and JPEG)
– Image size (W×H): 1 024 × 600 pixels
• Make sure that the image file is located within the root (top)
folder of the USB device.
• If multiple image files are stored on the USB device, the desired
image file may not be imported from the USB device. Store only
one desired image file on the USB device.
Audio & EQ Settings
Menu Item Description
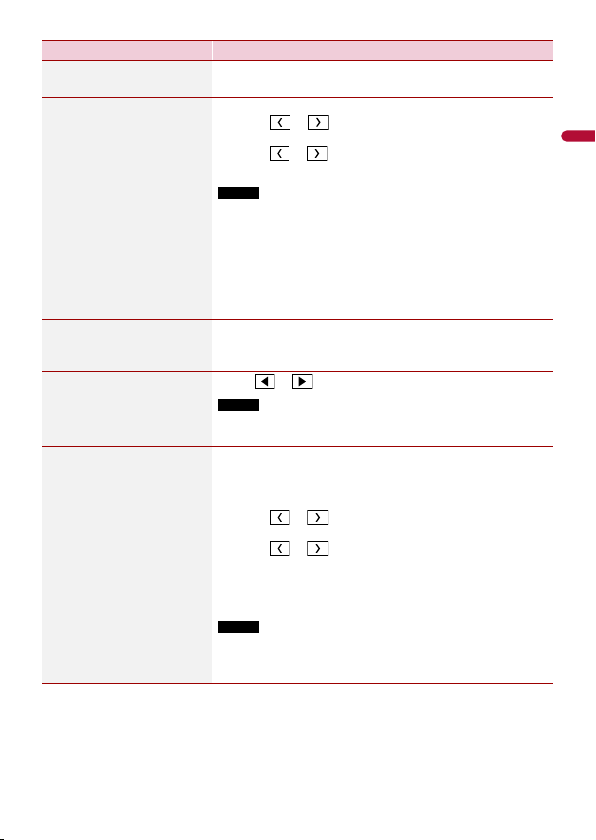
[Fader/Balance] Touch or to adjust the front/rear speaker balance.
Set [Front] and [Rear] to [0] when using a dual speaker
system.
Touch or to adjust the left/right speaker balance.
TIP
You can also set the value by dragging the point on the displayed
table.
NOTE
This function is available when [Standard Mode] is selected as the
speaker mode.
English
- 49 -
Page 50
Menu Item Description
[Loudness]
[Off] [Low] [Mid] [High]
[Speaker Level]
Listening Position*1*2
[Off ] [Front Left]
[Front Right] [Front] [All]
Standard Mode*3
[Front Left] [Front Right]
[Rear Left] [Rear Right]
[Subwoofer]
Network Mode*3
[High Left] [High Right]
[Mid Left] [Mid Right]
[Subwoofer]
Speaker output level
[-24] to [10]
[Listening Position]*1
[Off ] [Front-L] [Front-R]
[Front] [All]
Compensates for deficiencies in the low-frequency and
high-frequency ranges at low volume.
Adjust the speaker output level of the listening position.
1 Touch or to select the listening position then
select the output speaker.
2 Touch or to adjust the selected speaker output
level.
NOTE
You can adjust the subwoofer output level if the [Subwoofer]
setting is set to [On].
Select a listening position that you want to make as the
centre of sound effects.
[Balance] Touch or to adjust the left/right balance.
NOTE
This function is available when [Network Mode] is selected as the
speaker mode.
[Time Alignment]
[TA On] [TA Off]
Listening Position*1*2
[Off] [Front Left]
[Front Right] [Front] [All]
Standard Mode*3*4
[Front Left] [Front Right]
[Rear Left] [Rear Right]
[Subwoofer]
Network Mode*3*4
[High Left] [High Right]
[Mid Left] [Mid Right]
[Subwoofer]
Distance
[0] to [490]
Select or customise the time alignment settings to reflect
the distance between the listener’s position and each
speaker. You need to measure the distance between the
head of the listener and each speaker unit.
1 Touch or to select the listening position then
select the alignment speaker.
2 Touch or to input the distance between the
selected speaker and listening position.
TIP
If you touch [TA On], the time alignment is turned off mandatorily.
NOTE
This function is available only when the listening position setting
is set to [Front Left] or [Front Right].
English
- 50 -
Page 51

Menu Item Description
[EQ]
[Super Bass] [Powerful]
[Natural] [Vocal] [Flat]
[Custom1] [Custom2]
[Subwoofer]
[On] [Off]
[Crossover]*5 Select a speaker unit (filter) to adjust the HPF or LPF cutoff
[Bass Boost]
[0] to [6]
[Mute Level] If an interruption caused by an audio signal occurs while
Select or customise the equaliser curve.
Select a curve that you want to use as the basis of
customising then touch the frequency that you want to
adjust.
TIPS
• If you make adjustments when the [Super Bass], [Powerful],
[Natural], [Vocal] or [Flat] curve is selected, the equaliser curve
settings will be changed to [Custom1] mandatorily.
• If you make adjustments when the [Custom2] curve is selected
for example, the [Custom2] curve will be updated.
• [Custom1] and [Custom2] curves can be created common to all
sources.
Select enable or disable rear subwoofer output from this
product.
frequency and the slope for each speaker unit.
• [L PF]/[HPF]: Switches the [LPF]/[HPF] setting to [On] or
[Off ].
• [Phase]: Switches the subwoofer phase between normal
and reverse position.
TIP
You can also adjust the [High] and [Mid] phase in [Network Mode].
Adjust the bass boost level.
NOTE
This function is available when [Standard Mode] is selected as the
speaker mode.
AppleCarPlay or AndroidAuto is being used, select mute
or attenuate the volume of the AV source and iPhone/
smartphone application.
[ATT] The volume becomes 10 dB lower than the current volume.
[Mute] The volume becomes 0.
[Off] The volume does not change.
[Subwoofer Settings]*5 Select the subwoofer phase.
NOTE
[Subwoofer Settings] is available only when [Subwoofer] is [On].
*1 [All] is not available when [Network Mode] is selected as the speaker mode.
*2 If you change the listening position setting, the set values for all speakers will change in conjunction
with this setting.
*3 To use this function, the vehicle’s acoustics must be measured in advance.
English
- 51 -
Page 52
*4 This function is available only when the listening position setting is set to [Front Left] or [Front
Right].
*5 This function is not available when adjusting the High speaker in [Network Mode].
Camera settings
A separately sold rear view camera is required for utilising the rear view camera function.
(For details, consult your dealer.)
▶Rear view camera
This product features a function that automatically switches to the full-screen image of
the rear view camera installed on your vehicle when the gear stick is in the REVERSE (R)
position.
Camera View mode also allows you to check what is behind you while driving.
▶Camera for Camera View mode
Camera View can be displayed at all times. Note that with this setting, the camera image
is not resized to fit, and that a portion of what is seen by the camera is not viewable.
To display the camera image, touch [Camera View] on the source screen (page 42).
NOTES
• To set the rear view camera as the camera for Camera View mode, select [2nd Camera Input] or [Rear
View Camera Input] for [Rear Viewing Camera Input] (page 52).
• When using the 2nd camera, activate [2nd Camera Input] (page 54).
• When the camera view of both the rear view camera and 2nd camera are available, the key to switch
the display appears. Touch this key to switch the display between the rear view image and 2nd
camera image.
• When [2nd Camera Input] is selected, the following items are not shown on the camera footage.
– The parking assist guidelines
– The key to switch the parking assist guidelines on or off
CAUTION
Pioneer recommends the use of a camera which outputs mirror reversed images, otherwise the screen
image may appear reversed.
• Immediately verify whether the display changes to the rear view camera image when the gear stick is
moved to REVERSE (R) from another position.
Menu Item Description
[Rear Viewing Camera
Input]
[2nd Camera Input]
[Rear View Camera Input]
[Off]
[Rear Viewing Camera
view]
[Normal] [Reverse]
Setting rear view camera activation and which input video
to be displayed.
Select the way the screen image of a camera appears.
English
- 52 -
Page 53

Menu Item Description
[Parking Assist Guide]
[On] [Off]
You can set whether to display the parking assist
guidelines on the rear view camera images when backing
up your vehicle.
NOTE
When [2nd Camera Input] is selected for [Rear Viewing Camera
Input], this setting cannot be adjusted.
English
- 53 -
Page 54
Menu Item Description
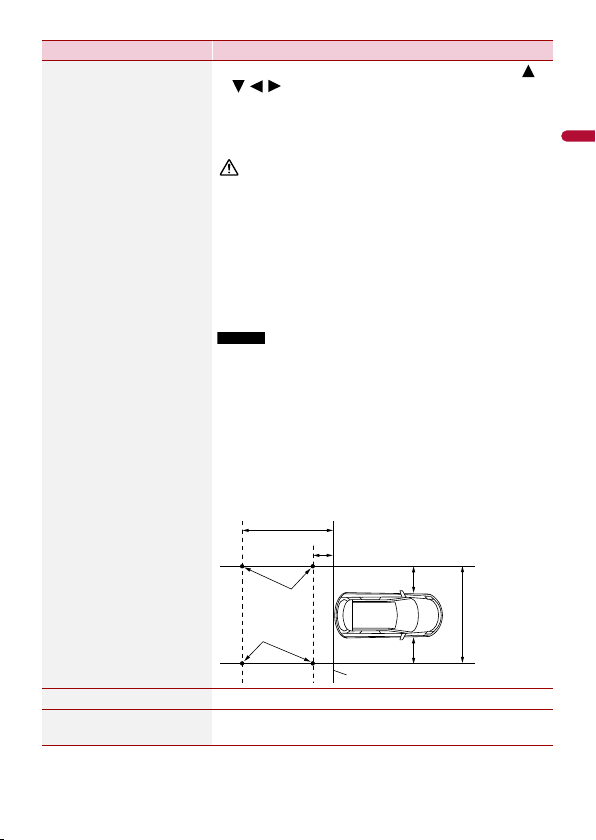
[Parking Assist Guide
Adjust]
1 Adjusting the guidelines by dragging or touching /
/ / on the screen.
2 Touch [OK] to finish the settings.
TIP
Touch [Reset] to reset the settings.
CAUTION
• When adjusting the guidelines, be sure to park the vehicle in a
safe place and apply the handbrake.
• Before getting out of the vehicle to place the markings, be sure
to turn the ignition switch off (ACC OFF).
• The range projected by the rear view camera is limited. Also, the
vehicle width and distance guidelines displayed on the rear view
camera image may differ from the actual vehicle width and
distance. (The guidelines are straight lines.)
• The image quality may deteriorate depending on the usage
environment, such as at night or in dark surroundings.
NOTES
• When [2nd Camera Input] is selected for [Rear Viewing Camera
Input], this setting cannot be adjusted.
• This setting is available only when you stop your vehicle in a safe
place and apply the handbrake.
• Using packing tape or similar tape place markings as shown
below before setting up the guidelines so that the guidelines can
be overlaid to the markings.
• Install the rear view camera as near the centre of the vehicle as
possible, and do not install it too low. Otherwise, the guideline
comes on the edge of the screen, preventing the guideline from
being adjusted.
Markings
Markings
[Picture Adjustment] (page 46)
[2nd Camera Input]
[On] [Off]
Setting 2nd camera activation.
English
2 m
50 cm
25 cm
MAX 2.7 m
25 cm
Rear bumper
- 54 -
Page 55

Menu Item Description
[2nd Camera view]
[Normal] [Reverse]
Select the way the screen image of a camera appears.
Phone Connectivity Settings
Menu Item Description
[AndroidAuto]
[On] [Off]
Setting AndroidAuto activation.
NOTE
The [AndroidAuto] icon may not be displayed on the home menu
screen depending on the Phone Connectivity Settings.
English
- 55 -
Page 56

Other functions
Setting the clock display
You can set the time format, time zone, daylight saving and the date format.
However, the time and date are automatically adjusted by the GPS aerial and cannot be
adjusted by the user.
1 Touch the current time on the screen.
2 Set the following items in the settings.
• The date display format:
[d/m/y] (day-month-year), [m/d/y] (month-day-year) or [y/m/d] (year-month-day)
• The time display format:
[12hour] or [24hour]
• The UTC (Universal Time Coordinated) time zone difference:
UTC-12.00h to UTC+14.00h
• Day-light saving time:
[On] or [Off]
You can also configure these items in [Date & Time] (page 44).
English
- 56 -
Page 57
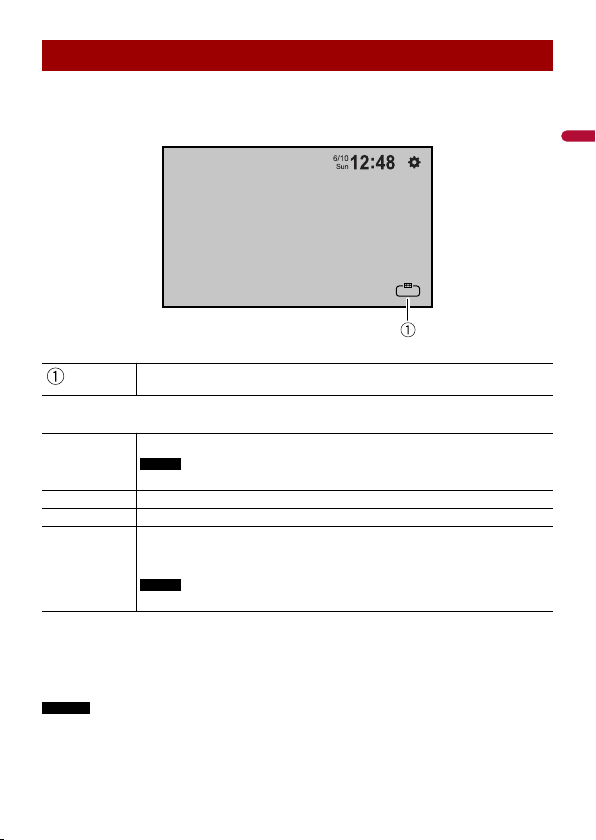
Changing the widescreen mode
AUX
Full
You can set the screen mode for the AV screen and image files.
1 Touch the screen display mode key.
Screen display mode key
2 Touch the desired mode.
[Full] Displays images across the entire screen.
NOTE
[Zoom] Displays images by enlarging them vertically.
[Normal] Displays images without changing the ratio.
[Trimming] An image is displayed across the entire screen with the horizontal-to-vertical ratio
TIPS
• Different settings can be stored for each video source.
• When a video is viewed in the widescreen mode with a setting that does not match its original aspect
ratio, it may appear different.
• The video image will appear coarser when viewed in [Zoom] mode.
NOTES
• Image files can be set to either [Normal] or [Trimming] in the widescreen mode.
• Depending on the software version of this unit, this function may vary.
Some images may not be displayed across the entire screen.
left as-is. If the screen ratio differs from the image, the image may be displayed
partly cut off either at the top/bottom or sides.
NOTE
[Trimming] is for image files only.
English
- 57 -
Page 58

About the reconnection function
You can reconnect the iPhone or smartphone by touching [Reconnect] on the home
menu screen.
TIPS
• [Reconnect] is displayed on the home menu screen only when the Wi-Fi connection (Wireless
AppleCarPlay or AndroidAuto) has failed or been disconnected automatically.
• If you touch [Reconnect], the message confirming whether to restart this product appears on the
display. Touch [Yes] to restart this product.
Restoring this product to the default settings
You can restore settings or recorded content to the default settings from [Factory Reset]
in the [System Settings] menu (page 46).
English
- 58 -
Page 59
Appendix
Troubleshooting
If you have problems operating this
product, refer to this section. The most
common problems are listed below, along
with likely causes and solutions. If a
solution to your problem cannot be found
here, contact your dealer or the nearest
authorised Pioneer service facility.
Common problems
A black screen is displayed, and
operation is not possible using the touch
panel keys.
Power off mode is on.
– Touch any button on this product to
release the mode.
Bluetooth operation does not work.
The power failed for the Bluetooth
module of this product.
– Turn the ignition switch to OFF and
then to ON. If the error message is still
displayed after performing the above
action, please contact your dealer or
an authorised Pioneer Service Station.
Problems with the AV screen
The screen is covered by a caution
message and the video cannot be shown.
The handbrake lead is not connected or
the handbrake is not applied.
– Connect the handbrake lead correctly
and apply the handbrake.
The speed sensor detects that the
vehicle is moving.
– Park your vehicle in a safe place and
apply the handbrake.
The audio or video skips.
This product is not firmly secured.
– Secure this product firmly.
No sounds are produced. The volume
level will not rise.
Cables are not connected correctly.
– Connect the cables correctly.
iPhone cannot be operated.
The iPhone is frozen.
– Reconnect the iPhone with the USB
interface cable for iPhone.
– Update the iPhone software version.
An error has occurred.
– Reconnect the iPhone with the USB
interface cable for iPhone.
– Park your vehicle in a safe place, and
then turn off the ignition switch (ACC
OFF). Subsequently, turn the ignition
switch to on (ACC ON) again.
– Update the iPhone software version.
Cables are not connected correctly.
– Connect the cables correctly.
Sound from the iPhone cannot be heard.
The audio output direction may switch
automatically when the Bluetooth and
USB connections are used at the same
time.
– Use the iPhone to change the audio
output direction.
Problems with the phone screen
Dialling is impossible because the touch
panel keys for dialling are inactive.
Your phone is out of range for service.
– Retry after re-entering the range for
service.
English
- 59 -
Page 60
The connection between the mobile
phone and this product cannot be
established.
– Perform the connection process.
Problems with Application
screen
A black screen is displayed.
While operating an application, the
application was ended on the
smartphone side.
– Touch to display the home menu
screen.
The smartphone OS may be awaiting
screen operation.
– Stop the vehicle in a safe place and
check the screen on the smartphone.
The screen is displayed, but operation
does not work at all.
An error has occurred.
– Park your vehicle in a safe place, and
then turn off the ignition switch (ACC
OFF). Subsequently, turn the ignition
switch to on (ACC ON) again.
The smartphone was not charged.
Charging stopped because the
temperature of the smartphone rose
due to prolonged use of the
smartphone during charging.
– Disconnect the smartphone from the
cable and wait until the smartphone
cools down.
More battery power was consumed
than was gained from charging.
– This problem may be resolved by
stopping any unnecessary services on
the smartphone.
Error messages
When problems occur with this product, an
error message appears on the display.
Refer to the table below to identify the
problem, then take the suggested
corrective action. If the error persists,
record the error message and contact your
dealer or your nearest Pioneer service
centre.
USB storage device
Unsupport USB device
The connected USB device is not
supported by this product.
– Check the supported USB formats
(page 70).
Unsupport USB hub device
The connected USB hub is not
supported by this product.
– Directly connect the USB storage
device to this product.
This content cannot be played.
There is no playable file in the USB
storage device.
– Check that the files in the USB storage
device are compatible with this
product.
This type of file is not supported on this
product.
– Select a file that can be played.
Security for the connected USB storage
device is enabled.
– Follow the USB storage device
instructions to disable security.
This product cannot recognise the
connected USB storage device.
– Disconnect the device and replace it
with another USB storage device.
Audio Format not supported
This type of file is not supported on this
product.
– Select a file that can be played.
No Data
There is no playable file in the USB
storage device.
English
- 60 -
Page 61
– Check that the files in the USB storage
device are compatible with this
product.
Security for the connected USB storage
device is enabled.
– Follow the USB storage device
instructions to disable security.
AppleCarPlay
Connection failed.
Communication failed and the system is
trying to connect.
Wait for a while. Then, perform the
actions below if the error message is still
displayed.
– Restart the iPhone.
– Disconnect the cable from the iPhone,
and then connect the iPhone again
after a few seconds.
– Turn the ignition switch to OFF and
then to ON.
Please attach the GPS antenna in order to
use AppleCarPlay over Wireless.
This unit cannot properly detect the
GPS signal from the GPS aerial.
– Check the GPS aerial installation and
connection. For details about the
connection and installation, refer to
the Quick start guide.
AndroidAuto
• Connect a USB cable to get started.
• Your phone does not support wireless,
check your phone.
The connected device is not compatible
with AndroidAuto.
– Check if the device is compatible with
AndroidAuto (page 38).
AndroidAuto app is not installed on the
device.
– Install the AndroidAuto app on the
device.
Connection failed. Please check your
phone to confirm connection.
Wi-Fi connection failed and
AndroidAuto app did not start.
– Check if the Wi-Fi function on the
device is turned on.
AndroidAuto has disconnected.
Wi-Fi function on the device or the unit
is turned off.
– Turn on the Wi-Fi function on the
device and the unit when you use
AndroidAuto (page 24).
To use AndroidAuto, please stop your car
and follow the instructions on your
phone
The default settings are displayed on
the screen of the AndroidAuto
compatible device or images are not
output from the AndroidAuto
compatible device.
– Park your vehicle in a safe place, and
follow the instructions displayed on
the screen. If the error message is still
displayed after performing on-screen
instructions, please reconnect the
device.
Camera View & AUX
No Video Signal
There is no video signal input.
– Confirm whether the connection with
the unit is established and there is an
output from the external device.
Bluetooth
Handsfree device is not connected
The phone’s Bluetooth HFP is not
connected and cannot make calls.
– Make a Bluetooth connection
(page 17).
English
- 61 -
Page 62

Phone book access is not authorized
The Bluetooth PBAP of the mobile
phone is not connected and the phone
book cannot be downloaded.
– Make a PBAP connection. You need to
operate your phone and allow the unit
to access the contact information on
your phone. When the related
information pops up on your phone,
follow the pop-up message.
Others
Overcurrent caution on USB.
Overcurrent is detected.
– Check the USB connection. Perform
one of the following operations to fix
the situation.
– Turn off the ignition switch (ACC OFF)
and then turn the ignition switch to on
(ACC ON) again.
– Power the unit off and then power it
on again.
– Disconnect the (+) battery cable and
then connect it again.
Overload Caution on AMP.
An amplifier overload is detected.
– Check the amp connection. Perform
one of the following operations to fix
the situation.
– Turn off the ignition switch (ACC OFF).
After 9 seconds or more, turn the
ignition switch to on (ACC ON) again.
– Disconnect the (+) battery cable and
then connect it again.
Detailed information
for playable media
Compatibility
Common notes about the USB storage
device
• Do not leave the USB storage device in
any location with high temperatures.
• Depending on the kind of the USB
storage device you use, this product may
not recognise the storage device or files
may not be played back properly.
• The text information of some audio and
video files may not be correctly
displayed.
• File extensions must be used properly.
• There may be a slight delay when starting
playback of files on a USB storage device
with complex folder hierarchies.
• Operations may vary depending on the
kind of USB storage device.
• It may not be possible to play some music
files from USB because of file
characteristics, file format, recorded
application, playback environment,
storage conditions and so on.
USB storage device compatibility
• For details about USB storage device
compatibility with this product, refer to
Specifications (page 69).
• Protocol: bulk
• You cannot connect a USB storage device
to this product via a USB hub.
• Partitioned USB storage device is not
compatible with this product.
• Firmly secure the USB storage device
when driving. Do not let the USB storage
device fall onto the floor, where it may
become jammed under the brake or
accelerator.
English
- 62 -
Page 63
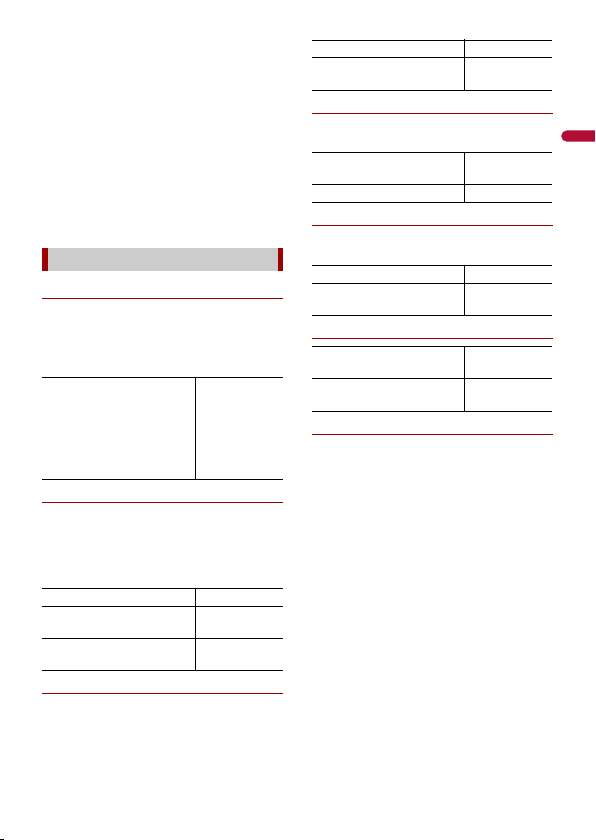
• There may be a slight delay when starting
playback of audio files encoded with
image data.
• So me USB storage devices connected to
this product may generate noise on the
radio.
• Do not connect anything other than the
USB storage device.
Handling guidelines and supplemental
information
• Copyright protected files cannot be
played back.
Media compatibility chart
General
• Maximum playback time of audio file
stored on a USB storage device: 7.5 h (450
minutes)
USB storage device
CODEC FORMAT MP3, WMA,
WAV, AAC,
FLAC, AVI,
MPEG-PS, MP4,
3GP, MKV,
MOV, ASF, FLV,
M4V, MPEG-TS
MP3 compatibility
• Ver. 2.x of ID3 tag is prioritised when both
Ver. 1.x and Ver. 2.x exist.
• This product is not compatible with the
following: MP3i (MP3 interactive), mp3
PRO, m3u playlist
SAMPLING FREQUENCY 8 kHz to 48 kHz
TRANSMISSION RATE CBR (8 kbps to
ID3 TAG ver.1.0/1.1/2.2/
320 kbps)/VBR
2.3/2.4
WMA compatibility
• This product is not compatible with the
following: Windows Media™ Audio 9.2
Professional, Lossless, Voice
SAMPLING FREQUENCY 8 kHz to 48 kHz
TRANSMISSION RATE CBR (8 kbps to
320 kbps)/VBR
WAV compatibility
• The sampling frequency shown in the
display may be rounded.
SAMPLING FREQUENCY 16 kHz to 192
QUANTIZATION BIT RATE 8 bit, 16 bit
kHz
AAC compatibility
• This product plays back AAC files
encoded by iTunes.
SAMPLING FREQUENCY 8 kHz to 96 kHz
TRANSMISSION RATE CBR (16 kbps to
320 kbps)
FLAC compatibility
SAMPLING FREQUENCY 8 kHz to 192
QUANTIZATION BIT RATE 8 bit, 16 bit, 24
kHz
bit
Video files compatibility
• Files may not be played back properly
depending on the environment in which
the file was created or on the contents of
the file.
• This product is not compatible with
packet write data transfer.
• This product can recognise up to 255
characters, beginning with the first
character, including extension for the file
and folder name. Depending on the
display area, this product may try to
display them with a reduced font size.
However, the maximum number of the
characters that you can display varies
according to the width of each character,
and of the display area.
• Folder selection sequence or other
operations may be altered, depending on
the encoding or writing software.
English
- 63 -
Page 64

• Regardless of the length of blank section
between the songs of original recording,
compressed audio files play with a short
pause between songs.
• Files may not be able to be played back
depending on the bit rate.
• The maximum resolution depends on the
compatible video codec.
H.264 video decoding format
Base Line Profile, Main Profile, High Profile
Maximum resolution 1 920 × 1 080
Maximum frame rate 30 fps
H.263 video decoding format
Base Line Profile 0/3
Maximum resolution 1 920 × 1 080
Maximum frame rate 30 fps
VC-1 video decoding format
Simple Profile, Main Profile, Advanced
Profile
Maximum resolution 1 920 × 1 080
Maximum frame rate 30 fps
MPEG-4 video decoding format
Simple Profile, Advanced Simple Profile
Maximum resolution 1 920 × 1 080
Maximum frame rate 30 fps
MPEG-1, 2 video decoding format
Main Profile
Maximum resolution 1 920 × 1 080
Maximum frame rate 30 fps
Example of a hierarchy
NOTE
This product assigns folder numbers. The
user cannot assign folder numbers.
Trademark · Copyright
etc.
• The Bluetooth® word mark and logos are
registered trademarks owned by
Bluetooth SIG, Inc. and any use of such
marks by Pioneer Corporation is under
license. Other trademarks and trade
names are those of their respective
owners.
• Wi-Fi is a registered trademark of Wi-Fi
Alliance®.
• Windows Media is either a registered
trademark or trademark of Microsoft
Corporation in the United States and/or
other countries.
– This product includes technology
owned by Microsoft Corporation and
cannot be used or distributed without a
license from Microsoft Licensing, Inc.
• Copyright © 2000-2009 Josh Coalson
Copyright © 2011-2013 Xiph.Org
Foundation
Redistribution and use in source and
binary forms, with or without
modification, are permitted provided that
the following conditions are met:
– Redistributions of source code must
retain the above copyright notice, this
list of conditions and the following
disclaimer.
– Redistributions in binary form must
reproduce the above copyright notice,
this list of conditions and the following
disclaimer in the documentation and/or
other materials provided with the
distribution.
– Neither the name of the Xiph.org
Foundation nor the names of its
contributors may be used to endorse or
promote products derived from this
English
- 64 -
Page 65

software without specific prior written
permission.
• THIS SOFTWARE IS PROVIDED BY THE
COPYRIGHT HOLDERS AND
CONTRIBUTORS “AS IS” AND ANY
EXPRESS OR IMPLIED WARRANTIES,
INCLUDING, BUT NOT LIMITED TO, THE
IMPLIED WARRANTIES OF
MERCHANTABILITY AND FITNESS FOR A
PARTICULAR PURPOSE ARE DISCLAIMED.
IN NO EVENT SHALL THE FOUNDATION
OR CONTRIBUTORS BE LIABLE FOR ANY
DIRECT, INDIRECT, INCIDENTAL, SPECIAL,
EXEMPLARY, OR CONSEQUENTIAL
DAMAGES (INCLUDING, BUT NOT LIMITED
TO, PROCUREMENT OF SUBSTITUTE
GOODS OR SERVICES; LOSS OF USE, DATA,
OR PROFITS; OR BUSINESS
INTERRUPTION) HOWEVER CAUSED AND
ON ANY THEORY OF LIABILITY, WHETHER
IN CONTRACT, STRICT LIABILITY, OR TORT
(INCLUDING NEGLIGENCE OR
OTHERWISE) ARISING IN ANY WAY OUT
OF THE USE OF THIS SOFTWARE, EVEN IF
ADVISED OF THE POSSIBILITY OF SUCH
DAMAGE.
• AAC is short for Advanced Audio Coding
and refers to an audio compression
technology standard used with MPEG-2
and MPEG-4. Several applications can be
used to encode AAC files, but file formats
and extensions differ depending on the
application which is used to encode. This
unit plays back AAC files encoded by
iTunes.
• WebLink® is a registered trademark of
Abalta Technologies, Inc.
• WebLink® Cast is a trademark of Abalta
Technologies, Inc.
• Google, Android, YouTube and
AndroidAuto are trademarks of Google
LLC.
• Pioneer accepts no responsibility for data
lost from an iPhone, even if that data is
lost while using this product. Please back
up your iPhone data regularly.
• Do not leave the iPhone in direct sunlight
for extended amounts of time. Extended
exposure to direct sunlight can result in
iPhone malfunction due to the resulting
high temperature.
• Do not leave the iPhone in any location
with high temperatures.
• Firmly secure the iPhone when driving.
Do not let the iPhone fall onto the floor,
where it may become jammed under the
brake or accelerator.
• For details, refer to the iPhone manuals.
• Please note that the use of this accessory
with an Apple product may affect
wireless performance.
• AppleCarPlay, iPhone, iTunes, QuickTime,
and Siri are trademarks of Apple Inc.,
registered in the U.S. and other countries
and regions.
• Works with Siri through the microphone.
• Use of the AppleCarPlay logo means that
a vehicle user interface meets Apple
performance standards. Apple is not
responsible for the operation of this
vehicle or its compliance with safety and
regulatory standards. Please note that the
use of this product with iPhone, iPod, or
iPad may affect wireless performance.
• Compatible iPhone models
English
- 65 -
Page 66

– iPhone 14 Pro Max
– iPhone 14 Pro
– iPhone 14 Plus
– iPhone 14
– iPhone SE (3rd generation)
– iPhone 13 Pro Max
– iPhone 13 Pro
– iPhone 13
– iPhone 13 mini
– iPhone 12 Pro Max
– iPhone 12 Pro
– iPhone 12
– iPhone 12 mini
– iPhone SE (2nd generation)
– iPhone 11 Pro Max
– iPhone 11 Pro
– iPhone 11
– iPhone XS Max
– iPhone XS
– iPhone XR
• Depending on the iPhone models, it may
not be compatible with some AV sources.
For details about iPhone compatibility
with this product, refer to the information
on our website.
• LTE is a trademark of ETSI.
Using app-based
connected content
Important
Requirements to access app-based
connected content services using this
product:
• Latest version of the Pioneer compatible
connected content application(s) for the
smartphone, available from the service
provider, downloaded to your
smartphone.
• A current account with the content
service provider.
• Smar tphone Data Plan.
Note: if the Data Plan for your
smartphone does not provide for
unlimited data usage, additional charges
from your carrier may apply for accessing
app-based connected content via 3G,
EDGE and/or LTE™ (4G) networks.
• Connection to the Internet via 3G, EDGE,
LTE (4G) or Wi-Fi network.
• Optional Pioneer adapter cable
connecting your iPhone to this product.
Limitations:
• Access to app-based connected content
will depend on the availability of cellular
and/or Wi-Fi network coverage for the
purpose of allowing your smartphone to
connect to the Internet.
• Ser vice availability may be
geographically limited to the region.
Consult the connected content service
provider for additional information.
• Abilit y of this product to access
connected content is subject to change
without notice and could be affected by
any of the following: compatibility issues
with future firmware versions of
smartphone; compatibility issues with
future versions of the connected content
application(s) for the smartphone;
changes to or discontinuation of the
connected Content application(s) or
service by its provider.
• Pioneer is not liable for any issues that
may arise from incorrect or flawed appbased content.
• The content and functionality of the
supported applications are the
responsibility of the App providers.
• In WebLink®, AppleCarPlay and
AndroidAuto, functionality through the
product is limited while driving, with
available functions determined by the
App providers.
• Availability of WebLink®, AppleCarPlay
and AndroidAuto functionalities is
determined by the App provider, and not
determined by Pioneer.
English
- 66 -
Page 67

• WebLink®, AppleCarPlay and
AndroidAuto allow access to
applications other than those listed
(subject to limitations while driving), but
the extent to which content can be used
is determined by the App providers.
Notice regarding video
viewing
Remember that use of this system for
commercial or public viewing purposes
may constitute an infringement on the
author’s rights as protected by the
Copyright Law.
Using the LCD screen
correctly
Handling the LCD screen
• When the LCD screen is subjected to
direct sunlight for a long period of time, it
will become very hot, resulting in
possible damage to the LCD screen.
When not using this product, avoid
exposing it to direct sunlight as much as
possible.
• The LCD screen should be used within
the temperature ranges shown in
Specifications on page 69.
• Do not use the LCD screen at
temperatures higher or lower than the
operating temperature range, because
the LCD screen may not operate normally
and could be damaged.
• The LCD screen is exposed in order to
increase its visibility within the vehicle.
Please do not press strongly on it as this
may damage it.
• Do not push the LCD screen with
excessive force as this may scratch it.
• Never touch the LCD screen with
anything besides your finger when
operating the touch panel functions. The
LCD screen can scratch easily.
Liquid crystal display (LCD)
screen
• If the LCD screen is near the vent of an air
conditioner, make sure that air from the
air conditioner is not blowing on it. Heat
from the heater may break the LCD
screen, and cool air from the cooler may
cause moisture to form inside this
product, resulting in possible damage.
• Small black dots or white dots (bright
dots) may appear on the LCD screen.
These are due to the characteristics of the
LCD screen and do not indicate a
malfunction.
• The LCD screen will be difficult to see if it
is exposed to direct sunlight.
• When using a mobile phone, keep the
aerial of the mobile phone away from the
LCD screen to prevent disruption of the
video in the form of disturbances such as
spots or coloured stripes.
Maintaining the LCD screen
• When removing dust from or cleaning
the LCD screen, first turn this product off
and then wipe the screen with a soft dry
cloth.
• When wiping the LCD screen, take care
not to scratch the surface. Do not use
harsh or abrasive chemical cleaners.
LED (light-emitting diode)
backlight
A light emitting diode is used inside the
display to illuminate the LCD screen.
• At low temperatures, using the LED
backlight may increase image lag and
English
- 67 -
Page 68

degrade the image quality because of the
characteristics of the LCD screen. Image
quality will improve with an increase in
temperature.
• The product lifetime of the LED backlight
is more than 10 000 hours. However, it
may decrease if used in high
temperatures.
• If the LED backlight reaches the end of its
product lifetime, the screen will become
dimmer and the image will no longer be
visible. In that case, please consult your
dealer or the nearest authorised Pioneer
Service Station.
English
- 68 -
Page 69

Specifications
General
Rated power source:
14.4 V DC (10.5 V to 16.0 V allowable)
Earthing system:
Negative type
Maximum current consumption:
10.0 A
Dimensions (W × H × D):
Chassis:
188 mm × 108 mm × 37 mm
Nose:
229 mm × 131 mm × 13 mm
Weight:
0.9 kg
Display
Screen size/aspect ratio:
9 inch wide/16:9 (effective display area: 196.608 mm × 114.15 mm)
Pixels:
1 024 (Width) × 600 (Height) × 3 (RGB)
Display method:
TFT Active matrix driving
Colour system:
PAL/NTSC/PAL-M/PAL-N/SECAM compatible
Temperature range:
-10 ˚C to +60 ˚C
Audio
Maximum power output:
50 W × 4
Continuous power output:
22 W × 4 (50 Hz to 15 kHz, 5 % THD, 4 Ω LOAD, Both Channels Driven)
Load impedance:
4 Ω
Preout output level (max): 4.0 V
Equaliser (13-Band Graphic Equaliser):
Frequency:
50 Hz/80 Hz/125 Hz/200 Hz/315 Hz/500 Hz/800 Hz/1.25 kHz/2 kHz/3.15 kHz/5 kHz/8
kHz/12.5 kHz
Gain: ±12 dB (2 dB/step)
<Standard Mode>
HPF: ON/OFF
Frequency:
25 Hz/31.5 Hz/40 Hz/50 Hz/63 Hz/80 Hz/100 Hz/125 Hz/160 Hz/200 Hz/250 Hz
English
- 69 -
Page 70

Slope:
-6 dB/oct, -12 dB/oct, -18 dB/oct, -24 dB/oct
LPF (Subwoofer): ON/OFF
Frequency:
25 Hz/31.5 Hz/40 Hz/50 Hz/63 Hz/80 Hz/100 Hz/125 Hz/160 Hz/200 Hz/250 Hz
Slope:
-6 dB/oct, -12 dB/oct, -18 dB/oct, -24 dB/oct, -30 dB/oct, -36 dB/oct
Phase: Normal/Reverse
Time alignment:
0 to 490 cm (1.4 cm/step)
Speaker level:
+10 dB to -24 dB (1 dB/step)
<Network Mode>
HPF (High):
Frequency:
1.25 kHz/1.6 kHz/2 kHz/2.5 kHz/3.15 kHz/4 kHz/5 kHz/6.3 kHz/8 kHz/10 kHz/12.5 kHz
Slope:
-6 dB/oct, -12 dB/oct, -18 dB/oct, -24 dB/oct
Phase (High): Normal/Reverse
HPF (Mid): ON/OFF
Frequency:
25 Hz/31.5 Hz/40 Hz/50 Hz/63 Hz/80 Hz/100 Hz/125 Hz/160 Hz/200 Hz/250 Hz
Slope:
-6 dB/oct, -12 dB/oct, -18 dB/oct, -24 dB/oct
LPF (Mid): ON/OFF
Frequency:
1.25 kHz/1.6 kHz/2 kHz/2.5 kHz/3.15 kHz/4 kHz/5 kHz/6.3 kHz/8 kHz/10 kHz/12.5 kHz
Slope:
-6 dB/oct, -12 dB/oct, -18 dB/oct, -24 dB/oct
Phase (Mid): Normal/Reverse
LPF (Subwoofer): ON/OFF
Frequency:
25 Hz/31.5 Hz/40 Hz/50 Hz/63 Hz/80 Hz/100 Hz/125 Hz/160 Hz/200 Hz/250 Hz
Slope:
-6 dB/oct, -12 dB/oct, -18 dB/oct, -24 dB/oct, -30 dB/oct, -36 dB/oct
Phase (Subwoofer): Normal/Reverse
Time alignment:
0 to 490 cm (1.4 cm/step)
Speaker level:
+10 dB to -24 dB (1 dB/step)
USB
USB standard spec:
USB 1.1, USB 2.0 full speed, USB 2.0 high speed
Max current supply: 1.5 A
English
- 70 -
Page 71

USB Class:
MSC (Mass Storage Class)
File system: FAT16, FAT32, NTFS
<USB audio>
MP3 decoding format:
MPEG-1 & 2 & 2.5 Audio Layer 3
WMA decoding format:
Ver. 7, 8, 9, 9.1, 9.2 (2 ch audio)
(Windows Media™ Player)
AAC decoding format:
MPEG-4 AAC (iTunes encoded only) (Ver. 12.5 and earlier)
FLAC decoding format (MSC Mode only):
Ver. 1.3.0
Sampling frequency:
8 kHz to 192 kHz
WAV signal format (MSC Mode only):
Linear PCM
Sampling frequency:
16 kHz to 192 kHz
<USB image>
JPEG decoding format (MSC Mode only):
.jpeg, .jpg
Pixel Sampling: 4:2:2, 4:2:0
Decode Size:
MAX: 5 000 (H) × 5 000 (W)
(Maximum file size: 6 MB)
(Minimum file size: 10 kB)
PNG decoding format (MSC Mode only):
.png
Decode Size:
MAX: 576 (H) × 720 (W)
BMP decoding format (MSC Mode only):
.bmp
Decode Size:
MAX: 936 (H) × 1 920 (W)
English
- 71 -
Page 72
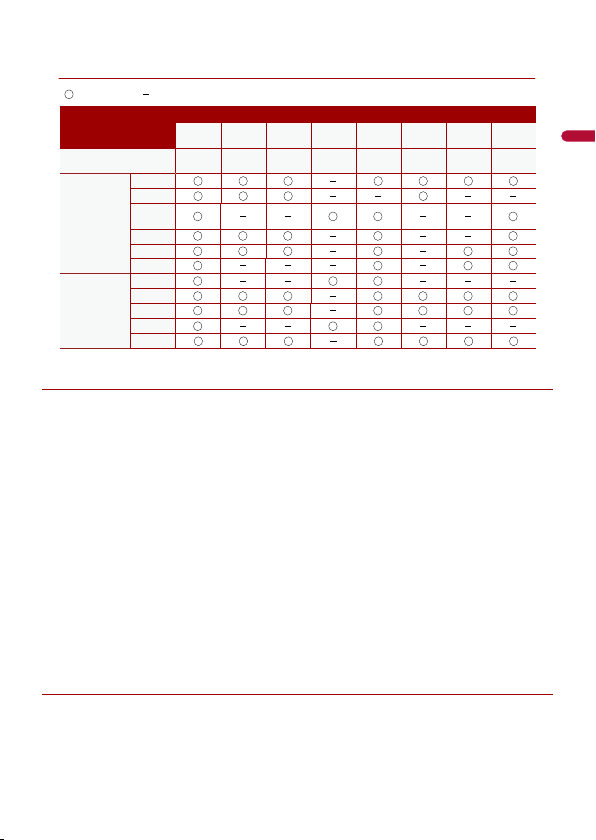
<USB video>
: Supported : Not supported
AVI MP4
QuickTime
(MOV)
WMV MKV FLV
MPEG1-PS
MPEG2-PS
TS Stream
Video codec
Audio codec
H.264
H.263
WMV9
(VC-1)
MPEG-4
MPEG-2
MPEG-1
WMA
MP3
AAC
FLAC
LPCM
Playable video format
(container)
EXTENSION
.avi mp4/.m4v .mov .wmv .v.mkv
.mpg/
.mpeg
.ts/.m2ts/
.mts
Bluetooth
Version:
Bluetooth 5.3 certified
Output power:
+4 dBm Max. (Power class 2)
Bluetooth Low Energy output power:
+4 dBm Max.
Frequency band(s):
2 402.0 MHz to 2 480.0 MHz
Bluetooth profiles:
HFP (Hands Free Profile) 1.8
PBAP (Phone Book Access Profile) 1.2.3
A2DP (Advanced Audio Distribution Profile) 1.4
AVRCP (Audio/Video Remote Control Profile) 1.6.2
AVCTP (Audio/Video Control Transport Protocol) 1.4
AVDTP (Audio/Video Distribution Transport Protocol) 1.3
GAVDP (Generic Audio/Video Distribution Profile) 1.3
IOP (Interoperability Test Specification)
RFCOMM (RFCOMM with TS 07.10) 1.2
FM tuner
Frequency range:
87.5 MHz to 108 MHz
Usable sensitivity:
12 dBf (1.1 μV/75 Ω, mono, S/N: 30 dB)
- 72 -
English
Page 73

Signal-to-noise ratio:
50 dB (IEC-A network)
AM tuner
Frequency range:
530 kHz to 1 640 kHz (10 kHz), 531 kHz to 1 602 kHz (9 kHz)
Usable sensitivity:
28 μV (S/N: 20 dB)
Signal-to-noise ratio:
45 dB (IEC-A network)
Wi-Fi
Version:
IEEE 802.11 a/n/ac (5 GHz)
Frequency channel:
149, 151, 155 ch (5 GHz)
Security:
WPA2 (Personal), WPA3 (Personal)
Output power:
+13.0 dBm Max (5 GHz)
GPS
GNSS receiver
System:
GPS L1C/Ac, SBAS L1C/A, GLONASS L1OF, Galileo E1B/C
SPS (Standard Positioning Service)
Reception system:
64 channel Multi-channel reception system
Reception frequency:
1 575.42 MHz/1 602 MHz
Sensitivity:
-140 dBm (typ)
Frequency:
Approx. once per second
GPS aerial
Aerial:
Micro strip flat aerial/right-handed helical polarisation
Aerial cable:
3.55 m
Dimensions (W × H × D):
47 mm × 16.2 mm × 55 mm
Weight:
104.0 g
NOTE
Specifications and design are subject to possible modifications without notice due to
improvements.
English
- 73 -
Page 74
© 2024 PIONEER CORPORATION
<KMTZ24I>
<OPM_SPHPF97BTEW_EG_A> EW
 Loading...