

Pioneer S-DV131, S-DV232T User Manual
00
DVD/CD Receiver
XV-DV131
XV-DV232T
Speaker System
S-DV131
S-DV232T
English
Deutsch
Français
Italiano
Nederlands
Español
Operating Instructions
1
En
Location: rear of the unit
IMPORTANT
The lightning flash with arrowhead symbol,
within an equilateral triangle, is intended to
alert the user to the presence of uninsulated
"dangerous voltage" within the product's
enclosure that may be of sufficient
magnitude to constitute a risk of electric
shock to persons.
CAUTION
RISK OF ELECTRIC SHOCK
DO NOT OPEN
CAUTION:
TO PREVENT THE RISK OF ELECTRIC
SHOCK, DO NOT REMOVE COVER (OR
BACK). NO USER-SERVICEABLE PARTS
INSIDE. REFER SERVICING TO QUALIFIED
SERVICE PERSONNEL.
The exclamation point within an equilateral
triangle is intended to alert the user to the
presence of important operating and
maintenance (servicing) instructions in the
literature accompanying the appliance.
D3-4-2-1-1_En-A
CAUTION : USE OF CONTROLS OR ADJUSTMENTS OR PERFORMANCE OF PROCEDURES OTHER THAN THOSE
SPECIFIED HEREIN MAY RESULT IN HAZARDOUS RADIATION EXPOSURE.
CAUTION : THE USE OF OPTICAL INSTRUMENTS WITH THIS PRODUCT WILL INCREASE EYE HAZARD.
WARNING
This equipment is not waterproof. To prevent a fire
or shock hazard, do not place any container filed
with liquid near this equipment (such as a vase or
flower pot) or expose it to dripping, splashing, rain
or moisture.
D3-4-2-1-3_A_En
VENTILATION CAUTION
When installing this unit, make sure to leave space
around the unit for ventilation to improve heat
radiation (at least 10 cm at top, 10 cm at rear, and
10 cm at each side).
D6-8-2-1_En
WARNING
WARNING
Before plugging in for the first time, read the following
section carefully.
The voltage of the available power supply differs
according to country or region. Be sure that the
power supply voltage of the area where this unit
will be used meets the required voltage (e.g., 230V
or 120V) written on the rear panel.
D3-4-2-1-4_A_En
WARNING
To prevent a fire hazard, do not place any naked
flame sources (such as a lighted candle) on the
equipment.
D3-4-2-1-7a_A_En
This product is intended for household
purposes. Any failure due to use for other
than household purposes (such as longterm use for business purposes in a
restaurant or use in a car or ship) and
which requires repair will be charged for
even in the warranty period.
KO41_En
Slots and openings in the cabinet are provided for
ventilation to ensure reliable operation of the
product, and to protect it from overheating. To
prevent fire hazard, the openings should never be
blocked or covered with items (such as newspapers,
table-cloths, curtains) or by operating the
equipment on thick carpet or a bed.
D3-4-2-1-7b_A_En
Operating Environment
Operating environment temperature and humidity:
+5 ºC – +35 ºC (+41 ºF – +95 ºF); less than 85 %RH
(cooling vents not blocked)
Do not install this unit in a poorly ventilated area, or in
locations exposed to high humidity or direct sunlight (or
strong artificial light)
DRM (digital rights management) copy protection is
a technology designed to prevent unauthorized
copying by restricting playback, etc. of material on
devices other than the PC (or other WMA recording
equipment) used to record it. For detailed
information, please see the instruction manuals or
help files that came with your PC and/or software.
D3-4-2-1-7c_A_En
CAUTION
This product is a class 1 laser product, but this
product contains a laser diode higher than Class 1.
To ensure continued safety, do not remove any covers
or attempt to gain access to the inside of the product.
Refer all servicing to qualified personnel.
The following caution label appears on your unit.
Location: top of the unit
[Taiwanese model]
CAUTION : CLASS 3B VISIBLE AND INVISIBLE LASER
RADIATION WHEN OPEN, AVOID
EXPOSURE TO THE BEAM.
VRW2159
[All other models]
D3-4-2-1-8_A_En
If the AC plug of this unit does not match the AC
outlet you want to use, the plug must be removed
and appropriate one fitted. Replacement and
mounting of an AC plug on the power supply cord of
this unit should be performed only by qualified
service personnel. If connected to an AC outlet, the
cut-off plug can cause severe electrical shock. Make
sure it is properly disposed of after removal.
The equipment should be disconnected by removing
the mains plug from the wall socket when left
unused for a long period of time (for example, when
on vacation).
D3-4-2-2-1a_A_En
POWER CORD CAUTION
Handle the power cord by the plug. Do not pull out the
plug by tugging the cord and never touch the power
cord when your hands are wet as this could cause a
short circuit or electric shock. Do not place the unit, a
piece of furniture, etc., on the power cord, or pinch the
cord. Never make a knot in the cord or tie it with other
cords. The power cords should be routed such that
they are not likely to be stepped on. A damaged power
cord can cause a fire or give you an electrical shock.
Check the power cord once in a while. When you find it
damaged, ask your nearest PIONEER authorized
service center or your dealer for a replacement.
S002_En
CAUTION
These speaker terminals carry HAZARDOUS LIVE
voltage. To prevent the risk of electric shock when
connecting or disconnecting the speaker cables,
disconnect the power cord before touching any
uninsulated parts.
D3-4-2-2-3_A_En
CAUTION
The STANDBY/ON switch on this unit will not
completely shut off all power from the AC outlet.
Since the power cord serves as the main disconnect
device for the unit, you will need to unplug it from
the AC outlet to shut down all power. Therefore,
make sure the unit has been installed so that the
power cord can be easily unplugged from the AC
outlet in case of an accident. To avoid fire hazard,
the power cord should also be unplugged from the
AC outlet when left unused for a long period of time
(for example, when on vacation).
D3-4-2-2-2a_A_En

Thank you for buying this Pioneer product.
Please read through these operating instructions so that you will know how to operate your model
properly. After you have finished reading the instructions, put them in a safe place for future
reference
.
Contents
01 Getting started
Home theater sound setup
Setting the channel levels
Using the on-screen displays
Playing discs
Basic playback controls
Resume and Last Memory
DVD-Video disc menus
Video CD/Super VCD PBC menus
Listening to the radio
Improving poor FM reception
Memorizing stations
Listening to station presets
Listening to other sources
Setting the sleep timer
Dimming the display
. . . . . . . . . . . . . . . . . . . . . 7
. . . . . . . . . . . 6
. . . . . . . . . . . 6
. . . . . . . . . . 7
. . . . . . . . . . . . . 7
. . . . . . . . . . . 8
. . . . . . . . . . . . . 8
. . . . . 8
. . . . . . . . . . . . . . . . 9
. . . . . . . . . 9
. . . . . . . . . . . . . . . 9
. . . . . . . . . . 9
. . . . . . . . . . . . 9
. . . . . . . . . . . . . 10
. . . . . . . . . . . . . . . 10
02 Listening to your system
About the listening modes
Auto listening mode
Listening in surround sound
Using Front Surround
Listening in stereo
Listening with headphones
Using the SFC modes
Adjusting the bass and treble
Boosting the bass level
. . . . . . . . . . . 11
. . . . . . . . . . . . . . . 11
. . . . . . . . . 11
. . . . . . . . . . . . . . 11
. . . . . . . . . . . . . . . . 12
. . . . . . . . . 12
. . . . . . . . . . . . . . 12
. . . . . . . . . 12
. . . . . . . . . . . . . 12
Using random play
Creating a program list
Other functions available from the
program menu
Searching a disc
Switching subtitles
Switching language/audio channels
Zooming the screen
Switching camera angles
Displaying disc information. . . . . . . . . . . 18
. . . . . . . . . . . . . . . . . 16
. . . . . . . . . . . . . . 16
. . . . . . . . . . . . . . . . . . . 17
. . . . . . . . . . . . . . . . . . 17
. . . . . . . . . . . . . . . . . 17
. . . . 17
. . . . . . . . . . . . . . . . 18
. . . . . . . . . . . . 18
04 Audio Settings and Video Adjust
menus
Audio Settings menu . . . . . . . . . . . . . . . 19
Audio DRC . . . . . . . . . . . . . . . . . . . . . 19
Video Adjust menu. . . . . . . . . . . . . . . . . 19
05 Initial Settings menu
Using the Initial Settings menu . . . . . . . . 20
Video Output settings . . . . . . . . . . . . . . . 20
Language settings . . . . . . . . . . . . . . . . . 20
Display settings . . . . . . . . . . . . . . . . . . . 21
Options settings. . . . . . . . . . . . . . . . . . . 21
Speakers settings. . . . . . . . . . . . . . . . . . 21
Parental Lock . . . . . . . . . . . . . . . . . . . 22
About DivX® VOD content . . . . . . . . . . 22
Speaker Distance. . . . . . . . . . . . . . . . . 23
03 Playing discs
Scanning discs
Playing in slow motion
Frame advance/frame reverse
Playing a JPEG slideshow
Browsing DVD or Video CD/Super VCD
discs with the Disc Navigator
Browsing WMA, MP3, DivX video and
JPEG files with the Disc Navigator
Looping a section of a disc
Using repeat play
4
En
. . . . . . . . . . . . . . . . . . . 13
. . . . . . . . . . . . . 13
. . . . . . . . . . . 13
. . . . . . . . . . . . . . . . . 15
. . . . . . . . 13
. . . . . . . . . 14
. . . . . 14
. . . . . . . . . . . 15
06 Other connections
Connecting auxiliary components . . . . . . 25
Recording mode . . . . . . . . . . . . . . . . . 25
Connecting external antennas. . . . . . . . . 26
Connecting the S-video output. . . . . . . . . 26
Connecting using the component video
output . . . . . . . . . . . . . . . . . . . . . . . . . . 27
About progressive scan video . . . . . . . . 27

07 Controls and displays
Display
. . . . . . . . . . . . . . . . . . . . . . . . . 28
Front panel
Remote control
. . . . . . . . . . . . . . . . . . . . . . 29
. . . . . . . . . . . . . . . . . . . 29
08 Additional information
Disc/content format playback
compatibility
Disc compatibility table
About DivX
DivX video compatibility
About WMA
Using and taking care of discs
DVD Video regions
Handling discs
Storing discs
Discs to avoid
Installation and maintenance
Hints on installation
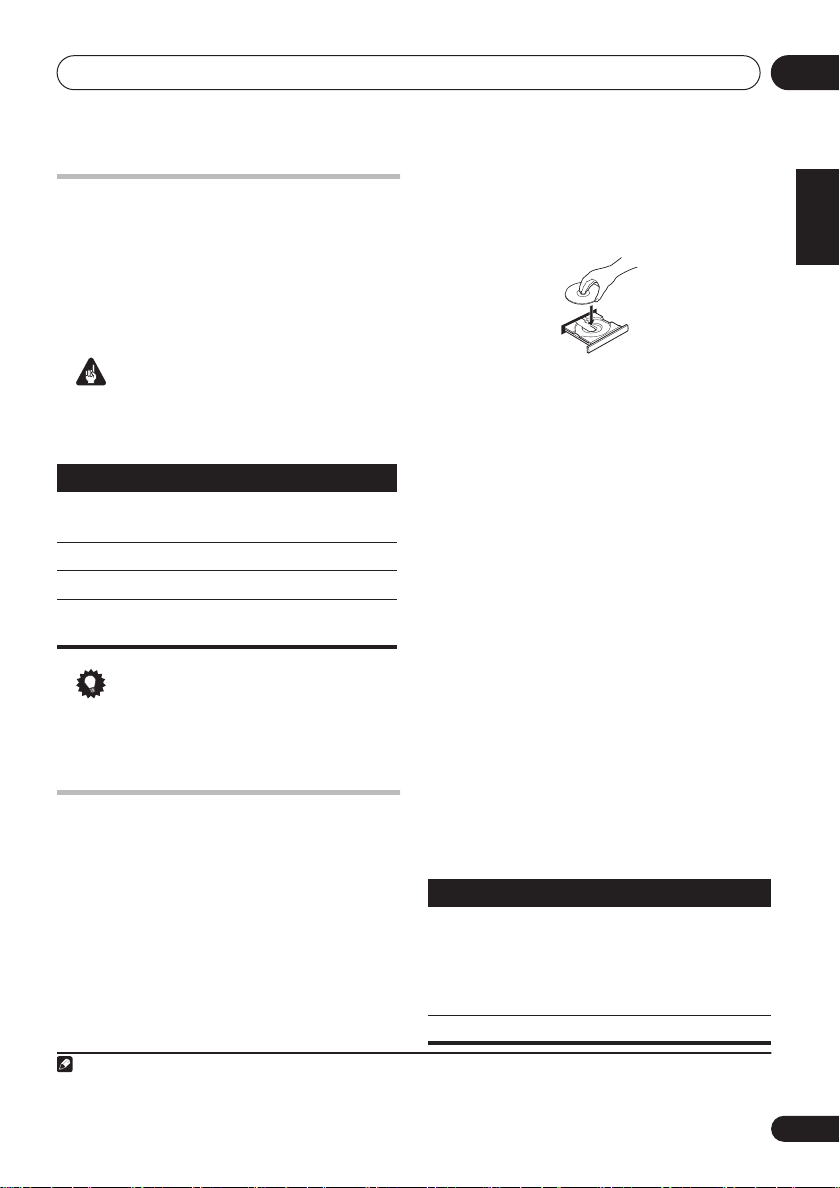
Cleaning the pickup lens
Problems with condensation
Moving the system unit
Screen sizes and disc formats
TV system setting
Frequency step setting
Troubleshooting
General
DVD/CD/Video CD player
Tuner
Error Messages
Resetting the system
Using the language code list
Language code list
Country/Area code list
Specifications
Wall-mounting the front and surround
speaker system
. . . . . . . . . . . . . . . . . . . . . 31
. . . . . . . . . . . . 31
. . . . . . . . . . . . . . . . . . . . . 32
. . . . . . . . . . . . 32
. . . . . . . . . . . . . . . . . . . . 33
. . . . . . . . 33
. . . . . . . . . . . . . . . 33
. . . . . . . . . . . . . . . . . . 33
. . . . . . . . . . . . . . . . . . . 33
. . . . . . . . . . . . . . . . . . . 33
. . . . . . . . . 34
. . . . . . . . . . . . . . 34
. . . . . . . . . . . 34
. . . . . . . . 34
. . . . . . . . . . . . 34
. . . . . . . . 35
. . . . . . . . . . . . . . . . . 35
. . . . . . . . . . . . . . 35
. . . . . . . . . . . . . . . . . . 36
. . . . . . . . . . . . . . . . . . . . . . . 36
. . . . . . . . . . . 37
. . . . . . . . . . . . . . . . . . . . . . . . . 38
. . . . . . . . . . . . . . . . . 38
. . . . . . . . . . . . . . . 39
. . . . . . . . . 39
. . . . . . . . . . . . . . . . 40
. . . . . . . . . . . . . . 40
. . . . . . . . . . . . . . . . . . . . 41
. . . . . . . . . . . . . . . . . . . 43
English
Deutsch
Français
Italiano
Nederlands
Español
En
5
Getting started01
Chapter 1
Getting started
Home theater sound setup
Depending on the size and characteristics of
your room, you can place your speakers in one
of two ways using this system:
•
Standard surround 5-spot setup
a standard multichannel surround sound
speaker setup for optimal 5.1 channel
home theater sound.
Center
Front left
Listening position
Surround
left
•
Front surround 3-spot setup
is ideal when rear surround speaker
placement isn't possible or you want to
avoid running long speaker cables in your
listening area. Use this setup together with
the Front Surround modes to take
advantage of wall and ceiling reflections
for a very realistic surround effect.
Surround
left
Center
Listening position
Front
left
Subwoofer
Subwoofer
Surround
1
Front right
Surround
right
right
– This is
– This setup
Front
right
After placing your speakers, complete
the channel levels
settings
on page 21 to complete your surround
below then refer to
Setting
Speakers
sound setup.
Setting the channel levels
Set the relative channel levels from your main
listening position.
1 Press
SHIFT+TEST TONE
The test tone is output in the following order
(from the speakers active in the current
listening mode):
•
L
– Front left speaker
•
C
– Center speaker
R
– Front right speaker
•
•
SR
– Right surround speaker
SL
– Left surround speaker
•
•
SW
– Subwoofer
2 Use the VOLUME +/– button to adjust
the volume to an appropriate level.
3 Use the
to adjust the speaker levels in turn.
You should hear the test tone at the same
volume from each speaker when seated in the
main listening position. The channel level
range is ± 10 dB.
4 When you’re done, press ENTER to exit
test tone setup.
2
.
3
/
(cursor up/down) buttons
Note
1 See
About the listening modes
2• This is only available when
• The speaker volume can be adjusted while listening to any sound source you want: Press
/
(cursor left/right) buttons to select the channel level setting, then press
/
channel levels;
3 Since the subwoofer produces ultra-low frequencies its sound may seem quieter than it actually is.
(cursor left/right) to move to the next channel. Press
on page 11 for more on using the different listening modes with each speaker setup.
DVD/CD
is selected and playback is stopped. Also make sure headphones are unplugged.
ENTER
ENTER
when you’re finished.
6
En
SHIFT+SYSTEM SETUP
. Use
/
(cursor up/down) to adjust the
, use the
Getting started
01
Using the on-screen displays
For ease of use, this system makes extensive
use of graphical on-screen displays (OSDs).
All the screens are navigated in basically the
same way, using the cursor buttons (
) to change the highlighted item and
ENTER
pressing
Important
• Throughout this manual, ‘Select’ means
use the cursor buttons to highlight an item
on-screen, then press
Button What it does
HOME
MENU
ENTER
RETURN
Tip
• The button guide at the bottom of every
OSD screen shows you which buttons
you’ll need to use for that screen.
to select it.
Displays/exits the on-screen display
Changes the highlighted menu item
Selects the highlighted menu item
Returns to the main menu without
saving changes
1
ENTER
, ,
.
,
Load a disc with the label side facing up, using
the disc tray guide to align the disc (if you’re
loading a double-sided DVD disc, load it with
the side you want to play face down).
3 Press (play) to start playback.
If you’re playing a DVD or Video CD/Super VCD,
a menu may appear. See
menus
and
page 8 to navigate these.
If you’re playing a DivX video or WMA/MP3
disc, it may take a few seconds before playing.
If you loaded a CD/CD-R/RW containing
JPEGs, a slideshow will start. See
JPEG slideshow
• If a disc contains a mixture of DivX video
4 Adjust the volume.
Use the
Video CD/Super VCD PBC menus
on page 13 for more on this.
and other media file types (MP3, for
example), first select whether to play the
DivX video files (
file types (
on-screen display.
MP3 / WMA / JPEG
VOLUME
DVD-Video disc
DivX
) or the other media
control.
on
Playing a
) from the
English
Deutsch
Français
Italiano
Nederlands
Español
Basic playback controls
Playing discs
The basic playback controls for playing DVD,
CD, Video CD/Super VCD, DivX video and MP3/
WMA discs are covered here. Further functions
are detailed in chapter 3.
1 If the player isn’t already on, switch it on.
If you’re playing a disc with video, also turn on
your TV and make sure that it is set to the
correct video input.
2 Press
1 The screen saver will appear after five minutes of inactivity.
2 You may find with some DVD discs that some playback controls don’t work in certain parts of the disc.
Note
OPEN/CLOSE
to load a disc.
The following table shows the basic controls on
the remote for playing discs
other playback features in the chapter 3.
Button
What it does
Starts/resumes normal playback.
•
If the display shows
LAST MEM
resume or last memory point (see
Resume and Last Memory
Pauses/unpauses a disc.
playback starts from the
2
. You can find
RESUME
or
below).
7
En
Getting started01
Button
Numbers
What it does
Stops playback or cancels the resume
function (if the display shows
Press to start fast reverse scanning.
Press to start fast forward scanning.
Skips to the start of the current track or
chapter, then previous tracks/chapters.
Skips to the next track or chapter.
Use to enter a title/chapter/track
number. Press
• If the disc is stopped, playback starts
from the selected title (for DVD) or
track (for CD/Video CD/Super VCD).
• If the disc is playing, playback jumps
to the start of the selected title (VR
mode DVD-RW), chapter (DVD-Video)
or track (CD/Video CD/Super VCD).
ENTER
RESUME
to select.
Resume and Last Memory
When you stop playback of a disc,
shows in the display indicating that you can
resume playback from that point.
With DVDs and Video CD/Super VCDs, even if
ejected, the play position is stored in memory.
The next time you load the disc, the display
shows
LAST MEM
and you can resume playback.
If you want to clear the resume point, press
(stop) while
RESUME
is displayed.
RESUME
DVD-Video disc menus
Many DVD-Video discs contain menus from
which you can select what you want to watch.
Sometimes DVD-Video menus are displayed
automatically when you start playback; others
only appear when you press
).
TOP MENU
Button What it does
SHIFT+TOP
MENU
DVD
MENU
ENTER
RETURN
Numbers
.
Displays the ‘top menu’ of a DVD
disc—this varies with the disc.
Displays a DVD disc menu—this
varies with the disc and may be
the same as the ‘top menu’.
Moves the cursor around the
screen.
Selects the current menu option.
Returns to the previously
displayed menu screen.
Highlights a numbered menu
option (some discs only). Press
ENTER
DVD MENU
to select.
Video CD/Super VCD PBC menus
Some Video CD/Super VCDs have menus from
which you can choose what you want to watch.
These are PBC (Playback control) menus.
1
You can play a PBC Video CD/Super VCD
without having to navigate the PBC menu by
starting playback using a number button to
select a track, rather than the
Button
RETURN
Numbers
What it does
Displays the PBC menu.
Selects numbered menu options.
Press
Displays the previous menu page
(if there is one).
Displays the next menu page (if
there is one).
ENTER
(play) button.
to select.
or
Note
1• The Last Memory function may not work with some discs.
• For DVD-Video discs (except VR mode DVD-RW), the player stores the play position of the last five discs.
8
En
Getting started
01
Listening to the radio
The tuner can receive both FM and AM
broadcasts, and lets you memorize your
favorite stations so you don’t have to manually
tune in every time you want to listen.
1 Press
press repeatedly to select the AM or FM band.
The display shows the band and frequency.
2 Tune to a frequency.
There are three tuning modes—manual, auto,
and high-speed:
•
•
•
Improving poor FM reception
If you’re listening to an FM station in stereo but
the reception is weak, you can improve the
sound quality by switching to mono.
1 Tune to an FM radio station then press
SHIFT+SYSTEM SETUP
2 Use
MODE then press
3 Use
MONO
The mono indicator ( ) lights when the tuner
is in mono reception mode.
Select
stereo mode (the stereo indicator ( ) lights
when receiving a stereo broadcast).
TUNER
to switch to the tuner, then
Manual tuning
repeatedly to change the displayed
frequency.
Auto tuning
until the frequency display starts to move,
then release. The tuner will stop on the next
station it finds. Repeat to keep searching.
High-speed tuning
+/–
until the frequency display starts to
move rapidly. Keep the button held down
until you reach the frequency you want. If
necessary, fine tune the frequency using
the manual tuning method.
/
/
then press
FM AUTO
: Press
TUNE +/–
: Press and hold
: Press and hold
.
(cursor left/right) to choose FM
ENTER
.
(cursor up/down) to select
ENTER
.
above to switch back to auto-
TUNE +/–
TUNE
FM
Memorizing stations
You can save up to 30 station presets so that
you always have easy access to your favorite
stations without having to tune in manually
each time.
1 Tune to an AM or FM radio station.
For the FM band, select mono or auto-stereo
reception as necessary. This setting is saved
along with the preset.
2 Press
3 Use
‘ST.MEM.’ then press
4 Use
station preset you want then press
SHIFT+SYSTEM SETUP
/
(cursor left/right) to choose
ENTER
.
/
(cursor up/down) to select the
.
ENTER
.
Listening to station presets
1 Make sure the
2 Use the
preset.
• You can also use the number buttons to do
this.
TUNER
function is selected.
ST +/–
buttons to select a station
Listening to other sources
You can connect up to two external sources
(TV, satellite receiver, etc.) to this system. See
Connecting auxiliary components
FM/AM
DVD/CD
TUNER LINE
1 Make sure that the external source (TV,
satellite receiver, etc.) is switched on.
LINE
2 Press
3 If necessary, start playback of the source.
to select the source.
on page 25.
English
Deutsch
Français
Italiano
Nederlands
Español
En
9

Getting started01
Setting the sleep timer
The sleep timer switches off the system after a
specified time so you can fall asleep without
worrying about it.
• Press
then press
Choose between the following options:
•
SLP AUTO
after the currently playing CD, Video CD or
DivX disc has finished.
•
SLP ON
•
SLP OFF
After selecting
again to check how much time is left. Each line
indicates approximately 12 minutes
(remaining):
1
SLEEP
repeatedly to select an option
ENTER
.
– Switches off automatically
– Switches off after about an hour
– Cancels the sleep timer
SLP ON
, you can press
2
SLEEP
SLP --- --
Dimming the display
You can choose to dim the display if you find it
too bright.
1 Press
2 Use
to choose the dimmer setting.
This is shown in the front panel display.
3 Use
LIGHT or DARK then press ENTER.
1 The display dims when the sleep timer is set.
2
10
En
SHIFT+SYSTEM SETUP
/
(cursor left/right) then
/
(cursor up/down) to select
Note
Sleep Auto
will not work with WMA/MP3 discs, Video CD/Super VCDs during PBC playback, or CDs in repeat play.
.
ENTER

Listening to your system
02
Chapter 2
Listening to your system
About the listening modes
As explained in
page 6, there are two basic surround speaker
setup options available with any of the listening
modes:
•
Standard surround 5-spot setup
any of the surround listening modes with
this setup (except Front Surround).
•
Front surround 3-spot setup
the Front Surround mode is switched on
before selecting a surround listening mode
(see
Home theater sound setup
Using Front Surround
on
– Use
– Make sure
on page 11).
Auto listening mode
The Auto listening mode is the simplest way to
listen to any source as it was mastered: the
output from the speakers mirrors the channels
in the source material.
DISPLAY
CLEAR SLEEP
SHIFT
SURROUND FRONT
SURROUND
• Press
AUTO listening mode.
SHIFT+SURROUND
1
to select the
Listening in surround sound
You can listen to stereo or multichannel
sources in surround sound.
is generated from stereo sources using one of
the Dolby Pro Logic decoding modes.
SHIFT
CLEAR SLEEP
SURROUND FRONT
2
DISPLAY
SURROUND
Surround sound
• Press
select a listening mode.
The choices that appear in the display will vary
according to the type of source that’s playing.
Using Front Surround
The Front Surround mode is effective when you
are using the Front surround 3-spot speaker
setup as described in
setup
should be placed on top of the front speakers
and oriented towards the walls (see the
Setup Guide
the input source.
SHIFT+SURROUND
•
AUTO
– Auto listening mode (see above)
DOLBY DIGITAL
•
repeatedly to
1
/
DTS
– Dolby Digital or
DTS decoding (depending on the source).
For a multichannel source, this will be the
same as
PROLOGIC
•
AUTO
.
(Dolby Pro Logic) – 4.1 channel
surround sound for use with any twochannel source
•
MOVIE
(Dolby Pro Logic II Movie) – Pro
Logic II 5.1 channel surround sound,
especially suited to movie sources (use
with any two-channel source)
•
MUSIC
(Dolby Pro Logic II Music) – Pro
Logic II 5.1 channel surround sound,
especially suited to music sources, for use
with any two-channel source
•
STEREO
– See
Listening in stereo
Home theater sound
on page 6. The surround speakers
) and
DVD/CD
2
must be selected as
below
Speaker
3
English
Deutsch
Français
Italiano
Nederlands
Español
Note
1 If the source is Dolby Digital or DTS, the front panel 2 D
2• Note that the input source must be switched to
• If you’re planning on recording a multichannel source, refer to
3 When listening in
Dolby Pro Logic II decoding.
DOLBY DIGITAL
/
DTS
mode, two-channel material will automatically be played in surround sound using
DVD/CD
or
DTS
indicator lights.
for multichannel playback.
Recording mode
on page 25.
11
En
Listening to your system02
HOME
DVD
DISPLAY
CLEAR SLEEP
SHIFT
SURROUND FRONT
SURROUND
• Press
SHIFT+FRONT SURROUND
to
switch Front Surround on or off.
When set to
MODE ON
, make sure to follow
the guidelines in the Setup Guide for best
surround sound.
Listening in stereo
You can listen to any source—stereo or
multichannel—in stereo. When playing a
multichannel source, all channels are
downmixed to the front left/right speakers and
the subwoofer.
DISPLAY
CLEAR SLEEP
SHIFT
SURROUND FRONT
SURROUND
• Press
STEREO shows in the display.
Listening with headphones
When headphones are connected, only the
STEREO
SHIFT+SURROUND
mode is available.
repeatedly until
Adjusting the bass and treble
Use the bass and treble controls to adjust the
overall tone.
1 Press
2 Use
BASS or TREBLE then press
3 Use
sound
SOUND MODE
/
(cursor left/right) to select
/
(cursor up/down) to adjust the
.
ENTER
.
then press ENTER to confirm
.
Boosting the bass level
There are two bass modes you can use to
enhance the bass in a source.
1 Press
2 Use
BASSMODE then press
3 Use
sound
Select between
SOUND MODE
/
(cursor left/right) to select
/
(cursor up/down) to adjust the
.
ENTER
.
then press ENTER to confirm
OFF, MUSIC
or
CINEMA
.
.
Using the SFC modes
The SFC (Sound Field Control) modes can be
used with any multichannel or stereo source
for a variety of additional surround sound
effects.
MENU
MENU
SYSTEM
SETUP
SOUND
MODE
1 Press
2 Use
MODE then press
3 Press
SOUND MODE
/
(cursor left/right) to select SFC
ENTER
/
(cursor up/down) then
to select an SFC Sound Mode.
Select between
OFF, ACTION, DRAMA
ROCK, POP, HALL
12
En
TEST TONE
or
ENTER
LIVE
TOP
MENU
RETURN
.
.
.
ENTER
,

Playing discs
03
Chapter 3
Playing discs
Important
• Many of the functions covered in this
chapter apply to DVD discs, Video CDs/
Super VCDs, CDs, DivX video and WMA/
MP3/JPEG discs, although the exact
operation of some varies slightly with the
kind of disc loaded.
• Some DVDs restrict the use of some
functions (random or repeat, for example)
in some or all parts of the disc. This is not a
malfunction.
• When playing Video CD/Super VCDs, some
of the functions are not available during
PBC playback. If you want to use them,
start the disc playing using a number
button to select a track.
Scanning discs
You can fast-scan discs forward or backward at
various different speeds.
• During playback, press or to start
scanning.
Press repeatedly to increase the scanning
speed (shown on-screen).
• To resume playback, press
Playing in slow motion
You can play DVDs, Video CD/Super VCDs and
DivX video at four different forward slow
motion speeds. DVD discs can also be played
in reverse slow motion.
1
(play).
2
1 During playback, press (pause).
2 Press and hold
motion playback starts.
Press repeatedly to change the slow motion
speed (shown on-screen).
• To resume playback, press
/
or
/
(play).
until slow
2
Frame advance/frame reverse
You can advance or back up DVD discs frameby-frame. With Video CD/Super VCDs and DivX
video you can only use frame advance.
1 During playback, press (pause).
2 Press
advance a frame at a time.
/
or
/
to reverse or
• To resume playback, press (play).
2
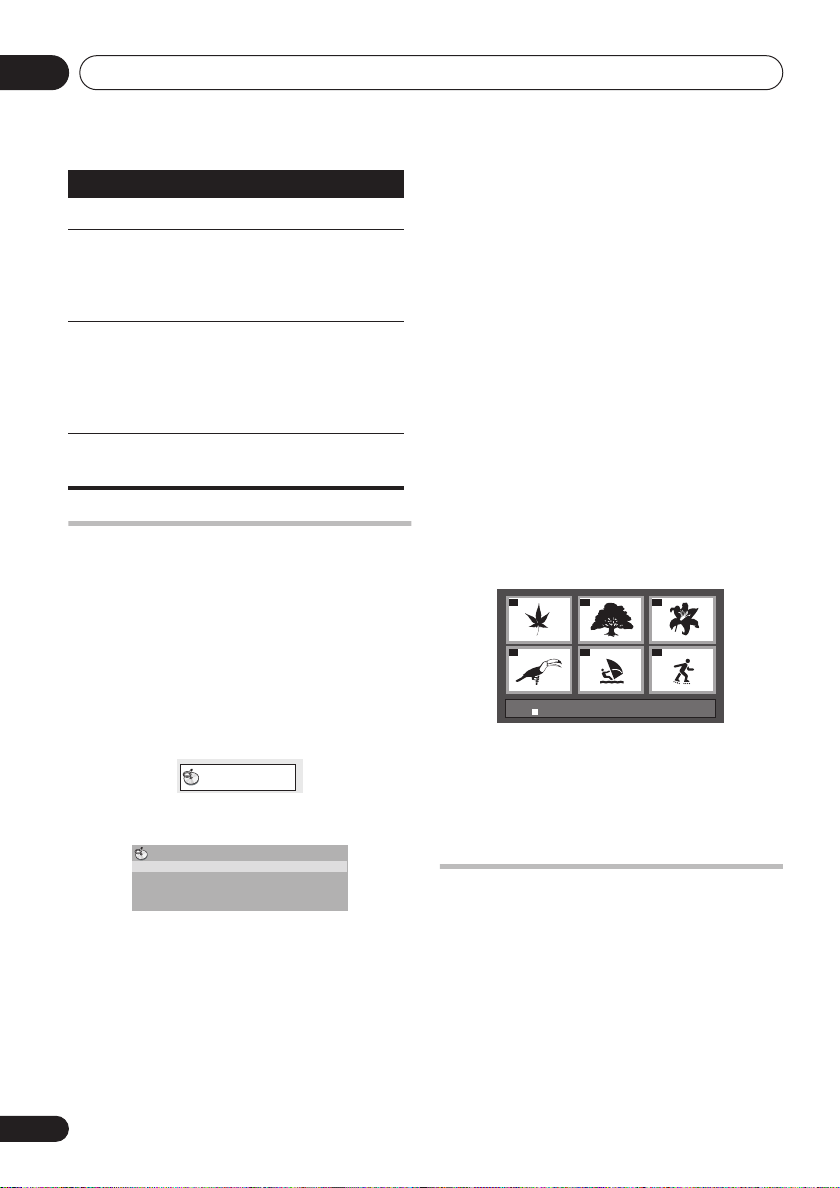
Playing a JPEG slideshow
After loading a CD/CD-R/RW containing JPEG
pictures, press
first folder/picture on the disc.
displays the pictures in each folder in alphabetical order.
Pictures are automatically adjusted so that
they fill as much of the screen as possible.
While the slideshow is running:
Button
to start a slideshow from the
What it does
Pauses the slideshow; press
again to restart.
Displays the previous picture.
3
The player
English
Deutsch
Français
Italiano
Nederlands
Español
Note
1 Only one speed is available for DivX video discs.
2• Depending on the disc, normal playback may automatically resume when a new chapter is reached on a DVD disc.
• With Video CD/Super VCDs in PBC mode or a WMA/MP3 track, playback automatically resumes at the end or beginning of
the track.
3 The time it takes for the player to load a file increases with large file sizes.
13
En
Playing discs03
Button
///
ZOOM
DVD
MENU
What it does
Displays the next picture.
Pauses the slideshow and
rotates/flips the displayed
picture. (Press (play) to restart
slideshow)
Pauses the slideshow and zooms
the picture. Press again to toggle
between 1x, 2x and 4x zoom.
(Press (play) to restart
slideshow)
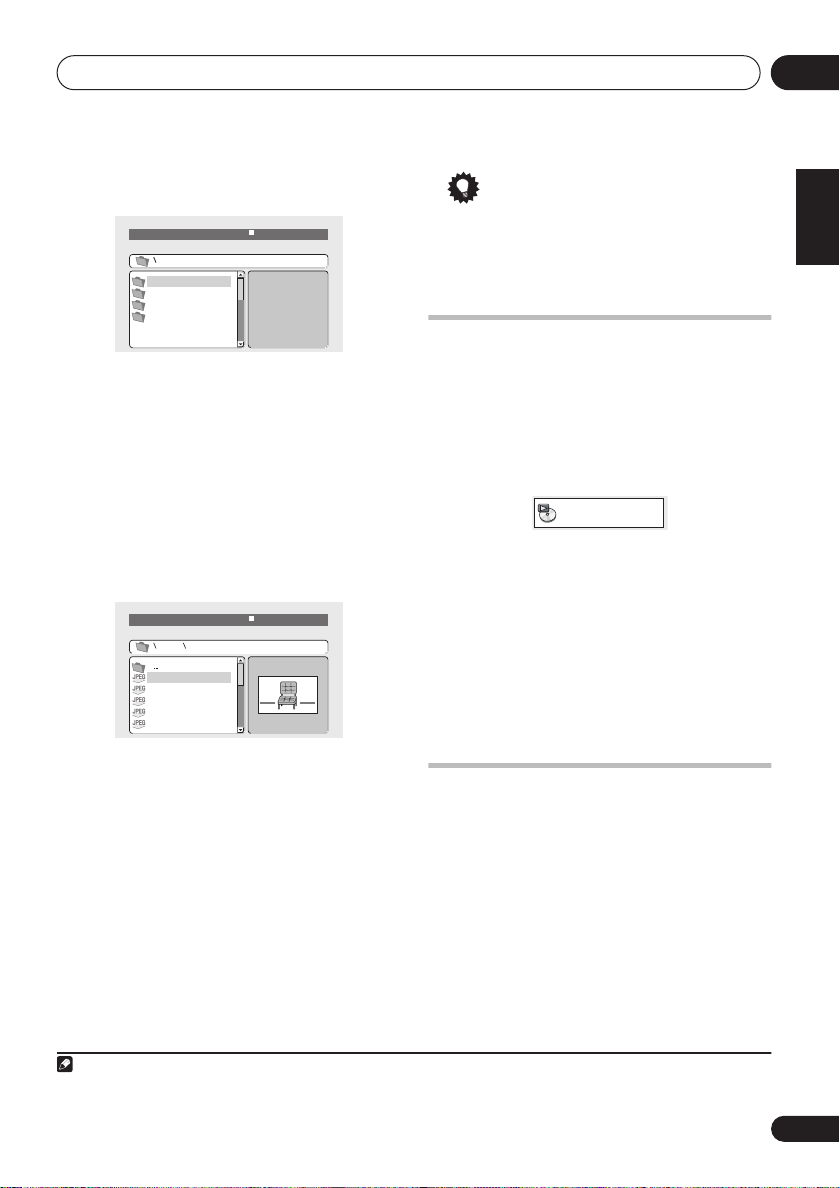
Displays the Disc Navigator
screen (see below).
Browsing DVD or Video CD/
Super VCD discs with the Disc
Navigator
Use the Disc Navigator to browse through the
contents of a DVD or Video CD/Super VCD disc
to find the part you want to play.
1 During playback, press HOME MENU
and select ‘ Disc Navigator ’ from the onscreen menu.
Disc Navigator
2 Select a view option.
Disc Navigator
Title
Chapter
The options available depend on the kind of
disc loaded and whether the disc is playing or
not, but include:
•
Title
– Titles from a DVD-Video disc.
•
Chapter
of a DVD-Video disc.
– Chapters from the current title
•
Track
– Tracks from a Video CD/Super VCD
disc.
•
Time
– Thumbnails from a Video CD/Super
VCD disc at 10 minute intervals.
•
Original: Title
– Original titles from a VR
mode DVD-RW disc.
•
Playlist: Title
– Playlist titles from a VR
mode DVD-RW disc.
•
Original: Time
– Thumbnails from the
Original content at 10 minute intervals.
•
Playlist: Time
– Thumbnails from the
Playlist at 10 minute intervals.
The screen shows up to six moving thumbnail
images displayed one after another. To display
the previous/next six thumbnails, press
.
/
3 Select the thumbnail image for what
you want to play.
01
04
Disc Navigator: Title
01- 49: - -
You can use either the cursor buttons (
/
) and
02
05
ENTER
to select a thumbnail, or the
03
06
//
number buttons.
To select using the number buttons, enter a
two-digit number then press
ENTER
.
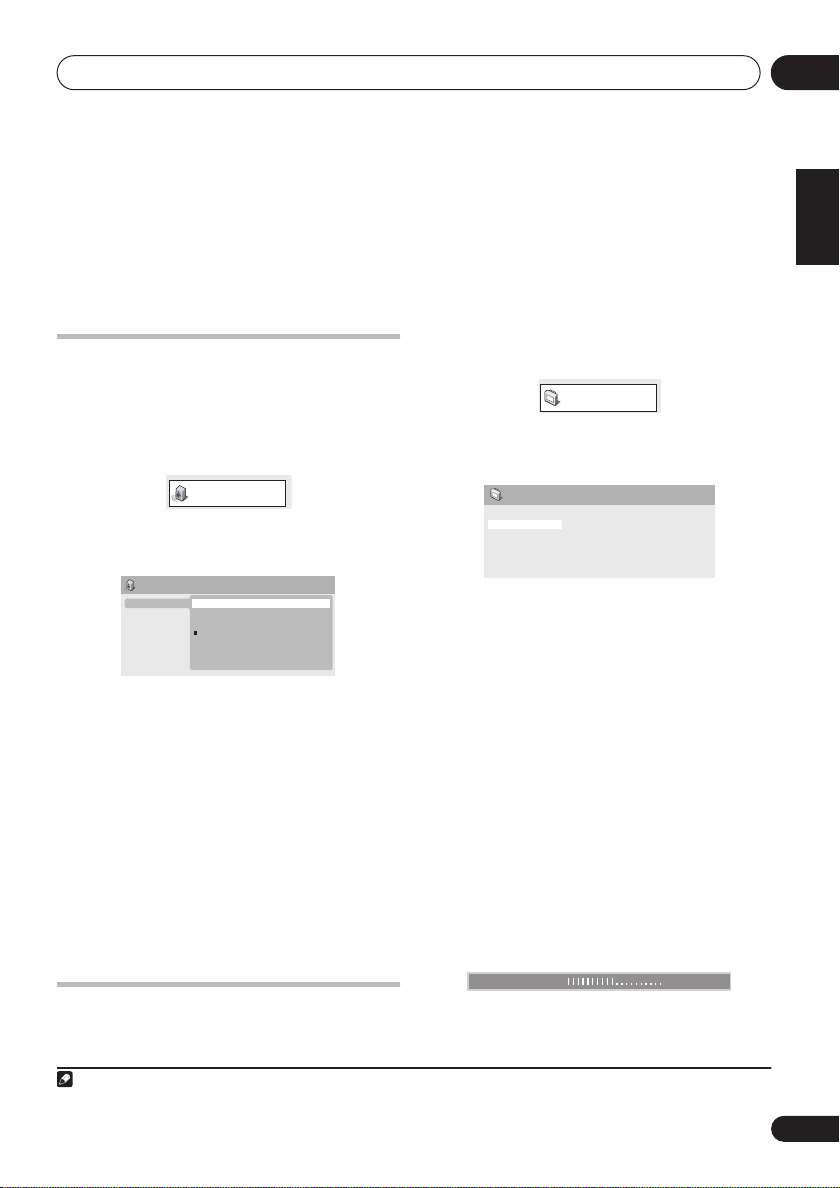
Browsing WMA, MP3, DivX
video and JPEG files with the
Disc Navigator
Use the Disc Navigator to find a particular file
or folder by filename.
14
En
Playing discs
Play Mode
03
1 Press HOME MENU and select ‘ Disc
Navigator ’ from the on-screen menu.
00:00/ 00:00 0kbps
Folder1
Folder2
Folder3
Folder4
• To play the contents of the whole disc
Looping a section of a disc
2 Use the cursor buttons (
///
and ENTER to navigate.
Use the cursor up/down buttons (
/
) to
move up and down the folder/file list.
Use the cursor left button (
parent folder.
Use
ENTER
1
or cursor right () to open a
) to return to the
highlighted folder.
• When a JPEG file is highlighted, a
thumbnail image is displayed on the right.
00:00/ 00:00 0kbps
Folder2
File1
File2
File3
File4
File5
3 To play the highlighted track or DivX
video file or display the highlighted JPEG
file, press ENTER .
• When a WMA/MP3 or DivX video file is
selected, playback begins from that file,
and continues until the end of the folder.
• When a JPEG file is selected, a slideshow
begins, starting with that file, and
continues to the end of the folder.
Note
1 You can also do this by going to the ‘..’ folder at the top, then pressing
2 You can’t use repeat play with WMA/MP3 discs.
The A-B Repeat function allows you to specify
)
two points (A and B) within a track (CD, Video
CD/Super Video CD) or title (DVD) that form a
loop which is played over and over.
1 During playback, press
select ‘
2 Select ‘A-B Repeat’.
3 Press
loop start point.
4 Press
loop end point.
After pressing
the start point and plays the loop.
5 To resume normal playback, select ‘Off’.
Using repeat play
In addition to various repeat play options, it’s
also possible to use repeat play together with
program play (see
page 16).
1 During playback, press
select ‘
2 Select ‘Repeat’ then select a repeat play
option.
If program play is active, select
Repeat
Off
Tip
rather than just the current folder, exit the
Disc Navigator and start playback using
the
(play) button.
Play Mode
ENTER
ENTER
ENTER
Play Mode
2
HOME MENU
’.
on ‘A(Start Point)’ to set the
on ‘B(End Point)’ to set the
, playback jumps back to
Creating a program list
HOME MENU
’.
and
on
and
Program
to repeat the program list, or
Repeat
to cancel.
ENTER
.
English
Deutsch
Français
Italiano
Nederlands
Español
15
En

Playing discs03
• For DVD discs, select
Chapter Repeat
Title Repeat
.
or
• For CDs and Video CD/Super VCDs, select
Disc Repeat
• For DivX video discs, select
(or
Repeat Off
or
Track Repeat
).
.
Repeat Title
Using random play
Use this function to play titles or chapters
(DVD-Video) or tracks (CD and Video CD/Super
VCD) in a random order.
1 During playback, press
select ‘
Play Mode
2 Select ‘Random’ then select an option.
• For DVD discs, select
Random Chapter
• For CDs and Video CD/Super VCDs, select
On
or
Off
to switch random play on or off.
Tip
• Use the following controls during random
play:
Button
What it does
Selects a new track/title/chapter
at random.
Returns to the beginning of the
current track/title/chapter;
further presses select another
random track/title/chapter.
’.
.
1
HOME MENU
Random Title
and
or
Creating a program list
This feature lets you program the play order of
titles/chapters/tracks on a disc.
1 During playback, press
select ‘
Play Mode
’.
2 Select ‘Program’ then select ‘Create/Edit’
from the list of program options.
3 Use the cursor buttons and
select a title, chapter or track for the current
step in the program list.
For a DVD disc, you can add a title or a chapter.
• For a CD or Video CD/Super VCD, select a
track to add to the program list.
After pressing
ENTER
to select the title/
chapter/track, the step number automatically
moves down one.
4 Repeat step 3 to build up a program list.
A program list can contain up to 24 steps.
• You can insert steps by just highlighting
the position where you want the new step
to appear and entering a title/chapter/track
number.
• To delete a step, highlight it and press
CLEAR
.
5 To play the program list, press (play).
Program play remains active until you turn off
program play (see below), erase the program
list (see below), eject the disc or switch off.
2
HOME MENU
ENTER
and
to
• Random play remains in effect until you
select
Random Off
from the random play
menu options.
Note
1• You can set the random play option when a disc is playing or stopped. However, you can't use random play together with
program play.
• You can’t use random play with VR format DVD-RW discs, WMA/MP3 discs, DivX video discs, or while a DVD disc menu is
being displayed.
2• Program lists are saved for the DVD disc loaded. When you load a disc with a saved program list, program play is automatically turned on.
• You can’t use Program play with VR format DVD-RW discs, WMA/MP3 discs, DivX video discs, or while a DVD disc menu is
being displayed.
16
En

Playing discs
03
Tip
• Use the following controls during program
play:
Button
HOME
MENU
What it does
Save the program list and exit
without starting playback.
Skip to the next step in the
program list.
Other functions available from the
program menu
There are a number of other options in the
program menu in addition to Create/Edit.
•
Playback Start
– Starts playback of a
saved program list
•
Playback Stop
– Turns off program play,
but does not erase the program list
•
Program Delete
– Erases the program list
and turns off program play
Searching a disc
You can search DVD discs by title or chapter
number, or by time; CDs and Video CD/Super
VCDs by track number or time; DivX video discs
by time.
1 Press
Mode
2 Select ‘Search Mode’.
The search options that appear depend on the
kind of disc loaded.
3 Select a search mode.
• The disc must be playing in order to use
HOME MENU
’.
time search.
and select ‘
Play
4 Use the number buttons to enter a title,
chapter or track number, or a time.
• For a time search, enter the number of
minutes and seconds into the currently
playing title (DVD/ DivX video) or track (CD/
Video CD/Super VCD) you want playback to
resume from. For example, press
4, 5, 0, 0
to have playback start from 45 minutes into
the disc. For 1 hour, 20 minutes and 30
seconds, press
5 Press
ENTER
8, 0, 3, 0
.
to start playback.
Switching subtitles
Some DVD discs and DivX video discs have
subtitles in one or more languages; the disc
box will usually tell you which subtitle
languages are available. You can switch
subtitle language during playback.
• Press
SHIFT+SUBTITLE
1
repeatedly to
select a subtitle option.
• To set subtitle preferences, see
settings
on page 20.
Displaying DivX subtitle files
• See
Language
on
page 32 for more on DivX subtitles.
Switching language/audio
channels
When playing discs recorded with dialog in two
or more languages, or with dual-mono audio
you can switch these during playback.
• Press
SHIFT+AUDIO
repeatedly to select
an audio language option.
• To set audio language preferences, see
Language settings
on page 20.
2
3
English
Deutsch
Français
Italiano
Nederlands
Español
Note
1 Some discs only allow you to change subtitle language from the disc menu. Press
access.
2 Some Super VCDs have two soundtracks. With these discs you can switch between the two soundtracks as well as individual
channels in each.
3 Some discs only allow you to change audio language from the disc menu. Press
SHIFT+TOP MENU
SHIFT+TOP MENU
or
DVD MENU
or
DVD MENU
to
to access.
17
En

Playing discs03
Zooming the screen
Using the zoom feature you can magnify a part
of the screen by a factor of 2 or 4, while
watching a DVD, DivX video title or Video CD/
Super VCD or playing a JPEG disc.
1 During playback, use the
SHIFT+ZOOM
button to select the zoom factor (Normal, 2x
or 4x).
2 Use the cursor buttons to change the
zoomed area.
You can change the zoom factor and the
zoomed area freely during playback.
1
Switching camera angles
Some DVD discs feature scenes shot from two
or more angles—check the disc box for details.
When a multi-angle scene is playing, a
icon appears on screen (this can be switched
off if you prefer—see
page 21).
• During playback (or when paused), press
SHIFT+ANGLE
Display settings
to switch angle.
on
Displaying disc information
Various track, chapter and title information
can be displayed on-screen during playback.
• To show/switch/hide the information
displayed, press
Limited disc information also appears in the
front panel display. Press
the displayed information.
Note
1• Since DVD, Video CD/Super VCD, DivX video title and JPEG pictures have a fixed resolution, picture quality will deteriorate,
especially at 4x zoom. This is not a malfunction.
• If the navigation square at the top of the screen disappears, press
18
En
DISPLAY
repeatedly.
DISPLAY
to change
SHIFT+ZOOM
again to display it.
Audio Settings and Video Adjust menus
Video Adjust
04
Chapter 4
Audio Settings and Video
Adjust menus
Audio Settings menu
The Audio Settings menu offers features for
adjusting the way discs sound.
1 Press
HOME MENU
and select ‘Audio
Settings’ from the on-screen display.
Audio Settings
2 Select and change settings using the
//
(cursor) buttons, and
Audio Settings
Audio DRC High
Medium
Low
Off
ENTER
/
.
Audio DRC
• Settings:
(default)
When watching Dolby Digital DVDs at low
volume, it’s easy to lose the quieter sounds
completely—including some of the dialog.
Switching Audio DRC (Dynamic Range
Control) to on can help by bringing up the
quieter sounds, while controlling loud peaks.
How much of a difference you hear depends on
the material you’re listening to. If the material
doesn’t have wide variations in volume, you
may not notice much change.
High, Medium, Low, Off
1
Video Adjust menu
From the Video Adjust screen you can adjust
settings that affect picture presentation.
Note
1• Audio DRC is only effective with Dolby Digital audio sources.
1 Press
Adjust’ from the on-screen display.
2 Make settings using the
///
You can adjust the following settings:
Adjust the Brightness, Contrast, Hue and
Chroma Level settings using the
left/right) buttons.
3 Press
screen, or
HOME MENU
and select ‘Video
(cursor) buttons, and
Video Adjust
Sharpness
Brightness
Contrast
Gamma
Hue
Chroma Level
•
Sharpness
edges in the picture (
•
Brightness
brightness (
Contrast
•
light and dark (
•
Gamma
picture (
Hue
– Adjusts the red/green balance
•
(
Green 9
Chroma Level
•
colors appear (
Brightness min max
ENTER
HOME MENU
Standard
0
0
Off
0
0
– Adjusts the sharpness of
Fine, Standard, Soft
– Adjusts the overall
–20
to
+20
– Adjusts the contrast between
–16
to
– Adjusts the ‘warmth’ of the
High, Medium, Low, Off
to
Red 9
)
– Adjusts how saturated
–9
to +9)
to return to the Video Adjust
to exit.
)
+16
ENTER
)
/
English
Deutsch
Français
.
Italiano
Nederlands
)
Español
)
(cursor
0
19
En
Initial Settings menu05
Initial Settings
Chapter 5
Initial Settings menu
1 Press
Using the Initial Settings menu
Settings’.
The Initial Settings menu provides audio and
video output settings, parental lock settings,
and display settings, among others.
If an option is grayed out it means that it
cannot be changed at the current time. This is
usually because a disc is playing. Stop the
disc, then change the setting.
2 Use the cursor buttons and
select the setting and option you want to set.
All the settings and options are explained on
the following pages.
Video Output settings
Setting Option What it means
TV Screen
(See also
and disc formats
page 35.)
Screen sizes
on
Component Out
(See also
using the component
video output
page 27.)
Connecting
on
4:3 (Letter Box)
4:3 (Pan & Scan)
16:9 (Wide)
Interlace
Progressive
Set if you have a conventional 4:3 TV. Widescreen movies are
shown with black bars top and bottom.
Set if you have a conventional 4:3 TV. Widescreen movies are
shown with the sides cropped so that the image fills the screen.
Set if you have a widescreen TV.
Set if your TV is not compatible with progressive scan video.
Set if your TV is compatible with progressive scan video (see
your TV’s instruction manual for details). Press
more to confirm (or
Note that progressive scan video is only output from the
component video jacks.
Language settings
HOME MENU
1
RETURN
to cancel).
and select ‘Initial
ENTER
to
ENTER
once
Setting
Option What it means
Audio Language English
Languages as displayed
Taiwan model –
Other Language
Note
1• In the table, the default setting is shown in
• Some settings, such as
these settings can also be made from the DVD disc menu.
TV Screen, Audio Language
20
En
If there is an English soundtrack on the disc, it is played.
If there is a language selected on the disc, it is played.
Chinese
Select to choose a language other than the ones displayed (see
Using the language code list
bold
: other settings are shown in
and
Subtitle Language
on page 39).
italics
.
may be overridden by the DVD disc. Often

Initial Settings menu
05
Setting
Subtitle Language English
DVD Menu
Language
Subtitle Display On
Option What it means
Languages as displayed
Taiwan model –
Other Language
w/Subtitle Lang.
Languages as displayed
Other Language
Off
Display settings
Setting
OSD Language English
Angle Indicator On
Option What it means
Languages as displayed
Taiwan model –
Off
Chinese
If there are English subtitles on the disc they are displayed.
The subtitle language selected on the disc is displayed.
Select to choose a language other than the ones displayed (see
Using the language code list
DVD disc menus are displayed in the same language as your
selected subtitle language, if possible.
DVD menus are displayed in the selected language, if possible.
Select to choose a language other than the ones displayed (see
Using the language code list
Subtitles are displayed in your selected subtitle language.
Subtitles are always off by default when you play a DVD disc.
On-screen displays of the player are in English.
On-screen displays are shown in the language selected.
A camera icon is displayed on-screen during multi-angle
scenes on a DVD disc.
No multi-angle indication is shown.
on page 39).
on page 39).
English
Deutsch
Français
Italiano
Nederlands
Español
Options settings
Setting
Parental Lock –
DivX VOD Display
Option What it means
Speakers settings
Setting
Speaker Distance –
Option What it means
See
Parental Lock
See
About DivX® VOD content
Specify the distance of your speakers from your listening
position (see
below.
Speaker Distance
below.
on page 23).
21
En
Initial Settings menu05
Parental Lock
• Default level:
Default Country/Area code:
To give you some control over what your
children watch on your DVD player, some DVDVideo discs feature a Parental Lock level. If
your player is set to a lower level than the disc,
the disc won’t play.
Some discs also support the Country/Area
Code feature. The player does not play certain
scenes on these discs, depending on the
Country/Area Code you set.
Off
; Default password:
none
us (2119)
3 Select a new level and press
• Press (cursor left) repeatedly to lock
;
more levels (more discs will require the
password); press
unlock levels. You can’t lock level 1.
Setting/changing the Country/Area code
You can find the
page 40.
1 Select ‘Country Code’.
2 Input your password, then press
3 Select a Country/Area code then press
Registering a new password
Register a password to change the Parental
Lock level or enter a Country/Area code.
1
1 Select ‘Password’.
Initial Settings
Video Output
Language
Display
Options
Speakers
Parental Lock
DivX VOD
Password
Level Change
Country Code
ENTER
.
There are two ways you can do this:
• Select by code letter: Use
down) to change the Country/Area code.
• Select by code number: Press
right) then use the number buttons to enter
the 4-digit Country/Area code.
The new Country/Area code takes effect after
ejecting the disc once.
About DivX® VOD content
2 Use the number buttons to input a 4-digit
ENTER
password then press
.
Changing your password
To change your password, confirm your
existing password then enter a new one.
1 Select ‘Password Change’.
2 Input your existing password, then press
ENTER
.
3 Enter a new password and press
ENTER
Setting/changing the Parental Lock
1 Select ‘Level Change’.
2 Use number buttons to enter your
ENTER
password, then press
Note
1• Not all discs use Parental Lock, and will play without requiring the password first.
• If you forget your password, you’ll need to reset the player to register a new password. (see
2 Resetting the player (as described in
.
Resetting the system
In order to play DivX VOD (video on demand)
content on this player, you first need to register
the player with your DivX VOD content
provider. You do this by generating a DivX VOD
registration code, which you submit to your
provider.
2
Important
• DivX VOD content is protected by a DRM
.
(Digital Rights Management) system. This
restricts playback of content to specific,
registered devices.
• If you load a disc that contains DivX VOD
content not authorized for your player, the
message
Authorization Error
and the content will not play.
on page 39) will not cause you to lose your registration code.
ENTER
(cursor right) to
Country/Area code list
/
(cursor up/
is displayed
Resetting the system
.
on
ENTER
(cursor
on page 39)
.
22
En
Initial Settings menu
05
Displaying your DivX VOD registration
code
1 Press HOME MENU and select ‘Initial
Settings’.
2 Select ‘Options’, then ‘DivX VOD’.
Initial Settings
Video Output
Language
Display
Options
Speakers
Parental Lock
DivX VOD
Display
3 Select ‘Display’.
Your 8-digit registration code is displayed.
Initial Settings
Video Output
Language
Display
Options
Speakers
DivX VOD Registration Code
0 1 2 3 4 5 6 7
Make a note of the code as you will need it
when you register with a DivX VOD provider.
Playing DivX® VOD content
Some DivX VOD content may only be playable
a fixed number of times. When you load a disc
containing this type of DivX VOD content, the
remaining number of plays is shown on-screen
and you then have the option of playing the
disc (thereby using up one of the remaining
plays), or stopping. If you load a disc that
contains expired DivX VOD content (for
example, content that has zero remaining
plays), the message
Rental Expired
is
displayed.
If your DivX VOD content allows an unlimited
number of plays, then you may load the disc
into your player and play the content as often
as you like, and no message will be displayed.
Speaker Distance
• Default setting:
To get the best surround sound from your
system, you should set up the speaker
distances from your listening position.
Initial Settings
Video Output
Language
Display
Options
Speakers
1 Use the
speaker.
• The L and R speakers are paired; you can’t
set them differently.
Initial Settings
Video Output
Language
Display
Options
Speakers
2 Press
speaker distance for the highlighted speaker.
3 Use the
the distance.
• When you change the distance settings of
the front left (
all the other speaker distances change
relative to it.
• Front left/right (
be set from 30 cm to 9 m in 30 cm
increments.
• The center speaker (
–2.1 m to 0 m relative to the front left/right
speakers.
• Surround left/right (
be set from –6.0 m to 0 m relative to the
front left/right speakers.
3.0 m
Speaker Distance
/
(cursor up/down) to select a
3.0m
L
3.0m
C
3.0m
R
3.0m
SR
3.0m
SL
3.0m
SW
(cursor right) to change the
/
(cursor up/down) to change
L
) or front right (R) speakers,
L/R
) speaker distances can
C
) can be set from
SL/SR
) speakers can
1
English
Deutsch
Français
Italiano
Nederlands
Español
Note
1 Make sure to set them the same distance when using Front Surround (page 11).
23
En

Initial Settings menu05
• The subwoofer (SW) can be set from –2.1 m
to 0 m relative to the front left/right
speakers.
4 Press (cursor left) to go back to the
speaker list if you want to modify another
speaker, or press
Distance screen.
ENTER
to exit the Speaker
24
En
Other connections
T
06
Chapter 6
Other connections
Connecting auxiliary
components
This system has both stereo analog inputs and
outputs. Use these to connect external
components, such as your VCR, MD or CD-R
recorder.
1 Connect the LINE (AUDIO IN) jacks to the
analog outputs of an external playback
component.
Connect using RCA pin-plug stereo cables.
2 Connect the LINE (AUDIO OUT) jacks to
the analog inputs of an external recording
component.
These include components such as a cassette
deck, VCR, MD, or another recorder with
analog inputs. Connect using RCA pin-plug
stereo cables.
Tape deck, etc.
AUDIO
OUTPUT
AUDIO
INPUT
Recording mode
The Recording mode allows you to make
surround-compatible analog recordings from
the
LINE
multichannel sources will be downmixed to
stereo for improved playback with systems that
can provide matrix-decoding (like Dolby Pro
Logic).
1 Press
2 Use
MODE then press
3 Use
MODE ON or MODE OFF then press
confirm.
(AUDIO OUT)
/
/
•
MODE ON
downmixed to stereo for recording (the
same downmix is heard through the front
speakers and the subwoofer).
•
MODE OFF
playback through your speaker system
(only the front left and right channels are
output from the line output).
jacks.1 Dolby
SOUND MODE
.
(cursor left/right) to select REC
ENTER
.
(cursor up/down) to select
– Multichannel sources are
– For regular multichannel
ENTER
English
Deutsch
Français
Italiano
to
Nederlands
Español
C
/
B
P
B
CR/
P
R
Y
LINE
FRONT
RL
OUT
IN
L
L
R
R
RL
SURROUND
AUDIO
SPEAKERS
XV-DV131/232T
Note
1• When Recording mode is on, most sound features cannot be used. The display will briefly blink
use a prohibited function while Recording mode is on.
• When Recording mode is off, the audio from the
• The Recording mode switches off if you change the input function (
LINE (AUDIO OUT)
jacks may be interrupted, depending on the operation.
DVD/CD, TUNER
REC MODE
, etc.) or switch the power off.
if you try and
25
En
Other connections06
Connecting external antennas
For an external AM antenna, use 5–6 meters of
vinyl-insulated wire and set up either indoors or
outdoors. Leave the loop antenna connected.
Outdoor antenna
Indoor
antenna
(vinyl-coated
wire)
5–6 m
For an external FM antenna, Use a PAL
connector to hook up an external FM antenna.
ANTENNA
PAL connector
AM
LOOP ANTENNA
Connecting the S-video output
If your TV has an S-video input, you can use this
instead of the standard video output for a
better quality picture.
• Use an S-video cable to connect the
VIDEO OUT
to an S-video input on your TV.
Line up the small triangle above the jack with
the same mark on the plug before plugging in.
S-VIDEO
INPUT
TV
COMPONENT
C
/
B
VIDEO OUT
VIDEO
OUT
S-VIDEO
OUT
VIDEO
XV-DV131/232T
P
B
CR/
P
R
Y
LINE
IN
OUT
L
R
AUDIO
S-
FRONT
R
L
R
R
SURROUND
26
En
 Loading...