

Pioneer PRV-LX1 Application Note # 190107: Setting Final Cut Pro via Firewire (IEEE-1394) for A/V Control

APPLICATION NOTE AN # 190107
PRV-LX1 – Settings for Final Cut Pro via Firewire for A/V Control
OVERVIEW:
Many customers with PRV-LX1 recorders use the built-in menu and edit options. However, there are some
that prefer to edit video with the Final Cut Pro software application from Apple. Although several editing
applications offer the Pioneer PRV-LX1 as an output option, Final Cut Pro must be configured to output video
to the recorder. This document steps you through the configuration process to allow Final Cut Pro to output
material to the PRV-LX1.
Once Final Cut Pro is configured to work with the PRV-LX1, the settings can be saved in the application as a
selectable output option. Configuring the program is detailed below in Technical Details. During this process,
the configuration is stored as an output option. When using Final Cut Pro, select this saved configuration
each time you wish to send material to your PRV-LX1.
Note: It is not necessary to have your PRV-LX1 connected to your computer while configuring the program.
TECHNICAL DETAILS:
To configure Final Cut Pro (FCP) for output to the Pioneer PRV-LX1 (LX1), follow the instructions below.
Create the Device Control:
1) Launch the FCP application.
2) Select File from the top menu.
3) Choose Audio/Video Settings from the options.
4) Click on the Device Control Presets tab.
5) Highlight Firewire NTSC Basic for the listing of Presets.
created: [JB] on 12 August 2005
Prod Mgmt / Tech Supt (800) 872-4159
Pioneer Electronics (USA) Inc
Page 1 of 4
AN # 190107
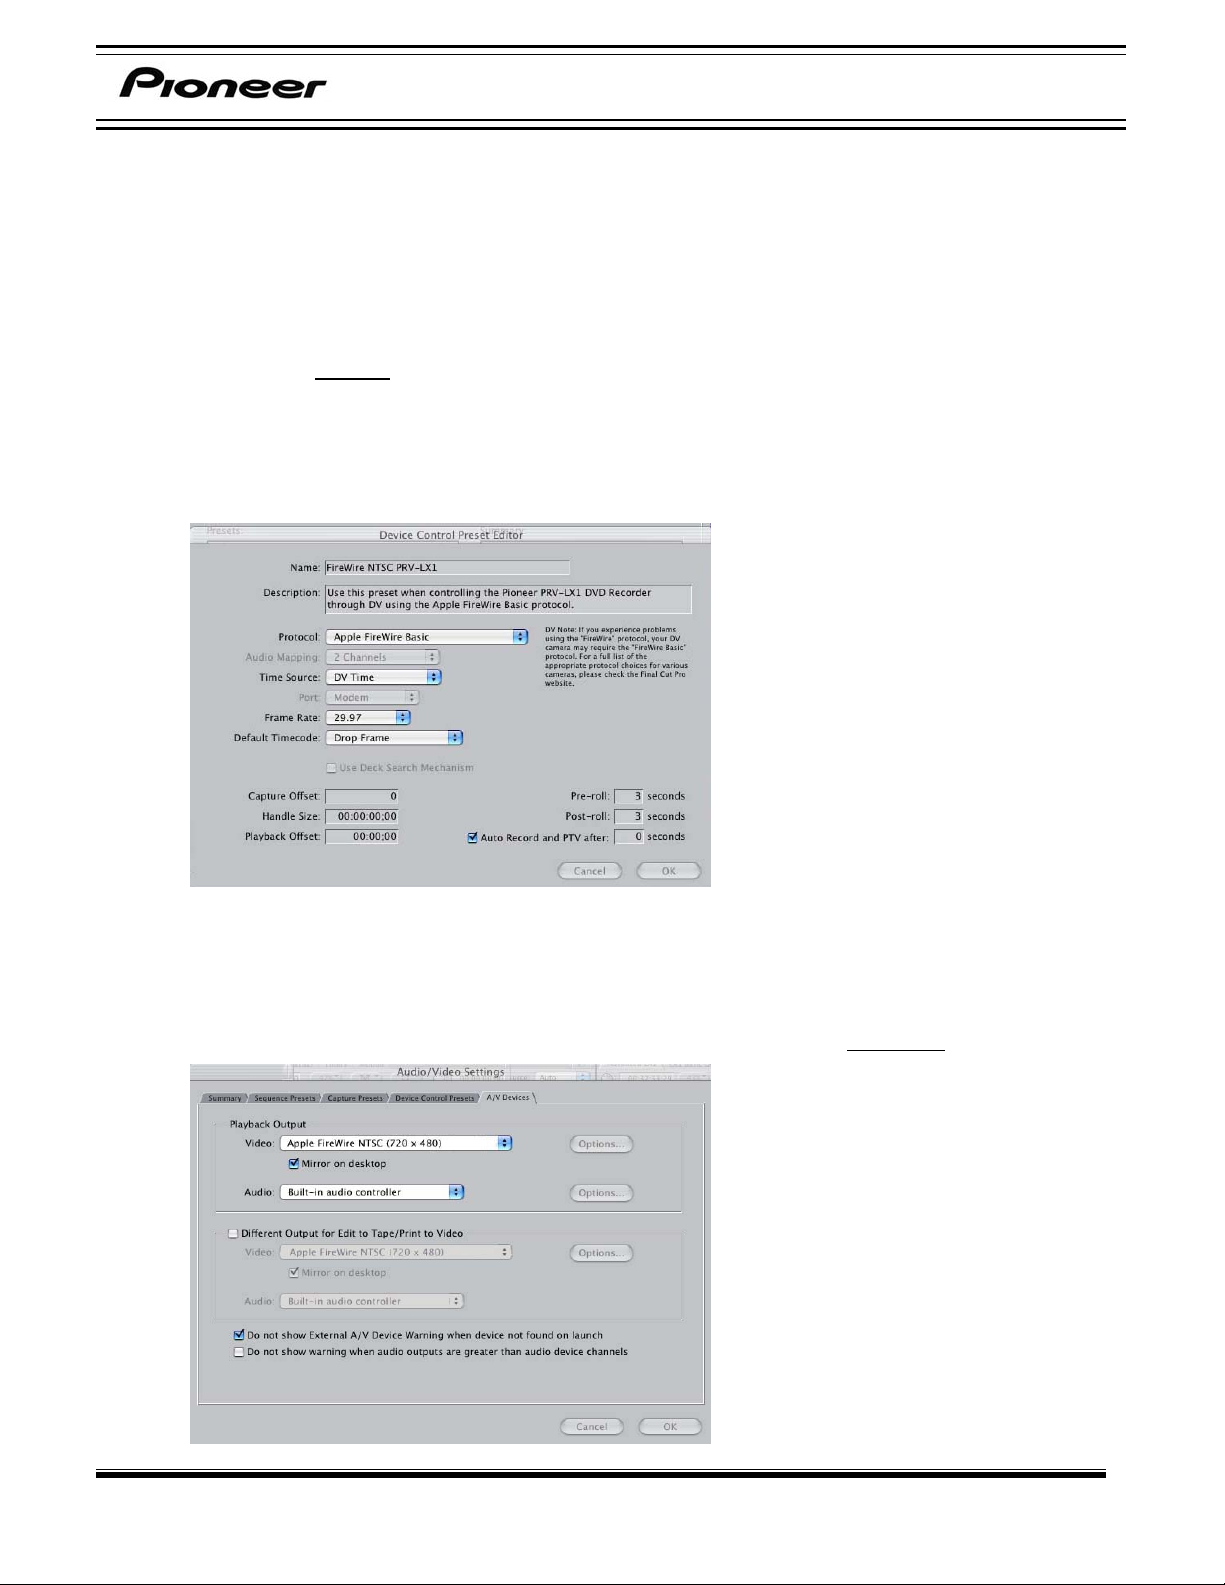
6) Select Duplicate to create a copy of the option.
7) Verify/change to the following settings:
• Protocol: Apple Firewire
• Time Source: DV
• Frame Rate: 29.97
technology standard for 30 frames per second
• Default Timecode: Non-Drop Frame
• Auto Record
checked
mark in the check box
• PTV after set for 0 Seconds
located in the lower right corner of the window
8) Rename this new Preset to a unique title such as Firewire NTSC PRV-LX1.
This name becomes an option within the FCP Configuration Settings selections.
9) Click OK to save the configuration settings.
Set the A /V Device:
10) Select the A / V Devices tab.
11) Verify that the Different Output for Edit to Tape / Print to Video option is
unchecked.
created: [JB] on 12 August 2005
Prod Mgmt / Tech Supt (800) 872-4159
Page 2 of 4
Pioneer Electronics (USA) Inc
 Loading...