

Page 1

Multi-CD/MD control DSP High power CD Cassette
player with RDS tuner
Operation Manual
FH-P6600R
ENGLISH
ESPAÑOLITALIANO
Page 2

1
Contents
Key Finder .................................................... 3
-
Head Unit (Close)
-
Head Unit (Open)
-
Steering Remote Controller
Remote Controller and Care .................... 5
Using the Steering Remote Controller .............. 5
-
Battery
Before Using This Product ...................... 7
About This Product .......................................... 7
About This Manual ............................................ 7
Resetting the Microprocessor ............................ 7
Precaution .......................................................... 8
In Case of Trouble ............................................ 8
Basic Operation ........................................ 9
To Listen to Music ............................................ 9
Setting the Display Angle .............................. 10
Basic Operation of Built-in CD Player .......... 11
-
Open/Eject
-
Switching the Display
-
Track Search and Fast Forward/Reverse
-
Disc Loading Slot
Basic Operation of Cassette Player ................ 13
-
Open/Eject
-
Direction Change
-
Fast Forward/Rewind and Music Search
-
Cassette Loading Slot
Basic Operation of Tuner ................................ 15
-
Manual and Seek Tuning
-
Preset Tuning
-
Band
Basic Operation of Multi-CD Player .............. 16
-
Track Search and Fast Forward/Reverse
-
Disc Search
-
Disc Number Search
(for 6-Disc, 12-Disc types)
Corresponding Display Indications and
Buttons ...................................................... 17
Entering the Function Menu ............................ 17
Function Menu Functions ................................ 18
Entering the Detailed Setting Menu ................ 20
Detailed Setting Menu Functions .................... 21
D.FUNC Button Functions .............................. 21
Tuner Operation ...................................... 22
-
Local Seek Tuning (LOCAL)
-
Best Stations Memory (BSM)
Using the RDS Functions ........................ 23
What is RDS? .................................................. 23
Program Service Name Display ...................... 23
AF Function (AF) ............................................ 24
-
Activating/Deactivating the AF Function
PI Seek Function ............................................ 25
-
PI Seek (PI SEEK)
-
Auto PI Seek (for preset station) (A-PI)
Regional Function (REG) ................................ 25
-
Activating/Deactivating the Regional
Function
Traffic Announcement Standby Function
(TA) .......................................................... 26
-
Activating/Deactivating the TA Function
-
Canceling Traffic Announcements
-
Adjusting the TA Volume
-
TP Alarm Function
PTY Function .................................................. 28
-
Searching the PTY
-
News Program Interruption Setting (NEWS)
-
PTY Alarm
-
Canceling Announcements
-
PTY List
Using the Built-in CD Player .................. 31
-
Repeat Play (REPEAT)
-
Random Play (RANDOM)
-
Scan Play (T.SCAN)
-
Pause (PAUSE)
-
Disc Title Input (TITLE IN)
Using the Cassette Player ...................... 34
-
Repeat Play (REPEAT)
-
Scan Play (SCAN)
-
Blank Skip (B.SKIP)
-
Radio Intercept (R.I)
-
Dolby B NR (NR)
Page 3

Using Multi-CD Players .......................... 36
-
Repeat Play (REPEAT)
-
Random Play (RANDOM)
-
Scan Play (SCAN)
-
Pause (PAUSE)
ITS (Instant Track Selection) .......................... 38
-
ITS Programming (ITS)
-
ITS Play (ITS.PLAY)
-
Erase a Track Program
-
Erase a Disc Program
Disc Title ........................................................ 40
-
Disc Title Input (TITLE IN)
-
Selecting Discs by Disc Title List
(TITLE LIST)
-
Displaying Disc Title
Compression and DBE (COMP) .................... 42
-
COMP/DBE ON/OFF Switching
CD TEXT Function (for CD TEXT
compatible type) ...................................... 42
-
Title Display Switching
-
Title Scroll
When using the 50-Disc Type
Multi-CD Player ...................................... 43
Audio Adjustment .................................... 44
Entering the Audio Menu 1 ............................ 44
Audio Menu 1 Functions ................................ 44
-
Balance Adjustment (FADER)
-
Loudness Adjustment (LOUD)
-
Source Level Adjustment (SLA)
Entering the Audio Menu 2 ............................ 46
-
Selecting the Contrast (CONTRAST)
Using the Digital Signal
Processor (DSP) ................................ 47
Entering the DSP Menu 1 ................................ 47
Graphic Equalizer ............................................ 47
-
About FLAT and CUSTOM
-
Recalling the Equalizer Curves
-
Adjusting the Equalizer Curves
Sound Field Control and Octaver .................... 50
-
Recalling the Sound Field Program (SFC)
Position Selector .............................................. 51
-
About the Position Indicator
-
Setting the Listening Position (POSI)
Entering the DSP Menu 2 ................................ 52
-
Subwoofer Output (SUB.W)
-
Subwoofer Setting Adjustment (80Hz)
-
High Pass Filter (HPF)
Initial Setting ............................................ 55
Entering the Initial Setting Menu .................... 55
Initial Setting Menu Functions ........................ 56
-
Changing the FM Tuning Step (FM STEP)
-
Switching the Auto PI Seek (A-PI)
-
Switching the AUX Mode (AUX)
-
Setting the Dimmer (DIMMER)
-
Setting Preout Output (PREOUT)
-
Selecting the Digital Attenuator (DIG.ATT)
Other Functions ........................................ 58
About the Demonstration Mode ...................... 58
Spectrum Analyzer Mode ................................ 58
Back Light Color Mode .................................. 58
Cellular Telephone Muting ............................ 58
Using the AUX Source .................................... 59
-
Selecting the AUX Source
-
AUX Title Input
CD Player and Care .................................. 60
Precaution ........................................................ 60
Built-in CD Player’s Error Message .............. 60
Cassette Player and Care ...................... 61
Precaution ........................................................ 61
-
About the Cassette Player
-
About Cassette Tapes
Cleaning the Head .......................................... 61
Specifications .......................................... 62
2
ENGLISH ESPAÑOL DEUTSCH FRANÇAIS
ITALIANO NEDERLANDS
Page 4
3
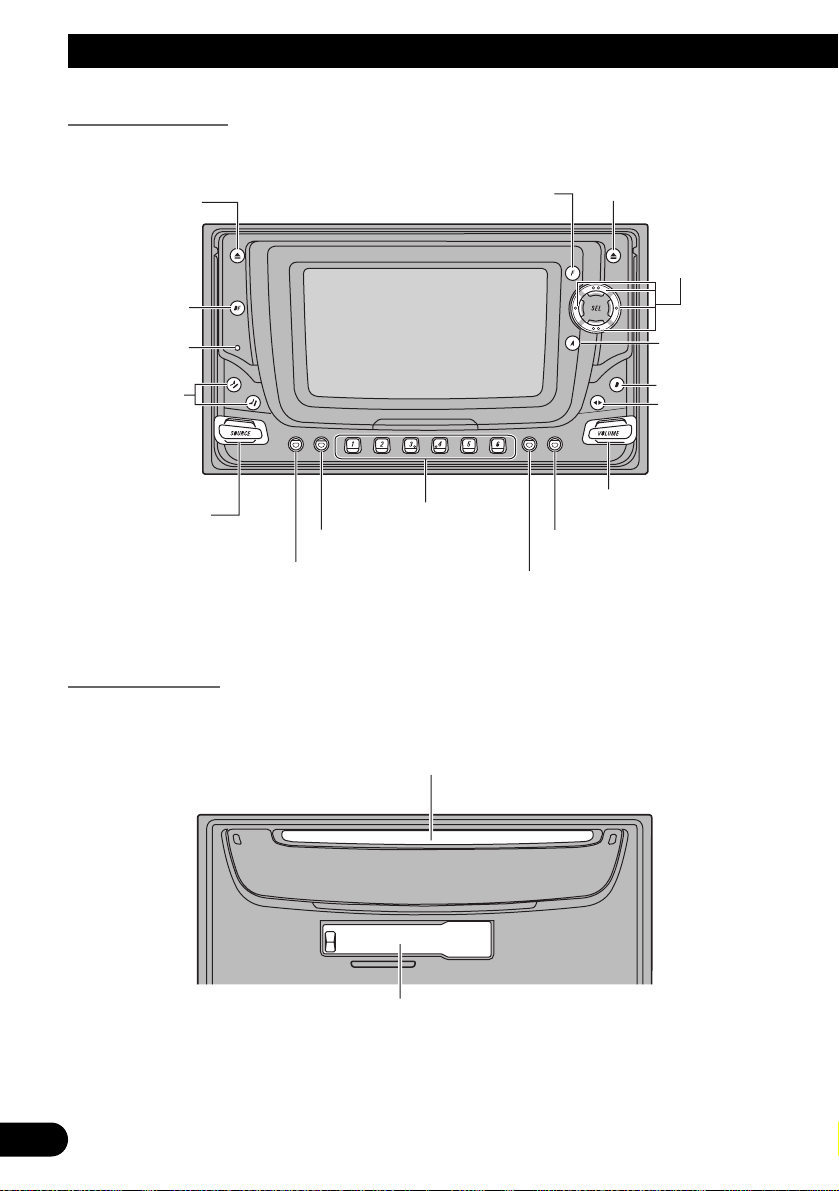
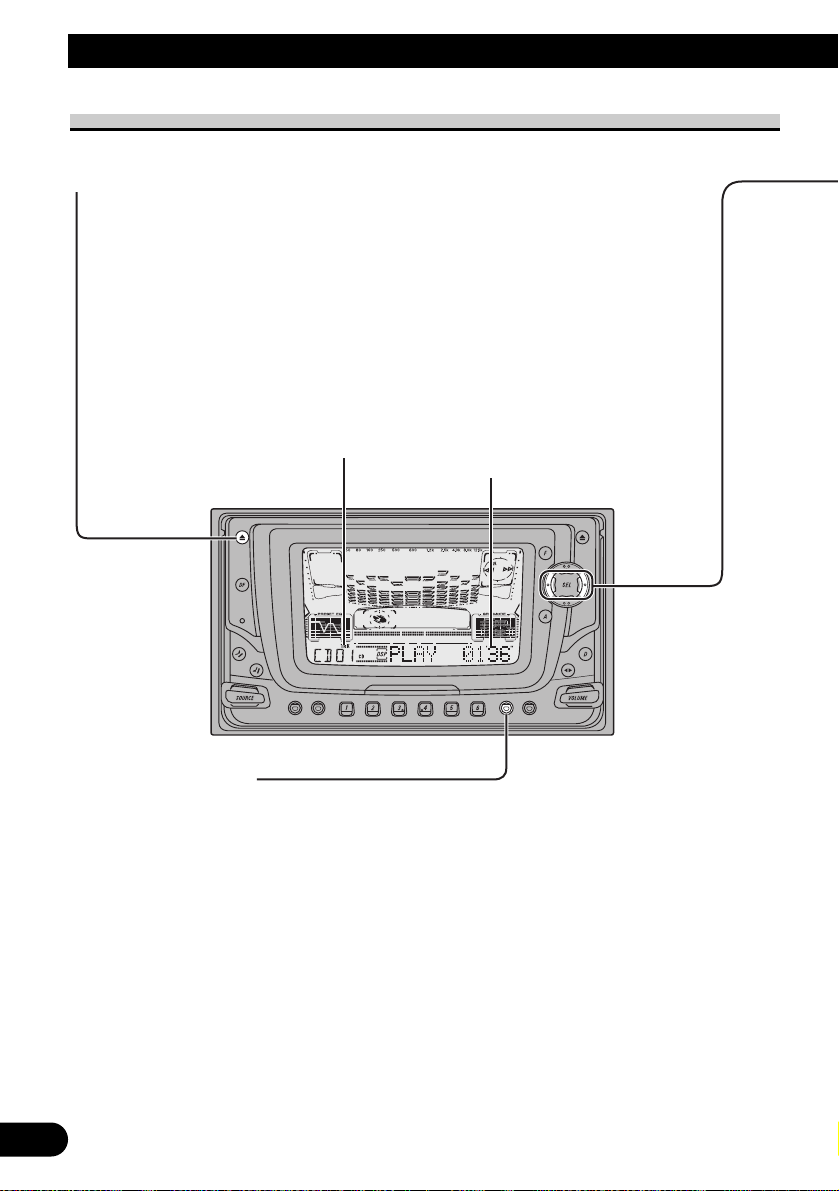
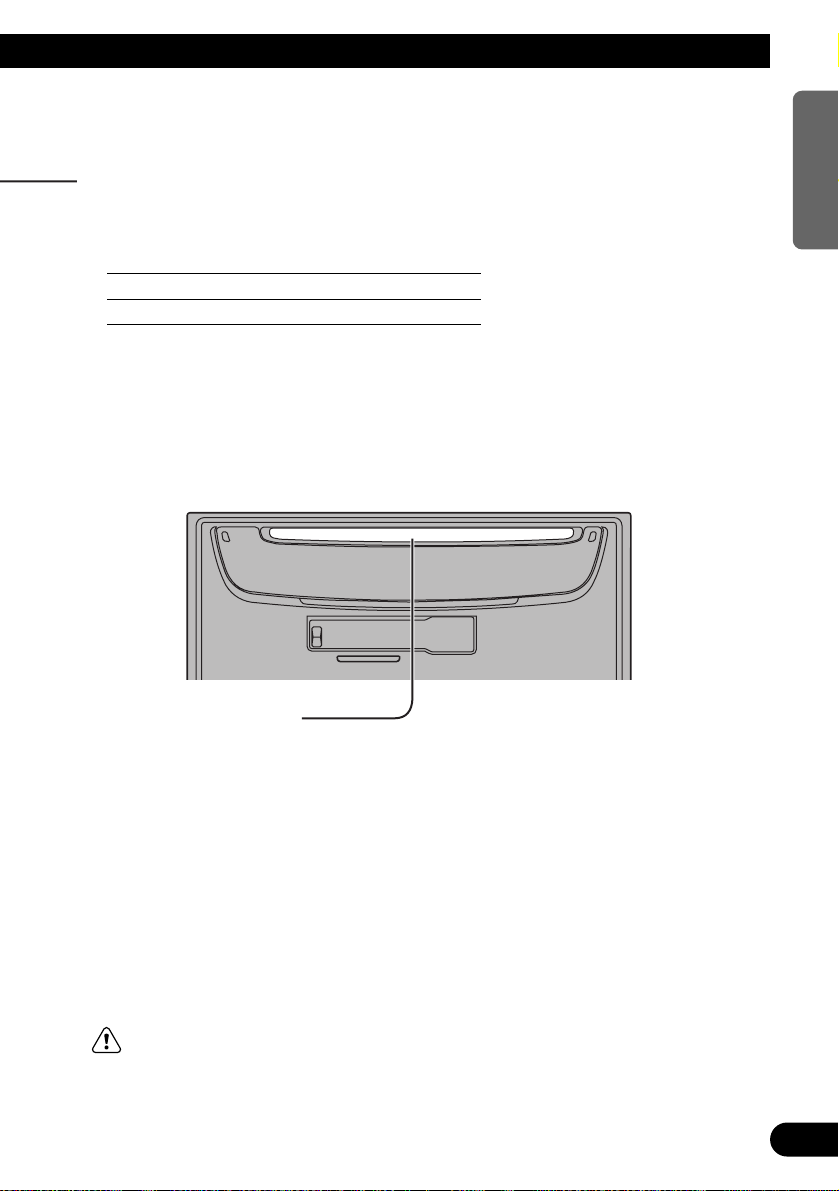
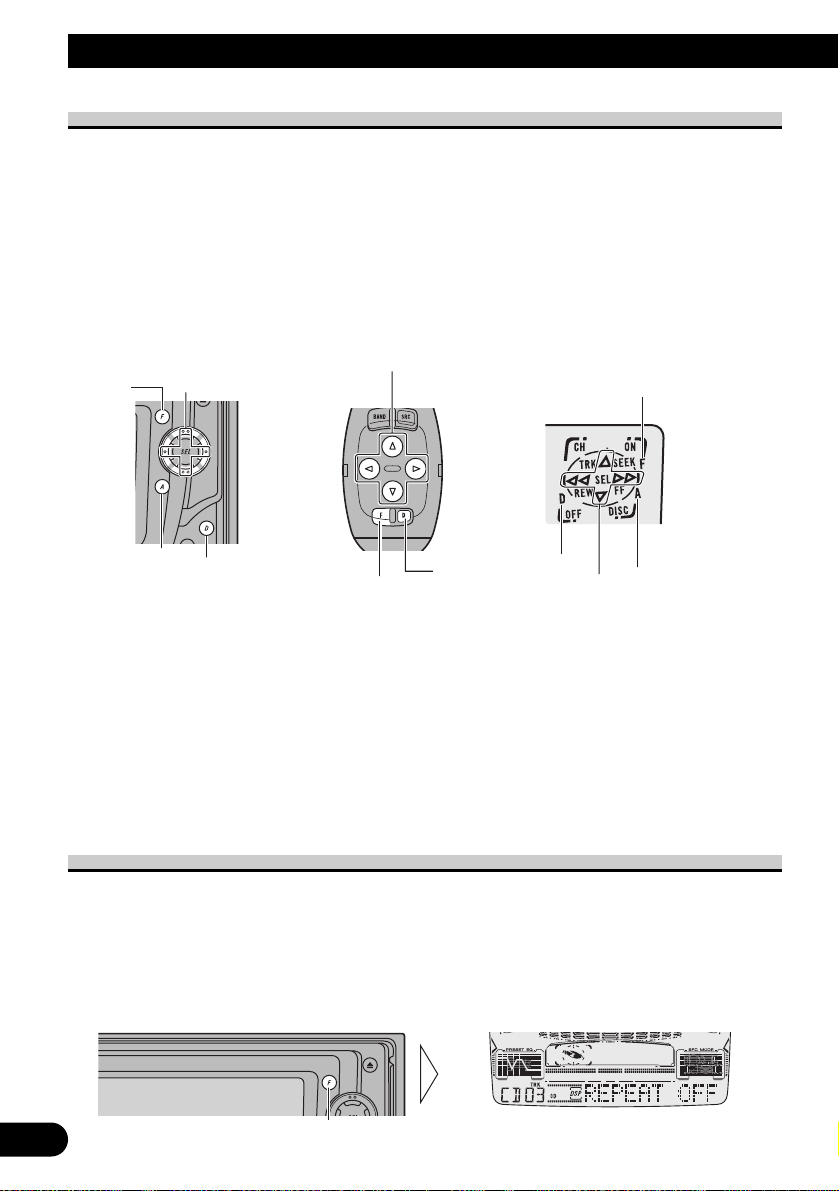
Key Finder
Head Unit (Close)
Head Unit (Open)
Refer to page 10 for details on how to open the front panel.
CD EJECT button
AUDIO button
5/∞/2/3 buttons
FUNCTION button
TAPE EJECT button
ANGLE buttons
RESET button
D.FUNC button
TA button
PTY button
Buttons 1 to 6
DISPLAY button
COLOR button
VOLUME
BAND button
DSP button
SOURCE selector
Disc loading slot
Cassette loading slot
Page 5
4
ENGLISH ESPAÑOL DEUTSCH FRANÇAIS
ITALIANO NEDERLANDS
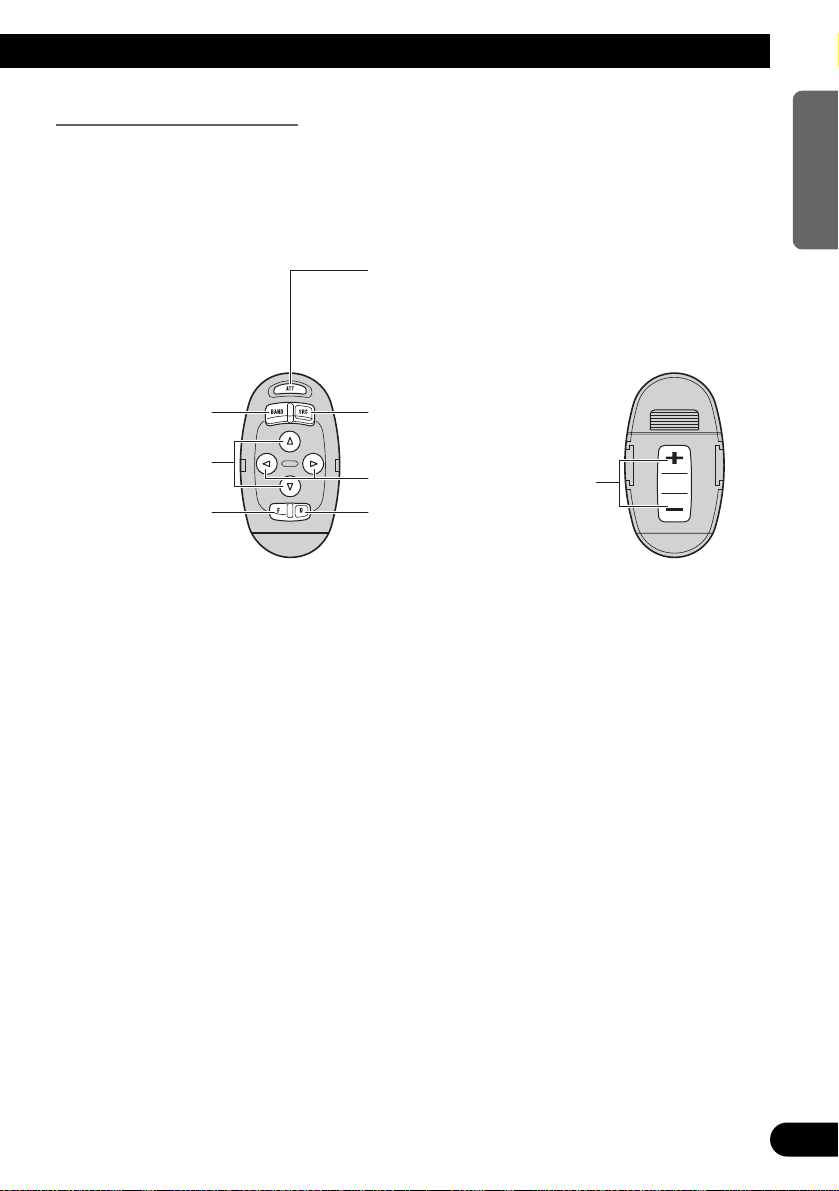
Steering Remote Controller
A steering remote controller that enables remote operation of the head unit is supplied.
Operation is the same as when using buttons on the head unit.
ATT button
This lets you quickly
lower volume level
(by about 90%). Press
once more to return to
the original volume
level.
BAND button
5/∞ buttons
FUNCTION button
SOURCE/OFF button
To turn the sorce OFF,
hold for 1 second.
2/3 buttons
DSP button
+/– button
Raise or
lower the
volume.
Page 6
5
Remote Controller and Care
Using the Steering Remote Controller
Precaution:
• Do not operate this unit while manipulating the steering wheel as it might result in a traffic accident.
• If you have to operate this unit unavoidably when driving, look ahead carefully to avoid the risk of
being involved in a traffic accident.
• If any of the following troubles occur, immediately stop using this unit and consult with the dealer
from whom you purchased it:
– the unit is smoking.
– the unit is emitting abnormal odor.
– a foreign object has entered the unit.
– liquid has been spilled on or into the unit.
If you continue to use this unit without finding a remedy, the unit may be damaged badly, resulting
in a serious accident or fire.
• Do not leave this unit free (unattached) inside the car. When the car stops or turns a curve, the unit
might drop on the floor. If the unit rolls under the brake pedal, it might prevent the driver from
braking well, causing serious trouble. Be sure to fix this unit to the steering wheel.
• Do not disassemble or modify this unit. To do so may cause a fault.
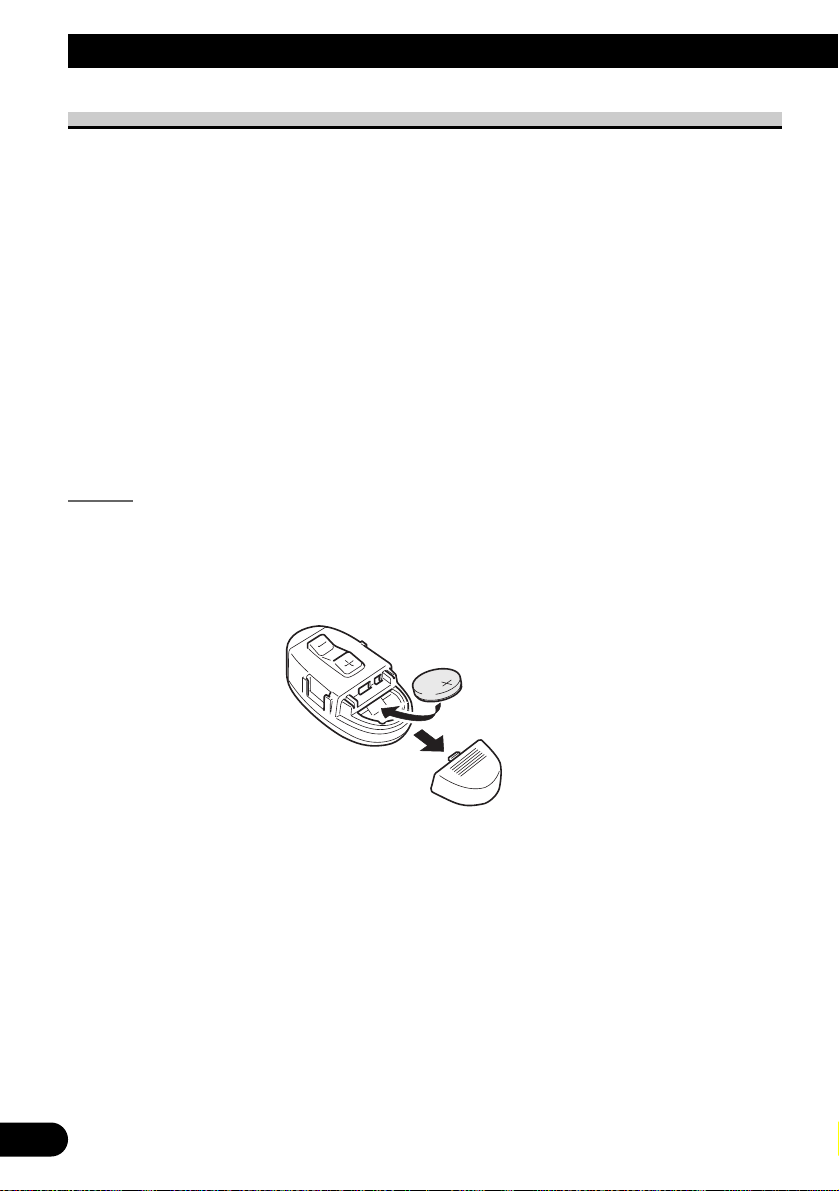
Battery
7 Install the Lithium Battery
• Remove the cover on the back of the steering remote controller and insert
the battery with the (+) and (–) poles pointing in the proper direction.
Page 7
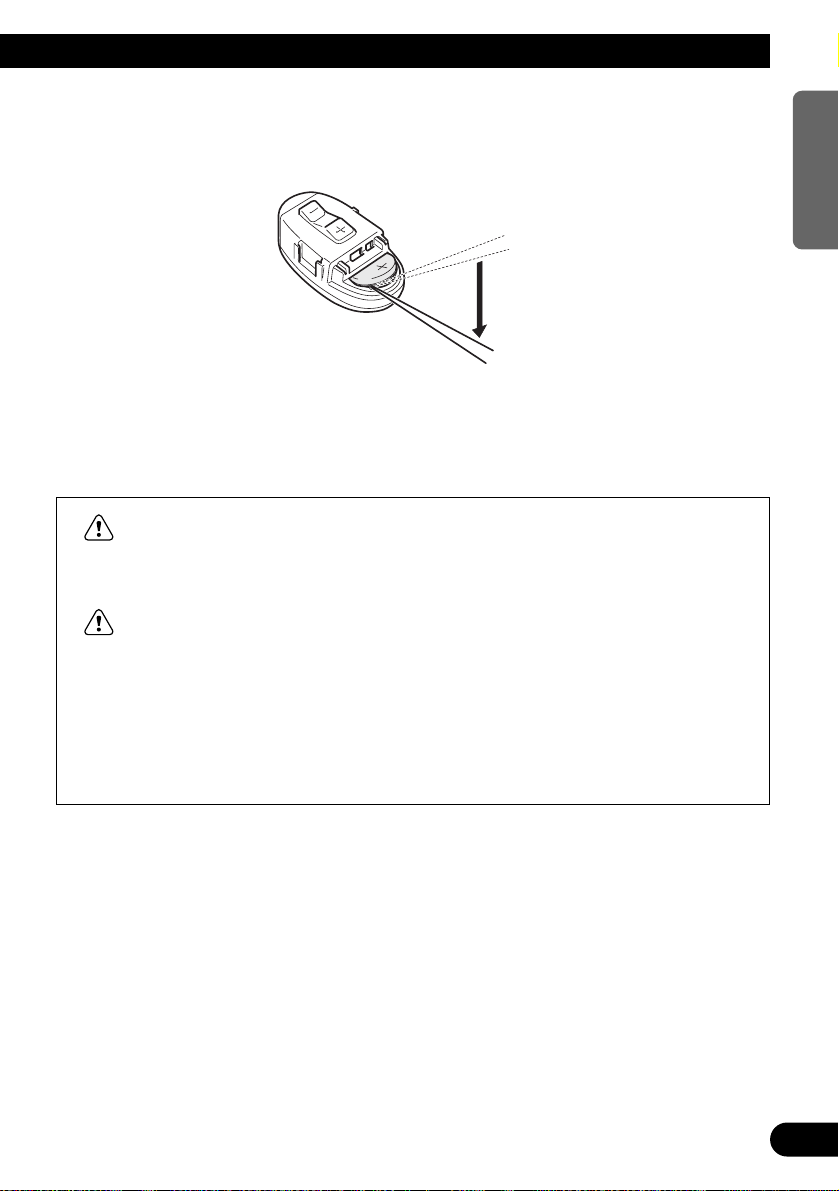
7 Replacing the Lithium Battery
• Remove the lithium battery.
Precaution:
• Replace the battery with a CR2032 lithium battery.
• Replace the battery in the unit using a non metallic tapered instrument.
WARNING:
• Keep the lithium battery out of reach of children. Should the battery be swallowed,
immediately consult a doctor.
CAUTION:
• Do not recharge, disassemble, heat or dispose of battery in a fire.
• Use a CR2032 (3 V) lithium battery only. Never use other types of battery with this unit.
• Do not handle the battery with metallic tools.
• Do not store the lithium battery with metallic materials.
• Dispose of the used lithium battery, in compliance with applicable laws and regulations.
• Always check carefully that you are loading the battery with its (+) and (–) poles facing
in the proper directions.
6
ENGLISH ESPAÑOL DEUTSCH FRANÇAIS
ITALIANO NEDERLANDS
Page 8

7
Before Using This Product
About This Product
The tuner frequencies on this product are allocated for use in Western Europe, Asia, the
Middle East, Africa and Oceania. Use in other areas may result in improper reception. The
RDS function operates only in areas with FM stations broadcasting RDS signals
About This Manual
This product features a number of sophisticated functions ensuring superior reception and
operation. All are designed for the easiest possible use, but many are not self-explanatory.
This operation manual is intended to help you benefit fully from their potential and to
maximize your listening enjoyment.
We recommend that you familiarize yourself with the functions and their operation by
reading through the manual before you begin using this product. It is especially important
that you read and observe the “Precaution” on page 8 and in other sections.
This manual explains head unit operation. You can perform the same operations with the
steering remote controller. The steering remote controller offers the convenience of ATT, a
function not provided on the head unit.
Resetting the Microprocessor
The microprocessor must be reset under the following conditions:
When using this product for the first time after installation.
When the product fails to operate properly.
When strange (incorrect) messages appear on the display.
• To reset the microprocessor, press the RESET button on the head unit with a
pen tip or other pointed instrument.
Note:
• After resetting the microprocessor, the front panel is closed automatically.
• Do not reset the microprocessor while a disc or a cassette is left partially inserted.
• This product complies with the EMC Directives (89/336/EEC, 92/31/EEC) and CE Marking
Directive (93/68/EEC).
Page 9

Precaution
• A “CLASS 1 LASER PRODUCT” label is affixed to the bottom of the player.
• The Pioneer CarStereo-Pass is for use only in Germany.
• Keep this manual handy as a reference for operating procedures and precautions.
• Always keep the volume low enough for outside sounds to be audible.
• Protect the product from moisture.
• If the battery is disconnected, the preset memory will be erased and must be repro-
grammed.
In Case of Trouble
Should this product fail to operate properly, contact your dealer or nearest authorized
Pioneer Service Station.
CLASS 1
LASER PRODUCT
8
ENGLISH ESPAÑOL DEUTSCH FRANÇAIS
ITALIANO NEDERLANDS
Page 10
9
Basic Operation
To Listen to Music
The following explains the initial operations required before you can listen to music.
Note:
• Loading a disc in this product. (Refer to page 12.)
• Loading a cassette tape in this product. (Refer to page 14.)
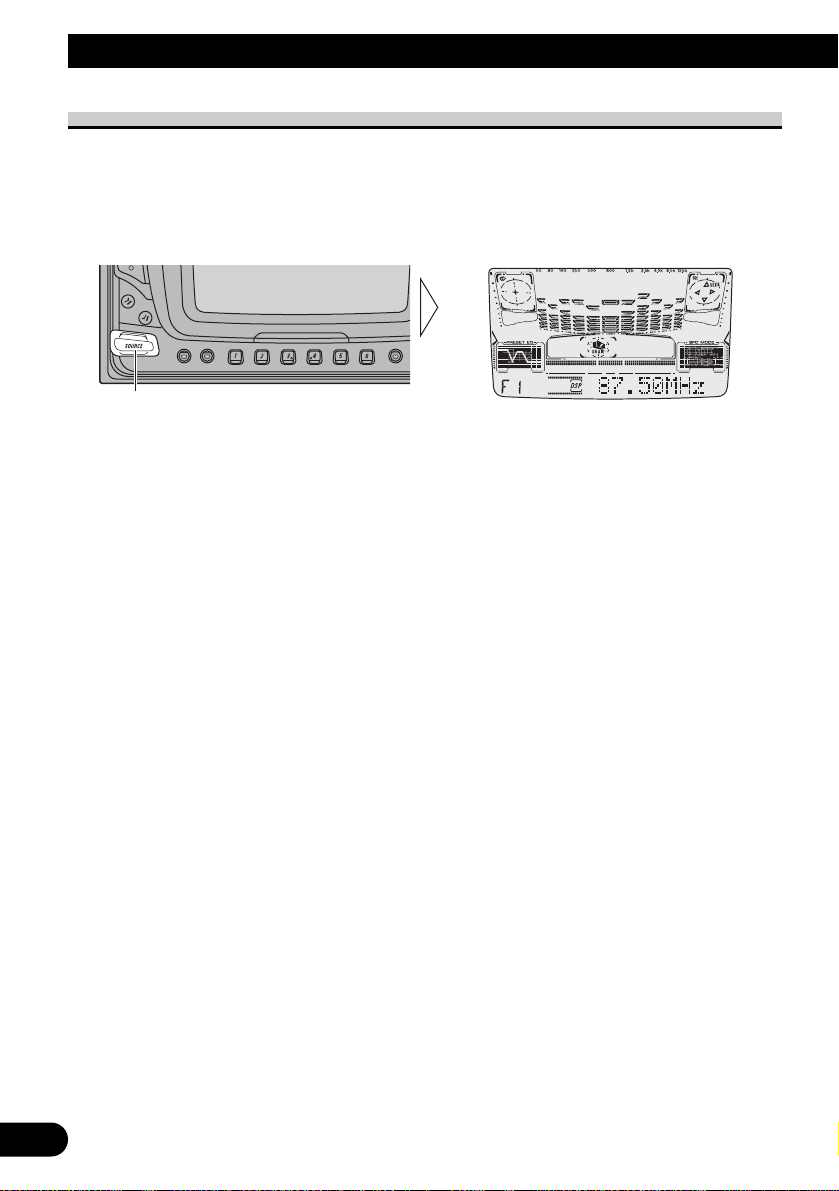
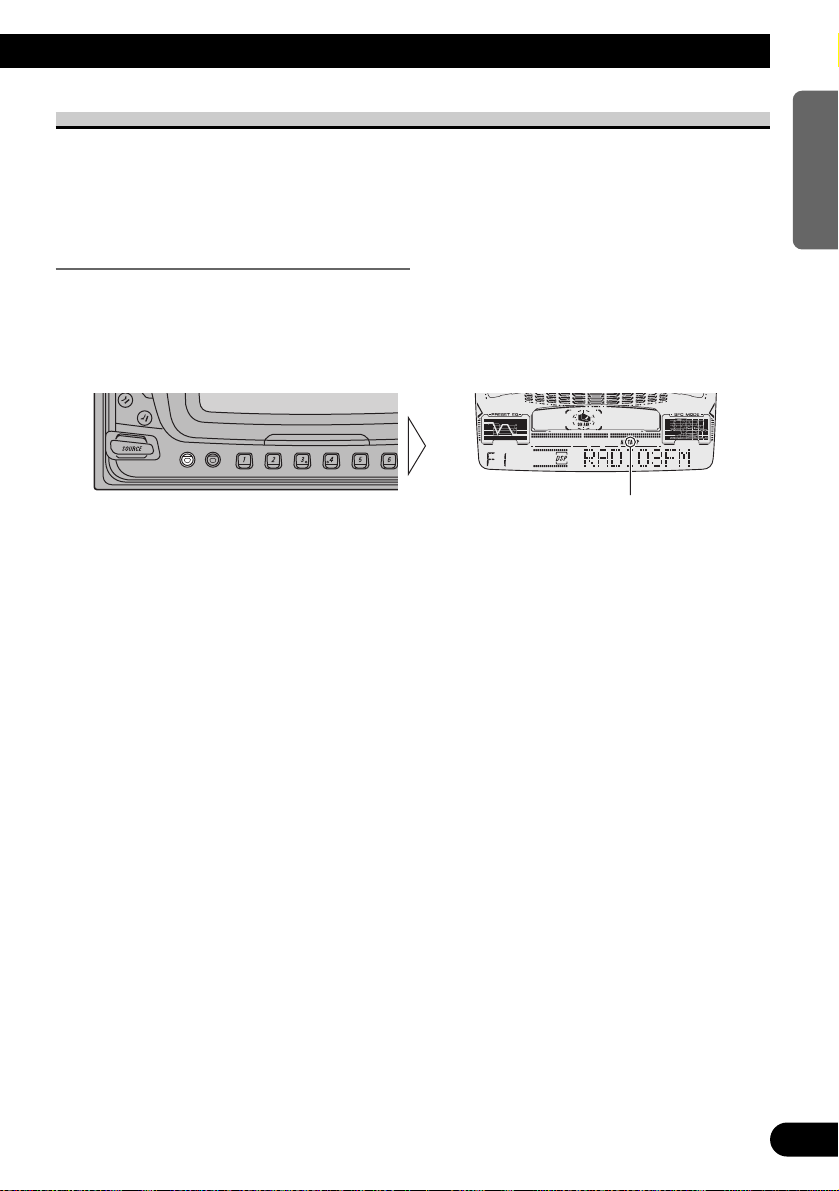
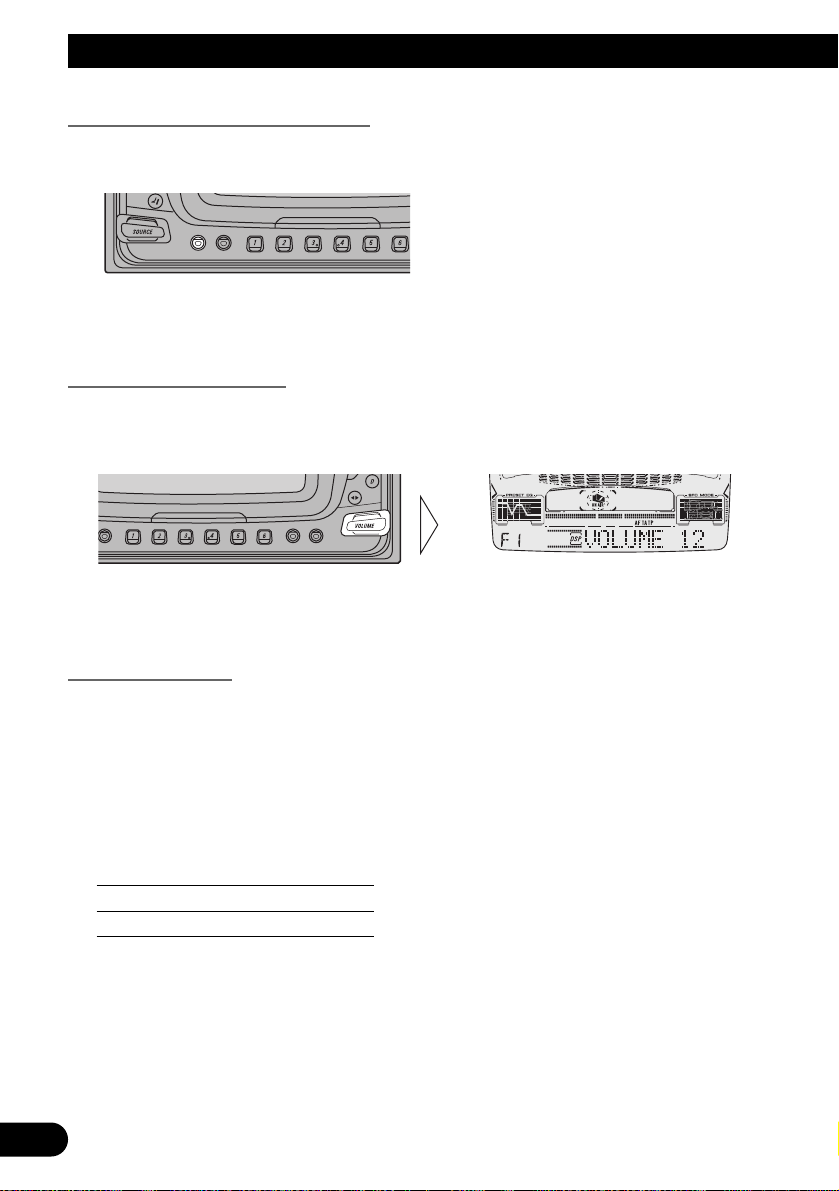
1. Select the desired source (e.g. Tuner).
7 Head Unit
Each press (up or down) of the SOURCE selector selects the desired source in the
following order:
Built-in CD player Ô TV Ô Tuner Ô Cassette player Ô Multi-MD player Ô
Multi-CD player Ô External Unit 1 Ô External Unit 2 Ô AUX Ô Sources OFF
7 Steering Remote Controller
Each press of the SOURCE button selects the desired source in the following order:
Built-in CD player = TV = Tuner = Cassette player = Multi-MD player =
Multi-CD player = External Unit 1 = External Unit 2 = AUX
Note:
• External Unit refers to a Pioneer product (such as one available in the future) that, although
incompatible as a source, enables control of basic functions by this product. Two External Units
can be controlled by this product, although “External” is displayed whether you select External
Unit 1 or External Unit 2. When two External Units are connected, the allocation of them to
External Unit 1 or External Unit 2 is automatically set by this product.
• In the following cases, the sound source will not change:
* When a product corresponding to each source is not connected to this product.
* No disc is set in this product.
* No tape is set in this product.
* No magazine is set in the Multi-CD player.
* No disc is set in the Multi-MD player.
* AUX (external input) is set to OFF. (Refer to page 56.)
• When this product’s blue/white lead is connected to the car’s Auto-antenna relay control terminal,
the car’s Auto-antenna extends when this product’s source is switched ON. To retract the antenna,
switch the source OFF.
Each press (up or down) changes the Source ...
Page 11
10
ENGLISH ESPAÑOL DEUTSCH FRANÇAIS
ITALIANO NEDERLANDS
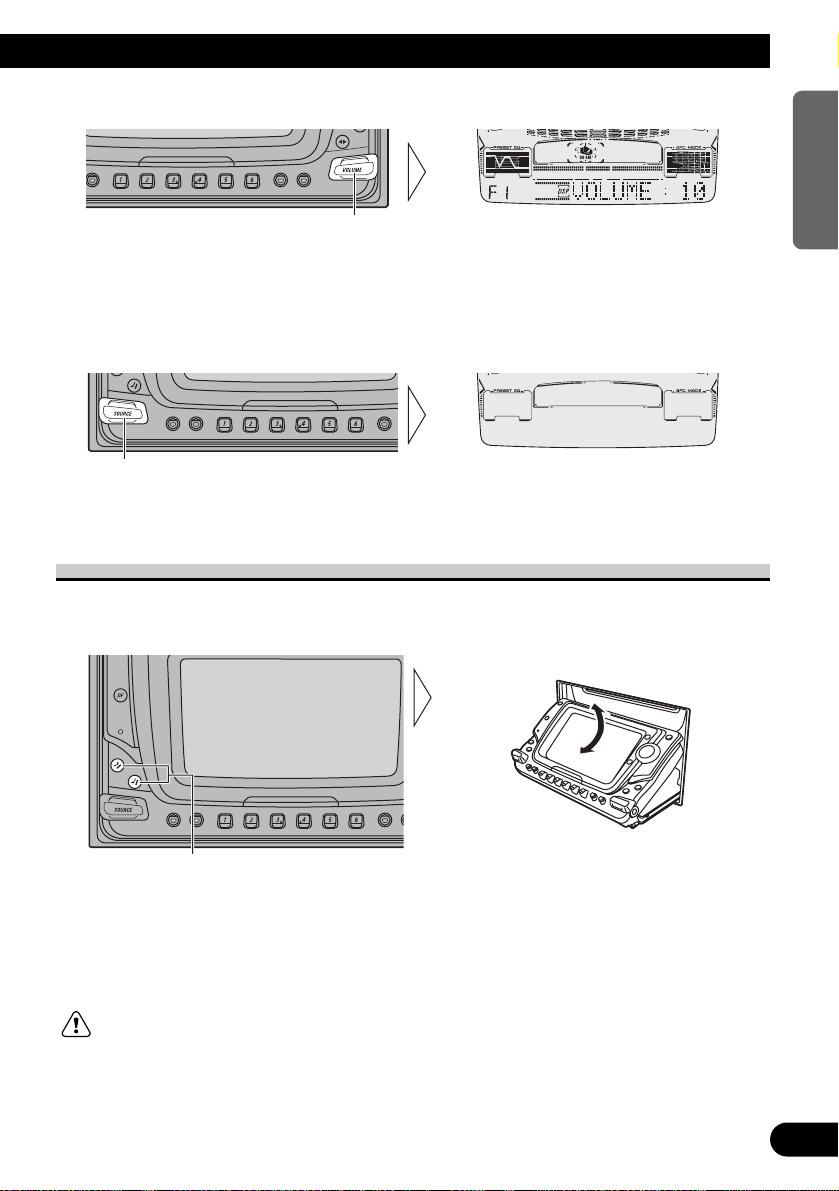
2. Raise or lower the volume.
Note:
• Press upward to raise the volume level.
• Press downward to lower the volume level.
3. Turn the source OFF.
Setting the Display Angle
You can adjust front panel angle for easier operation.
• Select the desired angle.
Note:
• While a disc or a cassette is left partially inserted, you cannot operate the ANGLE button.
• By pressing the ANGLE button for 2 seconds, you can open or close the front panel automatically.
WARNING:
• Do not use with the front panel left open. If you do leave it open, it may result in injury in the event
of an accident.
• Be careful not to catch your finger in the front panel when it is opening or closing.
Each press changes the angle.
Press (up or down) the SOURCE selector and
turn the source OFF.
Each press (up or down) the VOLUME changes
the volume level.
Page 12
Open/Eject
Press the CD EJECT button, and the front panel opens, then the
disc is ejected.
When a CD is not inserted, by pressing the CD EJECT button, you
can open or close the front panel alternately.
Note:
• The CD function can be turned ON/OFF with the disc remaining in this
product. (Refer to page 9.)
• A disc left partially inserted after ejection may incur damage or fall out.
11
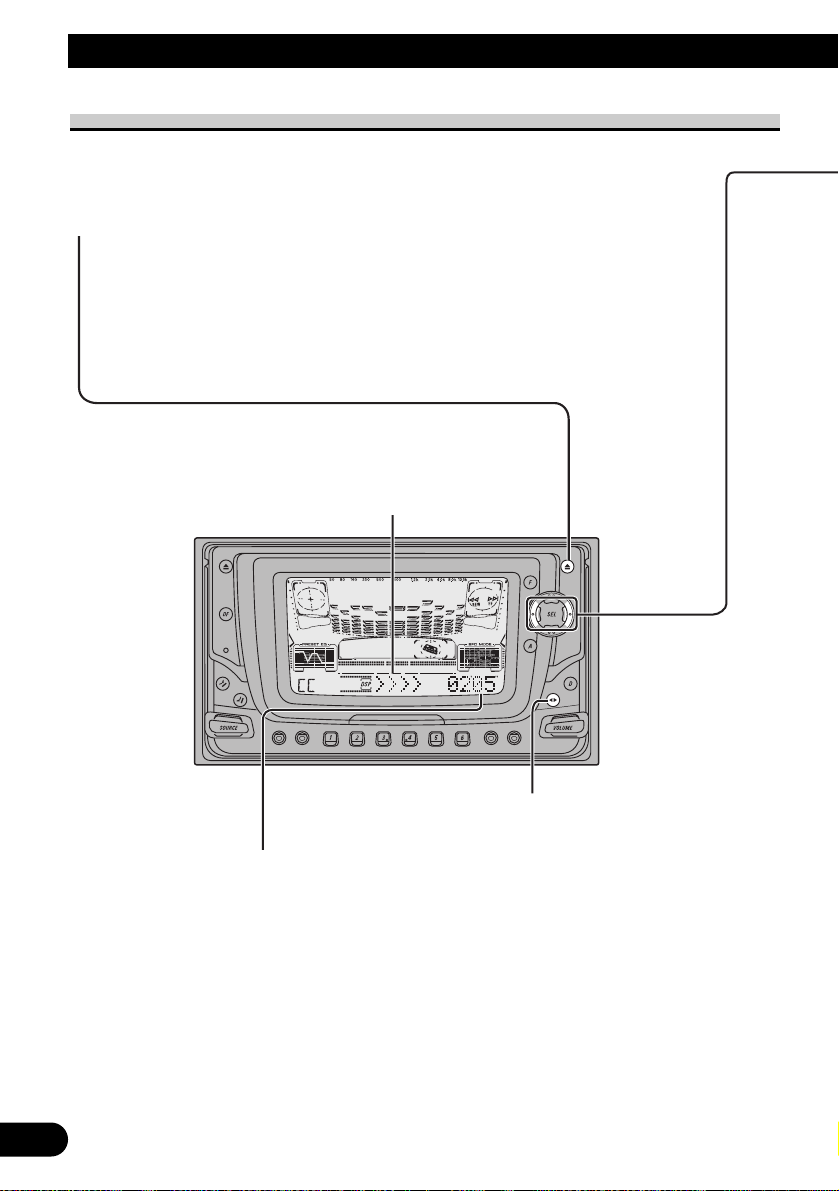
Basic Operation
Basic Operation of Built-in CD Player
Play Time Indicator
Track Number Indicator
Switching the Display
Each press of the DISPLAY button changes the display in the following order:
Playback mode (Play Time) = Disc Title (DISC TITLE)
Note:
• If you switch a display when the disc title has not been input, “NO TITLE” is displayed.
• When playing a CD TEXT disc, refer to “Title Display Switching” and “Title Scroll” on pages 42, 43.
• A CD TEXT disc is a CD featuring recorded text information such as Disc Title, Artist Name and Track
Title.
Page 13
ENGLISH ESPAÑOL DEUTSCH FRANÇAIS
ITALIANO NEDERLANDS
12
Disc Loading Slot
If a CD is inserted, the front panel is closed automatically.
Note:
• The Built-in CD player plays one standard 12 cm or 8 cm (single) CD at a time.
Do not use an adapter when playing 8 cm CD.
Note:
• If a disc cannot be inserted fully or playback fails, make sure the recorded side is
down. Push the CD EJECT button and check the disc for damage before
reinserting it.
• If the Built-in CD player cannot operate properly, an error message (such as
“ERROR-14”) appears on the display. Refer to “Built-in CD Player’s Error
Message” on page 60.
WARNING:
• Do not use with the front panel left open. If you do leave it open, it
may result in injury in the event of an accident.
Track Search and Fast Forward/Reverse
• You can select between Track Search or Fast forward/Reverse by
pressing the 2/3 button for a different length of time.
Track Search 0.5 seconds or less
Fast forward/Reverse Continue pressing
Page 14
13
Basic Operation
Basic Operation of Cassette Player
Note:
• Be sure to close the front panel after loading or ejecting a cassette.
Direction Indicator
Open/Eject
Press the TAPE EJECT button, and the front panel opens, then the
tape is ejected.
When a cassette tape is not inserted, by pressing the TAPE EJECT
button, you can open or close the front panel alternately.
Note:
• The Tape function can be turned ON/OFF with the cassette tape remaining
in this product. (Refer to page 9.)
Direction Change
Play Time Indicator
Note:
• The continuous playback time count starts at “00'00''” at the following times.
* When a tape is inserted.
* When the tape direction is changed.
* When you rewind the tape side currently playing back to the beginning.
• The continuous playback time count is halted when fast-forwarding/rewinding
and while the Music Search function is operating.
Page 15
14
ENGLISH ESPAÑOL DEUTSCH FRANÇAIS
ITALIANO NEDERLANDS
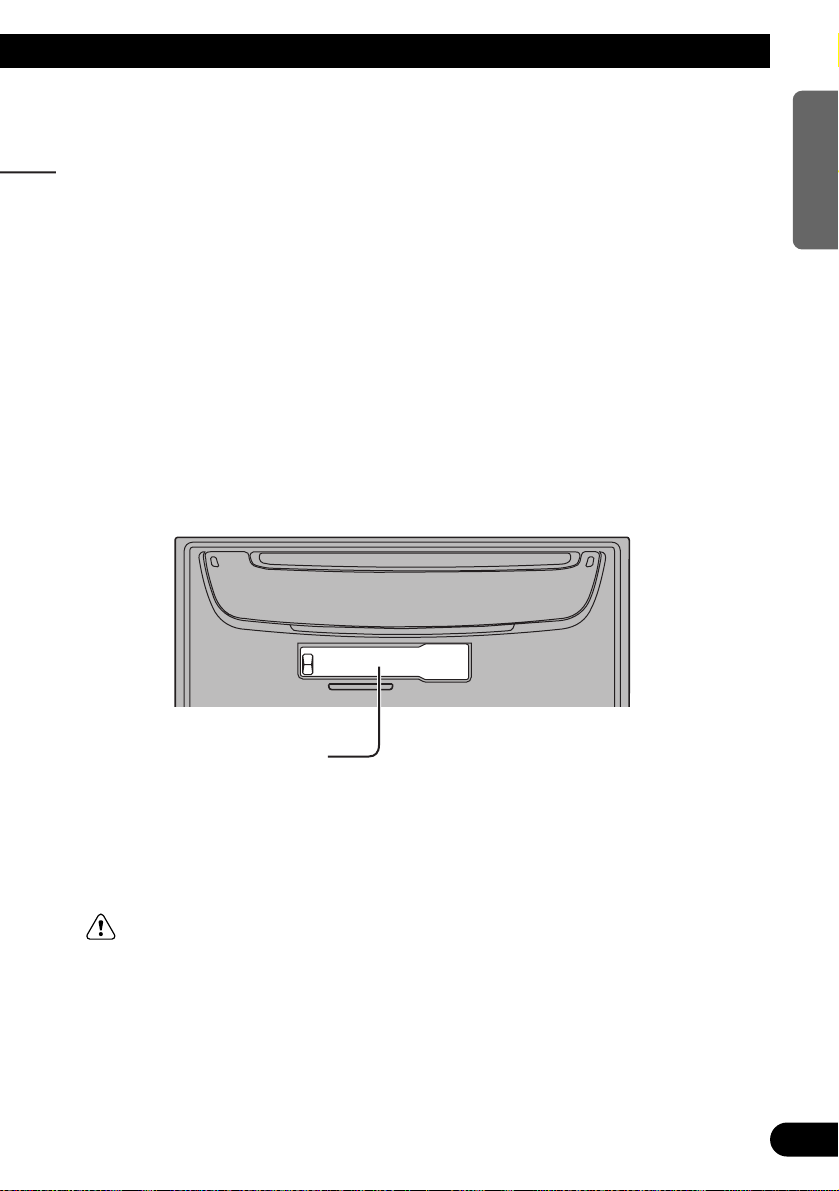
Cassette Loading Slot
If a cassette tape is inserted, the front panel is closed automatically.
Note:
• Indicator “METAL” lights when a metal or chrome tape is inserted.
Nothing is displayed for a nomal tape.
WARNING:
• Do not use with the front panel left open. If you do leave it open, it
may result in injury in the event of an accident.
Fast Forward/Rewind and Music Search
• Each press of the 3 button selects Fast Forward or Forward-Music Search.
FF (Fast Forward) = F-MS (Forward-Music Search) = Normal Playback
• Each press of the 2 button selects Rewind or Rewind-Music Search.
REW (Rewind) = R-MS (Rewind-Music Search) = Normal Playback
Note:
• Fast Forward/Rewind and Music Search can be canceled by pressing the BAND button.
Page 16
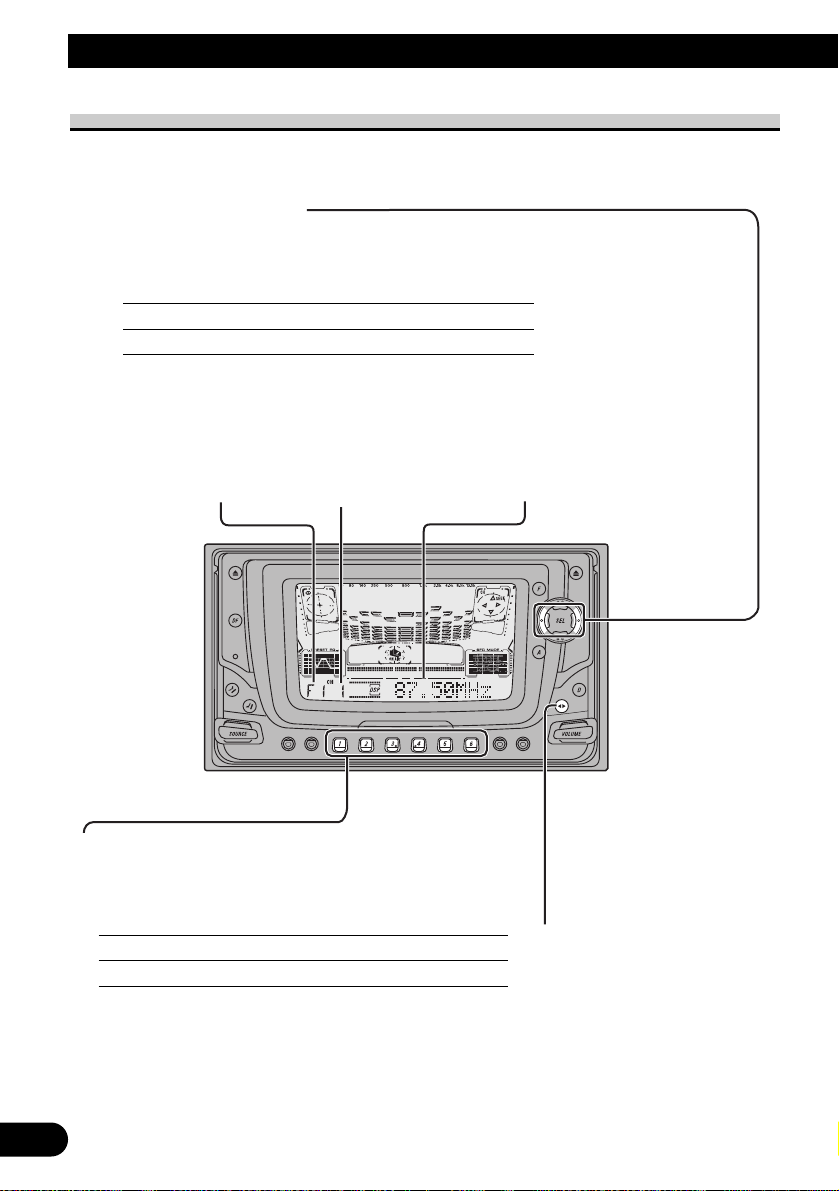
Basic Operation
Basic Operation of Tuner
This product’s AF function can be switched ON and OFF. AF should be switched OFF for
normal tuning operations. (Refer to page 24.)
Manual and Seek Tuning
• You can select the tuning method by changing the length of time you
press the 2/3 button.
Manual Tuning (step by step) 0.5 seconds or less
Seek Tuning 0.5 seconds or more
Note:
• If you continue pressing the button for longer than 0.5 seconds, you can skip broadcasting
stations. Seek Tuning starts as soon as you release the button.
• Stereo indicator “” lights when a stereo station is selected.
Preset Tuning
• You can memorize broadcast stations in buttons
1 through 6 for easy, one-touch station recall.
Preset station recall 2 seconds or less
Broadcast station preset memory 2 seconds or more
Note:
• Up to 18 FM stations (6 in F1 (FM1), F2 (FM2) and F3
(FM3)) and 6 MW/LW stations can be stored in memory.
• You can also use the 5 or ∞ buttons to recall broadcast
stations memorized in buttons 1 through 6.
Frequency Indicator
Band Indicator
Band
F1 (FM1) = F2 (FM2)
= F3 (FM3) = MW/LW
Preset Number Indicator
15
Page 17
16
ENGLISH ESPAÑOL DEUTSCH FRANÇAIS
ITALIANO NEDERLANDS
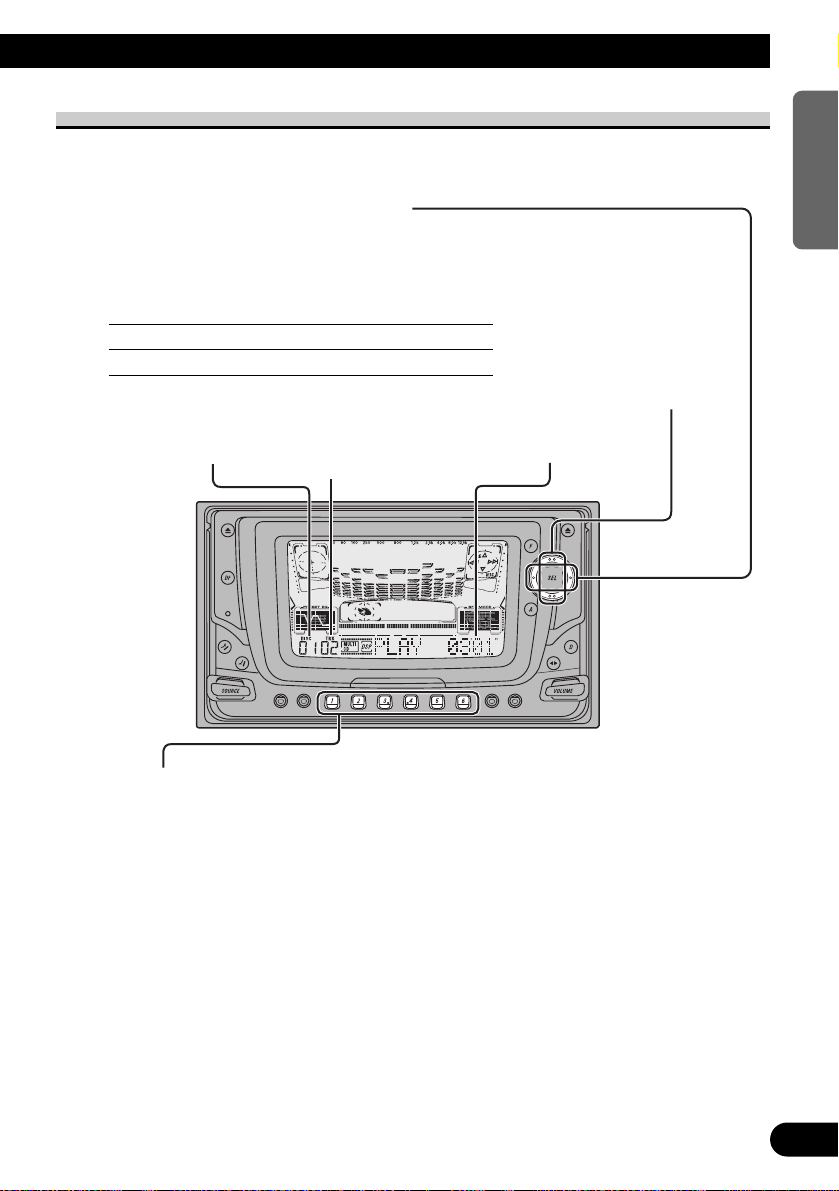
Track Search and Fast Forward/Reverse
• You can select between Track Search or
Fast forward/Reverse by pressing the 2/3
button for a different length of time.
Track Search 0.5 seconds or less
Fast Forward/Reverse Continue pressing
Play Time Indicator
Disc Search
Disc Number Indicator
Track Number Indicator
Basic Operation of Multi-CD Player
This product can control a Multi-CD player (sold separately).
Disc Number Search (for 6-Disc, 12-Disc types)
• You can select discs directly with the 1 to 6 buttons. Just press the number
corresponding to the disc you want to listen to.
Note:
• When a 12-Disc Multi-CD Player is connected and you want to select disc 7 to 12, press the 1 to 6
buttons for 2 seconds.
Note:
• The Multi-CD player may perform a preparatory operation, such as verifying the presence of a disc
or reading disc information, when the power is turned ON or a new disc is selected for playback.
“READY” is displayed.
• If the Multi-CD player cannot operate properly, an error message such as “ERROR-14” is
displayed. Refer to the Multi-CD player owner’s manual.
• If there are no discs in the Multi-CD player magazine, “NO DISC” is displayed.
Page 18
17
Basic Operation
Corresponding Display Indications and Buttons
This product’s display features Key Guidance Indicators. These light to indicate which of
the 5/∞/2/3, FUNCTION, AUDIO and DSP buttons you can use. When you’re in the
Function Menu (refer to next section), Detailed Setting Menu (refer to page 20), Initial
Setting Menu (refer to page 55), Audio Menu 1, 2 (refer to page 44, 46) or DSP Menu 1, 2
(refer to page 47, 52), they also make it easy to see which 5/∞/2/3 buttons you can use
to switch functions ON/OFF, switch repeat selections and perform other operations.
Indicator and corresponding buttons are shown below.
7 Head Unit 7 Steering Remote 7 Display
Controller
When 1 is lit in the display, perform appropriate operations with the z buttons.
When 2 is lit in the display, it indicates that you are in the Function Menu, Detailed
Setting Menu or Initial Setting Menu. You can switch between each of these menus and
between different modes in the menus using button x on the head unit or steering remote
controller.
When 3 is lit in the display, it indicates you are in the Audio Menu 1, 2. You can switch
between modes in the Audio Menu 1, 2 using button c on the head unit.
When 4 is lit in the display, it indicates you are in the DSP Menu 1, 2. You can switch
between modes in the DSP Menu 1, 2 using button v on the head unit or steering remote
controller.
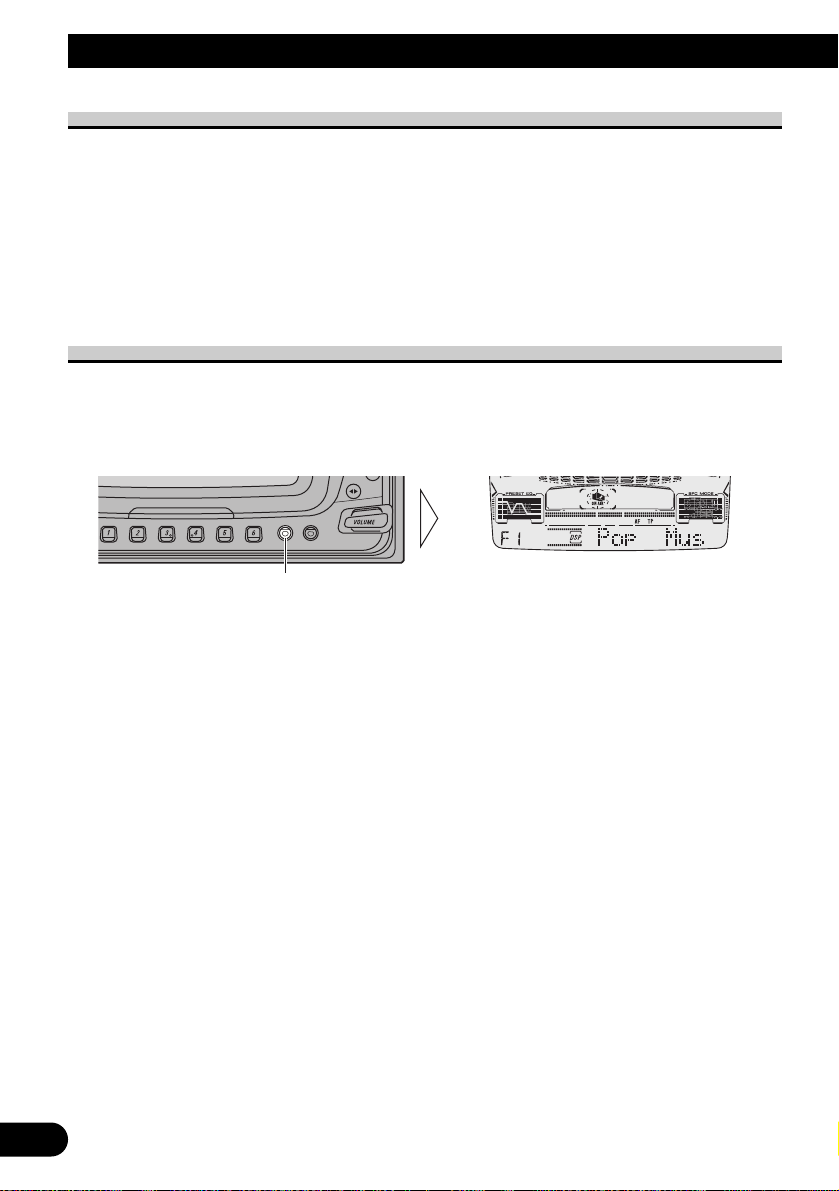
Entering the Function Menu
The Function Menu lets you operate simple functions for each source.
Note:
• After entering the Function Menu, if you do not perform an operation within about 30 seconds, the
Function Menu is automatically canceled.
1. Select the desired mode in the Function Menu. (Refer to next section,
“Function Menu Functions”.)
Each press changes the Mode ...
z
x
v
1
3
4
2
z
c
x
v
Page 19
18
ENGLISH ESPAÑOL DEUTSCH FRANÇAIS
ITALIANO NEDERLANDS
2. Operate a mode. (e.g. Repeat Play)
3. Cancel the Function Menu.
Function Menu Functions
The following chart shows functions for each source in the Function Menu.
The chart also shows indications for each function, operations and buttons used to perform
operations. For more details, or when you want to know about an operation, refer to the
page number indicated in the chart.
7 Tuner
Function name (Display) Button: Operation Page
Best Stations Memory 5: ON 22
(BSM) ∞: OFF
Regional Function (REG) 5: ON 25
∞: OFF
Local Seek Tuning (LOCAL) 1 5: ON 22
3 ∞: OFF
2 2 or 3: Select (Sensitivity)
TA Function (TA) 5: ON 26
∞: OFF
News Program Interruption Setting 5: ON 29
(NEWS) ∞: OFF
AF Function (AF) 5: ON 24
∞: OFF
The button used and the operation it performs
are indicated by the key guidance indicator.
Press the 5 button to switch the key guidance
indicator ON, and the ∞ button to switch it
OFF.
Page 20

19
Basic Operation
7 Built-in CD Player
Function name (Display) Button: Operation Page
Repeat Play (REPEAT) 5: ON 31
∞: OFF
Random Play (RANDOM) 5: ON 31
∞: OFF
Scan Play (T.SCAN) 5: ON 32
∞: OFF
Pause (PAUSE) 5: ON 32
∞: OFF
7 Cassette Player
Function name (Display) Button: Operation Page
Repeat Play (REPEAT) 5: ON 34
∞: OFF
Scan Play (SCAN) 5: ON 34
∞: OFF
Blank Skip (B.SKIP) 5: ON 34
∞: OFF
Radio Intercept (R.I) 5: ON 35
∞: OFF
Dolby B NR (NR) 5: ON 35
∞: OFF
7 Multi-CD Player
Function name (Display) Button: Operation Page
Repeat Play (REPEAT) 2 or 3: Select (Play range) 36
Selecting Discs by 1 2 or 3: Select (Disc Title) 41
Disc Title List (TITLE LIST) 2 5: Play
Random Play (RANDOM) 5: ON 36
∞: OFF
Scan Play (SCAN) 5: ON 37
∞: OFF
ITS Play (ITS.PLAY) 5: ON 38
∞: OFF
Pause (PAUSE) 5: ON 37
∞: OFF
Compression and DBE (COMP) 5 or ∞: Select 42
(Sound Quality Function)
Page 21
20
ENGLISH ESPAÑOL DEUTSCH FRANÇAIS
ITALIANO NEDERLANDS
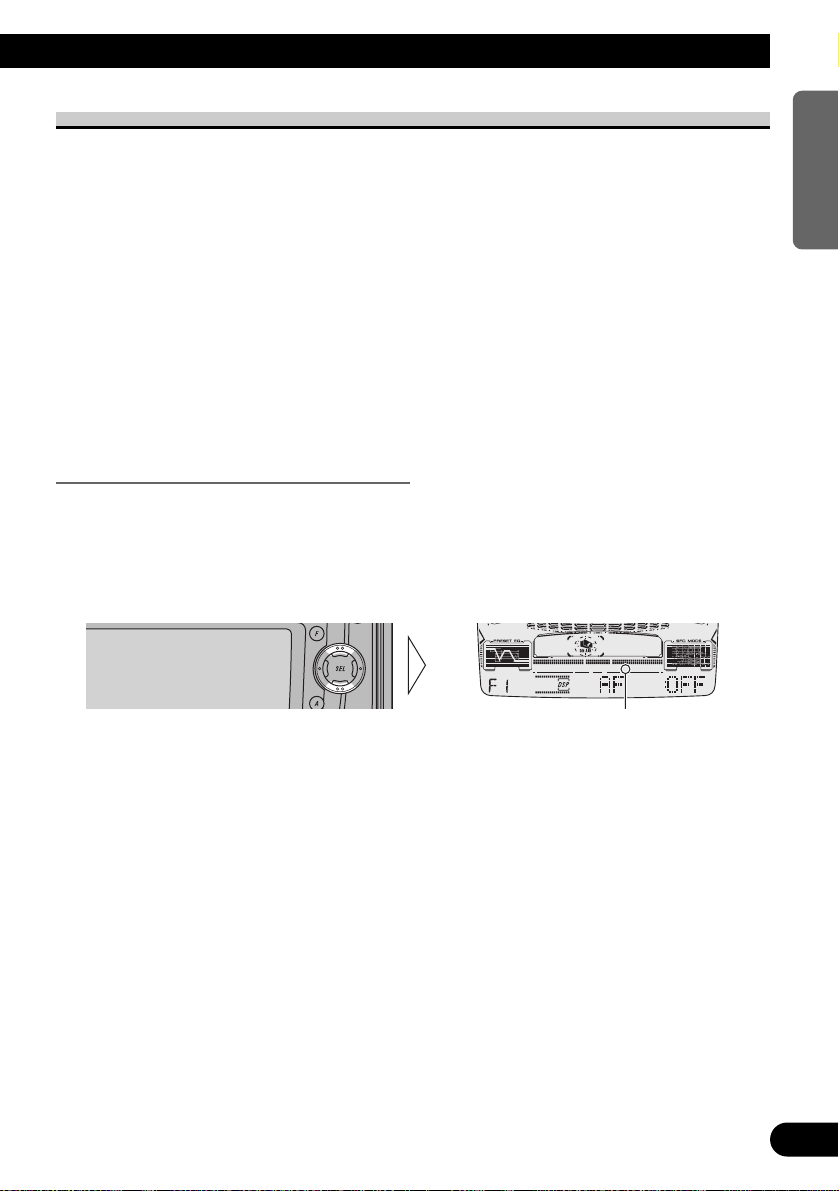
Entering the Detailed Setting Menu
In the Detailed Setting Menu, you can operate convenient, complex functions for each
source.
1. Enter the Detailed Setting Menu.
2. Select the desired mode. (Refer to next section, “Detailed Setting Menu
Functions”.)
3. Operate a mode.
4. Cancel the Detailed Setting Menu.
Note:
• You can cancel the Detailed Setting Menu by pressing the FUNCTION button again for 2 seconds.
Each press changes the Mode ...
Hold for 2 seconds
Page 22

21
Basic Operation
Detailed Setting Menu Functions
The following chart shows functions for each source in the Detailed Setting Menu.
The chart also shows indications for each function, operations and buttons used to perform
operations. For more details, or when you want to know about an operation, refer to the
page number indicated in the chart.
7 Built-in CD Player
Function name (Display) Button: Operation Page
Disc Title Input (TITLE IN) 1 5 or ∞: Select (Character) 33
2 2 or 3: Select (Position)
3 3: Memory
7 Multi-CD Player
Function name (Display) Button: Operation Page
Disc Title Input (TITLE IN) 1 5 or ∞: Select (Character) 40
2 2 or 3: Select (Position)
3 3: Memory
ITS Programming (ITS) 5: Memory 38
D.FUNC Button Functions
The following chart shows functions for each source by pressing D.FUNC button.
For more details, or when you want to know about an operation, refer to the page number
indicated in the chart.
7 D.FUNC
Source Function name Page
Tuner Best Stations Memory (OFF) 22
Best Stations Memory (ON)
(Hold for 2 seconds) 22
Built-in CD player Pause 32
Cassette player Repeat Play 34
Dolby B NR (Hold for 2 seconds) 35
Multi-CD player Pause 37
Page 23
Tuner Operation
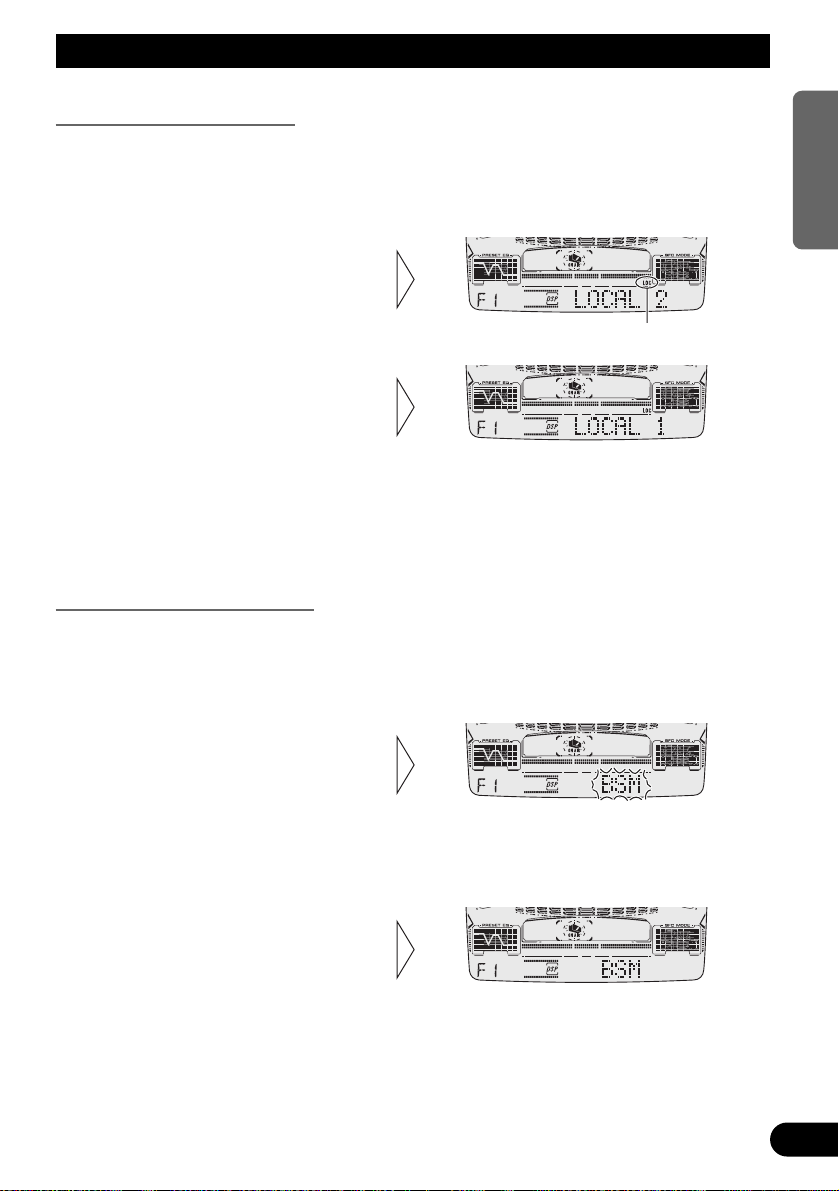
Local Seek Tuning (LOCAL)
When Local is ON, you can only select broadcast stations providing strong reception.
1. Press the FUNCTION button and select the Local mode (LOCAL) in the
Function Menu.
FM : LOCAL 1 Ô LOCAL 2 Ô LOCAL 3 Ô LOCAL 4
MW/LW : LOCAL 1 Ô LOCAL 2
Note:
• The LOCAL 4 setting allows reception of only the strongest stations, while lower settings let you
receive progressively weaker stations.
Best Stations Memory (BSM)
The BSM function stores stations in memory automatically.
1. Press the FUNCTION button and select the BSM mode (BSM) in the
Function Menu.
Note:
• You can also switch the BSM function ON by pressing the D.FUNC button for 2 seconds.
Note:
• You can also switch the BSM function OFF by pressing the D.FUNC button.
• To cancel the process, press the
∞ button in the Function Menu
before memorization is
complete.
2. Switch the BSM ON with the 5
button.
The stations with the strongest signals will be stored under buttons 1 –
6 and in order of their signal strength.
3. Select the desired Local Seek
sensitivity with the 2/3
buttons.
“LOC”
2. Switch the Local ON/OFF with
the 5/∞ buttons.
22
ENGLISH ESPAÑOL DEUTSCH FRANÇAIS
ITALIANO NEDERLANDS
Page 24
23
Using the RDS Functions
What is RDS?
RDS (Radio Data System) is a system for transmitting data along with FM programs. This
data, which is inaudible, provides a variety of features such as: program service name, program type display, traffic announcement standby, automatic tuning and program type tuning, intended to aid radio listeners in tuning to a desired station.
Note:
• RDS service may not be provided by all stations.
• RDS functions, like AF (Alternative Frequencies search) and TA (Traffic Announcement standby),
are only active when your radio is tuned to RDS stations.
Program Service Name Display
With this function, the names of networks/stations providing RDS services replace the frequency on the display a few seconds after they are tuned in.
• When you want to know the frequency of the current station, change
the display.
Each press of the DISPLAY button selects the display in the following order:
Frequency = Program Service Name = PTY Information
Note:
• After switching displays, if you do not perform an operation within 8 seconds, the Program Service
Name is automatically displayed.
7 PTY Information
PTY (Program Type ID code) information for the currently tuned station appears on the
display for 8 seconds. The information is correlated with the list in the section “PTY List”
on page 30.
Note:
• If a PTY code of zero is received from a station, “None” will be displayed. This indicates that the
station has not defined its program contents.
• If the signal is too weak for this product to pick up the PTY code, “NO PTY” will be displayed.
7 Frequency
The frequency of the current station appears on the display.
Each press changes the Display ...
Page 25
AF Function (AF)
The AF (Alternative Frequencies search) function is used to search for other frequencies in
the same network as the currently tuned station. It automatically retunes the receiver to
another frequency in the network which is broadcasting a stronger signal when there are
problems with reception of the currently tuned station or better reception is possible on
a different frequency.
Note:
• AF tunes the receiver only to RDS stations when you use Seek tuning or BSM Auto Memory with
the “AF” indicator ON.
• When you recall a preset station, the tuner may update the preset station with a new frequency from
the station’s AF list. (This is only available when using presets on the F1 (FM1) and F2 (FM2)
bands.) No preset number appears on the display if the RDS data for the station received differs
from that for the originally stored station.
• Sound may be temporarily interrupted by another program during an AF frequency search.
• When the tuner is tuned to a non-RDS station, the “AF” indicator flashes.
• AF can be switched ON or OFF independently for each FM band.
Activating/Deactivating the AF Function
AF is set to ON by default.
1. Press the FUNCTION button and select the AF mode (AF) in the Function
Menu.
2. Activate or deactivate AF while in an FM band.
“AF” disappears
24
ENGLISH ESPAÑOL DEUTSCH FRANÇAIS
ITALIANO NEDERLANDS
Page 26
25
Using the RDS Functions
PI Seek Function
The tuner searches for another frequency broadcasting the same programming. “PI SEEK”
appears on the display and the radio volume is muted during a PI Seek. The muting is discontinued after completion of the PI Seek, whether or not the PI seek has succeeded. If the PI Seek
is unsuccessful, the tuner returns to the previous frequency.
PI Seek (PI SEEK)
If the tuner fails to locate a suitable alternative frequency or if the broadcasting signal is
too weak for proper reception, the PI Seek (PI SEEK) will automatically start.
Auto PI Seek (for preset station) (A-PI)
When preset stations cannot be recalled, as when traveling long distances, the product can
be set to perform PI Seek also during preset recall.
The default setting for Auto PI Seek (A-PI) is OFF.
Note:
• Refer to “Initial Setting” for details on how to switch Auto PI Seek (A-PI) ON/OFF.
Regional Function (REG)
When AF is used to retune the tuner automatically, REG (regional) limits the selection to
stations broadcasting regional programs.
Note:
• Regional programming and regional networks are organized differently depending on the country
(i.e., they may change according to the hour, state or broadcast area).
• The preset number may disappear on the display if the tuner tunes in a regional station which differs from the originally set station.
• The Regional function can be turned ON independently for each FM band.
Activating/Deactivating the Regional Function
The REG function is set to ON by default.
1. Press the FUNCTION button and select the REG mode (REG) in the
Function Menu.
2. Activate or deactivate REG while in an FM band.
“REG”
Page 27
A Title (English)
Traffic Announcement Standby Function (TA)
The TA (Traffic Announcement standby) function lets you receive traffic announcements
automatically, no matter what source you are listening to. The TA function can be activated for either a TP station (a station that broadcasts traffic information) or an EON TP station (a station carrying information which cross-references TP stations).
Activating/Deactivating the TA Function
1. Tune in a TP or EON TP station.
The “TP” indicator lights when the tuner is tuned to a TP station or an EON TP
station.
2. Activate the TA function.
The “TA” indicator lights, indicating that the tuner is waiting for traffic announcements.
Repeat the preceding operation when no traffic announcement is being received to deactivate the TA function.
Note:
• You can also switch the TA function ON/OFF in the Function Menu.
• The system switches back to the original source following traffic announcement reception.
• The TA function can be activated from sources other than tuner if the tuner was last set to the FM
band but not if it was last set to the MW/LW band.
• If the tuner was last set to FM, turning on the TA function lets you operate other tuning functions
while listening to sources other than tuner.
• Only TP or EON TP stations are tuned in during the Seek Tuning mode when the “TA” indicator is
ON.
• Only TP or EON TP stations are stored by BSM when the “TA” indicator is ON.
“TA”
26
ENGLISH ESPAÑOL DEUTSCH FRANÇAIS
ITALIANO NEDERLANDS
Page 28
27
Using the RDS Functions
Canceling Traffic Announcements
• Press the TA button while a traffic announcement is being received to cancel
the announcement and return to the original source.
The announcement is canceled but the tuner remains in the TA mode until the TA button is
pressed again.
Adjusting the TA Volume
When a traffic announcement begins, the volume adjusts automatically to a preset level to
enable you to hear the announcement clearly.
• Set the volume by adjusting it during reception of a traffic announcement.
The newly set volume is stored in memory and recalled for subsequent traffic announcements.
TP Alarm Function
About 30 seconds after “TP” indicator is extinguished due to a weak signal, a 5 second
beep sounds to remind you to select another TP or EON TP station.
• If you are listening to the tuner, tune in another TP station or EON TP
station.
In sources other than tuner, the tuner automatically seeks out the TP station with the
strongest signal in the current area 10 (or 30)* seconds after “TP” indicator disappears
from the display.
* Time taken before Seek begins.
TA function ON 10 seconds
TA, AF functions ON 30 seconds
Page 29
A Title (English)
28
ENGLISH ESPAÑOL DEUTSCH FRANÇAIS
ITALIANO NEDERLANDS
PTY Function
With Wide and Narrow classification of program type, the PTY function provides two
ways to select stations by the type of program being broadcast (PTY Search). It also provides automatic tuning to emergency broadcasts (PTY Alarm).
Note:
• There’s no need to perform PTY Search settings again if they have previously been set. After
switching to the PTY Search Setting mode in Step 1, just perform PTY Search in Step 4.
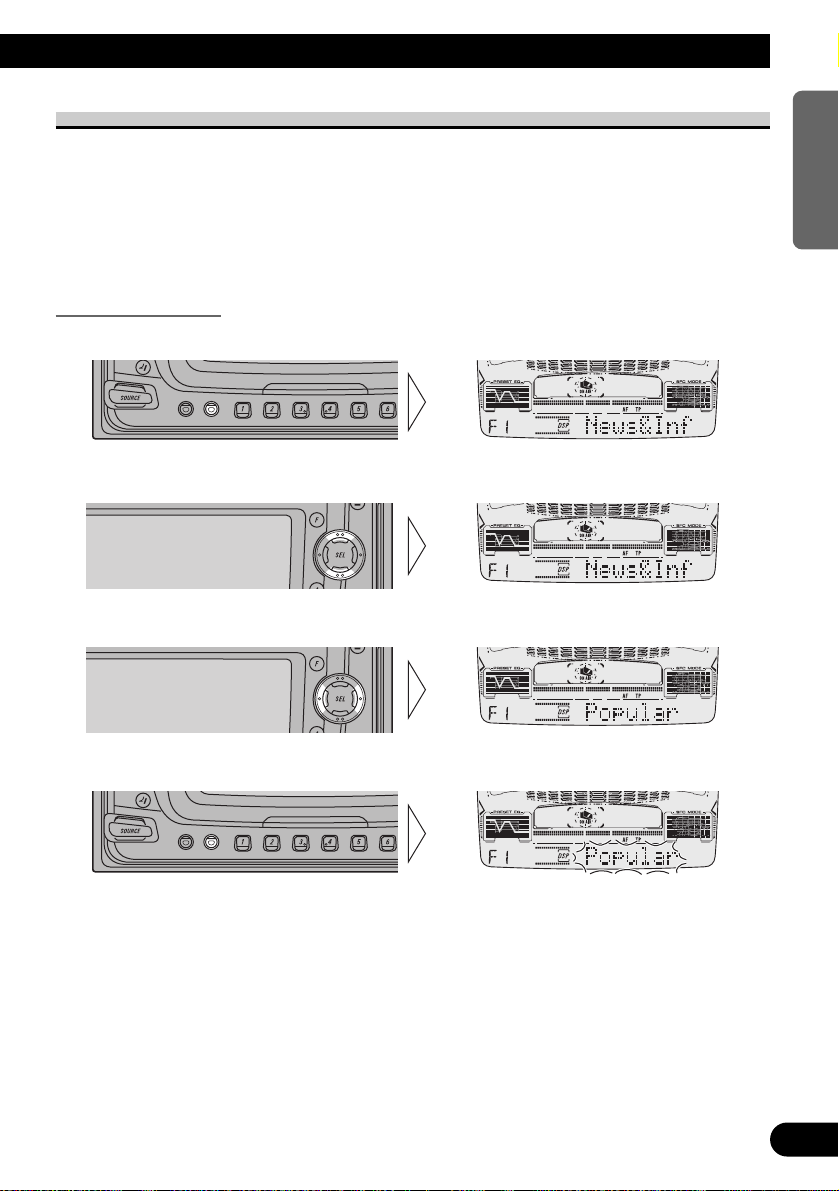
Searching the PTY
1. Select the PTY Search Setting mode.
2. Select the PTY Search method (Wide, Narrow).
3. Select one from among the PTY.
4. Start PTY Search.
The tuner searches for a station broadcasting the desired PTY.
To cancel the PTY Search Setting mode, hold down the PTY button for 2 seconds.
Note:
• The program of some stations may differ from that indicated by the transmitted PTY.
• If no station broadcasting the selected programming type is found, “NOT FOUND” is displayed for
about 2 seconds, and the tuner returns to the original station.
Page 30
29
A Title (English)Using the RDS Functions
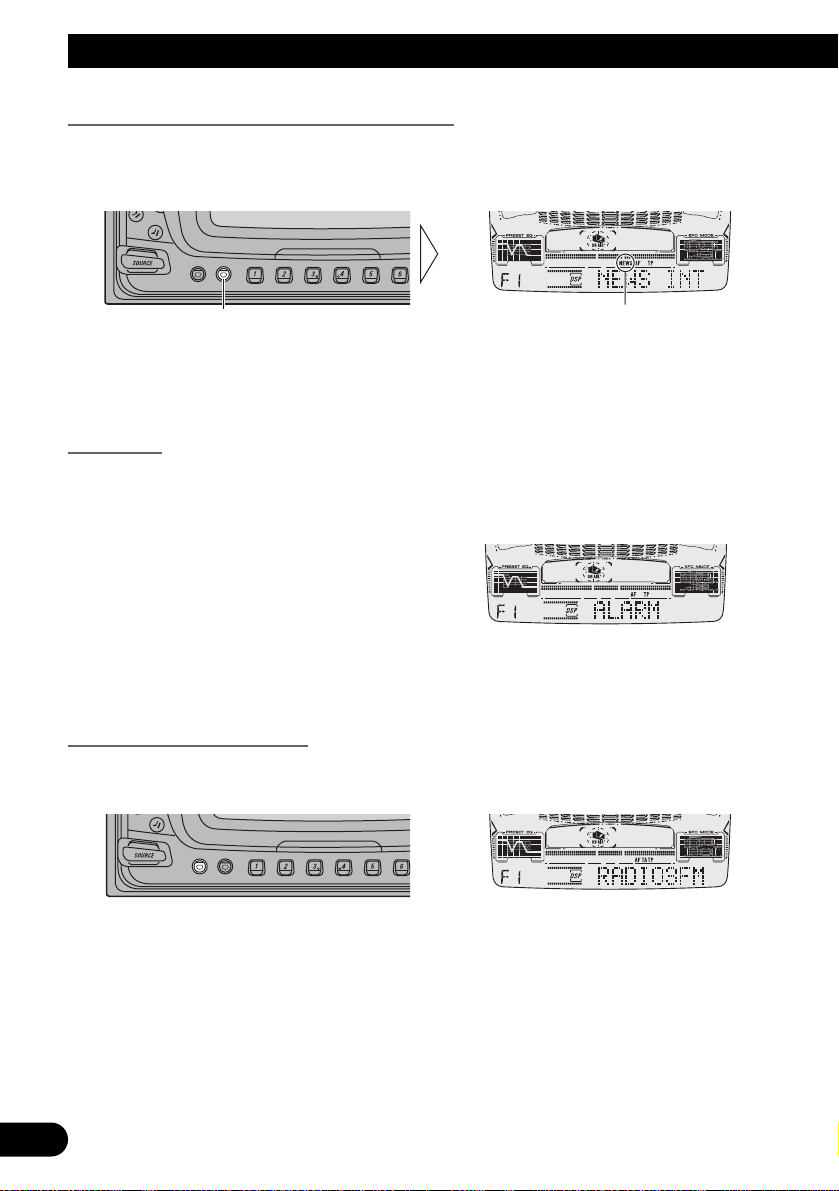
News Program Interruption Setting (NEWS)
You can switch automatic reception of PTY code news programs ON/OFF. When a
received news program ends, reception of the previous program resumes.
• Set interruption to ON or OFF.
Note:
• You can also switch the News Program Interruption Setting ON/OFF in the Function Menu.
PTY Alarm
PTY Alarm is a special PTY code for announcements regarding emergencies such as natural disasters. When the tuner receives the radio alarm code, “ALARM” appears on the
display and the volume adjusts to the TA volume. When the station stops broadcasting the
emergency announcement, the system returns to the previous source.
Note:
• The system switches back to the original source following emergency announcement reception.
Canceling Announcements
• Press the TA button during announcement reception to cancel the announcement and return to the previous source.
“NEWS”Hold for 2 seconds
Page 31

A Title (English)
30
ENGLISH ESPAÑOL DEUTSCH FRANÇAIS
ITALIANO NEDERLANDS
PTY List
Wide Narrow Details
News&Inf News News.
Affairs Current affairs.
Info General information and advice.
Sport Sports programs.
Weather Weather reports/Meteorological information.
Finance Stock market reports, commerce, trading etc.
Popular Pop Mus Popular music.
Rock Mus Contemporary modern music.
Easy Mus Easy listening music.
Oth Mus Other types of music, which can’t be
categorized.
Jazz Jazz music based programs.
Country Country music based programs.
Nat Mus National music based programs.
Oldies Oldies music, ‘Golden age’ based programs.
Folk Mus Folk music based programs.
Classics L. Class Light classical music.
Classic Serious classical music.
Others Educate Educational programs.
Drama All radio plays and serials.
Culture Programs concerned with any aspect of national
or regional culture.
Science Programs about nature, science and technology.
Varied Light entertainment programs.
Children Children’s programs.
Social Social affairs programs.
Religion Religion affairs programs or services.
Phone In Phone in based programs.
Touring Travel programs, not for announcements about
traffic problem.
Leisure Programs about hobbies and recreational
activities.
Document Documentary programs.
Page 32

31
Using the Built-in CD Player
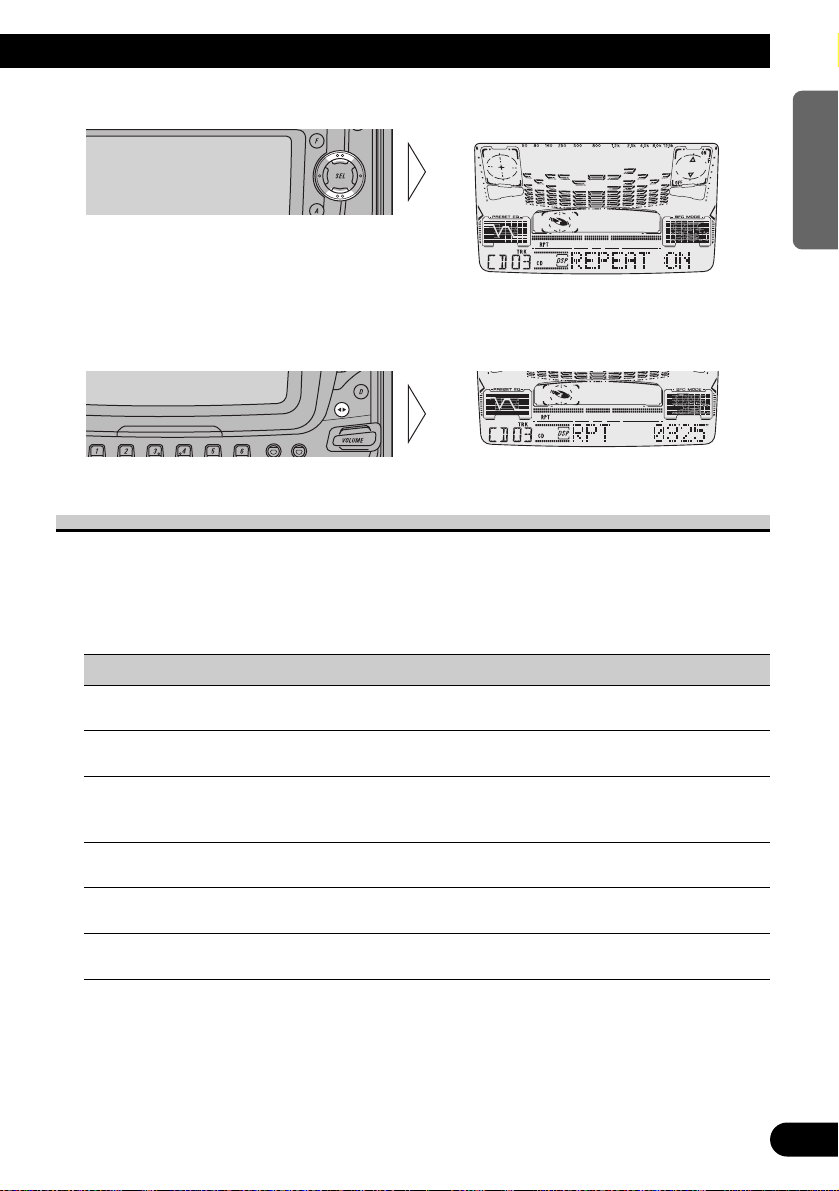
Repeat Play (REPEAT)
Repeat Play plays the same track repeatedly.
1. Press the FUNCTION button and select the Repeat mode (REPEAT) in the
Function Menu.
Note:
• If you perform Track Search or Fast Forward/Reverse, Repeat Play is automatically canceled.
Random Play (RANDOM)
Random Play plays the tracks on a CD in random order for variety.
1. Press the FUNCTION button and select the Random mode (RANDOM) in
the Function Menu.
2. Switch the Random Play
ON/OFF with the 5/∞ buttons.
“RPT”
2. Switch the Repeat Play
ON/OFF with the 5/∞ buttons.
Page 33

32
ENGLISH ESPAÑOL DEUTSCH FRANÇAIS
ITALIANO NEDERLANDS
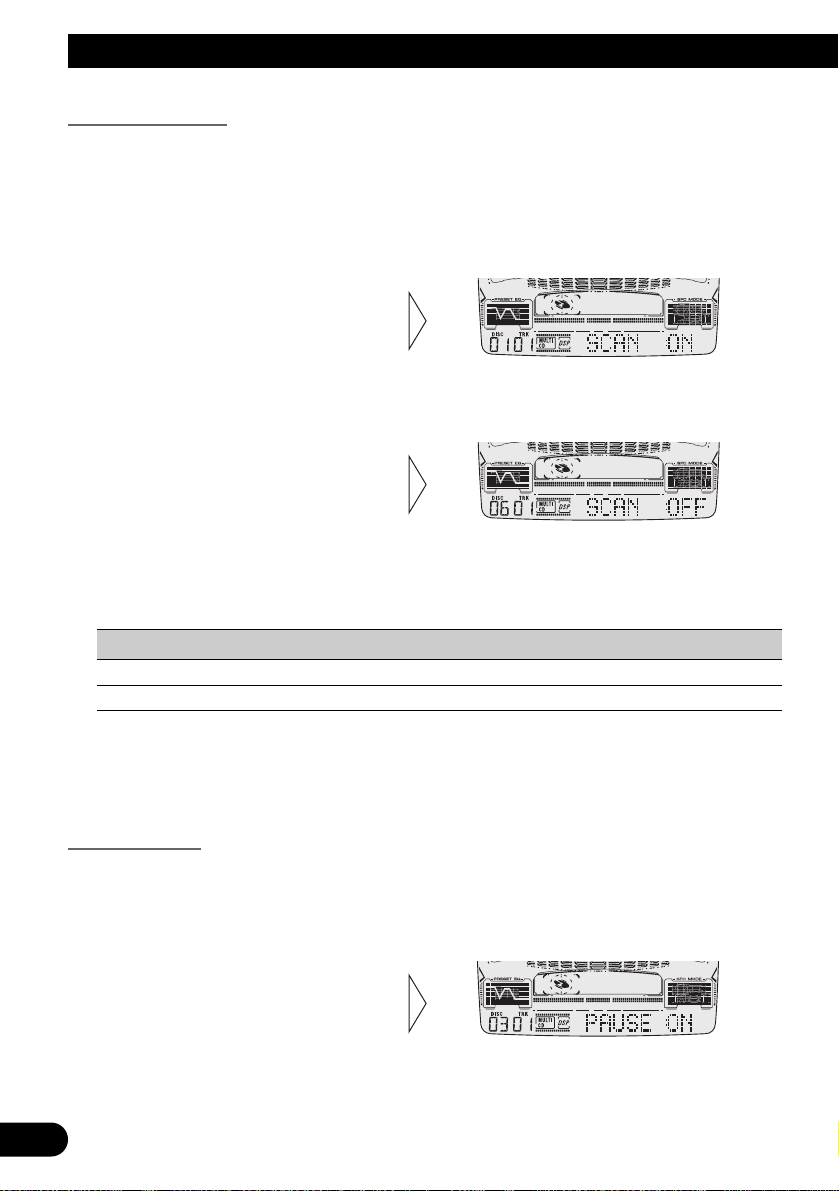
Scan Play (T.SCAN)
Scan Play plays the first 10 seconds or so of each track on a CD in succession.
1. Press the FUNCTION button and select the Scan mode (T.SCAN) in the
Function Menu.
Note:
• Scan Play is canceled automatically after all the tracks on a disc have been scanned.
Pause (PAUSE)
Pause pauses the currently playing track.
1. Press the FUNCTION button and select the Pause mode (PAUSE) in the
Function Menu.
Note:
• You can also switch the Pause function ON/OFF by pressing the D.FUNC button.
2. Switch the Pause ON/OFF with
the 5/∞ buttons.
3. When you find the desired
track, cancel the Scan Play
with the ∞ button.
If the Function Menu has been
canceled automatically, select the
Scan mode in the Function Menu
again.
2. Switch the Scan Play ON with
the 5 button.
Page 34

33
Using the Built-in CD Player
Disc Title Input (TITLE IN)
You can input up to 48 disc titles for CDs in the Built-in CD player. (Refer to “Disc Title
Input” on page 40 under “Using Multi-CD Players”.)
Note:
• After the title for 48 discs have been entered, data for a new disc will overwrite the oldest one.
• If you connect a Multi-CD player, you can input disc titles for up to 100 discs.
• When playing a CD TEXT disc on this product, you cannot switch to this mode.
• A CD TEXT disc is a CD featuring recorded text information such as Disc Title, Artist Name and
Track Title.
Page 35

Using the Cassette Player
Repeat Play (REPEAT)
The repeat mode lets you hear the same song over again.
Note:
• You can also switch the Repeat Play function ON/OFF by pressing the D.FUNC button.
Scan Play (SCAN)
This function plays approximately the first 10 seconds of each song in succession. This is
useful for finding a particular song you want to hear.
Blank Skip (B.SKIP)
This function fast-forwards to the next song automatically if there is a long period of
silence (12 seconds or longer) between songs.
2. Switch the Blank Skip ON/OFF
with the 5/∞ buttons.
1. Press the FUNCTION button and select the Blank Skip mode (B.SKIP) in
the Function Menu.
3. When you hear the song you
are looking for, cancel the Scan
Play with the ∞ button.
If the Function Menu has been
canceled automatically, select the
Scan mode in the Function Menu
again.
2. Switch the Scan Play ON with
the 5 button.
1. Press the FUNCTION button and select the Scan mode (SCAN) in the
Function Menu.
“RPT”
2. Switch the Repeat Play
ON/OFF with the 5/∞ buttons.
1. Press the FUNCTION button and select the Repeat mode (REPEAT) in
the Function Menu.
34
ENGLISH ESPAÑOL DEUTSCH FRANÇAIS
ITALIANO NEDERLANDS
Page 36

35
Using the Cassette Player
Radio Intercept (R.I)
This function allows you to listen to the radio during tape fast-forwarding/rewinding.
Note:
• The radio intercept function does not work during a Music Search operation.
Dolby B NR (NR)
Switch to the Dolby B NR on when listening to a cassette recorded with Dolby B NR.
Note:
• Manufactured under license from Dolby Laboratories.
“Dolby” and the double-D symbol are trademarks of Dolby Laboratories.
• You can also switch the Dolby B NR function ON/OFF by pressing the D.FUNC button for 2
seconds.
•“ ” indicator lights when the Dolby B NR is ON.
2. Switch the Dolby B NR
ON/OFF with the 5/∞ buttons.
1. Press the FUNCTION button and select the Dolby B NR mode (NR) in the
Function Menu.
“R.I”
2. Switch the Radio Intercept
ON/OFF with the 5/∞ buttons.
1. Press the FUNCTION button and select the Radio Intercept switching
mode (R.I) in the Function Menu.
Page 37

Using Multi-CD Players
Repeat Play (REPEAT)
There are three repeat play ranges: One-track Repeat, Disc Repeat and Multi-CD player
Repeat. Default repeat play range is Multi-CD player Repeat.
Play range Display Indicator
Multi-CD player Repeat MCD ----------
One-track Repeat TRK RPT
Disc Repeat DSC DISC
Note:
• If you select other discs during the repeat play, the repeat play range changes to Multi-CD player
Repeat.
• If you perform Track Search or Fast Forward/Reverse during One-track Repeat, the repeat play
range changes to Disc Repeat.
Random Play (RANDOM)
Tracks are played at random within the selected repeat play range as explained in “Repeat
Play” above.
Note:
• One-track Repeat changes to the Disc Repeat when you switch the Random Play ON.
2. Switch the Random Play
ON/OFF with the 5/∞
buttons.
After selecting the desired repeat
play range from those referred to in
“Repeat Play” above, switch MultiCD Player Random Play ON.
1. Press the FUNCTION button and select the Random mode (RANDOM) in
the Function Menu.
2 Select the desired repeat play
range with the 2/3 buttons.
Multi-CD player Repeat = One-
track Repeat = Disc Repeat
1. Press the FUNCTION button and select the Repeat Selecting mode
(REPEAT) in the Function Menu.
36
ENGLISH ESPAÑOL DEUTSCH FRANÇAIS
ITALIANO NEDERLANDS
Page 38
37
Using Multi-CD Players
Scan Play (SCAN)
In the Disc Repeat, the beginning of each track on the selected disc is scanned for about 10
seconds. In the Multi-CD player Repeat, the beginning of the first track on each disc is
scanned for about 10 seconds.
Display Play range
T.SCAN Disc Repeat
D.SCAN Multi-CD player Repeat
Note:
• Scan Play is canceled automatically after all the tracks or discs have been scanned.
• One-track Repeat changes to the Disc Repeat when you switch the Scan Play ON.
Pause (PAUSE)
Pause pauses the currently playing track.
Note:
• You can also switch the Pause function ON/OFF by pressing the D.FUNC button.
2. Switch the Pause ON/OFF with
the 5/∞ buttons.
1. Press the FUNCTION button and select the Pause mode (PAUSE) in the
Function Menu.
3. When you find the desired
track (or disc), cancel the Scan
Play with the ∞ button.
If the Function Menu has been
canceled automatically, select the
Scan mode in the Function Menu
again.
2. Switch the Scan Play ON with
the 5 button.
After selecting the desired repeat play
range from those referred to in
“Repeat Play” on page 36, switch
Multi-CD Player Scan Play ON.
1. Press the FUNCTION button and select the Scan mode (SCAN) in the
Function Menu.
Page 39
ITS (Instant Track Selection)
The ITS function allows you to search for the track you wish to play when a Multi-CD
player is installed. You can use ITS to program automatic playback of up to 24 tracks per
disc from up to 100 discs. (You can store ITS program and Disc Title data for up to 100
discs in memory.)
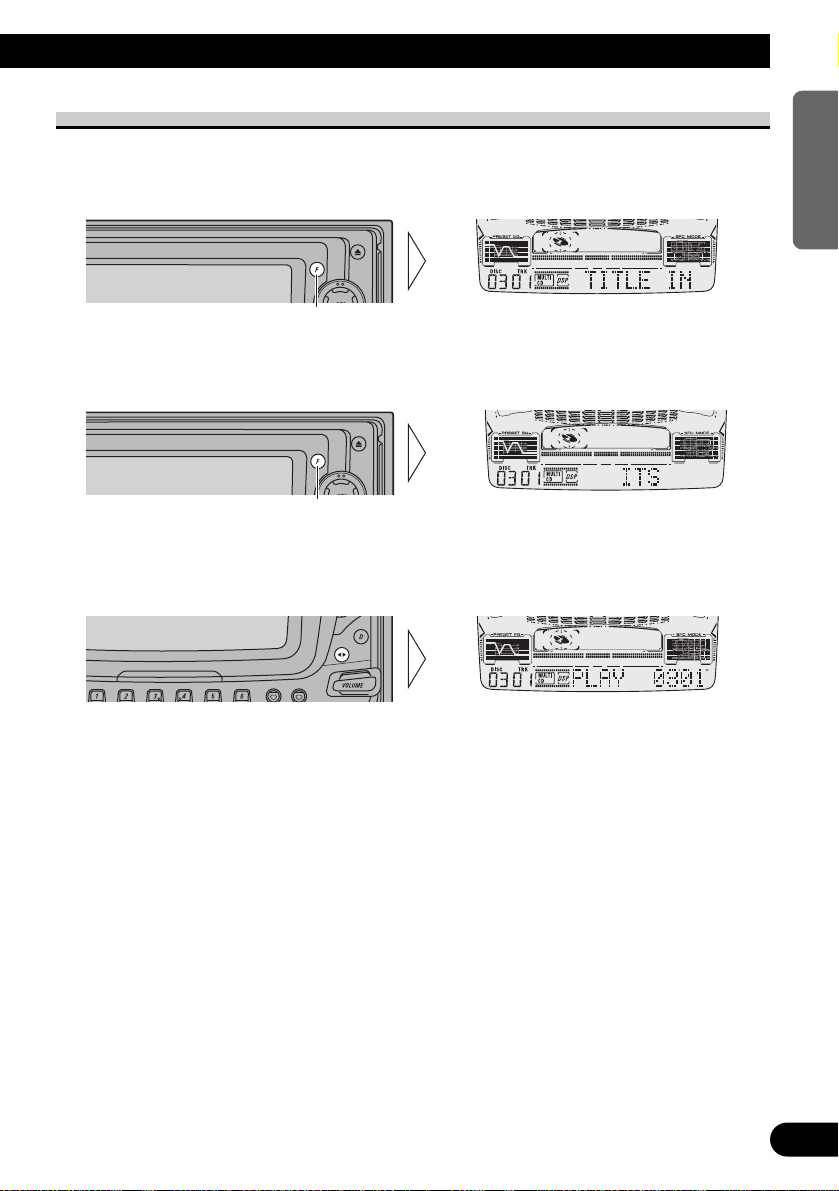
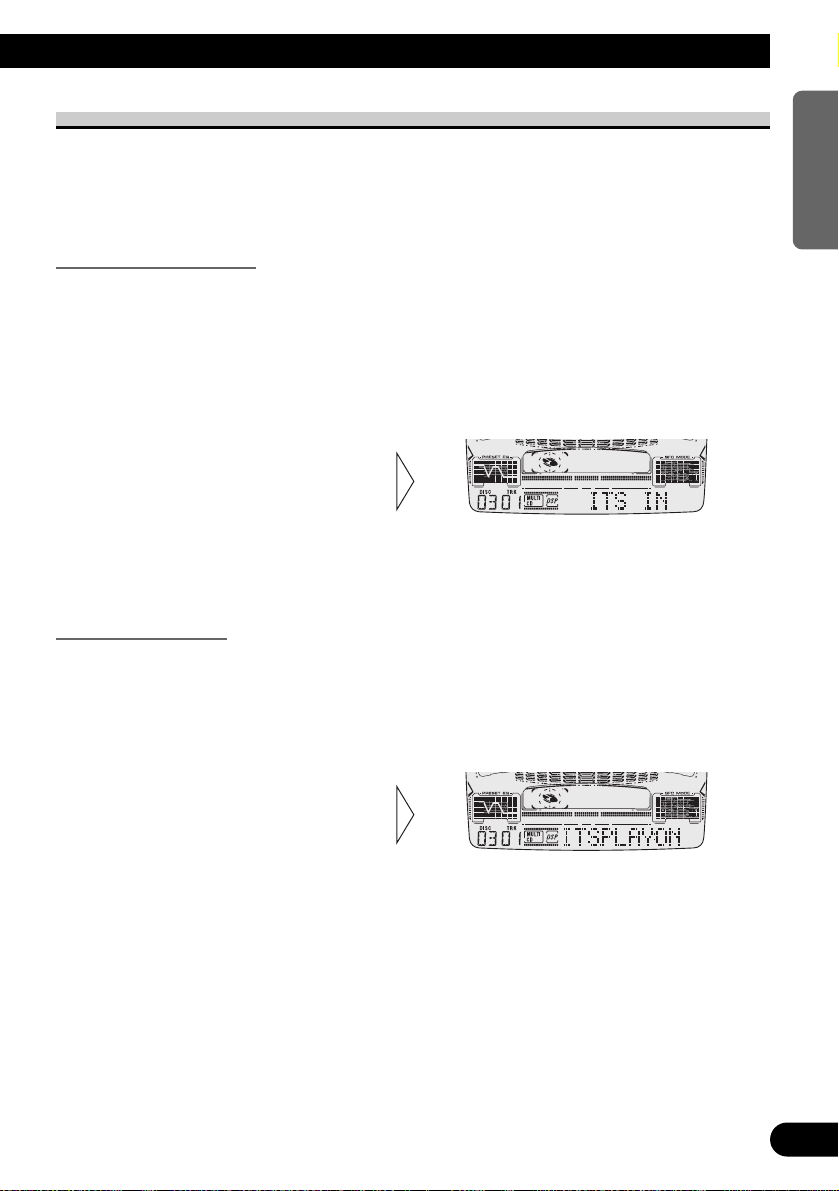
ITS Programming (ITS)
Programmed tracks are played within the selected repeat play range in the “Repeat Play”
on page 36.
Note:
• After 100 discs have been programmed, data for a new disc will overwrite the data for the disc that
has not been played back for the longest time.
ITS Play (ITS.PLAY)
ITS play of tracks is performed within the play range explained in the “Repeat Play” section.
Note:
• If no track in the current range is programmed for ITS play, “ITS EMPTY” is displayed.
2. Switch the ITS play ON/OFF
with the 5/∞ buttons.
After selecting the desired repeat
play range from those referred to in
“Repeat Play”on page 36, switch
ITS play ON.
1. Press the FUNCTION button and select the ITS Play mode (ITS.PLAY)
in the Function Menu.
3. Program the desired track
with the 5 button.
2. Select the ITS Programming mode (ITS) in the Detailed Setting Menu.
(Refer to page 20.)
1. Play the track you wish to program.
38
ENGLISH ESPAÑOL DEUTSCH FRANÇAIS
ITALIANO NEDERLANDS
Page 40
39
Using Multi-CD Players
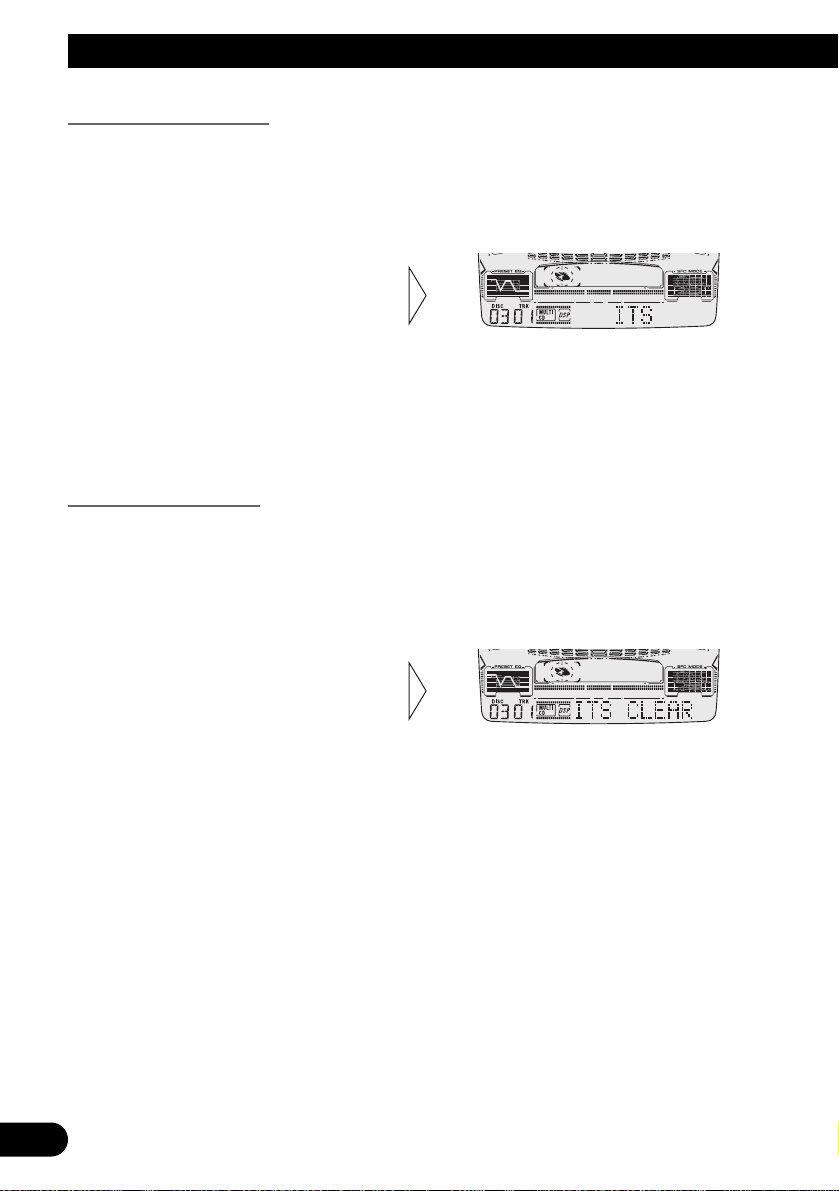
Erase a Track Program
Erase a Disc Program
3. Erase the disc program with
the ∞ button.
2. Select the ITS Programming mode (ITS) in the Detailed Setting Menu.
(Refer to page 20.)
1. Select the disc you wish to erase, while the disc is playing.
3. Erase the track program with
the ∞ button.
ITS is canceled and playback of the
next ITS-programmed track begins.
If there are no more programmed
tracks in the current range, “ITS
EMPTY” is displayed and normal
play resumes.
2. Select the ITS Programming mode (ITS) in the Detailed Setting Menu.
(Refer to page 20.)
1. Select the track you wish to erase, during ITS play.
Page 41

Disc Title
Disc Title Input (TITLE IN)
You can input Titles up to 10 letters long for up to 100 discs. Using this function lets you
easily search for and select a desired disc for play. (You can store ITS program and Disc
Title data for up to 100 discs in memory.)
Note:
• When playing a CD TEXT disc on a CD TEXT compatible Multi-CD player, you cannot switch to
this mode.
• A CD TEXT disc is a CD featuring recorded text information such as Disc Title, Artist Name and
Track Title.
Each press of button 1 changes the character type in the following order:
Alphabet (Upper case), Numbers and Symbols = Alphabet (Lower case)
= European letters, such as those with accents (e.g. á, à, ä, ç)
Note:
• You can select to input the Numbers and Symbols by pressing button 2.
Continued overleaf.
6. When you have completed title
input, make the 10th letter
flash, then memorize by
pressing the 3 button.
5. Move the box left and right
with the 2/3 buttons.
4. Select letters, numbers and
symbols with the 5/∞ buttons.
To insert a space, select the flashing
cursor “_”.
3. Switch the desired character
type with the button 1.
2. Select the Disc Title Input mode (TITLE IN) in the Detailed Setting Menu.
(Refer to page 20.)
1. Play the disc you wish to input the disc title.
40
ENGLISH ESPAÑOL DEUTSCH FRANÇAIS
ITALIANO NEDERLANDS
Page 42
41
Using Multi-CD Players
Note:
• Titles remain in memory, even after the disc has been removed from the magazine, and are recalled
when the disc is reinserted.
• After the titles for 100 discs have been entered, data for a new disc will overwrite the data for the
disc that has not been played back for the longest time.
• You can display the disc title of the disc currently playing. For details, refer to “Displaying Disc
Title” on this page.
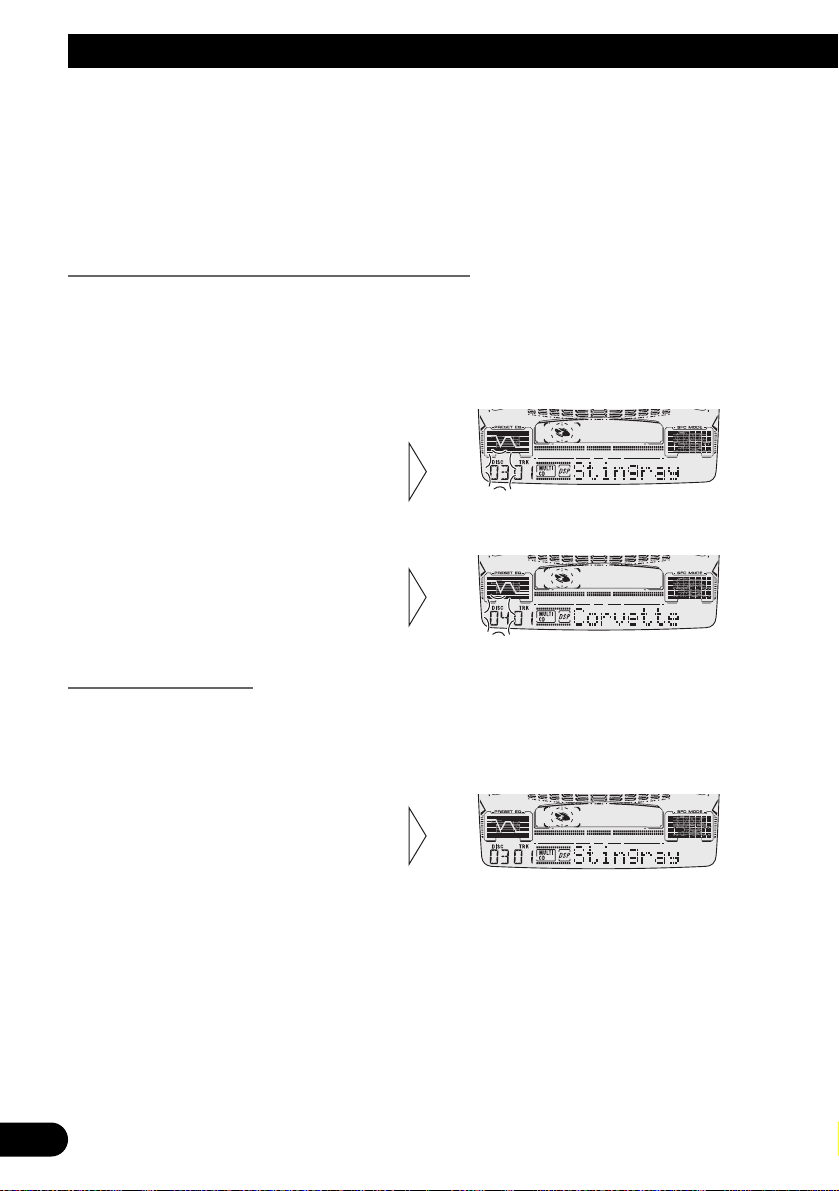
Selecting Discs by Disc Title List (TITLE LIST)
Follow the procedures below to play a disc for which you have input the title in a MultiCD player or a CD TEXT disc on a CD TEXT compatible Multi-CD player.
Displaying Disc Title
You can display the currently playing Disc Title.
Note:
• You can also display the currently playing Disc Title when playing a CD TEXT disc on a CD
TEXT compatible Multi-CD player.
Playback mode (Play Time) = Disc Title (DISC TITLE)
Note:
• If you switch displays when disc titles have not been input, “NO TITLE” is displayed.
• Switch the Disc Title Display
with the DISPLAY button.
Each press of the DISPLAY button
changes the display in the following
order:
3. Play the selected disc with the
5 button.
2. Select the desired disc title
with the 2/3 buttons.
“NO TITLE” is displayed for disc
whose titles have not been input.
1. Press the FUNCTION button and select the Disc Title List mode
(TITLE LIST) in the Function Menu.
Page 43

Compression and DBE (COMP)
Using the COMP (Compression) and DBE (Dynamic Bass Emphasis) functions enables
Multi-CD player sound quality adjustment. Each of the functions enables two-step adjustment.
COMP/DBE ON/OFF Switching
Note:
• You can use these functions with a Multi-CD player that has them. If the player does not feature the
COMP/DBE functions, “NO COMP” is displayed if you try to use them.
CD TEXT Function (for CD TEXT compatible type)
You can use these functions when playing a CD TEXT disc on a CD TEXT compatible
Multi-CD player.
Title Display Switching
Playback mode (Play Time) = Disc Title (DISC TITLE) = Disc Artist (D.ARTIST) =
Track Title (TRK TITLE) = Track Artist (T.ARTIST)
Note:
• If certain text information is not recorded on a CD TEXT disc, “NO ~” (e.g. “NO D-TITLE”)
is displayed.
• Select the desired title display
with the DISPLAY button.
Each press of the DISPLAY button
changes the display in the following
order:
2. Select the desired mode with
the 5/∞ buttons.
COMP OFF = COMP 1 = COMP 2
= COMP OFF = DBE 1 = DBE 2
1. Press the FUNCTION button and select the COMP/DBE Switching mode
(COMP) in the Function Menu.
7 DBE
DBE (Dynamic Bass Emphasis) boosts
bass levels to give a fuller sound.
7 COMP
The COMP (Compression) function
adjusts imbalances between loud and
subdued sounds at higher volumes.
42
ENGLISH ESPAÑOL DEUTSCH FRANÇAIS
ITALIANO NEDERLANDS
Page 44

43
Using Multi-CD Players
Title Scroll
This product displays the first 10 letters only of “DISC TITLE”, “D.ARTIST”,
“TRK TITLE” and “T.ARTIST”. With text longer than 10 letters, you can see the rest of
the text by scrolling.
When using the 50-Disc Type Multi-CD Player
The available functions of the 50-Disc Type Multi-CD Player are described in this
Operation Manual. Note that other 50-Disc Type Multi-CD Player functions cannot be
used with this product.
• Scroll the title display by
pressing the DISPLAY button
for 2 seconds.
Page 45
Audio Adjustment
44
ENGLISH ESPAÑOL DEUTSCH FRANÇAIS
ITALIANO NEDERLANDS
Entering the Audio Menu 1
With this Menu, you can adjust the sound quality.
Note:
• After entering the Audio Menu 1, if you do not perform an operation within about 30 seconds, the
Audio Menu 1 is automatically canceled.
1. Select the desired mode in the Audio Menu 1.
2. Operate a mode.
3. Cancel the Audio Menu 1.
Audio Menu 1 Functions
The Audio Menu 1 features the following functions.
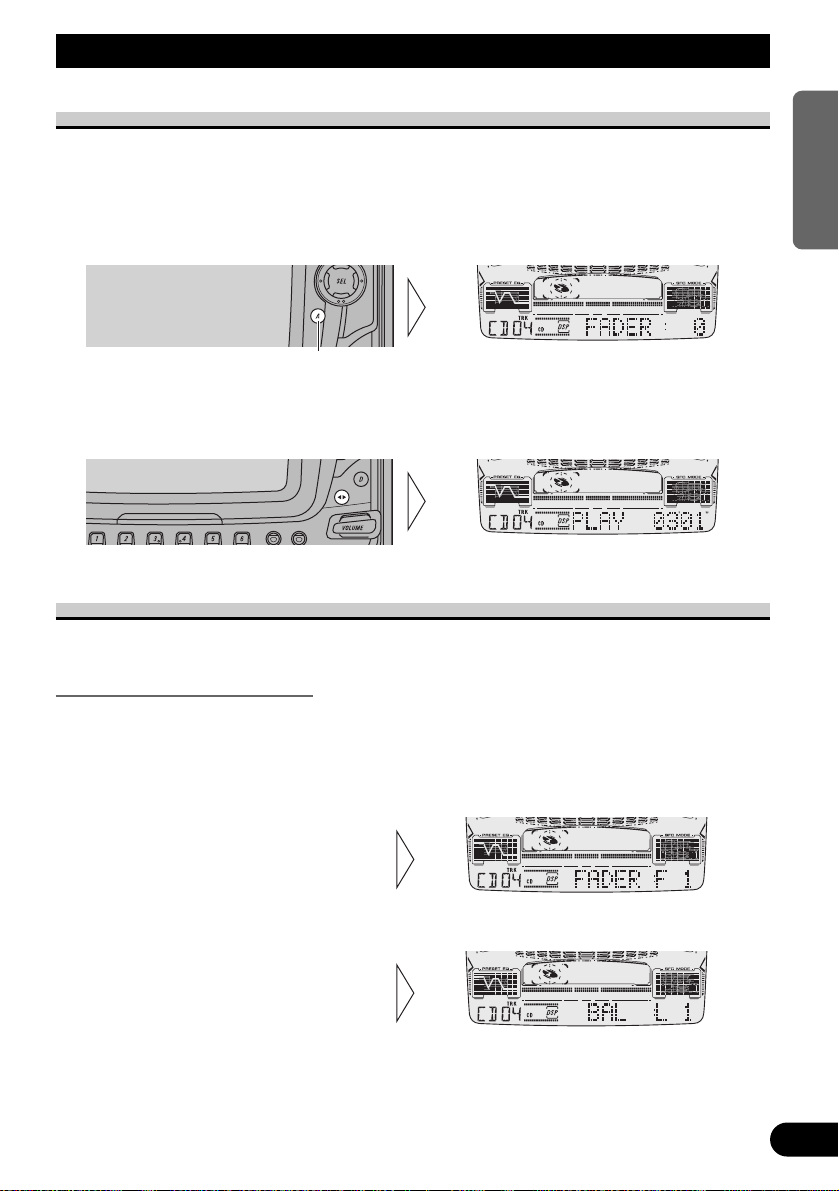
Balance Adjustment (FADER)
This function allows you to select a Fader/Balance setting that provides ideal listening conditions in all occupied seats.
1. Press the AUDIO button and select Fader/Balance mode (FADER) in the
Audio Menu 1.
Note:
•“FADER : 0” is the proper setting when 2 speakers are in use.
3. Adjust left/right speaker balance with the 2/3 buttons.
“BAL :L25” – “BAL :R25” is displayed as it moves from left to right.
2. Adjust front/rear speaker balance with the 5/∞ buttons.
“FADER :F25” – “FADER :R25” is
displayed as it moves from front to
rear.
Each press changes the Mode ...
Page 46
45
A Title (English)Audio Adjustment
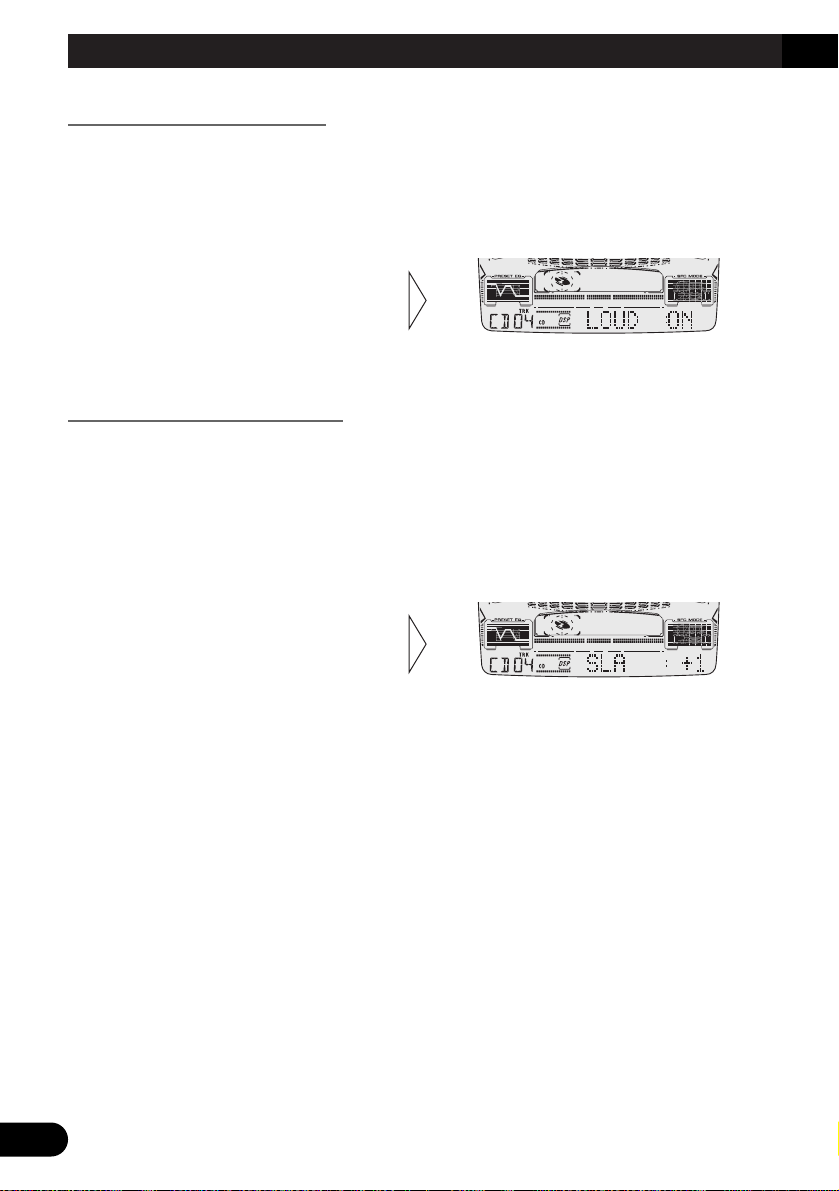
Loudness Adjustment (LOUD)
The Loudness function compensates for deficiencies in the low and high sound ranges at
low volume.
1. Press the AUDIO button and select the Loudness mode (LOUD) in the Audio
Menu 1.
Source Level Adjustment (SLA)
The SLA (Source Level Adjustment) function prevents radical leaps in volume level when
switching between sources. Settings are based on the FM volume level, which remains
unchanged.
1. Compare the FM volume with the volume of the other source.
(e.g. Built-in CD player)
2. Press the AUDIO button and select the SLA mode (SLA) in the Audio Menu 1.
Note:
• Since the FM volume is the control, SLA is not possible in the FM modes.
• The Built-in CD player and Multi-CD player are set to the same volume adjustment setting auto-
matically.
• The MW/LW volume level, which is different from the FM base setting volume level, can also be
adjusted similar to souces other than tuner.
3. Increase or decrease the level
with the 5/∞ buttons.
The display shows “+4” – “–4”.
2. Switch the Loudness function
ON/OFF with the 5/∞ buttons.
Page 47
Entering the Audio Menu 2
With this Menu, you can adjust the contrast of the product’s display.
Note:
• After entering the Audio Menu 2, if you do not perform an operation within about 30 seconds, the
Audio Menu 2 is automatically canceled.
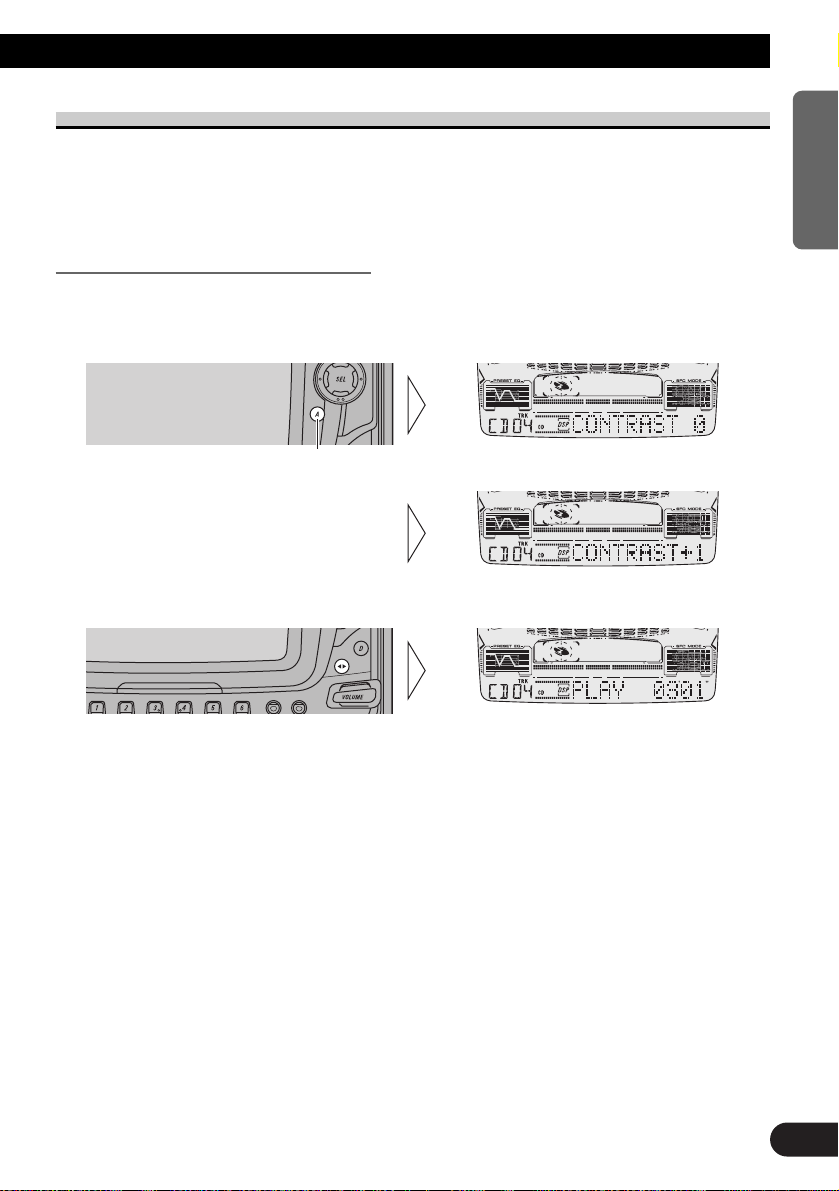
Selecting the Contrast (CONTRAST)
You can adjust the contrast of the product’s display.
1. Press the AUDIO button for 2 seconds and select the Contrast mode
(CONTRAST) in the Audio Menu 2.
3. Cancel the Audio Menu 2.
Note:
• If you press the AUDIO button while entering the Audio Menu 2, Audio Menu 1 resumes.
2. Select the desired Contrast with
the 22/33buttons.
The display shows “+7” – “–7”.
Hold for 2 seconds
46
ENGLISH ESPAÑOL DEUTSCH FRANÇAIS
ITALIANO NEDERLANDS
Page 48

47
Using the Digital Signal Processor (DSP)
Entering the DSP Menu 1
With this Menu, you can adjust the sound field.
Note:
• After entering the DSP Menu 1, if you do not perform an operation within about 30 seconds, the
DSP Menu 1 is automatically canceled.
1. Select the desired mode in the DSP Menu 1.
2. Operate a mode.
3. Cancel the DSP Menu 1.
Grapic Equalizer
Enables adjustment of equalization to match car interior acoustic characteristics as desired.
About FLAT and CUSTOM
7 FLAT
No supplement or correction is made to the sound. A useful function to check the effect of
the equalizer curves by switching alternatively between FLAT and a set equalizer curve.
7 CUSTOM
CUSTOM can be stored as an adjusted equalizer curve.
Adjustment can be made by 11-Band Graphic Equalizer Adjustment.
Recalling the Equalizer Curves
You can easily recall equalizer curves.
7 Direct Recall
1. Press the DSP button and select the Graphic Equalizer mode (ROCK) in the
DSP Menu 1.
Each press changes the Mode ...
Page 49

2. Select the desired equalizer curve with one of the buttons from 1 to 6.
(e.g. Press button 2.)
Button Display Equalizer Curve
1 ROCK Rock
2 POP Pop
3 HIPHOP Hiphop
4 TECHNO Techno
5 CUSTOM Custom
6 FLAT Flat
7 Sequential Recall
1. Press the DSP button and select the Grapic Equalizer mode (ROCK) in the
DSP Menu 1.
2. Select the desired Equalizer curve in the following order:
ROCK Ô POP Ô HIPHOP Ô TECHNO Ô CUSTOM Ô FLAT
Adjusting the Equalizer Curves
All curves but FLAT can be adjusted (fine adjustment).
Adjustment can be made by either using Graphic Equalizer or 11-Band Graphic Equalizer
Adjustment.
7 Graphic Equalizer
The fuctory curves can be adjusted at fine levels (nuance control).
1. Press the DSP button and select the Graphic Equalizer mode (ROCK) in the
DSP Menu 1.
Continued overleaf.
48
ENGLISH ESPAÑOL DEUTSCH FRANÇAIS
ITALIANO NEDERLANDS
Page 50

Using the Digital Signal Processor (DSP)
2. Recall the Equalizer curve you want to adjust (refer to previous section).
3. Adjust the Equalizer curve.
Display shows “+6” – “–5”.
Note:
• Adjustment range is subject to the curve.
• You can store the equalizer curve in CUSTOM by pressing button 5 for 2 seconds.
7 11-Band Graphic Equalizer Adjustment
You can select this mode only when you select CUSTOM.
1. Recall CUSTOM. (Refer to previous section.)
2. Press the DSP button and select the 11-Band Graphic Equalizer Adjustment
mode (50Hz) in the DSP Menu 1.
Note:
• Adjustment range is subject to the curve.
5. Repeat steps 3-4 above for the other band adjustments.
Note:
• You can create different CUSTOM for different sources. (The Built-in CD Player and Multi-CD
Player are set to the same Equalizer Adjustment setting automatically.)
4. Adjust the level with the 5/∞
buttons.
Display shows “+6” – “–6”.
3. Select the band to be adjusted
with the 2/3 buttons.
50 Ô 80 Ô 160 Ô 250 Ô 500
Ô 800 Ô 1.2k Ô 2.5k Ô 4.0k
Ô 8.0k Ô 12.5k (Hz)
49
Page 51

Sound Field Control and Octaver
The sound field control function (SFC) incorporates 4 programs for reproducing typical
sound fields of a studio etc. This function makes it possible to reproduce a realistic sound
field of a studio etc. in your car.
OCTAVER makes the bass sound loud effectively. OCTAVER 2 is more effective than
OCTAVER 1.
Recalling the Sound Field Program (SFC)
There are two ways to recall a sound field program.
Button Display Sound Field Program/Octaver
1 STUDIO Studio
2 CLUB Club
3 CONCERT Concert
4 DOME Dome
5 OCTAVER 1 Octaver 1
6 OCTAVER 2 Octaver 2
7 Direct Recall
1. Press the DSP button and select the SFC mode (SFC) in the DSP Menu 1.
2. Select the desired sound field program. (e.g. Press button 2.)
To cancel the sound field program, press the same button again.
7 Sequential Recall
1. Press the DSP button and select the SFC mode (SFC) in the DSP Menu 1.
2. Select the desired sound field program in the following order:
STUDIO Ô CLUB Ô CONCERT Ô DOME Ô OCTAVER 1 Ô OCTAVER 2
Ô SFC OFF
50
ENGLISH ESPAÑOL DEUTSCH FRANÇAIS
ITALIANO NEDERLANDS
Page 52

Using the Digital Signal Processor (DSP)
Position Selector
One way to assure a more natural sound is to clearly position the stereo sound image
(putting you in the center of the sound field).
The Position Selector function adjusts volume level of sound from each speaker to match
seat positions and the number of people in the car, and lets you recall settings at the touch
of a button. The result is a natural sound regardless of the seat you are sitting in.
Button Display Position
5 FRONT Front Seat Right & Left
∞ ALL All Seats
2 FRONT-L Front Seat Left
3 FRONT-R Front Seat Right
About the Position Indicator
This lets you confirm current Position setting without switching to the Position Selector
mode.
Front Seat Front Seat Front Seat All Seats
Left Right Right&Left
Setting the Listening Position (POSI)
1. Press the DSP button and select the Position Selector mode (POSI) in the
DSP Menu 1.
To cancel the listening position, press the same button again.
2. Press one of buttons 5/∞/2/3
to select the desired Position.
(e.g. Press button 2.)
51
Page 53

Entering the DSP Menu 2
With this Menu, you can adjust the sound quality.
Note:
• After entering the DSP Menu 2, if you do not perform an operation within about 30 seconds, the
DSP Menu 2 is automatically canceled.
1. Enter the DSP Menu 2.
\
2. Select the desired mode in the DSP Menu 2.
3. Operate a mode.
4. Cancel the DSP Menu 2.
Each press changes the Mode ...
Hold for 2 seconds
52
ENGLISH ESPAÑOL DEUTSCH FRANÇAIS
ITALIANO NEDERLANDS
Page 54

53
Using the Digital Signal Processor (DSP)
Subwoofer Output (SUB.W)
This product is equipped with a Subwoofer output which can be switched ON or OFF.
Initially, Subwoofer output is ON.
Note:
• You cannot select the SUB.W mode if the preout setting is switched to Rear output mode in the
Initial Setting Menu. (Refer to page 57.)
• Select the OFF setting when you do not want the Subwoofer to operate.
• When the Subwoofer output is ON, the “ ” indicator lights.
Subwoofer Setting Adjustment (80Hz)
When the Subwoofer output is ON, you can adjust the cut-off frequency and the output
level of Subwoofer.
Note:
• You can select the Subwoofer setting mode only when Subwoofer output is switched ON in the
Subwoofer ON/OFF mode.
3. Increase or decrease the output
level with the 5/∞ buttons.
The display shows “+6” – “–6”.
2. Select the frequency to 50 Hz,
80 Hz or 125 Hz with the 2/3
buttons.
1. Press the DSP button and select the Subwoofer setting mode (80Hz) in the
DSP Menu 2.
3. Change the phase of Subwoofer
output with the 2/3 buttons.
2. Switch the Subwoofer output
ON/OFF with the 5/∞
buttons.
1. Press the DSP button and select the Subwoofer ON/OFF mode (SUB.W)
in the DSP Menu 2.
Page 55

High Pass Filter (HPF)
When you do not want sound in the Subwoofer output frequency range output from the
front or rear speakers, switch the High Pass Filter (HPF) ON. Only higher frequencies than
those in the selected range are output from the front and rear speakers.
1. Press the DSP button and select the High Pass Filter mode (HPF) in the DSP
Menu 2.
3. Select the desired frequency
with the 2/3 buttons.
50 Ô 80 Ô 125 (Hz)
2. Switch the High Pass Filter
function ON/OFF with the 5/∞
buttons.
54
ENGLISH ESPAÑOL DEUTSCH FRANÇAIS
ITALIANO NEDERLANDS
Page 56

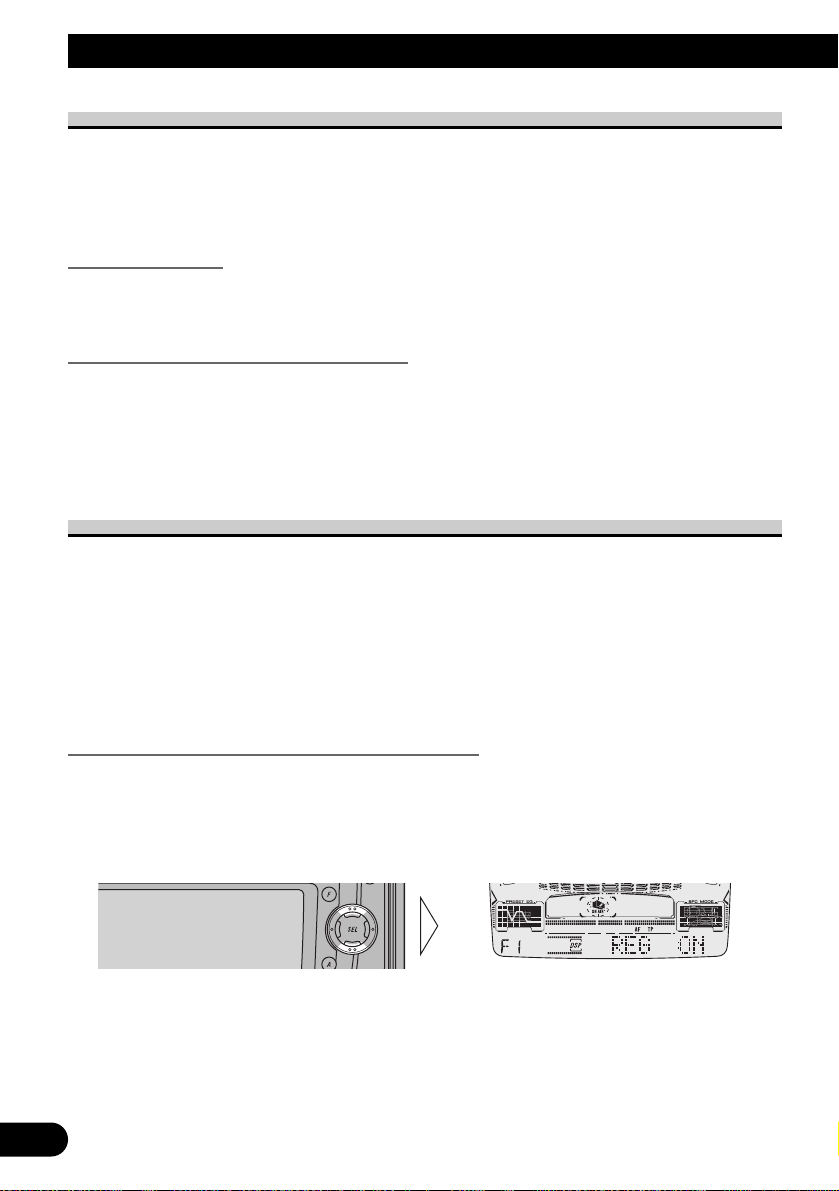
Initial Setting
Entering the Initial Setting Menu
With this Menu, you can perform initial settings for the product.
1. Switch the sources OFF.
2. Enter the Initial Setting Menu.
3. Select the desired mode.
4. Operate a mode.
5. Cancel the Initial Setting Menu.
Note:
• Holding down the FUNCTION button for 2 seconds also cancels the Initial Setting Menu.
• Press the D.FUNC button also cancels the Initial Setting Menu.
Each press changes the Mode ...
Hold for 2 seconds
55
Page 57

Initial Setting Menu Functions
The Initial Setting Menu features the following functions.
Changing the FM Tuning Step (FM STEP)
Normally set at 50 kHz during Seek tuning in the FM mode, the tuning step changes to
100 kHz when the AF or TA mode is activated.
It may be preferable to set tuning step to 50 kHz in the AF mode.
Note:
• The tuning step remains set at 50 kHz during Manual tuning.
• The tuning step returns to 100 kHz if the battery is temporarily disconnected.
Switching the Auto PI Seek (A-PI)
During Preset Station PI Seek operation, you can switch the Auto PI Seek function
ON/OFF. (Refer to “PI Seek Function” on page 25.)
Switching the AUX Mode (AUX)
It is possible to use auxiliary (AUX) equipment with this product.
Activate the AUX mode when using external equipment with this product.
1. Press the FUNCTION button and select the AUX Setting mode (AUX) in the
Initial Setting Menu.
2. Switch the AUX ON/OFF with
the 5/∞ buttons.
2. Switch the A-PI ON/OFF with
the 5/∞ buttons.
1. Press the FUNCTION button and select the Auto PI Seek mode (A-PI) in
the Initial Setting Menu.
2. Switch the desired tuning step
with the 2/3 buttons.
1. Press the FUNCTION button and select the FM Tuning Step mode (FM
STEP) in the Initial Setting Menu.
56
ENGLISH ESPAÑOL DEUTSCH FRANÇAIS
ITALIANO NEDERLANDS
Page 58

Initial Setting
Setting the Dimmer (DIMMER)
To enable this product’s display from being too bright at night, when the vehicle’s head
lights are turned ON the display is dimmed. You can switch this function ON/OFF.
1. Press the FUNCTION button and select the Dimmer mode (DIMMER) in
the Initial Setting Menu.
Setting Preout Output (PREOUT)
This product is equipped with two Preout outputs. One is for Front output. The other can
be used for Subwoofer or Rear output. Initially, it is set for Subwoofer output.
When connecting a rear speaker to this output, set for Rear output.
Selecting the Digital Attenuator (DIG.ATT)
When listening to a CD or other source on which the recording level is high, setting the
equalizer curve level to “H” (high) may result in distortion.
You can switch the digital attenuator to “L” (low) to reduce distortion. (Sound quality
when the setting is “H” (high) is better than when the setting is “L” (low), so usually set to
“H” (high).)
2. Select the desired attenuation
level with the 2/3 buttons.
L Ô H
1. Press the FUNCTION button and select the Digital Attenuator mode
(DIG.ATT) in the Initial Setting Menu.
2. Switch your desired Preout
output type with the 2/3
buttons.
1. Press the FUNCTION button and select the Preout Output Setting mode
(PREOUT) in the Initial Setting Menu.
2. Switch the Dimmer ON/OFF
with the 5/∞ buttons.
57
Page 59
Other Functions
About the Demonstration Mode
If you press the button 6 when this product’s source is OFF, a Demonstration is shown in
the display. Pressing button 6 during Demonstration operation cancels the Demonstration
mode. Remember that if the Demonstration continues operating when the car engine is
switched OFF, it may drain battery power.
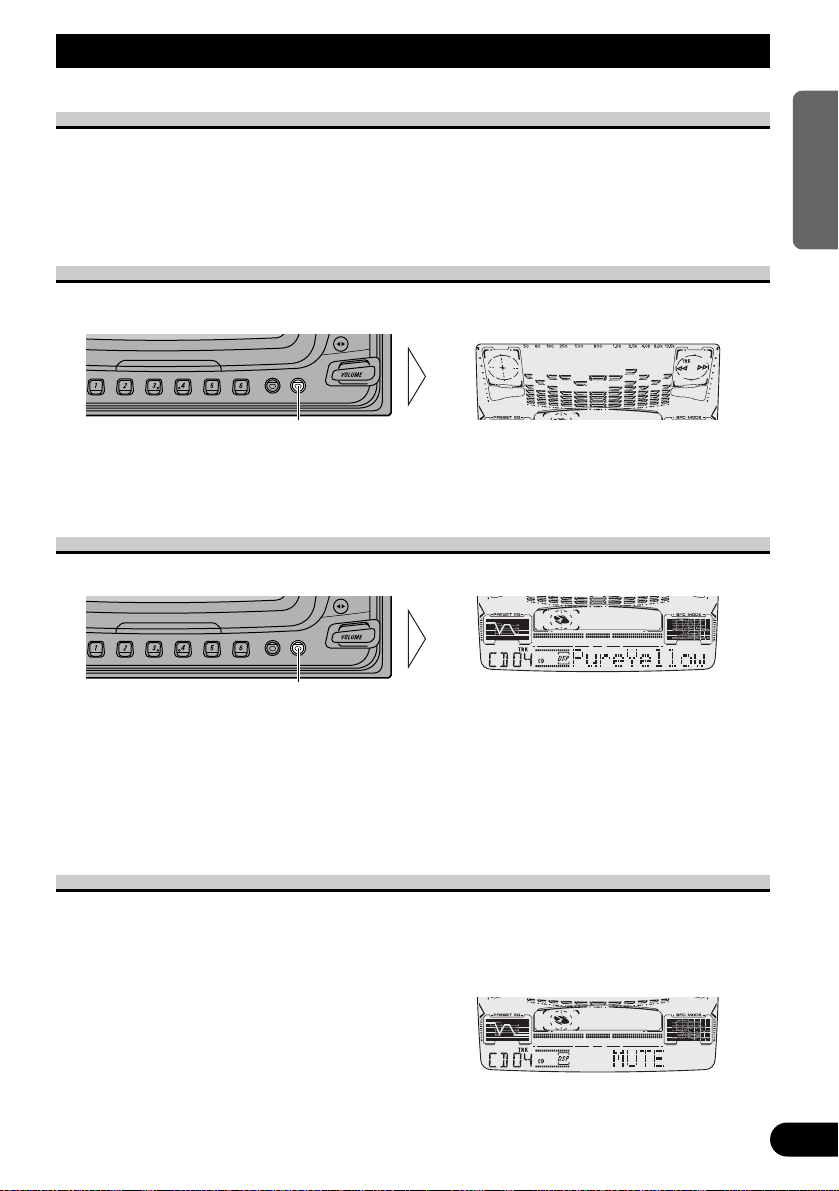
Spectrum Analyzer Mode
You can enjoy 6 kinds of Spectrum Analyzer displays while listening to each sound
source.
Each press of COLOR button for 2 seconds changes the display in the following order:
SPEED = RAINFALL = WIND = SYNCHROSCOPE = REVERSAL = EQ curve
Back Light Color Mode
You can change the Back Light Color of the product’s display.
Each press of COLOR button changes the color in the following order:
WhiteBlue = OceanBlue = DeepBlue = Aquamarine = LeafGreen = PureYellow =
PaleOrange = CyberRed = ActivePink = CoolViolet = Rainbow
• When you select “Rainbow”, the Back Light Color changes continuously in the above
order.
Cellular Telephone Muting
Sound from this system is muted automatically when a call is made or received using a
cellular telephone connected to this product.
• The sound is turned off, “MUTE” is displayed and no audio adjustment except volume
control is possible. Operation returns to normal when the phone connection is ended.
Each press changes the Color ...
Hold for 2 seconds
58
ENGLISH ESPAÑOL DEUTSCH FRANÇAIS
ITALIANO NEDERLANDS
Page 60

59
Other Functions
Using the AUX Source
An IP-BUS-Interconnector such as CD-RB20 (sold separately) enables you to connect this
product to auxiliary equipment featuring an RCA output.
For more details, refer to the IP-BUS-RCA Interconnector’s Owner’s Manual.
Selecting the AUX Source
• Select AUX. (Refer to page 9.)
AUX Title Input
The display title for AUX Source can be changed.
1. Select the AUX Title Input mode (TITLE IN) in the Detailed Setting Menu.
2. Input the AUX Title.
Refer to “Disc Title Input” on page 40, and perform procedures 3 to 6 in the same way.
Hold for 2 seconds
Each press (up or down) changes the Source ...
Page 61

A Title (English)
Precaution
• Play only CDs bearing the Compact Disc Digital
Audio mark. (If a CD features the top right mark on
its disc title side, that disc is a CD TEXT disc. There
are also some CD TEXT discs that do not feature the
top right mark.)
• This product is designed for use with conventional,
fully circular CDs only. Use of shaped CDs are not
recommended for this product.
• Check all CDs before playing and discard cracked, scratched or warped discs.
• Playback by this product of a CD-R disc recorded on a CD recorder may not be possible
due to characteristics of the disc, scratches or dirt on the disc, or dirt or condensation on
this product’s optical pickup lens.
• Read the precautions with the CD-R discs before
using.
• Wipe dirty or damp discs outward from the center
with a soft cloth.
• Avoid touching the recorded (iridescent) surface when handling discs.
• Store discs in their cases when not in use.
• Keep discs out of direct sunlight and high temperatures.
• Do not affix labels or apply chemicals to discs.
• Condensation may collect inside the player when using the heater in cold weather, interfering with playback. Turn it off for an hour or so and wipe damp discs with a soft cloth.
• Road shocks may interrupt CD playback.
Built-in CD Player’s Error Message
When problems occur with CD playback, an error message appears on the display. Refer
to the table below to identify the problem, then take the suggested corrective action. If the
error persists, contact your dealer or your nearest PIONEER Service Center.
Message Possible cause Recommended action
ERROR- 11, 12, 17, 30 Dirty disc. Clean the disc.
ERROR- 11, 12, 17, 30 Scratched disc. Replace the disc.
ERROR- 14 Unrecorded CD. Check the disc.
ERROR- 10, 11, 12, 14, Electrical or mechanical Turn the ignition ON and OFF, or
17, 30, A0 problem. switch to a different source, then back
to the CD player.
HEAT CD player overheating. Discontinue play until the machine
temperature drops.
60
ENGLISH ESPAÑOL DEUTSCH FRANÇAIS
ITALIANO NEDERLANDS
CD Player and Care
COMPACT
DIGITAL AUDIO
Page 62

61
Cassette Player and Care
Precaution
About the Cassette Player
• A loose or warped label on a cassette tape may interfere with the eject mechanism of the
unit or cause the cassette to become jammed in the unit. Avoid using such tapes or
remove such labels from the cassette before attempting use.
• The music search, repeat and scan functions may not work properly with the following
kinds of recorded tapes because the gap between songs cannot be found correctly.
* A tape with a gap of 4 seconds or less between songs.
* A tape containing dialog, etc., with pauses lasting for 4 seconds or longer.
* A tape with an extremely quiet passage in the music lasting for 4 seconds or longer.
About Cassette Tapes
• Do not use tapes longer than C-90 type (90 min.) cassettes. Longer tapes can interfere
with tape transport.
• Storing cassettes in areas directly exposed to sunlight or high temperatures can distort
them and subsequently interfere with tape transport.
• Store unused tapes in a tape case where there is no danger of them becoming loose or
being exposed to dust.
Cleaning the Head
If the head becomes dirty, the sound quality will deteriorate and there will be sound
dropouts and other imperfections in performance. In this case, the head must be cleaned.
NOT RECOMMENDED
Page 63

Specifications
General
Power source .......... 14.4 V DC (10.8 – 15.1 V allowable)
Grounding system ........................................ Negative type
Max. current consumption ...................................... 10.0 A
Dimensions
(mounting size) .... 178 (W) × 100 (H) × 160 (D) mm
(front face) .............. 170 (W) × 95 (H) × 18 (D) mm
Weight ...................................................................... 3.0 kg
Audio/DSP
Maximum power output ...................................... 45 W × 4
Continuous power output .................................... 27 W × 4
Load impedance .......................... 4 Ω (4 – 8 Ω allowable)
Preout maximum output level/
output impedance ........................................ 2 V/1 kΩ
Loudness contour ........ +10 dB (100 Hz), +7 dB (10 kHz)
(volume: –30 dB)
Equalizer (11-Band Graphic Equalizer)
Frequency ........................ 50/80/160/250/500/800 Hz
1.2/2.5/4/8/12.5 kHz
Equalization range .......................................... ±12 dB
HPF
Frequency ............................................ 50/80/125 Hz
Slope ........................................................ –12 dB/oct.
Subwoofer output
Frequency ............................................ 50/80/125 Hz
Slope ........................................................ –18 dB/oct.
Gain .................................................................. ±6 dB
Phase ................................................ Normal/Reverse
CD player
System .................................... Compact disc audio system
Usable discs .................................................. Compact disc
Signal format .................... Sampling frequency: 44.1 kHz
Number of quantization bits: 16; linear
Frequency characteristics .............. 5 – 20,000 Hz (±1 dB)
Signal-to-noise ratio ...... 94 dB (1 kHz) (IEC-A network)
Dynamic range ............................................ 92 dB (1 kHz)
Number of channels ............................................ 2 (stereo)
Cassette player
Tape ........................ Compact cassette tape (C-30 – C-90)
Tape speed ........................................................ 4.8 cm/sec.
Fast forward/rewinding time .... Approx. 100 sec. for C-60
Wow & flutter .......................................... 0.09% (WRMS)
Frequency response .......... Metal: 30 – 19,000 Hz (±3 dB)
Stereo separation ...................................................... 50 dB
Signal-to-noise ratio
...... Metal: Dolby B NR IN: 67 dB (IEC-A network)
Dolby NR OUT: 61 dB (IEC-A network)
FM tuner
Frequency range ...................................... 87.5 – 108 MHz
Usable sensitivity .................................................... 10 dBf
(1.0 µV/75 Ω, mono, S/N: 30 dB)
50 dB quieting sensitivity ........................................ 15 dBf
(1.7 µV/75 Ω, mono)
Signal-to-noise ratio ...................... 70 dB (IEC-A network)
Distortion .......................... 0.3% (at 65 dBf, 1 kHz, stereo)
Frequency response ...................... 30 – 15,000 Hz (±3 dB)
Stereo separation .......................... 40 dB (at 65 dBf, 1 kHz)
MW tuner
Frequency range .......................... 531 – 1602 kHz (9 kHz)
Usable sensitivity .............................. 18 µV (S/N: 20 dB)
Selectivity .................................................. 50 dB (±9 kHz)
LW tuner
Frequency range ........................................ 153 – 281 kHz
Usable sensitivity .............................. 30 µV (S/N: 20 dB)
Selectivity .................................................. 50 dB (±9 kHz)
Note:
• Specifications and the design are subject to
possible modification without notice due to
improvements.
62
ENGLISH ESPAÑOL DEUTSCH FRANÇAIS
ITALIANO NEDERLANDS
Page 64

1
Indice
I vari tasti .................................................... 3
- Corpo dell’apparecchio (Chiudi)
- Corpo dell’apparecchio (April)
-
Telecomando da volante
Il telecomando e sua cura ........................ 5
Uso del telecomando da volante ........................ 5
-
Batteria
Prima di usare questo prodotto .............. 7
A proposito del prodotto .................................. 7
Nota su questo manuale .................................... 7
Ripristino del microprocessore .......................... 7
Precauzione ...................................................... 8
In caso di problemi ............................................ 8
Uso in breve ................................................ 9
Ascolto di musica .............................................. 9
Impostazione dell’angolo
di visualizzazione...................................... 10
Principali operazioni del lettore
CD incorporato ........................................ 11
- Aprire/Espulsione
- Commutazione della visualizzazione
- Ricerca del brano e avanzamento o
retrocessione veloce
- Fessura di inserimento del disco
Funzionamento base del lettore
di audiocassette ........................................ 13
- Aprire/Espulsione
- Cambiamento di direzione
- Avanzamento veloce e riavvolgimento,
e ricerca dei brani
- Fessura di inserimento della cassetta
Principali operazioni del sintonizzatore .......... 15
- Sintonizzazione manuale o a ricerca
automatica
- Sintonizzazione a stazioni predesignate
- Bande
Principali operazioni del multilettore CD ...... 16
- Ricerca del brano e avanzamento o
retrocessione veloce
- Ricerca del disco
- Ricerca diretta del numero del disco
(per scambiatori a 6 e 12 dischi)
Indicazioni del quadrante e tasti
corrispondenti .......................................... 17
Attivazione del menù delle funzioni .............. 17
Funzioni del menù delle funzioni .................... 18
Attivazione del menù
delle predisposizioni dettagliate .............. 20
Funzioni del menù
delle predisposizioni dettagliate .............. 21
Funzioni del tasto D.FUNC ............................ 21
Uso del sintonizzatore ............................ 22
- Sintonizzazione a ricerca locale
(LOCAL)
- Memorizzazione delle stazioni più chiare
(BSM)
Uso delle funzioni RDS ............................ 23
Cos’è il sistema RDS? .................................... 23
Visualizzazione del nome
della stazione radio .................................. 23
Funzione AF (AF) .......................................... 24
- Attivazione o disattivazione della
funzione AF
Funzione PI Seek ............................................ 25
- PI Seek (PI SEEK)
- Ricerca automatica di stazioni predesignate
PI Seek (A-PI)
Funzione di sintonizzazione
regionale (REG) ...................................... 25
- Attivazione o disattivazione della
funzione regionale
Funzione di attesa per annunci sul traffico
(TA) .......................................................... 26
- Attivazione o disattivazione della
funzione TA
- Disattivazione degli annunci sul traffico
- Regolazione del volume della funzione TA
- Funzione di allarme TP
Funzione PTY ................................................ 28
- Ricerca PTY (del tipo di programma)
- Predisposizione dell’interruzione da
parte dei notiziari (NEWS)
- Allarme PTY
- Disattivazione della ricezione di annunci
- Lista dei tipi di programmi (PTY)
Uso del lettore CD incorporato .............. 31
- Ripetizione della riproduzione
(REPEAT)
- Riproduzione casuale (RANDOM)
- Riproduzione a scansione (T.SCAN)
- Pausa (PAUSE)
- Inserimento del titolo del disco
(TITLE IN)
Uso del lettore di audiocassette .......... 34
-
Ripetizione della riproduzione
(REPEAT)
-
Riproduzione a scansione (SCAN)
-
Evitamento di spazi non registrati
(B.SKIP)
-
Intercettazione radio (R.I)
-
Sistema Dolby B NR (NR)
Page 65

Uso di multilettori CD .............................. 36
- Ripetizione della riproduzione (REPEAT)
- Riproduzione casuale (RANDOM)
- Riproduzione a scansione (SCAN)
- Pausa (PAUSE)
ITS (Selezione istantanea dei brani) ................ 38
- Programmazione ITS (ITS)
- Riproduzione ITS (ITS.PLAY)
- Cancellazione di un brano programmato
- Cancellazione di un disco programmato
Titolo del disco ................................................ 40
- Inserimento del titolo del disco
(TITLE IN)
- Selezione del disco per mezzo della lista
dei titoli dei dischi (TITLE LIST)
- Visualizzazione del titolo del disco
Compressione e DBE (COMP) ...................... 42
- Attivazione e disattivazione delle
funzioni COMP e DBE
Funzione CD TEXT (per tipi comparatibili
con il sistema CD TEXT) ........................ 42
- Commutazione della visualizzazione del
titolo
- Scorrimrnto del titolo
Uso del multilettore CD a 50 dischi ................ 43
Regolazione audio .................................. 44
Attivazione del menù Audio 1 ........................ 44
Funzioni del menù Audio 1 ............................ 44
-
Regolazione del bilanciamento (FADER)
-
Regolazione della tonalità (LOUD)
-
Regolazione del livello della sorgente
(SLA)
Attivazione del menù Audio 2 ........................ 46
-
Selezionare il contrasto (CONTRAST)
Uso dell’elaboratore del segnale
digitale (DSP) .................................... 47
Attivazione del menù DSP 1 .......................... 47
Equalizzatore grafico ...................................... 47
-
Informazioni sulle opzioni
FLAT e CUSTOM
-
Richiamo delle curve dell’equalizzatore
-
Regolazione delle curve dell’equalizzatore
Controllo del campo sonoro e di
accentuazione dei bassi ............................ 50
-
Richiamo del programma di campo sonoro
(SFC)
Selettore di posizione ...................................... 51
-
Indicazione di posizione
-
Predisposizione della posizione di ascolto
(POSI)
Attivazione del menù DSP 2 .......................... 52
-
Uscita del subwoofer (SUB.W)
-
Regolazione del subwoofer (80Hz)
-
Filtro passa-alto (HFP)
Regolazione iniziale ................................ 55
Attivazione del menù
delle predisposizioni iniziali .................... 55
Funzioni del menù
delle predisposizioni iniziali .................... 56
-
Modifica del passo di salto per la
sintonizzazione FM (FM STEP)
-
Attivazione della ricerca automatica PI
(A-PI)
-
Attivazione della modalità ausiliaria
(AUX)
-
Predisposizione della luminosità
(DIMMER)
-
Impostazione dell’uscita del
preamplificatore (PREOUT)
-
Selezione dell’attenuatore digitale
(DIG.ATT)
Altre funzioni ............................................ 58
Modalità dimostrativa
delle funzioni dell’apparecchio ................ 58
Modalità analisi dello spettro .......................... 58
Modalità colore retroilluminazione ................ 58
Silenziamento del telefono cellulare .............. 58
Uso della modalità della sorgente AUX .......... 59
-
Selezione della modalità
della sorgente AUX
-
Inserimento di un titolo AUX
Il lettore CD e sua cura .......................... 60
Precauzione .................................................... 60
Messaggi di errore
del lettore CD incorporato ........................ 60
Manutenzione del lettore
di audiocassette ................................ 61
Precauzione .................................................... 61
-
Il lettore di audiocassette
-
Le audiocassette
Pulizia delle testine .......................................... 61
Dati tecnici ................................................ 62
2
ENGLISH
ITALIANO DEUTSCH FRANÇAIS
ITALIANO NEDERLANDS
Page 66

3
I vari tasti
Corpo dell’apparecchio (Chiudi)
Corpo dell’apparecchio (Apri)
Per ulteriori dettagli sul modo di aprire il pannello frontale, consultare pagina 10.
Tasto CD EJECT
Tasto AUDIO
Tasti 5/∞/2/3
Tasto FUNCTION
Tasto TAPE EJECT
Tasti ANGLE
Tasto RESET
Tasto D.FUNC
Tasto TA
Tasto PTY
Tasti 1 to 6
Tasto DISPLAY
Tasto COLOR
VOLUME
Tasto BAND
Tasto DSP
Selettore SOURCE
Fessura di inserimento del disco
Fessura di inserimento della cassetta
Page 67

4
ENGLISH
ITALIANO DEUTSCH FRANÇAIS
ITALIANO NEDERLANDS
Telecomando da volante
Viene fornito un telecomando da volante che consente di comandare a distanza il funzionamento dell’apparecchio principale. I tasti funzionano come quelli dell’apparecchio principale.
Tasto BAND
Tasti 5/∞
Tasto FUNCTION
TastoATT
Consente di abbassare rapidamente
il livello del volume (di circa il
90%).
Premerlo di nuovo per ritornare al
livello di volume iniziale.
Tasto SOURCE/OFF
Per disattivare la sorgente,
tenere premuto per 1 secondo.
Tasti 2/3
Tasto DSP
Tasto +/–
Regolare
opportunamente
il volume.
Page 68

5
Il telecomando e sua cura
Uso del telecomando da volante
Precauzione:
• Non utilizzare il dispositivo nel corso della guida, per evitare possibili incidenti.
• Se non si può fare a meno di utilizzare il telecomando nel corso della guida, continuare a tenere
d’occhio la strada per evitare possibili incidenti.
• Nel caso in cui si verifichi uno dei seguenti problemi, smettere immediatamente di utilizzare il
telecomando e rivolgersi al rivenditore dal quale il dispositivo è stato acquistato:
– fuoriuscita di fumi dal telecomando;
– emissione di strani odori dal telecomando;
– accidentale penetrazione nel telecomando di oggetti estranei;
– rovesciamento di liquidi sul telecomando.
Se si continua ad usare il telecomando senza cercare rimedio agli eventuali problemi verificatisi, il
telecomando può subire gravi danni, risultanti in incendi, e possibili conseguenti gravi incidenti.
• Non lasciare il telecomando all’interno dell’auto senza fissarlo a dovere. A seguito di una
improvvisa frenata, o di una curva, il telecomando potrebbe cadere sul pavimento. Se il telecomando rotola sotto il pedale del freno, una adeguata frenatura può risultare difficile, con possibili gravi
conseguenze. Il telecomando deve trovarsi sempre fissato al volante.
• Non smontare o modificare questo apparecchio, onde evitare possibili guasti.
Batteria
7 Installazione della batteria al litio
• Togliere il coperchietto sul retro del telecomando da volante ed inserire la
batteria con i poli (+) e (–) rivolti nella direzione corretta.
Page 69
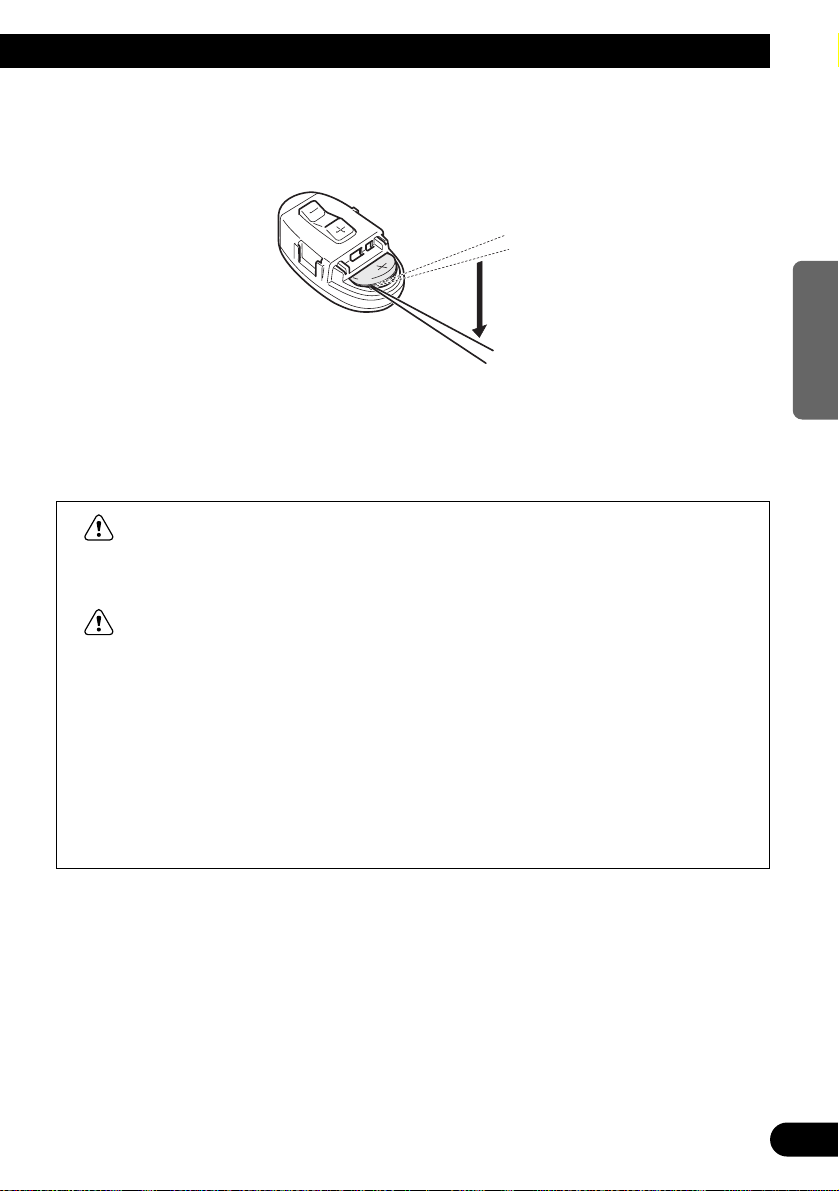
7 Sostituzione della batteria al litio
• Togliere la batteria al litio.
Precauzione:
• Per la sostituzione usare solo batterie al litio del tipo CR2032.
• Per la sostituzione, scalzare la batteria con uno stilo appuntito, non metallico.
AVVERTENZA:
• Tenere la batteria al litio fuori dalla portata dei bambini. In caso di ingestione
accidentale della batteria, rivolgersi immediatamente a un medico.
ATTENZIONE:
• Non ricaricare la batteria, non smontarla, non esporla al calore e non eliminarla
gettandola nel fuoco.
• Usare soltanto batterie al litio tipo CR2032 (3 V). Non usare mai batterie di tipo diverso
con questa unità.
• Non prendere la batteria servendosi di attrezzi metallici.
• Non riporre la batteria al litio insieme a materiali metallici.
• Le batterie al litio usate devono essere eliminate secondo le leggi e le disposizioni
vigenti.
• Fare sempre attenzione ad inserire la batteria con i poli (+) e (–) rivolti nella direzione
corretta.
6
ENGLISH
ITALIANO DEUTSCH FRANÇAIS
ITALIANO NEDERLANDS
Page 70

7
Prima di usare questo prodotto
A proposito del prodotto
Le frequenze del sintonizzatore di questo prodotto vengono allocate per l’uso in Europa
occidentale, Asia, Medio Oriente, Africa ed Oceania. L’uso in altri paesi può non dare
risultati soddisfacenti. La funzione RDS funziona solo in aree dove esistono stazioni in FM
che emettano segnali RDS.
Nota su questo manuale
Questo apparecchio dispone di numerose e sofisticate funzioni che permettono una
ricezione ed un funzionamento di livello superiore. Tutte le caratteristiche sono state
studiate in modo da facilitarne il più possibile l’impiego, ma l’uso di molte di queste può
non risultare immediatamente evidente.
Questo manuale intende quindi aiutare l’utente a beneficiare appieno della potenzialità di
tutte queste funzioni, per massimizzare il proprio piacere di ascolto.
Prima di passare all’uso dell’apparecchio si consiglia di leggere attentamente questo
manuale per familiarizzarsi con le varie caratteristiche ed il loro funzionamento. In particolare, è importante leggere e prendere nota delle “Precauzione” riportate a pag. 8 ed in altre
sezioni del manuale.
Il manuale descrive il funzionamento effettuato con i comandi dell’apparecchio. Le stesse
operazioni possono anche essere effettuate per mezzo del telecomando sullo sterzo. Il telecomando sullo sterzo offre anche la comodità della funzione di attenuazione (ATT) del
volume, una funzione non attivabile per mezzo dei comandi dell’apparecchio.
Ripristino del microprocessore
Il microprocessore deve essere inizializzato nelle seguenti condizioni:
Allorché il prodotto viene utilizzato per la prima volta dopo l’installazione.
Se l’unità non funziona correttamente.
Se sul quadrante appaiono messaggi strani (incorretti).
• Per inizializzare il microprocessore, premere con la punta di una penna o
con un altro strumento appuntito, il tasto RESET sull’unità principale.
Nota:
• Dopo che si è ripristinato il microprocessore, il pannello frontale viene chiuso automaticamente.
• Non ripristinare il microprocessore quando si sono lasciati un disco o una cassetta parzialmente
inseriti.
• Questo prodotto è conforme alle direttive EMC (89/336/CEE, 92/31/CEE) e alla direttiva
sul marchio CE (93/68/CEE).
Page 71

Precauzione
• L’adesivo A “CLASS 1 LASER PRODUCT” è affisso al fondo del lettore.
• Il sistema Pioneer CarStereo-Pass è utilizzabile solo in Germania.
• Conservare questo manuale per poterlo riutilizzare in caso di necessità.
• Tenere sempre il volume sempre sufficientemente basso perché i suoni provenienti
dall’esterno del veicolo siano chiaramente udibili.
• Proteggere questo prodotto dall’umidità.
• Se la batteria viene staccata, la memoria di preselezione viene cancellata e deve venire
riprogrammata.
In caso di problemi
Se questo prodotto non dovesse funzionare normalmente, rivolgersi al proprio negozio di
fiducia o ad un rivenditore autorizzato Pioneer.
CLASS 1
LASER PRODUCT
8
ENGLISH
ITALIANO DEUTSCH FRANÇAIS
ITALIANO NEDERLANDS
Page 72

9
Uso in breve
Ascolto di musica
Per poter passare all’ascolto della musica è necessario effettuare prima le seguenti
operazioni.
Nota:
• Inserire un disco nell’apparecchio (vedere a pag. 12).
• Inserire una cassetta nell’apparecchio (vedere a pag. 14).
1. Selezionare la sorgente desiderata (ad es. il sintonizzatore).
7 Corpo dell’apparecchio
Ad ogni successiva pressione (verso l’alto o verso il basso) del selettore SOURCE la sorgente desiderata viene selezionata nell’ordine seguente:
Lettore CD incorporato Ô TV Ô Sintonizzatore Ô Lettore di audiocassette Ô
Multilettore MD Ô Multilettore CD Ô Apparecchio esterno 1 Ô Apparecchio esterno 2
Ô AUX (ausiliario) Ô Sorgente OFF
7 Telecomando da volante
Ad ogni successiva pressione del tasto SOURCE la sorgente desiderata viene selezionata
nell’ordine seguente:
Lettore CD incorporato = TV = Sintonizzatore = Lettore di audiocassette =
Multilettore MD = Multilettore CD = Apparecchio esterno 1 = Apparecchio esterno 2
= AUX (ausiliario)
Nota:
• Il termine “apparecchio esterno” indica un apparecchio Pioneer (eventualmente anche di quelli che
verranno messi in commercio in futuro) che, sebbene incompatibile come sorgente, può essere
comandato, nelle sue funzioni principali, per mezzo di questo apparecchio. Quest’apparecchio può
comandare due apparecchi esterni, sebbene la dicitura “External” sia visualizzata indipendentemente dalla selezione dell’apparecchio esterno 1 o 2. Se gli apparecchi esterni collegati sono due,
l’assegnazione degli stessi all’apparecchio 1 o 2 è disposta automaticamente dall’apparecchio.
• Nei casi seguenti la sorgente selezionata non cambia:
* Nel caso in cui a questo apparecchio non siano collegati apparecchi corrispondenti a ciascuna
sorgente.
* Se non vi sono dischi inseriti nell’apparecchio.
* Se non vi sono cassette inserite nell’apparecchio.
* Se nel multilettore CD non è stato inserito un caricatore.
* Se non vi sono dischi nel multilettore MD.
* Se l’uscita ausiliaria esterna (AUX) è disattivata su OFF (vedere a pag. 56).
• Collegando il cavo blu e bianco dell’apparecchio al terminale di comando del relais dell’antenna
automatica del veicolo, l’antenna si estende automaticamente non appena si attiva una delle
sorgenti sonore dell’apparecchio. Per far rientrare l’antenna disattivare la sorgente.
Ad ogni pressione (verso l’alto o verso il basso)
la sorgente cambia ...
Page 73

10
ENGLISH
ITALIANO DEUTSCH FRANÇAIS
ITALIANO NEDERLANDS
2. Regolare opportunamente il volume.
Nota:
• Premere verso l’alto per alzare il livello del volume.
• Premere verso il basso per abbassare il livello del volume.
3. Disattivare la sorgente.
Impostazione dell’angolo di visualizzazione
È possibile regolare l’angolazione del pannello anteriore per facilitare le operazioni.
• Selezionare l’angolazione desiderata
Nota:
• Mentre un disco o una cassetta sono parzialmente inseriti, non è possibile azionare il tasto ANGLE.
• Premendo il tasto ANGLE per 2 secondi, è possibile aprire o chiudere automaticamente il pannello
frontale.
AVVERTENZA:
• Non usare l’apparecchio con il pannello anteriore aperto. Lasciando il pannello aperto si rischiano
lesioni in caso di incidenti.
• Quando si apre o si chiude il pannello anteriore, fare attenzione a non lasciarsi intrappolare le dita.
Ad ogni pressione si cambia l’angolazione.
Premere (verso l’alto o verso il basso) il selettore SOURCE e disattivare la sorgente.
Ad ogni pressione (verso l’alto o verso il basso)
del tasto VOLUME si cambia il livello del volume.
Page 74

11
Uso in breve
Principali operazioni del lettore CD incorporato
Aprire/Espulsione
Premendo il tasto CD EJECT si può aprire il pannello anteriore
prima dell’espulsione del disco.
Se non è stato inserito nessun CD, premendo il tasto CD EJECT è
possibile aprire e chiudere alternativamente il pannello frontale.
Nota:
• La funzione CD può essere attivata (ON) o disattivata (OFF) anche con
il disco inserito nell’apparecchio (vedere a pag. 9).
• I dischi espulsi e lasciati inseriti a metà possono subire danni, o cadere.
Indicazione del tempo di
riproduzione
Indicazione del numero del brano
Commutazione della visualizzazione
Ad ogni successiva pressione del tasto DISPLAY la visualizzazione cambia nell’ordine seguente:
Modalità di riproduzione (Tempo di riproduzione) = Titolo del disco (DISC TITLE)
Nota:
• Se si tenta di commutare la visualizzazione senza aver prima inserito il titolo del disco, sul quadrante compare il messaggio “NO TITLE”.
• Se si riproduce un disco CD TEXT, vedere “Commutazione della visualizzazione del titolo” e “Scorrimento
del titolo” a pag. 42 e 43.
• Un disco del tipo CD TEXT è un disco che contiene registrate delle informazioni sotto forma di testo quali il
titolo del disco, il nome dell’artista del disco ed i titoli dei brani.
Page 75

ENGLISH
ITALIANO DEUTSCH FRANÇAIS
ITALIANO NEDERLANDS
12
AVVERTENZA:
• Non usare l’apparecchio con il pannello anteriore aperto. Lasciando
il pannello aperto si rischiano lesioni in caso di incidenti.
Ricerca del brano e avanzamento o retrocessione veloce
• Per una ricerca a velocità diverse si può far uso della ricerca del brano,
o delle funzioni di avanzamento o retrocessione veloce, agendo sui tasti
2 o 3 per un diverso periodo di tempo.
Ricerca del brano 0,5 secondi o meno
Avanzamento o retrocessione veloce Pressione continua
Fessura di inserimento del disco
Inserendo un compact disc, il pannello anteriore si richiude
automaticamente.
Nota:
• Il lettore CD incorporato può riprodurre un solo CD, standard da 12 cm o singolo
da 8 cm, per volta. Per la riproduzione di dischi singoli da 8 cm non è necessario
usare alcun tipo di adattatore.
Nota:
• Se non si riesce ad inserire il disco fino in fondo, o se non si riesce a riprodurlo,
verificare di averlo inserito correttamente, con il lato registrato rivolto verso il
basso. Prima di reinserire il disco, agire sul tasto CD EJECT e controllare che il
disco non risulti danneggiato.
• Se il lettore CD incorporato non riesce a funzionare in modo corretto, sul
quadrante compare un messaggio di errore (quale, ad es., “ERROR-14”). Vedere il
paragrafo “Messaggi di errore del lettore CD incorporato” a pag. 60.
Page 76

13
Uso in breve
Funzionamento base del lettore di audiocassette
Nota:
• Dopo l’inserimento o l’espulsione di una cassetta ricordarsi di richiudere il pannello anteriore.
Indicazione di direzione
Aprire/Espulsione
Premendo il tasto TAPE EJECT si può aprire il pannello anteriore prima dell’e-
spulsione della cassetta.
Se non è stato inserita nessuna cassetta, premendo il tasto TAPE EJECT è possibile aprire e chiudere alternativamente il pannello anteriore.
Nota:
• La funzione Cassetta può essere attivata (ON) o disattivata (OFF) anche con la cassetta
inserita nell’apparecchio (vedere a pag. 9).
Cambiamento di direzione
Indicazione del tempo di riproduzione
Nota:
• Il conteggio del tempo per la riproduzione continua ha inizio da “00'00''”
nei casi seguenti.
* Quando viene inserita una cassetta.
* Quando si modifica la direzione del movimento del nastro nella cassetta.
* Quando si riavvolge sino all’inizio il lato del nastro nella cassetta in
corso di riproduzione.
• Il conteggio del tempo di riproduzione continua viene interrotto se si
procede a far avanzare rapidamente o a riavvolgere il nastro nella cassetta,
ed anche mentre la funzione di ricerca di un certo brano è attivata.
Page 77

14
ENGLISH
ITALIANO DEUTSCH FRANÇAIS
ITALIANO NEDERLANDS
AVVERTENZA:
• Non usare l’apparecchio con il pannello anteriore aperto.
Lasciando il pannello aperto si rischiano lesioni in caso di
incidenti.
Avanzamento veloce e riavvolgimento, e ricerca dei brani
• Ad ogni successiva pressione del tasto 3 si passa all’avanzamento veloce e
all’avanzamento veloce con ricerca dei brani.
FF (Avanzamento veloce) = F-MS (Avanzamento veloce con ricerca dei brani)
= Riproduzione normale
• Ad ogni successiva pressione del tasto 2 si passa al riavvolgimento veloce e
al riavvolgimento per la ricerca dei brani.
REW (Riavvolgimento) = R-MS (Riavvolgimento con ricerca dei brani)
= Riproduzione normale
Nota:
• L’avanzamento veloce e il riavvolgimento, e la ricerca dei brani possono essere cancellati
premendo il tasto BAND.
Fessura di inserimento della cassetta
Inserendo una cassetta, il pannello anteriore si richiude
automaticamente.
Nota:
• Se si inserisce un nastro di metallo o al cromo, sul quadrante compare
l’indicazione “METAL”. Per i nastri di tipo normale non vi è alcuna
indicazione.
Page 78

Uso in breve
Principali operazioni del sintonizzatore
La funzione AF di questo prodotto può venire attivata e disattivata a piacere. Essa deve
normalmente venire mantenuta disattivata (vedere a pag. 24).
Sintonizzazione a stazioni predesignate
• Nei tasti da 1 a 6 si possono memorizzare
delle stazioni trasmittenti, per poterle richiamare facilmente al solo tocco di un tasto.
Richiamo di una stazione predesignata 2 secondi o meno
Inserimento in memoria di una stazione 2 secondi o più
trasmittente
Nota:
• Possono essere memorizzate sino a 18 stazioni FM
(6 ciascuna per F1 (FM1), F2 (FM2) e F3 (FM3)) e 6
stazioni MW/LW.
• Per richiamare le stazioni memorizzate nei tasti da 1 a 6 si
può anche agire sui tasti 5 o ∞.
Indicazione della frequenza
Indicazione della banda
Bande
F1 (FM1) = F2 (FM2)
= F3 (FM3) = MW/LW
Indicazione del numero
predesignato
15
Sintonizzazione manuale o a ricerca automatica
• Il metodo di sintonizzazione può essere selezionato variando la durata
della pressione dei tasti 2 o 3.
Sintonizzazione manuale (ad uno scatto per volta) 0,5 secondi o meno
Sintonizzazione a ricerca (automatica) 0,5 secondi o più
Nota:
• Continuando a tenere premuto il tasto per almeno 0,5 secondi si possono saltare le stazioni
trasmittenti. La ricerca automatica della sintonizzazione ha inizio non appena si lascia
andare il tasto.
• In caso di selezione di una stazione stereofonica l’indicazione stereo “” si illumina.
Page 79

16
ENGLISH
ITALIANO DEUTSCH FRANÇAIS
ITALIANO NEDERLANDS
Indicazione del
tempo di riproduzione
Ricerca del disco
Indicazione del numero
del disco
Indicazione del numero
del brano
Principali operazioni del multilettore CD
Questo prodotto è in grado di comandare un multilettore CD (venduto separatamente).
Ricerca diretta del numero del disco (per scambiatori a 6 e 12 dischi)
• I dischi possono essere scelti direttamente per mezzo dei tasti da 1 a 6.
È sufficiente premere il numero corrispondente al disco che si vuole
ascoltare.
Nota:
• Se all’apparecchio si trova collegato uno scambiatore contenente 12 dischi, per selezionare i dischi
nelle posizioni da 7 a 12 agire sui tasti da 1 a 6 per 2 secondi.
Nota:
• Al momento in cui si accende l’apparecchio, o dopo la selezione di un altro disco per la ripro-
duzione, talvolta il multilettore CD effettua delle operazioni preparatorie, quali la verifica della presenza di un disco o la lettura di informazioni concernenti il disco. Al termine, sul quadrante compare l’indicazione “READY” (“pronto”).
• Nel caso in cui il multilettore CD non funzioni regolarmente, sul quadrante compare una
indicazione di errore quale, ad esempio, “ERROR-14”. Consultare il manuale di istruzioni del
multilettore CD.
• Se non vi sono dischi nel caricatore inserito nel multilettore, sul quadrante compare l’indicazione
“NO DISC” (“dischi non inseriti”).
Ricerca del brano e avanzamento o retrocessione veloce
• Per una ricerca a velocità diverse si può far uso della
ricerca del brano, o delle funzioni di avanzamento o
retrocessione veloce, agendo sui tasti 2 o 3 per un
diverso periodo di tempo.
Ricerca del brano 0,5 secondi o meno
Avanzamento o Pressione continua
retrocessione veloce
Page 80

17
Uso in breve
Indicazioni del quadrante e tasti corrispondenti
Il quadrante di questo apparecchio dispone di un sistema di indicazioni di guida all’uso dei
tasti. Queste indicazioni si illuminano per visualizzare quale dei tasti 5/∞/2 o 3
FUNCTION, AUDIO o DSP devono essere usati. Inoltre, quando ci si trova in uno dei menù
delle funzioni (vedere la sezione successiva), delle predisposizioni dettagliate (pag. 20),
delle predisposizioni iniziali (pag. 55), dell’audio 1, 2 (pag. 44, 46) o DSP 1, 2 (pag. 47, 52),
queste indicazioni facilitano la scelta del tasto 5/∞/2 o 3 da usare per commutare le funzioni su ON o su OFF, per commutare la selezione della funzione di ripetizione, e per altre
operazioni.
Le indicazioni e i corrispondenti tasti sono esemplificati qui di seguito:
7 Apparecchio 7 Telecomando da volante 7 Quadrante
Se sul quadrante è presenta la forma 1, eseguire le operazioni del caso per mezzo
dei tasti z.
Se sul quadrante è presenta la forma 2, ciò indica che ci si trova in uno dei menù delle
funzioni, delle predisposizioni dettagliate o delle predisposizioni iniziali. Si può passare
dall’uno all’altro di questi menù, e fra le differenti modalità all’interno di ogni menù,
agendo sul tasto x dell’apparecchio o del telecomando da volante.
Se sul quadrate è presenta la forma 3, ciò indica che ci si trova nei menù audio 1, 2. Si
può passare fra le varie modalità dei menù audio 1, 2 agendo sul tasto c dell’apparecchio.
Se sul quadrante è presenta la foema 4, ciò indica che ci si trova nei menù DSP 1, 2. Si
può passare fra le varie modalità dei menù DSP 1, 2 agendo sul tasto v dell’apparecchio o
del telecomando da volante.
Attivazione del menù delle funzioni
Il menù delle funzioni consente l’uso di semplici funzioni per ciascuna delle sorgenti.
Nota:
• Dopo l’attivazione del menù delle funzioni, se non si procede ad effettuare alcuna operazione entro
30 secondi, il menù delle funzioni viene automaticamente cancellato.
1. Nel menù delle funzioni selezionare la modalità desiderata (vedere la sezione
successiva “Funzioni del menù delle funzioni”).
Ad ogni pressione la sorgente cambia ...
z
x
v
1
3
4
2
z
c
x
v
Page 81

18
ENGLISH
ITALIANO DEUTSCH FRANÇAIS
ITALIANO NEDERLANDS
2. Utilizzare la modalità desiderata (ad es. la ripetizione della riproduzione).
3. Disattivare il menù delle funzioni.
Funzioni del menù delle funzioni
La seguente tabella riporta le funzioni per ciascuna delle sorgenti nel menù delle funzioni.
La tabella riporta anche le indicazioni per ciascuna delle funzioni, operazioni e tasti utilizzati per l’esecuzione delle operazioni. Per ulteriori dettagli, o per maggiori informazioni
relative ad una certa funzione, vedere alla pagina indicata a destra.
7 Sintonizzatore
Nome della funzione (visualizzazione) Tasto: operazione Pag.
Memorizzazione delle stazioni più chiare 5: Attivazione (ON) 22
(BSM) ∞: Disattivazione (OFF)
Funzione di sintonizzazione regionale
5: Attivazione (ON) 25
(REG) ∞: Disattivazione (OFF)
Sintonizzazione a ricerca locale (LOCAL) 1 5: Attivazione (ON) 22
3 ∞: Disattivazione (OFF)
2 2 o 3: Selezione (Sensitività)
Funzione TA (TA) 5: Attivazione (ON) 26
∞: Disattivazione (OFF)
Predisposizione dell’interruzione da parte 5: Attivazione (ON) 29
dei notiziari (NEWS) ∞: Disattivazione (OFF)
Funzione AF (AF) 5: Attivazione (ON) 24
∞: Disattivazione (OFF)
Il tasto da usare e l’operazione da esso comandata vengono visualizzati dall’indicazione
guida dei tasti. Agire sul tasto 5 per attivare
(ON) le indicazioni di guida all’uso dei tasti, e
sul tasto ∞ per disattivarle (OFF).
Page 82

19
Uso in breve
7 Lettore CD incorporato
Nome della funzione (visualizzazione) Tasto: operazione Pag.
Ripetizione della riproduzione (REPEAT) 5: Attivazione (ON) 31
∞: Disattivazione (OFF)
Riproduzione casuale (RANDOM) 5: Attivazione (ON) 31
∞: Disattivazione (OFF)
Riproduzione a scansione (T.SCAN) 5: Attivazione (ON) 32
∞: Disattivazione (OFF)
Pausa (PAUSE) 5: Attivazione (ON) 32
∞: Disattivazione (OFF)
7 Lettore di audiocassette
Nome della funzione (visualizzazione) Tasto: operazione Pag.
Ripetizione della riproduzione (REPEAT) 5: Attivazione (ON) 34
∞: Disattivazione (OFF)
Riproduzione a scansione (SCAN) 5: Attivazione (ON) 34
∞: Disattivazione (OFF)
Evitamento di spazi non registrati 5: Attivazione (ON) 34
(B.SKIP) ∞: Disattivazione (OFF)
Intercettazione radio (R.I) 5: Attivazione (ON) 35
∞: Disattivazione (OFF)
Dolby B NR (NR) 5: Attivazione (ON) 35
∞: Disattivazione (OFF)
7 Multilettore CD
Nome della funzione (visualizzazione) Tasto: operazione Pag.
Ripetizione della riproduzione (REPEAT) 2 o 3: Selezione (Gamma di riproduzione) 36
Selezione del disco per mezzo della lista 1 2 o 3: Selezione (Titolo del disco) 41
dei titoli dei dischi (TITLE LIST) 2 5: Riproduzione
Riproduzione casuale (RANDOM) 5: Attivazione (ON) 36
∞: Disattivazione (OFF)
Riproduzione a scansione (SCAN) 5: Attivazione (ON) 37
∞: Disattivazione (OFF)
Riproduzione ITS (ITS.PLAY) 5: Attivazione (ON) 38
∞: Disattivazione (OFF)
Pausa (PAUSE) 5: Attivazione (ON) 37
∞: Disattivazione (OFF)
Compressione e DBE (COMP) 5 o ∞: Selezione 42
(Funzione della qualità del suono)
Page 83

20
ENGLISH
ITALIANO DEUTSCH FRANÇAIS
ITALIANO NEDERLANDS
Attivazione del menù delle predisposizioni dettagliate
Nel menù delle predisposizioni dettagliate si possono effettuare operazioni comode e
complesse per ciascuna delle funzioni.
1. Attivare il menù delle predisposizioni dettagliate.
2. Selezionare la modalità desiderata (vedere la sezione successiva “Funzioni
del menù delle predisposizioni dettagliate”).
3. Utilizzare la modalità desiderata.
4. Disattivare il menù delle predisposizioni dettagliate.
Nota:
• Il menù delle predisposizioni dettagliate può essere disattivato tenendo premuto il tasto
FUNCTION per 2 secondi.
Ad ogni pressione la sorgente cambia ...
Tenere premuto per 2 secondi
Page 84

21
Uso in breve
Funzioni del menù delle predisposizioni dettagliate
La seguente tabella riporta le funzioni per ciascuna delle sorgenti del menù delle predisposizioni dettagliate. La tabella riporta anche le indicazioni per ciascuna delle funzioni,
operazioni e tasti utilizzati per l’esecuzione delle operazioni. Per ulteriori dettagli, o per
maggiori informazioni relative ad una certa funzione, vedere alla pagina indicata a destra.
7 Lettore CD incorporato
Nome della funzione (visualizzazione) Tasto: operazione Pag.
Inserimento del titolo del disco 1 5 o ∞: Selezione (Carattere) 33
(TITLE IN) 2 2 o 3: Selezione (Posizione)
3 3: Memorizzazione
7 Multilettore CD
Nome della funzione (visualizzazione) Tasto: operazione Pag.
Inserimento del titolo del disco 1 5 o ∞: Selezione (Carattere) 40
(TITLE IN) 2 2 o 3: Selezione (Posizione)
3 3: Memorizzazione
Programmazione ITS (ITS) 5: Memorizzazione 38
Funzioni del tasto D.FUNC
La seguente tabella riporta le funzioni per ciascuna delle sorgenti con la pressione del tasto
D.FUNC.
Per ulteriori dettagli, o per maggiori informazioni relative ad una certa funzione, vedere
alla pagina indicata a destra.
7 D.FUNC
Sorgente Nome della funzione Pag.
Sintonizzatore Memorizzazione delle stazioni piu chiare (OFF) 22
Memorizzazione delle stazioni piu chiare (ON) 22
(tenere premuto per 2 secondi)
Lettore CD incorporato Pausa 32
Lettore di Audiocassette Ripetizione della riproduzione 34
Sistema Dolby B NR 35
(tenere premuto per 2 secondi)
Multilettore CD Pausa 37
Page 85

Uso del sintonizzatore
Sintonizzazione a ricerca locale (LOCAL)
Se questa modalità è attivata (ON), si possono selezionare solamente trasmittenti con segnali forti.
1. Premere il tasto FUNCTION e selezionare, nel menù delle funzioni, la
modalità locale (LOCAL).
FM : LOCAL 1 Ô LOCAL 2 Ô LOCAL 3 Ô LOCAL 4
MW/LW: LOCAL 1 Ô LOCAL 2
Nota:
• La posizione LOCAL 4 consente la ricezione solo delle stazioni più potenti, mentre le predispo-
sizioni inferiori consentono di ricevere stazioni di potenza progressivamente inferiore.
Memorizzazione delle stazioni più chiare (BSM)
Questa modalità BSM memorizza automaticamente le stazioni radio ricevute.
1. Premere il tasto FUNCTION e selezionare, nel menù delle funzioni, la
modalità BSM (BSM).
Nota:
• La funzione dell’interruzione per i notiziari può essere attivata anche premendo il tasto D.FUNC
per 2 secondi.
Nota:
• La funzione dell’interruzione per i notiziari può essere disattivata anche premendo il tasto
D.FUNC.
• Per cancellare la procedura agire
sul tasto ∞ del menù delle funzioni prima che la memorizzazione venga completata.
2. Per attivare (ON) la modalità
BSM agire sul tasto 5.
Le stazioni con i segnali più forti
vengono memorizzate nei tasti da 1 a
6, nell’ordine della potenza del
rispettivo segnale.
3. Agire opportunamente sui tasti
2 o 3 per selezionare il livello di
sensibilità desiderata per la ricerca locale.
“LOC”
2. Attivare (ON) o disattivare
(OFF) la modalità locale agendo opportunamente sui tasti
5 o ∞.
22
ENGLISH
ITALIANO DEUTSCH FRANÇAIS
ITALIANO NEDERLANDS
Page 86

23
Uso delle funzioni RDS
Cos’è il sistema RDS?
L’RDS (Radio Data System) è un sistema che permette di trasmettere dati insieme alle
normali trasmissioni radio in FM. Questi dati, che non sono udibili, forniscono una varietà
di informazioni, fra le quali il nome della stazione, il tipo di programma, annunci sul
traffico, sintonizzazione automatica e sintonizzazione automatica su programmi di tipo
particolare intesi ad aiutare gli ascoltatori a massimizzare il piacere dell’ascolto.
Nota:
• Non tutte le stazioni radio forniscono servizi RDS.
• Le funzioni RDS come la AF (Alternative Frequencies search) e la TA (Traffic Announcement
standby) sono disponibili solo quando si ascoltano trasmissioni RDS.
Visualizzazione del nome della stazione radio
Con questa funzione, il nome di reti radiofoniche o stazioni che forniscono servizi RDS
sostituisce la frequenza sul quadrante per qualche secondo quando esse vengono
sintonizzate.
• Per conoscere la frequenza della stazione correntemente sintonizzata,
cambiare la visualizzazione.
Ogni pressione del tasto DISPLAY seleziona la visualizzazione nella sequenza seguente:
Frequenza = Nome della stazione = Informazioni PTY
Nota:
• Cambiata la visualizzazione, se non si esegue alcun’altra operazione entro 8 secondi, il nome della
stazione radio scompare.
7 Informazioni PTY
Le informazioni PTY (Program Type ID code) relative alla stazione al momento in sintonia appaiono sul quadrante per 8 secondi. Le informazioni sono legate alla lista della
sezione “Lista dei tipi di programmi (PTY)” a pag. 30.
Nota:
• Se un codice PTY pari a zero viene ricevuto da una stazione, viene visualizzata l’indicazione
“None”. Ciò indica che la stazione non ha definito il contenuto dei suoi programmi.
• Se il segnale è troppo debole perché questo prodotto possa ricevere il codice PTY, viene
visualizzato “NO PTY”.
7 Frequenza
La frequenza della stazione attuale appare sul quadrante.
Ad ogni pressione la visualizzazione cambia ...
Page 87

Funzione AF (AF)
La funzione di ricerca di frequenze alternative AF viene usata per trovare frequenze sulle
quali una certa stazione desiderata sia ricevuta più chiaramente. Essa sintonizza
automaticamente una nuova frequenza se quella attuale è disturbata o se la ricezione è
migliore su una frequenza diversa.
Nota:
• La funzione AF sintonizza solo stazioni RDS se sono in uso le funzioni di ricerca di sintonia o la
memoria automatica BSM con l’indicazione “AF ” accesa.
• Quando si richiama una stazione preselezionata, il sintonizzatore potrebbe sostituire la stazione
preselezionata con una nuova più chiara presa dalla lista AF di quella stazione (disponibile solo per
l’uso delle stazioni predesignate sulle bande F1 (FM1) e F2 (FM2)). Nessun numero di preselezione
appare invece sul quadrante se i dati RDS della stazione ricevuta sono differenti da quelli della
stazione originale.
• Durante la ricerca AF la riproduzione può venire momentaneamente interrotta.
• Se il sintonizzatore viene sintonizzato su di una stazione non RDS, l’indicazione “AF ” lampeggia.
• La funzione AF può venire attivata e disattivata indipendentemente per ciascuna delle bande in FM.
Attivazione o disattivazione della funzione AF
La funzione AF è normalmente ON.
1. Premere il tasto FUNCTION e selezionare, nel menù delle funzioni, la
modalità AF (AF).
2. Attivare o disattivare la funzione AF durante l’ascolto in FM.
“AF” scompare
24
ENGLISH
ITALIANO DEUTSCH FRANÇAIS
ITALIANO NEDERLANDS
Page 88

25
Uso delle funzioni RDS
Funzione PI Seek
Il sintonizzatore cerca un’altra frequenza che stia trasmettendo lo stesso programma.
Durante la funzione di ricerca PI, sul quadrante appare l’indicazione “PI SEEK” e il
volume della radio viene abbassato completamente. Terminata la ricerca PI, il volume
viene ripristinato comunque, sia che la ricerca abbia avuto successo oppure no. Se la
ricerca PI Seek non ha avuto successo, il sintonizzatore ritorna sulla frequenza precedente.
PI Seek (PI SEEK)
Se il sintonizzatore non trova una frequenza alternativa o se il segnale ricevuto è troppo
debole per una ricezione corretta, la funzione PI Seek (PI SEEK) inizia automaticamente.
Ricerca automatica di stazioni predesignate PI Seek (A-PI)
Se le stazioni predesignate non possono essere richiamate, come ad esempio nel corso di
lunghi viaggi, l’apparecchio può eseguire la ricerca PI Seek anche durante il richiamo di
stazioni predesignate.
Nell’impostazione di base, la ricerca automatica di stazioni predesignate, Auto PI Seek (API), è disattivata.
Nota:
• Per i dettagli sull’attivazione e la disattivazione della ricerca automatica di stazioni predesignate
(A-PI), vedere la sezione “Regolazione iniziale”.
Funzione di sintonizzazione regionale (REG)
Se la funzione AF viene usata per rimettere in sintonia il sintonizzatore automaticamente,
la funzione REG (Regional) limita la scelta a stazioni che trasmettono programmi regionali.
Nota:
• I programmi e le reti radiofoniche regionali sono organizzate differentemente a seconda del paese
(possono ad esempio cambiare a seconda dell’ora, dello stato o dell’area).
• Il numero di preselezione può scomparire dal quadrante se il sintonizzatore mette in sintonia una
stazione regionale che differisce da quella originariamente scelta.
• La funzione regionale può venire attivata indipendentemente per ciascuna banda in FM.
Attivazione o disattivazione della funzione regionale
La funzione REG è normalmente ON.
1. Premere il tasto FUNCTION e selezionare, nel menù delle funzioni, la
modalità REG (REG).
2. Attivare o disattivare REG durante l’ascolto in FM.
“REG”
Page 89

A Title (English)
Funzione di attesa per annunci sul traffico (TA)
La funzione TA (Traffic Announcement standby) di attesa di annunci sul traffico permette
di ricevere automaticamente annunci sul traffico durante l’ascolto di qualsiasi sorgente di
segnale. La funzione TA può essere attivata sia per una stazione TP (una stazione che
effettivamente dà informazioni sul traffico) che con una stazione EON TP (che porta
informazioni che conducono a stazioni TP).
Attivazione o disattivazione della funzione TA
1. Sintonizzarsi su una stazione TP o EON TP.
Con il sintonizzatore sintonizzato su una stazione TP o su una stazione EON TP, l’indicazione “TP” si illumina.
2. Attivare la funzione TA.
L’indicazione “TA” si illumina ad indicare che il sintonizzatore è in attesa di annunci sul
traffico.
Ripetere la procedura indicata quando non si ricevono annunci sul traffico e si desidera
quindi disattivare la funzione TA.
Nota:
• La funzione TA può essere disattivata ed attivata anche dal menù delle funzioni.
• Il sistema, dopo la ricezione di un annuncio sul traffico, fa ritorno alla stazione originaria.
• La funzione TA può venire attivata anche con sorgenti diverse dal sintonizzatore se il sintonizzatore si
trovava nella banda FM l’ultima volta che è stato usato, ma non se si trovava nelle bande MW o LW.
• Se il sintonizzatore è stato usato per l’ultima volta in modalità FM, accendendo la funzione TA si
possono usare altre funzioni di sintonizzazione anche durante l’ascolto di sorgenti che non siano il
sintonizzatore.
• Se l’indicazione “TA” è accesa, vengono sintonizzate solo stazioni TP o EON TP.
• Se l’indicazione “TA” è accesa, la funzione di memoria delle stazioni migliori BSM memorizza
solo stazioni TP o EON TP.
“TA”
26
ENGLISH
ITALIANO DEUTSCH FRANÇAIS
ITALIANO NEDERLANDS
Page 90

27
Uso delle funzioni RDS
Disattivazione degli annunci sul traffico
• Premere il tasto TA mentre un annuncio sul traffico è in corso per disattivare l’annuncio e tornare alla riproduzione normale.
L’annuncio viene disattivato ma il sintonizzatore rimane in modalità TA sino a che il tasto
TA non viene premuto di nuovo.
Regolazione del volume della funzione TA
Quando un annuncio sul traffico inizia, il volume si regola automaticamente su di un
livello preregolato che permetta agevolmente l’ascolto.
• Fissare tale volume regolandolo durante l’ascolto di trasmissioni sul traffico.
Il livello del volume viene memorizzato e richiamato per ogni successivo annuncio sul
traffico.
Funzione di allarme TP
Circa 30 secondi dopo che l’indicazione “TP” si spegne a causa di segnale troppo debole,
un segnale sonoro della durata di 5 secondi entra in funzione per invitare a scegliere una
nuova stazione TP o EON TP.
• Se si sta ascoltando la radio, sintonizzarsi su un’altra stazione TP o
EON TP.
Durante l’ascolto di sorgenti diverse dal sintonizzatore, il sintonizzatore automaticamente
ricerca una stazione TP dal segnale più forte 10 (o 30)* secondi dopo che l’indicazione
“TP” è scomparsa dal quadrante.
* Tempo necessario per l’inizio della ricerca.
Funzione TA Attivazione (ON) 10 secondi
Funzioni TA e AF Attivazione (ON) 30 secondi
Page 91

A Title (English)
28
ENGLISH
ITALIANO DEUTSCH FRANÇAIS
ITALIANO NEDERLANDS
Funzione PTY
Con la classificazione in “largo” o “stretto” del tipo di programma, la funzione PTY
fornisce due metodi per la selezione delle stazioni per tipo di programma trasmesso al
momento (PTY Search). Permette inoltre la sintonizzazione di programmi di emergenza
(PTY Alarm).
Nota:
• I parametri per la ricerca PTY, una volta predisposti, non necessitano di ripredisposizione. Dopo
essere passati alla modalità di predisposizione della ricerca PTY, al punto 1, ripetere semplicemente
di nuovo la ricerca PTY descritta al punto 4.
Ricerca PTY (del tipo di programma)
1. Selezionare la modalità di predisposizione della ricerca PTY.
2. Selezionare il tipo (a banda stretta o a banda larga) di ricerca PTY
desiderata.
3. Selezionare il tipo di programma PTY che si vuole ricercare.
4. Avviare la ricerca PTY.
Il sintonizzatore ricerca una emittente che trasmetta programmi del tipo PTY desiderato.
Per cancellare la modalità di predisposizione della ricerca PTY, tenere premuto il tasto
PTY per 2 secondi.
Nota:
• I programmi di alcune stazioni possono differire dal tipo indicato dal codice PTY trasmesso.
• Se non viene trovata alcuna trasmissione del tipo cercato, l’indicazione “NOT FOUND” (“non
trovato”) viene visualizzata per 2 secondi e quindi il sintonizzatore si riporta alla stazione originale.
Page 92
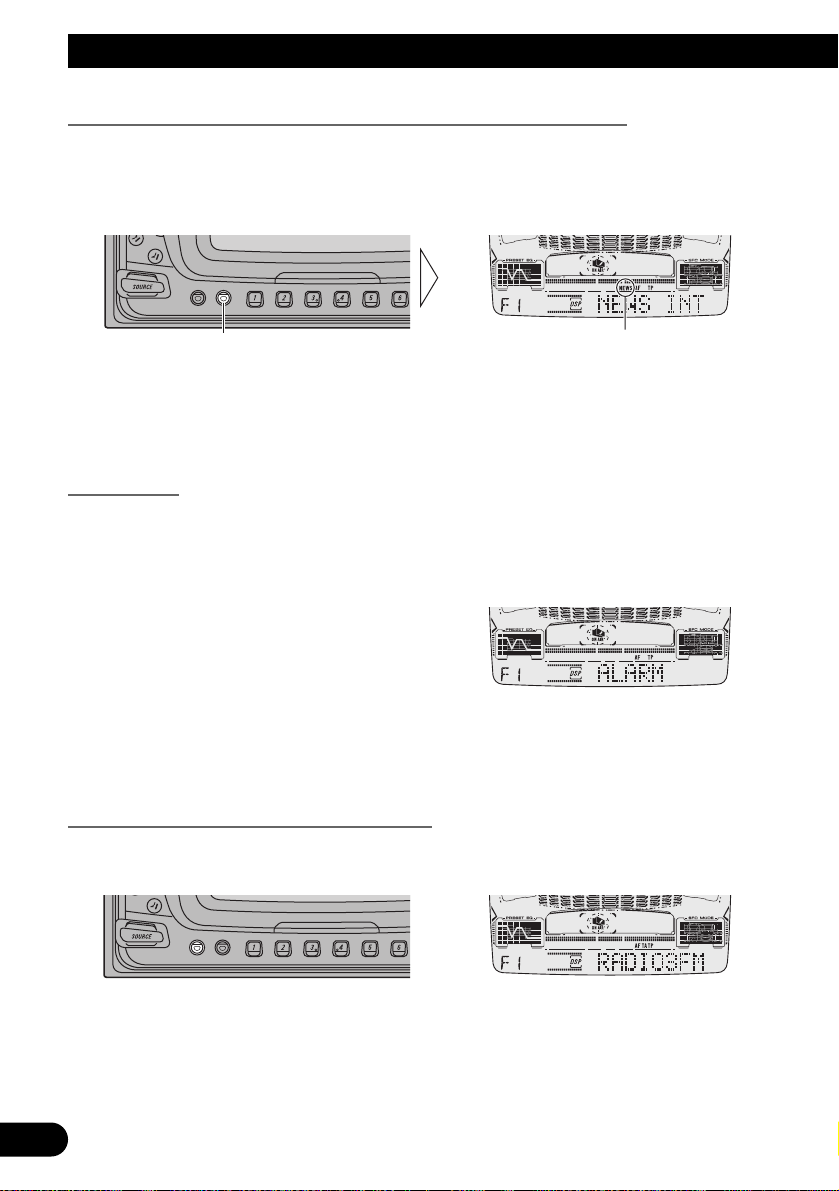
29
A Title (English)Uso delle funzioni RDS
Predisposizione dell’interruzione da parte dei notiziari (NEWS)
Si può attivare o disattivare la ricezione automatica di notiziari con classificazione PTY.
Al termine della ricezione di un programma di notizie, la ricezione del precedente
programma riprende.
• Disposizione della funzione di interruzione su ON o su OFF.
Nota:
• La funzione di predisposizione dell’interruzione per i notiziari può venire disattivata ed attivata
anche dal menù di funzioni.
Allarme PTY
L’allarme PTY è un particolare codice PTY per annunci riguardanti emergenze quali, ad
esempio, i disastri naturali. Quando il sintonizzatore riceve il codice di allarme radio,
l’indicazione “ALARM” (allarme) appare sul quadrante ed il volume viene portato al
livello stabilito nella funzione TA. Quando la stazione cessa l’annuncio, la ricezione torna
alla situazione originale.
Nota:
• Il sistema torna a riprodurre la sorgente originale di segnale una volta che il messaggio di
emergenza sia cessato.
Disattivazione della ricezione di annunci
• Premere il tasto TA durante la ricezione di annunci per disattivarli e tornare
alla riproduzione normale della sorgente del segnale precedente.
“NEWS”Tenere premuto per 2 secondi
Page 93

A Title (English)
30
ENGLISH
ITALIANO DEUTSCH FRANÇAIS
ITALIANO NEDERLANDS
Lista dei tipi di programmi (PTY)
Banda larga Banda stretta Dettagli
News&Inf News Notiziari.
Affairs Attualità.
Info Informazioni di carattere generale.
Sport Programmi sportivi.
Weather Previsioni del tempo e metereologia.
Finance Mercato azionario, commercio, ecc.
Popular Pop Mus Programmi di musica pop.
Rock Mus Programmi di musica rock.
Easy Mus Programmi di musica popolare.
Oth Mus Altri tipi di musica non categorizzabili.
Jazz Programmi di musica Jazz.
Country Programmi di musica Country.
Nat Mus Programmi di musica nazionale.
Oldies Programmi di vecchia musica leggera.
Folk Mus Programmi di musica folk.
Classics L. Class Musica classica leggera.
Classic Musica classica.
Others Educate Programmi educativi.
Drama Commedie e drammi radiofonici.
Culture Programmi culturali di vario tipo.
Science Programmi scientifici o tecnici.
Varied Programmi di varietà.
Children Programmi per bambini.
Social Programmi di interesse sociale.
Religion Programmi religiosi.
Phone In Programmi con intervento telefonico degli
ascoltatori.
Touring Programmi di viaggi ma non di informazioni sul
traffico.
Leisure Programmi su hobby e attività ricreative.
Document Documentari.
Page 94

31
Uso del lettore CD incorporato
Ripetizione della riproduzione (REPEAT)
Questa funzione riproduce ripetutamente sempre lo stesso brano.
1. Premere il tasto FUNCTION e selezionare, nel menù delle funzioni, la
modalità di ripetizione della riproduzione (REPEAT).
Nota:
• Eseguendo la ricerca dei brani o le operazioni di avanzamento o retrocessione veloce, la ripetizione
della riproduzione viene disattivata.
Riproduzione casuale (RANDOM)
Questa funzione riproduce tutti i brani del disco in un ordine scelto a caso
dall’apparecchio.
1. Premere il tasto FUNCTION e selezionare, nel menù delle funzioni, la
modalità di riproduzione casuale (RANDOM).
2. Agire opportunamente sui tasti
5 o ∞ per attivare e disattivare
la riproduzione casuale.
“RPT”
2. Agire opportunamente sui tasti
5 o ∞ per attivare e disattivare
la ripetizione della riproduzione.
Page 95

32
ENGLISH
ITALIANO DEUTSCH FRANÇAIS
ITALIANO NEDERLANDS
Riproduzione a scansione (T.SCAN)
Questa funzione riproduce i primi 10 secondi circa di ciascuno dei brani del disco, nell’ordine.
1. Premere il tasto FUNCTION e selezionare, nel menù delle funzioni, la
modalità di riproduzione a scansione (T.SCAN).
Nota:
• La funzione di riproduzione a scansione si disattiva automaticamente al termine dell’esplorazione
di tutti i brani del disco.
Pausa (PAUSE)
La funzione di pausa interrompe momentaneamente la riproduzione del brano corrente.
1. Premere il tasto FUNCTION e selezionare, nel menù delle funzioni, la
modalità di pausa (PAUSE).
Nota:
• La funzione della pausa può essere disattivata ed attivata anche premendo il tasto D.FUNC.
2. Agire opportunamente sui tasti
5 o ∞ per attivare e disattivare
la pausa.
3. Una volta individuato il brano
desiderato, disattivare la riproduzione a scansione agendo sul
tasto ∞.
Se il menù delle funzioni si è cancellato automaticamente, selezionare di
nuovo la modalità di scansione dal
menù delle funzioni.
2. Agire sul tasto 5 per attivare
(ON) la riproduzione a scansione.
Page 96

33
Uso del lettore CD incorporato
Inserimento del titolo del disco (TITLE IN)
Si possono inserire sino a 48 titoli di dischi per i compact disc contenuti nel lettore CD
incorporato (vedere in proposito la voce “Inserimento del titolo del disco”, al paragrafo
“Uso di multilettori CD”, a pag. 40).
Nota:
• Una volta memorizzati i titoli per 48 dischi, memorizzandone successivamente degli altri i dati
relativi si sovrappongono a quelli già esistenti, a partire da quelli che erano stati memorizzati per
primi.
• Se all’apparecchio viene collegato un multilettore CD, si possono inserire titoli di dischi per sino a
100 dischi.
• Questa modalità non è selezionabile in caso di riproduzione di un disco del tipo CD TEXT.
• Un disco del tipo CD TEXT è un disco che contiene registrate delle informazioni sotto forma di testo
quali il titolo del disco, il nome dell’artista del disco ed i titoli dei brani.
Page 97

Uso del lettore di audiocassette
Ripetizione della riproduzione (REPEAT)
Il modo di ripetizione della riproduzione permette di ascoltare più volte uno stesso brano.
Nota:
• La funzione di ripetizione della riproduzione può essere disattivata ed attivata anche premendo il
tasto D.FUNC.
Riproduzione a scansione (SCAN)
Questa funzione riproduce i primi 10 secondi, circa, di ogni singolo brano, in successione.
Si tratta di una funzione molto utile per l’individuazione di un certo brano che si desidera
ascoltare.
Evitamento di spazi non registrati (B.SKIP)
Questa funzione porta automaticamente la riproduzione al brano successivo se viene
trovato nella cassetta uno spazio non registrato da 12 secondi o più.
2. Agire sui tasti 5 o ∞ per attivare
o disattivare la modalità di salto
degli spazi non registrati.
1. Premere il tasto FUNCTION e selezionare, nel menù delle funzioni, la
modalità di salto degli spazi non registrati (B.SKIP).
3. Una volta individuato il brano
desiderato, disattivare la modalità di riproduzione a scansione
agendo sul tasto ∞.
Se il menù delle funzioni si è cancellato
automaticamente, selezionare di nuovo
la modalità di scansione dal menù delle
funzioni.
2. Agire sul tasto 5 per attivare
(ON) la modalità di
riproduzione a scansione.
1. Premere il tasto FUNCTION e selezionare, nel menù delle funzioni, la
modalità di riproduzione a scansione (SCAN).
“RPT”
2. Agire sui tasti 5 o ∞ per attivare (ON) o disattivare (OFF)
la modalità di ripetizione.
1. Premere il tasto FUNCTION e selezionare, nel menù delle funzioni, la
modalità di ripetizione della riproduzione (REPEAT).
34
ENGLISH
ITALIANO DEUTSCH FRANÇAIS
ITALIANO NEDERLANDS
Page 98

35
Uso del lettore di audiocassette
Intercettazione radio (R.I)
Questa funzione consente di ascoltare un programma radio durante l’avanzamento veloce o
il riavvolgimento di un nastro nella cassetta.
Nota:
• La funzione di intercettazione radio non è operativa nel corso della ricerca dei brani.
Sistema Dolby B NR (NR)
Scegliere il sistema Dolby B NR se la cassetta in ascolto era stata registrata facendone uso.
Nota:
• Prodotto sotto licenza della Dolby Laboratories.
“Dolby” ed il simbolo doppia D sono marchi registrati della Dolby Laboratories.
• La funzione Dolby B NR può essere disattivata ed attivata anche premendo il tasto D.FUNC per 2
secondi.
• Quando il Dolby B NR è attivato, si accende la spia “”.
2. Agire sui tasti 5 o ∞ per attivare o disattivare la modalità
Dolby B NR.
1. Premere il tasto FUNCTION e selezionare, nel menù delle funzioni, la
modalità di riduzione del rumore Dolby B NR (NR).
“R.I”
2. Agire sui tasti 5 o ∞ per attivare o disattivare la funzione di
intercettazione radio.
1. Premere il tasto FUNCTION e selezionare, nel menù delle funzioni, la
modalità di commutazione fra intercettazione radio (R.I).
Page 99

Uso di multilettori CD
Ripetizione della riproduzione (REPEAT)
Vi sono tre tipi di ripetizione della riproduzione: ripetizione di un solo brano, ripetizione di
un disco e ripetizione del multilettore CD. Il tipo standard di ripetizione della riproduzione
è quello di ripetizione del multilettore CD.
Gamma riproduzione Display Indicatore
Ripetizione del multilettore CD MCD ---------Ripetizione di un solo brano TRK RPT
Ripetizione di un disco DSC DISC
Nota:
• In caso di selezione di altri dischi nel corso della riproduzione ripetuta, il tipo di riproduzione
ripetuta passa a quello della ripetizione del multilettore CD.
• Effettuando le operazioni di ricerca dei brani o di avanzamento o retrocessione veloce nel corso
della ripetizione di un solo brano, il tipo di riproduzione ripetuta passa alla ripetizione del disco.
Riproduzione casuale (RANDOM)
I brani vengono riprodotti in ordine casuale all’interno del tipo di ripetizione selezionata,
come descritto al paragrafo precedente “Ripetizione della riproduzione”.
Nota:
• Attivando la funzione di riproduzione casuale, la funzione di ripetizione di un solo brano passa alla
funzione di ripetizione del disco.
2. Agire opportunamente sui tasti
5 o ∞ per attivare o disattivare
la riproduzione casuale.
Dopo aver scelto il desiderato tipo di
ripetizione fra quelli descritti al
precedente paragrafo “Ripetizione
della riproduzione”, attivare (ON) la
riproduzione casuale del multilettore
CD.
1. Premere il tasto FUNCTION e selezionare, nel menù delle funzioni, la
modalità di riproduzione casuale (RANDOM).
2. Per selezionare il tipo desiderato di
ripetizione della riproduzione agire
opportunamente sui tasti 2 o 3.
Ripetizione del multilettore CD =
Ripetizione di un solo brano =
Ripetizione di un disco
1. Premere il tasto FUNCTION e selezionare, nel menù delle funzioni, la
modalità di ripetizione della riproduzione (REPEAT).
36
ENGLISH
ITALIANO DEUTSCH FRANÇAIS
ITALIANO NEDERLANDS
Page 100

37
Uso di multilettori CD
Riproduzione a scansione (SCAN)
Nella ripetizione di un disco, l’inizio di ogni brano del disco selezionato viene riprodotto
per circa 10 secondi. Nella ripetizione del multilettore CD, viene riprodotto per circa 10
secondi l’inizio del primo brano di ogni disco.
Indicazione Genere di riproduzione
T.SCAN Ripetizione di un disco
D.SCAN Ripetizione del multilettore CD
Nota:
• La funzione di riproduzione a scansione si disattiva automaticamente al termine dell’esplorazione
di tutti i brani o di tutti i dischi.
• Attivando la funzione di riproduzione a scansione, la funzione di ripetizione di un solo brano passa
alla funzione di ripetizione del disco.
Pausa (PAUSE)
La funzione di pausa interrompe momentaneamente la riproduzione del brano corrente.
Nota:
• La funzione della pausa può essere disattivata ed attivata anche premendo il tasto D.FUNC.
2. Agire opportunamente sui tasti
5 o ∞ per attivare o disattivare la pausa.
1. Premere il tasto FUNCTION e selezionare, nel menù delle funzioni, la
modalità di pausa (PAUSE).
3. Una volta individuato il brano
desiderato (o CD), disattivare la
riproduzione a scansione agendo
sul tasto ∞.
Se il menù delle funzioni si è cancellato automaticamente, selezionare di
nuovo la modalità di scansione dal
menù delle funzioni.
2. Attivare la riproduzione a scansione agendo sul tasto 5.
Dopo aver scelto il desiderato tipo di
ripetizione fra quelli descritti al
paragrafo “Ripetizione della
riproduzione” a pag. 36, attivare la
riproduzione a scansione del
multilettore CD.
1. Premere il tasto FUNCTION e selezionare, nel menù delle funzioni, la
modalità di riproduzione a scansione (SCAN).
 Loading...