

Page 1

Avid Unity™ MediaManager
Administrator’s Guide
make manage move | media
™
Avid
®
Page 2

Copyright and Disclaimer
Product specifications are subject to change without notice and do not represent a commitment on the part
of Avid Technology, Inc. The software described in this document is furnished under a license agreement.
You can obtain a copy of that license by visiting Avid's Web site at www.avid.com. The terms of that license
are also available in the product in the same directory as the software. The software may not be reverse
assembled and may be used or copied only in accordance with the terms of the license agreement. It is
against the law to copy the software on any medium except as specifically allowed in the license
agreement. Avid products or portions thereof are protected by one or more of the following United States
patents: 4,746,994; 4,970,663; 5,045,940; 5,267,351; 5,309,528; 5,355,450; 5,396,594; 5,440,348;
5,452,378; 5,467,288; 5,513,375; 5,528,310; 5,557,423; 5,568,275; 5,577,190; 5,584,006; 5,640,601;
5,644,364; 5,654,737; 5,715,018; 5,724,605; 5,726,717; 5,729,673; 5,745,637; 5,752,029; 5,754,851;
5,799,150; 5,812,216; 5,852,435; 5,883,670; 5,905,841; 5,929,836; 5,929,942; 5,930,445; 5,946,445;
5,987,501; 5,995,115; 6,016,152; 6,018,337; 6,023,531; 6,035,367; 6,038,573; 6,058,236; 6,061,758;
6,091,778; 6,105,083; 6,118,444; 6,128,001; 6,130,676; 6,134,607; 6,137,919; 6,141,007; 6,141,691;
6,157,929; 6,198,477; 6,201,531; 6,211,869; 6,223,211; 6,239,815; 6,249,280; 6,269,195; 6,301,105;
6,317,158; 6,317,515; 6,327,253; 6,330,369; 6,351,557; 6,353,862; 6,357,047; 6,392,710; 6,404,435;
6,407,775; 6,417,891; 6,426,778; D396,853; D398,912. Additional U.S. and foreign patents pending. No
part of this document may be reproduced or transmitted in any form or by any means, electronic or
mechanical, including photocopying and recording, for any purpose without the express written permission
of Avid Technology, Inc.
Copyright © 1999–2000, 2002 Avid Technology, Inc. and its licensors. All rights reserved.
Printed in USA.
The following disclaimer is required by Apple Computer, Inc.
APPLE COMPUTER, INC. MAKES NO WARRANTIES WHATSOEVER, EITHER EXPRESS OR IMPLIED,
REGARDING THIS PRODUCT, INCLUDING WARRANTIES WITH RESPECT TO ITS
MERCHANTABILITY OR ITS FITNESS FOR ANY PARTICULAR PURPOSE. THE EXCLUSION OF
IMPLIED WARRANTIES IS NOT PERMITTED BY SOME STATES. THE ABOVE EXCLUSION MAY NOT
APPLY TO YOU. THIS WARRANTY PROVIDES YOU WITH SPECIFIC LEGAL RIGHTS. THERE MAY BE
OTHER RIGHTS THAT YOU MAY HAVE WHICH VARY FROM STATE TO STATE.
The following disclaimer is required by Sam Leffler and Silicon Graphics, Inc. for the use of
their TIFF library:
Copyright © 1988–1997 Sam Leffler
Copyright © 1991–1997 Silicon Graphics, Inc.
Permission to use, copy, modify, distribute, and sell this software [i.e., the TIFF library] and its
documentation for any purpose is hereby granted without fee, provided that (i) the above copyright notices
and this permission notice appear in all copies of the software and related documentation, and (ii) the
names of Sam Leffler and Silicon Graphics may not be used in any advertising or publicity relating to the
software without the specific, prior written permission of Sam Leffler and Silicon Graphics.
THE SOFTWARE IS PROVIDED “AS-IS” AND WITHOUT WARRANTY OF ANY KIND, EXPRESS,
IMPLIED OR OTHERWISE, INCLUDING WITHOUT LIMITATION, ANY WARRANTY OF
MERCHANTABILITY OR FITNESS FOR A PARTICULAR PURPOSE.
IN NO EVENT SHALL SAM LEFFLER OR SILICON GRAPHICS BE LIABLE FOR ANY SPECIAL,
INCIDENTAL, INDIRECT OR CONSEQUENTIAL DAMAGES OF ANY KIND, OR ANY DAMAGES
WHATSOEVER RESULTING FROM LOSS OF USE, DATA OR PROFITS, WHETHER OR NOT ADVISED
OF THE POSSIBILITY OF DAMAGE, AND ON ANY THEORY OF LIABILITY, ARISING OUT OF OR IN
CONNECTION WITH THE USE OR PERFORMANCE OF THIS SOFTWARE.
The following disclaimer is required by the Independent JPEG Group:
Portions of this software are based on work of the Independent JPEG Group.
The following disclaimer is required by Paradigm Matrix:
Portions of this software licensed from Paradigm Matrix.
Page 3

The following disclaimer is required by Ray Sauers Associates, Inc.:
“Install-It” is licensed from Ray Sauers Associates, Inc. End-User is prohibited from taking any action to
derive a source code equivalent of “Install-It,” including by reverse assembly or reverse compilation, Ray
Sauers Associates, Inc. shall in no event be liable for any damages resulting from reseller’s failure to
perform reseller’s obligation; or any damages arising from use or operation of reseller’s products or the
software; or any other damages, including but not limited to, incidental, direct, indirect, special or
consequential Damages including lost profits, or damages resulting from loss of use or inability to use
reseller’s products or the software for any reason including copyright or patent infringement, or lost data,
even if Ray Sauers Associates has been advised, knew or should have known of the possibility of such
damages.
The following disclaimer is required by Videomedia, Inc.:
“Videomedia, Inc. makes no warranties whatsoever, either express or implied, regarding this product,
including warranties with respect to its merchantability or its fitness for any particular purpose.”
“This software contains V-LAN ver. 3.0 Command Protocols which communicate with V-LAN ver. 3.0
products developed by Videomedia, Inc. and V-LAN ver. 3.0 compatible products developed by third
parties under license from Videomedia, Inc. Use of this software will allow “frame accurate” editing control
of applicable videotape recorder decks, videodisc recorders/players and the like.”
The following disclaimer is required by Altura Software, Inc. for the use of its Mac2Win
software and Sample Source Code:
©1993–1998 Altura Software, Inc.
The following disclaimer is required by Ultimatte Corporation:
Certain real-time compositing capabilities are provided under a license of such technology from Ultimatte
Corporation and are subject to copyright protection.
The following disclaimer is required by 3Prong.com Inc.:
Certain waveform and vector monitoring capabilities are provided under a license from 3Prong.com Inc.
Attn. Government User(s). Restricted Rights Legend
U.S. GOVERNMENT RESTRICTED RIGHTS. This Software and its documentation are “commercial
computer software” or “commercial computer software documentation.” In the event that such Software or
documentation is acquired by or on behalf of a unit or agency of the U.S. Government, all rights with
respect to this Software and documentation are subject to the terms of the License Agreement, pursuant to
FAR §12.212(a) and/or DFARS §227.7202-1(a), as applicable.
Trademarks
888 I/O, AirPlay, AirSPACE, AirSPACE HD, AniMatte, AudioSuite, AudioVision, AutoSync, Avid,
AVIDdrive, AVIDdrive Towers, AvidNet, AvidNetwork, AVIDstripe, Avid Unity, Avid Xpress, AVoption, AVX,
CamCutter, ChromaCurve, ChromaWheel, DAE, D-Fi, D-fx, Digidesign, Digidesign Audio Engine,
Digidesign Intelligent Noise Reduction, DigiDrive, DINR, D-Verb, Equinox, ExpertRender, FieldPak,
Film Composer, FilmScribe, FluidMotion, HIIP, HyperSPACE, HyperSPACE HDCAM, IllusionFX,
Image Independence, Intraframe, iS9, iS18, iS23, iS36, Lo-Fi, Magic Mask, make manage move | media,
Marquee, Matador, Maxim, MCXpress, Media Composer, MediaDock, MediaDock Shuttle, Media Fusion,
Media Illusion, MediaLog, Media Reader, Media Recorder, MEDIArray, MediaShare, Meridien, MetaSync,
NaturalMatch, NetReview, NewsCutter, OMF, OMF Interchange, OMM, Open Media Framework,
Open Media Management, ProEncode, Pro Tools, QuietDrive, Recti-Fi, rS9, rS18, Sci-Fi, Softimage,
Sound Designer II, SPACE, SPACEShift, Symphony, Trilligent, UnityRAID, Vari-Fi, Video Slave Driver,
VideoSPACE, and Xdeck are either registered trademarks or trademarks of Avid Technology, Inc. in the
United States and/or other countries.
iNEWS, iNEWS ControlAir, and Media Browse are trademarks of iNews, LLC.
Macintosh is a trademark of Apple Computer, Inc., registered in the U.S. and other countries. Microsoft and
Windows are either registered trademarks or trademarks of Microsoft Corporation in the United States
and/or other countries. All other trademarks contained herein are the property of their respective owners.
Page 4

GOT FOOTAGE?
Editors — Filmmakers — Special Effects Artists — Game Developers — Animators — Educators —
Broadcasters — Content creators of every genre — Just finished an incredible project and want to
share it with the world?
Send us your reels and we may use your footage in our show reel or demo!*
For a copy of our release and Avid’s mailing address, go to www.avid.com/footage.
*Note: Avid cannot guarantee the use of materials submitted.
Avid Unity MediaManager Administrator’s Guide • Part 0130-05484-01 • December 2002
Page 5

Contents
Using This Guide . . . . . . . . . . . . . . . . . . . . . . . . . . . . . . . . . . . . . 7
Who Should Use This Guide . . . . . . . . . . . . . . . . . . . . . . . . . . . . . . . . . . 7
About This Guide . . . . . . . . . . . . . . . . . . . . . . . . . . . . . . . . . . . . . . . . . . . 7
Symbols and Conventions . . . . . . . . . . . . . . . . . . . . . . . . . . . . . . . . . . . . 8
If You Need Help . . . . . . . . . . . . . . . . . . . . . . . . . . . . . . . . . . . . . . . . . . . 9
Related Information . . . . . . . . . . . . . . . . . . . . . . . . . . . . . . . . . . . . . . . . 10
If You Have Documentation Comments. . . . . . . . . . . . . . . . . . . . . . . . . 10
How to Order Documentation . . . . . . . . . . . . . . . . . . . . . . . . . . . . . . . . . 10
Avid Educational Services . . . . . . . . . . . . . . . . . . . . . . . . . . . . . . . . . . . 11
Chapter 1 Getting Started. . . . . . . . . . . . . . . . . . . . . . . . . . . . . . . . . . . . . . 13
Overview. . . . . . . . . . . . . . . . . . . . . . . . . . . . . . . . . . . . . . . . . . . . . . . . . 14
Database Services. . . . . . . . . . . . . . . . . . . . . . . . . . . . . . . . . . . . . . 14
Data . . . . . . . . . . . . . . . . . . . . . . . . . . . . . . . . . . . . . . . . . . . . . . . . . 14
Accessing and Logging In to MediaManager . . . . . . . . . . . . . . . . . . . . . 15
Opening MediaManager . . . . . . . . . . . . . . . . . . . . . . . . . . . . . . . . . 15
Logging In as Administrator . . . . . . . . . . . . . . . . . . . . . . . . . . . . . . . 16
User Interface Overview . . . . . . . . . . . . . . . . . . . . . . . . . . . . . . . . . . . . . 17
Administrative Tasks . . . . . . . . . . . . . . . . . . . . . . . . . . . . . . . . . . . . . . . 18
Logging Out . . . . . . . . . . . . . . . . . . . . . . . . . . . . . . . . . . . . . . . . . . . . . . 19
Chapter 2 Managing User Accounts . . . . . . . . . . . . . . . . . . . . . . . . . . . . . 21
Overview. . . . . . . . . . . . . . . . . . . . . . . . . . . . . . . . . . . . . . . . . . . . . . . . . 21
Accessing Shortcut Menus . . . . . . . . . . . . . . . . . . . . . . . . . . . . . . . 22
MediaManager Privilege Levels. . . . . . . . . . . . . . . . . . . . . . . . . . . . 22
The Users List . . . . . . . . . . . . . . . . . . . . . . . . . . . . . . . . . . . . . . . . . 23
Creating User Accounts . . . . . . . . . . . . . . . . . . . . . . . . . . . . . . . . . . . . . 23
Page 6

Editing User Accounts. . . . . . . . . . . . . . . . . . . . . . . . . . . . . . . . . . . . . . . 25
Deleting User Accounts. . . . . . . . . . . . . . . . . . . . . . . . . . . . . . . . . . . . . . 27
Selecting the Media Deletion Settings . . . . . . . . . . . . . . . . . . . . . . . . . . 28
Chapter 3 Administrative Tasks. . . . . . . . . . . . . . . . . . . . . . . . . . . . . . . . . 33
Maintenance Tasks . . . . . . . . . . . . . . . . . . . . . . . . . . . . . . . . . . . . . . . . . 34
Database Maintenance Tasks and Schedule . . . . . . . . . . . . . . . . . . 34
Performing Database Maintenance Tasks . . . . . . . . . . . . . . . . . . . . 35
Managing Database Size . . . . . . . . . . . . . . . . . . . . . . . . . . . . . . . . . . . . 35
Deleting Media Pending . . . . . . . . . . . . . . . . . . . . . . . . . . . . . . . . . . . . . 37
Hiding the Delete Media Pending Catalog . . . . . . . . . . . . . . . . . . . . 37
Deleting Disassociated Media. . . . . . . . . . . . . . . . . . . . . . . . . . . . . . . . . 38
Checking Consistency. . . . . . . . . . . . . . . . . . . . . . . . . . . . . . . . . . . . . . . 39
MediaManager Database Backup and Restore . . . . . . . . . . . . . . . . . . . 40
Specifying the Location for MediaManager Backup Files. . . . . . . . . 40
Backing Up the MediaManager Database . . . . . . . . . . . . . . . . . . . . 42
Restoring the MediaManager Database. . . . . . . . . . . . . . . . . . . . . . 43
Setting the Session Timeout . . . . . . . . . . . . . . . . . . . . . . . . . . . . . . . . . . 45
Setting the Default Access . . . . . . . . . . . . . . . . . . . . . . . . . . . . . . . . . . . 46
Setting the Desktop Check-in Limit. . . . . . . . . . . . . . . . . . . . . . . . . . . . . 47
Syncing with Avid Unity. . . . . . . . . . . . . . . . . . . . . . . . . . . . . . . . . . . . . . 48
Resyncing to the Avid Unity Workspaces . . . . . . . . . . . . . . . . . . . . . . . . 48
Recovering from a Server Crash. . . . . . . . . . . . . . . . . . . . . . . . . . . . . . . 49
Restarting MediaManager. . . . . . . . . . . . . . . . . . . . . . . . . . . . . . . . . . . . 50
Appendix A Managing Select List Accounts . . . . . . . . . . . . . . . . . . . . . . . . 51
Overview . . . . . . . . . . . . . . . . . . . . . . . . . . . . . . . . . . . . . . . . . . . . . . . . . 51
Creating Select List User Accounts. . . . . . . . . . . . . . . . . . . . . . . . . . . . . 52
Editing Select List User Accounts . . . . . . . . . . . . . . . . . . . . . . . . . . . . . . 54
Deleting Select List User Accounts . . . . . . . . . . . . . . . . . . . . . . . . . . . . . 56
Setting Up Burn-in for the Avid Player . . . . . . . . . . . . . . . . . . . . . . . . . . 56
List of Terms . . . . . . . . . . . . . . . . . . . . . . . . . . . . . . . . . . . . . . . 59
Index . . . . . . . . . . . . . . . . . . . . . . . . . . . . . . . . . . . . . . . . . . . . . . 63
6
Page 7

Using This Guide
Congratulations on your purchase of Avid Unity™ MediaManager, a
powerful tool for managing media in an Avid Unity MediaNetwork shared
storage environment.
Who Should Use This Guide
This guide is intended for MediaManager administrators responsible for
the setup and day-to-day operation of MediaManager in a MediaNetwork
environment.
About This Guide
The Contents lists all topics included in the book. They are presented with
the following overall structure:
• Chapter 1, “Getting Started,” helps you get oriented with beginning
concepts and general workflow and provides valuable pointers as you
proceed.
• Chapter 2 and Chapter 3 follow the natural flow of your work, with
clear and comprehensive step-by-step procedures.
• Appendix A provides information on the MediaManager Select option.
Page 8

Using This Guide
Symbols and Conventions
Avid documentation uses the following symbols and conventions:
Symbol or Convention Meaning or Action
n
c
w
> This symbol indicates menu commands (and
t
k This symbol represents the Apple or Command key.
A note provides important related information,
reminders, recommendations, and strong
suggestions.
A caution means that a specific action you take could
cause harm to your computer or cause you to lose
data.
A warning describes an action that could cause you
physical harm. Follow the guidelines in this
document or on the unit itself when handling
electrical equipment.
subcommands) in the order you select them. For
example, File > Import means to open the File menu
and then select the Import command.
This symbol indicates a single-step procedure.
Multiple arrows in a list indicate that you perform
one of the actions listed.
Press and hold the Command key and another key to
perform a keyboard shortcut.
Margin tips In the margin, you will find tips that help you
perform tasks more easily and efficiently.
Italic font Italic font is used to emphasize certain words and to
indicate variables.
Courier Bold font
Click Quickly press and release the left mouse button
8
Courier Bold font identifies text that you type.
(Windows) or the mouse button (Macintosh).
Page 9

If You Need Help
Symbol or Convention Meaning or Action
Double-click Click the left mouse button (Windows) or the mouse
button (Macintosh) twice rapidly.
Right-click Quickly press and release the right mouse button
(Windows only).
Drag Press and hold the left mouse button (Windows) or
the mouse button (Macintosh) while you move the
mouse.
Ctrl+key
k+key
If You Need Help
If you are having trouble using MediaManager:
1. Retry the action, carefully following the instructions given for that task
in this guide. It is especially important to check each step of your
workflow.
2. Check the release notes supplied with your Avid application for the
latest information that might have become available after the hardcopy
documentation was printed.
3. Check the documentation that came with your Avid application or
your hardware for maintenance or hardware-related issues.
4. Visit the online Knowledge Center at www.avid.com/support. Online
services are available 24 hours per day, 7 days per week. Search this
online Knowledge Center to find answers, to view error messages, to
access troubleshooting tips, to download updates, and to read/join
online message-board discussions.
Press and hold the first key while you press the
second key.
5. For Technical Support, please call 800-800-AVID (800-800-2843).
For Broadcast On-Air Sites and Call Letter Stations, call
800-NEWSDNG (800-639-7364).
9
Page 10

Using This Guide
Related Information
The following documents provide more information about MediaManager
and other workgroup documents:
• Avid Unity MediaManager Setup and User’s Guide
• Avid Unity MediaManager Release Notes
• Avid Unity TransferManager Setup and User’s Guide
• Avid Unity TransferManager Release Notes
• Avid Unity MediaNetwork Windows Fibre Channel Client Setup Guide
• Avid Unity MediaNetwork Troubleshooting Guide
If You Have Documentation Comments
Avid Technology continuously seeks to improve its documentation. We
value your comments about this guide, the Help, and other Avid-supplied
documentation.
Simply e-mail your documentation comments to Avid Technology at
TechPubs@avid.com
Please include the title of the document, its part number, and the specific
section you are commenting on in all correspondence.
How to Order Documentation
To order additional copies of this documentation from within the
United States, call Avid Sales at 800-949-AVID (800-949-2843). If you
are placing an order from outside the United States, contact your local
Avid representative.
10
Page 11

Avid Educational Services
For information on courses/schedules, training centers, certifications,
courseware, and books, please visit www.avid.com/training or call
Avid Sales at 800-949-AVID (800-949-2843).
Avid Educational Services
11
Page 12

Using This Guide
12
Page 13

Chapter 1
Getting Started
MediaManager is a media management tool that allows MediaNetwork
clients to search the large number of media objects (master clips,
sequences, effects, and any other type of object that references digital
media) in the MediaNetwork shared storage environment.
The MediaManager database resides on a dedicated Windows
system, apart from the MediaNetwork server, so that database load can
never impact critical file system operations.
This chapter discusses the following topics:
• Overview
• Accessing and Logging In to MediaManager
• User Interface Overview
• Administrative Tasks
• Logging Out
®
2000
Page 14

Chapter 1 Getting Started
Overview
MediaManager is based on Microsoft® SQL Server. It manages the
database by adding, removing, and modifying objects and records in the
database in response to client requests. MediaManager consists of two
major components:
• Database services — The software applications that drive the
• Data — The information about media objects physically stored on
Database Services
MediaManager is implemented using a number of Windows services on
the MediaManager server system. The main database service is listed in
the Services control panel as MSSQLServer. Ancillary services also
required for MediaManager operation are IIS Admin Service and World
Wide Web Publishing Service.
database functions
drives (optionally mirrored for data security)
Data
14
The data is stored on one or more drives, depending on whether you have a
server configuration that supports mirroring (duplication of the data on
multiple drives in a redundant configuration). In a mirrored configuration,
if one drive fails, the mirrored drive is automatically used instead.
For every media object, the database stores an associated record that
contains specific information about the object. Information in each record
is recorded as a predetermined set of attributes. Each attribute describes a
feature of the object, for example, its name, creation date, or tape ID.
When you initiate a search, MediaManager finds the records with the
attributes you specify and then lists the associated objects. For a complete
list of attributes, see the Avid Unity MediaManager Setup and User’s
Guide.
Page 15

Accessing and Logging In to MediaManager
Accessing and Logging In to MediaManager
The MediaManager user interface is implemented as a dynamic Web page.
You can open MediaManager with Internet Explorer 5.0 or later.
For installation information, see the Avid Unity MediaManager Release
Notes.
For an overview of how to use MediaManager for administrative purposes,
see “User Interface Overview” on page 17. For more information about the
user interface, see the Avid Unity MediaManager Setup and User’s Guide.
To set up Internet Explorer to work with MediaManager, see the
Avid Unity MediaManager Setup and User’s Guide.
This section describes how to open the MediaManager Web page and then
log in.
Opening MediaManager
You can access the MediaManager user interface to perform
administrative functions from the MediaManager server or any system
running Internet Explorer that has a TCP/IP network connection to the
MediaManager server by opening the appropriate dynamic Web page.
To open MediaManager, first obtain its Uniform Resource Locator (URL)
from your site administrator. A typical example is:
mmserver/omm/
(In this example, mmserver is the computer name of the MediaManager
server.)
To open the page in Internet Explorer:
1. Start your Internet Explorer application.
2. Select File > Open (or press Ctrl+O).
3. Type the URL supplied to you by your administrator in the Open
dialog box, and then click OK.
15
Page 16

Chapter 1 Getting Started
Alternatively, if the Address toolbar is open, you can simply type the
URL there and press Enter.
n
After you open the MediaManager page for the first time by specifying its
address manually, you might want to set it as your default home page or to
bookmark it for easy access. For more information, see the Help provided
with your Internet browser.
Logging In as Administrator
Each time you open MediaManager, a login screen appears, prompting you
to enter a user name and password. To gain access to MediaManager’s
administrative functions, you must supply a user name with administrative
privileges. Once you have logged in as administrator, you can access all
the standard MediaManager functionality as well as its administrative
functions.
n
MediaManager comes preconfigured with a default administrative
account (Administrator) with no associated password to allow you to log
in for the first time. Once you have logged in, Avid recommends that you
immediately specify a password for this account to prevent unauthorized
users from gaining administrative access to MediaManager.
16
Page 17
Type any user name and password with administrative privileges in the
text boxes, and then click Login. The first time you need to log in (prior to
setting up user accounts), specify user name Administrator with no
password. If both are accepted, the full MediaManager user interface will
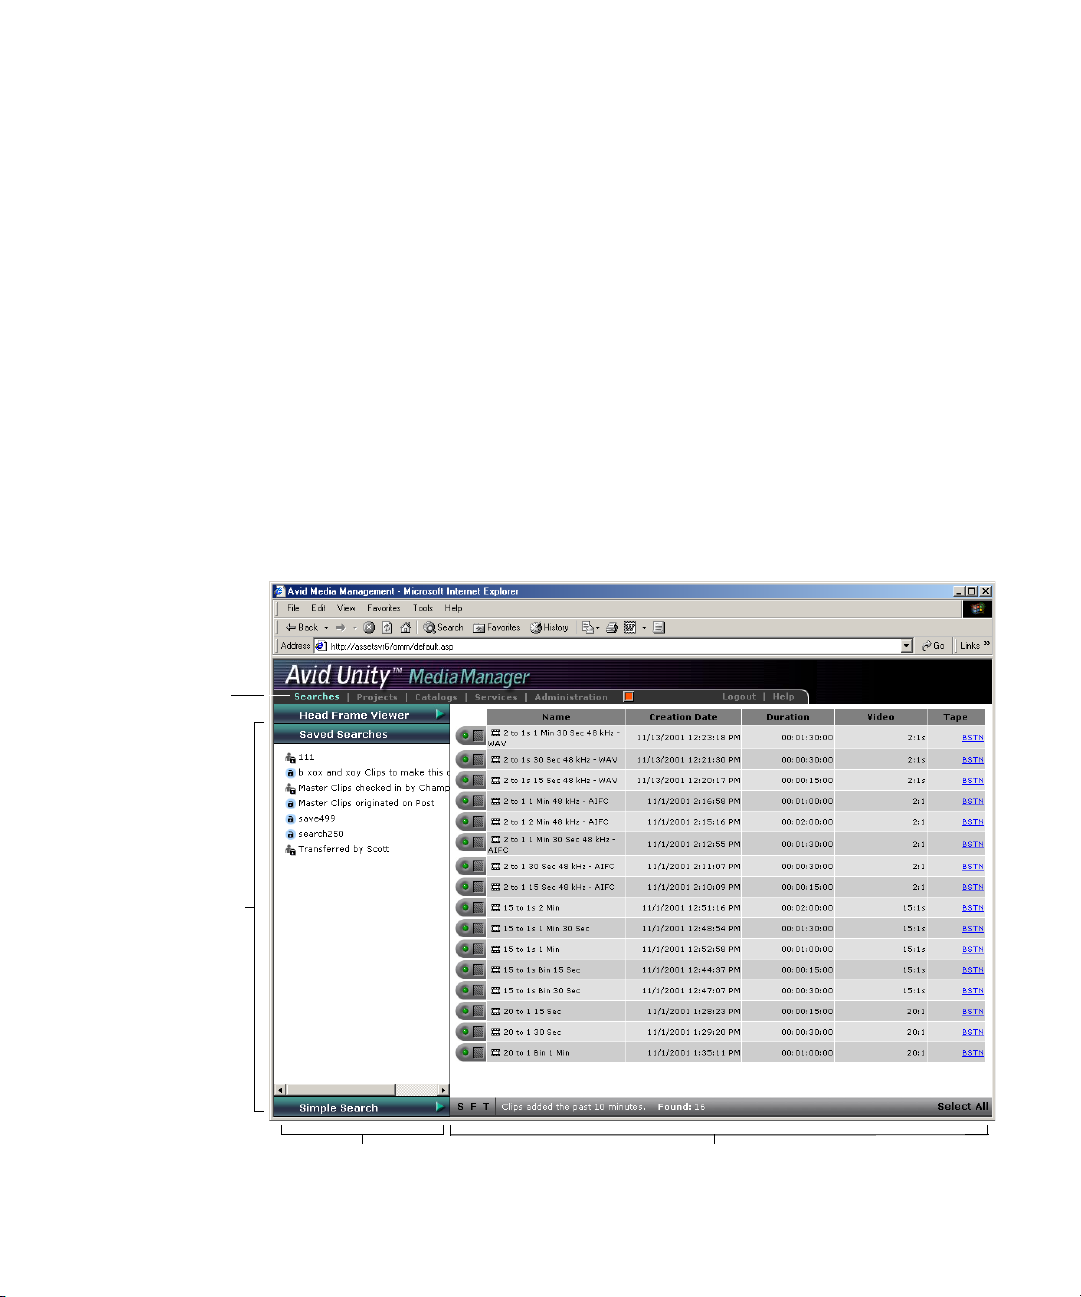
appear, automatically running a default search to find any media objects
added to its database during the last 10 minutes.
User Interface Overview
The user interface has several modes that provide access to
MediaManager’s most commonly used functions. You select the mode by
clicking the appropriate item in the mode selector. As administrator, you
will be interested primarily in Administration mode, which provides access
to the Users list and the Functions list.
User Interface Overview
Mode
selector
Moderelated
controls
Control frame
Results frame
17
Page 18

Chapter 1 Getting Started
For more information about the other MediaManager modes (Searches,
Projects, Catalogs, and Services), see the Avid Unity MediaManager Setup
and User’s Guide.
Administrative Tasks
As administrator of MediaManager, you are responsible for:
• Creating, editing, and deleting user accounts. You must establish an
account for each client user that needs to access the MediaManager
database. For more information, see Chapter 2.
• Selecting the Media Deletion setting. The administrator must select
the Media Deletion setting. This determines whether the delete options
are based on the user’s Avid Unity workspace privileges or
MediaManager privileges. For more information, see Chapter 2.
• Purging media objects from the database. MediaManager users
delete media objects from the database, but items that are in use in
another project are not deleted. These items are placed in the Delete
Media Pending catalog. As an administrator, you must purge these
objects to actually remove them from MediaManager. For more
information, see “Deleting Media Pending” on page 37.
18
• Backing up the database. Backing up the database regularly protects
your data, allowing you to restore the database to a saved state in the
event of failure. For more information, see “MediaManager Database
Backup and Restore” on page 40.
• Other routine maintenance tasks. Other routine maintenance tasks
include checking the database size, performing consistency checks,
and periodically rebooting the server. For more information, see
Chapter 3.
Page 19

Logging Out
Logging Out
When you are finished using MediaManager, you should log out rather
than leave it open or access another page in Internet Explorer.
To log out:
t Click Logout in the MediaManager banner.
MediaManager logs you out, and the login screen opens.
n
MediaManager defaults to automatically time-out and log you out after it
has been idle for more than 30 minutes. This makes your license available
for other sessions. If this happens, you will need to start a new session by
logging in again. The administrator can change the session time-out
default in the System Setup window. See “Setting the Session Timeout” on
page 45.
19
Page 20

Chapter 1 Getting Started
20
Page 21

Chapter 2
Managing User Accounts
The administrator controls access to MediaManager with user accounts.
This chapter describes how to create, edit, and delete user accounts so that
all authorized MediaNetwork client users can access MediaManager. It
also describes how to select the Media Deletion settings.
This chapter discusses the following topics:
• Overview
• Creating User Accounts
• Editing User Accounts
• Deleting User Accounts
• Selecting the Media Deletion Settings
Overview
c
You must create a user account for each MediaNetwork client user and
anyone else who needs to access MediaManager.
Always create MediaManager user accounts with the same names and
passwords as MediaNetwork user accounts.
Page 22

Chapter 2 Managing User Accounts
Accessing Shortcut Menus
When using MediaManager, you need to access a shortcut menu for certain
procedures. For example, if you want to delete a user, you must access the
shortcut menu. To access shortcut menus, follow the appropriate
procedure.
To access a shortcut menu while in Text view:
• (Windows) Right-click the name or icon of the object for which you
want to perform the procedure.
• (Macintosh) Move the mouse pointer over the object for which you
want to perform the procedure, and then click the shortcut menu arrow.
To access a shortcut menu while in Script or Frame view:
• (Windows) Right-click the frame of the object for which you want to
perform the procedure.
• (Macintosh) Move the mouse pointer over the frame of the object for
which you want to perform the procedure, and then click the shortcut
menu arrow.
MediaManager Privilege Levels
Each user account has an associated privilege level that determines
whether the user logging in to that account has regular or administrative
privileges in MediaManager.
n
22
Avid recommends that you restrict administrative privileges to designated
administrators who absolutely need to perform the administrative tasks
described in this guide.
Page 23

The Users List
New User icon
Creating User Accounts
You access the Users list when MediaManager is in Administration mode
to view, create, delete, and edit user accounts.
The topics in the remainder of this chapter describe how to manage your
MediaManager user accounts with the Users list.
Creating User Accounts
To create a user account:
1. Click Administration in the mode selector.
2. Click the New User icon in the Functions list.
The Create User window opens.
23
Page 24

Chapter 2 Managing User Accounts
24
3. Specify the standard user account attributes by typing in the
appropriate text boxes.
- User Name — The account name (login name).
- Password — The login password. Type the required password
identically in both the Password and Retype Password text boxes.
- Full Name (Option) — The user’s name.
- Description (Option) — A brief description of the user or notes
about the account’s purpose (for example, the user’s title, role,
client type, and so on).
4. Select the user account privilege level (Regular User, System User, or
Administrator) from the Role list.
Page 25

- Regular User — Can do everything except administrative tasks.
Can also change the account password.
- System User — Cannot log in to MediaManager through the user
interface. Can be used as a valid account to log in from a service
such as Avid Unity TransferManager.
- Administrator — Can perform functions as a regular user and can
also perform administrative tasks such as backup and restore.
5. (Option) Add the new user to existing access lists by selecting the
name of the access list.
6. Click Save.
The new user account is created and added to the Users list.
Editing User Accounts
To edit a user account:
1. Click Administration in the mode selector.
Editing User Accounts
2. Access the user account you want to edit, and select Edit User from the
shortcut menu. See “Accessing Shortcut Menus” on page 22.
The Edit User window opens.
25
Page 26

Chapter 2 Managing User Accounts
26
n
3. Edit the standard user account attributes that you want to change by
typing in the appropriate text boxes.
You cannot edit the user name. To change the user name, you must create
a new user account with the required name and attributes.
- Password — The login password. Type the required password
identically in both the Password and Retype Password text boxes.
- Full Name (Option) — The user’s name.
- Description (Option) — A brief description of the user or notes
about the account’s purpose (for example, the user’s title, role,
client type, and so on).
Page 27

4. If necessary, modify the user account privilege level (Regular User,
System User, or Administrator) by selecting an item from the Role list.
- Regular User — Can do everything except administrative tasks.
Can also change the account password.
- System User — Cannot log in to MediaManager through the user
interface. Can be used as a valid account to log in from a service
such as Avid Unity TransferManager.
- Administrator — Can perform functions as a regular user and can
also perform administrative tasks such as backup, restore, and
system setup.
If the user is a member of an access list, the name of the access list or
lists will appear.
5. Click Save.
The user account is modified.
Deleting User Accounts
Deleting User Accounts
c
To delete a user account:
1. Click Administration in the mode selector.
The Users list appears in the results frame.
2. Select the user you want to delete, and select Delete from the shortcut
menu. See “Accessing Shortcut Menus” on page 22.
A dialog box opens, prompting you to confirm that you want to
proceed with deleting the user account.
3. Click OK.
The user account is deleted.
Never delete or modify the Resync user account. Resync will not work
properly if you delete the Resync user account.
27
Page 28

Chapter 2 Managing User Accounts
Selecting the Media Deletion Settings
MediaManager allows you to set the deletion options according to user
privileges. You can choose to set the delete options to correspond with the
user’s Avid Unity workspace privileges or MediaManager privileges.
To select the Media Deletion settings:
1. Click Administration in the mode selector.
2. Click the System Setup icon in the Functions list.
The System Setup window opens.
28
3. Click the DeleteSetting button to select a Media Deletion setting.
Page 29

Selecting the Media Deletion Settings
The Delete Mode Setup window opens.
c
4. Select a Media Deletion setting for your environment.
- If you select “Delete protection based on media references,” only
administrators can delete media. When administrators try to delete
media that has a parent or child relative (that is, when referenced
by a sequence), the media is not deleted. Administrators have the
option to override this delete protection.
If you select “Delete protection based on media references,” you must
check in the sequence manually to protect the media.
29
Page 30

Chapter 2 Managing User Accounts
- If you select “Delete protection based on projects and media
associations,” regular users (including editors) can delete from
either the editing application or the MediaManager user interface.
If the media is used in a project, catalog, or production, the media
will not be deleted. Administrators have the option to override this
delete protection. If you want to delete media by project reference
only, select “Ignore Catalog references.”
Shared media is protected by the project or bin tracking feature
that automatically checks in elements brought into other projects
and bins. If you select “Delete protection based on projects and
media associations,” see Tab le 1 for information on delete options.
Table 1 Media Deletion If Set to “Delete protection based on
Deleting Media from
User
a Public Project
projects and media associations”
Deleting Media from
a Private Project
Deleting Media with
No Project Context
(Simple Search)
Administrator Media is placed in the
Delete Media Pending
catalog if the media is
in use and the
administrator clicks
Delete in the Delete
Confirmation dialog
box.
To delete media
in use, the administrator
clicks the Details button
in the Delete
Confirmation dialog box
and clicks Delete in the
Media In-Use dialog
box.
30
Media is placed in the
Delete Media Pending
catalog if the media is
in use and the
administrator clicks
Delete in the Delete
Confirmation dialog
box.
To delete media
in use, the administrator
clicks the Details button
in the Delete
Confirmation dialog box
and clicks Delete in the
Media In-Use dialog
box.
Media is deleted if the
administrator overrides
the Media In-Use
warning by clicking the
Details button in the
Delete Confirmation
dialog box and then
clicking Delete again.
Page 31

User
Selecting the Media Deletion Settings
Table 1 Media Deletion If Set to “Delete protection based on
projects and media associations” (Continued)
Deleting Media with
Deleting Media from
a Public Project
Deleting Media from
a Private Project
No Project Context
(Simple Search)
Project Owner Media will be placed in
the Delete Media
Pending catalog.
Users with Full
Privileges
Users with Read/Write
Privileges
Does not apply. Media is deleted if it is
Does not apply. Media is not deleted. Does not apply.
- If you select “Delete protection based on Unity workspace rights
only,” when an administrator chooses to delete media from a
public or private project or from a non-project context, the media
is deleted. If a non-administrator chooses to delete media, the
media is deleted if the non-administrator has Unity workspace
privileges. If the non-administrator does not have Unity workspace
privileges, the media is moved to the Delete Media Pending
catalog.
Media is deleted if it is
not in use by another
project or catalog. If it is
in use, it is placed in the
Delete Media Pending
catalog.
not in use by another
project or catalog. If it is
in use, it is placed in the
Delete Media Pending
catalog.
Media is not deleted.
Does not apply.
n
5. Click Submit.
You should choose this setting for your site’s work environment and not
change the setting. Changing a Media Deletion setting could confuse users
and should be avoided if possible.
31
Page 32

Chapter 2 Managing User Accounts
32
Page 33

Chapter 3
Administrative Tasks
MediaManager allows you to perform several routine tasks to maintain the
health of the database. Additionally, there are some procedures that you
might need to perform if problems do occur.
This chapter discusses the following topics:
• Maintenance Tasks
• Managing Database Size
• Deleting Media Pending
• Deleting Disassociated Media
• Checking Consistency
• MediaManager Database Backup and Restore
• Setting the Session Timeout
• Setting the Default Access
• Setting the Desktop Check-in Limit
• Syncing with Avid Unity
• Resyncing to the Avid Unity Workspaces
• Recovering from a Server Crash
• Restarting MediaManager
Page 34

Chapter 3 Administrative Tasks
Maintenance Tasks
MediaManager is a Microsoft SQL Server database running on a Windows
2000 system set up as a dedicated server system.
c
c
Do not run any other applications on the database server. They might
interfere with operation of the database and slow its response time.
You should not use any SQL Server tools other than those described in
this chapter to administer MediaManager — you might corrupt your
data.
The Microsoft SQL Server service starts when you start the
MediaManager server.
Database Maintenance Tasks and Schedule
There are several administrative tasks that you must perform to maintain
the health of the MediaManager database:
• Regularly check the amount of free space on the MediaManager server
data drives, and purge media as necessary. For details, see “Managing
Database Size” on page 35.
• Check the consistency of the database daily. For details, see “Checking
Consistency” on page 39.
• Back up the MediaManager database daily to protect your data. For
details, see “MediaManager Database Backup and Restore” on
page 40.
34
• Reboot the MediaManager server once a week.
If the database ever crashes or shuts down, you should investigate the
reason for the problems, make repairs, and then restart the database
service. See “Restarting MediaManager” on page 50.
Page 35

Performing Database Maintenance Tasks
You perform most database maintenance tasks by using functions
available from the Functions list, which appears when MediaManager is in
Administration mode.
Functions
list
Managing Database Size
Managing Database Size
The MediaManager database has no preset maximum size; it is constrained
only by the amount of drive space that you have available to accommodate
data. Although the MediaManager database should have enough space to
accommodate approximately 100,000 media objects, the actual number of
objects that can be stored in MediaManager depends to some extent on the
following:
• Your MediaManager drive configuration. If you have a server
configuration in which MediaManager data is stored on the same drive
as the system and database software, less space will be available to
accommodate database records.
• The number and complexity of sequences that have been checked
in. A sequence with 1000 cuts takes more space than a sequence with
three cuts.
35
Page 36

Chapter 3 Administrative Tasks
When the drive or drives containing the MediaManager data are close to
full, you should ask users to go through their checked-in objects and delete
those no longer required. You can then purge these objects if necessary to
free up space (see “Deleting Media Pending” on page 37).
n
Do not assign MediaManager database drives for temporary disk storage
or use them for shared public disk space.
You should regularly check that sufficient drive space is available by
looking at the MediaManager data drive properties.
To check disk space:
1. Click Administration in the mode selector.
2. Click the Server Statistics icon in the Functions list.
The Server Statistics window opens, indicating the available disk
space.
36
Free disk space
Page 37

Deleting Media Pending
When MediaManager users delete media objects from the database, the
media is not deleted if the media is used in another project or catalog. The
media objects are moved to the Delete Media Pending catalog. To
physically remove these objects and free up the disk space, you must purge
them from the Delete Media Pending catalog.
To purge media objects from the Delete Media Pending catalog:
1. Click Catalogs in the mode selector.
2. Click the Delete Media Pending folder.
3. Select the items in the catalog that you want to delete.
4. Press the Delete key.
5. A delete confirmation message box opens.
6. Click OK.
The media files are deleted from Avid Unity MediaNetwork shared
storage.
Deleting Media Pending
Hiding the Delete Media Pending Catalog
Avid recommends that you select the option to hide the Delete Media
Pending catalog. You must be an administrator to hide the Delete Media
Pending catalog.
To hide the Delete Media Pending catalog:
1. Click Administration in the mode selector.
2. Click the System Setup icon in the Functions list.
The System Setup window opens.
37
Page 38

Chapter 3 Administrative Tasks
3. Select “Don’t Show (recommended)” in the Delete Media Pending
Catalog list.
Deleting Disassociated Media
When MediaManager media objects are not associated with any bins or
projects, the media objects are moved to the Disassociated Media catalog.
This can happen when a user deletes clips but does not delete the
associated media files. The clips are removed from the bin, and, if they are
not in any other bins or catalogs, they are moved to the Disassociated
Media catalog. To physically remove these objects and free up the disk
space, you must purge them from the Disassociated Media catalog.
38
Page 39

To purge media objects from the Disassociated Media catalog:
1. Click Catalogs in the mode selector.
2. Click the Disassociated Media folder.
3. Select the items in the catalog that you want to delete.
4. Press the Delete key.
5. A delete confirmation message box opens.
6. Click OK.
The selected media objects are permanently deleted from the
MediaManager database, and the media files are deleted from
Avid Unity MediaNetwork shared storage.
Checking Consistency
Hardware problems (drive failures) and operating system problems might
cause consistency problems in the database. You should periodically verify
that your database is consistent by using the SQL Server Query Analyzer
installed with SQL Server (see “Database Maintenance Tasks and
Schedule” on page 34).
Checking Consistency
To check the consistency of the database:
1. Start the SQL Server Query Analyzer by clicking the Start button and
selecting Programs > Microsoft SQL Server > Query Analyzer.
A Login dialog box opens.
2. Log in to the database as user sa, with the appropriate password.
The SQL Server Query Analyzer starts and displays a new query
window.
3. Type the following in the query window:
use MediaManager_Database_Name ; dbcc checkdb
4. Press F5 to run the query.
The results appear in the lower panel window.
39
Page 40

Chapter 3 Administrative Tasks
SQL Server should be able to fix and recover from most errors that it finds.
If the search returns any data corruption from which it cannot recover, you
should search for warning messages that might provide additional
information about the problem and might be useful to Avid Customer
Support; then contact them for help. You will probably need to restore
your database from a recent backup (see “Restoring the MediaManager
Database” on page 43).
MediaManager Database Backup and Restore
Avid recommends that you back up the entire MediaManager database
daily. You use MediaManager to back up and restore your files.
Specifying the Location for MediaManager Backup Files
To specify the location in which to store MediaManager backup files:
1. Click Administration in the mode selector.
40
2. Click the System Setup icon in the Functions list.
The System Setup window opens.
Page 41

MediaManager Database Backup and Restore
n
3. Select a drive from the Backup Location list. The default location is
drive C. This location can be a tape drive or other removable media
device but not a network drive remote from the MediaManager server.
4. In the Directory text box, accept the default name (backup), or type
another name.
The backup location is on the MediaManager server; it is not on local
drives if you are accessing the MediaManager user interface from a client
system.
5. Click Submit.
The new location for MediaManager backup files is stored.
41
Page 42

Chapter 3 Administrative Tasks
Backing Up the MediaManager Database
You should perform a complete backup of the MediaManager database
daily.
n
You should back up MediaManager only when user activity is light; the
backup can take a long time and uses a significant amount of CPU
resources.
To back up the MediaManager database:
1. Click Administration in the mode selector.
2. Click the Backup icon in the Functions list.
The Create Backup window opens.
42
3. Create a new backup file name, or select an existing one:
- To create a new backup, select New and then type the name of the
file in the text box.
- To overwrite an existing backup file, select Existing and then
select an existing file from the list that appears.
4. (Option) Type a description to be associated with the backup in the
Description text box.
Page 43

MediaManager Database Backup and Restore
5. Click Start.
The backup procedure begins. It can take a long time, depending on
the number of media objects.
Restoring the MediaManager Database
If the database loses its data or becomes corrupted for any reason, you will
need to copy the data from your most recent database backup files back to
the database. (This is known as restoring the database.)
To restore the MediaManager database:
1. Check that the specified backup location (see “Specifying the Location
for MediaManager Backup Files” on page 40) contains the backup file
that you want to restore.
2. Click Administration in the mode selector.
3. Click the Restore icon in the Functions list. The Restore from Backup
window opens.
43
Page 44

Chapter 3 Administrative Tasks
4. Select the backup file to be restored from the Backup File list. Any
description associated with the chosen backup file appears in the
Description text box.
5. Specify the directory in which the existing MediaManager database is
installed by typing the name in the Database Directory text box (for
example, E:\SQLData\MSSQL\data).
6. Specify a temporary database name to create from the backup file by
typing the name in the Database Name text box. The name must be
unique (different from the current database name).
7. Specify the SQL Server database access password (the password
associated with the sa account for the SQL Server database) by typing
the name in the DBA Password text box.
8. Click Restore.
A progress indicator appears, and then a dialog box opens, displaying
the numbers of different types of media objects in the database being
restored.
9. If the database being restored is correct, click Accept to override the
current database. Otherwise, click Cancel to stop the restore operation.
44
c
Proceeding with the restore operation will overwrite your existing
database. If you want to preserve it, back up your database before
completing the restore.
If you clicked Accept, the database restore operation proceeds,
copying the data from the backup file to the appropriate directories.
This can take a long time, depending on the number of objects in the
database being restored. When the operation is complete, a message
box opens, informing you of this.
10. Restart the MediaManager server.
Page 45

Setting the Session Timeout
MediaManager defaults to automatically time-out and log you out after it
has been idle for more than 30 minutes. This makes your license available
for other sessions. You can reset the session timeout to between 10 minutes
and 24 hours.
To specify the session timeout:
1. Click Administration in the mode selector.
2. Click the System Setup icon in the Functions list.
The System Setup window opens.
Setting the Session Timeout
3. Select another value from the Session Timeout list.
4. Click Submit.
The updated timeout value will take effect for any new session.
45
Page 46

Chapter 3 Administrative Tasks
Setting the Default Access
MediaManager allows you to specify the default access for your projects
and catalogs. You can choose to have the projects and catalogs Public or
Private.
To specify the default access:
1. Click Administration in the mode selector.
2. Click the System Setup icon in the Functions list.
The System Setup window opens.
46
3. Select either Private or Public from the Default Access list. When set
to Private, the default for accessing projects and catalogs is Private,
indicating only the owner of the project and catalog and an
administrator can access the projects and catalogs. When set to Public,
all MediaManager users can access the projects and catalogs.
Page 47

Setting the Desktop Check-in Limit
MediaManager allows you to specify a limit to the file size for a desktop
check-in.
To specify the desktop check-in size:
1. Click Administration in the mode selector.
2. Click the System Setup icon in the Functions list.
The System Setup window opens.
Setting the Desktop Check-in Limit
3. Select a desktop limit from the Desktop Limit list. The range is
100M bytes to 2Gb.
4. Click Submit.
When you perform a desktop check-in, the size of the file will be
limited to the chosen size. For information on performing a desktop
check-in, see the Avid Unity MediaManager Setup and User’s Guide.
47
Page 48

Chapter 3 Administrative Tasks
Syncing with Avid Unity
MediaManager allows you to synchronize with Avid Unity users. Any
changes that have occurred with Avid Unity users, such as privilege
changes or new users being added, can be synchronized with the
MediaManager system. Also, syncing with Avid Unity updates any
Avid Unity workspaces.
If you make changes to users on Avid Unity, use the Sync with Unity
feature to make sure these users appear in the Users list with the proper
privileges.
To sync with the Avid Unity users:
1. Click Administration in the mode selector.
2. Click the Sync With Unity icon.
Any users that have been added or changed on Avid Unity now appear
in the Users list.
Resyncing to the Avid Unity Workspaces
MediaManager allows you to resync to the Avid Unity drives. Resyncing
ensures that all the media on Avid Unity has been checked in to
MediaManager.
When media files are copied into a shared storage environment manually,
resyncing is necessary to make the compositional metadata (the clips
associated with those media files) appear in MediaManager.
To resync to the Avid Unity drives:
1. Click Administration in the mode selector.
2. Click the Resync icon in the Functions list.
The Resync window opens.
48
Page 49

Recovering from a Server Crash
3. Select the workspaces to which you want to resync.
4. Click Resync.
A progress indicator displays that the resync process is taking place.
n
n
Not all attributes are restored. The Name, Tape name, Creation date,
Audio, Audio format, Tracks, Drive, End, and Start attributes are restored.
All other attributes are left blank.
Only media clips such as master clips and rendered effects are checked in
by Resync. Sequences and subclips must be checked in again from the
editing application.
Recovering from a Server Crash
If the MediaManager server crashes, perform the following procedure to
recover.
To recover from a server crash:
1. Reboot the MediaManager server.
2. Check the database consistency. See “Checking Consistency” on
page 39.
3. Restore from backup if necessary. See “Restoring the MediaManager
Database” on page 43.
4. Make sure the server is functional by simply logging in to
MediaManager from the browser. If the server is not running, contact
Avid Customer Support.
5. If the server is up and running, run Resync to ensure the media on
Avid Unity is in sync with the data in MediaManager. See “Resyncing
to the Avid Unity Workspaces” on page 48.
49
Page 50

Chapter 3 Administrative Tasks
Restarting MediaManager
If MediaManager ever fails, reboot the MediaManager server.
To reboot the MediaManager server:
1. Restart the MediaManager server computer.
2. Log in as a valid Avid Unity user. This should be the same Avid Unity
user name that you used during the MediaManager installation.
3. Map to an Avid Unity drive:
a. Double-click the My Network Places icon.
The My Network Places window opens.
b. Select Tools > Map Network Drive.
n
Do not unmap this Avid Unity drive from MediaManager.
50
Page 51

Appendix A
Managing Select List Accounts
The Avid MediaManager Select option enables you to create select lists,
stream the media across a corporate LAN, and play the media on the Avid
Player. User accounts are required to create select lists or to simply view
select lists. This appendix describes how to create, edit, and delete both
types of accounts, and how to set up burn-in for the Avid Player.
This appendix discusses the following topics:
• Overview
• Creating Select List User Accounts
• Editing Select List User Accounts
Overview
• Deleting Select List User Accounts
• Setting Up Burn-in for the Avid Player
You must create a user account for anyone who will be a select list creator
or a select list viewer. Select list creators use MediaManager to edit the
collections of video clips that become select lists. You can select an option
in the Create User window to make a user a select list creator.
Page 52

Appendix A Managing Select List Accounts
A select list viewer uses the Avid Player to play select lists. You can create
a standard user’s account for a select list user, without selecting any
options in the Create User window.
Creating Select List User Accounts
n
Select list reviewer and creator accounts are also regular MediaManager
accounts.
To create a select list user or a select list creator account:
1. Click Administration in the mode selector.
2. Click the New User icon in the Functions list.
The Create User window opens.
52
Page 53

Creating Select List User Accounts
3. Specify the standard user account attributes by typing in the
appropriate text boxes.
- User Name — The account name (login name).
- Password — The login password. Type the required password
identically in both the Password and Retype Password text boxes.
- Full Name (Option) — The user’s name.
- Description (Option) — A brief description of the user or notes
about the account’s purpose (for example, the user’s title, role,
client type, and so on).
4. Select either Regular User or Administrator from the Role list.
- Regular User — Can do everything except administrative tasks.
Can also change the account password.
- Administrator — Can perform functions as a regular user and can
also perform administrative tasks such as backup and restore.
n
Do not select System User, because a system user cannot create or review
select lists.
5. Select the Reserved License option if the user must always have a
license available. (For example, a screening room operator may
require a reserved license.) Each reserved license removes one license
from the available license count.
6. Select the Additional Capabilities option if you want this user to be a
Select List Creator.
7. Type the initials of the user.
8. (Option) Add the new user to existing access lists by selecting the
name of the access list.
9. Click Save.
The new user account is created and added to the Users list.
53
Page 54

Appendix A Managing Select List Accounts
Editing Select List User Accounts
To edit a select list user or select list creator account:
1. Click Administration in the mode selector.
2. Access the user account you want to edit, and select Edit User from the
shortcut menu.
The Edit User window opens.
54
3. Edit the standard user account attributes that you want to change by
typing in the appropriate text boxes.
Page 55

Editing Select List User Accounts
n
You cannot edit the user name. To change the user name, you must create
a new user account with the required name and attributes.
- Password — The login password. Type the required password
identically in both the Password and Retype Password text boxes.
- Full Name (Option) — The user’s name.
- Description (Option) — A brief description of the user or notes
about the account’s purpose (for example, the user’s title, role,
client type, and so on).
4. If necessary, modify the user account privilege level (Regular User,
System User, or Administrator) by selecting an item from the Role list.
- Regular User — Can do everything except administrative tasks.
Can also change the account password.
- System User — Cannot log in to MediaManager through the user
interface. Can be used as a valid account to log in from a service
such as TransferManager.
- Administrator — Can perform functions as a regular user and can
also perform administrative tasks such as backup, restore, and
system setup.
5. (Option) Select or deselect the Reserved License option.
6. (Option) Select or deselect the Select List Creator option.
If the user is a member of an access list, the name of the access list or
lists will appear.
7. Click Save.
The user account is modified.
55
Page 56

Appendix A Managing Select List Accounts
Deleting Select List User Accounts
To delete a select list reviewer or select list creator account:
1. Click Administration in the mode selector.
The Users list appears in the results frame.
2. Select the user you want to delete, and select Delete from the shortcut
menu. A dialog box opens, prompting you to confirm that you want to
proceed with deleting the user account.
3. Click OK.
The user account is deleted.
Setting Up Burn-in for the Avid Player
Burn-in protection provides an added layer of security and piracy
prevention for your media. You can create up to six burn-in marks, which
are visible when you play select lists in the Avid Player.
56
n
When you create a new production, set the correct aspect ratio for your
media. This ensures that burn-in appears properly in your media.
To set burn-in:
1. Click Administration in the mode selector.
2. Click the System Setup icon in the Functions list.
The System Setup window opens.
Page 57

Setting Up Burn-in for the Avid Player
3. Select Enable Burn-in for Piracy Prevention.
4. Click the Burn-in Setup button.
The Security Burn-in window opens.
5. For each area you wish to mark, make a selection from the lists.
6. Click Save.
57
Page 58

Appendix A Managing Select List Accounts
58
Page 59

List of Terms
attribute name Information in each record is recorded as a predetermined set of attributes.
Each attribute describes a feature of the object: for example, its name,
creation date, or tape ID.
Avid Unity
MediaNetwork
browser A browser is an application program that provides a way to look at and
data The information about media objects physically stored on drives
database
services
drag tool (Macintosh) The drag tool is the destination for drag-and-drop check-in of
effect The manipulation of an audio or video signal. Types of film or video
Avid Unity MediaNetwork allows you to connect the latest in shared
storage environments to your MediaNetwork clients. The shared storage
lets you set up a collaborative user environment where several editors can
work on a project at the same time using the same media files and audio
files.
interact with all the information on the World Wide Web.
(optionally mirrored for data security).
The software applications that drive the database functions.
media objects from Avid systems. It is always located at the top right of the
MediaManager user interface, regardless of the selected mode.
effects include special effects (F/X) like morphing; simple effects like
dissolves, fades, superimpositions, and wipes; complex effects like keys
and DVEs; motion effects like freeze frame and slow motion; and title and
character generation. Effects usually have to be rendered because most
systems cannot accommodate multiple video streams in real time.
See also rendering.
Page 60

List of Terms
Fibre Channel Fibre Channel is a technology for transmitting data between computer
devices at a data rate of up to 1 Gbps (one billion bits per second). Fibre
Channel is especially suited for connecting computer servers to shared
storage devices and for interconnecting storage controllers and drives.
JPEG format A JPEG file is a graphic image created by choosing from a range of
compression qualities (actually, from one of a suite of compression
algorithms). When you create a JPEG file or convert an image from
another format to a JPEG file, you are asked to specify the quality of image
you want. Since the highest quality results in the largest file, you can make
a trade-off between image quality and file size.
master clip The media object that refers to the media files recorded or digitized from
tape or other sources.
MediaNetwork
server
The MediaNetwork server controls user access to the shared storage
subsystem by logging in users through controlled user accounts with
passwords. It also controls which workspaces a user can mount on the
MediaNetwork client desktop and whether the user has read or write
access to the files on the workspace. This allows a system administrator to
control a user’s privileges and to manage the shared environment,
preventing overwriting or damage to shared media files and audio files.
media objects Master clips, sequences, effects, and any other type of object that
references digital media.
metadata Data about data; for example, the clips associated with media files.
mirroring Duplication of the data on multiple drives in a redundant configuration. In
a mirrored configuration, if one data drive fails, the mirrored drive is
automatically used instead.
motion effect An effect that speeds up or slows down the presentation of media in a
track.
record For every media object, the database stores an associated record that
contains specific information about the object.
rendering Merging effect layers to create one stream of digital video for playback in
real time.
60
Page 61

List of Terms
resync The resync process ensures that all the media on Avid Unity has been
checked in to MediaManager. When media files are copied into a shared
storage environment manually, resync is necessary to make the
compositional metadata (the clips associated with media files) appear in
MediaManager.
sequence An edited composition that often includes audio and video clips and
rendered effects connected by applied transitions.
SQL Server Structured Query Language (SQL) is a standard interactive and
programming language for getting information from and updating a
database. Although SQL is both an ANSI and an ISO standard, many
database products support SQL with proprietary extensions to the standard
language. Queries take the form of a command language that lets you
select, insert, update, and find out the location of data.
subclip 1. An edited part of a clip. In a sequence, a subclip can be bound by any
variation of clip beginnings, endings, and IN or OUT points.
2. A subclip created by marking IN and OUT points in a clip and by saving
the frames between the marks. The subclip does not contain pointers to
media files. The subclip references the master clip, which alone contains
pointers to the media files.
TCP/IP network
connection
Transmission Control Protocol/Internet Protocol (TCP/IP) is the basic
communication language or protocol of the Internet. It can also be used as
a communications protocol in the private networks called intranets and in
extranets. When you are set up with direct access to the Internet, your
computer is provided with a copy of the TCP/IP program just as every
other computer that you might send messages to or get information from
also has a copy of TCP/IP.
TransferManager The TransferManager system manages the transfer of media to and from
workgroups.
Uniform
Resource Locator
(URL)
A Uniform Resource Locator (URL) is the address of a file (resource)
accessible on the Internet.
61
Page 62

List of Terms
workspaces MediaManager clients mount MediaNetwork workspaces on their
workstations (requiring a user account to do so). Once mounted,
workspaces behave like local media drives that can be accessed by others
working on the same project. When the workspaces are properly
configured, several users can access the same media and start using it
immediately after it has been created.
62
Page 63

Index
ABCDELMPRSU
A
Administration mode 17
Attributes
MediaManager database 14
Avid Player 51
Avid Unity workspaces
resyncing to 48
B
Backup files
procedure 42
Burn-in
setting up 56
C
Checking
disk space 36
Consistency
checking database 39
Creating
select list user accounts 52
user account 23
D
Database
backing up 42
checking consistency 39
records 14
restoring 43
Database services 14
Default access
setting 46
Delete Media Pending catalog
deleting items from 37
hiding 37
Deleting
from Delete Media Pending catalog 37
from Disassociated Media catalog 38
select list user accounts 56
setting the options for 28
user account 27
Disassociated Media catalog
deleting items from 38
Disk space
check-in 36
E
Editing
select list user accounts 54
user account 25
Page 64

Index
L
Logging in
as administrator 16
to MediaManager 15
Logging out
of MediaManager 19
M
Managing
MediaManager database 34
MediaManager database size 35
Media Deletion Settings 28
MediaManager
Select option 51
MediaManager database
attributes 14
managing 34
managing size of 35
restarting the database service 50
storage 14
mirrored disks 14
Resync user account 27
Resyncing
to Avid Unity workspaces 48
Role
user options 24
S
Select list user account
creating 52
deleting 56
editing 54
Select option 51
Setting
default access 46
desktop check-in limit 47
session timeout 45
SQL Server Query Analyzer 39
Storage
MediaManager database 14
Sync with Unity 48
P
Performing database backup 42
Privilege levels 22
Privilege options 24
R
Recovering
from server crash 49
Restarting
MediaManager 50
Restoring
database 43
64
U
User account
attributes 24
creating 23
deleting 27
editing 25
Users list
described 23
 Loading...