

Page 1

®
Pro Tools SE User Guide
Version 8.0.3
Page 2

Legal Notices
This guide is copyrighted ©2010 by Avid Technology, Inc.,
(hereafter “Avid”), with all rights reserved. Under copyright
laws, this guide may not be duplicated in whole or in part
without the written consent of Avid.
003, 96 I/O, 96i I/O, 192 Digital I/O, 192 I/O, 888|24 I/O,
882|20 I/O, 1622 I/O, 24-Bit ADAT Bridge I/O, AudioSuite,
Avid, Avid DNA, Avid Mojo, Avid Unity, Avid Unity ISIS,
Avid Xpress, AVoption, Axiom, Beat Detective, Bomb Factory,
Bruno, C|24, Command|8, Control|24, D-Command, D-Control,
D-Fi, D-fx, D-Show, D-Verb, DAE, Digi 002, DigiBase,
DigiDelivery, Digidesign, Digidesign Audio Engine, Digidesign
Intelligent Noise Reduction, Digidesign TDM Bus, DigiDrive,
DigiRack, DigiTest, DigiTranslator, DINR, D-Show, DV Toolkit,
EditPack, Eleven, HD Core, HD Process, Hybrid, Impact,
Interplay, LoFi, M-Audio, MachineControl, Maxim, Mbox,
MediaComposer, MIDI I/O, MIX, MultiShell, Nitris, OMF,
OMF Interchange, PRE, ProControl, Pro Tools M-Powered,
Pro Tools, Pro Tools|HD, Pro Tools LE, QuickPunch, Recti-Fi,
Reel Tape, Reso, Reverb One, ReVibe, RTAS, Sibelius,
Smack!, SoundReplacer, Sound Designer II, Strike, Structure,
SYNC HD, SYNC I/O, Synchronic, TL Aggro, TL AutoPan,
TL Drum Rehab, TL Everyphase, TL Fauxlder, TL In Tune,
TL MasterMeter, TL Metro, TL Space, TL Utilities, Transfuser,
Trillium Lane Labs, Vari-Fi Velvet, X-Form, and XMON are
trademarks or registered trademarks of Avid Technology, Inc.
Xpand! is Registered in the U.S. Patent and Trademark Office.
All other trademarks are the property of their respective
owners.
Product features, specifications, system requirements, and
availability are subject to change without notice.
Guide Part Number 8420-30252-01 REV A 06/10
Documentation Feedback
At Avid, we are always looking for ways to improve our
documentation. If you have comments, corrections, or
suggestions regarding our documentation, email us at
techpubs@avid.com.
Page 3

contents
Chapter 1. Welcome to Pro Tools SE . . . . . . . . . . . . . . . . . . . . . . . . . . . . . . . . . . . . . . . . . . 1
Pro Tools SE Systems . . . . . . . . . . . . . . . . . . . . . . . . . . . . . . . . . . . . . . . . . . . . . . . . . . . . . 1
Pro Tools SE Capabilities . . . . . . . . . . . . . . . . . . . . . . . . . . . . . . . . . . . . . . . . . . . . . . . . . . . 1
System Requirements and Compatibility . . . . . . . . . . . . . . . . . . . . . . . . . . . . . . . . . . . . . . . . 2
Conventions Used in This Guide . . . . . . . . . . . . . . . . . . . . . . . . . . . . . . . . . . . . . . . . . . . . . . 3
About www.avid.com . . . . . . . . . . . . . . . . . . . . . . . . . . . . . . . . . . . . . . . . . . . . . . . . . . . . . . 3
Chapter 2. Installing Pro Tools on Mac . . . . . . . . . . . . . . . . . . . . . . . . . . . . . . . . . . . . . . . . 5
Installation Overview . . . . . . . . . . . . . . . . . . . . . . . . . . . . . . . . . . . . . . . . . . . . . . . . . . . . . . 5
Installing Pro Tools SE . . . . . . . . . . . . . . . . . . . . . . . . . . . . . . . . . . . . . . . . . . . . . . . . . . . . . 5
Installing Device Drivers. . . . . . . . . . . . . . . . . . . . . . . . . . . . . . . . . . . . . . . . . . . . . . . . . . . . 6
Connecting the Interface . . . . . . . . . . . . . . . . . . . . . . . . . . . . . . . . . . . . . . . . . . . . . . . . . . . 7
Getting Started with Pro Tools SE . . . . . . . . . . . . . . . . . . . . . . . . . . . . . . . . . . . . . . . . . . . . . 7
MP3 Export Option . . . . . . . . . . . . . . . . . . . . . . . . . . . . . . . . . . . . . . . . . . . . . . . . . . . . . . . 9
Uninstalling Pro Tools . . . . . . . . . . . . . . . . . . . . . . . . . . . . . . . . . . . . . . . . . . . . . . . . . . . . 10
Chapter 3. Installing Pro Tools on Windows . . . . . . . . . . . . . . . . . . . . . . . . . . . . . . . . . . . 11
Installation Overview . . . . . . . . . . . . . . . . . . . . . . . . . . . . . . . . . . . . . . . . . . . . . . . . . . . . . 11
Installing Pro Tools SE . . . . . . . . . . . . . . . . . . . . . . . . . . . . . . . . . . . . . . . . . . . . . . . . . . . . 11
Installing Device Drivers. . . . . . . . . . . . . . . . . . . . . . . . . . . . . . . . . . . . . . . . . . . . . . . . . . . 12
Connecting the Interface . . . . . . . . . . . . . . . . . . . . . . . . . . . . . . . . . . . . . . . . . . . . . . . . . . 13
Getting Started with Pro Tools SE . . . . . . . . . . . . . . . . . . . . . . . . . . . . . . . . . . . . . . . . . . . . 13
MP3 Export Option . . . . . . . . . . . . . . . . . . . . . . . . . . . . . . . . . . . . . . . . . . . . . . . . . . . . . . 15
Uninstalling Pro Tools . . . . . . . . . . . . . . . . . . . . . . . . . . . . . . . . . . . . . . . . . . . . . . . . . . . . 15
Contents iii
Page 4

Chapter 4. Configuring Your Pro Tools System . . . . . . . . . . . . . . . . . . . . . . . . . . . . . . . . 17
Starting Up or Shutting Down Your System . . . . . . . . . . . . . . . . . . . . . . . . . . . . . . . . . . . . . 17
Configuring Pro Tools SE . . . . . . . . . . . . . . . . . . . . . . . . . . . . . . . . . . . . . . . . . . . . . . . . . . 18
Optimizing a Mac System for Pro Tools. . . . . . . . . . . . . . . . . . . . . . . . . . . . . . . . . . . . . . . . 20
Optimizing a Windows System for Pro Tools . . . . . . . . . . . . . . . . . . . . . . . . . . . . . . . . . . . . 22
Appendix A. Hard Drive Configuration and Maintenance. . . . . . . . . . . . . . . . . . . . . . . . 25
Formatting an Audio Drive. . . . . . . . . . . . . . . . . . . . . . . . . . . . . . . . . . . . . . . . . . . . . . . . . 25
Partitioning Drives . . . . . . . . . . . . . . . . . . . . . . . . . . . . . . . . . . . . . . . . . . . . . . . . . . . . . . 27
Hard Disk Storage Space . . . . . . . . . . . . . . . . . . . . . . . . . . . . . . . . . . . . . . . . . . . . . . . . . 28
Appendix B. Resources . . . . . . . . . . . . . . . . . . . . . . . . . . . . . . . . . . . . . . . . . . . . . . . . . . . . . 29
About the Pro Tools Guides . . . . . . . . . . . . . . . . . . . . . . . . . . . . . . . . . . . . . . . . . . . . . . . . 29
Index . . . . . . . . . . . . . . . . . . . . . . . . . . . . . . . . . . . . . . . . . . . . . . . . . . . . . . . . . . . . . . . . . . . . . 31
Pro Tools SE User Guideiv
Page 5

chapter 1
Welcome to Pro Tools SE
Welcome to Pro Tools® SE from Avid®. This
guide provides step-by-step instructions
to install and configure Pro Tools SE software.
Pro Tools SE Systems
The basic components of a Pro Tools SE system
are as follows:
• M-Audio interface qualified for
Pro Tools SE.
• Mac or Windows computer qualified for
Pro Tools SE.
• Pro Tools SE software.
For a list of qualified M-Audio interfaces
and minimum system requirements, refer to
the compatibility information on the Avid
website: (www.m-audio.com/ptsefaq).
Pro Tools SE Capabilities
Pro Tools SE software provides the following capabilities:
• 24-bit audio resolution, at sample rates up to
• 8 Instrument tracks, 16 Audio tracks, 1 Master
• Playback of up to 16 tracks of mono or stereo
• Normal and loop recording.
• Processing with up to 3 effects per track.
• Undo or redo up to 10 operations.
• Comprehensive set of effects and
• Comprehensive collection of loops in many
96 kHz (depending on the M-Audio interface).
Fader.
digital audio, and playback of up to 15 tracks
while recording 1 track (stereo or mono) or up
to 14 tracks while recording 2 mono or stereo
tracks.
software instruments.
musical genres.
Pro Tools uses your computer’s CPU to mix
and process audio tracks (host processing).
Computers with faster clock speeds yield the
best performance and more plug-in
processing.
Chapter 1: Welcome to Pro Tools SE 1
Page 6

System Requirements and Compatibility
To use Pro Tools SE, you need:
• A qualified M Audio interface, running on a
qualified Windows or Mac computer.
• A qualified version of Adobe Flash Player
(not included).
• A DVD drive for Installation disc.
Avid can only assure compatibility and provide
support for hardware and software it has tested
and approved.
Refer to the compatibility information on
the Avid website:
(www.m-audio.com/ptsefaq).
Pro Tools Co-installation Information
• Pro Tools SE cannot be co-installed with
Pro Tools HD, LE, M-Powered, and
M-Powered Essential.
• If you already have Pro Tool M-Powered Essential installed and you want to use Pro
Tools SE instead, you must uninstall Pro Tools
M-Powered Essential first.
If you are using an ATA/IDE or FireWire hard
drive, initialize your drive with the Disk Utility
application included with Apple System software (Mac) or the Windows Disk Management
(Windows).
Always back up any important data on your
drive before formatting it, as it will erase all
data on the drive.
For more information, see Appendix A, “Hard
Drive Configuration and Maintenance.”
Session Compatibility
• Pro Tools SE session files can be opened by
Pro Tools HD, LE, and M-Powered.
• Pro Tools HD, LE, M-Powered, and
M-Powered Essential session files cannot be
opened by Pro Tools SE.
• Pro Tools SE session files cannot be opened by
M-Powered Essential.
MIDI Requirements
USB MIDI keyboards and interfaces work effectively with Pro Tools systems on Mac or Windows.
Hard Drive Requirements
Pro Tools SE can be used on your system drive. A
5400 RPM drive is the minimum system requirement. If your computer has a slower drive (but
otherwise meets all the specifications) you can
add a drive or use the application with some reduced track count.
Pro Tools SE User Guide2
Page 7
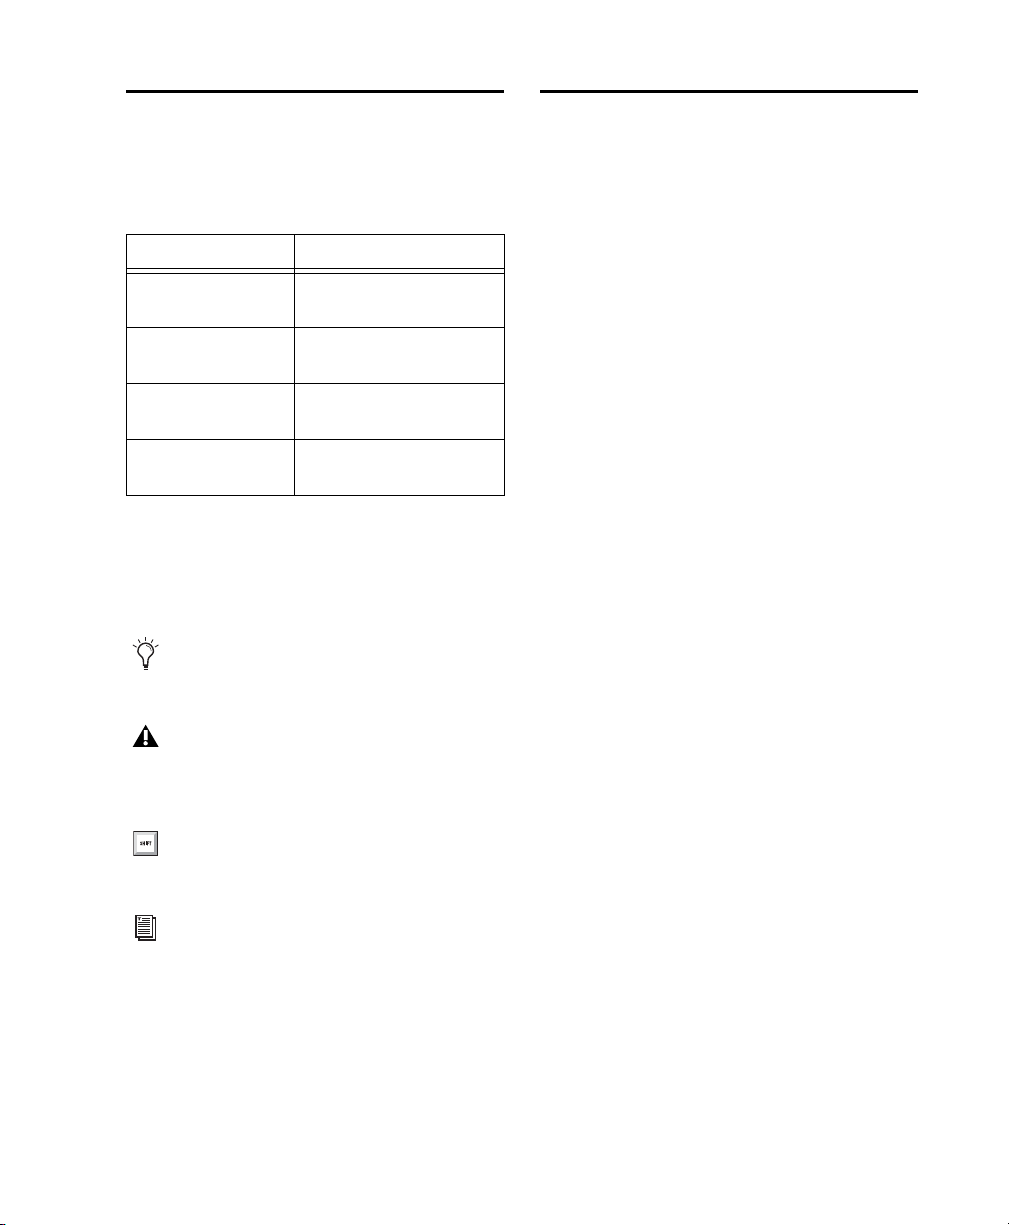
Conventions Used in This Guide
All of our guides use the following conventions
to indicate menu choices and key commands:
:
Convention Action
About www.avid.com
The Avid website (www.avid.com) is your best
online source for information to help you get
the most out of your Pro Tools system. The following are just a few of the services and features
available.
File > Save Choose Save from the
File menu
Control+N Hold down the Control key
and press the N key
Control-click Hold down the Control key
and click the mouse button
Right-click Click with the right
mouse button
The names of Commands, Options, and Settings
that appear on-screen are in a different font.
The following symbols are used to highlight
important information:
User Tips are helpful hints for getting the
most from your system.
Important Notices include information that
could affect your data or the performance of
your system.
Shortcuts show you useful keyboard or
mouse shortcuts.
Product Registration Register your purchase
online.
Support and Downloads Contact Avid Customer
Success (technical support); download software
updates and the latest online manuals; browse
the Compatibility documents for system requirements; search the online Knowledge Base
or join the worldwide Pro Tools community on
the User Conference.
Training and Education Study on your own using
courses available online or find out how you can
learn in a classroom setting at a certified
Pro Tools training center.
Products and Developers Learn about Avid
products; download demo software or learn
about our Development Partners and their
plug-ins, applications, and hardware.
News and Events Get the latest news from Avid
or sign up for a Pro Tools demo.
Compatibility Information
www.m-audio.com/ptsefaq.
Cross References point to related sections in
this guide and other Pro Tools guides.
Chapter 1: Welcome to Pro Tools SE 3
Page 8

Pro Tools SE User Guide4
Page 9

chapter 2
Installing Pro Tools on Mac
This chapter contains information for Mac systems only. If you are installing Pro Tools on a
Windows computer, see Chapter 3, “Installing
Pro Tools on Windows.”
Before installing this version of Pro Tools,
refer to the Read Me information included
on the Pro Tools SE Installer disc.
Installing Pro Tools SE
Before installing drivers and connecting your
M-Audio interface to the computer, you need to
install Pro Tools SE software.
Do not start this procedure with your
M-Audio interface connected to your
computer.
Installation Overview
Installation of Pro Tools SE on a Mac includes
the following steps:
1 “Installing Pro Tools SE” on page 5.
2 “Installing Device Drivers” on page 6.
3 “Connecting the Interface” on page 7.
4 “Getting Started with Pro Tools SE” on page 7.
5 Configuring your system for improved perfor-
mance (see Chapter 4, “Configuring Your
Pro Tools System”).
To install Pro Tools SE on Mac OS X:
1 Make sure you are logged in as an Administra-
tor for the account where you want to install
Pro Tools.
When the installation is complete, you will
need to reboot your computer.
For details on Administrator privileges in
Mac OS X, see your Apple OS X documentation.
2 Insert the Pro Tools SE Installer disc in your
DVD drive.
Chapter 2: Installing Pro Tools on Mac 5
Page 10

3 Double-click the installer icon when you are
prompted.
9 Click Install.
Software instrument content is very large
and may take up to 30 minutes to install.
During this time, the progress bar may not
appear to move even though your software
is still installing. Do not terminate your installation.
Pro Tools SE installer icon
4 Click Continue when you are prompted.
5 Follow the on-screen instructions to proceed
with installation.
6 Click Continue each time you are prompted.
7 When the “Installation Type” dialog appears,
leave the following boxes checked:
Pro Tools SE 8.0.3 Installs all Pro Tools application files (which includes the free plug-in suite
and associated content).
SE Audio Loops and Demo Songs Installs additional loops and demo songs.
8 Click Continue.
When the installation is complete, the M-Audio
driver dialog appears.
Installing Device Drivers
1 When the following dialog appears, do one of
the following:
• Click on the icon for the device that represents the one you are installing and follow
the on-screen instructions to install your
device drivers.
– or –
• Click the Other SE Device option if there is
not an icon that represents the one you are
installing. Then follow the on-screen instructions.
2 If prompted, enter your Administrator pass-
word and click OK to authenticate the installation.
3 Follow the remaining on-screen instructions.
Pro Tools SE User Guide6
Page 11
4 When installation is complete, click Restart.
If you clicked the “Other SE Device” option
then your device drivers have not yet been
installed and you will need to install them
now. See the User Guide that came with
your M-Audio interface for instructions on
driver installation.
Once these loops and demo songs are installed,
they can be found in the following locations:
• Applications/Digidesign/Loops
• Applications/Digidesign/Demo Songs
Getting Started with Pro Tools SE
Connecting the Interface
1 After the computer has restarted, connect
your interface to your computer.
See the User Guide that came with your system for instructions on connecting your interface.
2 Launch Pro Tools SE by clicking its icon in the
Dock.
Pro Tools SE application icon
3 Connect headphones, speakers or an instru-
ment to your interface so you can verify that
you have sound once you launch Pro Tools.
Use the “Demo Songs” option in the Quick
Start dialog to verify you have sound. See
“Listening to Demo Songs” on page 8.
The first step in beginning a Pro Tools project is
creating a session. Pro Tools provides a Quick
Start dialog “on launch” that lets you quickly
and easily create a session, or listen to demo
songs and view tutorials.
To launch Pro Tools
1 Click the Pro Tools SE icon in the Dock (or
double-click the application icon in the
Pro Tools folder inside the Digidesign folder).
2 Use the Quick Start dialog to do one of
the following:
• Create a session from templates.
• Listen to demo songs (lets you verify
sound).
• Open any other session on your system.
• Open and view tutorials.
Loops and Demo Songs
Pro Tools SE installation includes Loops and
Demo Songs.
The loops are pro-quality loops that you can use
to quickly sketch out musical ideas. The demo
songs let you see and hear many of the things
you’ll soon be doing in Pro Tools.
Chapter 2: Installing Pro Tools on Mac 7
Page 12

Creating a Session from a
Template
To create a new session from a template:
1 Select the default New Session button.
2 Select any session template from the list.
3 Click Choose to open the template.
4 In the Save As dialog, name the session,
choose where you want to save the session, and
click Save.
Listening to Demo Songs
You have to be able to hear your music. Listening to demo songs is an easy way to verify audio.
To hear the audio from Pro Tools you will need
your headphones or speakers connected to your
M-Audio interface.
Make sure your volume is at a good listening
level. See the User Guide that came with your
system for instructions.
To listen to a demo song:
1 Select the Demo Songs button.
2 From the list of music styles, select the cate-
gory you want (or select an item from a submenu).
3 Click Audio Preview to listen to the song, then
click Choose to open the song in a Pro Tools session.
The “Audio Preview” button outputs audio
from the sound card or audio interface set as
default on your operating system.
4 Audio Preview
Opening a Recent Session
To open a recent session:
1 Select the Open Session button.
Pro Tools SE User Guide8
Page 13

2 From the list of recent session templates, se-
lect the one you want. (Or, select Open Other... to
select other recent sessions.)
3 Click to open the session.
To authorize the MP3 Export Option using an
authorization code:
1 Launch Pro Tools.
2 Open a session.
Viewing Tutorials
To view a tutorial:
1 Select the Tutorials button.
2 From the list of tutorials, click to open the cat-
egory you want.
MP3 Export Option
The MP3 Export Option lets you create MP3 files
from Pro Tools sessions when exporting a region
or a Timeline selection as a new audio file.
3 Click on a region or make a Timeline selection
and choose File > Export > Audio.
4 Select Compressed MP3 as the File Type.
5 Click Export.
6 In the Pro Tools MP3 Option dialog, click Au-
thorize.
7 In the Pro Tools MP3 Export Option dialog, se-
lect Manual Activation, then click Next.
8 In the Pro Tools MP3 Export Option dialog,
deselect the Use my iLok Smart Key option, then
click Next.
9 When prompted, enter your Pro Tools MP3
Export Option serial code (authorization code).
10 Click Next and follow the on-screen instruc-
tions to complete the authorization process.
With the MP3 Export Option, the MP3 file type
is available when using File > Export > Audio.
Pro Tools uses the Fraunhofer codec for encoding MP3 files.
Authorizing the MP3 Export Option
The MP3 Export Option is a paid option and can
be purchased and authorized when you export
an audio file as an MP3.
Chapter 2: Installing Pro Tools on Mac 9
Page 14

Uninstalling Pro Tools
If you need to uninstall Pro Tools software from
your computer, use the Uninstaller application.
To remove Pro Tools from your computer:
1 Make sure you are logged in as an Administra-
tor for the account where Pro Tools is installed.
For details on Administrator privileges in
Mac OS X, see your Apple OS X documentation.
2 Go to Applications/Digidesign/Pro Tools/
Pro Tools Utilities and double-click
Uninstall Pro Tools
3 Click Continue to proceed with the uninstall.
4 Choose the type of uninstall you want to per-
form:
Safe Uninstall Leaves certain plug-ins and system files needed for compatibility with some
Avid products. Use Safe Uninstall if you are using an Avid application or preparing to update
to a CS (customer support) release.
Clean Uninstall Removes all Pro Tools files, including system files, Avid plug-ins, and MIDI
patch names. Use Clean Uninstall whenever you
are preparing to upgrade, or to troubleshoot
from a clean system.
5 Click Uninstall.
6 Enter your Administrator password and click
OK.
7 Click Finish to close the Installer window.
Pro Tools SE User Guide10
Page 15

chapter 3
Installing Pro Tools on Windows
This chapter contains information for Windows
systems only. If you are installing Pro Tools on a
Mac computer, see Chapter 2, “Installing
Pro Tools on Mac.”
Before installing this version of Pro Tools,
refer to the Read Me information included
on the Pro Tools SE Installer disc.
Installing Pro Tools SE
Before connecting your M-Audio interface to
the computer, you need to install Pro Tools SE
software.
Do not start this procedure with your
M-Audio interface connected to your
computer.
Installation Overview
Installation of Pro Tools SE on a Windows includes the following steps:
1 “Installing Pro Tools SE” on page 11.
2 “Installing Device Drivers” on page 12
3 “Connecting the Interface” on page 13
4 “Getting Started with Pro Tools SE” on
page 13
5 Configuring your system for improved perfor-
mance (see Chapter 4, “Configuring Your
Pro Tools System”).
To install Pro Tools SE on Windows:
1 Start Windows, logging in with Administrator
privileges. For details on Administrator privileges, refer to your Windows documentation.
When the installation is complete, you will
need to reboot your computer.
2 Insert the Pro Tools SE Installer disc in your
DVD drive.
In Windows 7, if the User Account Control
dialog appears, click “Allow.”
Chapter 3: Installing Pro Tools on Windows 11
Page 16

3 Click Continue when you are prompted.
10 When installation is complete, click Finish.
Software instrument Content is very large
and may take up to 30 minutes to install.
During this time, the progress bar may not
appear to move even though software is still
installing. Do not terminate your installation.
11 When the installation is complete, the M-Au-
dio driver dialog appears.
In Windows 7 and Windows XP, a series of
Windows Security dialogs may appear. If
you see “Install” or “Continue Anyway,”
click on each one until they go away.
4 Follow the on-screen instructions to proceed
with installation and click Next when prompted.
5 To install the complete compliment of
Pro Tools software and plug-ins, leave Pro Tools
selected.
6 When the “Select Features” dialog appears,
leave the following boxes checked:
Pro Tools SE 8.0.3 Installs all Pro Tools application files (which includes the free plug-in suite
and associated content).
SE Audio Loops and Demo Songs Installs additional loops and demo songs.
7 Click Next.
8 Click Install.
9 Wait for the installer to finish installing all
components before proceeding to the next step.
Installing Device Drivers
1 When the following dialog appears, do one of
the following:
• Click on the icon for the device that represents the one you are installing and follow
the on-screen instructions to install your
device drivers.
– or –
• Click the Other SE Device option if there is
not an icon that represents the one you are installing. Then follow the on-screen instruc-
tions.
2 Follow the remaining on-screen instructions.
Pro Tools SE User Guide12
Page 17

3 When installation is complete, click Restart.
If you clicked the “Other SE Device” option
then your device drivers have not yet been
installed and you will need to install them
now. See the User Guide that came with
your M-Audio interface for instructions on
driver installation.
3 Connect headphones, speakers or an instru-
ment to your interface so you can verify that
you have sound once you launch Pro Tools.
Use the “Demo Songs” option in the Quick
Start dialog to verify you have sound. See
“Listening to Demo Songs” on page 14.
Loops and Demo Songs
Connecting the Interface
1 After the computer has started, connect your
interface to your computer.
See the User Guide that came with your system for instructions on connecting your interface.
In Windows 7 and Windows XP, a series of
Software Installation dialogs about the
driver not passing Windows Logo testing
may appear. Click “Continue Anyway” on
each one until they go away.
If any other dialogs appear (such as the
“Found New Hardware” dialog), leave them
open and do not click on them. These dialogs will close on their own.
2 Launch Pro Tools SE by double-clicking its
icon on your desktop.
Pro Tools SE installation includes an option to
install Loops and Demo Songs.
The loops are pro-quality audio loops that you
can use to quickly sketch out musical ideas. The
demo songs let you see and hear many of the
things you’ll soon be doing in Pro Tools.
Once these loops and demo songs are installed,
they can be found in the following locations:
• Programs Files\Digidesign\Pro Tools\
Loops
• Programs\Digidesign\Pro Tools\Demo
Songs
Getting Started with Pro Tools SE
The first step in beginning a Pro Tools project is
creating a session. Pro Tools provides a Quick
Start dialog “on launch” that lets you quickly
and easily create a session, or listen to demo
songs and view tutorials.
Pro Tools SE application icon
To launch Pro Tools
1 Double-click the Pro Tools SE shortcut on your
desktop (or the application icon in the Pro Tools
folder inside the Digidesign folder).
2 Use the Quick Start dialog to do one of
the following:
• Create a session from templates.
Chapter 3: Installing Pro Tools on Windows 13
Page 18

• Listen to demo songs (lets you verify
sound).
• Open any other session on your system.
• Open and view tutorials.
Creating a Session from a
Template
To create a new session from a template:
1 Select the default New Session button.
2 Select any session template from the list.
3 Click Choose to open the template.
4 In the Save As dialog, name the session,
choose where you want to save the session, and
click Save.
Listening to Demo Songs
To listen to a demo song:
1 Select the Demo Songs button.
2 From the list of music styles, select the cate-
gory you want (or select an item from a submenu).
3 Click Audio Preview to listen to the song, then
click Choose to open the song in a Pro Tools session.
The “Audio Preview” button outputs audio
from the sound card or audio interface set as
default on your operating system.
Opening a Recent Session
To open a recent session:
1 Select the Open Session button.
You have to be able to hear your music. Listening to demo songs is an easy way to verify audio.
To hear the audio from Pro Tools you will need
your headphones or speakers connected to your
M-Audio interface.
Make sure your volume is at a good listening
level. See the User Guide that came with your
system for instructions.
Pro Tools SE User Guide14
2 From the list of recent session templates, se-
lect the one you want.
Page 19

3 Click to open the session.
Viewing Tutorials
2 Open a session.
3 Click on a region or make a Timeline selection
and choose File > Export > Audio.
To view a tutorial:
1 Select the Tutorials button.
2 From the list of tutorials, click to open the cat-
egory you want.
MP3 Export Option
The MP3 Export Option lets you create MP3 files
from Pro Tools sessions when exporting a region
or a Timeline selection as a new audio file.
With the MP3 Export Option, the MP3 file type
is available when using File > Export > Audio.
Pro Tools uses the Fraunhofer codec for encoding MP3 files.
Authorizing the MP3 Export Option
The MP3 Export Option is a paid option and can
be purchased and authorized when you export
an audio file as an MP3.
To authorize the MP3 Export Option using an
authorization code:
1 Launch Pro Tools.
4 Select Compressed MP3 as the File Type.
5 Click Export.
6 In the Pro Tools MP3 Option dialog, click Au-
thorize.
7 In the Pro Tools MP3 Export Option dialog, se-
lect Manual Activation, then click Next.
8 In the Pro Tools MP3 Export Option dialog,
deselect the Use my iLok Smart Key option, then
click Next.
9 When prompted, enter your Pro Tools MP3
Export Option serial code (authorization code).
Click Next and follow the on-screen instructions
to complete the authorization process.
Uninstalling Pro Tools
Use the Uninstall Pro Tools application to uninstall Pro Tools software from your computer.
To uninstall Pro Tools from your computer:
1 Start Windows, logging in with Administrator
privileges. For details on Administrator privileges, refer to your Windows documentation.
2 Go to C:\Program Files\Digidesign\
Pro Tools\Pro Tools Utilities and double-click
Uninstall Pro Tools.exe.
3 Click Next.
4 Click Uninstall to proceed with the uninstalla-
tion.
Chapter 3: Installing Pro Tools on Windows 15
Page 20

Pro Tools SE User Guide16
Page 21

chapter 4
Configuring Your Pro Tools System
After you have connected your system and installed Pro Tools software, you are ready to start
up and configure your Pro Tools system.
Starting Up or Shutting Down Your System
To ensure that the components of your
Pro Tools system communicate properly with
each other, you need to start them in a particular order.
Start up your Pro Tools system in this order:
1 Make sure all your equipment (including your
computer) is off.
2 Lower the volume of all output devices in your
system (especially the main outputs to your
speakers!).
3 Turn on any external hard drives. Wait ap-
proximately ten seconds for them to spin up to
speed.
4 Turn on any control surfaces.
5 Turn on any MIDI interfaces, MIDI devices, or
synchronization peripherals.
6 With the volume of all output devices low-
ered, turn on your Pro Tools SE audio interfaces.
(Only for interfaces that use hardware requiring
external power). Wait at least fifteen seconds for
the audio interface to initialize and the status
LEDs to stop flashing
7 Turn on your computer.
8 Launch Pro Tools or any third-party audio or
MIDI applications.
9 Bring the output levels up to a comfortable lis-
tening level.
Shut down your Pro Tools system in this order:
1 Quit Pro Tools and any other running applica-
tions.
To quit Pro Tools, choose Pro Tools > Quit
(Mac) or File > Exit (Windows).
2 Turn off or lower the volume of all output de-
vices in your system.
3 Turn off your computer.
4 For Pro Tools SE systems that use hardware re-
quiring external power, turn off the hardware.
5 Turn off any MIDI interfaces, MIDI devices, or
synchronization peripherals.
6 Turn off any control surfaces.
7 Turn off any external hard drives.
Chapter 4: Configuring Your Pro Tools System 17
Page 22

Configuring Pro Tools SE
Pro Tools System Settings
Pro Tools SE provides preference settings that let
you quickly adjust the performance of your system by changing system settings that affect its capacity for processing, playback, and recording.
To change Pro Tools preferences:
1 Launch Pro Tools.
2 Choose Pro Tools SE > Preferences (Mac) or
File > Preferences (Windows).
3 Click the tab (Audio, Control Surfaces, or Ses-
sion) for the page that has the preferences you
want to change.
4 Change preferences.
5 Click OK to save your changes and close the
Preferences dialog.
Recording or Performing Sets the minimum
delay when recording real or software
instruments. Use this option when you create
music by playing into Pro Tools.
Mixing or Producing Sets the maximum number
of audio tracks, instrument tracks and plug-ins.
Use this option when preparing music for CD or
MP3, constructing music from loops, or if the
sound is cutting out.
Audio Tab
Using this tab, you can quickly choose and set
up your computer for “Recording or Performing” or “Mixing or Producing” tasks. You can
also verify your audio device.
If you have an audio device with more than two
outputs, Pro Tools SE automatically uses the first
two.
Audio Device Displays the audio device connected to your system.
Pro Tools SE User Guide18
Pro Tools Preferences dialog (Audio tab shown)
Control Surfaces Tab
This tab lets your configure one MIDI control
surface keyboard for Pro Tools SE.
Control Surfaces tab (Oxygen Direct Link shown)
Page 23

MIDI Control Surface 1 Lets you select the MIDI
control surface connected to your computer and
defaults to the selected choice. When selected,
all ports of the control surface are enabled and
all ports on any other control surfaces are disabled.
Receive From Lets you select the MIDI In port to
which your MIDI control surface is connected.
Send To Lets you select the MIDI Out port to
which your MIDI control surface is connected.
Channels Displays the number of control channels supported by the selected MIDI control surface type.
Session Tab
This tab lets you easily create a new Pro Tools
session with your usual settings.
It also lets you “hide” or “show” Pro Tools compatible ReWire client applications and external
MIDI ports within Pro Tools.
Compatible ReWire client applications and external MIDI devices are automatically detected
by Pro Tools and are available in the Instrument
list on Instrument tracks.
To create a new session with your preferred
settings:
1 Click Session.
2 Select the Bit Depth (16 bit or 24 bit) and the
Sample Rate (44.1 kHz, 48 kHz, 88.2 kHz or
96 kHz).
3 Check Show Rewire Clients in Instrument List if
you want a ReWire application to be available in
an Instrument list.
4 Check External MIDI Ports if you want an exter-
nal MIDI device to be available in an Instrument
list.
5 Click OK to save your changes and close the
Preferences dialog.
Selecting Bit Depth and Sample Rate
When selecting a bit depth or sample rate for
your session, consider fidelity, any compatibility issues with others systems, and storage space.
Bit depth and sample rate also have an effect on
the amount of mixing power available in a session. Fewer mixer channels are available with
24-bit sessions and with sessions at higher sample rates.
It is not possible to combine different bit depths
within a single Pro Tools session: files of different big depths must be converted and imported
into the session.
Session tab
Chapter 4: Configuring Your Pro Tools System 19
Page 24

Optimizing a Mac System for Pro Tools
To ensure optimum performance with
Pro Tools, configure your computer before using
Pro Tools hardware and software.
For Windows System Optimization, see
“Optimizing a Windows System for
Pro Tools” on page 22.
Before configuring your computer, make sure
you are logged in as an Administrator for the account where you want to install Pro Tools. For
details on Administrator privileges in Mac OS X,
see your Apple OS X documentation.
Turning Off Software Update
Do not use the Mac OS X automatic Software
Update feature, as it may upgrade your system to
a version of Mac OS that has not been qualified
for Pro Tools. For details on qualified versions of
Mac OS, visit www.avid.com/compatibility.
Disable or Reassign Mac Keyboard
Shortcuts Used by Pro Tools
To have the full complement of Pro Tools keyboard shortcuts, you need to disable or reassign
any conflicting Mac OS X Keyboard Shortcuts in
the Apple System Preferences, including the following:
• “Show Help menu”
• Under “Keyboard Navigation”
• “Move focus to the window drawer”
• Under “Dock, Exposé, and Dashboard”
• “Automatically hide and show the Dock”
•“All windows”
• “Application windows”
•“Desktop”
•“Dashboard”
• “Spaces”
• Under “Spotlight”
• “Show Spotlight search field”
• “Show Spotlight window”
To turn off the Software Update feature:
1 Choose System Preferences from the Apple
menu and click Software Update.
2 Click the Scheduled Check tab.
3 Deselect “Check for Updates.”
Turning Off Energy Saver
To turn off the Energy Saver feature:
1 Choose System Preferences from the Apple
menu and click Energy Saver.
2 Do the following:
• Set the computer sleep setting to Never.
• Set the display sleep setting to Never.
• Deselect “Put the hard disk(s) to sleep when
possible.”
Pro Tools SE User Guide20
For a complete list of Pro Tools keyboard
shortcuts, see the Keyboard Shortcuts Guide
(Help > Keyboard Shortcuts)..
To disable or reassign Mac OS X keyboard
shortcuts:
1 Choose System Preferences from the Apple
menu and click Keyboard.
2 Click the Keyboard Shortcuts tab.
3 Do one of the following:
• Deselect the Mac OS X options that conflict
with Pro Tools keyboard shortcuts.
– or –
• Assign different, non-conflicting keyboard
shortcuts to the corresponding Mac OS X
options.
Page 25

Reassign Spaces Keyboard Shortcuts
If you want to use Spaces, you should reassign
the Spaces keyboard shortcuts to avoid conflicts
with important Pro Tools keyboard shortcuts.
You can reassign Spaces keyboard shortcuts to
use a combination of modifier keys (Command+Option+Control+Shift) in addition to
the default Spaces keyboard shortcut assignments to avoid these conflicts.
To reassign Spaces keyboard shortcuts to use
modifier key combinations that do not conflict
with Pro Tools keyboard shortcuts:
1 Choose System Preferences from the Apple
menu and click Exposé & Spaces.
2 Click the Spaces tab.
3 Ensure that Enable Spaces is selected.
4 Press and hold Command+Option+Con-
trol+Shift and select “Control+Option+Shift+Command+F8” from the “To activate Spaces” pop-up
menu.
5 Press and hold Command+Option+Con-
trol+Shift and select “Control+Option+Shift+Command+Arrow Keys” from the “To switch between
spaces” pop-up menu.
6 Press and hold Command+Option+Con-
trol+Shift and select “Control+Option+Shift+Command+Number Keys” from the “To switch directly
to a space” pop-up menu.
affect Pro Tools system performance. You may
want to disable Spotlight indexing for all local
drives before using Pro Tools for big recording
projects.
Disabling Spotlight indexing also disables
the Find function in Mac OS.
To disable Spotlight indexing:
1 Choose System Preferences from the Apple
menu and click Spotlight.
2 In the Spotlight window, click the Privacy tab.
3 To prevent indexing of a drive, drag its icon
from the desktop into the list.
Enabling Journaling for Audio Drives
To yield higher performance from audio drives,
enable journaling.
To enable journaling:
1 Launch the Disk Utility application, located in
Macintosh HD/Applications/Utilities.
2 Select the volume in the left column of the
Disk Utility window.
3 Select Enable Journaling in the toolbar.
Disabling Spotlight Indexing
The Mac OS X Spotlight feature automatically
indexes files and folders on local hard drives in
the background. In most cases, this is not a concern for normal Pro Tools operation. However,
if Spotlight starts indexing drives while recording in a Pro Tools session with high track counts
for an extended period of time, it can adversely
Chapter 4: Configuring Your Pro Tools System 21
Page 26

Optimizing a Windows System for Pro Tools
4 In the right pane, click the triangle
(Windows 7) or the plus (+) sign (Windows XP)
next to IDE ATA/ATAPI Controllers.
To ensure optimum performance with
Pro Tools SE, configure your computer before
using Pro Tools SE hardware and software.
For Mac System Optimization, see “Optimizing a Mac System for Pro Tools” on
page 20.
Before configuring your computer, make sure
you are logged in as an Administrator for the account where you want to install Pro Tools. For
details on Administrator privileges, see your
Windows documentation.
Recommended Optimizations
To ensure optimum performance with
Pro Tools, configure the following settings before using Pro Tools hardware and software.
When you are finished changing Windows
system settings, restart your computer.
Enabling DMA
Enabling your computer's DMA (Direct Memory
Access) frees up CPU bandwidth so your computer can do other Pro Tools tasks.
In most cases the DMA option will already be set
correctly, as Windows detects and activates
DMA mode by default.
To enable DMA for any IDE hard drives
(Windows 7, Windows XP):
1 Choose Start.
2 Right-click Computer (Windows 7) or My Com-
puter (Windows XP) and choose Manage.
3 In the left pane of Computer Management un-
der System Tools, click on Device Manager.
5 Double-click on an IDE Channel.
6 Click the Advanced Settings tab.
7 Under Device Properties, check the Enable
DMA box (Windows 7), or under each listed Device, set the Transfer Mode to DMA if available
(Windows XP).
8 Click OK.
9 Repeat for each IDE Channel.
Configuring Windows Power
Management Settings
Pro Tools requires maximum CPU performance
for optimal RTAS processing and disk streaming.
For best performance, use the following recommended Windows Power Management settings.
To configure Windows Power Management
Settings (Windows 7):
1 Choose Start > Control Panel.
2 Click Hardware and Sound > Power Options.
3 In the Power Options control panel, click High
Performance.
4 Click Change plan settings.
5 Click Change advanced power settings to
change additional settings.
6 Click Hard disk > Turn off hard disk after =
Never. You can make optional changes such as
disabling sleep and disabling shutting down the
monitor.
7 Click OK or click Save changes to save the
changes.
8 Close the window.
Pro Tools SE User Guide22
Page 27

To configure Windows Power Management
Settings (Windows XP):
1 Choose Start > Control Panel.
2 Double-click Power Options.
3 Click the Power Schemes tab.
4 From the Power Schemes pop-up menu, select
Always On.
5 Verify that the following settings are set to
Never:
• Turn off hard disks
• System standby
• System hibernates
6 Click OK.
Disabling User Account Control
(Windows 7)
Some third-party applications that interface
with Pro Tools may require UAC to be disabled
for proper operation.
Additional Optimizations
Pro Tools can also be affected by other software
and hardware drivers installed on your computer. For best possible performance, it is recommended (but not required) that you do the following:
• Avoid running any unneeded programs at
the same time as Pro Tools.
• Turn off any software utilities that run in
the background, such as Windows Messenger, calendars, and disk maintenance programs.
• Turn off any non-essential USB devices
while running Pro Tools.
• If your video display card supports it, enable Bus Mastering in the manufacturer’s
Control Panel. See the manufacturer’s instructions for details.
To disable User Account Control (UAC):
1 Choose Start > Control Panel.
2 Click User Accounts and Family Safety.
3 In the User Accounts and Family Safety control
panel, click User Accounts.
4 Click Change User Account Control settings
(Windows 7).
5 Move the User Account Control slider to Never
Notify (Windows 7).
6 Click OK.
7 Restart your computer.
Chapter 4: Configuring Your Pro Tools System 23
Page 28

Pro Tools SE User Guide24
Page 29

appendix a
Hard Drive Configuration and Maintenance
Pro Tools SE software can be installed and used
on your system drive.
Formatting an Audio Drive
Session files and audio can then be created and
recorded to your system drive. Session files are
the documents you create for each song or project. Audio files refer to the files you record or import into each session.
A 5400 RPM drive is the minimum system requirement. If you are using an older computer,
if your computer has a slower drive (but otherwise meets all the specifications), we recommend either using the application with some reduced track count or using an external or
secondary internal audio drive to store your
Pro Tools SE sessions and audio.
For example, if you plan to record and play back
many tracks simultaneously, we recommend using a second hard drive dedicated to saving and
recording your session and audio files.
When creating new session files, save them to
this second hard drive and then all audio files
will also record and save to this hard drive.
Alw ay s ba ck up a ny im por ta nt dat a o n y our
drive before formatting it, as formatting
will erase all data on the drive.
Formatting Mac Audio Drives
For optimum performance, audio drives should
be formatted as Mac OS Extended (Journaled).
To format an audio drive:
1 Launch the Disk Utility application, located in
Macintosh HD/Applications/Utilities.
2 Click the Erase tab.
Disk Utility (Mac OS X)
3 Select the drive you want to initialize in the
column on the left side of the window.
Hard Drive Configuration and Maintenance 25
Page 30

4 Choose the Mac OS Extended (Journaled) for-
mat.
Do not choose the “Case-Sensitive” format
option. Pro Tools will not operate properly
with case-sensitive formatted drives.
5 Type a name for the new volume.
6 If you plan to connect the drive to a Mac OS 9
computer, select Install Mac OS 9 Drivers
(Mac OS 9 options only appear in 10.5 or below).
7 Click Erase.
The drive appears on the Desktop with the new
volume name.
Formatting Windows Audio Drives
For optimal performance, audio drives should
be formatted as NTFS.
Pro Tools only supports Basic drive types.
Do not convert the drive to a Dynamic type.
To format an audio drive (Windows 7 and
Windows XP):
1 Right-click Computer (Windows 7) or My Com-
puter (Windows XP) and choose Manage.
2 Under Storage, choose Disk Management.
3 If the volume is “Healthy,” do the following:
Healthy volumes are volumes that have previously been partitioned and formatted.
• In the Disk Management window, rightclick the hard drive you will use for audio
and choose Format.
• In the Format window, name the volume.
• Choose a file system. For optimum performance, audio drives should be formatted as
NTFS.
• Select Perform a quick format.
•Make sure Enable file and folder compression
is not selected.
• Set the Allocation unit size to Default.
• Click OK.
4 If the volume is “Unallocated,” do the follow-
ing:
• In the Disk Management window, Rightclick the hard drive you will use for audio
and choose New Partition.
• In the New Partition Wizard window, click
Next.
• When prompted, select the partition type.
Avid recommends using Primary partitions,
instead of Extended partitions.
Disk Management window (Windows XP)
Pro Tools SE User Guide26
• Follow the on-screen instructions to select
a partition size and other partition settings.
• When prompted, choose a file system. For
optimum performance, audio drives
should be formatted as NTFS.
• Select Perform a quick format.
•Make sure Enable file and folder compression
is not selected.
• Set the Allocation unit size to Default.
• Click OK.
Page 31

Partitioning Drives
Partitioning creates a logical volume or volumes
on a physical drive, almost as if you were creating virtual hard drives. Partitions can then be
formatted with the appropriate file system
(NTFS for Windows, HFS+ for Mac).
Mac OS allows drives larger than 4096 MB
to be seen as whole volumes. Drives must be
initialized with a disk utility that recognizes the 2 terabyte limit. Single Pro Tools
audio files cannot exceed 3.4 GB in size.
Windows XP allows drives formatted with
the NTFS file system to be seen as whole
volumes. Single Pro Tools audio files cannot exceed 3.4 GB in size.
Seek Times on Partitioned Drives
Seek times are actually faster on partitioned
drives (assuming that reads and writes are performed on a single partition), since the heads
only have to seek within the partition boundaries, rather than the whole capacity of the drive.
Smaller partitions perform faster than larger partitions, but this comes at the expense of contiguous storage space. When you partition a drive,
you will need to find the compromise that best
suits your performance and storage requirements.
Avoid distributing audio files within a session over different partitions on the same
drive since this will adversely affect drive
performance.
Hard Drive Configuration and Maintenance 27
Page 32

Hard Disk Storage Space
Mono audio tracks recorded with 16-bit resolution at 44.1 kHz (CD quality) require approximately
5 MB of hard disk space per minute. The same tracks recorded with 24-bit resolution require about
7.5 MB per minute.
Stereo audio tracks recorded with 16-bit resolution at 44.1 kHz (CD quality) require approximately
10 MB of hard disk space per minute. The same tracks recorded with 24-bit resolution require about
15 MB per minute.
Table 2 lists the required disk space for certain track numbers and track lengths, to help you estimate
your hard disk usage.
Table 2. Required hard drive space for audio tracks (44.1 kHz and 48 kHz sessions shown)
Number of Tracks and Length 16-bit at
44.1 kHz
1 mono track, 1 minute 5 MB 5.5 MB 7.5 MB 8.2 MB
16-bit at
48 kHz
24-bit at
44.1 kHz
24-bit at
48 kHz
1 stereo track (or two mono
tracks), 5 minutes
1 stereo track (or two mono
tracks), 60 minutes
24 mono tracks, 5 minutes 600 MB 662 MB 900 MB 991 MB
24 mono tracks, 60 minutes 7 GB 7.8 GB 10.5 GB 11.6 GB
32 mono tracks, 5 minutes 800 MB 883 MB 1.2 GB 1.3 GB
32 mono tracks, 60 minutes 9.4 GB 10.4 GB 14 GB 15.4 GB
50 MB 55 MB 75 MB 83 MB
600 MB 662 MB 900 MB 991 MB
Pro Tools SE User Guide28
Page 33

appendix b
Resources
Whether you are new to Pro Tools or just starting out with your new system, we encourage
you to read and utilize the many guides that
Pro Tools provides. There are also useful online
resources available, giving you everything from
Pro Tools tips to Pro Tools answers.
About the Pro Tools Guides
In addition to any printed guides included with
your system, PDF versions of the printed guides
and many additional Pro Tools guides are installed automatically during Pro Tools installation (see “Documentation Installed Automatically with Pro Tools SE” on page 30).
You can download the guide for whatever interface you have. Go to:
http://www.m-audio.com/manuals
User Guide
The User Guide for your system gives you detailed instructions for setting up and configuring software and hardware for optimum performance.
Guides Accessible in Pro Tools
The main Pro Tools guides are accessible from
the Pro Tools Help menu. (Choose Help, then select a guide.)
These include:
•Pro Tools SE User Guide
• Pro Tools SE Shortcuts Guide
•Hardware Guides
• KeyStudio User Guide
• Recording Studio User Guide
• Vocal Studio User Guide
• Interactive Projects Guide
Printed Quick Setup Instructions
The printed Quick Setup instructions give you
easy-to-follow steps for setting up your software
and hardware.
Resources 29
Page 34

Documentation Installed
Automatically with Pro Tools SE
When you install Pro Tools SE, you can access
the PDF versions of the same Pro Tools guides
found in the Help Menu. This documentation
can be found in the following locations:
Mac Applications/Digidesign/Documentation
Windows C:\Program Files\Digidesign\
Documentation
To view or print PDF guides, you can use
Adobe Reader (recommended) or Apple Preview (Mac only).
Helpful Online Resources
Once you get going, here are some helpful online resources:
• For questions about installation, visit
Avid’s online Knowledge Base. Go to:
http://www.m-audio.com/ptsefaq
• Get useful information, help, and tips from
the worldwide community of Pro Tools users
at the online User Conference. Go to:
http://duc.avid.com
• If you can’t find your answer on the User Conference or the Knowledge Base, contact Avid
email support. Go to:
http://www.avid.com/support
Pro Tools SE User Guide30
Page 35

index
A
Avid
customer success 3
C
Clean Uninstall (Mac) 10
D
DMA option (Windows), enabling 22
drive formatting
Mac 25
Windows 26
E
Energy Saver (Mac), turning off 20
H
hard drives
formatting 25, 26, 25
partitioning 27
space requirements 28
I
installing Pro Tools SE
Mac 5
Windows 11
R
removing Pro Tools
Mac 10
Windows 15
S
Safe Uninstall (Mac) 6, 10
Software Update (Mac), turning off 20
Spotlight indexing (Mac), disabling 21
system
recommended optimizations (Windows) 23, 22
shutting down 17
system optimization
Mac 20
Windows 22
T
technical support 3
U
uninstalling Pro Tools
Mac 10
Windows 15
User Account Control (UAC)
disabling 23
J
journaling (Mac), enabling 21
P
partitioning hard drives 27
Pro Tools
capabilities 1
removing (Mac) 10, 15
Index 31
Page 36

Avid
2001 Junipero Serra Boulevard
Daly City, CA 94014-3886 USA
Technical Support (USA)
Visit the Online Support Center at
www.avid.com/support
Product Information
For company and product information,
visit us on the web at www.avid.com
 Loading...