

Page 1

Menus Guide
Pro Tools® M-Powered™ Essential
Version 8.0.2
Page 2

Legal Notices
This guide is copyrighted ©2009 by Digidesign, a division of Avid Technology, Inc.
(hereafter “Digidesign”), with all rights reserved. Under copyright laws, this guide
may not be duplicated in whole or in part without the written consent of
Digidesign.
003, 96 I/O, 96i I/O, 192 Digital I/O, 192 I/O, 888|24 I/O, 882|20 I/O,
1622 I/O, 24-Bit ADAT Bridge I/O, AudioSuite, Avid, Avid DNA, Avid Mojo,
Avid Unity, Avid Unity ISIS, Avid Xpress, AVoption, Beat Detective, Bomb Factory,
Bruno, C|24, Command|8, Control|24, D-Command, D-Control, D-Fi, D-fx, D-Show,
D-Verb, DAE, Digi 002, DigiBase, DigiDelivery, Digidesign,
Digidesign Audio Engine, Digidesign Intelligent Noise Reduction, Digidesign
TDM Bus, DigiDrive, DigiRack, DigiTest, DigiTranslator, DINR, D-Show,
DV Toolkit, EditPack, Eleven, Hybrid, Impact, Interplay, M-Audio, MachineControl,
Maxim, Mbox, MediaComposer, MIDI I/O, MIX, MultiShell, OMF,
OMF Interchange, PRE, ProControl, Pro Tools M-Powered, Pro Tools,
Pro Tools|HD, Pro Tools LE, QuickPunch, Reel Tape, Reso, Reverb One, ReVibe,
RTAS, Sibelius, Smack!, SoundReplacer, Sound Designer II, Strike, Structure,
SYNC HD, SYNC I/O, Synchronic, TL Space, Transfuser, Velvet, X-Form, XMON,
and Xpand! are trademarks or registered trademarks of Digidesign and/or Avid
Technology, Inc. All other trademarks are the property of their respective owners.
Product features, specifications, system requirements, and availability are
subject to change without notice.
Guide Part Number: 9329-61711-00 REV A June, 2009
Documentation Feedback
We’re always looking for ways to improve our documentation. If you have
comments, corrections, or suggestions regarding our documentation, email us
at techpubs@digidesign.com.
Page 3

Contents
Chapter 1. Introduction . . . . . . . . . . . . . . . . . . . . . . . . . . . . . . . . . . . . . . . . . . . . . . . . . . . . . . . . . . . . . . . . . . . . . . . . . . . 1
Chapter 2. Pro Tools Menu (Mac Only) . . . . . . . . . . . . . . . . . . . . . . . . . . . . . . . . . . . . . . . . . . . . . . . . . . . . . . . . . . . . . 3
About Pro Tools . . . . . . . . . . . . . . . . . . . . . . . . . . . . . . . . . . . . . . . . . . . . . . . . . . . . . . . . . . . . . . . . . . . . . . . . . . . . . . 3
Preferences . . . . . . . . . . . . . . . . . . . . . . . . . . . . . . . . . . . . . . . . . . . . . . . . . . . . . . . . . . . . . . . . . . . . . . . . . . . . . . . . . 3
Mac Application Management Commands. . . . . . . . . . . . . . . . . . . . . . . . . . . . . . . . . . . . . . . . . . . . . . . . . . . . . . . . . . . . 3
Quit . . . . . . . . . . . . . . . . . . . . . . . . . . . . . . . . . . . . . . . . . . . . . . . . . . . . . . . . . . . . . . . . . . . . . . . . . . . . . . . . . . . . . . . 3
Chapter 3. File Menu. . . . . . . . . . . . . . . . . . . . . . . . . . . . . . . . . . . . . . . . . . . . . . . . . . . . . . . . . . . . . . . . . . . . . . . . . . . . . . 5
New Session . . . . . . . . . . . . . . . . . . . . . . . . . . . . . . . . . . . . . . . . . . . . . . . . . . . . . . . . . . . . . . . . . . . . . . . . . . . . . . . . . 5
Open Session . . . . . . . . . . . . . . . . . . . . . . . . . . . . . . . . . . . . . . . . . . . . . . . . . . . . . . . . . . . . . . . . . . . . . . . . . . . . . . . . 5
Close Session . . . . . . . . . . . . . . . . . . . . . . . . . . . . . . . . . . . . . . . . . . . . . . . . . . . . . . . . . . . . . . . . . . . . . . . . . . . . . . . . 5
Save . . . . . . . . . . . . . . . . . . . . . . . . . . . . . . . . . . . . . . . . . . . . . . . . . . . . . . . . . . . . . . . . . . . . . . . . . . . . . . . . . . . . . . 5
Save As . . . . . . . . . . . . . . . . . . . . . . . . . . . . . . . . . . . . . . . . . . . . . . . . . . . . . . . . . . . . . . . . . . . . . . . . . . . . . . . . . . . . 5
Revert to Saved . . . . . . . . . . . . . . . . . . . . . . . . . . . . . . . . . . . . . . . . . . . . . . . . . . . . . . . . . . . . . . . . . . . . . . . . . . . . . . 5
Save Copy In. . . . . . . . . . . . . . . . . . . . . . . . . . . . . . . . . . . . . . . . . . . . . . . . . . . . . . . . . . . . . . . . . . . . . . . . . . . . . . . . . 5
Save As Template . . . . . . . . . . . . . . . . . . . . . . . . . . . . . . . . . . . . . . . . . . . . . . . . . . . . . . . . . . . . . . . . . . . . . . . . . . . . . 5
Send via DigiDelivery . . . . . . . . . . . . . . . . . . . . . . . . . . . . . . . . . . . . . . . . . . . . . . . . . . . . . . . . . . . . . . . . . . . . . . . . . . . 6
Send to Sibelius . . . . . . . . . . . . . . . . . . . . . . . . . . . . . . . . . . . . . . . . . . . . . . . . . . . . . . . . . . . . . . . . . . . . . . . . . . . . . . 6
Bounce to Commands . . . . . . . . . . . . . . . . . . . . . . . . . . . . . . . . . . . . . . . . . . . . . . . . . . . . . . . . . . . . . . . . . . . . . . . . . . 6
Import . . . . . . . . . . . . . . . . . . . . . . . . . . . . . . . . . . . . . . . . . . . . . . . . . . . . . . . . . . . . . . . . . . . . . . . . . . . . . . . . . . . . . 7
Export . . . . . . . . . . . . . . . . . . . . . . . . . . . . . . . . . . . . . . . . . . . . . . . . . . . . . . . . . . . . . . . . . . . . . . . . . . . . . . . . . . . . . 7
Exit . . . . . . . . . . . . . . . . . . . . . . . . . . . . . . . . . . . . . . . . . . . . . . . . . . . . . . . . . . . . . . . . . . . . . . . . . . . . . . . . . . . . . . . 7
Contents iii
Page 4

Chapter 4. Edit Menu . . . . . . . . . . . . . . . . . . . . . . . . . . . . . . . . . . . . . . . . . . . . . . . . . . . . . . . . . . . . . . . . . . . . . . . . . . . . . . 9
Undo . . . . . . . . . . . . . . . . . . . . . . . . . . . . . . . . . . . . . . . . . . . . . . . . . . . . . . . . . . . . . . . . . . . . . . . . . . . . . . . . . . . . . . . 9
Redo . . . . . . . . . . . . . . . . . . . . . . . . . . . . . . . . . . . . . . . . . . . . . . . . . . . . . . . . . . . . . . . . . . . . . . . . . . . . . . . . . . . . . . . 9
Restore Last Selection . . . . . . . . . . . . . . . . . . . . . . . . . . . . . . . . . . . . . . . . . . . . . . . . . . . . . . . . . . . . . . . . . . . . . . . . . . 9
Cut . . . . . . . . . . . . . . . . . . . . . . . . . . . . . . . . . . . . . . . . . . . . . . . . . . . . . . . . . . . . . . . . . . . . . . . . . . . . . . . . . . . . . . . . 9
Copy . . . . . . . . . . . . . . . . . . . . . . . . . . . . . . . . . . . . . . . . . . . . . . . . . . . . . . . . . . . . . . . . . . . . . . . . . . . . . . . . . . . . . . . 9
Paste . . . . . . . . . . . . . . . . . . . . . . . . . . . . . . . . . . . . . . . . . . . . . . . . . . . . . . . . . . . . . . . . . . . . . . . . . . . . . . . . . . . . . . 9
Clear . . . . . . . . . . . . . . . . . . . . . . . . . . . . . . . . . . . . . . . . . . . . . . . . . . . . . . . . . . . . . . . . . . . . . . . . . . . . . . . . . . . . . . . 9
Select All . . . . . . . . . . . . . . . . . . . . . . . . . . . . . . . . . . . . . . . . . . . . . . . . . . . . . . . . . . . . . . . . . . . . . . . . . . . . . . . . . . . . 9
Duplicate. . . . . . . . . . . . . . . . . . . . . . . . . . . . . . . . . . . . . . . . . . . . . . . . . . . . . . . . . . . . . . . . . . . . . . . . . . . . . . . . . . . 10
Snap To. . . . . . . . . . . . . . . . . . . . . . . . . . . . . . . . . . . . . . . . . . . . . . . . . . . . . . . . . . . . . . . . . . . . . . . . . . . . . . . . . . . . 10
Separate Region . . . . . . . . . . . . . . . . . . . . . . . . . . . . . . . . . . . . . . . . . . . . . . . . . . . . . . . . . . . . . . . . . . . . . . . . . . . . . 10
Heal Separation . . . . . . . . . . . . . . . . . . . . . . . . . . . . . . . . . . . . . . . . . . . . . . . . . . . . . . . . . . . . . . . . . . . . . . . . . . . . . . 10
Mute/Unmute Region . . . . . . . . . . . . . . . . . . . . . . . . . . . . . . . . . . . . . . . . . . . . . . . . . . . . . . . . . . . . . . . . . . . . . . . . . . 10
Strip Silence . . . . . . . . . . . . . . . . . . . . . . . . . . . . . . . . . . . . . . . . . . . . . . . . . . . . . . . . . . . . . . . . . . . . . . . . . . . . . . . . 10
Consolidate . . . . . . . . . . . . . . . . . . . . . . . . . . . . . . . . . . . . . . . . . . . . . . . . . . . . . . . . . . . . . . . . . . . . . . . . . . . . . . . . . 10
Fades . . . . . . . . . . . . . . . . . . . . . . . . . . . . . . . . . . . . . . . . . . . . . . . . . . . . . . . . . . . . . . . . . . . . . . . . . . . . . . . . . . . . . 10
Chapter 5. View Menu . . . . . . . . . . . . . . . . . . . . . . . . . . . . . . . . . . . . . . . . . . . . . . . . . . . . . . . . . . . . . . . . . . . . . . . . . . . . 11
Mix Window . . . . . . . . . . . . . . . . . . . . . . . . . . . . . . . . . . . . . . . . . . . . . . . . . . . . . . . . . . . . . . . . . . . . . . . . . . . . . . . . . 11
Narrow Mix . . . . . . . . . . . . . . . . . . . . . . . . . . . . . . . . . . . . . . . . . . . . . . . . . . . . . . . . . . . . . . . . . . . . . . . . . . . . . . . . . 11
Edit Window Views . . . . . . . . . . . . . . . . . . . . . . . . . . . . . . . . . . . . . . . . . . . . . . . . . . . . . . . . . . . . . . . . . . . . . . . . . . . . 11
Rulers . . . . . . . . . . . . . . . . . . . . . . . . . . . . . . . . . . . . . . . . . . . . . . . . . . . . . . . . . . . . . . . . . . . . . . . . . . . . . . . . . . . . . 11
Other Displays . . . . . . . . . . . . . . . . . . . . . . . . . . . . . . . . . . . . . . . . . . . . . . . . . . . . . . . . . . . . . . . . . . . . . . . . . . . . . . . 12
Waveforms . . . . . . . . . . . . . . . . . . . . . . . . . . . . . . . . . . . . . . . . . . . . . . . . . . . . . . . . . . . . . . . . . . . . . . . . . . . . . . . . . 12
Sends A–E . . . . . . . . . . . . . . . . . . . . . . . . . . . . . . . . . . . . . . . . . . . . . . . . . . . . . . . . . . . . . . . . . . . . . . . . . . . . . . . . . . 12
Transport. . . . . . . . . . . . . . . . . . . . . . . . . . . . . . . . . . . . . . . . . . . . . . . . . . . . . . . . . . . . . . . . . . . . . . . . . . . . . . . . . . . 12
Chapter 6. Track Menu . . . . . . . . . . . . . . . . . . . . . . . . . . . . . . . . . . . . . . . . . . . . . . . . . . . . . . . . . . . . . . . . . . . . . . . . . . . 13
New Track . . . . . . . . . . . . . . . . . . . . . . . . . . . . . . . . . . . . . . . . . . . . . . . . . . . . . . . . . . . . . . . . . . . . . . . . . . . . . . . . . . 13
Make Inactive or Make Active . . . . . . . . . . . . . . . . . . . . . . . . . . . . . . . . . . . . . . . . . . . . . . . . . . . . . . . . . . . . . . . . . . . . 13
Delete . . . . . . . . . . . . . . . . . . . . . . . . . . . . . . . . . . . . . . . . . . . . . . . . . . . . . . . . . . . . . . . . . . . . . . . . . . . . . . . . . . . . . 13
Group . . . . . . . . . . . . . . . . . . . . . . . . . . . . . . . . . . . . . . . . . . . . . . . . . . . . . . . . . . . . . . . . . . . . . . . . . . . . . . . . . . . . . 13
Clear All Clip Indicators . . . . . . . . . . . . . . . . . . . . . . . . . . . . . . . . . . . . . . . . . . . . . . . . . . . . . . . . . . . . . . . . . . . . . . . . . 13
Create Click Track . . . . . . . . . . . . . . . . . . . . . . . . . . . . . . . . . . . . . . . . . . . . . . . . . . . . . . . . . . . . . . . . . . . . . . . . . . . . 13
Chapter 7. Region Menu . . . . . . . . . . . . . . . . . . . . . . . . . . . . . . . . . . . . . . . . . . . . . . . . . . . . . . . . . . . . . . . . . . . . . . . . . . 15
Edit Lock/Unlock Region . . . . . . . . . . . . . . . . . . . . . . . . . . . . . . . . . . . . . . . . . . . . . . . . . . . . . . . . . . . . . . . . . . . . . . . . 15
Group . . . . . . . . . . . . . . . . . . . . . . . . . . . . . . . . . . . . . . . . . . . . . . . . . . . . . . . . . . . . . . . . . . . . . . . . . . . . . . . . . . . . . 15
Loop . . . . . . . . . . . . . . . . . . . . . . . . . . . . . . . . . . . . . . . . . . . . . . . . . . . . . . . . . . . . . . . . . . . . . . . . . . . . . . . . . . . . . . 15
Unloop . . . . . . . . . . . . . . . . . . . . . . . . . . . . . . . . . . . . . . . . . . . . . . . . . . . . . . . . . . . . . . . . . . . . . . . . . . . . . . . . . . . . 15
Rename . . . . . . . . . . . . . . . . . . . . . . . . . . . . . . . . . . . . . . . . . . . . . . . . . . . . . . . . . . . . . . . . . . . . . . . . . . . . . . . . . . . 15
Quantize to Grid . . . . . . . . . . . . . . . . . . . . . . . . . . . . . . . . . . . . . . . . . . . . . . . . . . . . . . . . . . . . . . . . . . . . . . . . . . . . . . 15
Elastic Properties . . . . . . . . . . . . . . . . . . . . . . . . . . . . . . . . . . . . . . . . . . . . . . . . . . . . . . . . . . . . . . . . . . . . . . . . . . . . . 15
Conform to Tempo . . . . . . . . . . . . . . . . . . . . . . . . . . . . . . . . . . . . . . . . . . . . . . . . . . . . . . . . . . . . . . . . . . . . . . . . . . . . 16
Remove Warp . . . . . . . . . . . . . . . . . . . . . . . . . . . . . . . . . . . . . . . . . . . . . . . . . . . . . . . . . . . . . . . . . . . . . . . . . . . . . . . 16
Remove Pitch Shift. . . . . . . . . . . . . . . . . . . . . . . . . . . . . . . . . . . . . . . . . . . . . . . . . . . . . . . . . . . . . . . . . . . . . . . . . . . . 16
Essential Menus Guideiv
Page 5

Chapter 8. Event Menu. . . . . . . . . . . . . . . . . . . . . . . . . . . . . . . . . . . . . . . . . . . . . . . . . . . . . . . . . . . . . . . . . . . . . . . . . . . 17
Event Operations. . . . . . . . . . . . . . . . . . . . . . . . . . . . . . . . . . . . . . . . . . . . . . . . . . . . . . . . . . . . . . . . . . . . . . . . . . . . . 17
MIDI Real-Time Properties . . . . . . . . . . . . . . . . . . . . . . . . . . . . . . . . . . . . . . . . . . . . . . . . . . . . . . . . . . . . . . . . . . . . . . 18
Identify Beat . . . . . . . . . . . . . . . . . . . . . . . . . . . . . . . . . . . . . . . . . . . . . . . . . . . . . . . . . . . . . . . . . . . . . . . . . . . . . . . . 18
Beat Detective . . . . . . . . . . . . . . . . . . . . . . . . . . . . . . . . . . . . . . . . . . . . . . . . . . . . . . . . . . . . . . . . . . . . . . . . . . . . . . 18
All MIDI Notes Off . . . . . . . . . . . . . . . . . . . . . . . . . . . . . . . . . . . . . . . . . . . . . . . . . . . . . . . . . . . . . . . . . . . . . . . . . . . . 18
Chapter 9. AudioSuite Menu . . . . . . . . . . . . . . . . . . . . . . . . . . . . . . . . . . . . . . . . . . . . . . . . . . . . . . . . . . . . . . . . . . . . . . 19
EQ Plug-ins . . . . . . . . . . . . . . . . . . . . . . . . . . . . . . . . . . . . . . . . . . . . . . . . . . . . . . . . . . . . . . . . . . . . . . . . . . . . . . . . . 19
Dynamics Plug-ins . . . . . . . . . . . . . . . . . . . . . . . . . . . . . . . . . . . . . . . . . . . . . . . . . . . . . . . . . . . . . . . . . . . . . . . . . . . . 19
Reverb Plug-ins . . . . . . . . . . . . . . . . . . . . . . . . . . . . . . . . . . . . . . . . . . . . . . . . . . . . . . . . . . . . . . . . . . . . . . . . . . . . . . 19
Delay Plug-ins . . . . . . . . . . . . . . . . . . . . . . . . . . . . . . . . . . . . . . . . . . . . . . . . . . . . . . . . . . . . . . . . . . . . . . . . . . . . . . . 20
Modulation Plug-ins . . . . . . . . . . . . . . . . . . . . . . . . . . . . . . . . . . . . . . . . . . . . . . . . . . . . . . . . . . . . . . . . . . . . . . . . . . . 20
Other Plug-ins . . . . . . . . . . . . . . . . . . . . . . . . . . . . . . . . . . . . . . . . . . . . . . . . . . . . . . . . . . . . . . . . . . . . . . . . . . . . . . . 20
Chapter 10. Options Menu. . . . . . . . . . . . . . . . . . . . . . . . . . . . . . . . . . . . . . . . . . . . . . . . . . . . . . . . . . . . . . . . . . . . . . . . 21
Loop Record . . . . . . . . . . . . . . . . . . . . . . . . . . . . . . . . . . . . . . . . . . . . . . . . . . . . . . . . . . . . . . . . . . . . . . . . . . . . . . . . 21
Loop Playback . . . . . . . . . . . . . . . . . . . . . . . . . . . . . . . . . . . . . . . . . . . . . . . . . . . . . . . . . . . . . . . . . . . . . . . . . . . . . . 21
Pre/Post-Roll . . . . . . . . . . . . . . . . . . . . . . . . . . . . . . . . . . . . . . . . . . . . . . . . . . . . . . . . . . . . . . . . . . . . . . . . . . . . . . . 21
QuickPunch . . . . . . . . . . . . . . . . . . . . . . . . . . . . . . . . . . . . . . . . . . . . . . . . . . . . . . . . . . . . . . . . . . . . . . . . . . . . . . . . 21
Dynamic Transport Mode . . . . . . . . . . . . . . . . . . . . . . . . . . . . . . . . . . . . . . . . . . . . . . . . . . . . . . . . . . . . . . . . . . . . . . . 21
Transport Online . . . . . . . . . . . . . . . . . . . . . . . . . . . . . . . . . . . . . . . . . . . . . . . . . . . . . . . . . . . . . . . . . . . . . . . . . . . . . 21
Click . . . . . . . . . . . . . . . . . . . . . . . . . . . . . . . . . . . . . . . . . . . . . . . . . . . . . . . . . . . . . . . . . . . . . . . . . . . . . . . . . . . . . 21
MIDI Thru . . . . . . . . . . . . . . . . . . . . . . . . . . . . . . . . . . . . . . . . . . . . . . . . . . . . . . . . . . . . . . . . . . . . . . . . . . . . . . . . . . 22
Chapter 11. Setup Menu . . . . . . . . . . . . . . . . . . . . . . . . . . . . . . . . . . . . . . . . . . . . . . . . . . . . . . . . . . . . . . . . . . . . . . . . . 23
Hardware . . . . . . . . . . . . . . . . . . . . . . . . . . . . . . . . . . . . . . . . . . . . . . . . . . . . . . . . . . . . . . . . . . . . . . . . . . . . . . . . . . 23
Playback Engine . . . . . . . . . . . . . . . . . . . . . . . . . . . . . . . . . . . . . . . . . . . . . . . . . . . . . . . . . . . . . . . . . . . . . . . . . . . . . 23
Peripherals . . . . . . . . . . . . . . . . . . . . . . . . . . . . . . . . . . . . . . . . . . . . . . . . . . . . . . . . . . . . . . . . . . . . . . . . . . . . . . . . . 23
I/O. . . . . . . . . . . . . . . . . . . . . . . . . . . . . . . . . . . . . . . . . . . . . . . . . . . . . . . . . . . . . . . . . . . . . . . . . . . . . . . . . . . . . . . 23
MIDI. . . . . . . . . . . . . . . . . . . . . . . . . . . . . . . . . . . . . . . . . . . . . . . . . . . . . . . . . . . . . . . . . . . . . . . . . . . . . . . . . . . . . . 23
Click/Countoff . . . . . . . . . . . . . . . . . . . . . . . . . . . . . . . . . . . . . . . . . . . . . . . . . . . . . . . . . . . . . . . . . . . . . . . . . . . . . . 24
Preferences . . . . . . . . . . . . . . . . . . . . . . . . . . . . . . . . . . . . . . . . . . . . . . . . . . . . . . . . . . . . . . . . . . . . . . . . . . . . . . . . 24
Chapter 12. Window Menu . . . . . . . . . . . . . . . . . . . . . . . . . . . . . . . . . . . . . . . . . . . . . . . . . . . . . . . . . . . . . . . . . . . . . . . 25
Configurations . . . . . . . . . . . . . . . . . . . . . . . . . . . . . . . . . . . . . . . . . . . . . . . . . . . . . . . . . . . . . . . . . . . . . . . . . . . . . . 25
Arrange . . . . . . . . . . . . . . . . . . . . . . . . . . . . . . . . . . . . . . . . . . . . . . . . . . . . . . . . . . . . . . . . . . . . . . . . . . . . . . . . . . . 25
Close Window . . . . . . . . . . . . . . . . . . . . . . . . . . . . . . . . . . . . . . . . . . . . . . . . . . . . . . . . . . . . . . . . . . . . . . . . . . . . . . . 25
Mix . . . . . . . . . . . . . . . . . . . . . . . . . . . . . . . . . . . . . . . . . . . . . . . . . . . . . . . . . . . . . . . . . . . . . . . . . . . . . . . . . . . . . . 25
Edit . . . . . . . . . . . . . . . . . . . . . . . . . . . . . . . . . . . . . . . . . . . . . . . . . . . . . . . . . . . . . . . . . . . . . . . . . . . . . . . . . . . . . . 25
Score Editor . . . . . . . . . . . . . . . . . . . . . . . . . . . . . . . . . . . . . . . . . . . . . . . . . . . . . . . . . . . . . . . . . . . . . . . . . . . . . . . . 25
Task Manager . . . . . . . . . . . . . . . . . . . . . . . . . . . . . . . . . . . . . . . . . . . . . . . . . . . . . . . . . . . . . . . . . . . . . . . . . . . . . . . 26
Workspace . . . . . . . . . . . . . . . . . . . . . . . . . . . . . . . . . . . . . . . . . . . . . . . . . . . . . . . . . . . . . . . . . . . . . . . . . . . . . . . . . 26
Transport . . . . . . . . . . . . . . . . . . . . . . . . . . . . . . . . . . . . . . . . . . . . . . . . . . . . . . . . . . . . . . . . . . . . . . . . . . . . . . . . . . 26
Memory Locations. . . . . . . . . . . . . . . . . . . . . . . . . . . . . . . . . . . . . . . . . . . . . . . . . . . . . . . . . . . . . . . . . . . . . . . . . . . . 26
System Usage. . . . . . . . . . . . . . . . . . . . . . . . . . . . . . . . . . . . . . . . . . . . . . . . . . . . . . . . . . . . . . . . . . . . . . . . . . . . . . . 26
Contents v
Page 6

Chapter 13. Help Menu . . . . . . . . . . . . . . . . . . . . . . . . . . . . . . . . . . . . . . . . . . . . . . . . . . . . . . . . . . . . . . . . . . . . . . . . . . . 27
Check For Updates . . . . . . . . . . . . . . . . . . . . . . . . . . . . . . . . . . . . . . . . . . . . . . . . . . . . . . . . . . . . . . . . . . . . . . . . . . . . 27
Display M-Powered Information Dialogs . . . . . . . . . . . . . . . . . . . . . . . . . . . . . . . . . . . . . . . . . . . . . . . . . . . . . . . . . . . . . 27
About Pro Tools M-Powered Essential . . . . . . . . . . . . . . . . . . . . . . . . . . . . . . . . . . . . . . . . . . . . . . . . . . . . . . . . . . . . . . . 27
Chapter 14. Region List. . . . . . . . . . . . . . . . . . . . . . . . . . . . . . . . . . . . . . . . . . . . . . . . . . . . . . . . . . . . . . . . . . . . . . . . . . . 29
Region List . . . . . . . . . . . . . . . . . . . . . . . . . . . . . . . . . . . . . . . . . . . . . . . . . . . . . . . . . . . . . . . . . . . . . . . . . . . . . . . . . 29
Index . . . . . . . . . . . . . . . . . . . . . . . . . . . . . . . . . . . . . . . . . . . . . . . . . . . . . . . . . . . . . . . . . . . . . . . . . . . . . . . . . . . . . . . . . . . 31
Essential Menus Guidevi
Page 7

Chapter 1: Introduction
This guide summarizes Pro Tools® M-Powered™ Essential
menus along with their commands and options, as well as the
Region List and its commands and tools.
For more information about any item, see the Pro Tools
M-Powered Essential User Guide, or refer to the Pro Tools
Reference Guide (installed inside your Pro Tools\
Documentation folder).
Chapter 1: Introduction 1
Page 8

Essential Menus Guide2
Page 9
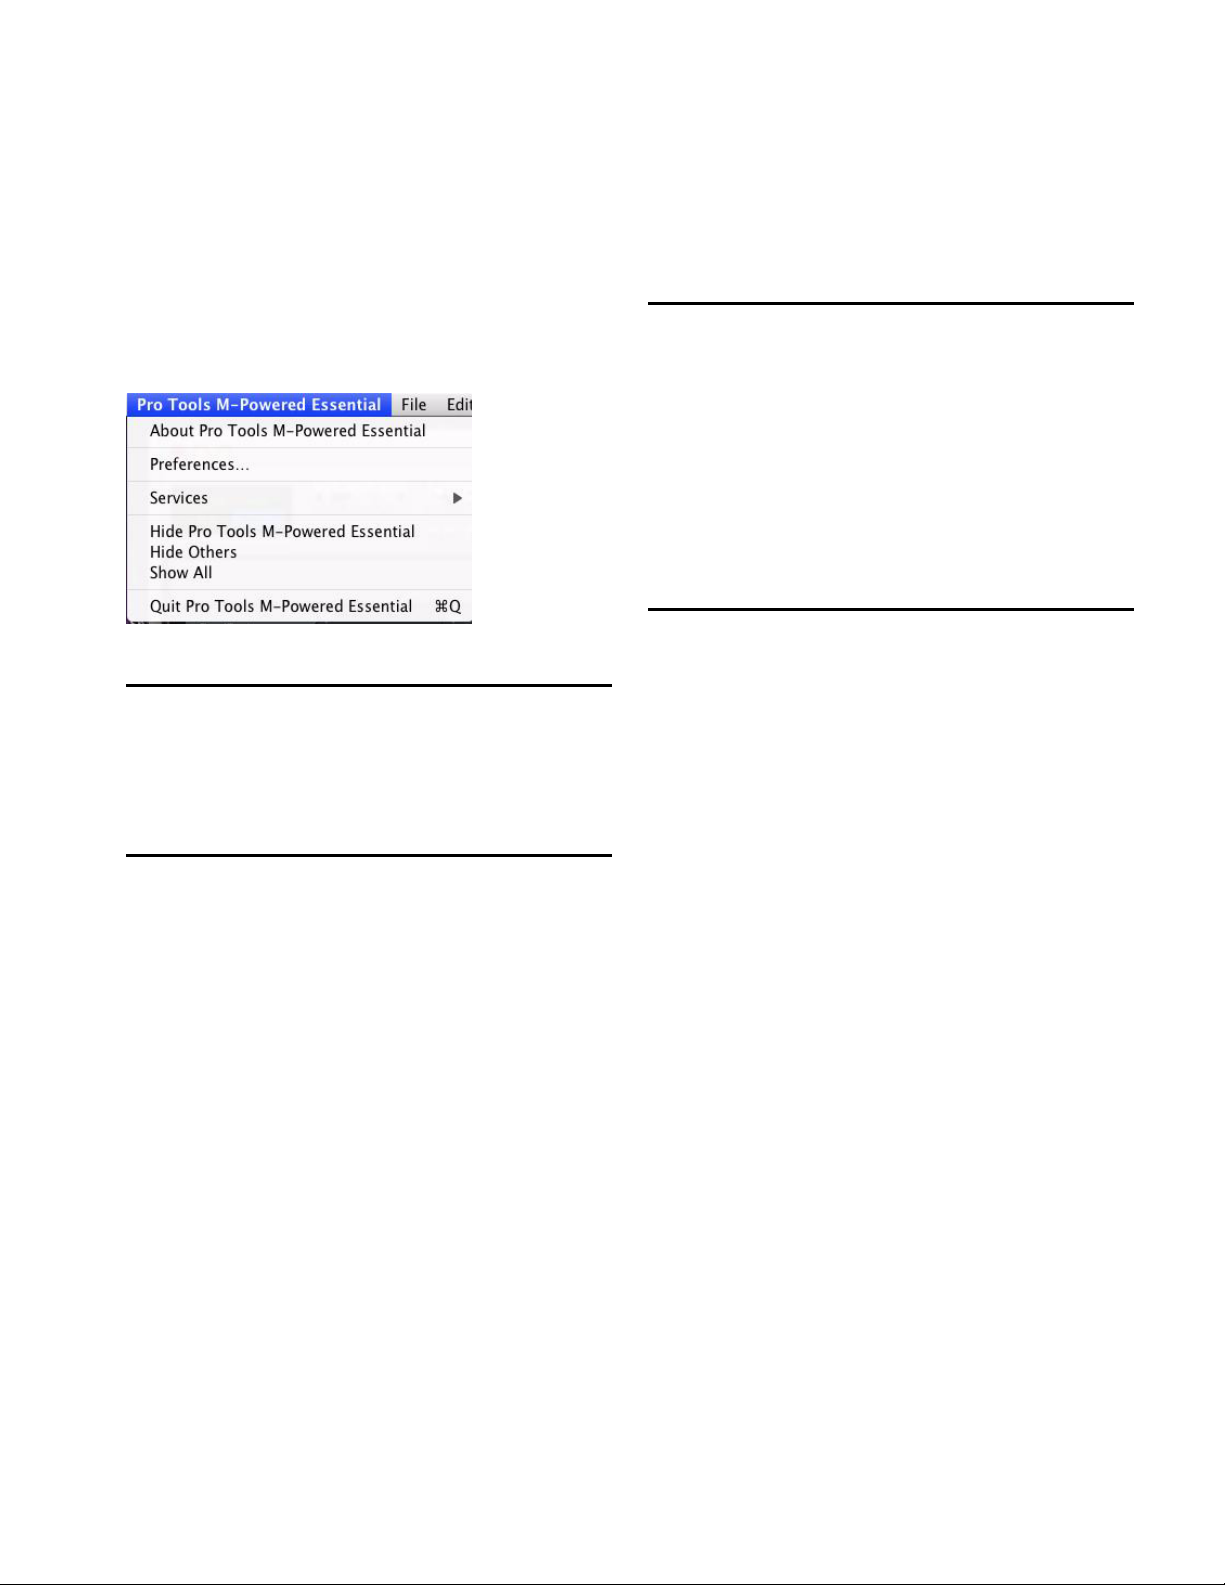
Chapter 2: Pro Tools Menu (Mac Only)
The Pro Tools Menu commands include links to Pro Tools
Preferences, access to Mac OS X application management,
and the Quit command.
Mac Application Management Commands
(Services, Hide Pro Tools M-Powered Essential, Hide Others,
Show All)
The Pro Tools menu also provides access to the following Mac
OS X application management commands: Services, Hide
Pro Tools M-Powered Essential, Hide Others, and Show All.
For more information about these and other Mac OS X features, refer to your Apple Mac documentation.
Pro Tools menu
About Pro Tools
The About Pro Tools command launches the Pro Tools
M-Powered Essential banner, which includes the version
number of your Pro Tools software.
Preferences
This command is available when you purchase Pro Tools
M-Powered.
You can read more about this command on-screen by selecting this menu command. Be sure that the Help menu item Dis-
play M-Powered Information Dialogs is enabled.
Quit
The Quit Pro Tools command ends your Pro Tools M-Powered
Essential session and closes the Pro Tools application.
Chapter 2: Pro Tools Menu (Mac Only) 3
Page 10

Essential Menus Guide4
Page 11

Chapter 3: File Menu
File menu commands are used to create and maintain
Pro Tools sessions.
File menu
Save As
The Save As command lets you save a copy of the current session under a different name, or in a different location. Because
the Save As command closes the current session and allows
you to keep working on the renamed copy, it is useful for saving successive stages of the session.
Revert to Saved
The Revert to Saved command restores the most recently
saved version of a session, discarding all changes made since
the last time you saved. Reverting to the last saved version of
a session is like closing the session without saving changes
and reopening it.
New Session
The New Session command lets you create and name a new
Pro Tools M-Powered Essential session.
Open Session
The Open command opens a session previously created with
Pro Tools. Only one session can be open at a time.
Close Session
The Close command closes the current session without quitting Pro Tools. Pro Tools prompts you to save changes before
closing the session.
Save
The Save command saves changes made since the last time the
session was saved. You cannot undo the Save command.
Save Copy In
This command is available when you purchase Pro Tools
M-Powered.
You can read more about this command on-screen by selecting this menu command. Be sure that the Help menu item Dis-
play M-Powered Information Dialogs is enabled (select that item
so that a checkmark appears next to it in the Help menu).
Save As Template
This command is available when you purchase Pro Tools
M-Powered.
You can read more about this command on-screen by selecting it. Be sure that the Help menu item Display M-Powered In-
formation Dialogs is enabled (select that item so that a checkmark appears next to it in the Help menu).
Chapter 3: File Menu 5
Page 12

Send via DigiDelivery
Resolution Selects the bit depth. Choices are
24-bit, 16-bit, or 8-bit resolution.
This command is available when you purchase Pro Tools
M-Powered.
You can read more about this command on-screen by selecting this menu command. Be sure that the Help menu item Dis-
play M-Powered Information Dialogs is enabled (select that item
so that a checkmark appears next to it in the Help menu).
Send to Sibelius
This command is available when you purchase Pro Tools
M-Powered.
You can read more about this command on-screen by selecting this menu command. Be sure that the Help menu item Dis-
play M-Powered Information Dialogs is enabled (select that item
so that a checkmark appears next to it in the Help menu).
Bounce to Commands
The Bounce to commands let you mix tracks together into one
file.
Bounce to Disk
The Bounce to Disk command allows you to mix together the
outputs of all currently audible tracks routed to a common
output path to create a new audio file. You can use the Bounce
to Disk command to create a submix or to create a final mix in
any of several audio file formats.
For more information, see the Essential User Guide.
Bounce Source Selects the audio output path to bounce. Only
audio routed to the selected path will be included in the
bounce.
Sample Rate Selects the sample rate.
Whenever a Bounce to Disk is configured to a different file
type, file format, resolution, or sample rate, additional options become available to convert during or after the
bounce. See “Additional Bounce Options” on page 6 for
more information.
Import After Bounce Automatically imports the audio after it is
bo unced and adds it to the Region List so that it ca n be used in
the session.
The Import After Bounce option is only available if the target file type and sample rate for the bounce are the same as
the file type and sample rate of the current session, and the
target resolution (bit rate) is the same or lower than the resolution of the session. In addition, tracks bounced to a Stereo Interleaved file cannot be imported after a bounce.
Additional Bounce Options
The following Bounce options are only available when bouncing to a different file type, format, resolution, or sample rate.
Conversion Quality Selects the quality, with option ranging
from lowest to highest, when bouncing to a new sample rate.
Use Squeezer Optimizes the dynamics of the bounced audio
before conversion to 8-bit resolution.
Convert During Bounce Automatically performs file type, sample rate, and bit resolution conversion as the file is being
bounced.
Convert After Bounce Automatically performs file type, sample rate, and bit resolution conversion after the file has been
bounced.
Enforce Avid Compatibility Creates frame-accurate edits, wraps
the files as OMFI (unless File Type is MXF), and limits the sample rate options to 44.1 kHz or 48 kHz. Dithering without
noise shaping will be applied to files being exported from
24-bit to 16-bit.
File Type Selects the audio file type. Choices include BWF
(.WAV), AIFF, and MPEG-1 Layer 3 (MP3). Windows systems
also include Windows Media (Windows). Mac systems also include SD II and Sound Resource. Systems with the DigiTranslator™ option also support MXF audio files. Creating an MP3
requires the MP3 Option (not included). Certain file types are
restricted in regards to format, resolution, and sample rate.
Format Selects the channel format (number of channels).
Choices are mono (summed), multiple mono, or interleaved.
Essential Menus Guide6
Page 13

Import
Export
Pro Tools provides several menu commands to import files
and regions into an open session.
Import Session Data
This command is available when you purchase Pro Tools
M-Powered.
You can read more about this command on-screen by selecting this menu command. Be sure that the Help menu item Dis-
play M-Powered Information Dialogs is enabled (select that item
so that a checkmark appears next to it in the Help menu).
Import Audio
This command lets you import audio files into the current session. Audio files can be imported into a new track (and the Region List), or the Region List only.
Import MIDI
The Import MIDI command imports all tracks from a Standard
MIDI f il e int o Pro T oo ls . MID I files can be imported into a new
track (and the Region List) or the Region List only.
Options are provided for importing the Session Start or Song
Start Marker (if the marker is not located at the session start),
importing tempo map data contained in the sequence, and removing existing Instrument or MIDI tracks.
Import Video
Pro Tools provides several menu commands to export session
tracks or data as files.
Export MIDI
This command is available when you purchase Pro Tools
M-Powered.
You can read more about this command on-screen by selecting this menu command. Be sure that the Help menu item Dis-
play M-Powered Information Dialogs is enabled (select that item
so that a checkmark appears next to it in the Help menu).
Export Sibelius
This command is available when you purchase Pro Tools
M-Powered.
You can read more about this command on-screen by selecting this menu command. Be sure that the Help menu item Dis-
play M-Powered Information Dialogs is enabled (select that item
so that a checkmark appears next to it in the Help menu).
Exit
(Windows Only)
The Exit command ends your Pro Tools session and closes the
Pro Tools M-Powered application.
This command is available when you purchase Pro Tools
M-Powered.
You can read more about this command on-screen by selecting this menu command. Be sure that the Help menu item Dis-
play M-Powered Information Dialogs is enabled (select that item
so that a checkmark appears next to it in the Help menu).
Chapter 3: File Menu 7
Page 14

Essential Menus Guide8
Page 15

Chapter 4: Edit Menu
Edit menu commands are used to edit and manipulate the currently selected material in the timeline or the clipboard.
Restore Last Selection
If you lose the current Edit (or Timeline) selection and want to
restore it, use the Restore Last Selection command.
If no actions are available to restore, the menu displays a
grayed out Restore Last Selection.
Cut
This command cuts a selection out of its current location and
stores it in memory so that you can paste it elsewhere.
Copy
This command copies a selection (leaving the original intact)
and stores it in memory so that you can paste it elsewhere.
Edit Menu
Undo
The Undo command lets you sequentially undo up to 10 of
your previous actions. Certain commands and actions (such
as saving) are not undoable. The last command in the undo
queue will appear in the menu (for example, “Undo Paste”).
If no actions are available to undo, the menu displays a grayed
out Can’t Undo.
Redo
After undoing a command or action, you can redo it by choosing the Redo command. This is a good way to compare before
and after states of edits.
If no actions are available to redo, the menu displays a grayed
out Can’t Redo.
Paste
This command inserts cut or copied data into a location specified with an Edit tool (such as the Selector tool).
Clear
This command removes the contents within a selection in the
Edit window.
Select All
This command selects all audio and MIDI data in one or more
tracks.
To select all regions in a single track, select a portion of the
track, or click the Selector anywhere in a track and choose Select All.
To select all regions on multiple tracks, Shift-click a region
on each track with the Selector or Grabber and choose Select
All.
To select all regions on all tracks, Select the “All” Edit Group
in the Groups List, click the Selector anywhere in a track, and
choose Select All.
Chapter 4: Edit Menu 9
Page 16

Duplicate
Strip Silence
This command copies a selection and places it immediately after the end of that selection in a track.
Snap To
This command provides two options for “butt splicing” successive elements on a track.
Next Snaps a region (or Edit selection containing whole regions) to the beginning of the next region in a track.
Previous Snaps a region (or Edit selection containing whole regions) to the end of the preceding region
Separate Region
These commands separate a region from adjacent data in the
track where it was created. By separating a region you will also
create by-product regions from data on either side of the separation. The Separate Region commands automatically unloop and flatten looped regions before separating.
Separate Region includes the following commands:
At Selection This command creates new region boundaries at
the selection start and end points.
This command is available when you purchase Pro Tools
M-Powered.
You can read more about this command on-screen by selecting this menu command. Be sure that the Help menu item Dis-
play M-Powered Information Dialogs is enabled (select that item
so that a checkmark appears next to it in the Help menu).
Consolidate
This command consolidates multiple regions into a single region. When an audio track is consolidated, a new audio file is
written that encompasses the selection range, including any
blank space or fades.
Fades
These commands let you create (or delete) a crossfade between
two adjacent audio regions, or a fade-in or fade-out of a single
region. Crossfade duration, position, and shape are all selectable. A selection that crosses multiple regions will create crossfades for each of the region transitions. If a selection includes
regions that already contain crossfades, the existing crossfades
will be modified.
When separating regions that include fades, the status of the
fade depends on the Preserve Fades when Editing preference.
On Grid This command constrains newly created regions to
start and end on grid points.
Heal Separation
This command repairs separated regions, provided that the regions are contiguous and their relative start and end points
haven’t changed since they were originally separated. If you
have trimmed or changed the start and end points of the two
regions, or moved them away from each other, they cannot be
repaired with the Heal Separation command.
Mute/Unmute Region
This command is available when you purchase Pro Tools
M-Powered.
You can read more about this command on-screen by selecting this menu command. Be sure that the Help menu item Dis-
play M-Powered Information Dialogs is enabled (select that item
so that a checkmark appears next to it in the Help menu).
Fades dialog
Create The Create command produces a crossfade between adjacent regions according to parameters you specify with the
Fades editor.
Delete The Delete command removes a crossfade between adjacent regions.
Essential Menus Guide10
Page 17

Chapter 5: View Menu
View menu options and commands control the display of
Pro Tools windows, tracks, and track data. Some View menu
options toggle the display of various Pro Tools windows or
data: selecting the option displays the data, and deselecting
the option hides the data.
View Menu
Edit Window Views
These options selectively display the following views in the
Edit window:
• Comments
• Instruments
•Inserts A-C
•Sends A–E
•I/O
• Track Color
Rulers
These options selectively display various Timebase and Conductor rulers in the Edit window. In addition to providing a
timing reference for track material, Timebase rulers are used to
define Edit and Timeline selections.
Mix Window
These options selectively display the following views in the
Mix window:
•Instruments
•Inserts A-C
•Sends A–E
•Track Color
• Comments
Narrow Mix
This option reduces the width of Mix channels on-screen, allowing you to display the maximum number of tracks on your
computer monitor. In this view, track names, names of sends,
and plug-in names are abbreviated to accommodate the
smaller view. To return to normal view width, choose this
command again.
Besides selecting individual rulers, you can select All of the
rulers, or None of them.
Timebase Rulers
Any or all of the following Timebase rulers can be displayed at
the top of the Edit window:
• Bars:Beats
•Minutes:Seconds
Conductor Rulers
Any or all of the following Conductor rulers can be displayed:
•Markers
• Tempo (and Tempo Editor)
•Meter
The Tempo, Meter, Key Signature and Chord Symbols rulers
indicate changes in tempo, meter, key signature, and chords
within the session. The Markers ruler displays Markers to important track locations.
The Tempo Editor is an expansion of the Tempo ruler, opening in the rulers section of the Edit window.
Chapter 5: View Menu 11
Page 18

Other Displays
Wavefor ms
These options allow you to show or hide the Universe view,
the Track List, Regions List, or the MIDI Editor. A check mark
indicates an open display.
Universe The Universe view displays an overview of the entire
session, representing audio and MIDI material on all tracks
that are not hidden (including tracks that are inactive, or that
contain offline regions). The order in which material is displayed in the Universe view corresponds to the track order in
the Edit window.
In the Universe view, audio, MIDI, and video regions on tracks
are represented by horizontal lines that are the same colors as
the regions on the tracks. Additionally, each channel in a stereo or multichannel audio track is represented individually.
Regions List This option shows or hides the Regions List.
MIDI Editor This option opens a MIDI Editor docked within
the Edit window. This option appears grayed out if no MIDI
editor window is available.
Waveforms can be displayed normally (as positive and negative shapes around the zero crossing) or rectified. They can
also be calculated as Peak or Power whether displayed normally or rectified. Any waveform can have an Outline.
Peak When selected, the waveform display is calculated based
on the sample-by-sample peak level. Peak view is traditionally
how Pro Tools calculates the waveform overview and can be
used for normal or rectified views. Peak view clearly displays
any clipping in the waveform
Power When selected, the wave form display is calculated according to the Root Mean Square (RMS). Power view can be
used for normal or rectified views. When zoomed in to the
sample level, Pro Tools always displays Peak view, but Power
view is useful for better seeing the characteristics of the audio
in the waveform representation when zoomed out beyond the
sample level. For mastering applications in particular, it can
be more revealing of the sonic characteristics of the audio
than Peak view.
Rectified When selected, audio waveforms are displayed so
that their positive and negative waveform excursions (the portions that fall above and below the center line) are summed
together and viewed as a single positive-value signal. This
view allows more waveform detail to be seen in either normal
or reduced track height views. It can be particularly useful
when editing volume automation data, since it depicts waveform levels as starting at the bottom of the track. Rectified
Waveform view is an option that can be enabled in Peak or
Power views.
Outline When selected, audio waveforms are outlined.
Sends A–E
These options display either send assignments for all sends, or
the controls for individual sends (Sends A–E). Select Assignment to display all five of these send assignments.
Transpor t
These options selectively display Counters, MIDI Controls,
Synchronization, and Expanded controls in the Transport
window.
Essential Menus Guide12
Page 19

Chapter 6: Track Menu
Track menu commands are used to create, manage, and edit
tracks.
Track M enu
New Track
The New Track command lets you add one or more new audio
tracks, Auxiliary Inputs, Master Faders, MIDI or Instrument
tracks to a session.
Audio tracks, Auxiliary Inputs, and Master faders can be mono
or stereo.
Delete
This command removes selected tracks from a session. While
audio or MIDI region data will remain in the Region List, the
track and its arrangement of the regions on the deleted track
(the track’s playlist) will be lost.
Group
This command is available when you purchase Pro Tools
M-Powered.
You can read more about this command on-screen by selecting this menu command. Be sure that the Help menu item Dis-
play M-Powered Information Dialogs is enabled (select that item
so that a checkmark appears next to it in the Help menu).
Clear All Clip Indicators
This command clears all clip indication from all meters.
New Track dialog
Make Inactive or Make Active
This command is available when you purchase Pro Tools
M-Powered.
You can read more about this command on-screen by selecting this menu command. Be sure that the Help menu item Dis-
play M-Powered Information Dialogs is enabled (select that item
so that a checkmark appears next to it in the Help menu).
Create Click Track
This command lets you create one or more click tracks. Click
tracks are Auxiliary Input tracks with the Click plug-in already
inserted.
Chapter 6: Track Menu 13
Page 20

Essential Menus Guide14
Page 21

Chapter 7: Region Menu
Region menu commands are used to manage and edit regions.
Region Menu
Loop
The Loop command lets you loop audio, video, and MIDI regions so they repeat again and again while Pro Tools is in action playing back. Selecting one or more regions and choosing
Region > Loop displays the Loop dialog, where you can specify
how long you want the selection to loop. Similar to (but more
flexible than) the Edit > Duplicate command, the Loop dialog
automates all the copy/paste involved in
Unloop
The Unloop command lets you switch looped regions back to
standard (unlooped) regions so that they can be edited individually.
Edit Lock/Unlock Region
This command is available when you purchase Pro Tools
M-Powered.
You can read more about this command on-screen by selecting this menu command. Be sure that the Help menu item Dis-
play M-Powered Information Dialogs is enabled (select that item
so that a checkmark appears next to it in the Help menu).
Group
This command is available when you purchase Pro Tools
M-Powered.
You can read more about this command on-screen by selecting this menu command. Be sure that the Help menu item Dis-
play M-Powered Information Dialogs is enabled (select that item
so that a checkmark appears next to it in the Help menu).
Rename
This command lets you rename the selected region. When renaming a region that was auto-created during editing, the region becomes a user-defined region and is displayed in the Region List even when auto-created regions are hidden.
Quantize to Grid
This command adjusts the placement of a selected audio or
MIDI region in a track so that its start point (or Sync Point, if
it contains one) precisely aligns to the nearest Grid boundary.
Grid units are chosen from the Grid pop-up menu in the Edit
window.
Elastic Properties
This command is available when you purchase Pro Tools
M-Powered.
You can read more about this command on-screen by selecting this menu command. Be sure that the Help menu item Dis-
play M-Powered Information Dialogs is enabled (select that item
so that a checkmark appears next to it in the Help menu).
Chapter 7: Region Menu 15
Page 22

Conform to Tempo
This command lets you conform regions on Elastic Audio–enabled tracks (both sample- and tick-based) to the session
tempo. If necessary, the Conform to Tempo command analyzes the selected region to determine its tempo and duration
(in bars and beats), and then applies Elastic Audio processing
to conform the region to match the session tempo.
Remove Warp
This command removes warping applied to a region, but
leaves underlying Warp markers intact. This feature will only
remove warping created by Warp markers (that is, warping
caused by quantization or tempo mapping). This can be useful
if you are not satisfied with the results and want to revert to
the pre-warped region. (For information on working with
Warp markers, see the Pro Tools Reference Guide.)
Remove Pitch Shift
This command removes pitch shifts applied to Elastic Audio–enabled regions using the Pitch Shift option in the Elastic
Properties dialog.
Essential Menus Guide16
Page 23

Chapter 8: Event Menu
The Event menu contains commands for editing audio and
MIDI events.
Ev
Event Menu
Event Operations
Pro Tools provides several commands for changing event data
over a range of time (or measures). The Event Operations commands include:
Event Operations Window
The Event Operations window provides commands to transform groups of MIDI notes to affect pitch, timing, and phrasing. The Quantize and Restore Performance Event Operations
can also be applied to audio region start times (or sync points)
or Elastic Audio events.
• Quantize
• Transpose
Quantize
This command lets you adjust the placement of selected MIDI
or audio events in a track using Grid Quantize.
Event Operations window, Quantize page
Grid Quantize lets you adjust the placement of selected MIDI
events, Elastic Audio events, or audio regions in a track so that
their start or end points precisely align to the quantization
value chosen.
Chapter 8: Event Menu 17
Page 24

Transpose
This command transposes selected MIDI notes in key up or
down by scale steps.
Event Operations window, Transpose page
Step Input
This command is available when you purchase Pro Tools
M-Powered.
You can read more about this command on-screen by selecting this menu command. Be sure that the Help menu item Dis-
play M-Powered Information Dialogs is enabled (select that item
so that a checkmark appears next to it in the Help menu).
Identify Beat
This command lets you establish a tempo/meter map for audio that was recorded without listening to a click, or for imported audio with unknown tempos.
Identify Beat dialog
The Identify Beat command analyzes a selection range (usually with a distinct number of beats or measures) and calculates its tempo based on the specified meter. In doing this,
Bar|Beat markers for the calculated tempo are inserted and appear in the Tempo Ruler at the beginning and end of the selection. in addition, meter events are inserted into the Meter
Ruler.
Beat Detective
MIDI Real-Time Properties
This command opens the Real-Time Properties window. This
window lets you adjust and apply MIDI quantization, duration, delay, velocity, and transposition parameters during
playback.
MIDI Real-Time Properties window
This command is available when you purchase Pro Tools
M-Powered.
You can read more about this command on-screen by selecting this menu command. Be sure that the Help menu item Dis-
play M-Powered Information Dialogs is enabled (select that item
so that a checkmark appears next to it in the Help menu).
This command opens the Beat Detective window. Beat Detective automatically detects the tempo of a session and conforms an audio track or selection to that tempo by separating
it into regions and aligning it to the beats. Beat Detective is
ideal for tailoring a performance to a groove.
This command is available when you purchase Pro Tools
M-Powered.
You can read more about this command on-screen by selecting this menu command. Be sure that the Help menu item Dis-
play M-Powered Information Dialogs is enabled (select that item
so that a checkmark appears next to it in the Help menu).
Beat Detective window
All MIDI Notes Off
This command sends an All Notes Off MIDI message to all
MIDI devices connected to your system to silence any stuck
notes.
Essential Menus Guide18
Page 25

Chapter 9: AudioSuite Menu
The AudioSuite™ menu allows you to access all AudioSuite
plug-ins provided in Pro Tools M-Powered Essential. AudioSuite plug-ins are non-real-time, file-based processing plug-ins
for Pro Tools.
AudioSuite Menu
For more information about file-based processing, and for
details on each of the AudioSuite plug-ins, refer to the
Essential Plug-ins Guide.
Dynamics Plug-ins
Compressor/Limiter III
The Compressor/Limiter III plug-in applies either compression or limiting to audio material, depending on the ratio of
compression used.
The Compressor reduces the dynamic range of signals that exceed a selected threshold by a specific amount.
The Limiter is used to prevent signal peaks from ever exceeding a chosen level so that they do not overload amplifiers or
recording devices.
De-Esser III
The De-Esser reduces sibilants and other high frequency
noises that can occur in vocals, voice-overs, and wind instruments such as flutes. These sounds can cause peaks in an audio
signal and lead to distortion.
EQ Plug-ins
1 Band, and 7 Band EQ III
The EQ III plug-ins adjust the frequency spectrum of an audio
selection. These plug-ins are flexible EQ types for maximum
CPU and DSP efficiency.
On the 1 Band EQ, the EQ Type selector lets you choose any
one of six available filter types: High-Pass, Notch, High-Shelf,
Low-Shelf, Peak, and Low-Pass.
On the 7 Band EQ and the 2–4 Band EQ, t he HPF, LPF , LF , and
HF sections have EQ Type selectors to toggle between the two
available filter types in each section.
The DeEsser reduces these unwanted sounds using fast-acting
compression. A Threshold control sets the level above which
compression starts, and a Frequency control sets the frequency band in which the DeEsser operates.
Expander/Gate III
The Expander/Gate III plug-in applies expansion or gating to
audio material, depending on the ratio setting.
The Expander/Gate plug-in is useful for reducing noise or signal leakage that creeps into recorded material as its level falls,
as often occurs in the case of headphone leakage.
Reverb Plug-ins
D-Verb
D-Verb is a studio-quality reverb. Reverberation processing
can simulate the complex natural reflections and echoes that
occur after a sound has been produced, imparting a sense of
an acoustic environment. D-Verb artificially creates a sound
space with a specific acoustic character.
Chapter 9: AudioSuite Menu 19
Page 26

Delay Plug-ins
Modulation Plug-ins
Delay
The Delay plug-in provides time delay-based effects, with up
to 10.9 seconds of delay (regardless of the sample rate). In addition to long delays, you can create many delay-based effects
with this plug-in, including slap echo, doubling, chorusing,
and flanging.
Multi-Tap Delay
The Multi-Tap Delay plug-in adds up to four independently-controllable delays or taps to the original audio signal.
By allowing you to individually control the delay time and
number of repetitions of each of the four taps, the Multi-Tap
delay provides greater flexibility than standard single-delay
devices.
Ping-Pong Delay
The Ping-Pong Delay plug-in modifies an audio signal by adding a controllable delay to the original signal. It is ideal for
adding spatialization, and when used in stereo, adds panned
echo to virtually any instrument. In stereo mode, this plug-in
will feed back delayed signals to their opposite channels, creating a characteristic ping-pong echo effect.
Chorus
The Chorus plug-in modifies an audio signal by combining a
time-delayed, pitch-shifted copy with the original signal. It is
ideal for thickening and adding a shimmering quality to guitars, keyboards, and other instruments.
Flanger
The Flanger plug-in combines a time-delayed, pitch shifted
copy of an audio signal with itself. The Flanger differs from
other digital flangers in that it uses a thru-zero flanging algorithm that results in a truer tape-like flange. This technique
delays the original dry signal very slightly (approximately 256
samples), then modulates the delayed signal back and forth in
time in relation to the dry signal, passing through its zero
point on the way.\
Other Plug-ins
The Other Plug-in category includes plug-ins that do not fit
into a standard category, or third party plug-ins that have not
had a category designated to them by their manufacturer.
Reverse
The Reverse plug-in rewrites the currently selected region in
reverse, producing a backwards audio effect.
Essential Menus Guide20
Page 27

Chapter 10: Options Menu
The Options menu commands let you select several editing,
recording, monitoring, playback, and display options.
Options Menu
Loop Record
Pre/Post-Roll
This option enables pre- and post-roll playback, which let you
have Pro Tools “back up” a bit before the current play/edit
point (Pre-roll) or “keep going” for a bit after the current
play/edit point (Post-roll). Pre- and post-roll amounts can be
entered in the Transport window, set from a track’s playlist or
Timebase Ruler, or by recalling a Memory Location.
QuickPunch
This command is available when you purchase Pro Tools
M-Powered.
You can read more about this command on-screen by selecting this menu command. Be sure that the Help menu item Dis-
play M-Powered Information Dialogs is enabled (select that item
so that a checkmark appears next to it in the Help menu).
Loop Record lets you record take after take while the same section of audio repeats. This is a convenient technique for
quickly recording multiple takes of a part without losing spontaneity.
The time range that is looped and recorded—which must be at
least one second in length—is defined by selecting a range in
the Ruler or in a track’s playlist, or by specifying start and end
points in the Transport window.
Loop Playback
This option continuously loops playback of a selection until
you stop playback. Looping playback is a useful way to check
the rhythmic continuity of a selection when working with
musical material. Selections must be at least 0.5 seconds in
length to use Loop Playback.
Dynamic Transport Mode
This mode lets you decouple the playback start location from
the Timeline selection. This means that you can start playback
from anywhere on the Timeline without losing your Timeline
or Edit selections.
Transport Online
This command is available when you purchase Pro Tools
M-Powered.
You can read more about this command on-screen by selecting this menu command. Be sure that the Help menu item Dis-
play M-Powered Information Dialogs is enabled (select that item
so that a checkmark appears next to it in the Help menu).
Click
When the Click command is enabled, a metronome event is
generated during playback and recording. The metronome
can trigger an external MIDI device (as specified by the Output
setting in the Click/Countoff Options dialog) or the DigiRack
Click TDM or RTAS
®
plug-in (see the DigiRack Plug-ins Guide).
Chapter 10: Options Menu 21
Page 28

MIDI Thru
Enabling the MIDI Thru command routes MIDI from your
controllers to the devices and channels assigned to the MIDI
track currently record-enabled. This allows you to monitor
MIDI tracks while recording.
Essential Menus Guide22
Page 29

Chapter 11: Setup Menu
This menu provides commands to open dialogs and windows
for configuring various Pro Tools hardware and software parameters.
Setup Menu
Peripherals
This command is available when you purchase Pro Tools
M-Powered.
You can read more about this command on-screen by selecting this menu command. Be sure that the Help menu item Dis-
play M-Powered Information Dialogs is enabled (select that item
so that a checkmark appears next to it in the Help menu).
I/O
This I/O Setup dialog provides tools to label and map
Pro Tools input, output, and bus signal paths. The I/O Setup
dialog also lets you configure delay compensation for hardware inserts.
Hardware
The Hardware Setup dialog lets you specify settings for your
hardware and sessions. Configure the settings for any audio
interface connected to your system by selecting it from the Peripherals list.
Refer to the Pro Tools M-Powered Essential Guide for more information.
Playback Engine
This Playback Engine lets you set a hardware buffer size, define
the RTAS Processors allocation on multi-processor computers,
allocate a percentage of CPU resources for these tasks, and
configure host error reporting for playback and recording.
MIDI
MIDI Studio
This command is available when you purchase Pro Tools
M-Powered.
You can read more about this command on-screen by selecting this menu command. Be sure that the Help menu item Dis-
play M-Powered Information Dialogs is enabled (select that item
so that a checkmark appears next to it in the Help menu).
MIDI Beat Clock
This command lets you enable synchronization for certain
MIDI devices (such as drum machines, software synthesizers,
and hardware sequencers) to MIDI Beat Clock. Devices selected in the MIDI Beat Clock dialog will receive the MIDI Beat
Clock signal. If your MIDI interface does not support transmitting MIDI Beat Clock to separate ports, the interface will appear as the only destination.
Chapter 11: Setup Menu 23
Page 30

Click/Countoff
This command lets you configure metronome parameters
such as MIDI note, velocity, duration, and output. If you are
using the Click plug-in, set the output to None.
Click/Countoff Options dialog
Preferences
This command is available when you purchase Pro Tools
M-Powered.
You can read more about this command on-screen by selecting this menu command. Be sure that the Help menu item Dis-
play M-Powered Information Dialogs is enabled (select that item
so that a checkmark appears next to it in the Help menu).
Essential Menus Guide24
Page 31

Chapter 12: Window Menu
The Window menu provides commands to toggle the display
of various Pro Tools windows: selecting the command displays the window; selecting the command again hides the
window.
Window Menu
Arrange
The Arrange commands tile or cascade all open windows.
Floating windows (such as plug-in, output, and send windows) and the Transport window are not affected by these
commands.
Tile Arranges all open windows in a tiled pattern on the
screen.
Tile Horizontal Arranges all open windows in a horizontally-tiled pattern on the screen. This option is not available if
there are too many windows open.
Tile Vertical Arranges all open windows in a vertically-tiled
pattern, side by side, on the screen. This option is not available if there are too many windows open.
Cascade Arranges all open windows in a cascading pattern on
the screen.
For Window menu items, keyboard shortcuts with number
keys only work using the numeric keypad on your computer.
Configurations
The Configurations menu provides commands and options to
manage the configuration of windows in your session, as well
as the internal window configurations of the Edit, Mix, Transport, MIDI Editor, and Score Editor windows.
New Configuration
This command is available when you purchase Pro Tools
M-Powered.
You can read more about this command on-screen by selecting this menu command. Be sure that the Help menu item Dis-
play M-Powered Information Dialogs is enabled (select that item
so that a checkmark appears next to it in the Help menu).
Close Window
Closes the currently targeted window.
Mix
This command displays the Mix window, used for recording
and mixing tasks.
Edit
This command displays the Edit window, used for graphical
editing and arranging of audio, MIDI and automation.
Score Editor
This command is available when you purchase Pro Tools
M-Powered.
You can read more about this command on-screen by selecting this menu command. Be sure that the Help menu item Dis-
play M-Powered Information Dialogs is enabled (select that item
so that a checkmark appears next to it in the Help menu).
Chapter 12: Window Menu 25
Page 32

Task Manager
Memory Locations
This command displays the Task Window, used to monitor,
pause, or cancel ongoing processing tasks. If you think your
computer is slowing down, check the Task Manager; it may
show that your computer is merely busy trying to convert an
audio file or calculate fades in the background, as would be
shown in the Task Manager
Workspace
This command displays the Workspace browser, which can be
used for searching, sorting, auditioning, and importing data.
Transpor t
This command opens the Transport window. This window
can display counters, MIDI controls, and basic or expanded
transport controls (configure the Transport window from
View > Transport).
Transp or t window
This command opens the Memory Locations window. Here
you can store up to 200 time location markers, selections,
zoom settings, pre- and post-roll times, track show and hide
states, track height states, and group enables. To recall a memory location, click the button for the location or, on your computer’s numeric keypad, press the number of the location followed by a period (.).
Memory Locations window
System Usage
This command opens the System Usage window. This window
provide meters that indicate how much of your system’s processing power is being used in processing audio, and when
writing and playing back automation.
There are four system activity meters:
•PCI
•CPU (RTAS
• CPU (Elastic)
•Disk
System Usage window (Pro Tools HD shown)
For information on these indicators, see the Pro Tools Reference
Guide.
Essential Menus Guide26
Page 33

Chapter 13: Help Menu
The Help menu commands provide links to important
Pro Tools documentation, including Intro to Pro Tools
M-Powered Essential, Pro Tools M-Powered Essential User Guide,
and Pro Tools M-Powered Essential Plug-ins Guide, as well as
other guides for menus and shortcuts (with your keyboard or
mouse Right-click button).
Select the title of the document from the Pro Tools menu to
open the document in Adobe Reader (available from
www.adobe.com).
Check For Updates
This command allows you to check for Pro Tools M-Powered
Essential application and Digidesign plug-in updates, either
automatically or manually. An internet connection is required
to be able to check for updates.
If updates are available for Pro Tools or any plug-ins, you are
notified about what is available and how important the updates are for your system. You can then visit the Digidesign
website to locate, download, and install the appropriate updates for your Pro Tools system.
Display M-Powered Information Dialogs
This command enables the icons and information dialogs for
various commands within Pro Tools M-Powered Essential.
Help Menu
About Pro Tools M-Powered Essential
(Windows Only)
The About Pro Tools command launches the Pro Tools banner, which includes the version number of your Pro Tools
software.
Chapter 13: Help Menu 27
Page 34

Essential Menus Guide28
Page 35

Chapter 14: Region List
Region List
The Edit Window displays all audio regions, MIDI regions,
video regions, and region groups in a single, comprehensive
Region List.
The pop-up menu at the top of the Region List provides menu
commands and tools to clear and rename items in the list.
Region List Menu
Clear
This command lets you remove unwanted regions from the
session. Whole-file regions can also be removed permanently
from your hard drive.
Clearing whole-file regions is destructive and cannot be
undone. It permanently removes the file from your hard
drive. There is no way to recover files deleted with this
command.
Rename
This command lets you rename selected regions.
When you rename a whole-file audio region, you can specify
whether to rename just the region, or both the region and the
disk file.
Recalculate Waveform Overviews
This command re-creates the session’s waveform overview
data (the data used to create waveform displays). Use this command if you think overview data for a session has become corrupted, or if you import audio files which have no overview
data into a session.
Recalculating waveform overviews may take some time if
there are many tracks in the session.
Chapter 14: Region List 29
Page 36

Essential Menus Guide30
Page 37

index
Numerics
1-Band EQ plug-in 19
2–4 Band EQ plug-in 19
7 Band EQ plug-in 19
A
About Pro Tools command 3, 27
All MIDI Notes Off command 18
Assignment View option 12
AudioSuite menu 19
Delay plug-ins 20
Dynamics plug-ins 19
EQ plug-ins 19
Modulation plug-ins 20
Reverb plug-ins 19
B
Beat Detective command 18
Bounce options
Conversion Quality 6
Convert After Bounce 6
Convert During Bounce 6
Enforce Avid Compatibility 6
File Type 6
Format 6
Import After Bounce 6
Resolution 6
Sample Rate 6
Source 6
Use Squeezer 6
Bounce to Disk command 6
C
Chorus plug-in 20
Clear All Clip Indicators 13
Clear command 9
Clear Region List command 29
Clear Trim Automation command 13
Click Setup command 24
Click/Countoff Options command 21
Close Session command 5
Compressor plug-in 19
Conductor rulers 11
Consolidate command 10
Conversion Quality option 6
Convert After Bounce option 6
Convert During Bounce option 6
Copy command 9
Counters Transport view option 12
Create Click Track command 13
Create Fades command 10
Cut command 9
D
Delay plug-ins
Delay 20
Multi-Tap Delay 20
Ping-Pong Delay 20
Delete Fades command 10
Delete Tracks command 13
DigiRack Delay plug-in 20
Display menu
Narrow Mix window option 11
Duplicate command 10
D-Verb 19
Dynamic Transport Mode 21
Dynamics plug-ins
Compressor III 19
Expander-Gate 19
Limiter plug-in 19
E
Edit menu 9
Clear command 9
Consolidate command 10
Copy command 9
Cut command 9
Duplicate command 10
Fades commands 10
Heal Separation command 10
Paste command 9
Redo command 9
Select All command 9
Separate Region commands 10
Snap To commands 10
Undo command 9
Edit window
Universe view 12
Edit Window command 25
Edit Window view options 11
EQ III plug-ins 19
Event menu
All MIDI Notes Off command 18
Beat Detective command 18
Event Operations commands 17
Identify Beat command 18
MIDI Real-Time Properties command 18
Event Operations commands 17
Quantize 17
Transpose 18
Exit command 7
Expanded Transport view option 12
Expander-Gate plug-in 19
Export commands 7
F
Fades commands 10
Create 10
Delete 10
File menu 5
Bounce to commands 6
Close Session command 5
Exit command 7
Export commands 7
Import Audio command 7
Import MIDI command 7
New Session command 5
Open Session command 5
Revert to Saved command 5
Save As command 5
Save command 5
Flanger plug-in 20
G
Group Region command 15
H
Hardware Setup dialog 23
Heal Separation command 10
Help menu
Pro Tools documentation 27
Hide Others command 3
Hide Pro Tools command 3
Index 31
Page 38

I
I/O Setup dialog 23
Identify Beat command 18
Import Audio command 7
Import commands 7
Import MIDI command 7
Reverse plug-in 20
Revert to Saved command 5
rulers
Conductor rulers 11
Timebase rulers 11
Rulers view options 11
L
Limiter plug-in 19
Loop Playback option 21
Loop Record mode 21
Loop Region command 15
M
Memory Locations Window command 26
MIDI Beat Clock command 23
MIDI Controls Transport view option 12
MIDI Real-Time Properties command 18
MIDI Setup commands
MIDI Beat Clock 23
MIDI Thru command 22
Mix Window command 25
Mix Window view options 11
Modulation plug-ins 20
Chorus 20
Flanger 20
Multi-Tap Delay plug-in 20
N
Narrow Mix window option 11
New Session command 5
New Track command 13
O
Open Session command 5
Options menu
Click/Countoff command 21
Dynamic Transport Mode 21
Loop Playback option 21
Loop Record mode 21
MIDI Thru command 22
Pre/Post Roll option 21
Other plug-ins
Reverse plug-in 20
P
Paste command 9
Peripherals dialog
Synchronization page 23
Ping-Pong Delay plug-in 20
Playback Engine dialog 23
Pre/Post Roll option 21
Pro Tools documentation 27
Pro Tools menu 3
About Pro Tools command 3, 27
Hide Others command 3
Hide Pro Tools command 3
Quit Pro Tools command 3
Services command 3
Show All command 3
Q
Quantize command 17
Quantize to Grid command 15
Quit Pro Tools command 3
R
Recalculate Waveform Overviews command 29
Redo command 9
Region List menu 29
Clear command 29
Recalculate Waveform Overviews command 29
Rename command 29
Region menu 15
Group command 15
Loop command 15
Quantize to Grid command 15
Unloop command 15
Rename Region List command 29
Restore Last Selection command 9
Essential Menus Guide32
S
Save As command 5
Save command 5
Select All command 9
Sends A–E view options 12
Separate Region commands 10
At Selection 10
On Grid 10
Services command 3
Setup menu 23
Click command 24
Hardware Setup dialog 23
I/O dialog 23
Playback Engine dialog 23
Show All command 3
sibilants 19
Snap To commands 10
Next 10
Previous 10
Synchronization page 23
System Usage Window command 26
T
Task Manager Window command 26
Timebase rulers 11
Track menu
Clear All Clip Indicators command 13
Clear Trim Automation 13
Create Click Track 13
Delete command 13
New Track command 13
Transport view options 12
Transport Window command 26
Transpose command 18
U
Undo command 9
Universe window 12
Unloop Region command 15
Use Squeezer option 6
V
View menu 11
Edit Window view options 11
Mix Window view options 11
Rulers view options 11
Sends A–E view options 12
Transport view options 12
Waveform view options 12
W
Waveform view options
Outline views 12
Peak view 12
Power view 12
Rectified view 12
Window menu 25
Edit command 25
Memory Locations command 26
Mix command 25
System Usage command 26
Task Manager command 26
Transport command 26
Workspace command 26
Workspace browser 26
Workspace Window command 26
Page 39

www.digidesign.com
DIGIDESIGN
2001 Junipero Serra Boulevard
Daly City, CA 94014-3886 USA
TECHNICAL SUPPORT (USA)
Visit the Digidesign Online Support Center
at www.digidesign.com/support
PRODUCT INFORMATION
For company and product information,
visit us on the web at www.digidesign.com
 Loading...