

Page 1

Upgrading to Pro Tools LE 8.0
Version 8.0
Page 2

Legal Notices
This guide is copyrighted ©2008 by Digidesign, a division of
Avid Technology, Inc. (hereafter “Digidesign”), with all rights
reserved. Under copyright laws, this guide may not be
duplicated in whole or in part without the written consent of
Digidesign.
003, 96 I/O, 96i I/O, 192 Digital I/O, 192 I/O, 888|24 I/O,
882|20 I/O, 1622 I/O, 24-Bit ADAT Bridge I/O, AudioSuite,
Avid, Avid DNA, Avid Mojo, Avid Unity, Avid Unity ISIS,
Avid Xpress, AVoption, Axiom, Beat Detective, Bomb Factory,
Bruno, C|24, Command|8, Control|24, D-Command, D-Control,
D-Fi, D-fx, D-Show, D-Verb, DAE, Digi 002, DigiBase,
DigiDelivery, Digidesign, Digidesign Audio Engine, Digidesign
Intelligent Noise Reduction, Digidesign TDM Bus, DigiDrive,
DigiRack, DigiTest, DigiTranslator, DINR, D-Show, DV Toolkit,
EditPack, Eleven, HD Core, HD Process, Hybrid, Impact,
Interplay, LoFi, M-Audio, MachineControl, Maxim, Mbox,
MediaComposer, MIDI I/O, MIX, MultiShell, Nitris, OMF,
OMF Interchange, PRE, ProControl, Pro Tools M-Powered,
Pro Tools, Pro Tools|HD, Pro Tools LE, QuickPunch, Recti-Fi,
Reel Tape, Reso, Reverb One, ReVibe, RTAS, Sibelius,
Smack!, SoundReplacer, Sound Designer II, Strike, Structure,
SYNC HD, SYNC I/O, Synchronic, TL Aggro, TL AutoPan, TL
Drum Rehab, TL Everyphase, TL Fauxlder, TL In Tune, TL
MasterMeter, TL Metro, TL Space, TL Utilities, Transfuser,
Trillium Lane Labs, Vari-Fi Velvet, X-Form, and XMON are
trademarks or registered trademarks of Digidesign and/or Avid
Technology, Inc. Xpand! is Registered in the U.S. Patent and
Trademark Office. All other trademarks are the property of their
respective owners.
Product features, specifications, system requirements, and
availability are subject to change without notice.
Guide Part Number 9329-60789-00 REV A 11/08
Documentation Feedback
At Digidesign, we're always looking for ways to improve our
documentation. If you have comments, corrections, or
suggestions regarding our documentation, email us at
techpubs@digidesign.com.
Page 3

contents
Chapter 1. Introduction . . . . . . . . . . . . . . . . . . . . . . . . . . . . . . . . . . . . . . . . . . . . . . . . . . . . . . 1
System Requirements and Compatibility Information . . . . . . . . . . . . . . . . . . . . . . . . . . . . . . . 1
Chapter 2. Installing Pro Tools on Mac . . . . . . . . . . . . . . . . . . . . . . . . . . . . . . . . . . . . . . . . 3
Installation Overview . . . . . . . . . . . . . . . . . . . . . . . . . . . . . . . . . . . . . . . . . . . . . . . . . . . . . . 3
Authorizing Pro Tools Upgrades . . . . . . . . . . . . . . . . . . . . . . . . . . . . . . . . . . . . . . . . . . . . . . 4
Installing Pro Tools LE Software . . . . . . . . . . . . . . . . . . . . . . . . . . . . . . . . . . . . . . . . . . . . . . 4
Launching Pro Tools LE . . . . . . . . . . . . . . . . . . . . . . . . . . . . . . . . . . . . . . . . . . . . . . . . . . . . 5
Configuring Pro Tools. . . . . . . . . . . . . . . . . . . . . . . . . . . . . . . . . . . . . . . . . . . . . . . . . . . . . . 6
Additional Software on the Pro Tools Installer Disc . . . . . . . . . . . . . . . . . . . . . . . . . . . . . . . . . 6
Uninstalling Pro Tools . . . . . . . . . . . . . . . . . . . . . . . . . . . . . . . . . . . . . . . . . . . . . . . . . . . . . 8
Chapter 3. Installing Pro Tools on Windows . . . . . . . . . . . . . . . . . . . . . . . . . . . . . . . . . . . . 9
Installation Overview . . . . . . . . . . . . . . . . . . . . . . . . . . . . . . . . . . . . . . . . . . . . . . . . . . . . . . 9
Authorizing Pro Tools Upgrades . . . . . . . . . . . . . . . . . . . . . . . . . . . . . . . . . . . . . . . . . . . . . 10
Installing Pro Tools LE Software . . . . . . . . . . . . . . . . . . . . . . . . . . . . . . . . . . . . . . . . . . . . . 10
Installing QuickTime . . . . . . . . . . . . . . . . . . . . . . . . . . . . . . . . . . . . . . . . . . . . . . . . . . . . . 11
Launching Pro Tools LE Software . . . . . . . . . . . . . . . . . . . . . . . . . . . . . . . . . . . . . . . . . . . . 12
Configuring Your System for Improved Performance . . . . . . . . . . . . . . . . . . . . . . . . . . . . . . . 12
Additional Software on the Pro Tools Installer Disc . . . . . . . . . . . . . . . . . . . . . . . . . . . . . . . . 13
Uninstalling Pro Tools . . . . . . . . . . . . . . . . . . . . . . . . . . . . . . . . . . . . . . . . . . . . . . . . . . . . 15
Appendix A. Noting Your Preferences. . . . . . . . . . . . . . . . . . . . . . . . . . . . . . . . . . . . . . . . . 17
Taking Screenshots of Your Preferences Pages . . . . . . . . . . . . . . . . . . . . . . . . . . . . . . . . . . 17
Preferences Tables . . . . . . . . . . . . . . . . . . . . . . . . . . . . . . . . . . . . . . . . . . . . . . . . . . . . . . 19
Contents iii
Page 4

Upgrading to Pro Tools LE 8.0iv
Page 5

chapter 1
Introduction
This guide documents how to upgrade to
Pro Tools
Digidesign
puter.
®
8.0 for Pro Tools LE™ systems on a
®
-qualified Windows or Mac com-
If you are installing Pro Tools on a Mac
computer, see Chapter 2, “Installing
Pro Tools on Mac.”
If you are installing Pro Tools on a Windows computer, see Chapter 3, “Installing
Pro Tools on Windows.”
Before installing this version of Pro Tools,
refer to the Read Me information included
on the Pro Tools Installer disc.
If you are configuring a new Pro Tools system, follow the complete hardware and software installation steps in the
that came with your system.
Setup Guide
System Requirements and Compatibility Information
Pro Tools LE software can be used on a
Pro Tools LE system on a Digidesign-qualified
Windows or Mac computer.
Digidesign can only assure compatibility and
provide support for hardware and software it has
tested and approved.
For complete system requirements and a list of
Digidesign-qualified computers, operating systems, hard drives, and third-party devices, refer
to the latest information on the Digidesign website:
www.digidesign.com/compatibility
Internet Access
Upgrading to any version of Pro Tools requires
access to the Internet for software activation and
registration purposes.
DVD Drive
The Pro Tools Installer disc requires a DVD drive
for installation.
Chapter 1: Introduction 1
Page 6

Upgrading to Pro Tools LE 8.02
Page 7

chapter 2
Installing Pro Tools on Mac
This chapter explains how to install and configure Pro Tools for Pro Tools LE systems on a
Digidesign-qualified Mac computer.
If you are installing Pro Tools on a Windows computer, see Chapter 3, “Installing
Pro Tools on Windows.”
For complete system requirements and compatibility information, visit the Digidesign website
(www.digidesign.com/compatibility).
Before You Upgrade
Retaining Your Pro Tools Preferences
When you upgrade your Pro Tools LE software,
Pro Tools Preferences settings are reset to their
default settings. These default settings may differ from your previous settings. Therefore, you
may want to note your current Preferences settings before upgrading. See for tips on noting
your current Pro Tools Preferences settings.
Read Mes
Before installing this version of Pro Tools, refer
to the Read Me information included on the
Pro Tools Installer disc.
Important Information about Structure and
Xpand! Plug-ins
If the full version of Structure® or Str u cture L E is
already installed on your system, Structure Free
will not be installed.
If Xpand!
installing Xpand!
Xpand! presets are copied to the Xpand!
Presets folder and will be available in Xpand!
®
is already installed on your system,
2
will overwrite Xpand! All
2
Plug-in
2
Installation Overview
Installation of Pro Tools software on a Mac computer includes the following steps:
1 Authorizing Pro Tools software. See “Autho-
rizing Pro Tools Upgrades” on page 4.
2 Installing Pro Tools LE software. See “Install-
ing Pro Tools LE Software” on page 4.
3 Launching Pro Tools. See “Launching
Pro Tools LE” on page 5.
4 Configuring your system for improved perfor-
mance. (See your system’s Setup Guide.)
.
Chapter 2: Installing Pro Tools on Mac 3
Page 8

Authorizing Pro Tools Upgrades
Before you install your Pro Tools upgrade, you
must first authorize it. The process for getting
authorization depends on how you purchased
it.
If you purchased a software upgrade online,
follow the instructions provided online.
If you purchased a boxed Pro Tools software
upgrade, you need to authorize the software using an Activation Code (located on the Activation Card). See “Authorizing Boxed Pro Tools LE
Upgrades” on page 4.
Authorizing Boxed Pro Tools LE
Upgrades
3 After you are logged in, take note of your
Pro Tools LE Authorization Code. You will need
this code the first time you launch your software
upgrade.
Your Authorization Code will be stored in
your My Digi account.
4 Proceed to “Installing Pro Tools LE Software”
on page 4.
Installing Pro Tools LE Software
(003®, 003 Rack, 003 Rack+, Digi 002®,
®
Digi 002 Rack, Mbox
Mbox 2 Mini, Mbox 2 Micro, and Mbox
Systems Only)
2 Pro, Mbox 2,
The authorization procedure on the Activation
Card will help you go online and retrieve the
Authorization Code required to launch
Pro Tools following software installation.
If you have not already completed authorizing
your software by following the instructions on
the Activation Card, complete the following
steps for your Pro Tools system.
To authorize a boxed Pro Tools LE upgrade using
an Activation Code:
1 Locate the enclosed Activation Card. The
unique code on this card will allow you to retrieve your Authorization Code.
2 Visit www.digidesign.com/activation, enter
your activation code, and click Continue. If
you’re not already logged in to your Digidesign
(My Digi) account, you will be asked to log in using the email address you used to set up the account. If you don’t already have an account,
click Create Profile to create one.
To install Pro Tools LE on Mac OS X:
1 Make sure you are logged in as an Administra-
tor for the account where you want to install
Pro Tools. For details on Administrator privileges in Mac OS X, refer to your Apple Mac OS X
documentation.
2 Do one of the following:
• If you purchased a software upgrade online,
follow the instructions provided with it to expand and launch the installer.
– or –
• If you purchased a boxed version Pro Tools
upgrade, do all of the following:
• Insert the Pro Tools Installer disc for Windows in your DVD drive.
• Locate and double-click the Install
Pro Tools LE.mpkg file.
3 Follow the on-screen instructions to proceed
with installation.
Upgrading to Pro Tools LE 8.04
Page 9
4 When prompted to select features to install,
leave the default options selected.
• Locate and double-click the Pro Tools LE
application on your hard drive.
5 You can also select from a list of optional
items to install along with Pro Tools:
®
Avid
Video Engine The Avid Video Engine is required to use Pro Tools with Avid video peripherals such as the Avid Mojo or the Digidesign
AVoption|V10.
MIDI I/O™ Driver The MIDI I/O Driver is required if you are using the Digidesign MIDI I/O.
The Pro Tools Installer disc includes additional software for your system. For more information, see “Additional Software on the
Pro Tools Installer Disc” on page 6.
6 Click Install.
7 If prompted, enter your Administrator pass-
word and click OK to authenticate the installation.
8 Follow the remaining on-screen instructions.
9 When installation is complete, click Restart.
If you get a warning dialog about updating
the firmware for your hardware, follow the
on-screen instructions to perform the
firmware update.
3 Enter the Authorization Code in the dialog
when prompted (making sure to type it exactly
as printed, and observing any spaces and capitalization).
4 Click Validate.
All letters are case sensitive. All “0” characters are zeros. You must include both
spaces. The spaces separate 3 sets of 8 characters.
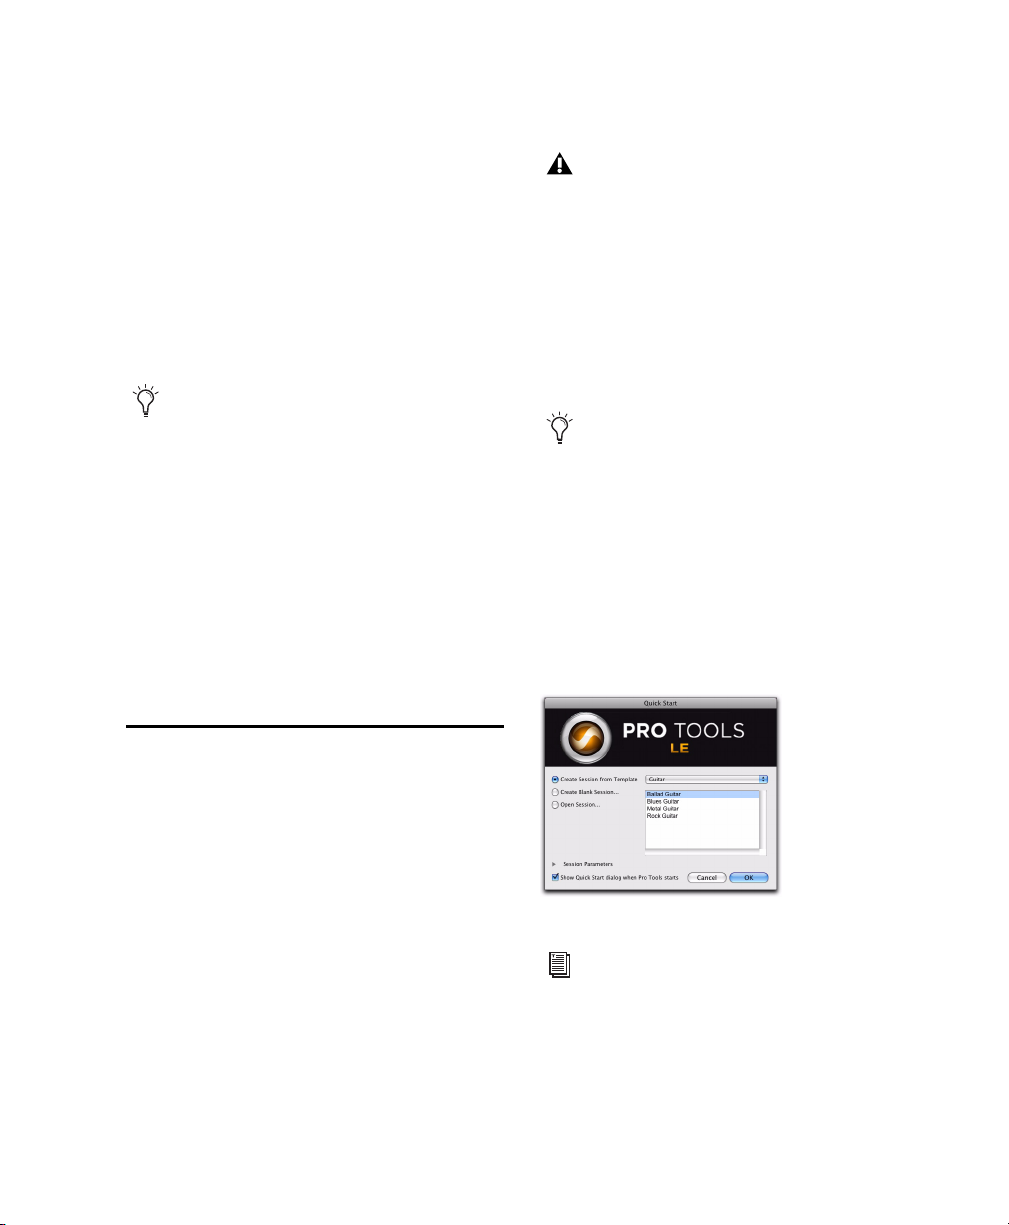
5 Use the Quick Start dialog to do one of the fol-
lowing:
• Create a new session from a template.
• Create a new blank session.
• Open a session.
Launching Pro Tools LE
When launching Pro Tools LE the first time, you
are prompted to enter an Authorization Code to
validate your software.
To launch Pro Tools LE software:
1 Make sure your LE interface is connected to
your computer and powered on if it has a power
switch.
2 Do one of the following:
• Double-click the Pro Tools LE shortcut on
the desktop.
– or –
Quick Start dialog
For more information on the Quick Start dialog and session templates, see the
Pro Tools Reference Guide.
Chapter 2: Installing Pro Tools on Mac 5
Page 10

Configuring Pro Tools
You can adjust the performance of your system
by changing certain Pro Tools system settings
that affect its capacity for processing, playback,
and recording.
In most cases, the default settings for your system provide optimum performance, but you
may want to adjust them to accommodate large
or processing-intensive Pro Tools sessions.
Refer to the electronic PDF version of the Setup
Guide that was installed with your software for
instructions on configuring Pro Tools settings.
Additional Software on the Pro Tools Installer Disc
The Pro Tools Installer disc provides additional
software for your system, including third-party
applications and plug-ins, audio drivers (for
playing other audio applications through your
Digidesign hardware), and a Pro Tools demo session.
Check your Pro Tools Installer disc for additional software and installers.
Digidesign CoreAudio Driver
(Pro Tools|HD, 003, 003 Rack, 003 Rack+,
Digi 002, Digi 002 Rack, and Mbox Systems
Only)
The Digidesign CoreAudio Driver lets you use
your Digidesign-qualified audio interfaces with
third-party applications that support the CoreAudio Driver standard.
The following Pro Tools system interfaces are
supported:
• Pro Tools|HD
•003
•003 Rack
•003Rack+
• Digi 002
• Digi 002 Rack
•Mbox
The Digidesign CoreAudio Driver for your
Digidesign hardware is automatically installed
when you install Pro Tools.
For information on configuring the Digidesign CoreAudio Driver, see the CoreAudio
Drivers Guide
Standalone Digidesign CoreAudio Drivers
®
.
Third-Party Applications and
Plug-ins
Your Pro Tools package includes several free applications and plug-ins from selected Digidesign
Third Party developers. Once you've completed
your Pro Tools installation, you can install these
separately.
Installers are located on your Pro Tools Installer
disc in the Additional Files\3rd Party Content
folder.
Upgrading to Pro Tools LE 8.06
Digidesign CoreAudio Drivers can be installed
on Mac systems that do not have Pro Tools software installed.
For information on installing and configuring the standalone version of the Digidesign
CoreAudio Driver, see the CoreAudio Drivers Guide.
If you uninstall Pro Tools, CoreAudio
Driver is automatically uninstalled at that
time.
Page 11

Mbox 2 Family CoreAudio Drivers
(Mbox 2 Pro, Mbox 2, Mbox 2 Mini, and
Mbox 2 Micro Systems Only)
Digidesign Mbox 2 family CoreAudio Drivers let
you use your Digidesign-qualified Mbox 2 family audio interfaces with third-party applications
that support the CoreAudio Driver standard.
The following Pro Tools Mbox 2 family system
interfaces are supported:
•Mbox 2 Pro
•Mbox 2
• Mbox 2 Mini
• Mbox 2 Micro
The Mbox 2 CoreAudio Driver is a multi-client,
multichannel sound driver that allows CoreAudio compatible applications to record and
play back through Digidesign hardware.
The Mbox 2 CoreAudio Driver is installed by default when you install Pro Tools.
For information on configuring the Mbox 2
CoreAudio Driver, see the CoreAudio Drivers Guide
.
Pro Tools Demo Session
The Pro Tools Installer disc includes a demo session, which you can use to verify that your system is working properly. The demo session is
not installed automatically. The demo session is
called Filtered Dream.
To install the demo session:
1 Insert the Pro Tools Installer disc into your
DVD drive.
2 On the installer disc, in the Additional Files
folder, locate and open the Pro Tools Demo Session Installer folder.
3 Double-click the LE Demo Session.pkg file.
4 Follow the onscreen instructions to proceed
with installation.
5 When prompted, select your audio drive as
the install location and click Next to begin the
install.
6 Click Install.
7 When installation is complete, click Close.
The demo session can be opened by doubleclicking the Filtered Dream.ptf file located in the
Pro Tools LE Demo Session folder.
Chapter 2: Installing Pro Tools on Mac 7
Page 12

Uninstalling Pro Tools
If you need to uninstall Pro Tools software from
your computer, use the Uninstall Pro Tools application.
To uninstall Pro Tools from your computer:
1 Make sure you are logged in as an Administra-
tor for the account where Pro Tools is installed.
For details on Administrator privileges in
Mac OS X, see your Apple OS X documentation.
2 Go to Applications/Digidesign/Pro Tools/
Pro Tools Utilities and double-click the
“Uninstall Pro Tools” file.
3 Click Continue to proceed with the uninstall.
4 Choose the type of uninstall you want to per-
form:
Safe Uninstall Leaves certain plug-ins and system files needed for compatibility with some
Avid products. Use Safe Uninstall if you are using an Avid application or preparing to update
to a .cs release.
Clean Uninstall Removes all Pro Tools files, including system files, Digidesign plug-ins, and
MIDI patch names. Use Clean Uninstall whenever you are preparing to upgrade, or to troubleshoot from a clean system.
5 Click Uninstall.
6 Enter your Administrator password and click
OK.
7 Click Finish to close the Installer window.
Upgrading to Pro Tools LE 8.08
Page 13

chapter 3
Installing Pro Tools on Windows
This chapter explains how to install Pro Tools
for Pro Tools LE on a Digidesign-qualified Windows computer.
If you are installing Pro Tools on a Mac
computer, see Chapter 2, “Installing
Pro Tools on Mac.”
For complete system requirements and compatibility information, visit the Digidesign website
(www.digidesign.com/compatibility).
Before You Upgrade
Retaining Your Pro Tools Preferences
When you upgrade your Pro Tools LE software,
Pro Tools Preferences settings are reset to their
default settings. These default settings may differ from your previous settings. Therefore, you
may want to note your current Preferences settings before upgrading. See Appendix A, “Noting Your Preferences” for tips on noting your
current Pro Tools Preferences settings.
Important Information about Structure and
Xpand! Plug-ins
If the full version of Structure or Structure LE is
already installed on your system, Structure Free
will not be installed.
If Xpand! is already installed on your system, installing Xpand!
Xpand! presets are copied to the Xpand!
Presets folder and will be available in Xpand!
2
will overwrite Xpand! All
2
Plug-in
2
Installation Overview
Installation of Pro Tools software on a Windows
computer includes the following steps:
1 Authorizing Pro Tools software. See “Autho-
rizing Pro Tools Upgrades” on page 10.
2 Installing Pro Tools software. See “Installing
Pro Tools LE Software” on page 10.
3 Installing QuickTime software. (See “Install-
ing QuickTime” on page 11)
.
Read Mes
Before installing this version of Pro Tools, refer
to the Read Me information included on the
Pro Tools Installer disc.
4 Launching Pro Tools. See “Launching Pro
Tools LE Software” on page 12.
5 Configuring your system for improved perfor-
mance. (See your system’s Setup Guide.)
Chapter 3: Installing Pro Tools on Windows 9
Page 14

Authorizing Pro Tools Upgrades
Before you install your Pro Tools upgrade, you
must first authorize it. The process for getting
authorization depends on how you purchased
it.
If you purchased a software upgrade online,
follow the instructions provided online.
If you purchased a boxed Pro Tools software
upgrade, you need to authorize the software using an Activation Code (located on the Activation Card). See “Authorizing Boxed Pro Tools LE
Upgrades” on page 10.
Authorizing Boxed Pro Tools LE
Upgrades
The authorization procedure on the Activation
Card will help you go online and retrieve the
Authorization Code required to launch
Pro Tools following software installation.
If you have not already completed authorizing
your software by following the instructions on
the Activation Card, complete the following
steps for your Pro Tools system.
3 After you are logged in, take note of your
Pro Tools LE Authorization Code. You will need
this code the first time you launch your software
upgrade.
Your Authorization Code will be stored in
your My Digi account.
4 Proceed to “Installing Pro Tools LE Software”
on page 10.
Installing Pro Tools LE Software
Before you install your Pro Tools software upgrade, you should uninstall the version of
Pro Tools currently installed on your system.
Use the Uninstall Pro Tools application located
on your Pro Tools upgrade disk or download.
To install Pro Tools LE:
1 Start Windows, logging in with Administrator
privileges. For details on Administrator privileges, refer to your Windows documentation.
2 Uninstall your older version of Pro Tools. See
“Uninstalling Pro Tools” on page 15 for more
information on uninstalling Pro Tools.
To authorize a boxed Pro Tools LE upgrade using
an Activation Code:
1 Locate the enclosed Activation Card. The
unique code on this card will allow you to retrieve your Authorization Code.
2 Visit www.digidesign.com/activation, enter
your activation code, and click Continue. If
you’re not already logged in to your Digidesign
(My Digi) account, you will be asked to log in using the email address you used to set up the account.If you don’t already have an account,
click Create Profile to create one.
Upgrading to Pro Tools LE 8.010
3 Do one of the following:
• If you purchased a software upgrade online,
follow the instructions provided with it to expand the installer.
– or –
• If you purchased a boxed version Pro Tools
upgrade, do all of the following:
• Insert the Pro Tools Installer disc for Windows in your DVD drive.
• Locate and double-click the Setup icon.
4 When prompted to select features to install,
leave the default options selected.
Page 15

5 You can also select from a list of optional
items to install along with Pro Tools.
Mac HFS+ Disk Support Option This option lets
your Pro Tools system read, write, record, and
play back using Mac-formatted HFS+ disks. HFS+
disks are commonly referred to as Mac OS Extended disks.
Avid Video Engine The Avid Video Engine is required to use Pro Tools with Avid video peripherals such as the Avid Mojo or the Digidesign
AVoption|V10.
Command|8
®
Controller and Driver The Command|8 Driver is required if you are using the
Digidesign Command|8 control surface.
The Pro Tools Installer disc includes additional software for your system. For more information, see “Additional Software on the
Pro Tools Installer Disc” on page 13.
6 Click Next.
9 When installation is complete, click Finish.
10 If QuickTime is not installed, proceed to “In-
stalling QuickTime” on page 11.
Installing QuickTime
A Digidesign-qualified version of QuickTime is
required for Pro Tools if you plan to include
movie files, or import MP3 or MP4 (AAC) files in
your sessions. QuickTime for Windows is available as a free download from the Apple website
(www.apple.com).
For information on which version of QuickTime is compatible with your version of
Pro Tools, visit the compatibility pages of the
Digidesign website (www.digidesign.com).
To install QuickTime:
1 Visit www.apple.com and go to the Quick-
Time page.
7 Click Install.
In Windows XP, a series Software Installation dialogs about the driver not passing
Windows Logo testing may appear. Click
Continue Anyway on each one until they go
away.
If any other dialogs appear (such as the
“Found New Hardware” dialog) leave them
open and do not click on them. These dialogs will close on their own.
In Windows Vista, a series of Windows Security dialogs may appear. Click “Install”
on each one until they go away.
8 Wait for the installer to finish installing all
software components, drivers, and PACE System
files before proceeding to the next step.
2 Download the QuickTime installer applica-
tion to your computer.
3 Double-click the QuickTime installer applica-
tion and follow the on-screen installation instructions.
4 Restart your computer.
If the USB LED on the front panel of the
Mbox 2 does not illuminate after installation, try unplugging the USB cable from the
Mbox 2 USB port, and plugging it back in. If
the USB LED still does not illuminate, shut
down the computer, disconnect Mbox 2 and
start the computer. Once the computer has
fully restarted, reconnect Mbox 2.
5 Proceed to “Launching Pro Tools LE Software”
on page 12.
Chapter 3: Installing Pro Tools on Windows 11
Page 16

Launching Pro Tools LE Software
When launching Pro Tools the first time, you
are prompted to enter an Authorization Code to
validate your software.
To authorize Pro Tools LE software:
1 Make sure your LE interface is connected to
your computer and powered on if it has a power
switch.
2 Do one of the following:
• Double-click the Pro Tools LE shortcut on
the desktop.
– or –
• Locate and double-click the Pro Tools LE
application on your hard drive.
If you get a warning dialog about updating
the firmware for your hardware, follow the
on-screen instructions to perform the
firmware update.
3 Enter the Authorization Code in the dialog
(making sure to type it exactly as printed, and
observing any spaces and capitalization).
All letters are case sensitive. All “0” characters are zeros. You must include both
spaces. The spaces separate 3 sets of 8 characters.
4 Click Validate.
5 Use the Quick Start dialog to do one of the fol-
lowing:
• Create a new session from a template.
• Create a new blank session.
• Open a session.
Quick Start dialog
For more information on the Quick Start dialog and session templates, see the
Pro Tools Reference Guide.
Configuring Your System for Improved Performance
You can adjust the performance of your system
by changing certain Pro Tools system settings
that affect its capacity for processing, playback,
and recording.
In most cases, the default settings for your system provide optimum performance, but you
may want to adjust them to accommodate large
or processing-intensive Pro Tools sessions.
In addition, you can configure your Windows
system settings to ensure optimum performance
with Pro Tools.
Refer to the electronic PDF version of the Setup
Guide that was installed with your software for
instructions on configuring Pro Tools and Windows system settings.
Upgrading to Pro Tools LE 8.012
Page 17

Additional Software on the Pro Tools Installer Disc
The Pro Tools Installer disc provides additional
software for your system, including third-party
applications and plug-ins, audio drivers (for
playing other audio applications through your
Digidesign hardware) and a Pro Tools demo session.
Check your Pro Tools Installer disc for additional software and installers.
Third-Party Applications and
Plug-ins
Your Pro Tools package includes several free applications and plug-ins from selected Digidesign
Third Party developers. Once you've completed
your Pro Tools installation, you can install these
separately.
Installers are located on your Pro Tools Installer
disc in the Additional Files\3rd Party Content
folder.
Windows Audio Drivers for Most
Pro Tools Interfaces
(Pro Tools|HD, 003, 003 Rack, Digi 002,
Digi 002 Rack, Mbox 2, Mbox 2 Mini,
Mbox 2 Micro and Mbox Only)
The Digidesign ASIO Driver and WaveDriver
Windows System Audio Driver let you use your
Digidesign hardware interface with third-party
applications that support the ASIO Driver or
WaveDriver MME (Multimedia Extension).
The following Pro Tools system interfaces are
supported:
• Pro Tools|HD
•003
•003 Rack
•003 Rack+
• Digi 002
• Digi 002 Rack
•Mbox 2
• Mbox 2 Mini
• Mbox 2 Micro
•Mbox
The Digidesi gn ASIO D river and WaveD river fo r
your Digidesign hardware are automatically installed when you install Pro Tools.
For specifications and configuration information specific to each driver, see the Windows Audio Drivers Guide.
Chapter 3: Installing Pro Tools on Windows 13
Page 18

Digidesign ASIO Driver
The Digidesign ASIO Driver is a single-client,
multichannel sound driver that allows thirdparty audio programs that support the ASIO
Driver standard to record and play back through
Digidesign-qualified Pro Tools audio interfaces.
The Digidesign ASIO Driver and DirectSound
Driver for Mbox 2 Pro are automatically installed when you install Pro Tools.
For specifications and configuration information specific to each driver, see the Windows Audio Drivers Guide.
For detailed information on configuring the
Digidesign ASIO Driver, see the Windows
Audio Drivers Guide.
Digidesign WaveDriver (Windows XP only)
The Digidesign WaveDriver Windows System
Audio Driver is a single-client, multichannel
sound driver that allows third-party audio programs that support the WaveDriver MME (Multimedia Extensions) standard to play back
through Digidesign-qualified Pro Tools audio
interfaces.
For detailed information on configuring the
Digidesign WaveDriver, see the Windows
Audio Drivers Guide.
Standalone Windows Audio Drivers
Digidesign Windows Audio Drivers can be installed on Windows systems that do not have
Pro Tools software installed. Use the standalone
version of the Digidesign Windows Audio Drivers installer (Digidesign Audio Drivers
Setup.exe), which is available on the Pro Tools
Installer disc or download.
Windows Audio Drivers for
Mbox 2 Pro
The Digidesign ASIO Driver and DirectSound
Driver let you use your Digidesign Mbox 2 Pro
hardware interface with third-party applications
that support the ASIO Driver or DirectSound
Driver standard.
Digidesign ASIO Driver
The Digidesign ASIO Driver is a single-client,
multichannel sound driver that allows thirdparty audio programs that support the ASIO
Driver standard to record and play back through
the Mbox 2 Pro audio interfaces.
For detailed information on configuring the
Digidesign ASIO Driver, see the Windows
Audio Drivers Guide.
Digidesign DirectSound Driver
The DirectSound Windows System Audio Driver
is a multi-client, multichannel sound driver that
allows third-party audio programs that support
the DirectSound standard to play back and
record through Mbox 2 Pro.
For detailed information on configuring the
Digidesign DirectSound Driver, see the
Windows Audio Drivers Guide.
Standalone Digidesign Windows Audio Drivers
Digidesign Windows Audio Drivers can be installed on Windows systems that do not have
Pro Tools software installed. Use the standalone
version of the Digidesign Windows Audio Drivers installer (Digidesign Audio Drivers
Setup.exe), which is available on the Pro Tools
Installer disc.
Upgrading to Pro Tools LE 8.014
Page 19

Pro Tools Demo Session
The Pro Tools Installer disc includes a demo session, which you can use to verify that your system is working properly. The demo session is
not installed automatically.
To install the demo session:
1 Insert the Pro Tools Installer disc into your
DVD drive.
2 On the installer disc, in the Additional Files
folder, locate and open the Pro Tools Demo Session Installer folder.
3 Double-click the LE Demo Session Setup.exe
file.
4 Follow the onscreen instructions to proceed
with installation.
5 When prompted, select your audio drive as
the install location and click Next to begin the
install.
6 When installation is complete, click Finish.
The demo session can be opened by doubleclicking the Filtered Dream.ptf file located in the
Pro Tools LE Demo Session folder.
Uninstalling Pro Tools
Use the Uninstall Pro Tools application to uninstall Pro Tools software from your computer
To uninstall Pro Tools from your computer:
1 Start Windows, logging in with Administrator
privileges. For details on Administrator privileges, refer to your Windows documentation.
2 Do one of the following:
• Insert the Pro Tools Installer disc for Windows in your DVD drive and double-click
“Uninstall Pro Tools.exe.”
– or –
• If you have already installed the Pro Tools
upgrade, go to Program Files\Digidesign\Pro Tools\Pro Tools Utilities, and
double-click the “Uninstall Pro Tools.exe”
file.
3 Click Next.
4 Click Uninstall to proceed with the uninstalla-
tion.
5 When the uninstall has completed, restart
your computer.
Chapter 3: Installing Pro Tools on Windows 15
Page 20

Upgrading to Pro Tools LE 8.016
Page 21

appendix a
Noting Your Preferences
When you upgrade your Pro Tools LE software,
Pro Tools Preferences settings are reset to their
default settings. These default settings may differ from your previous settings. Therefore, you
may want to note your current Preferences settings before upgrading.
To note your current Preferences settings, you can
do one the following:
Take a picture, a screenshot, of the existing
tabbed pages in the Preferences dialog. See “Taking Screenshots of Your Preferences Pages” on
page 17.
– or –
Note your preference settings using the tables
provided in this chapter. See “Preferences Tables” on page 19.
Taking Screenshots of Your Preferences Pages
Mac and Windows both offer the capability of
taking a screenshot of whatever appears on your
computer screen. Follow the instructions below
for your computer platform.
Taking Screenshots on a Mac
Use Mac’s Grab application to take and save
your screenshots.
To take screenshots of your Preferences pages on
a Mac:
1 Open Pro Tools and choose Setup > Prefer-
ences.
2 Open the Grab application on your Mac.
3 In Grab, choose Capture > Window.
4 When the Window Grab dialog opens, click
Choose Window.
5 Click the Preference dialog to take the screen-
shot.
6 In Grab, choose File > Save As to name and
save the screenshot.
7 Repeat this procedure for each tabbed page in
the Preferences dialog.
Appendix A: Noting Your Preferences 17
Page 22

Taking Screenshots in Windows
Use the Print Screen key on your keyboard to
take your screenshots, and use the Paint application to save them.
To take and save screenshots of your Preferences
pages in Windows:
1 Open Pro Tools and choose Setup > Prefer-
ences.
2 Press the Print Screen key on your computer’s
keyboard.
3 Open the Paint application.
4 In Paint, choose Edit > Paste.
5 After the screenshot appears in Paint, choose
File > Save As to name and save the screenshot.
6 Repeat this procedure for each tabbed page in
the Preferences dialog.
Upgrading to Pro Tools LE 8.018
Page 23

Preferences Tables
Display Preferences
Preference Setting
Basics
Track Position Numbers
Stay with Hidden Tracks
Tools Tips
Function
Details
Edit Window Default Length
Organize Plug-in Menus By
Flat List
Category
Manufacturer
Category and Manufactur-
er
Language
Default Auto-naming to
English (ASCII)
Meters
Preference Setting
Color Coding
Always Display Marker Colors
Midi Note Color Shows
Velocity
Default Track Color Coding;
None
Tracks and MIDI Channels
Tracks and MIDI Devices
Groups
Track Type
Default Region Color Coding
Tracks and MIDI Channels
Tracks and MIDI Devices
Trac k C olo r
Groups
Marker Locations
Region List Color
Peak Hold
3 Seconds
Infinite
None
Clip Indication
3 Seconds
Infinite
None
Appendix A: Noting Your Preferences 19
Page 24

Operation Preferences
Preference Setting
Transport
Timeline Insertion/Play
Start Marker Follows Playback
Edit Insertion Follows
Scrub/Shuttle
Audio During Fast
Forward/Rewind
Latch Forward/Rewind
Play Start Marker Follows
Timeline Selection
Reserve Voices for Preview
in Context (Pro Tools HD)
Custom Shuttle Lock Speed
Back/Forward Amount
(Pro Tools HD)
2 seconds
5 Seconds
10 Seconds
15 Seconds
20 Seconds
30 Seconds
Bars|Beats
Min:Secs
Time Code
Feet+Frames
Samples
Preference Setting
Classic
Transpor t
Shuttle
Use Separate Play and Stop
Keys
Auto Backup
Enable Session File Auto
Backup
Keep
Every
Video
Quick Time Playback Priority
Normal
Medium
Highest
High Quality QuickTime
Image
Avid Video Errors Stop Playback (Pro Tools HD with
Avid Video Engine Only)
Avid Video NTSC Has Setup
(NTSC-J) (Pro Tools HD with
Avid Video Engine Only)
Record
Latch Record Enable Buttons
Link Record and Play Faders
Audio Track RecordLock
(Pro Tools HD)
Follow Main Time Scale
Numeric Keypad
Upgrading to Pro Tools LE 8.020
Transpor t RecordLock
(Pro Tools HD)
Page 25

Preference Setting
Disable “Input” When Disarming Track (In “Stop”)
(Pro Tools HD)
Mute Record-Armed Tracks
While Stopped
(Pro Tools HD)
PEC/Direct Style Input Monitoring (Pro Tools HD)
Automatically Create New
Playlists When Loop
Recording
Online Options
Record Online at Time
Code (or ADAT) Lock
Record Online at Inser-
tion/Selection
Open-Ended Record Allocation
Use All Available Space
Limit to
Destructive Punch File
Length
Misc.
Show Quick Start dialog
when Pro Tools Starts
Auto Region Fade In/Out
Length
Calibration Reference Level
Delay Compensation Time
Mode
Samples
Seconds
Appendix A: Noting Your Preferences 21
Page 26

Editing Preferences
Preference Setting
Regions
Region List Selection Follows Edit Selections
Edit Selection Follows
Region List Selection
Auto-Name Separated
Regions
Preference Setting
Zoom Toggle
Vertical Midi Zoom
selection
last used
Horizontal Zoom
selection
last used
“Separate Region” Operations on All Related Takes
Track s
New Tracks Default to Tick
Timebase
Memory Locations
Auto-Name Memory Locations when Playing
Fades
Crossfade Preview Pre-Roll
Crossfade Preview Post-Roll
QuickPunch/TrackPunch
Crossfade Length
Preserve Fades when Editing
Default Fade Settings
Fade In...
Fade Out...
Crossfade...
REX...
Remove Range Selection
After Zooming In
Tack H e i g h t
last used
medium
large
jumbo
extreme
fit to window
Track V i ew
waveform/notes
warp/notes
last used
no change
Separate Grid Settings
When Zoomed In
Zoom Toggle Follows Edit
Selection
Levels of Undo
Upgrading to Pro Tools LE 8.022
Page 27

Mixing Preferences
Preference Setting
Preference Setting
Setup
Sends Default to “–INF”
Send Pans Default to Follow
Main Pan
Link Mix/Edit Groups
Enables
Use Absolute Pan Linking
Default EQ
none
TDM plug-in
RTAS plug-in
Default Dynamics
none
TDM plug-in
RTAS plug-in
Automation
Smooth and Thin Data After
Pass
Degree of Thinning
none
Latching Behavior for
Switch Controls in “Touch”
Allow Latch Prime in Shop
Coalesce when Removing
Slaves from VCA Group
Standard VCA Logic for
Group Attributes
Include Sends in Trim Mode
Include Control Changes in
Undo Queue
AutoMatch Time
AutoGlide Time
After Write Pass, Switch To
Touch
Latch
No Change
Coalesce Trim Automation
After Every Pass
On Existing Trim Mode
Controllers
Edit WIndow Follows Bank
Selection
little
some
more
most
Plug-in Controls Default to
Auto-Enabled
Suppress Automation
“Write To...” Warnings
Mix Window Follows Bank
Selection
“Scroll to Track” Banks Controllers
Always Fill Channel Strips
when Banking
Touch Timeout
Appendix A: Noting Your Preferences 23
Page 28

Processing Preferences
Preference Setting
AudioSuite
Use AudioSuite Dither
Plug-in
Bit Depth
16 Bits
18 Bits
20 Bits
24 Bits
Import
Convert Imported “.wav”
Files to AES31/Broadcast
Wave
Automatically Copy Files on
Import
Import REX Files as Region
Groups
Automatically Create
Fades
Drag and Drop from Desktop Conforms to Session
Tem pl at e
No Files
Preference Setting
Elastic Audio
Default Plug-in
Polyphonic
Rhythmic
Monophonic
Varispe ed
Default Input Gain
Enable Elastic Audio on
New Tracks
REX and ACID Files Only
All Files
Sample Rate Conversion
Quality
TC/E
TC/E Plug-in
Default Settings
Upgrading to Pro Tools LE 8.024
Page 29

MIDI Preferences
Preference Setting
Basics
Remove Range Selection
After Opening the
MIDI/Score Editor
Use MIDI to Tap Tempo
Display Events as Modified
by Real-Time Properties
Use F11 Key for Wait for
Note
Automatically Create Click
Track in New Sessions
Default Thru Instrument
Pencil Tool Resolution when
Drawing Controller Data
Global MIDI Playback Offset
(-10,000 to 10,000)
Double-clicking a MIDI
Region Opens
MIDI Editor
Preference Setting
Delay Compensation for
External Devices
MIDI Time Code
MIDI Beat Clock
MIDI/Score Editor Display
Additional Empty Bars in
the Score Editor
Score Editor
MIDI Event List
Name Dialog
Note Display
Standard Pitch Middle
Alternate Pitch Middle
MIDI Note Number
Appendix A: Noting Your Preferences 25
Page 30

Synchronization Preferences
Preference Setting
Machine Control
Machine CHases Memory
Locations
Machine Follows Edit/Insertion Scrub
Linear Devices (jog)
Non-Linear Devices (cue)
Machine Cues Intelligently
Stop at Shuttle Speed Zero
Non-Linear Transport Error
Suppression
Synchronization
Minimum Sync Delay
Delay before Locking to Longitudinal Time Code
Delay before Locking to
Serial Time Code
Remote Mode
Preference Setting
Satellites
Transmit Solos
Receive Solos
Solo Independent Of Linked
State
DAE Errors Stop All Linked
Systems
Transmit Play Selections
Receive Play Selections
Ignore Track Arming
Set Servo Lock Bit at Play
Allow Track Arm Commands
in Local Mode
Punch in Frame Offset
Punch Out Frame Offset
Delay after Play Command
Upgrading to Pro Tools LE 8.026
Page 31

www.digidesign.com
DIGIDESIGN
2001 Junipero Serra Boulevard
Daly City, CA 94014-3886 USA
Tel: 650.731.6300
Fax: 650.731.6399
TECHNICAL SUPPORT (USA)
Tel: 650.731.6100
Fax: 650.731.6375
PRODUCT INFORMATION (USA)
Tel: 800.333.2137
INTERNATIONAL OFFICES
Visit the Digidesign website
for contact information
 Loading...