

Page 1

Avid® EDL Manager
User’s Guide
make manage move | media
™
Avid
®
Page 2

Copyright and Disclaimer
Product specifications are subject to change without notice and do not represent a commitment on the part
of Avid Technology, Inc. The software described in this document is furnished under a license agreement.
You can obtain a copy of that license by visiting Avid's Web site at www.avid.com. The terms of that license
are also available in the product in the same directory as the software. The software may not be reverse
assembled and may be used or copied only in accordance with the terms of the license agreement. It is
against the law to copy the software on any medium except as specifically allowed in the license
agreement. Avid products or portions thereof are protected by one or more of the following United States
patents: 4,746,994; 4,970,663; 5,045,940; 5,267,351; 5,309,528; 5,355,450; 5,396,594; 5,440,348;
5,452,378; 5,467,288; 5,513,375; 5,528,310; 5,557,423; 5,568,275; 5,577,190; 5,584,006; 5,640,601;
5,644,364; 5,654,737; 5,715,018; 5,724,605; 5,726,717; 5,729,673; 5,745,637; 5,752,029; 5,754,851;
5,799,150; 5,812,216; 5,852,435; 5,883,670; 5,905,841; 5,929,836; 5,929,942; 5,930,445; 5,946,445;
5,987,501; 5,995,115; 6,016,152; 6,018,337; 6,023,531; 6,035,367; 6,038,573; 6,058,236; 6,061,758;
6,091,778; 6,105,083; 6,118,444; 6,128,001; 6,130,676; 6,134,607; 6,137,919; 6,141,007; 6,141,691;
6,157,929; 6,198,477; 6,201,531; 6,211,869; 6,223,211; 6,239,815; 6,249,280; 6,269,195; 6,301,105;
6,317,158; 6,317,515; 6,327,253; 6,330,369; 6,351,557; 6,353,862; 6,357,047; 6,392,710; 6,404,435;
6,407,775; 6,417,891; 6,426,778; D396,853; D398,912. Additional U.S. and foreign patents pending. No
part of this document may be reproduced or transmitted in any form or by any means, electronic or
mechanical, including photocopying and recording, for any purpose without the express written permission
of Avid Technology, Inc.
Copyright © 2000, 2002-2003 Avid Technology, Inc. and its licensors. All rights reserved.
Printed in USA.
The following disclaimer is required by Apple Computer, Inc.
APPLE COMPUTER, INC. MAKES NO WARRANTIES WHATSOEVER, EITHER EXPRESS OR IMPLIED,
REGARDING THIS PRODUCT, INCLUDING WARRANTIES WITH RESPECT TO ITS
MERCHANTABILITY OR ITS FITNESS FOR ANY PARTICULAR PURPOSE. THE EXCLUSION OF
IMPLIED WARRANTIES IS NOT PERMITTED BY SOME STATES. THE ABOVE EXCLUSION MAY NOT
APPLY TO YOU. THIS WARRANTY PROVIDES YOU WITH SPECIFIC LEGAL RIGHTS. THERE MAY BE
OTHER RIGHTS THAT YOU MAY HAVE WHICH VARY FROM STATE TO STATE.
The following disclaimer is required by Sam Leffler and Silicon Graphics, Inc. for the use of
their TIFF library:
Copyright © 1988–1997 Sam Leffler
Copyright © 1991–1997 Silicon Graphics, Inc.
Permission to use, copy, modify, distribute, and sell this software [i.e., the TIFF library] and its
documentation for any purpose is hereby granted without fee, provided that (i) the above copyright notices
and this permission notice appear in all copies of the software and related documentation, and (ii) the
names of Sam Leffler and Silicon Graphics may not be used in any advertising or publicity relating to the
software without the specific, prior written permission of Sam Leffler and Silicon Graphics.
THE SOFTWARE IS PROVIDED “AS-IS” AND WITHOUT WARRANTY OF ANY KIND, EXPRESS,
IMPLIED OR OTHERWISE, INCLUDING WITHOUT LIMITATION, ANY WARRANTY OF
MERCHANTABILITY OR FITNESS FOR A PARTICULAR PURPOSE.
IN NO EVENT SHALL SAM LEFFLER OR SILICON GRAPHICS BE LIABLE FOR ANY SPECIAL,
INCIDENTAL, INDIRECT OR CONSEQUENTIAL DAMAGES OF ANY KIND, OR ANY DAMAGES
WHATSOEVER RESULTING FROM LOSS OF USE, DATA OR PROFITS, WHETHER OR NOT ADVISED
OF THE POSSIBILITY OF DAMAGE, AND ON ANY THEORY OF LIABILITY, ARISING OUT OF OR IN
CONNECTION WITH THE USE OR PERFORMANCE OF THIS SOFTWARE.
The following disclaimer is required by the Independent JPEG Group:
Portions of this software are based on work of the Independent JPEG Group.
The following disclaimer is required by Paradigm Matrix:
Portions of this software licensed from Paradigm Matrix.
The following disclaimer is required by Ray Sauers Associates, Inc.:
“Install-It” is licensed from Ray Sauers Associates, Inc. End-User is prohibited from taking any action to
derive a source code equivalent of “Install-It,” including by reverse assembly or reverse compilation, Ray
Sauers Associates, Inc. shall in no event be liable for any damages resulting from reseller’s failure to
Page 3

perform reseller’s obligation; or any damages arising from use or operation of reseller’s products or the
software; or any other damages, including but not limited to, incidental, direct, indirect, special or
consequential Damages including lost profits, or damages resulting from loss of use or inability to use
reseller’s products or the software for any reason including copyright or patent infringement, or lost data,
even if Ray Sauers Associates has been advised, knew or should have known of the possibility of such
damages.
The following disclaimer is required by Videomedia, Inc.:
“Videomedia, Inc. makes no warranties whatsoever, either express or implied, regarding this product,
including warranties with respect to its merchantability or its fitness for any particular purpose.”
“This software contains V-LAN ver. 3.0 Command Protocols which communicate with V-LAN ver. 3.0
products developed by Videomedia, Inc. and V-LAN ver. 3.0 compatible products developed by third parties
under license from Videomedia, Inc. Use of this software will allow “frame accurate” editing control of
applicable videotape recorder decks, videodisc recorders/players and the like.”
The following disclaimer is required by Altura Software, Inc. for the use of its Mac2Win
software and Sample Source Code:
©1993–1998 Altura Software, Inc.
The following disclaimer is required by Ultimatte Corporation:
Certain real-time compositing capabilities are provided under a license of such technology from Ultimatte
Corporation and are subject to copyright protection.
The following disclaimer is required by 3Prong.com Inc.:
Certain waveform and vector monitoring capabilities are provided under a license from 3Prong.com Inc.
Attn. Government User(s). Restricted Rights Legend
U.S. GOVERNMENT RESTRICTED RIGHTS. This Software and its documentation are “commercial
computer software” or “commercial computer software documentation.” In the event that such Software or
documentation is acquired by or on behalf of a unit or agency of the U.S. Government, all rights with
respect to this Software and documentation are subject to the terms of the License Agreement, pursuant to
FAR §12.212(a) and/or DFARS §227.7202-1(a), as applicable.
Trademarks
888 I/O, AirPlay, AirSPACE, AirSPACE HD, AniMatte, AudioSuite, AudioVision, AutoSync, Avid, AVIDdrive,
AVIDdrive Towers, AvidNet, AvidNetwork, AVIDstripe, Avid Unity, Avid Xpress, AVoption, AVX, CamCutter,
ChromaCurve, ChromaWheel, DAE, D-Fi, D-fx, Digidesign, Digidesign Audio Engine, Digidesign Intelligent
Noise Reduction, DigiDrive, DINR, D-Verb, Equinox, ExpertRender, FieldPak, Film Composer, FilmScribe,
FluidMotion, HIIP, HyperSPACE, HyperSPACE HDCAM, IllusionFX, Image Independence, Intraframe, iS9,
iS18, iS23, iS36, Lo-Fi, Magic Mask, make manage move | media, Marquee, Matador, Maxim, MCXpress,
Media Composer, MediaDock, MediaDock Shuttle, Media Fusion, Media Illusion, MediaLog,
Media Reader, Media Recorder, MEDIArray, MediaShare, Meridien, MetaSync, NaturalMatch, NetReview,
NewsCutter, OMF, OMF Interchange, OMM, Open Media Framework, Open Media Management,
ProEncode, Pro Tools, QuietDrive, Recti-Fi, rS9, rS18, Sci-Fi, Softimage, Sound Designer II, SPACE,
SPACEShift, Symphony, Trilligent, UnityRAID, Vari-Fi, Video Slave Driver, VideoSPACE, and Xdeck are
either registered trademarks or trademarks of Avid Technology, Inc. in the United States and/or other
countries.
iNEWS, iNEWS ControlAir, and Media Browse are trademarks of iNews, LLC.
All other trademarks contained herein are the property of their respective owners.
Footage
Arri — Courtesy of Arri™/Fauer — John Fauer, Inc.
Bell South “Anticipation” — Courtesy of Two Headed Monster — Tucker/Wayne Atlanta/GMS.
Canyonlands — Courtesy of the National Park Service/Department of the Interior.
Eco Challenge British Columbia — Courtesy of Eco Challenge Lifestyles, Inc., All Rights Reserved.
Eco Challenge Morocco — Courtesy of Discovery Communications, Inc.
It’s Shuttletime — Courtesy of BCP & Canadian Airlines.
Nestlé Coffee Crisp — Courtesy of MacLaren McCann Canada.
Saturn “Calvin Egg” — Courtesy of Cossette Communications.
Page 4

“Tigers: Tracking a Legend” — Courtesy of www.wildlifeworlds.com.
Windhorse — Courtesy of Paul Wagner Productions.
Arizona Images — KNX-TV Production — Courtesy of Granite Broadcasting, Inc.,
Editor/Producer Bryan Foote.
Canyonlands — Courtesy of the National Park Service/Department of the Interior.
WCAU Fire Story — Courtesy of NBC-10, Philadelphia, PA.
Paragliding — Courtesy of Legendary Entertainment, Inc.
GOT FOOTAGE?
Editors — Filmmakers — Special Effects Artists — Game Developers — Animators — Educators —
Broadcasters — Content creators of every genre — Just finished an incredible project and want to
share it with the world?
Send us your reels and we may use your footage in our show reel or demo!*
For a copy of our release and Avid’s mailing address, go to www.avid.com/footage.
*Note: Avid cannot guarantee the use of materials submitted.
Avid EDL Manager User’s Guide • Part 0130-05625-01 February 2003
Page 5

Contents
Using This Guide . . . . . . . . . . . . . . . . . . . . . . . . . . . . . . . . . . . . 11
Who Should Use This Guide . . . . . . . . . . . . . . . . . . . . . . . . . . . . . . . . . 11
About This Guide . . . . . . . . . . . . . . . . . . . . . . . . . . . . . . . . . . . . . . . . . . 11
Symbols and Conventions . . . . . . . . . . . . . . . . . . . . . . . . . . . . . . . . . . . 12
If You Need Help . . . . . . . . . . . . . . . . . . . . . . . . . . . . . . . . . . . . . . . . . . 14
Related Information . . . . . . . . . . . . . . . . . . . . . . . . . . . . . . . . . . . . . . . . 15
If You Have Documentation Comments . . . . . . . . . . . . . . . . . . . . . . . . . 15
How to Order Documentation . . . . . . . . . . . . . . . . . . . . . . . . . . . . . . . . . 16
Avid Educational Services . . . . . . . . . . . . . . . . . . . . . . . . . . . . . . . . . . . 16
Chapter 1 Working with EDLs . . . . . . . . . . . . . . . . . . . . . . . . . . . . . . . . . . 17
EDLs and the EDL Manager. . . . . . . . . . . . . . . . . . . . . . . . . . . . . . . . . . 17
Online and Offline Editing . . . . . . . . . . . . . . . . . . . . . . . . . . . . . . . . 18
What the EDL Manager Does . . . . . . . . . . . . . . . . . . . . . . . . . . . . . 18
Starting EDL Manager . . . . . . . . . . . . . . . . . . . . . . . . . . . . . . . . . . . . . . 19
Using Help . . . . . . . . . . . . . . . . . . . . . . . . . . . . . . . . . . . . . . . . . . . . . . . 20
Creating or Reading an EDL . . . . . . . . . . . . . . . . . . . . . . . . . . . . . . . . . 20
Creating an EDL from a Sequence in a Bin, Existing EDL,
or OMFI File (Windows) . . . . . . . . . . . . . . . . . . . . . . . . . . . . . . . . 20
Creating an EDL from a Sequence in a Bin, Existing EDL, or OMFI File
(Macintosh) . . . . . . . . . . . . . . . . . . . . . . . . . . . . . . . . . . . . . . . . . . 23
Reading an Existing EDL from the RT-11 Disk . . . . . . . . . . . . . . . . 24
Saving an EDL . . . . . . . . . . . . . . . . . . . . . . . . . . . . . . . . . . . . . . . . . . . . 25
Saving an EDL as a Text File or an OMFI Composition . . . . . . . . . 26
Saving an EDL to an RT-11 Disk . . . . . . . . . . . . . . . . . . . . . . . . . . . 26
Verifying an RT-11 Save . . . . . . . . . . . . . . . . . . . . . . . . . . . . . . . . . 28
Formatting an RT-11 Disk . . . . . . . . . . . . . . . . . . . . . . . . . . . . . . . . . . . 29
Printing an EDL . . . . . . . . . . . . . . . . . . . . . . . . . . . . . . . . . . . . . . . . . . . 30
Copying an EDL between Storage Locations. . . . . . . . . . . . . . . . . . . . . 30
Using EDL Manager with Your Avid Editing System . . . . . . . . . . . . . . . 31
5
Page 6

Creating an EDL from the Active Sequence. . . . . . . . . . . . . . . . . . . 32
Creating a Sequence from an EDL. . . . . . . . . . . . . . . . . . . . . . . . . . 32
Viewing a List of Tapes in the Source Table. . . . . . . . . . . . . . . . . . . . . . 33
About the Source Table . . . . . . . . . . . . . . . . . . . . . . . . . . . . . . . . . . . . . 34
Printing a List of Tapes in the Source Table . . . . . . . . . . . . . . . . . . . . . . 34
Chapter 2 Customizing EDLs . . . . . . . . . . . . . . . . . . . . . . . . . . . . . . . . . . . 35
EDL Manager Option Settings . . . . . . . . . . . . . . . . . . . . . . . . . . . . . . . . 35
Changing Settings in the EDL Manager Window . . . . . . . . . . . . . . . . . . 36
Changing the Title of an EDL . . . . . . . . . . . . . . . . . . . . . . . . . . . . . . 37
Defining Video Tracks and Audio Channels. . . . . . . . . . . . . . . . . . . 38
Including or Excluding Specific Tracks. . . . . . . . . . . . . . . . . . . . 39
Redefining a Track . . . . . . . . . . . . . . . . . . . . . . . . . . . . . . . . . . . 39
Combining or Isolating Tracks . . . . . . . . . . . . . . . . . . . . . . . . . . 40
Creating Stereo Channels . . . . . . . . . . . . . . . . . . . . . . . . . . . . . 41
Choosing a Format for the Audio Channels. . . . . . . . . . . . . . . . 42
Displaying Different Views of an EDL. . . . . . . . . . . . . . . . . . . . . . . . 42
Selecting a Template for the EDL. . . . . . . . . . . . . . . . . . . . . . . . . . . 42
File Names in the Template Pop-up Menu. . . . . . . . . . . . . . . . . 43
Opening a Template. . . . . . . . . . . . . . . . . . . . . . . . . . . . . . . . . . 43
Adjusting the Source and Output Timecodes . . . . . . . . . . . . . . . . . . 43
Finding the Field Where an Edit Occurred . . . . . . . . . . . . . . . . . . . . 45
Updating an EDL with EDL Manager Window Changes. . . . . . . . . . 46
Changing Settings in the Options Window . . . . . . . . . . . . . . . . . . . . . . . 46
Selecting an Edit Controller Format . . . . . . . . . . . . . . . . . . . . . . . . . 48
Selecting an Edit Controller Format . . . . . . . . . . . . . . . . . . . . . . . . . 48
Sorting the Order of Events . . . . . . . . . . . . . . . . . . . . . . . . . . . . . . . 50
Setting Up a Master List . . . . . . . . . . . . . . . . . . . . . . . . . . . . . . . . . . 52
Setting Up a Dupe List . . . . . . . . . . . . . . . . . . . . . . . . . . . . . . . . . . . 53
Using the Preread Option . . . . . . . . . . . . . . . . . . . . . . . . . . . . . . . . . 56
Showing or Hiding Comments and Other Information . . . . . . . . . . . 56
The Effects Info Comment . . . . . . . . . . . . . . . . . . . . . . . . . . . . . 57
The Repair Notes Comment . . . . . . . . . . . . . . . . . . . . . . . . . . . 58
Optimizing the EDL. . . . . . . . . . . . . . . . . . . . . . . . . . . . . . . . . . . . . . 59
Setting Up Standards . . . . . . . . . . . . . . . . . . . . . . . . . . . . . . . . . . . . 60
6
Page 7

Setting the Record Start Time . . . . . . . . . . . . . . . . . . . . . . . . . . . . . 61
Setting the Pulldown Start Frame . . . . . . . . . . . . . . . . . . . . . . . . . . 62
Setting the Tapename Truncation . . . . . . . . . . . . . . . . . . . . . . . . . . 62
Saving Options to a Template File . . . . . . . . . . . . . . . . . . . . . . . . . . 63
Changing Options in the Site Settings Dialog Box . . . . . . . . . . . . . . . . . 64
Changing Serial Transmission Options . . . . . . . . . . . . . . . . . . . . . . 64
Changing Font Options . . . . . . . . . . . . . . . . . . . . . . . . . . . . . . . . . . 64
Chapter 3 Editing and Troubleshooting EDLs . . . . . . . . . . . . . . . . . . . . . 67
Using a Text Editor to Edit an EDL. . . . . . . . . . . . . . . . . . . . . . . . . . . . . 67
Fitting the Format to the EDL Manager . . . . . . . . . . . . . . . . . . . . . . 68
Changing the Header Format . . . . . . . . . . . . . . . . . . . . . . . . . . . . . 69
Removing Problems Caused by Complex Sequences. . . . . . . . . . . . . . 69
Using the Console Window to Display Messages . . . . . . . . . . . . . . 70
Fixing Difficult Transitions . . . . . . . . . . . . . . . . . . . . . . . . . . . . . . . . 72
Locating Trouble Spots. . . . . . . . . . . . . . . . . . . . . . . . . . . . . . . . . . . . . . 72
Slicing and Dicing . . . . . . . . . . . . . . . . . . . . . . . . . . . . . . . . . . . . . . 72
Trying One Track at a Time . . . . . . . . . . . . . . . . . . . . . . . . . . . . . . . 73
Avoiding Problems in EDLs . . . . . . . . . . . . . . . . . . . . . . . . . . . . . . . . . . 73
Simplifying Effects . . . . . . . . . . . . . . . . . . . . . . . . . . . . . . . . . . . . . . 73
Looking for Missing Information. . . . . . . . . . . . . . . . . . . . . . . . . . . . 73
Dealing with Corruptions . . . . . . . . . . . . . . . . . . . . . . . . . . . . . . . . . 74
Appendix A Check List for Online Editing . . . . . . . . . . . . . . . . . . . . . . . . . . 75
Calling Ahead to the Online Suite. . . . . . . . . . . . . . . . . . . . . . . . . . . . . . 75
Deciding What to Take to the Online Suite. . . . . . . . . . . . . . . . . . . . . . . 76
Take EDL Manager . . . . . . . . . . . . . . . . . . . . . . . . . . . . . . . . . . . . . 77
Take the EDL in Several Forms . . . . . . . . . . . . . . . . . . . . . . . . . . . . 77
Take Reference Information . . . . . . . . . . . . . . . . . . . . . . . . . . . . . . 77
Double-Checking the EDL File Names. . . . . . . . . . . . . . . . . . . . . . . . . . 77
Appendix B Creating EDLs for Film Projects. . . . . . . . . . . . . . . . . . . . . . . . 79
Matchback Conversion in Film-to-Video EDLs. . . . . . . . . . . . . . . . . . . . 79
Creating EDLs for a Matchbacked Sequence . . . . . . . . . . . . . . . . . . . . 80
Creating Audio-Only EDLs . . . . . . . . . . . . . . . . . . . . . . . . . . . . . . . . . . . 80
7
Page 8

Appendix C Using Serial Transmission to Transfer EDLs . . . . . . . . . . . . . 81
Connecting the Edit Controller to the Computer . . . . . . . . . . . . . . . . . . . 81
Setting Serial Transmission Options . . . . . . . . . . . . . . . . . . . . . . . . . . . . 82
Transmitting the EDL . . . . . . . . . . . . . . . . . . . . . . . . . . . . . . . . . . . . . . . 83
Glossary . . . . . . . . . . . . . . . . . . . . . . . . . . . . . . . . . . . . . . . . . . . 85
Index . . . . . . . . . . . . . . . . . . . . . . . . . . . . . . . . . . . . . . . . . . . . . . 93
8
Page 9

Tables
Table 1 Source and Output Timecodes . . . . . . . . . . . . . . . . . . . . .45
Table 2 Timecode Format. . . . . . . . . . . . . . . . . . . . . . . . . . . . . . . .46
Table 3 Formats and Audio Channels . . . . . . . . . . . . . . . . . . . . . .48
Table 4 EDL Sort Modes . . . . . . . . . . . . . . . . . . . . . . . . . . . . . . . .51
Table 5 Master List Options . . . . . . . . . . . . . . . . . . . . . . . . . . . . . .52
Table 6 Dupe List Options . . . . . . . . . . . . . . . . . . . . . . . . . . . . . . .54
Table 7 Show Options . . . . . . . . . . . . . . . . . . . . . . . . . . . . . . . . . .56
Table 8 Optimization Options . . . . . . . . . . . . . . . . . . . . . . . . . . . . .59
Table 9 Standards Options . . . . . . . . . . . . . . . . . . . . . . . . . . . . . . .60
Table 10 Tapename Truncation Options . . . . . . . . . . . . . . . . . . . . .63
Table 11 Serial Transfer Options . . . . . . . . . . . . . . . . . . . . . . . . . . .82
9
Page 10

Figures
Figure 1 EDL Manager Window . . . . . . . . . . . . . . . . . . . . . . . . . . . 37
Figure 2 Options Window . . . . . . . . . . . . . . . . . . . . . . . . . . . . . . . . 47
10
Page 11

Using This Guide
EDL Manager is an application that allows you to create, modify, and
manage edit decision lists (EDLs). The EDL Manager application can
generate EDLs from sequences created with all Avid
Because EDL Manager can generate lists from any Open Media
Framework
applications. You can start EDL Manager from within your Avid videobased editing system, use it in conjunction with other Avid video-based
editing systems, or use it as a standalone application.
The EDL Manager application runs on the Windows
Windows 98, and Mac OS
®
composition, it is also compatible with a broad range of other
®
X operating systems.
®
editing systems.
®
2000, Windows® XP
n
The documentation describes the features and hardware of all models.
Therefore, your system might not contain certain features and hardware
that are covered in the documentation.
Who Should Use This Guide
This guide is intended for EDL Manager users from beginning to advanced
levels. Typically, these users are video editors who need to move a video
project between one editing environment and another, or otherwise use an
EDL to control aspects of the editing process.
About This Guide
This guide is designed to keep pace with current advances in the Avid
system’s effects capabilities by consolidating in one comprehensive
resource all the information you will need to take advantage of the many
Page 12

Using This Guide
options available to you. This guide will lead you through even the most
complex procedures with task-oriented instructions, illustrated in full color
for a more realistic presentation of the actual icons and images you will
encounter. The information provided here builds on editing procedures
described in the tutorial and the user’s guide, while adding a complete
explanation of all the tools and techniques required to create, apply, and
adjust various effects and graphics, including useful tips, shortcuts, and
custom options.
This guide has the following structure:
• Chapter 1, “Working with EDLs,” describes EDLs and how to create,
read, and save them.
• Chapter 2, “Customizing EDLs,” explains how to customize an EDL,
and how to use templates to manage customized settings.
• Chapter 3, “Editing and Troubleshooting EDLs,” explains how to use a
text editor to edit EDLs, and helps you to troubleshoot problems with
EDLs.
• Appendix A, “Check List for Online Editing,” provides suggestions for
successfully transferring a project to an online editing environment.
• Appendix B, “Creating EDLs for Film Projects,” explains some special
considerations that affect the use of EDLs for film projects.
• Appendix C, “Using Serial Transmission to Transfer EDLs,” explains
procedures for using serial transmission to transfer EDLs.
•The Glossary provides a list of industry terms and definitions. Terms
defined in the glossary appear in italics within the text.
• Finally, a detailed Index helps you quickly locate specific topics.
Symbols and Conventions
Unless noted otherwise, the material in this document applies to the
Windows 2000, Windows XP, Windows 98, and Mac OS X operating systems.
When text applies to a specific operating system, it is marked as follows:
• (Windows) or (Windows only) means the information applies to the
Windowsoperating system.
12
Page 13

Symbols and Conventions
• (Macintosh) or (Macintosh only) means the information applies to the
Mac OS X operating system.
The majority of screen shots in this document were captured on a
Windows 2000 system, but the information applies to Windows
and Mac OS X systems. Where differences exist, both
Windows and Mac OS X screen shots are shown.
Avid documentation uses the following symbols and conventions:
Symbol or Convention Meaning or Action
n
c
w
> This symbol indicates menu commands (and
t
k This symbol represents the Apple or Command key.
A note provides important related information,
reminders, recommendations, and strong
suggestions.
A caution means that a specific action you take could
cause harm to your computer or cause you to lose
data.
A warning describes an action that could cause you
physical harm. Follow the guidelines in this
document or on the unit itself when handling
electrical equipment.
subcommands) in the order you select them. For
example, File > Import means to open the File menu
and then select the Import command.
This symbol indicates a single-step procedure.
Multiple arrows in a list indicate that you perform
one of the actions listed.
Press and hold the Command key and another key to
perform a keyboard shortcut.
Margin tips In the margin, you will find tips that help you
perform tasks more easily and efficiently.
13
Page 14

Using This Guide
Symbol or Convention Meaning or Action
Italic font Italic font is used to emphasize certain words and to
indicate variables.
Courier Bold font
Click Quickly press and release the left mouse button
Double-click Click the left mouse button (Windows) or the mouse
Right-click Quickly press and release the right mouse button
Drag Press and hold the left mouse button (Windows) or
Ctrl+key
k+key
If You Need Help
If you are having trouble using EDL Manager, you should:
1. Retry the action, carefully following the instructions given for that task
in this guide. It is especially important to check each step of your
workflow.
Courier Bold font identifies text that you type.
(Windows) or the mouse button (Macintosh).
button (Macintosh) twice rapidly.
(Windows only).
the mouse button (Macintosh) while you move the
mouse.
Press and hold the first key while you press the
second key.
14
2. Check the release notes supplied with your Avid application for the
latest information that might have become available after the hardcopy
documentation was printed.
3. Check the documentation that came with your Avid application or your
hardware for maintenance or hardware-related issues.
Page 15

4. Visit the online Knowledge Center at www.avid.com/support. Online
services are available 24 hours per day, 7 days per week. Search this
online Knowledge Center to find answers, to view error messages, to
access troubleshooting tips, to download updates, and to read/join
online message-board discussions.
5. For Technical Support, please call 800-800-AVID (800-800-2843).
For Broadcast On-Air Sites and Call Letter Stations, call
800-NEWSDNG (800-639-7364).
Related Information
The following documents provide more information about EDL Manager:
• Avid EDL Manager Quick Reference
• Avid EDL Manager Release Notes
• Avid AudioVision User’s Guide
Related Information
If You Have Documentation Comments
Avid Technology continuously seeks to improve its documentation. We
value your comments about this guide, the Help, the Online Publications
CD-ROM, and other Avid-supplied documentation.
Simply e-mail your documentation comments to Avid Technology at
TechPubs@avid.com
Please include the title of the document, its part number, and the specific
section you are commenting on in all correspondence.
15
Page 16

Using This Guide
How to Order Documentation
To order additional copies of this documentation from within the
United States, call Avid Sales at 800-949-AVID (800-949-2843). If you are
placing an order from outside the United States, contact your local
Avid representative.
Avid Educational Services
For information on courses/schedules, training centers, certifications,
courseware, and books, please visit www.avid.com/training or call
Avid Sales at 800-949-AVID (800-949-2843).
16
Page 17

Chapter 1
Working with EDLs
This chapter introduces edit decision lists (EDLs) and provides instructions
for basic EDL Manager procedures. It includes the following sections:
• EDLs and the EDL Manager
• Starting EDL Manager
• Using Help
• Creating or Reading an EDL
• Saving an EDL
• Formatting an RT-11 Disk
• Printing an EDL
• Copying an EDL between Storage Locations
• Using EDL Manager with Your Avid Editing System
• Viewing a List of Tapes in the Source Table
EDLs and the EDL Manager
An edit decision list (EDL) is a list of instructions for all the edits you
make for creating a program on videotape. This list might include cuts,
wipes, dissolves, fades, and black edits. The EDL Manager application
organizes the instructions as a series of chronological edits called events.
Each event specifies a timecode for the source and master tapes.
Page 18

Chapter 1 Working with EDLs
Online and Offline Editing
In most cases, you generate an EDL to take a project from the offline
editing environment, where rough editing and experimentation are less
expensive, into the online editing environment, where an editor using an
edit controller can produce a finished master in less time. The EDL
Manager saves EDLs in a format an editing system can use, such as GVC
or CMX. You might also need to import an EDL from the online
environment back into the offline suite to make further changes before
completing the master tape.
Traditionally, the offline environment consisted of a simplified videotape
suite with less expensive machines and fewer effects capabilities. More
recently, offline environments are likely to include nonlinear editing
systems such as Avid’s Media Composer
also include a high-end nonlinear editing system such as Avid’s
Symphony™, or an online model of Media Composer.
In all cases, the EDL, in the form of a file generated in a readable format, is
the link back and forth between the two environments.
®
. The online environment might
What the EDL Manager Does
You can use EDL Manager to generate an EDL from a sequence in a bin or
from an OMFI file. OMFI is a file format for importing and exporting
media; it allows you to share information with other platforms. You can
also read a previously saved EDL into EDL Manager. After creating an
EDL, you can save it as a text file that can be read by different edit
controllers, such as Sony
OMFI composition.
You can use EDL Manager to create an EDL that displays additional types
of information, such as comments or patches. You can specify the different
audio and video tracks in the sequence. You can also specify the assembly
modes that the online edit controller uses when creating your program.
Because EDL Manager is a standalone application, your other Avid
applications do not have to be running when you create EDLs from
sequences. When you run EDL Manager with your Avid editing system,
18
®
, GVG, or CMX, or you can save the EDL as an
Page 19
you can bring the sequence that is currently in the editing system into the
EDL Manager window. After working with the EDL in EDL Manager, you
can create a sequence in the Avid editing system from the EDL.
Starting EDL Manager
You can start EDL Manager as a standalone application, or you can start it
from within your Avid editing system application.
(Windows) To start EDL Manager as a standalone application:
1. Click the Start button.
2. Point to Programs.
3. Point to Avid.
4. Point to EDL Manager.
EDL Manager opens.
Starting EDL Manager
(Macintosh) To start EDL Manager as a standalone application:
t Double-click the EDL Manager icon.
EDL Manager opens.
To start EDL Manager from within your Avid editing system
application:
t Select Output > EDL.
EDL Manager opens as the active window, showing the Editing System
icon connected to the Update button by a Right Arrow button.
19
Page 20

Chapter 1 Working with EDLs
Using Help
The Help provides all the information contained in the Avid EDL Manager
User’s Guide, and operates in a web browser. To open the Help, select
Help > EDL Manager Help in the Avid EDL Manager application. For
information about using the Help, click the Using Help button in the Help
system.
Creating or Reading an EDL
The EDL Manager window displays the EDL you create or the existing
EDL you open or read. You can view an EDL by doing any of the
following:
• Creating an EDL from a Sequence in a Bin, Existing EDL, or OMFI
File (Windows)
• Creating an EDL from a Sequence in a Bin, Existing EDL, or OMFI
File (Macintosh).
• Creating an EDL from the Active Sequence.
• Reading an Existing EDL from the RT-11 Disk.
Creating an EDL from a Sequence in a Bin, Existing EDL, or OMFI File (Windows)
To create an EDL from a sequence in a bin, from an existing EDL, or
from an OMFI file:
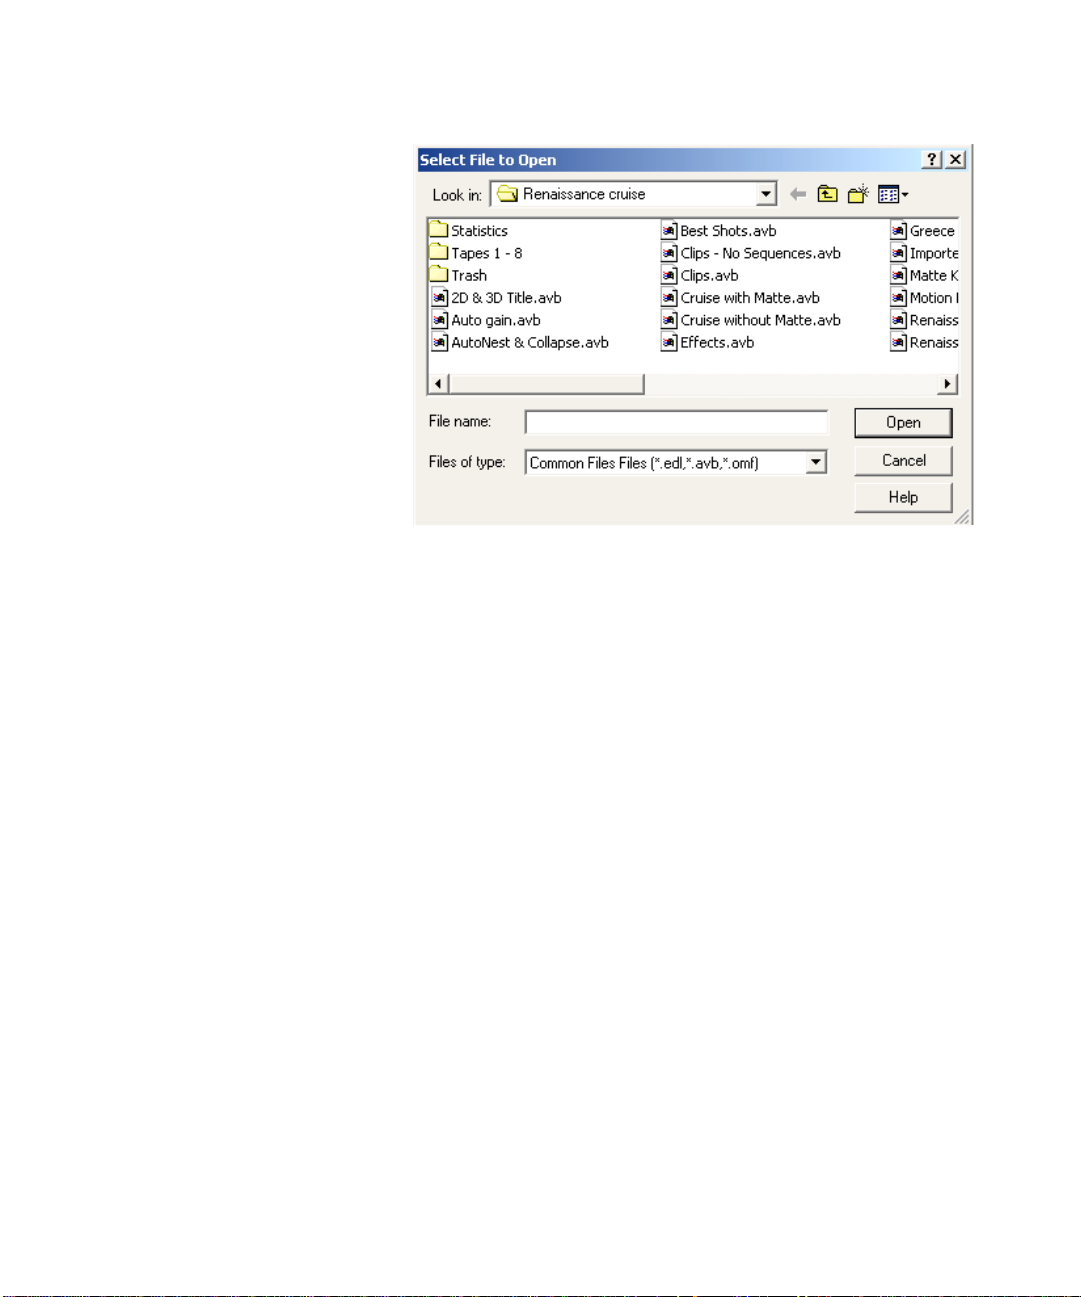
1. Select File > Open.
The Select File to Open dialog box opens.
20
Page 21
Creating or Reading an EDL
2. Select Common Files (*.avb, *.edl, *.omf) from the Files of type popup menu.
3. Navigate to the disk or folder that contains the file you want.
n
4. Select a file — either a sequence in a bin (.avb), another EDL (.edl), or
an OMFI (.omf) file — and click Open.
When you open an OMF file or a file from a bin, EDL Manager
automatically determines whether the EDL you are generating should be
NTSC, PAL Video, or PAL Film 1 or 2. If you open an EDL other than from
an OMF file or a file from a bin, you must select a standard suboption.
If you select a bin or an OMFI file, one of the following happens:
t If the file contains only one sequence, EDL Manager creates the
EDL for that sequence.
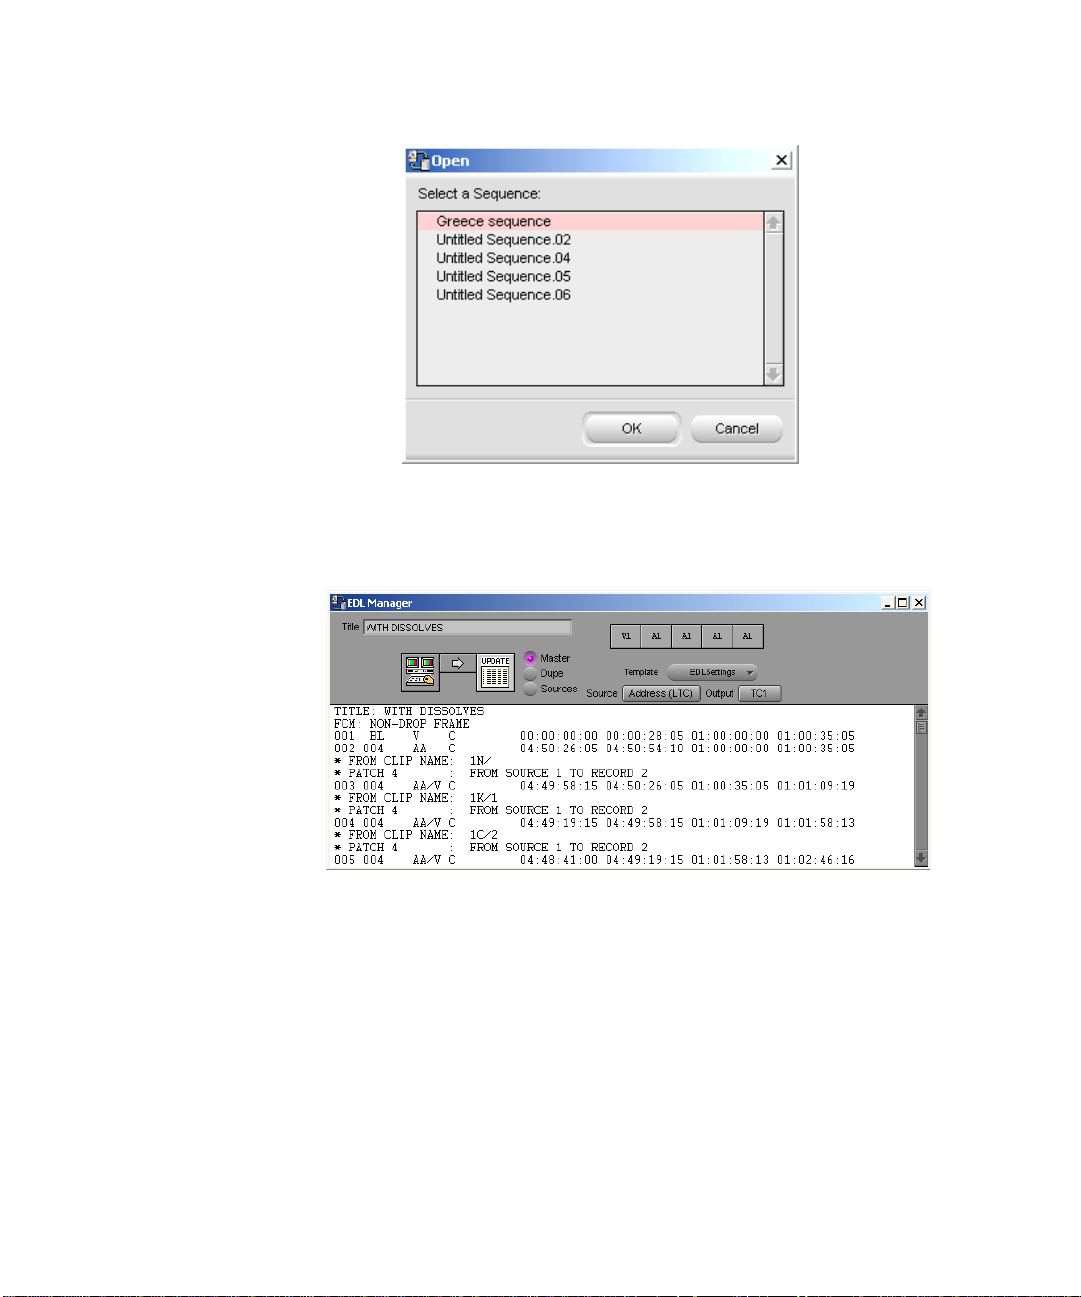
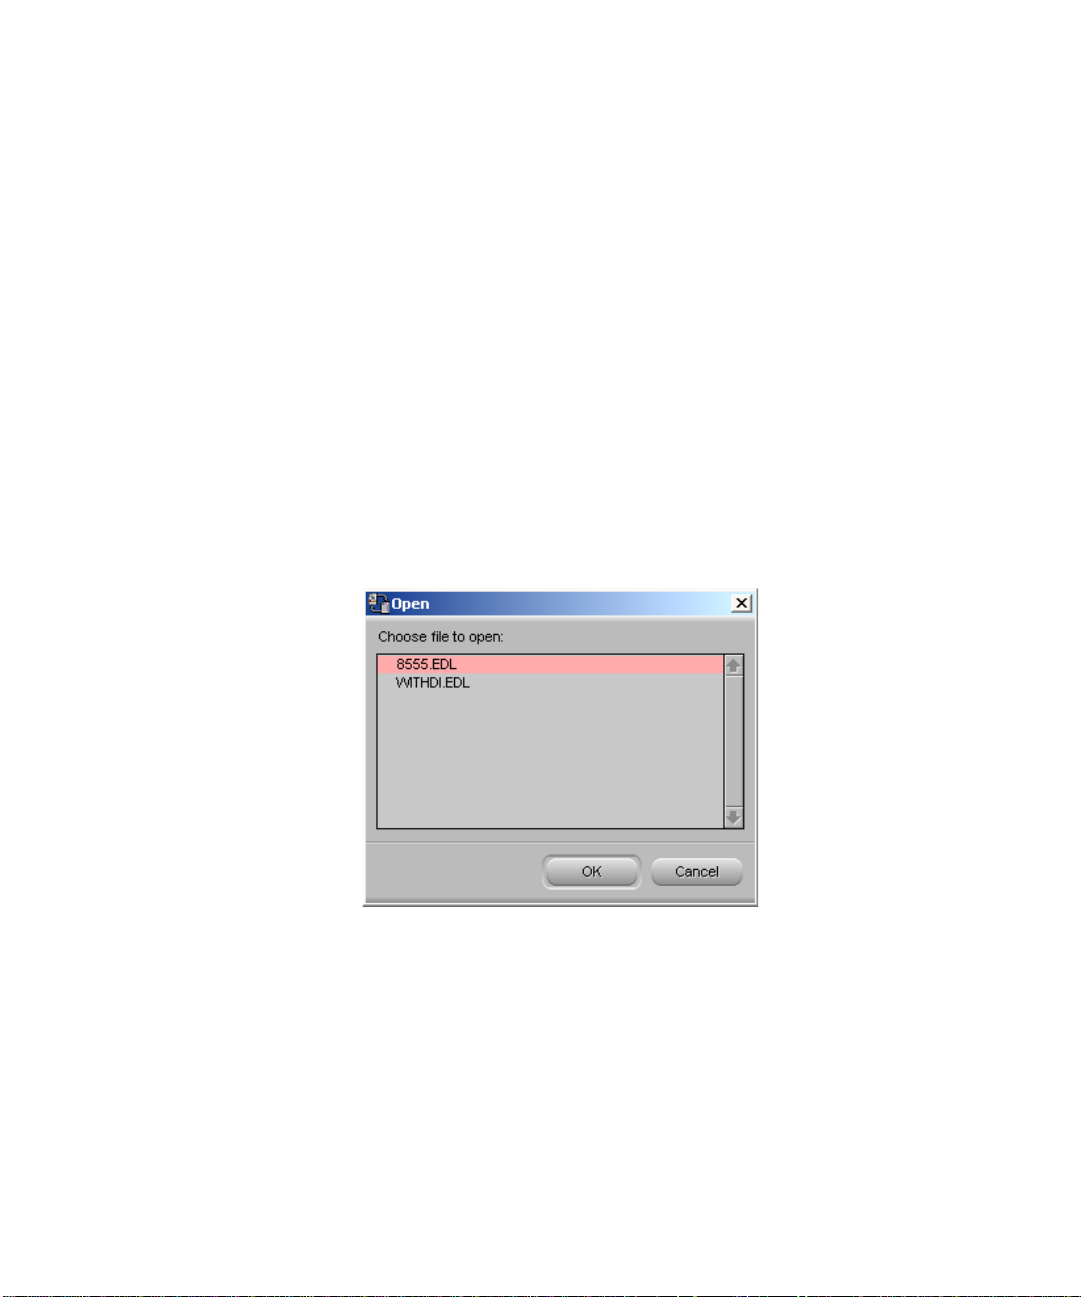
t If the file contains more than one sequence, the Open dialog box
opens.
21
Page 22
Chapter 1 Working with EDLs
5. Select a sequence and click OK.
The created EDL appears in the EDL Manager window.
22
n
The Source and Output pop-up menus appear only for 24p or 25p bins and
for OMFI files.
For information on changing the settings in the EDL, see Chapter 2.
Page 23
Creating or Reading an EDL
Creating an EDL from a Sequence in a Bin, Existing EDL, or OMFI File (Macintosh)
To create an EDL from a sequence in a bin, from an existing EDL, or
from an OMFI file:
1. Select File > Open.
A dialog box opens.
2. Navigate to the disk or folder that contains the file you want.
3. Select a file — either a sequence in a bin (.avb), another EDL (.edl), or
an OMFI (.omf) file — and click Open.
n
When you open an OMF file or a file from a bin, EDL Manager
automatically determines whether the EDL you are generating should be
NTSC, PAL Video, or PAL Film 1 or 2. If you open an EDL other than from
an OMF file or a file from a bin, you must select a standard suboption.
If you select a bin or an OMFI file, one of the following happens:
t If the file contains only one sequence, EDL Manager creates the
EDL for that sequence.
t If the file contains more than one sequence, a dialog box opens.
Select a sequence and click OK. EDL Manager creates the EDL.
The created EDL appears in the EDL Manager window.
23
Page 24
Chapter 1 Working with EDLs
n
The Source and Output pop-up menus appear only for 24p or 25p bins and
for OMFI files.
For information on changing the settings in the EDL, see “Customizing
EDLs” on page 35.
Reading an Existing EDL from the RT-11 Disk
(Windows) To read an EDL that is saved on an RT-11 disk in a CMX,
GVG, or high-density GVG (HDGVG) edit controller format:
1. Insert the RT-11 disk that contains the EDL you want to read into the
disk drive.
2. Select File > Read From RT11 Disk.
The Open dialog box opens.
24
n
3. Select the EDL you want and click OK.
The EDL opens in the EDL Manager window.
When you open an OMF file or a file from a bin, EDL Manager
automatically determines whether the EDL you are generating should be
NTSC, PAL Video, or PAL Film 1 or 2. If you open an EDL other than from
an OMF file or a file from a bin, you must select a standard suboption.
Page 25
Saving an EDL
(Macintosh) To read an EDL that is saved on an RT-11 disk in a CMX,
GVG, or high-density GVG (HDGVG) edit controller format:
1. Insert the RT-11 disk that contains the EDL you want to read into the
disk drive.
An alert box warns that the disk is not a Macintosh disk.
2. Click OK.
A Disk icon appears in the main window.
Disk icon
3. Select File > Read From RT11 Disk.
4. Select an EDL and click OK.
n
When you open an OMF file or a file from a bin, EDL Manager
automatically determines whether the EDL you are generating should be
NTSC, PAL Video, or PAL Film 1 or 2. If you open an EDL other than from
an OMF file or a file from a bin, you must select a standard suboption.
To eject the RT-11 disk:
t Select File > Eject RT11 Disk.
Saving an EDL
You can save an EDL as a text file with the .EDL file name extension, or as
an OMFI composition. The location where you save the EDL can be a
DOS-formatted disk, a hard drive or other storage device, or an RT-11 disk
A list of EDL files appears.
The EDL opens in the EDL Manager main window.
25
Page 26

Chapter 1 Working with EDLs
that can be read by CMX or GVG edit controllers. For information on
formatting an RT-11 disk, see “Formatting an RT-11 Disk” on page 29.
Saving an EDL as a Text File or an OMFI Composition
To save an EDL as a text file or an OMFI composition:
1. Select one of the following:
t File > Save As, to save the EDL as a text file
t File > Save As OMFI, to save the EDL as an OMFI composition
A dialog box opens.
2. Navigate to the disk or folder where you want to save the EDL.
3. Accept the default file name, or enter a new name.
If you are saving to a DOS-formatted disk for transfer to an edit
controller, use a file name that the edit controller can read. The name
must be eight alphanumeric characters or less in uppercase letters,
followed by the file name extension (either .EDL or .OMF). For
example:
ANNA23.EDL
4. Click Save.
EDL Manager saves the EDL to the location you specified.
Saving an EDL to an RT-11 Disk
(Windows) To save an EDL to an RT-11 disk:
1. Insert a CMX or GVG disk into the disk drive.
2. With an EDL open in the EDL Manager window, select File > Write
To RT11 Disk.
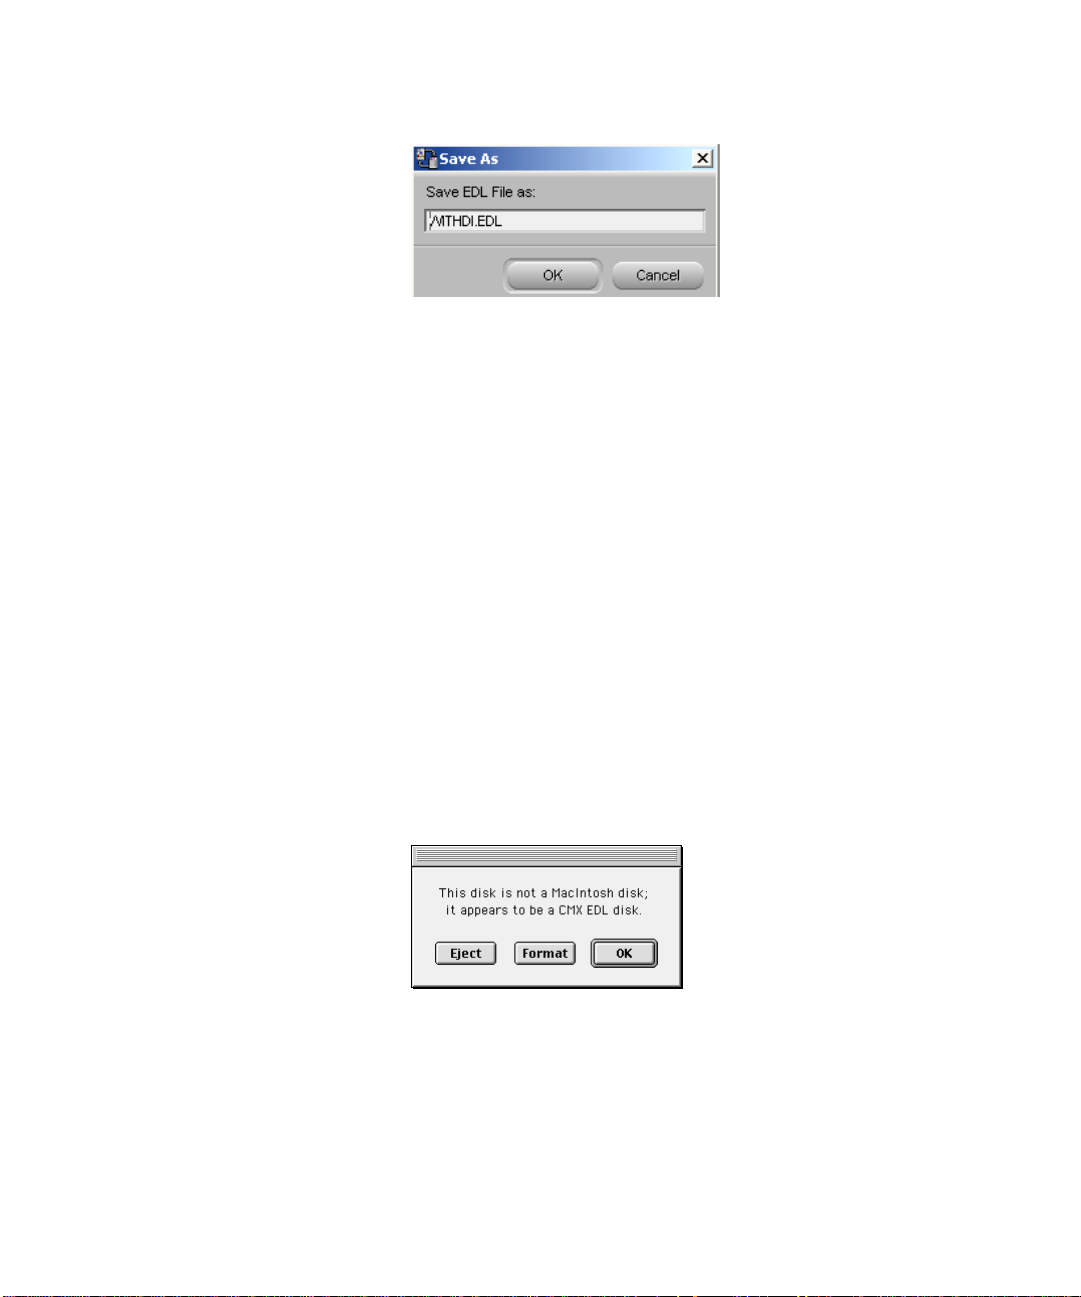
A dialog box opens, showing the name of the EDL.
26
Page 27
Saving an EDL
3. Accept the EDL file name, or type a new name.
The name must be six or fewer alphanumeric characters, in uppercase
letters, followed by the .EDL file name extension.
For example:
LEO3A.EDL
4. Click OK.
EDL Manager saves the EDL to the CMX or GVG disk.
n
Some edit systems cannot read high-density disks (marked with the HD
symbol), so you might have to use a double-density disk. If you are in
doubt, check with the online suite or have the suite provide you with a
formatted disk.
(Macintosh) To save an EDL to an RT-11 disk:
1. Insert a CMX or GVG disk into the disk drive.
An alert box opens.
2. Click OK.
3. With an EDL open, select File > Write To RT11 Disk.
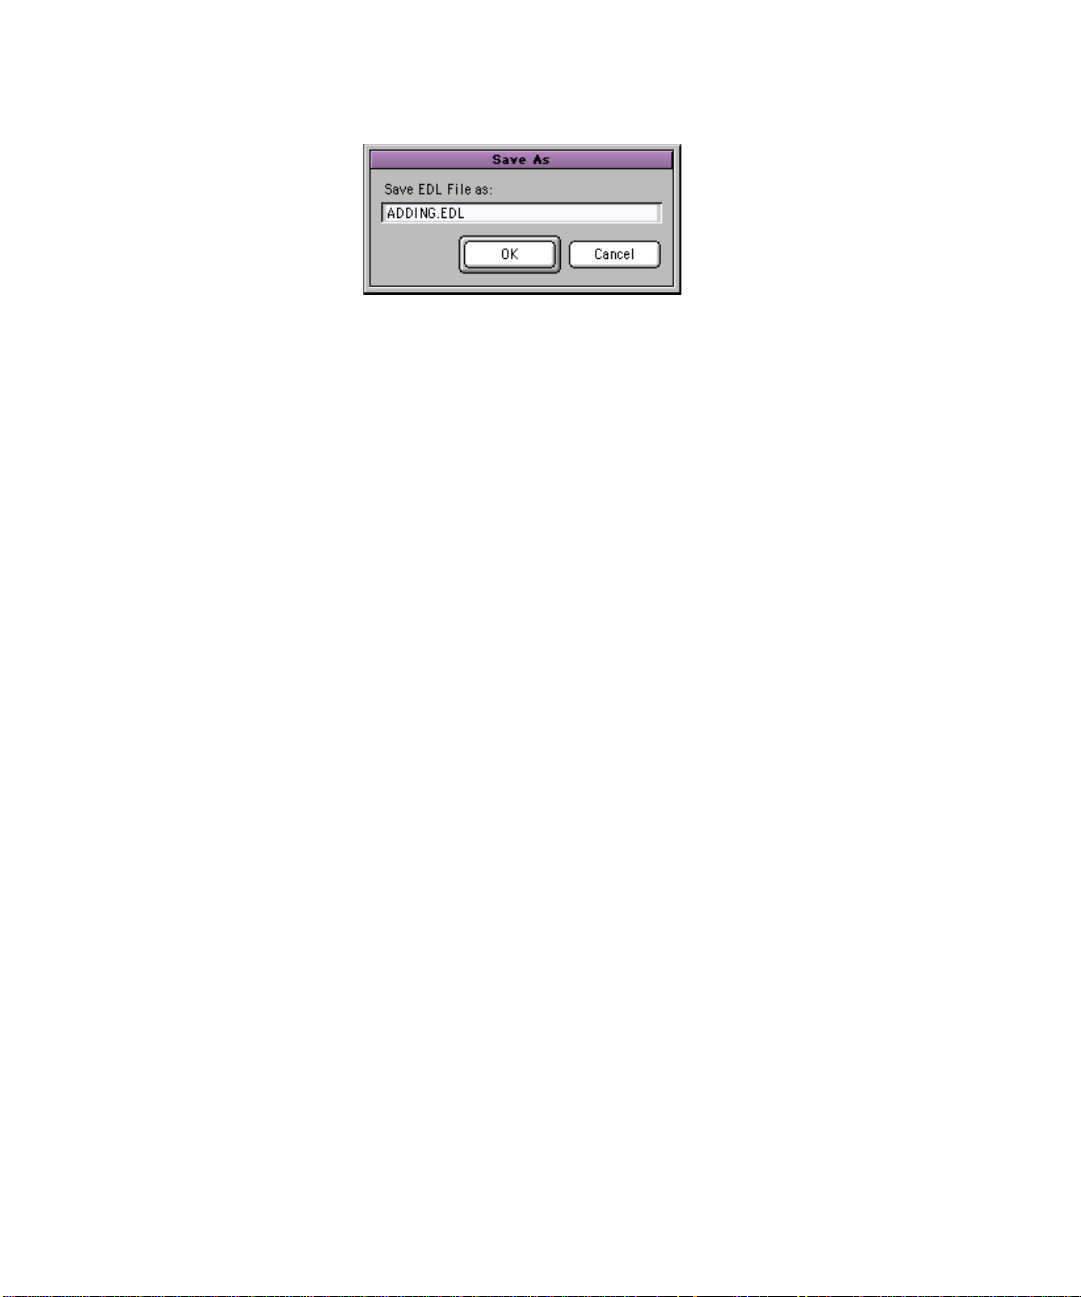
A dialog box opens, showing the name of your EDL.
27
Page 28
Chapter 1 Working with EDLs
4. Accept the EDL file name, or type a new name.
The name must be six or fewer alphanumeric characters, in uppercase
letters, followed by the .EDL file name extension.
For example:
LEO3A.EDL
5. Click OK.
EDL Manager saves the EDL to the CMX or GVG disk.
n
Some edit systems cannot read high-density disks (marked with the HD
symbol), so you might have to use a double-density disk. If you are in
doubt, check with the online suite or have the suite provide you with a
formatted disk.
Verifying an RT-11 Save
Because an RT-11 disk is not initialized for Macintosh, or Windows, you
cannot see its contents by using the standard operating system tools (for
example, My Computer on Windows). To verify that the EDL has been
saved successfully to the disk, you can follow the first few steps of
“Reading an Existing EDL from the RT-11 Disk” on page 24. If the EDL
appears in the Make Selection dialog box, then you know it was saved to
the disk.
To verify that the EDL was saved to the disk:
1. Select File > Read From RT11 Disk.
The list of files for the RT-11 disk appears, allowing you to verify that
your EDL was saved to the disk.
2. Click Cancel to return to the EDL Manager.
28
Page 29
Formatting an RT-11 Disk
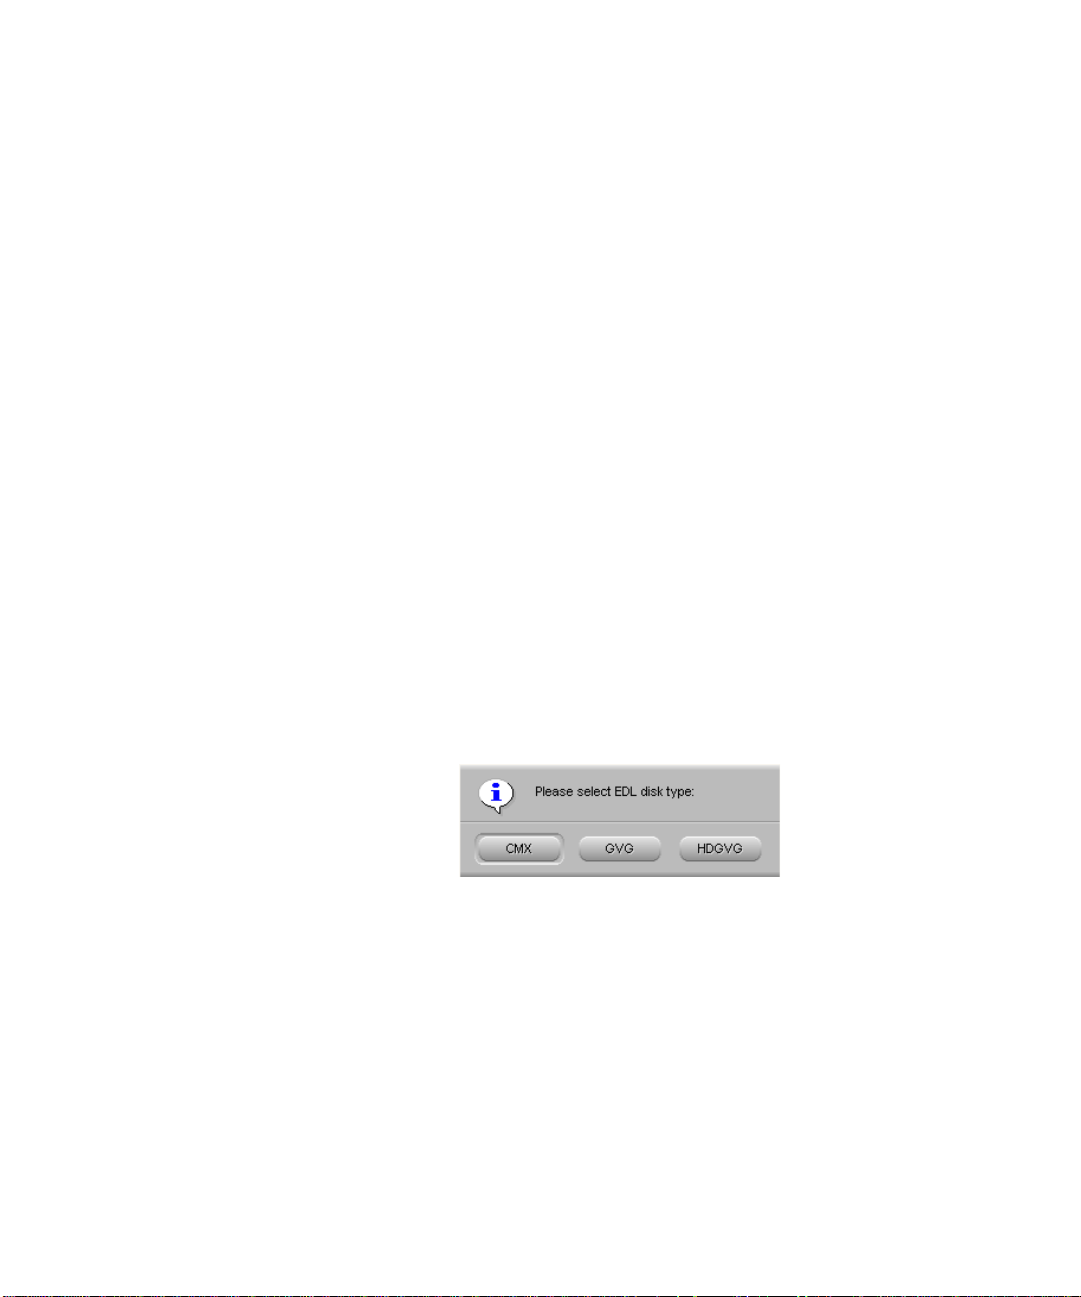
An RT-11 disk in EDL Manager can be in any of the following formats:
•CMX
•GVG
• HDGVG (high-density GVG)
Formatting an RT-11 Disk
c
When you take a DOS or Macintosh-formatted disk and format it as
an RT-11 disk, data on the disk is erased.
To format an RT-11 disk:
1. Select File > Format RT11 Disk.
A dialog box opens telling you to insert a diskette.
2. Insert a DOS-formatted disk (Windows) or a blank disk (Macintosh)
into the drive and click OK.
A message box opens warning that all data on the disk will be lost.
3. Click OK.
The Format Options dialog box opens.
4. Click one of the option buttons to select an EDL disk type format.
EDL Manager formats the disk.
29
Page 30

Chapter 1 Working with EDLs
Printing an EDL
To print an open EDL:
1. Select File > Print EDL (Windows) or File > Print (Macintosh).
A dialog box opens.
2. Select the print options you want.
3. Click OK (Windows) or Print (Macintosh).
Copying an EDL between Storage Locations
You can copy an EDL from any drive or disk storage location to another
without having to open the EDL in the EDL Manager window or switch to
operating system tools such as My Computer. The storage locations,
including RT-11 disks, must be accessible to your computer.
To copy an EDL from one location to another:
30
1. To copy to or from an RT-11 disk, insert the RT-11 disk in the disk
drive.
(Macintosh only) A message appears stating that this is not a
Macintosh disk.
2. Click OK.
3. Select File > Copy To/From Disk.
The following dialog box opens:
4. To select the EDL to copy, do one of the following:
t To copy from an RT-11 disk, click Yes.
Page 31

Using EDL Manager with Your Avid Editing System
A list of EDL files appears. Select the EDL you want and click
OK.
t To copy from any other disk or drive, click No.
A dialog box opens.
t Navigate to the file you want to open and click Open.
Once you have selected the EDL you want to copy, a dialog box opens,
and asks if you want to write to an RT-11 disk.
5. To select the destination for the EDL copy, do one of the following:
t To copy to an RT-11 disk, click Yes, either accept the default file
name or enter a new name of six or fewer uppercase characters,
and then click OK.
t To copy to any other disk or drive, click No.
t A dialog box opens.
t Navigate to the location where you want to save the file and click
Save.
Using EDL Manager with Your Avid Editing System
EDL Manager is a standalone application; your other Avid editing
applications (for example, Media Composer, Film Composer, Symphony,
or Avid Xpress) do not have to be running when you create EDLs from
existing sequences.
When you start EDL Manager from your Avid editing system, or have
EDL Manager and the editing system running at the same time, you can
create an EDL for the sequence loaded in the active monitor or you can
create a sequence in the Avid editing system from an EDL that is open in
EDL Manager. See the following sections for more information:
• Creating an EDL from the Active Sequence
• Creating a Sequence from an EDL
31
Page 32

Chapter 1 Working with EDLs
Creating an EDL from the Active Sequence
You can create an EDL directly from the sequence that is loaded in your
Avid editing system. For more information, see “Using EDL Manager with
Your Avid Editing System” on page 31.
To create an EDL from the sequence currently loaded in the Avid
editing system, do one of the following in EDL Manager:
t Click the Right Arrow button between the Editing System button and
the Update button in the EDL Manager window.
t Select File > Get Current Sequence.
The EDL appears in the EDL Manager window and a Left Arrow button
appears under the Right Arrow button, indicating that you can now also
create a sequence from the EDL.
Creating a Sequence from an EDL
32
You can create a sequence in your Avid editing system directly from an
EDL. This procedure only applies to 30i and 25i projects and sequences.
To create a sequence in your Avid editing system from an EDL that is
open in EDL Manager:
1. With your Avid editing system running, do one of the following:
t Click the Left Arrow button between the Editing System button
and the Update button in the EDL Manager EDL Manager
window.
t Select Create Composer Sequence from the EDL Manager File
menu.
The editing system becomes the active window, and a dialog box
opens. The dialog box lists only those bins currently open in the
editing system.
2. Do one of the following:
t Select an existing bin in which to place the EDL sequence, and
then click OK.
Page 33

Viewing a List of Tapes in the Source Table
t Click New Bin to create a new bin in which to place the EDL
sequence.
The sequence is created in the bin you selected, and EDL Manager
becomes the active window again.
Viewing a List of Tapes in the Source Table
The source table lists all source tapes in the sequence that the EDL
describes. The source table is a useful reference when you assemble your
program.
To view the source table:
t Click the Sources button in the EDL Manager window. A list of source
tapes appears.
n
User-defined
name
Avid-defined
name
Avid import ID
If Sources is already selected before you open an EDL, the source table
appears when you complete the opening procedure. To view the master
EDL display, click Master in the EDL Manager window.
33
Page 34

Chapter 1 Working with EDLs
About the Source Table
The source table has one row for each source tape. The three columns
provide the following information:
• The user-defined name for a source tape
• The Avid-defined name for a source tape
•The Avid import ID, which is the internal identification for your Avid
source tape
The exact format for these columns varies depending on the format of your
EDL.
User-defined
name
Avid-defined
name
Avid import ID
Before your online session, you might want to print the source table on
paper.
Printing a List of Tapes in the Source Table
To print the source table:
t Select File > Print EDL.
For more information about the online session, see “Online and Offline
Editing” on page 18.
34
Page 35

Chapter 2
Customizing EDLs
This chapter describes how to customize an edit decision list by changing a
variety of settings. It also explains how to save settings as templates for use
with other EDLs.
This chapter includes the following sections:
• EDL Manager Option Settings
• Changing Settings in the EDL Manager Window
• Changing Settings in the Options Window
• Changing Options in the Site Settings Dialog Box
EDL Manager Option Settings
Initially, EDL Manager uses default option settings to generate the EDL,
unless you customize the EDL by changing the settings for any of the
options. You can change the settings, save them to a template, and then use
the template for other EDLs; or you can continue to manipulate the settings
until you find the most effective combination for your sequence.
Settings that you can change are located in several places within EDL
Manager. See the following sections:
• Changing Settings in the EDL Manager Window
• Changing Settings in the Options Window
• Changing Options in the Site Settings Dialog Box
Page 36

Chapter 2 Customizing EDLs
As you choose the settings for your EDL, remember that they might
significantly affect the online session in terms of time and money. For
example, if you finish your program in a suite with preread capabilities,
choosing the preread option in the EDL Manager application can save time
in dubbing sources, and save money in additional deck rental.
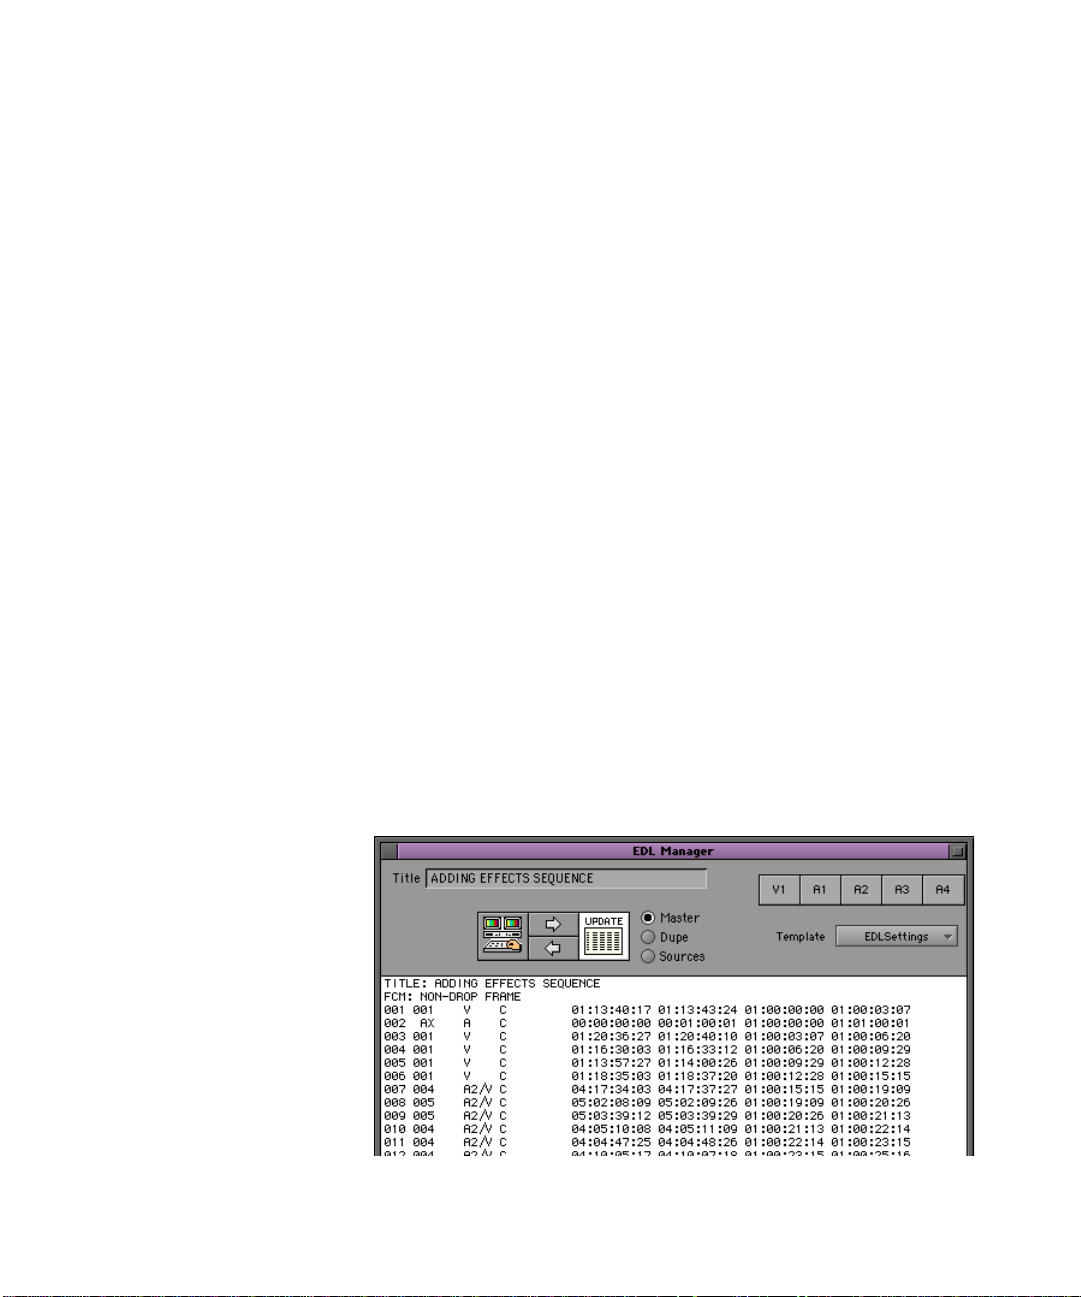
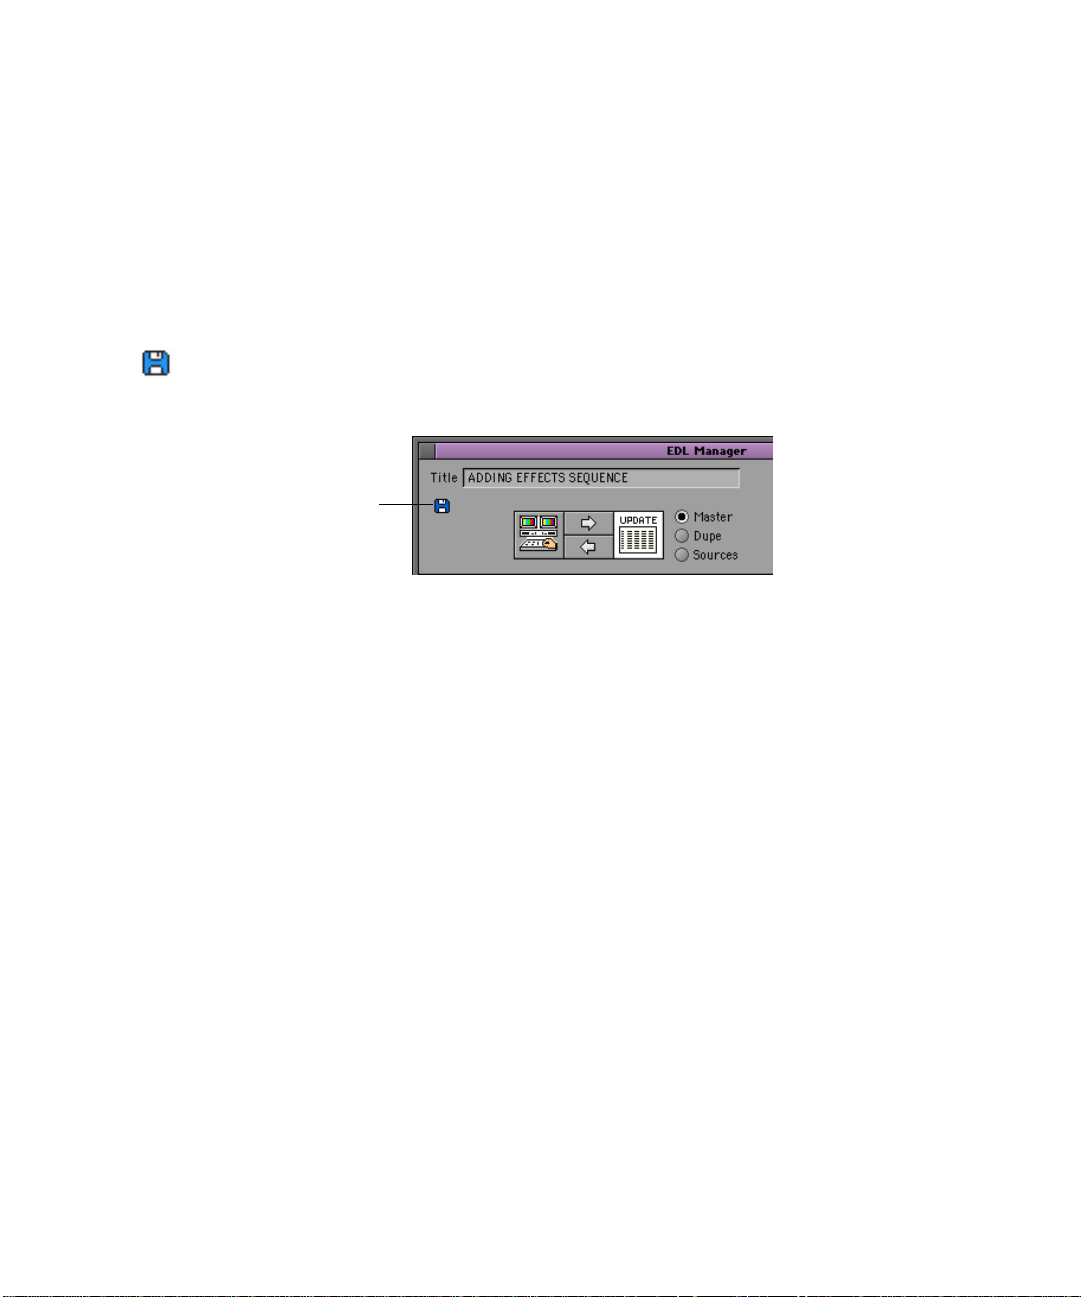
Changing Settings in the EDL Manager Window
Use the EDL Manager window (see Figure 1) to change or select the
following settings:
• Title name of your EDL
• Video tracks and audio channels
• Views of the EDL — master list, dupe list, or source table
• Templates to apply to the EDL
• Source and output frame rates (for 24p or 25p bins and OMFI files
only)
36
Use the Update button to update the EDL with changes you make to the
video tracks, audio channels, title, and to the Source and Output frame
rates.
Page 37

Changing Settings in the EDL Manager Window
EDL
EDL name Three views
Update button
Source timecode Output timecode
Video and Audio
Track selector panel
Timecode options
(24p, 25p and OMFI files only)
Figure 1 EDL Manager Window
Changing the Title of an EDL
You can change the title of your EDL at any time. For example, you might
want to open an EDL, modify it in some way, and then retitle the modified
version to distinguish it from the original. If you then save the new version
by using a new file name, you have two distinct versions of the EDL with
different titles and file names.
To change the title of an EDL:
1. Click in the Title text box.
2. Delete the old title and type a new one.
3. Click Update.
37
Page 38

Chapter 2 Customizing EDLs
The new title appears as the first line of the EDL.
n
Changing the title of an EDL does not automatically create a new file. To
create a new file, you must save the EDL by choosing File > Save As. In the
Save As dialog box that opens (for an EDL with a changed title), the
system supplies a new file name by default — the first six characters of the
new name plus the .EDL file name extension. You can accept this file name
or modify it before you save the EDL.
Defining Video Tracks and Audio Channels
EDL Manager works with a maximum of 24 video tracks and 16 audio
channels, depending on the edit controller format you select, as described
in “Changing Settings in the Options Window” on page 46. The
capabilities of the edit controller determine how many output tracks
(channels) you can use.
The Track Selector panel in the EDL Manager window controls the
selection of video and audio tracks for the EDL. Each button in the panel
represents one channel of audio or video in the EDL.
Initially, EDL Manager uses the following panel configuration:
Video track
Audio channels
38
Track Selector panel
The number on each button refers to the channel from the sequence that is
assigned to that channel in the EDL.
If you create an EDL from a simple sequence that contains one video track
and up to four audio channels, you can use the default arrangement of the
Track Selector panel. For other situations, you can reconfigure the Track
Selector panel differently.
Page 39

Including or Excluding Specific Tracks
If multiple audio channels and video tracks exist in your sequence, you
might want to include only certain tracks in the EDL.
To specify which tracks to include or exclude:
1. Click the audio or video track button in the Track Selector panel.
A pop-up menu of channels (or tracks) appears. The number of audio
channels listed depends on your edit controller.
2. Do one of the following:
t Select a track number from the pop-up menu.
t Select the minus sign (–), at the top of the pop-up menu, to turn off
a track.
The track number or the minus sign appears on the button.
3. Click Update.
Redefining a Track
Changing Settings in the EDL Manager Window
You can assign any track from your sequence to any track in your EDL.
Keeping channel A1 in the sequence as the first audio channel in the EDL
is not necessary.
For example, suppose you decide to move audio channel 16 in your
sequence to audio channel 1 in your EDL. Select A16 from the pop-up
menu.
The underlined number in the list of available tracks — in this case, A1 —
is a reminder that you are moving A16 to the EDL audio channel 1.
The audio button displays A16, indicating that you have assigned track
A16 from the sequence to the first audio channel in the EDL.
39
Page 40

Chapter 2 Customizing EDLs
EDL
channels
Track selected to
include in the EDL
When you generate your list, the EDL will refer to this channel as A1
because it is the first audio channel in the EDL itself.
Combining or Isolating Tracks
Depending on the complexity of your sequence, you can combine or
isolate video tracks.
• For simple sequences, you can combine video tracks. To do so, select
the All V (All Video) setting from the Video Track pop-up menu. EDL
Manager combines all the video tracks in a sequence into one
representative video track in the EDL.
40
Track displayed
in the EDL
Page 41

Changing Settings in the EDL Manager Window
When you combine video tracks and the list is too complex, EDL
Manager simplifies the list. To see error messages, select Console from
the Windows menu. For more information on the Console window, see
“Removing Problems Caused by Complex Sequences” on page 69.
• For sequences too complex to be represented in one EDL, you can
isolate a video track.
As an example, you might have multiple layers of keys, or a key over a
superimposition (super) with color correction, and so on.
Track isolation creates successive EDLs for the same sequence, each
with a different video track.
To isolate a video track:
1. Assign a single video track from the sequence, such as V1, to the EDL
Manager video track.
2. Save this EDL with a unique name.
Repeat the steps for each video track you want to isolate.
c
Creating Stereo Channels
When you save successive EDLs for the same sequence, be sure to
devise a system for giving each file a unique name, such as
SOURCE1.EDL, SOURCE2.EDL, and so on.
By assigning the same audio channel from your sequence to two different
EDL Track Selector panels, you can create stereo channels. For example,
to create stereo channels using A16 from your sequence, assign A16 to
both audio tracks 1 and 2 in EDL Manager:
To create stereo channels:
1. Click an audio button in the Track Selector panel.
2. Select the audio channel in the sequence from which you want to
create a stereo channel.
3. Click another audio button.
41
Page 42

Chapter 2 Customizing EDLs
4. Select the same audio channel from the sequence to assign to this EDL
channel.
5. Click Update.
Choosing a Format for the Audio Channels
Your EDL can include a maximum of 16 audio channels at any one time in
the EDL, depending on the edit controller format you chose. For
information on choosing an edit controller format, see “Selecting an Edit
Controller Format” on page 48.
Displaying Different Views of an EDL
Your EDL Manager window can display the EDL in one of three ways:
• Master list
• Dupe list (if options are set for creating a dupe list)
• A table of your source tapes
To display one of the views in the EDL Manager window:
t Click the button of the view you want to see.
For more information, see “Setting Up a Master List” on page 52, “Setting
Up a Dupe List” on page 53, and “Viewing a List of Tapes in the Source
Table” on page 33.
Selecting a Template for the EDL
A template file is where you can save a customized set of options. This
feature allows you to organize and recall the customized settings in
whatever way is useful for your work. For example, you might want to
create a template for each editor who works on your system, or perhaps
create a template for each type of edit controller you regularly work with.
42
Page 43

File Names in the Template Pop-up Menu
The Template pop-up menu lists the name of the current template your
EDL is using and any other templates you have saved. It also lists any
temporary template, shown as an italicized file name. EDL Manager
automatically creates the temporary file as you make and apply changes in
the Options window (see Figure 2). To save your customized options to a
template, see “Saving Options to a Template File” on page 63.
Opening a Template
To open an existing template or a temporary template:
1. Click the Template pop-up menu.
A list of templates appears.
2. Select the template you want to open.
EDL Manager loads the option settings associated with the template.
To see the options that are set for this template, open the Options
window by choosing Options from the EDL Manager Windows menu.
The name of the template appears in the Template Name text box in
the Options window.
Changing Settings in the EDL Manager Window
Adjusting the Source and Output Timecodes
You can deliver various output formats in 24p and 25p projects by
adjusting the timecodes in your EDL. The Source and Output pop-up
menus, in the EDL Manager Window, each list timecode options that you
can set for the EDL. The Source and Output options you select affect the
source and output timecode columns of the EDL (see Figure 1).
n
The Source and Output pop-up menus appear in the EDL Manager window
only when you read in a sequence from a 24p or 25p project or from an
OMFI file.
If you are not working with a 24p or 25p project, you set the timecodes in
the Timecode Type pop-up menu in the Master List pane of the Options
Window. For information on the Timecode Type pop-up menu, see Table 5
on page 52.
43
Page 44

Chapter 2 Customizing EDLs
n
Setting the timecodes in the Master List pane for 24p and 25p projects has
no effect on your EDL; you must use the Source and Output pop-up menus
to set timecodes for 24p and 25p projects.
To adjust source and output timecodes for 24p and 25p projects and
OMFI files:
1. Select File > Open.
2. Select a 24p or 25p project sequence from a bin or select an OMFI file.
The EDL automatically loads into the EDL Manager window and the
Source and Output pop-up menus appear.
Source
pop-up menu
Output
pop-up menu
44
Source timecodes Output timecodes
3. Select a frame rate option from the Source pop-up menu, the Output
pop-up menu, or from both. Table 1 explains the options.
EDL Manager adjusts the frame rates and displays the new timecodes
in the source and output timecode columns of the EDL.
Page 45

Changing Settings in the EDL Manager Window
4. Click the Update button.
EDL Manager displays the new timecodes in the EDL.
Table 1 Source and Output Timecodes
Source Timecodes Output Timecodes Description
Address (LTC) — The longitudinal timecode.
VITC — The vertical interval timecode.
Sound TC — The sound timecode, such as
DAT or Nagra.
Film TC — The film timecode from the film
source in your bin.
Aux 1–5 TC — The timecode from the
timecode column in the bin.
24 24 24 fps
25PD 25PD 25 fps with pulldown
25 25 25 fps
30 30D 30 fps drop frame
30ND 30 fps non-drop-frame
Finding the Field Where an Edit Occurred
While field dominance is generally consistent for video-originated
material, the pulldown of the film transfer determines field dominance for
24p and 25p material. This field information, which is important for color
correction of 24p and 25p material, is indicated in the timecode display.
The timecode format is as follows:
hh:mm:ssQff
45
Page 46

Chapter 2 Customizing EDLs
Table 2 explains how Q indicates the timecode format and field.
Table 2 Timecode Format
Symbol Example Field Timecode Format
. (period) 04:50:25.05 Field 1 Non-drop-frame
: (colon) 04:50:25:05 Field 2 Non-drop-frame
, (comma) 04:50:25,05 Field 1 Drop frame
; (semi-colon) 04:50:25;05 Field 2 Drop frame
Updating an EDL with EDL Manager Window Changes
The changes you make to the Track Selector panel or to the Source and
Output pop-up menus do not take effect until you update the EDL.
To update an EDL with changes:
t Click the Update button.
The Update button flashes to indicate when you should update.
Changing Settings in the Options Window
You can further customize your EDL by defining options in the EDL
Manager Options window. You can set the following options:
• Format of the edit controller
• Sort mode
• Master list characteristics
• Dupe list/preread characteristics
• Show or hide options
• Optimization types
46
Page 47

• Standards settings
• Record start time settings
• Saving options to a template file
Changing Settings in the Options Window
n
EDL Manager initially uses default settings to generate your EDL, if you
do not customize the EDL. For any subsequent EDL, EDL Manager uses
settings from the previously generated EDL, unless you specify a template
of settings to use.
To change the option settings:
t Select Options from the EDL Manager Windows menu.
The Options window opens in EDL Manager. The name of the template
you are using appears in the Template Name text box.
Figure 2 Options Window
47
Page 48

Chapter 2 Customizing EDLs
n
The EDL Manager check boxes on the Windows operating system now
have a slightly-rounded look. There is no difference in their functionality.
Selecting an Edit Controller Format
For information on
going to the online
suite, see Appendix A.
n
EDL Manager needs to know the format and version number of your edit
controller. If you do not select a format, EDL Manager uses format
CMX_3600, which is the most common format. Tab le 3 lists the available
edit controller formats and the number of audio channels that each format
supports.
Check with your online house before you make an edit decision list. As a
backup, always create a list based on the CMX_3600 format — it is the
most common format. Otherwise, create several lists in different formats
with distinct titles and file names. You will be prepared in case your list
will not load or you are moved to another editing room at the last minute.
Selecting an Edit Controller Format
To select a format:
1. Click the Format pop-up menu and select a format.
2. Click Apply.
n
48
A format might be available in several versions. For example, Avid
supports GVG 4.1 and GVG 7.0 formats.
Table 3 explains the formats.
Table 3 Formats and Audio Channels
Format Number of Audio Channels
.HSancillary
Page 49

Changing Settings in the Options Window
Table 3 Formats and Audio Channels (Continued)
Format Number of Audio Channels
Abekas_Solo_(ASCII) 2
Ace 25 2
Ace_25_4.1_4.1 2
AmpexACE 200_9.10.03 4
a
Avid
16
CMX_340 2
CMX_3400
CMX_3600 4
CMX_DigitalCut 4
CMX_Pulldown 4
CMX_Transfer 4
Cuedos_1 16
GVG_4.1_6.0 4
GVG_7.0_7.0 4
Paltex 2
Sony_5000 2
Sony_9000_1.0_2.21 4
Sony_9000_2.22_2.32 4
Sony_9100_1.02_1.04 4
Sony_9100_1.1_2.11 4
Sony_DigitalCut 4
Sony_Pulldown 4
49
Page 50

Chapter 2 Customizing EDLs
Table 3 Formats and Audio Channels (Continued)
Format Number of Audio Channels
Sony_Transfer 4
a. Avid is not available as a selection from the Format menu. However, you
might want to generate an EDL for further use with an Avid editing system. In
this case, you can preserve up to 16 channels of audio information by
choosing 16 from the Audio Channels pop-up menu in the Standards option
pane (see “Setting Up Standards” on page 60).
n
If you mix down audio channels, EDL Manager does not represent them
properly in an EDL. Once audio channels are mixed down, EDL Manager
does not have a source to associate them with, and therefore cannot find
the timecode values it needs to create a list.
Sorting the Order of Events
To minimize the amount of time the edit controller spends shuttling linear
tapes, you can select the appropriate sort mode. Sort mode affects only the
order of the events and not their content. Table 4 describes the different
ways you can use each mode.
c
n
Do not select a sort mode and then expect to change it again in the
online session unless you have EDL Manager installed at the site. Some
edit controllers cannot re-sort an EDL.
To select a sort mode for your EDL:
1. Click the Sort Mode pop-up menu and select a sort mode.
2. Click Apply.
Select mode A if you are unsure about which sort mode to use.
50
Page 51

Changing Settings in the Options Window
Table 4 EDL Sort Mo des
Mode Sorts by Results in Use when
A
(Record In)
B
(Source, Record In)
C
(Source, Source In)
C
(Source Start,
Source In)
D
(Source, Record In,
Effects at End)
E
(Source, Source In,
Effects at End)
Record In timecode. Sequential editing from one
IN point on the record tape
to the next.
Individual source
reel, then by the
Record In timecode.
Individual source
reel, then by the
Source In timecode.
Checkerboard editing on
the record reel, one source
reel to the next.
Checkerboard editing on
the record reel, with
sequential playback of
material from each source.
Source In timecode,
then by individual
source reel.
Individual source
reel, then by the
Direct sequential transfer of
source material by record
reel.
Same as B, but with all
effects saved for the end.
Record In timecode.
Sorts effects at the
end.
Individual source
reel, then by the
Same as C, but with all
effects saved for the end.
Source In timecode.
Sorts effects at the
end.
You have a short show, want
to generate a simple, flexible
EDL, or need to make many
last-minute decisions.
The length of source material
is roughly equivalent to the
length of the finished show.
The length of source material
is much greater than the
length of the finished show.
The length of source material
is much greater than the
length of the finished show.
The length of source material
is roughly equivalent to the
length of the finished show,
and there are many special
effects.
The length of source material
is much greater than the
length of the finished show,
and there are many special
effects.
S
(Source Start)
Source In timecode
only.
Direct sequential transfer of
source material, in
matching order on the
record reel.
Completing one-light
transfers.
51
Page 52

Chapter 2 Customizing EDLs
Setting Up a Master List
In the Master List area of the Options window (see Figure 2), you can
specify the master start event, reel ID type, timecode type, whether to
convert reel IDs to numbers, and whether to include a source table. Tab le 5
explains the master list options.
Table 5 Master List Options
Option Procedure Suboption Notes
Master Start
Event
Reel ID type Click to open the pop-up
Change the master start
event number by typing
in the text box.
menu, then select the reel
ID type.
The highest number accepted by
most edit controllers is 999. You
should not need to change this
number.
If you change the reel ID, you
must reload the sequence from the
bin, OMFI file, or Record monitor.
Tape Uses the reel ID from the tape
source from which you digitized
your video.
Sound roll Uses the reel ID from the sound
roll source, such as digital
audiotape (DAT) (if you entered
this information in the bin). Used
for film projects.
Camera roll Uses the reel ID from the camera
source (if you entered this
information in the bin). Used for
film projects.
AUX Sources 1–4 Uses the reel ID from various
auxiliary sources (if you entered
this information in the bin).
Timecode type Click to open the pop-up
menu, then select the
timecode type.
52
EDL Manager can access
n
only those types of timecode
that are present in your bin.
Page 53

Changing Settings in the Options Window
Table 5 Master List Options (Continued)
Option Procedure Suboption Notes
Address (LTC) Uses the longitudinal timecode of
the source from which you
digitized.
VITC Uses the vertical interval timecode
of the source in your bin from
which you digitized.
Sound TC Uses the timecode from the sound
source, such as DAT or Nagra,
from which you digitized. Used for
film projects.
Film TC Uses the timecode from the film
source in your bin.
Aux 1–5 TC Uses the timecode specified in the
timecode column in your bin.
Convert to
Numbers
Incl. source
table w/ saved
EDL
Click to select or
deselect.
Click to select or
deselect.
Setting Up a Dupe List
A dupe reel is a compilation of the duplicate clips that you need to conform
a sequence, or make the final show from your editing. If you have clips that
a transition effect joins from a single tape, you need to dupe a clip so that
another source tape exists to transition to and from, as one tape cannot be
in two places at once. The second source tape is called a B-roll.
If you select Convert to Numbers,
the EDL you generate always uses
numbers for reel IDs, even if your
edit controller uses alphanumeric
tape names.
Includes the source table
information whenever you save an
EDL.
53
Page 54

Chapter 2 Customizing EDLs
The following figure illustrates the use of dupe clips and a B-roll:
Shot 2, Source A
Shot 2, Source A
Sequence
B-roll
Shot 1, Source A
(Handle)
Dissolve
A dupe list is a list of dupe clips. The editor conforms the dupe list onto a
separate tape, which is then used as a source when editing the final show
from the master list.
In the Dupe List/Preread area of the Options window (see Figure 2), you
can set the dupe list options. Table 6 explains the options.
Table 6 Dupe List Options
Option Procedure Suboption Notes
Type Click to open the pop-up
menu, then select the
dupe reel type.
None Creates no dupe reel.
(Handle)
54
One, New
Timecodes
Creates one dupe reel with a
timecode you select.
One, Jam Sync Creates one dupe reel with
timecodes from the original
sources.
Multiple (B-rolls) Appends a “B” to the incoming
source when transitions are made
from a single source.
Page 55

Changing Settings in the Options Window
Table 6 Dupe List Options (Continued)
Option Procedure Suboption Notes
Preread Creates no dupe list. Adapts the
EDL master list to accommodate
duplicate frames as preread frames
when editing with digital decks.
For more information on preread,
see “Using the Preread Option” on
page 56.
Dupe reel name Type a name or number in
the text box.
Preread name Type a new name in the
text box to override the
default name.
Starting Event Type in the text box to
change the dupe reel’s
starting event number.
Start Timecode Type in the text box to
specify the starting record
timecode of the dupe reel.
Handle Type in the text box to
specify the length of extra
material you include
before and after cuts on
the dupe reel.
Dupe all
transitions
Click to select or
deselect.
Used to specify the source name of
the “to” side in a preread transition
(see “Using the Preread Option”
on page 56). The new name is an
override only for the duration of
the sessio
To avoid handles, set this number
to 00:00:00:00.
Forces a B-roll for every transition.
55
Page 56

Chapter 2 Customizing EDLs
Using the Preread Option
Preread (see Ta bl e 6) is an increasingly popular choice for online editing
because more suites now have digital decks. Preread allows an editor to
make a transition between two segments of a single source. The online
session requires fewer source decks, and preread virtually eliminates the
need for dupe reels, allowing online editing to move more quickly. This
saves both time and resources.
Without preread, a dissolve between two shots from a single source
requires three decks: two source decks and a record deck. One of the shots
must be dubbed out and played from a second source deck. With preread,
the third deck and the dubbing out are unnecessary.
n
With preread edits, the cut before the transition (sometimes called the Aside, or outgoing footage) is overrecorded. The overrecord area must be
equal to or greater than the duration of the transition. You specify the
source name of the “to” side of a preread transition in the Preread name
text box (see Tab le 6) of the Dupe List/Preread area in the Options window.
Showing or Hiding Comments and Other Information
The Show area of the Options window (see Figure 2) is where you select
the types of comments and other information, generated during the editing
of a sequence, to display in the EDL. Displaying this information can be
helpful when conforming the program in an online suite.
Click an option in the Show area to select or deselect it. The selected
options that appear in the EDL are prefixed by asterisks (*). Tab le 7
explains the options.
Table 7 Show Options
Option Description
56
Comments Includes comments about events in the EDL that were
added during editing.
Page 57

Changing Settings in the Options Window
Table 7 Show Options (Continued)
Option Description
Clip Names Includes names associated with the source clips in Avid
editing system bins.
Patch Info Refers to audio patching information. Can aid during the
manual setup of cross-channel patching.
Audio EQ Info Refers to audio equalization (EQ) information. EDL
Manager generates comments containing EQ values
specified for clips with audio EQ.
Pan/Volume Info Displays pan and volume levels in each event: pan levels
are measured in percentages left and right of center, and
volume is measured in +/– decibels.
Effects Info Refers to information about special effects; for more
information, see explanation in “The Effects Info
Comment” on page 57.
Repair Notes Indicates modifications made to the EDL by EDL
Locators Includes locator text added to the sequence during
c
Some edit controllers might not be able to load comments successfully.
Check with the online editor to make sure the edit controller can
support these types of comments. If necessary, you can create two
separate versions of the list — one without comments for the edit
controller, and one with comments — that you can print for your own
reference.
The Effects Info Comment
If you select Effects Info, EDL Manager generates a comment in the EDL
that indicates the type of effect and its parameters. Effect types available in
EDL Manager are:
• Picture-in-Pictures
Manager; for more information, see “The Repair Notes
Comment” on page 58.
digitize.
57
Page 58

Chapter 2 Customizing EDLs
• Superimpositions
•Masks
• Resize and Blowup
• Flip, Flop, and Flip-Flop
• Color Effects
• Film Dissolves
•Film Fades
• Fades to Color
• Fades from Color
•Keys
•Wipes
• Rolling and crawling titles
For more information on effects, see your Avid editing system
documentation.
The Repair Notes Comment
Repair notes indicate changes EDL Manager makes to handle a complex
EDL or discrepancies EDL Manager finds in the sequence. If you select
the Repair Notes option, EDL Manager displays changes that it makes,
such as limiting the number of frames in a dissolve or invalid Source In
times.
The following example shows two repair notes:
Example
of repair
notes
58
Page 59

For more information on the use of repair notes, see “Removing Problems
Caused by Complex Sequences” on page 69.
Optimizing the EDL
Optimization is a process that simplifies your EDL. An optimized EDL
contains simplified text, and events that are combined or condensed to
speed up the online assembly process.
For example, if two tracks of video and one channel of audio share the
same Record In and Record Out timecodes, and they come from the same
source tape, optimization expresses them as one edit instead of three.
In the Optimization area of the Options window (see Figure 2), click an
option to select or deselect it. Table 8 explains the options.
Table 8 Optimization Options
Changing Settings in the Options Window
n
Option Description
Optimize EDL Allows optimization to occur.
Dissolves as Cuts Changes all dissolves to cuts.
Wipes as Cuts Changes all wipes to cuts.
Include Black Edits Includes filler as black edits (video only). Select this
option to have Cuts to Black appear in your EDL.
Audio Diss. as Cuts Changes all audio dissolves to cuts.
If you select both Optimize EDL and Dissolves as Cuts, EDL Manager will
display an alert message. This does not affect the sequence in your bin,
OMFI file, or Record monitor. You can always reset the dissolves by
reloading your bin.
59
Page 60

Chapter 2 Customizing EDLs
Setting Up Standards
The Standards area of the Options Window (see Figure 2) includes the
broadcast standards, number of supported audio channels, and switcher
settings.
To set Standards options:
t Click an item in the Standards area to open the pop-up menu, and then
select the option you want. Tab le 9 explains the options.
Table 9 Standards Options
Option Suboption Description
Standard NTSC Use for video projects or for film projects
in which video and audio were transferred
and digitized at 30 frames per second (fps)
using pulldown.
60
PAL Video Use exclusively for video projects.
PAL Film 1 Use for film projects in which video and
audio were transferred and digitized
together at 25 fps.
PAL Film 2 Use for film projects in which video and
audio were transferred and digitized
separately at different speeds.
Switcher EDL Manager supports the SMPTE
switcher, and a number of GVG and Sony
switchers.
Page 61

Changing Settings in the Options Window
Table 9 Standards Options (Continued)
Option Suboption Description
Audio Channels 4 Use for selecting the number of channels.
For a full list of edit controllers and the
number of supported audio channels, see
Table 3 on page 48.
16 Use this setting for Cuedos controllers
and Avid systems. If you select 16
channels, the tracks display changes to
reflect your choice. For a list of edit
controllers and the number of supported
audio channels, see “Formats and Audio
Channels” on page 48.
n
If you open an OMF file or a file from a bin, EDL Manager automatically
determines whether the EDL you are generating should be NTSC, PAL
Video, or PAL Film 1 or 2. However, if you open an EDL other than from
an OMF file or file from a bin, you must select a standard suboption.
Setting the Record Start Time
The Record Start Time area of the Options window (see Figure 2) allows
you to base the record start time on either of the following options:
• The sequence currently active in your Avid video-based editing
system.
• The time that you specify.
To specify a time:
t Enter a time in the Other text box.
61
Page 62

Chapter 2 Customizing EDLs
Setting the Pulldown Start Frame
The Pulldown Start Frame area of the Options Window (see Figure 2),
used with 24p and 25p projects, allows you to select the start frame for
your generated EDL.
To set the pulldown start frame:
t Select one of the following options from the pulldown menu:
- Sequence — default setting, based on start frame set in sequence
- A Frame — sets pulldown start frame to A
- B Frame — sets pulldown start frame to B
To see the pulldown start frame in the EDL:
t Select the Show Pulldown Comment option.
The following example shows the pulldown start frame:
Setting the Tapename Truncation
The Tapename Truncation area of the Options window allows you to
determine which part of the tapename you want to save.
To set the tapename truncation:
t Select one of the following options from the pulldown menu:
-Trunc. End
62
Page 63

Changing Settings in the Options Window
-Remove Middle
- Remove Beginning
-First Char. + End
Table 1 0 explains these options.
Table 10 Tapename Truncation Options
Option Example Description Use When
Trunc. End CHICAGO13810
1 becomes
CHICAGO1.
Remove Middle CHICAGO13810
1 becomes
CHIC8101.
Remove Beginning CHICAGO13810
1 becomes
GO138101.
First Char. + End CHICAGO13810
1 becomes
CO138101.
Truncates the end of the tape
name. This method is the
default.
Takes half of the allowed
number of characters from
the front and the other half
from the end of the tape
name.
Removes the beginning of
the tape name.
Keeps the first character and
the last characters and
removes everything in
between.
Saving Options to a Template File
Distinguishing segment of
tape name is at the
beginning.
Sequentially numbered
series of tape names, such as
CHICAGO138100,
CHICAGO138101, and so
forth.
Distinguishing segment of
tape name is at the end, such
as tape names with very
long numbers in a large
library system.
Distinguishing segment of
tape name is at the end.
To save your customized options as a template:
1. Make changes to any of the option settings as described in this chapter.
2. Click one of the following buttons:
63
Page 64

Chapter 2 Customizing EDLs
- Apply — saves your settings to a temporary template and brings
the EDL Manager window to the front. The italicized name of the
temporary template appears in the Template pop-up menu of the
EDL Manager window. The template remains temporary until you
click the Save As button and provide a file name.
- Save As — saves the options to a new template. A dialog box
opens in which you can provide a file name for the template. The
new name appears in two places:
– In the Template pop-up menu in the EDL Manager window
– In the Template Name text box of the Options window
n
Click the Revert button to discard your changes and reinstate the options of
the current template file.
Changing Options in the Site Settings Dialog Box
You can change serial transmission, list font, and printer font options in the
Site Settings dialog box.
To open the Site Settings dialog box:
t Select Edit > Site Settings.
Changing Serial Transmission Options
Set up serial transmission options only if you will be transferring an EDL
to an online editor by means of serial transmission.For information on
using the Site Settings dialog box to define the serial transmission and
options, see Appendix C.
Changing Font Options
64
The List Font and Printer Font tabs in the Site Settings dialog box allow
you to change the font and size of the text in your EDL. The List Font tab
affects the on-screen display; the Printer Font tab affects the printed
version of the EDL.
Page 65

Changing Options in the Site Settings Dialog Box
To change the font and font size of your EDL text:
1. Click either the List Font or Printer Font tab, depending on which font
you want to change.
2. Select a font from the Font pulldown menu.
3. Type a number in the Font Size text box.
4. Click OK.
65
Page 66

Chapter 2 Customizing EDLs
66
Page 67

Chapter 3
Editing and Troubleshooting EDLs
You can edit an EDL with a text editor to clean up the EDL for a successful
reading. You can also troubleshoot EDLs by using techniques described in
this chapter.
This chapter includes the following sections:
• Using a Text Editor to Edit an EDL
• Removing Problems Caused by Complex Sequences
• Locating Trouble Spots
• Avoiding Problems in EDLs
Using a Text Editor to Edit an EDL
You can use a text editor to delete or change information in the EDL that
might not read correctly into EDL Manager.
c
Before you edit, create a copy of the EDL. Edit the copied EDL rather
than the original. You can then revert to the original if you make
errors.
Page 68

Chapter 3 Editing and Troubleshooting EDLs
c
When you edit the EDL, be careful to delete only the information you
want to delete; do not delete any extra characters. If you delete extra
characters, you might see further errors when you try to read the EDL
again.
The following sections describe possible edits you can make to clean up
the EDL for successful reading. To make sure EDL Manager can read your
EDL, complete the following procedures. If the first procedure does not
solve the problem, proceed to the next.
Fitting the Format to the EDL Manager
If you are having trouble reading a list in EDL Manager, the list might not
meet EDL Manager formatting requirements. The following is a check list
of the most common formatting problems:
t Check the format layout.
Make sure the columns are in the correct place and the characters are
correct for your edit controller. If you use an editor that can display
hidden characters, turn on that feature to view spacing, tabs, and
carriage returns more easily. If you are unsure about the layout, see the
edit controller documentation from the online suite.
68
t Check reel names and numbers.
Make sure they are the appropriate length for your edit controller. If
you are unsure about the layout, see the edit controller documentation
from the online suite.
t Delete all general-purpose interface triggers.
These triggers, labeled GPI, cause problems reading into
EDL Manager.
t Delete any Master/Slave comments.
These comments, preceded by the MS symbol, cause problems reading
into EDL Manager.
t Change the source names in the EDL from Aux and Black to an
unused reel number.
Page 69

When you create a new EDL, this new number will represent Aux and
Black. You need to do this because EDL Manager reads only numbers,
not letters.
Changing the Header Format
Sometimes the EDL does not read properly because the EDL Manager
does not recognize the header format. This might happen if you use an
EDL not generated by an Avid video-based editing system. If this is the
case, you can replace the unreadable header with an EDL header generated
by the Avid editing system.
To make sure the header format matches the EDL:
1. Delete the current header from the EDL you are trying to read.
2. Generate a list in EDL Manager that is the same format as the EDL
you are trying to read.
3. Open an EDL generated by an Avid video-based editing system and
copy the EDL headers.
Removing Problems Caused by Complex Sequences
4. Paste the EDL headers into the EDL you are trying to read.
Removing Problems Caused by Complex Sequences
When a sequence is too complex for the EDL Manager to describe, it
generates error messages and tries to simplify the sequence. This happens
most frequently when you try to generate a list for a sequence that has
multiple video tracks.
EDL Manager’s attempts at simplifying complex sequences are pointed out
in the repair notes and appear as comments within the list.
You can avoid having EDL Manager simplify your composition by
requesting a separate list for each video track. This is known as track
isolation. Or you can delete comments and motion effects that might be
causing problems.
69
Page 70

Chapter 3 Editing and Troubleshooting EDLs
Using the Console Window to Display Messages
To display EDL Manager messages:
t Select Windows > Console.
The Console window opens.
Command text box
70
Message area
Repeat button
Recall button
To get help about console commands:
t Type the Help command in the Command text box, and then press
Return.
A description of how to use the Help command appears in the message
area.
Page 71

Removing Problems Caused by Complex Sequences
To display a previous command in the Command text box:
t Click the Recall button (F3).
To perform a previous command:
t Click the Repeat button (F2).
To clear the display:
t Click the Clear button.
Always check the Console window after making a list. Error messages
appear in the Console window if certain comments or events cause
problems.
c
EDL Manager generally identifies motion effects by M1, M2, and so on.
Do not use the programming functions of the Console window without
the guidance of an Avid professional. If you need help interpreting
information in the Console window, contact your local Avid Reseller;
in North America, you may call Avid Customer Support at 1-800-800AVID (2843).
71
Page 72

Chapter 3 Editing and Troubleshooting EDLs
Fixing Difficult Transitions
Specific transitions can cause difficulties for the EDL Manager. For
example, a color effect on a resized motion-controlled clip that dissolves to
an imported graphic file will overwhelm the EDL Manager’s descriptive
capacities, forcing a repair note. Less obvious complexities can also affect
list generation.
You can best resolve these problems by isolating the offending transitions
and simplifying or removing them.
Locating Trouble Spots
You can isolate trouble spots in several ways. They include slicing and
dicing, and trying one track at a time.
Slicing and Dicing
72
The most effective method for finding trouble spots is slicing and dicing
the sequence. Slicing and dicing isolates trouble spots by dividing
sequences in half and testing for successful generation.
To slice and dice the sequence with your Avid video-based editing
system:
1. Load the sequence into the Source monitor.
2. Mark an IN point at the head frame and an OUT point halfway
through.
3. Cut this portion over to the Record side.
4. Test this portion of the sequence by creating an EDL.
If the EDL is generated successfully, you know that the problem is in the
second half of the sequence. If not, subdivide the sequence elsewhere to
further isolate the source of the problem.
Page 73

To subdivide the sequence:
1. Press Ctrl+Z (Windows) or Command+Z (Macintosh) to clear the
sequence from the Record monitor (so you will not accumulate
“Untitled Sequence.01...02...03” in your bin).
2. Load the unsuccessful half into the Source monitor, and repeat steps 2
through 4 in the preceding procedure.
Trying One Track at a Time
Another way to isolate trouble spots is to generate an EDL by using one
track at a time. The problem might be on a particular track. For
information on isolating tracks, see “Combining or Isolating Tracks” on
page 40.
Avoiding Problems in EDLs
Avoiding Problems in EDLs
You can help resolve problems by trying the following:
• Simplifying Effects
• Looking for Missing Information
• Dealing with Corruptions
Simplifying Effects
You can simplify effects in your sequence that are overly complex. For
example, you can remove a color effect from a resized segment. Use
comments to help re-create the original sequence in the online suite.
Looking for Missing Information
Occasionally, EDL Manager fails to generate a list because clips in the
sequence are missing information essential to the EDL (for example, you
try to create an audio list by using clips lacking audio timecode).
73
Page 74

Chapter 3 Editing and Troubleshooting EDLs
Try the following suggestions if you suspect a problem caused by missing
information:
• Scan your bins for any obvious omissions of files you need for your
sequence.
• Use the slice and dice technique to isolate difficulties.
• In your Avid video-based editing system, find the overlap frame of
troublesome clips, then use the Find Bin command to check their
statistics.
• Add information to the bin as needed.
Dealing with Corruptions
List generation can be hampered by corruptions. These are areas where
information relating to a clip or transition has become damaged or lost,
preventing the system from describing it in an EDL. In extreme cases,
corruption prevents the clip from playing. The most effective way of
dealing with corruptions is to cut them out and replace them.
74
Scrupulously backing up a project can reward you if you encounter
corruptions. Using an earlier, uncorrupted version of a sequence that does
not exhibit the corruption can save you considerable time.
Page 75

Appendix A
Check List for Online Editing
When you move from nonlinear to linear editing systems and generate
EDLs to help re-create your sequence online, you might encounter some
obstacles. For example, an EDL generated in one format might be
incompatible with the edit controller at the online suite. Or, you might be
unaware of the dupe reel characteristics your EDL should contain.
Problems like these might result in an unproductive and costly online
session.
This appendix contains a list of suggestions to help you avoid or minimize
problems.
• Calling Ahead to the Online Suite
• Deciding What to Take to the Online Suite
• Double-Checking the EDL File Names
If you have questions, contact your local Avid Reseller; in North America,
you may call Avid Customer Support at 800-800-AVID (2843).
Calling Ahead to the Online Suite
Before you finish working offline, call the online suite to find out:
• What types of edit controllers the suite has. Find out all the different
types in case you are assigned to one edit controller but end up using
another when you get there. If possible, go to the suite, look at the
equipment, and determine the appropriate EDL format.
Page 76

Appendix A Check List for Online Editing
• Whether the edit controller reads high-density or low-density (doubledensity) disks.
• What EDL format the controller reads. CMX_3600 format is read by
most edit controllers. If you are unsure what type of edit controller the
suite uses, save the EDL in several different formats. If you have
trouble with one format, you will have other formats from which to
select.
• If the computer system at the online suite reads 3.5-inch disks. Some
older computers use only 5.25-inch or 8-inch disks, and very few
newer computers can read or write to these types of disks.
• If you need to generate a dupe reel list with new timecodes or a
multiple B-roll list in EDL Manager. Also, find out if any other
information is required for your project and that you should include as
a comment in the EDL.
• If the online suite can create all the effects you specified in the EDL. If
not, consider regenerating the EDL and adjusting the options.
• If you can send a preliminary version of the EDL ahead of time to
make sure it loads properly on the edit controller. If it does not, you
can make the necessary adjustments.
• The name of the switcher in the online suite. If you are not sure which
switcher is being used, adjust the Switcher setting in EDL Manager to
SMPTE. (The switcher setting is in the Options window.)
• If the suite has a computer you can use.
Deciding What to Take to the Online Suite
Consider taking EDL Manager, several forms of your EDL, and reference
information to the online suite.
76
Page 77

Take EDL Manager
If possible, take EDL Manager with you, along with the bins on a disk. You
can use EDL Manager on a computer running the Windows or Macintosh
operating systems. If you do not have a portable computer, call ahead to
find out if you can load EDL Manager from a CD-ROM onto a computer at
the suite.
Take the EDL in Several Forms
Having your EDL in several forms allows greater editing flexibility. If
difficulties arise, you can refer to a paper copy. Take the EDL in the
following forms:
• Saved on 3.5-inch disk
• Printed on paper (in A-mode sort for easy reference)
For more information on saving and printing, see “Saving an EDL” on
page 25 and “Printing an EDL” on page 30.
Double-Checking the EDL File Names
Take Reference Information
You might also want to take as a reference one of the following:
• A digital cut. For more information, see the user’s guide for your Avid
video-based editing system.
• A printout of the source table.
Double-Checking the EDL File Names
Make sure the EDL file names are the correct length and type for the disk
format in which you saved them. Follow these guidelines:
• If you save your EDL to a disk formatted for CMX or GVG, the file
name must have six or fewer uppercase alphanumeric characters
followed by the file name extension .EDL. There can be no spaces in
the file name, and no characters except letters and numbers.
77
Page 78

Appendix A Check List for Online Editing
For example, TEST1.EDL is a valid file name for GVG and CMX
systems.
• If you save your EDL to a DOS-formatted disk, make sure the file
names are no more than eight uppercase alphanumeric characters
followed by the .EDL file name extension. Again, the file name must
not contain spaces or other special characters; only letters and numbers
are acceptable.
For example, WINSTON3.EDL is a valid file name for DOS-formatted
disks.
78
Page 79

Appendix B
Creating EDLs for Film Projects
This appendix explains several things to consider when you create EDLs
for film projects. It includes the following sections:
• Matchback Conversion in Film-to-Video EDLs
• Creating EDLs for a Matchbacked Sequence
• Creating Audio-Only EDLs
Matchback Conversion in Film-to-Video EDLs
If you are editing a film project with an Avid video-based editing system,
you might intend to finish the project in video. The matchback conversion
process requires the editing system to perform special calculations to
match the film to video. Because the ratio of film-to-video frames is
uneven, the film and corresponding video edit points do not line up evenly.
For example, with a ratio of 24 film frames to 30 video frames, a 6-frame
film edit corresponds exactly to a 7 1/2-frame video edit. However, video
edits cannot include partial frames, so the video edit must be 7 or 8 frames
long.
Page 80

Appendix B Creating EDLs for Film Projects
Edit
Film
NTSC
The corresponding video edit point does not fall
exactly on the boundary between two video frames.
Because video edits might be longer or shorter than the original film edits,
the system makes sure the film and video sequences match as closely as
possible by checking the durations at the end of each edit. If the total
video-sequence duration is a frame longer than the film, the system will
subtract a frame from the last video edit. If the video is a frame too short,
the system adds a frame to the last video edit.
Creating EDLs for a Matchbacked Sequence
When you create an EDL for a sequence that converts from film to video,
an edit listed in the EDL might be slightly longer or shorter than the
corresponding film edit. The EDL might not be an exact representation of
the sequence — it can be plus or minus one frame, in accordance with the
30 to 24 frames per second (fps) matchback conversion. In this case, be
aware of the discrepancy when you go to the online suite so that you can
adjust for the difference.
Creating Audio-Only EDLs
If you create an audio-only EDL for a film project, set the following
options in the EDL Manager Options window before you generate the list:
• Dissolves as Cuts (Optimization area)
• Sound Roll as the Reel ID type (Master List area)
• Sound TC as the Timecode type (Master List area)
These options simplify the EDL, and ensure that the pertinent source
information is referred from the bin to the EDL.
80
Page 81

Appendix C
Using Serial Transmission to Transfer EDLs
If your offline and online editing suites are in the same building, or if you
are transferring the EDL to an edit controller that has no disk drive,
consider using serial connections to transmit EDLs from offline to online.
This appendix contains the following sections:
• Connecting the Edit Controller to the Computer
• Setting Serial Transmission Options
• Transmitting the EDL
Connecting the Edit Controller to the Computer
To connect the edit controller and your computer:
1. Decide which port on the edit controller you will use for transmission.
2. Connect the serial port on the computer to the port on the edit
controller that you have chosen to use for transmission.
Page 82

Appendix C Using Serial Transmission to Transfer EDLs
Setting Serial Transmission Options
Before the edit controller and computer can communicate, you must
specify various options in EDL Manager.
To set the serial transfer options:
1. Select Edit > Site Settings.
The Site Settings dialog box opens.
2. Select the Serial Transfer tab.
82
3. Select an option from the pop-up menus. Table 1 1 explains the
options.
4. Click OK to apply your changes to your EDL.
5. Click OK to implement the options you have selected.
Table 1 1 explains the serial transfer options.
Table 11 Serial Transfer Options
Option Description
Port Indicates the system port. The items on this pop-up
menu vary depending on your system’s ports.
Page 83

Transmitting the EDL
Table 11 Serial Transfer Options (Continued)
Option Description
Data Width Indicates if 7-bit words or 8-bit words are being
transferred — the default is 7 bits.
Parity Indicates error detection, found through counting the
number of bits in a transmitted word. Even indicates
the number of bits in a word is even. Odd indicates the
number of bits is odd. The default is zero.
Baud Rate Sets the data transmission rate for the computer on
which EDL Manager is running — the default is 9600.
Stop Bits Indicates how many bits are needed to make a break in
transmission — the default is 0 stop bits.
Handshaking Allows communication between two systems — the
default is none. Options include DTR and XON/XOFF.
Transmitting the EDL
When you are ready to transmit the EDL, another person should be ready
at the edit controller to help you.
To transmit the EDL, do the following at the same time:
• Have the other person press Receive at the edit controller.
• Select File > Transmit EDL.
When you see events scrolling one by one onto the edit controller screen,
the transmission was successful.
If you see either an error or strings of indistinguishable text, the serial
parameters were set incorrectly in EDL Manager. Check the parameters for
the serial port and reset them in the Site Settings dialog box.
83
Page 84

Appendix C Using Serial Transmission to Transfer EDLs
84
Page 85

Glossary
24p or 25p 24-fps or 25-fps progressive media. The progressive media file is
composed of single frames, each of which is vertically scanned as one
pass. The Avid system creates 24p or 25p media by combining
(deinterlacing) two video fields into a single full, reconstructed frame. For
NTSC film-to-tape transfers, the system creates 24p media by undoing the
2:3 pulldown inserted by the telecine process, removing the extra fields,
and creating progressive frames.
Glossary: B
bin A database in which master clips, subclips, effects, and sequences are
organized for a project in an Avid editing system. A file structure that
contains other files, including sequences, and is analogous to a folder or a
directory in other computer applications.
black edits 1. A video source with no image. 2. A special source you can fade into, out
of, or use for other effects.
B-roll An exact copy of the A-roll original material, or new original material on a
separate reel, for use in A/B-roll editing.
Glossary: C
CMX Edit controller made by CMX Corporation (originally a joint venture by
composition The standard term used by OMF Interchange
®
CBS
and Memorex®). CMX uses its own proprietary format EDLs (340,
3600).
®
to refer to an edited
sequence made up of a number of clips. The OMF equivalent of a sequence
in an Avid editing system.
Page 86

Glossary
conform To make the final show based on the editing. Conforming organizes the
source material for final assembly.
corruptions Information relating to a clip or transition that has been damaged or lost,
preventing EDL Manager from describing the information in an EDL. The
solution is to cut the corruptions out and replace them with a backup
version of the sequence.
cut An instantaneous transition from one video source to another. Also, a
section of source or record tape.
Glossary: D
dissolve A video or audio transition in which an image from one source gradually
becomes less distinct as an image from a second source replaces it.
dupe list A list of dupe reels. A view of this list is available only if options are set for
creating a dupe list. You can set the options in the EDL Manager Options
window.
dupe reel A reel designated for the recording and playback of dupes (duplicate shots)
during videotape editing. You create dupe reels as backup copies, to help in
the creation of special effects, and for A/B-roll editing.
Glossary: E
edit controller An electronic device, often computer-based, that allows an editor to
precisely control, play, and record to various videotape machines. The edit
controller keeps track of timecodes for each shot and coordinates the
machines in the suite: videotape machines, monitors, an audio mixing
board, a videotape switcher, and other peripheral devices.
See also suite.
EDL Edit Decision List. A list of edits you have made. You generate, customize,
and optimize it in the EDL Manager, then take it with the source tapes to an
online edit controller for final assembly of your show or program.
event A number assigned by the editing system to each performed edit. In most
computer editing systems, defines an action or a sequence of actions
performed by the computer in a single pass of the record tape.
86
Page 87

Glossary
Glossary: F
fade A dissolve from full video to black video or from full audio to no audio, or
vice versa.
fps Frames per second, pronounced “fips.”A measure of the film or video
display rates. (NTSC = 30 fps; PAL = 25 fps; SECAM = 25 fps;
Film = 24 fps.)
Glossary: G
GVG An edit controller made by Grass Valley Group and that uses a proprietary
format for EDLs.
Glossary: H
handles Additional source material before and after edit points; you use a handle
for later adjustments.
Glossary: I
import ID The internal identification for your Avid source tape.
linear editing Tape editing in which you assemble the program from beginning to end. If
you require changes, you must rerecord everything downstream of the
change. The physical nature of the medium (for example, analog
videotape) dictates how you must place material on the medium.
See also nonlinear editing.
Glossary: M
master list A list that specifies the starting event number, reel ID options, and
timecode options.
matchback
conversion
The conversion from film to video frame rates.
87
Page 88

Glossary
Glossary: N
nonlinear editing A type of editing in which you do not need to assemble the program from
beginning to end. The physical nature of the medium and the technical
process of manipulating that medium do not enforce or dictate how the
material must be physically ordered. You can use nonlinear editing for
traditional film cutting and splicing, and digitized video images. You can
make changes at the beginning, middle, or end of the sequence.
See also linear editing.
NTSC National Television Standards Committee. The group that established the
color television transmission system used in the United States. The
standard calls for 525 lines of information scanned at a rate of
approximately 30 frames per second.
Glossary: O
offline editing Nonlinear editing, usually done on a low-cost editing system, using
digitized work tapes. This preliminary or rough-cut editing allows you to
make edit decisions before performing the final edit.
OMFI Open Media Framework Interchange format. A standard format for the
interchange of digital media data among heterogeneous platforms. The
format is designed to encapsulate all the information required to
interchange a variety of digital media, such as audio, video, graphics, and
still images as well as the rules for combining and presenting the media.
The format includes rules for identifying the original sources of the digital
media, and it can encapsulate both compressed and uncompressed digital
media data.
online editing The final editing using the original camera tapes and an edit decision list
(EDL) to produce a finished program ready for distribution; usually
associated with high-quality computer editing systems. Offline editing
often precedes online editing, but in some cases programs go directly to the
online editing stage.
See also edit controller.
88
Page 89

Glossary
optimization The process that simplifies your edit decision list. EDL Manager simplifies
the text and combines or condenses events to speed up the online assembly
process.
overrecord To use a long shot from one reel, then place shots from other reels over the
continuous shot.
Glossary: P
PAL Phase Alternating Line. A color television standard used in many
countries. PAL consists of 625 lines scanned at a rate of 25 frames per
second.
patching The routing of audio or video from one channel or track in the sequence to
another.
preread To read information from a tape passing under the play head of a videotape
machine before it passes under the record head. Information can be read
from the tape before the information is replaced. On digital video decks,
the information gathered by the play head is stored in a digital buffer; the
edit controller can use it as a virtual source, taking the place of a second
tape deck in a transition.
Glossary: R
reel ID The reel identification (ID) EDL Manager uses to refer to the master reel
source. The reel ID can come from tape, sound roll, camera, or auxiliary
sources.
RT-11 A disk format used to store EDLs read by CMX and GVG edit controllers.
Glossary: S
serial
transmission
options
slicing and dicing Isolating trouble spots in a sequence by repeatedly dividing the sequence in
The options you set to transmit your EDL over serial connections to an
online edit controller. Options include port, data width, parity, baud rate,
stop bits, and handshaking.
half, creating an EDL for the isolated half, and testing for successful
generation.
89
Page 90

Glossary
SMPTE Society of Motion Picture and Television Engineers. One of the principal
standards organizations for the film and video industry.
See also timecode.
sort mode The mode that controls the auto-assembly process, determining in what
order the edit controller reads the edit decision list, and assembles the final
tape. There are six different types of sort mode: A, B, C, D, E, and S.
source table The list of the source tapes you use to create the sequence the EDL
describes. The source table includes three kinds of information: your name
for a tape, the Avid name for the same tape, and the Avid internal
identification for your Avid source tape.
suite Standard industry name for the site of editing. A room or rooms containing
such equipment as the edit controller computer, videotape machines,
monitors, an audio mixing board, a videotape switcher, and other
peripheral devices.
super Superimposition. One shot half-dissolved over another.
template A set of EDL Manager options saved under a specific name. You can use
templates to save settings you use frequently and apply them quickly.
Glossary: T
timecode An electronic indexing method for editing and timing video programs.
Timecode denotes hours, minutes, seconds, and frames (00:00:00:00)
elapsed on a videotape.
Address track timecode is recorded simultaneously with the video picture.
Longitudinal timecode (LTC) is recorded on an audio track. Vertical
interval timecode (VITC) is recorded in the vertical blanking interval of the
video track. SMPTE timecode is the prevalent standard.
Other timecodes include film timecode and audio timecode used during
film projects. During editing, an Avid editing system can display and track
several types of timecode.
See also SMPTE.
90
Page 91

Glossary
track isolation The process of creating a separate list for each video track to simplify the
composition.
Glossary: W
wipe A shaped transition between video sources in which a margin or border
moves across the screen, wiping out the image of one scene and replacing
it with another.
91
Page 92

Glossary
92
Page 93

Index
A B C D E F G H I L M N O P R S T U V W
Numerics
24p and 25p projects 45
24p projects
43
A
All Video setting 40
Apply options
Audio channels
See also Tracks
choosing format for
defining
mixing down
selecting
standards options in EDLs
support in edit controllers
Audio Dissolves as Cuts option
Audio-only EDLs
creating
Avid editing system
creating a sequence from an EDL on
creating an EDL from a sequence on
using EDL Manager with
Avid Xpress
64
42
38
50
38
61
48
80
31
31
59
32
32
B
Backing up projects 74
Bins
creating EDLs from
Black edits
Broadcast standards
options in EDLs
settings for
B-roll
59
60
54
20
60
C
Changing
header format
Changing EDL titles
Changing settings
in the EDL Manager window
in the Options window
Channels, audio
choosing format for
defining
mixing down
selecting
standards options in EDLs
support in edit controllers
Check list for online editing
Choosing audio channel format
Clip Names option
69
37
46
42
38
50
38
48
75
57
36
61
42
Page 94

Index
CMX format
for RT-11 disks
Combining tracks
Comments in EDLs
showing or hiding
Complex sequences
Composer
using EDL Manager with
Console window
using to display messages
Controllers
connecting to a computer
defining tracks and channels for
format for audio channels
selecting a format for
sorting events for
support for comments
Corruptions
Creating a sequence from an EDL
Creating EDLs
for matchbacked sequences
from a bin
from an active sequence
from an existing EDL
from an OMFI file
from sequence in bin
with audio only
Creating stereo channels
Customizing EDLs
in the EDL Manager window
in the Options window
in the Site Settings dialog box
29
40
56
41, 69
31
70
81
42
48
50
57
74
80
20
32
20
20
20
80
41
46
D
Defining a track 39
Defining audio channels
Defining video tracks
Digital cut
Disks
77
38
38
36
64
32
38
See also RT-11 disk
types used in online suite
Dissolves as Cuts option
Dupe list
described
options in EDLs
view in EDL Manager window
Dupe reel
described
53
53
53
76
59
E
Edit controllers
connecting to a computer
defining tracks and channels for
format for audio channels
selecting a format for
sorting events for
support for comments
Editing EDLs
for successful reading
with a text editor
EDL formats
troubleshooting
EDL Manager
defined
17
functions
EDL Manager window
changing settings in
displaying different views in
EDLs (edit decision lists)
audio-only
changing titles of
creating for film projects
creating for matchbacked sequences
creating from an active sequence
creating from an OMFI files
creating sequences from
customizing
defined
18
17
50
67
68
80
37
35–64
81
42
48
57
67
36
79
32
42
38
42
80
32
20
94
Page 95

Index
editing with a text editor 67
file name guidelines for
film-to-video matchback conversion
finding the edited field
formats supported for
formatting
optimizing
printing
reading in CMX or GVG (RT-11) format
saving as OMFI compositions
saving as text files
saving to RT-11 disks
selecting templates for
serial transmission
setting options
sorting
transmitting
troubleshooting
updating
verifying an RT-11 save
views for
Effects
simplifying
supported in EDL Manager
Effects Info comment
Effects Info option
Error messages
Events
order of
simplifying
Excluding tracks
68
59
30
25
36
50
83
67
46
42
73
57
70
50
59
39
77
45
48
26
26
26
42
81
28
57
57
79
24,
matchback conversion in
Fixing transitions
Format header
Formats
selecting EDL
supported by EDL Manager
Formatting requirements
Formatting RT-11 disks
Frame rates
72
69
46, 48
43
79
48
68
29
G
GPI (general-purpose interface) triggers 68
GVG format
for RT-11 disks
29
H
Hardware connections
for serial transmission
Header format
changing
in EDLs
troubleshooting
Hiding or showing text
69
69
81
69
56
I
Include Black Edits option 59
Including tracks
Isolating tracks
39
40
F
File name guidelines for EDLs 77
File names of templates
Film projects
creating EDLs for
Film-to-video EDLs
43
79
L
Launching EDL Manager 19
List views
Locating missing information
Locating trouble spots
42
72
73
95
Page 96

Index
Locators
in EDLS
57
M
Main window
changing EDL setting in
Master list
options in EDLs
view in EDL Manager window
Master start event
Matchback conversion in EDLs
Messages
displayed in Console window
Missing information
locating
72
52
52
36
42
79
70
N
Nonlinear editing systems 18
NTSC (National Television Standards
Committee)
Options window
60
O
Offline editing
transmitting from
OMFI
defined
OMFI compositions
saving EDLs as
Online editing
check list for
defined
Online suite
preparing for
running EDL Manager at
18
18
81
26
75
75
77
transmitting to
Opening
template
Optimization
options for EDLs
Options
defined
saving
64
undoing changes
Options window
changing settings in
setting Record Start Time in
Order of events, sorting
Output and Source pop-up menus
updating changes to
Output and Source timecodes
adjusting
81
43
59
35
64
46
61
50
46
43
P
PAL (Phase Alternating Line)
PAL standards (Options window)
Preread option
Printing
EDLs
source tables
Printing list of tapes in Source table
Problems
header format
Projects
backing up
55
30
34
69
74
R
Reading existing EDLs
in CMX or GVG (RT-11) format
Record Start Time (Options window)
Repair notes
in EDLs
57, 58
60
34
24, 25
61
96
Page 97

Index
Representing complex sequences 41
Revert button
RT-11 disk
formatting
reading an EDL from
saving EDLs to
verifying a save to
64
29
24, 25
26
28
S
Save As button 64
Saving EDLs
as OMFI compositions
as text files
to RT-11 disks
Saving options to a template
Selecting EDL Controller formats
Selecting EDL settings
Sending EDLs
Sequences
complex
creating an EDL from an Avid editing system
creating from an EDL
for an Avid editing system from an EDL
Serial transfer options
changing
Serial transmission
hardware connections for
of EDLs
options in Site Settings dialog box
setting options
Setting EDL options
Settings
for EDL Manager
for pulldown start frame
for record start time
for serial transmission
for tapename truncation
in the EDL Manager window
26, 67
26
41, 69
32
64
81
82
26
63
48
46
32
81
64
36
35
62
61
82
62
36
32
in the Options window
selecting a template of
Showing or hiding text
Simplifying
EDLs
59
Simplifying effects
Site Settings dialog box, opening
Slicing and dicing
Sort mode options
Sorting order of events
Source and Output pop-up menus
updating changes to
Source and Output timecodes
adjusting
Source table
displaying list of source tapes in
printing
taking to the online suite
view in EDL Manager window
Source tapes
printing list of
viewing list of
Standards
options for EDLs
Start time options
Starting EDL Manager
Stereo channels, creating
Suite
defined
Suite See Online suite
Switchers
options for EDLs
72
50
43
34
34
33
61
18
46
42
56
73
64
50
46
42
77
42
60
19
41
60
T
Template pop-up menu 43
Templates
described
file names of
opening
42
43
43
97
Page 98

Index
saving options as 63
selecting
temporary files
Temporary template file
Text
showing or hiding
Text editors
editing EDLs with
Timecode
adjusting
field where edit occurred
formats
sort mode
Title of EDL, changing
Track Selector panel
described
updating changes to
Tracks
See also Audio channels
combining
defining
excluding
including
isolating
selecting
stereo, creating
Transitions
troubleshootng
Transmitting EDLs See Serial transmission
Triggers
GPI
Troubleshooting
complex sequences
corruptions
difficult transitions
EDL formats
EDLs
error messages
header format
missing information
42
64
64
56
67
43
45
46
50
37
38
46
40
38, 39
39
39
40
38
41
72
68
69
74
72
68
67
70
69
73
simplifying effects
slicing and dicing
trouble spots
73
72
72
U
Undoing option changes 64
Update button
Updating EDLs
Using EDL Manager with an Avid editing system
31
46
46
V
Verifying a save to an RT-11 disk 28
Video tracks
See also Audio channels
combining
creating stereo
defining
excluding
including
isolating
selecting
updating
Viewing list of tapes in Source table
Views of an EDL
40
41
38, 39
39
39
40
38
46
33
42
W
Wipes as Cuts option 59
98
 Loading...