

Page 1

™
Avid® DS Nitris
Compositing and Effects Guide
Version 7.6
make manage move | media
™
Avid
®
Page 2

Copyright and Disclaimer
Product specifications are subject to change without notice and do not represent a commitment on the part
of Avid Technology, Inc.
The software described in this document is furnished under a license agreement. You can obtain a copy of
that license by visiting Avid's Web site at www.avid.com. The terms of that license are also available in the
product in the same directory as the software. The software may not be reverse assembled and may be
used or copied only in accordance with the terms of the license agreement. It is against the law to copy the
software on any medium except as specifically allowed in the license agreement.
No part of this document may be reproduced or transmitted in any form or by any means, electronic or
mechanical, including photocopying and recording, for any purpose without the express written permission
of Avid Technology, Inc.
Copyright © 2004 Avid Technology, Inc. and its licensors. All rights reserved. Printed in USA.
The Avid DS Nitris application uses JScript and Visual Basic Scripting Edition from Microsoft Corporation.
Attn. Government User(s). Restricted Rights Legend
U.S. GOVERNMENT RESTRICTED RIGHTS. This Software and its documentation are “commercial
computer software” or “commercial computer software documentation.” In the event that such Software or
documentation is acquired by or on behalf of a unit or agency of the U.S. Government, all rights with
respect to this Software and documentation are subject to the terms of the License Agreement, pursuant to
FAR §12.212(a) and/or DFARS §227.7202-1(a), as applicable.
Trademarks
888 I/O, Adrenaline, AirPlay, AirSPACE, AirSPACE HD, AniMatte, AudioSuite, AudioVision, AutoSync, Avid,
Avid DNA, AVIDdrive, AVIDdrive Towers, Avid DNxHD, Avid Mojo, AvidNet, AvidNetwork, AVIDstripe,
Avid Unity, Avid Xpress, AVoption, AVX, CamCutter, ChromaCurve, ChromaWheel, DAE, D-Fi, D-fx,
Digidesign, Digidesign Audio Engine, Digidesign Intelligent Noise Reduction, DigiDrive,
Digital Nonlinear Accelerator, DigiTranslator, DINR, D-Verb, Equinox, ExpertRender, FieldPak,
Film Composer, FilmScribe, FluidMotion, HIIP, HyperSPACE, HyperSPACE HDCAM, IllusionFX,
Image Independence, Intraframe, iS9, iS18, iS23, iS36, Lo-Fi, Magic Mask, make manage move | media,
Marquee, Matador, Maxim, MCXpress, Media Composer, MediaDock, MediaDock Shuttle, Media Fusion,
Media Illusion, MediaLog, Media Reader, Media Recorder, MEDIArray, MediaShare, Meridien, MetaSync,
NaturalMatch, Nearchive, NetReview, NewsCutter, Nitris, OMF, OMF Interchange, OMM,
Open Media Framework, Open Media Management, ProEncode, Pro Tools, QuietDrive, Recti-Fi,
RetroLoop, rS9, rS18, Sci-Fi, Softimage, Sound Designer II, SPACE, SPACEShift, Symphony, the Avid|DS
logo, Trilligent, UnityRAID, Vari-Fi, Video Slave Driver, VideoSPACE, and Xdeck are either registered
trademarks or trademarks of Avid Technology, Inc. in the United States and/or other countries.
iNEWS, iNEWS ControlAir, and Media Browse are trademarks of iNews, LLC.
Adobe, Acrobat, and Acrobat Reader are either registered trademarks or trademarks of Adobe Systems
Incorporated in the United States and/or other countries. Microsoft, Windows, and Windows XP are
registered trademarks of Microsoft Corporation. All other trademarks contained herein are the property of
their respective owners.
Footage
Saturn “Calvin Egg” — Courtesy of Cossette Communications.
GOT FOOTAGE?
Editors — Filmmakers — Special Effects Artists — Game Developers — Animators — Educators —
Broadcasters — Content creators of every genre — Just finished an incredible project and want to
share it with the world?
Send us your reels and we may use your footage in our show reel or demo!*
For a copy of our release and Avid’s mailing address, go to www.avid.com/footage.
*Note: Avid cannot guarantee the use of materials submitted.
Avid DS Nitris Compositing and Effects Guide • 0130-05576-02A • February 2005
2
Page 3

Contents
Using This Guide. . . . . . . . . . . . . . . . . . . . . . . . . . . . . . . . . . . . . . . 21
Symbols and Conventions . . . . . . . . . . . . . . . . . . . . . . . . . . . . . . . . . . . . . . 21
Mouse, Pen, and Keyboard . . . . . . . . . . . . . . . . . . . . . . . . . . . . . . . . . . 22
Customizing the Pen or Mouse . . . . . . . . . . . . . . . . . . . . . . . . . . . . . . . 23
If You Need Help. . . . . . . . . . . . . . . . . . . . . . . . . . . . . . . . . . . . . . . . . . . . . . 23
Avid DS Customer Support . . . . . . . . . . . . . . . . . . . . . . . . . . . . . . . . . . . . . . 24
E-mail Support . . . . . . . . . . . . . . . . . . . . . . . . . . . . . . . . . . . . . . . . . . . . 24
Web Support . . . . . . . . . . . . . . . . . . . . . . . . . . . . . . . . . . . . . . . . . . . . . 24
Upload Utility . . . . . . . . . . . . . . . . . . . . . . . . . . . . . . . . . . . . . . . . . . . . . 24
Avid Community Forum . . . . . . . . . . . . . . . . . . . . . . . . . . . . . . . . . . . . . 25
How to Order Documentation . . . . . . . . . . . . . . . . . . . . . . . . . . . . . . . . . . . . 25
Avid Educational Services. . . . . . . . . . . . . . . . . . . . . . . . . . . . . . . . . . . . . . . 26
Chapter 1 Compositing . . . . . . . . . . . . . . . . . . . . . . . . . . . . . . . . . . . . . . . . . . 27
Quick Recap: Compositing . . . . . . . . . . . . . . . . . . . . . . . . . . . . . . . . . . . . . . 28
Using the Effects Tree to Composite . . . . . . . . . . . . . . . . . . . . . . . . . . . . . . 29
Relationship within the Compositing Layout . . . . . . . . . . . . . . . . . . . . . . . . . 30
Working with the Layers View . . . . . . . . . . . . . . . . . . . . . . . . . . . . . . . . . . . . 32
Adding Layers . . . . . . . . . . . . . . . . . . . . . . . . . . . . . . . . . . . . . . . . . . . . 32
Reordering Layers . . . . . . . . . . . . . . . . . . . . . . . . . . . . . . . . . . . . . . . . . 33
Renaming Layers . . . . . . . . . . . . . . . . . . . . . . . . . . . . . . . . . . . . . . . . . . 33
Scrolling Layers . . . . . . . . . . . . . . . . . . . . . . . . . . . . . . . . . . . . . . . . . . . 34
Navigating Through Layers . . . . . . . . . . . . . . . . . . . . . . . . . . . . . . . . . . 34
Loading a Layer Effect in the Layers View . . . . . . . . . . . . . . . . . . . . . . . 35
Animating Layers . . . . . . . . . . . . . . . . . . . . . . . . . . . . . . . . . . . . . . . . . . 36
Page 4

Animating the Order of Layers . . . . . . . . . . . . . . . . . . . . . . . . . . . . 36
Adjusting the Opacity of a Layer . . . . . . . . . . . . . . . . . . . . . . . . . . . . . . 37
Animating the Transparency of a Layer . . . . . . . . . . . . . . . . . . . . . 38
Removing Layers and External Mattes . . . . . . . . . . . . . . . . . . . . . . . . . 38
Working with Mattes . . . . . . . . . . . . . . . . . . . . . . . . . . . . . . . . . . . . . . . . . . . 39
Using Clips with Internal Mattes . . . . . . . . . . . . . . . . . . . . . . . . . . . . . . 39
Using Clips without Mattes in the Alpha Channel . . . . . . . . . . . . . . . . . 40
Creating a Matte by Using a Keyer. . . . . . . . . . . . . . . . . . . . . . . . . 41
Using the Shapes Tools . . . . . . . . . . . . . . . . . . . . . . . . . . . . . . . . . 41
Creating a Matte on the Timeline . . . . . . . . . . . . . . . . . . . . . . . . . . 42
Creating a Matte on a Layer . . . . . . . . . . . . . . . . . . . . . . . . . . . . . . 43
Viewing Mattes . . . . . . . . . . . . . . . . . . . . . . . . . . . . . . . . . . . . . . . . 43
Using External Mattes in the Timeline and Layers View . . . . . . . . . . . . 44
Using Matte Containers on the Timeline. . . . . . . . . . . . . . . . . . . . . 44
Using External Mattes on Layers . . . . . . . . . . . . . . . . . . . . . . . . . . 46
Combining Mattes . . . . . . . . . . . . . . . . . . . . . . . . . . . . . . . . . . . . . . . . . 49
Working with Masks . . . . . . . . . . . . . . . . . . . . . . . . . . . . . . . . . . . . . . . . . . . 49
Applying Channel or Pixel Masking. . . . . . . . . . . . . . . . . . . . . . . . . . . . 50
Using Alpha and Luma as Mask . . . . . . . . . . . . . . . . . . . . . . . . . . . . . . 52
Applying Blending Operations in the Layers View . . . . . . . . . . . . . . . . . . . . 52
Compositing with Premultiplied Images . . . . . . . . . . . . . . . . . . . . . . . . . . . . 55
The Science behind Premultiplication . . . . . . . . . . . . . . . . . . . . . . . . . . 56
Importing Source Files with an Alpha Channel . . . . . . . . . . . . . . . . . . . 58
Setting the Premultiplication Option . . . . . . . . . . . . . . . . . . . . . . . . 58
Changing the Premultiplication Setting. . . . . . . . . . . . . . . . . . . . . . 59
Applying the Premultiplication Effect . . . . . . . . . . . . . . . . . . . . . . . . . . . 59
Automatic Changes to the Premultiplication Setting . . . . . . . . . . . . . . . 61
Compositing Clips over a Black Background. . . . . . . . . . . . . . . . . . . . . 62
Unpremultiplying with Color. . . . . . . . . . . . . . . . . . . . . . . . . . . . . . . . . . 63
Working with Layered Photoshop Images . . . . . . . . . . . . . . . . . . . . . . . . . . 65
4
Page 5

Photoshop Layer Notes and Tips . . . . . . . . . . . . . . . . . . . . . . . . . . . . . . 66
Using Photoshop Images . . . . . . . . . . . . . . . . . . . . . . . . . . . . . . . . . . . . 67
Deleting Imported Photoshop Files . . . . . . . . . . . . . . . . . . . . . . . . . 68
Processing Composites . . . . . . . . . . . . . . . . . . . . . . . . . . . . . . . . . . . . . . . . 68
Processing Layered Clips on the Timeline . . . . . . . . . . . . . . . . . . . . . . . 70
Processing Effect Nodes . . . . . . . . . . . . . . . . . . . . . . . . . . . . . . . . . . . . 71
Chapter 2 Using Effects Trees. . . . . . . . . . . . . . . . . . . . . . . . . . . . . . . . . . . . . 73
Applying Effects Trees . . . . . . . . . . . . . . . . . . . . . . . . . . . . . . . . . . . . . . . . . 74
Applying an Effects Tree on a Clip or Track. . . . . . . . . . . . . . . . . . . . . . 74
Applying an Effects Tree as a Transition . . . . . . . . . . . . . . . . . . . . . . . . 75
Converting a Stack of Effects to an Effects Tree . . . . . . . . . . . . . . . . . . 76
Applying an Effects Tree on a Layer . . . . . . . . . . . . . . . . . . . . . . . . . . . 78
Opening the Effects Tree View. . . . . . . . . . . . . . . . . . . . . . . . . . . . . . . . 79
Working with the Effects Tree . . . . . . . . . . . . . . . . . . . . . . . . . . . . . . . . . . . . 79
Adding Effect Nodes to a Tree . . . . . . . . . . . . . . . . . . . . . . . . . . . . . . . . 79
Adding Clips to the Effects Tree. . . . . . . . . . . . . . . . . . . . . . . . . . . . . . . 80
Adding or Removing Inputs To and From an Effect Node . . . . . . . . . . . 81
Connecting Nodes . . . . . . . . . . . . . . . . . . . . . . . . . . . . . . . . . . . . . . . . . 81
Disconnecting Nodes . . . . . . . . . . . . . . . . . . . . . . . . . . . . . . . . . . . . . . . 83
Selecting Nodes . . . . . . . . . . . . . . . . . . . . . . . . . . . . . . . . . . . . . . . . . . . 84
Collapsing and Expanding Nodes . . . . . . . . . . . . . . . . . . . . . . . . . . . . . 85
Removing Nodes . . . . . . . . . . . . . . . . . . . . . . . . . . . . . . . . . . . . . . . . . . 85
Editing an Effect Node . . . . . . . . . . . . . . . . . . . . . . . . . . . . . . . . . . . . . . 86
Viewing and Bypassing Nodes. . . . . . . . . . . . . . . . . . . . . . . . . . . . . . . . 87
Folding Nodes . . . . . . . . . . . . . . . . . . . . . . . . . . . . . . . . . . . . . . . . . . . . 88
Attracting or Repelling Nodes. . . . . . . . . . . . . . . . . . . . . . . . . . . . . . . . . 90
Organizing Nodes. . . . . . . . . . . . . . . . . . . . . . . . . . . . . . . . . . . . . . . . . . 92
Renaming Nodes . . . . . . . . . . . . . . . . . . . . . . . . . . . . . . . . . . . . . . . . . . 93
Renaming Input Ports . . . . . . . . . . . . . . . . . . . . . . . . . . . . . . . . . . . 93
Displaying Tooltips . . . . . . . . . . . . . . . . . . . . . . . . . . . . . . . . . . . . . . . . . 94
5
Page 6

Zooming the Effects Tree . . . . . . . . . . . . . . . . . . . . . . . . . . . . . . . . . . . 94
Using the Birds Eye View . . . . . . . . . . . . . . . . . . . . . . . . . . . . . . . . . . . 95
Saving and Loading Trees. . . . . . . . . . . . . . . . . . . . . . . . . . . . . . . . . . . 96
Saving an Effects Tree . . . . . . . . . . . . . . . . . . . . . . . . . . . . . . . . . . 96
Loading an Effects Tree . . . . . . . . . . . . . . . . . . . . . . . . . . . . . . . . . 96
Using the Effects Tree to Composite . . . . . . . . . . . . . . . . . . . . . . . . . . . . . . 98
Using External Mattes in the Effects Tree . . . . . . . . . . . . . . . . . . . . . . . 98
Compositing Two Layers . . . . . . . . . . . . . . . . . . . . . . . . . . . . . . . . . . . 100
Compositing Multiple Images . . . . . . . . . . . . . . . . . . . . . . . . . . . . . . . 100
Uncompositing Foreground from the Background. . . . . . . . . . . . . . . . 103
Combining Separate RGB and Alpha Channels . . . . . . . . . . . . . . . . . 104
Unpremultiplying with Color in the Effects Tree. . . . . . . . . . . . . . . . . . 107
Compositing Multiple Mattes . . . . . . . . . . . . . . . . . . . . . . . . . . . . . . . . 109
Applying Blending Operations in the Effects Tree . . . . . . . . . . . . . . . . 111
Mapping Luminance Variations between Clips . . . . . . . . . . . . . . . . . . 113
Chapter 3 Keying. . . . . . . . . . . . . . . . . . . . . . . . . . . . . . . . . . . . . . . . . . . . . . . 117
About Keying . . . . . . . . . . . . . . . . . . . . . . . . . . . . . . . . . . . . . . . . . . . . . . . 117
Using the Blue-Green Keyer . . . . . . . . . . . . . . . . . . . . . . . . . . . . . . . . . . . 118
Creating a Basic Matte . . . . . . . . . . . . . . . . . . . . . . . . . . . . . . . . . . . . 118
Fine-tuning the Matte . . . . . . . . . . . . . . . . . . . . . . . . . . . . . . . . . . . . . 120
Creating a Spill Matte . . . . . . . . . . . . . . . . . . . . . . . . . . . . . . . . . . . . . 123
Spill Subtraction . . . . . . . . . . . . . . . . . . . . . . . . . . . . . . . . . . . . . . . . . . . . . 125
Applying a Spill Subtract on the Timeline . . . . . . . . . . . . . . . . . . . . . . 126
Applying a Spill Subtract in the Effects Tree . . . . . . . . . . . . . . . . . . . . 127
Using the Chroma Keyer . . . . . . . . . . . . . . . . . . . . . . . . . . . . . . . . . . . . . . 129
Creating a Basic Matte . . . . . . . . . . . . . . . . . . . . . . . . . . . . . . . . . . . . 129
Fine-tuning the Matte . . . . . . . . . . . . . . . . . . . . . . . . . . . . . . . . . . . . . 130
Creating a Spill Matte . . . . . . . . . . . . . . . . . . . . . . . . . . . . . . . . . . . . . 132
Using the Difference Keyer Effect . . . . . . . . . . . . . . . . . . . . . . . . . . . . . . . 134
Applying the Difference Keyer on Layers . . . . . . . . . . . . . . . . . . . . . . 135
6
Page 7

Applying the Difference Keyer to an Effects Tree . . . . . . . . . . . . . . . . 137
Fine-tuning the Matte . . . . . . . . . . . . . . . . . . . . . . . . . . . . . . . . . . . . . 139
Using the HSL Keyer Effect . . . . . . . . . . . . . . . . . . . . . . . . . . . . . . . . . . . . 141
Creating a Basic Key . . . . . . . . . . . . . . . . . . . . . . . . . . . . . . . . . . . . . . 141
Fine-tuning the Key . . . . . . . . . . . . . . . . . . . . . . . . . . . . . . . . . . . . . . . 143
Using the Linear Luma Keyer Effect . . . . . . . . . . . . . . . . . . . . . . . . . . . . . . 144
Creating a Basic Key . . . . . . . . . . . . . . . . . . . . . . . . . . . . . . . . . . . . . . 144
Fine-tuning the Matte . . . . . . . . . . . . . . . . . . . . . . . . . . . . . . . . . . . . . 146
Using the Luma Keyer Effect . . . . . . . . . . . . . . . . . . . . . . . . . . . . . . . . . . . 148
Creating a Basic Matte . . . . . . . . . . . . . . . . . . . . . . . . . . . . . . . . . . . . 148
Fine-tuning the Matte . . . . . . . . . . . . . . . . . . . . . . . . . . . . . . . . . . . . . 151
Chapter 4 Color Correcting Images . . . . . . . . . . . . . . . . . . . . . . . . . . . . . . . 153
Setting Up the Color Correction Environment . . . . . . . . . . . . . . . . . . . . . . . 154
Workflow: Color Correcting Images . . . . . . . . . . . . . . . . . . . . . . . . . . . . . . 155
Color Correction in Avid DS Nitris . . . . . . . . . . . . . . . . . . . . . . . . . . . . . . . . 156
Working with Source Effects . . . . . . . . . . . . . . . . . . . . . . . . . . . . . . . . . . . . 157
Applying and Editing Tape Source Effects . . . . . . . . . . . . . . . . . . . . . . 158
Using the Tape Tool to Apply Source Effects . . . . . . . . . . . . . . . . 158
Using the Avid Explorer to Apply Source Effects. . . . . . . . . . . . . . 160
Applying Tape Source Effects on the Timeline . . . . . . . . . . . . . . . 160
Applying Tape Source Effects in the Effects Layout . . . . . . . . . . . 161
Editing Masterclip and Subclip Source Effects. . . . . . . . . . . . . . . . . . . 161
Editing Masterclip Source Effects in the Effects Layout . . . . . . . . 162
Removing Source Effects. . . . . . . . . . . . . . . . . . . . . . . . . . . . . . . . . . . 162
Loading Source Effects . . . . . . . . . . . . . . . . . . . . . . . . . . . . . . . . . . . . 163
Applying a Color Correction Effect . . . . . . . . . . . . . . . . . . . . . . . . . . . . . . . 163
Setting the Color Correction Mode . . . . . . . . . . . . . . . . . . . . . . . . . . . . . . . 164
Analyzing Footage . . . . . . . . . . . . . . . . . . . . . . . . . . . . . . . . . . . . . . . . . . . 165
Analyzing Images using Histograms . . . . . . . . . . . . . . . . . . . . . . . . . . 165
Setting Black and White Points of an Image . . . . . . . . . . . . . . . . . . . . 168
7
Page 8

Displaying Pixel Information in the Viewer . . . . . . . . . . . . . . . . . . 168
Setting the Black and White Points. . . . . . . . . . . . . . . . . . . . . . . . 170
Color Correcting Tonal Ranges in Images . . . . . . . . . . . . . . . . . . . . . . . . . 171
Working with the HSL Controls . . . . . . . . . . . . . . . . . . . . . . . . . . . . . . 172
Hue and Saturation. . . . . . . . . . . . . . . . . . . . . . . . . . . . . . . . . . . . 172
Gain, Brightness, Setup, and Contrast . . . . . . . . . . . . . . . . . . . . . 173
Gamma Corrections . . . . . . . . . . . . . . . . . . . . . . . . . . . . . . . . . . . 174
Using Levels to Correct Tonal Ranges . . . . . . . . . . . . . . . . . . . . . . . . 176
Input and Output Adjustments . . . . . . . . . . . . . . . . . . . . . . . . . . . 176
Working with the Composite and Luma Tabs . . . . . . . . . . . . . . . . 177
Linearizing Film-Based Material . . . . . . . . . . . . . . . . . . . . . . . . . . . . . . . . . 177
Working with LUTs . . . . . . . . . . . . . . . . . . . . . . . . . . . . . . . . . . . . . . . 178
Exporting LUTs . . . . . . . . . . . . . . . . . . . . . . . . . . . . . . . . . . . . . . . 179
Loading LUTs . . . . . . . . . . . . . . . . . . . . . . . . . . . . . . . . . . . . . . . . 179
Linearizing Log-based Media . . . . . . . . . . . . . . . . . . . . . . . . . . . . . . . 180
About Softclipping. . . . . . . . . . . . . . . . . . . . . . . . . . . . . . . . . . . . . 181
Color Correcting a Dark Image. . . . . . . . . . . . . . . . . . . . . . . . . . . . . . . . . . 182
Color Correction by Matching Clips . . . . . . . . . . . . . . . . . . . . . . . . . . . . . . 186
Using the Match Color Chip. . . . . . . . . . . . . . . . . . . . . . . . . . . . . . . . . 187
The Natural Match Feature . . . . . . . . . . . . . . . . . . . . . . . . . . . . . . . . . 188
Correcting Inaccurate or Deficient Color Channels . . . . . . . . . . . . . . . . . . 193
Channel Blending Considerations . . . . . . . . . . . . . . . . . . . . . . . . . . . . 194
Adjusting Curves to Color Correct . . . . . . . . . . . . . . . . . . . . . . . . . . . . . . . 196
Setting Legal Luma, Chroma, and RGB Values. . . . . . . . . . . . . . . . . . . . . 199
Returning to Default Values . . . . . . . . . . . . . . . . . . . . . . . . . . . . . . . . . . . . 200
Animating with the Color Correction Effect . . . . . . . . . . . . . . . . . . . . . 202
Chapter 5 Transforming Images . . . . . . . . . . . . . . . . . . . . . . . . . . . . . . . . . . 203
Applying a DVE . . . . . . . . . . . . . . . . . . . . . . . . . . . . . . . . . . . . . . . . . . . . . 204
Applying a DVE to a Layer . . . . . . . . . . . . . . . . . . . . . . . . . . . . . . . . . 204
Locking DVEs . . . . . . . . . . . . . . . . . . . . . . . . . . . . . . . . . . . . . . . . . . . 207
8
Page 9

Transforming an Image . . . . . . . . . . . . . . . . . . . . . . . . . . . . . . . . . . . . . . . . 207
Translating an Image . . . . . . . . . . . . . . . . . . . . . . . . . . . . . . . . . . . . . . 207
Scaling an Image . . . . . . . . . . . . . . . . . . . . . . . . . . . . . . . . . . . . . . . . . 208
Rotating an Image . . . . . . . . . . . . . . . . . . . . . . . . . . . . . . . . . . . . . . . . 208
Cropping an Image. . . . . . . . . . . . . . . . . . . . . . . . . . . . . . . . . . . . . . . . 209
Transformation in Layers View and Effects Tree . . . . . . . . . . . . . . . . . . . . 210
Applying a Global DVE in the Layers View . . . . . . . . . . . . . . . . . . . . . 210
Transform Trees. . . . . . . . . . . . . . . . . . . . . . . . . . . . . . . . . . . . . . . . . . 211
What are Transform Nodes? . . . . . . . . . . . . . . . . . . . . . . . . . . . . . 211
What are Rasterization Effect Nodes? . . . . . . . . . . . . . . . . . . . . . 212
What is the Difference between Local and Global Inputs? . . . . . . 213
Working with Transform Trees . . . . . . . . . . . . . . . . . . . . . . . . . . . . . . . . . . 214
Visualization of Sequential DVE Transformations . . . . . . . . . . . . . . . . 214
Globally Transforming Multiple Images . . . . . . . . . . . . . . . . . . . . . . . . 215
Multi-Level Global DVE in the Effects Tree . . . . . . . . . . . . . . . . . . . . . 218
Common Transformation Around a Local Axis. . . . . . . . . . . . . . . . . . . 220
Corner Pinning . . . . . . . . . . . . . . . . . . . . . . . . . . . . . . . . . . . . . . . . . . . . . . 221
Working with Motion Paths . . . . . . . . . . . . . . . . . . . . . . . . . . . . . . . . . . . . . 222
Creating a Motion Path. . . . . . . . . . . . . . . . . . . . . . . . . . . . . . . . . . . . . 222
Editing a Motion Path . . . . . . . . . . . . . . . . . . . . . . . . . . . . . . . . . . . . . . 224
Changing the Speed of the Motion Path . . . . . . . . . . . . . . . . . . . . . . . 227
Previewing an Animated DVE . . . . . . . . . . . . . . . . . . . . . . . . . . . . . . . 228
Chapter 6 Tracking . . . . . . . . . . . . . . . . . . . . . . . . . . . . . . . . . . . . . . . . . . . . . 229
Motion Tracking. . . . . . . . . . . . . . . . . . . . . . . . . . . . . . . . . . . . . . . . . . . . . . 229
Choosing a Tracking Method . . . . . . . . . . . . . . . . . . . . . . . . . . . . . . . . . . . 231
Stabilizing Clips . . . . . . . . . . . . . . . . . . . . . . . . . . . . . . . . . . . . . . . . . . 231
Tracking . . . . . . . . . . . . . . . . . . . . . . . . . . . . . . . . . . . . . . . . . . . . . . . . 231
Using the Trackers . . . . . . . . . . . . . . . . . . . . . . . . . . . . . . . . . . . . . . . . . . . 232
Using Multiple Trackers . . . . . . . . . . . . . . . . . . . . . . . . . . . . . . . . . . . . 233
Selecting a Suitable Reference Point for Tracking. . . . . . . . . . . . . . . . 234
9
Page 10

Setting the Search Region. . . . . . . . . . . . . . . . . . . . . . . . . . . . . . . . . . 235
Tracking Composited Clips . . . . . . . . . . . . . . . . . . . . . . . . . . . . . . . . . . . . 236
Using the Tracker in the Layers View . . . . . . . . . . . . . . . . . . . . . . . . . 237
Using the Tracker in an Effects Tree . . . . . . . . . . . . . . . . . . . . . . . . . . 239
Positioning the Reference Tracker . . . . . . . . . . . . . . . . . . . . . . . . . . . 241
Positioning the Layer Tracker . . . . . . . . . . . . . . . . . . . . . . . . . . . . . . . 244
Starting the Tracking Process . . . . . . . . . . . . . . . . . . . . . . . . . . . . . . . 246
Cropping Unwanted Parts of Images. . . . . . . . . . . . . . . . . . . . . . . . . . 248
Combining Tracking with Other DVEs . . . . . . . . . . . . . . . . . . . . . . . . . . . . 249
Tracking Shapes . . . . . . . . . . . . . . . . . . . . . . . . . . . . . . . . . . . . . . . . . . . . 250
Using the Shape Tracker. . . . . . . . . . . . . . . . . . . . . . . . . . . . . . . . . . . 251
Tracking a Shape . . . . . . . . . . . . . . . . . . . . . . . . . . . . . . . . . . . . . 251
Tracking Control Points . . . . . . . . . . . . . . . . . . . . . . . . . . . . . . . . 254
Setting an Offset for the Tracker. . . . . . . . . . . . . . . . . . . . . . . . . . 256
Correcting Tracker Errors when Tracking Shapes Objects . . . . . . . . . 257
Stabilizing Clips . . . . . . . . . . . . . . . . . . . . . . . . . . . . . . . . . . . . . . . . . . . . . 257
Using the Stabilizer in the Effects Tree . . . . . . . . . . . . . . . . . . . . . . . . 258
10
Using the Stabilizer in the Layers View . . . . . . . . . . . . . . . . . . . . . . . . 262
4-Point Corner Pinning . . . . . . . . . . . . . . . . . . . . . . . . . . . . . . . . . . . . . . . . 264
Tracking Difficult Shots. . . . . . . . . . . . . . . . . . . . . . . . . . . . . . . . . . . . . . . . 266
Offsetting the Tracker . . . . . . . . . . . . . . . . . . . . . . . . . . . . . . . . . . . . . 267
Correcting Tracker Errors . . . . . . . . . . . . . . . . . . . . . . . . . . . . . . . . . . 269
Chapter 7 Painting and 2D Titling . . . . . . . . . . . . . . . . . . . . . . . . . . . . . . . . . 271
Workflow: Painting and 2D Titling . . . . . . . . . . . . . . . . . . . . . . . . . . . . . . . 272
Applying Graphics . . . . . . . . . . . . . . . . . . . . . . . . . . . . . . . . . . . . . . . . . . . 275
Setting the Working Resolution . . . . . . . . . . . . . . . . . . . . . . . . . . . . . . 276
Applying Graphics on the Video or Background Tracks . . . . . . . . . . . 276
Applying Graphics as a Source-Generated Effect. . . . . . . . . . . . . . . . 277
Applying Graphics on the Timeline Effect Track . . . . . . . . . . . . . . . . . 278
Applying Graphics on a Layer . . . . . . . . . . . . . . . . . . . . . . . . . . . . . . . 279
Page 11

Applying Graphics in an Effects Tree . . . . . . . . . . . . . . . . . . . . . . . . . . 280
Using Presets in Graphics. . . . . . . . . . . . . . . . . . . . . . . . . . . . . . . . . . . . . . 281
Loading and Saving Presets . . . . . . . . . . . . . . . . . . . . . . . . . . . . . . . . 281
Using Stroke, Text, or Group Presets . . . . . . . . . . . . . . . . . . . . . . . . . 283
Setting Drawing Tool Properties . . . . . . . . . . . . . . . . . . . . . . . . . . . . . . . . . 285
Setting the Paint Style . . . . . . . . . . . . . . . . . . . . . . . . . . . . . . . . . . . . . 285
Setting Brush Properties . . . . . . . . . . . . . . . . . . . . . . . . . . . . . . . . . . . 287
Creating Custom Brushes . . . . . . . . . . . . . . . . . . . . . . . . . . . . . . . . . . 289
Setting the Titling Style. . . . . . . . . . . . . . . . . . . . . . . . . . . . . . . . . . . . . 290
Setting the Font Properties. . . . . . . . . . . . . . . . . . . . . . . . . . . . . . . . . . 291
Setting the Masks Properties . . . . . . . . . . . . . . . . . . . . . . . . . . . . . . . . 293
Setting the Time Span Properties . . . . . . . . . . . . . . . . . . . . . . . . . . . . 294
Defining Color . . . . . . . . . . . . . . . . . . . . . . . . . . . . . . . . . . . . . . . . . . . . . . . 296
Working with Graphics . . . . . . . . . . . . . . . . . . . . . . . . . . . . . . . . . . . . . . . . 299
Checking the Premultiplication Setting. . . . . . . . . . . . . . . . . . . . . . . . . 299
Wireframe Mode. . . . . . . . . . . . . . . . . . . . . . . . . . . . . . . . . . . . . . . . . . 299
Wireframe Preview . . . . . . . . . . . . . . . . . . . . . . . . . . . . . . . . . . . . . . . . 300
Drawing Polylines. . . . . . . . . . . . . . . . . . . . . . . . . . . . . . . . . . . . . . . . . 301
Drawing Freehand Strokes. . . . . . . . . . . . . . . . . . . . . . . . . . . . . . . . . . 302
Using the Express Tools . . . . . . . . . . . . . . . . . . . . . . . . . . . . . . . . 304
Drawing Rectangles and Ellipses. . . . . . . . . . . . . . . . . . . . . . . . . . . . . 305
Filling Shapes. . . . . . . . . . . . . . . . . . . . . . . . . . . . . . . . . . . . . . . . . . . . 306
Using the Magic Wand Tool . . . . . . . . . . . . . . . . . . . . . . . . . . . . . . . . . 307
Selecting Graphics Objects . . . . . . . . . . . . . . . . . . . . . . . . . . . . . . . . . 309
Grouping Graphics Objects . . . . . . . . . . . . . . . . . . . . . . . . . . . . . . . . . 310
Regrouping Objects. . . . . . . . . . . . . . . . . . . . . . . . . . . . . . . . . . . . 311
Selecting Objects in a Group. . . . . . . . . . . . . . . . . . . . . . . . . . . . . 311
Cutting and Pasting Objects in a Group . . . . . . . . . . . . . . . . . . . . 312
Locking Graphics Objects . . . . . . . . . . . . . . . . . . . . . . . . . . . . . . . . . . 312
Hiding Graphics Objects. . . . . . . . . . . . . . . . . . . . . . . . . . . . . . . . . . . . 313
11
Page 12

Hiding Bounding Boxes . . . . . . . . . . . . . . . . . . . . . . . . . . . . . . . . 314
Creating Clusters of Graphics Objects and Vertices . . . . . . . . . . . . . . 314
Aligning Graphics Objects . . . . . . . . . . . . . . . . . . . . . . . . . . . . . . . . . . 315
Editing the Shape of a Stroke . . . . . . . . . . . . . . . . . . . . . . . . . . . . . . . 316
Selecting Control Points . . . . . . . . . . . . . . . . . . . . . . . . . . . . . . . . 316
Breaking and Unifying Strokes . . . . . . . . . . . . . . . . . . . . . . . . . . . 318
Combining and Separating Strokes . . . . . . . . . . . . . . . . . . . . . . . 318
Morphing Strokes . . . . . . . . . . . . . . . . . . . . . . . . . . . . . . . . . . . . . 319
Changing the Slope of a Curve. . . . . . . . . . . . . . . . . . . . . . . . . . . 320
Changing the Direction of a Stroke. . . . . . . . . . . . . . . . . . . . . . . . 321
Reshaping a Stroke . . . . . . . . . . . . . . . . . . . . . . . . . . . . . . . . . . . . . . . 321
Chopping Control Points. . . . . . . . . . . . . . . . . . . . . . . . . . . . . . . . 322
Moving a Shape . . . . . . . . . . . . . . . . . . . . . . . . . . . . . . . . . . . . . . 323
Scaling, Rotating, and Skewing a Shape . . . . . . . . . . . . . . . . . . . 323
Stretching a Shape . . . . . . . . . . . . . . . . . . . . . . . . . . . . . . . . . . . . 324
Changing the Opacity of a Stroke. . . . . . . . . . . . . . . . . . . . . . . . . 324
Working with Titles . . . . . . . . . . . . . . . . . . . . . . . . . . . . . . . . . . . . . . . . . . . 325
12
Using Text from Other Applications. . . . . . . . . . . . . . . . . . . . . . . . . . . 326
Importing HTML Text . . . . . . . . . . . . . . . . . . . . . . . . . . . . . . . . . . 327
Selecting and Editing Text. . . . . . . . . . . . . . . . . . . . . . . . . . . . . . . . . . 327
Aligning Text . . . . . . . . . . . . . . . . . . . . . . . . . . . . . . . . . . . . . . . . . . . . 330
Converting Text to Strokes . . . . . . . . . . . . . . . . . . . . . . . . . . . . . . 331
Searching for Text . . . . . . . . . . . . . . . . . . . . . . . . . . . . . . . . . . . . . . . . 331
Creating Rolls and Crawls . . . . . . . . . . . . . . . . . . . . . . . . . . . . . . . . . . 332
Creating a Fade . . . . . . . . . . . . . . . . . . . . . . . . . . . . . . . . . . . . . . 333
Creating Handwritten and Type-On Animation . . . . . . . . . . . . . . . . . . 334
Manipulating Graphics . . . . . . . . . . . . . . . . . . . . . . . . . . . . . . . . . . . . . . . . 336
Editing Graphics Properties. . . . . . . . . . . . . . . . . . . . . . . . . . . . . . . . . 336
Cutting, Copying, and Pasting Graphics . . . . . . . . . . . . . . . . . . . . . . . 338
Copying and Pasting Shapes . . . . . . . . . . . . . . . . . . . . . . . . . . . . 338
Page 13

Duplicating Graphics . . . . . . . . . . . . . . . . . . . . . . . . . . . . . . . . . . . . . . 339
Deleting Graphics. . . . . . . . . . . . . . . . . . . . . . . . . . . . . . . . . . . . . . . . . 340
Changing the Order of Graphics . . . . . . . . . . . . . . . . . . . . . . . . . . . . . 341
Transforming Graphics. . . . . . . . . . . . . . . . . . . . . . . . . . . . . . . . . . . . . 342
Moving Objects . . . . . . . . . . . . . . . . . . . . . . . . . . . . . . . . . . . . . . . 342
Scaling Objects . . . . . . . . . . . . . . . . . . . . . . . . . . . . . . . . . . . . . . . 342
Rotating Objects . . . . . . . . . . . . . . . . . . . . . . . . . . . . . . . . . . . . . . 343
Skewing Objects . . . . . . . . . . . . . . . . . . . . . . . . . . . . . . . . . . . . . . 344
Setting the Transformation Properties. . . . . . . . . . . . . . . . . . . . . . 344
Tracking Graphics Objects . . . . . . . . . . . . . . . . . . . . . . . . . . . . . . . . . . . . . 345
Transformation Tracking . . . . . . . . . . . . . . . . . . . . . . . . . . . . . . . . . . . 345
Tracking Vertices . . . . . . . . . . . . . . . . . . . . . . . . . . . . . . . . . . . . . . . . . 346
Working in Raster Mode . . . . . . . . . . . . . . . . . . . . . . . . . . . . . . . . . . . . . . . 347
Raster Mode Caches . . . . . . . . . . . . . . . . . . . . . . . . . . . . . . . . . . . . . . 349
Using the GOV in Raster Mode . . . . . . . . . . . . . . . . . . . . . . . . . . . . . . 350
Creating Mattes. . . . . . . . . . . . . . . . . . . . . . . . . . . . . . . . . . . . . . . . . . . . . . 351
Creating a Travelling Matte . . . . . . . . . . . . . . . . . . . . . . . . . . . . . . . . . 351
Scratch Removal. . . . . . . . . . . . . . . . . . . . . . . . . . . . . . . . . . . . . . . . . . . . . 353
Blending Frames . . . . . . . . . . . . . . . . . . . . . . . . . . . . . . . . . . . . . . . . . . . . . 354
Blending Graphics Objects or Titles . . . . . . . . . . . . . . . . . . . . . . . . . . . . . . 355
Importing Images . . . . . . . . . . . . . . . . . . . . . . . . . . . . . . . . . . . . . . . . . . . . 356
Importing Encapsulated PostScript (EPS) Files . . . . . . . . . . . . . . . . . . 357
Importing Clips . . . . . . . . . . . . . . . . . . . . . . . . . . . . . . . . . . . . . . . . . . . . . . 358
Importing Subtitles . . . . . . . . . . . . . . . . . . . . . . . . . . . . . . . . . . . . . . . . . . . 359
The DS Subtitles File . . . . . . . . . . . . . . . . . . . . . . . . . . . . . . . . . . . . . . 359
The Header Section of the DS Subtitles File . . . . . . . . . . . . . . . . . 360
The Subtitles Section of the DS Subtitles File . . . . . . . . . . . . . . . . 360
Examples of DS Subtitles Files . . . . . . . . . . . . . . . . . . . . . . . . . . . 361
Processing Graphics . . . . . . . . . . . . . . . . . . . . . . . . . . . . . . . . . . . . . . . . . . 364
13
Page 14

Chapter 8 Paint Effects. . . . . . . . . . . . . . . . . . . . . . . . . . . . . . . . . . . . . . . . . . 367
Clone Effect . . . . . . . . . . . . . . . . . . . . . . . . . . . . . . . . . . . . . . . . . . . . . . . . 367
Color Blend Effect . . . . . . . . . . . . . . . . . . . . . . . . . . . . . . . . . . . . . . . . . . . 370
Setting the Opacity of a Color . . . . . . . . . . . . . . . . . . . . . . . . . . . . . . . 371
Defining Color . . . . . . . . . . . . . . . . . . . . . . . . . . . . . . . . . . . . . . . . . . . 372
Picking a Color from an Image . . . . . . . . . . . . . . . . . . . . . . . . . . . 373
Loading and Saving a Color Palette . . . . . . . . . . . . . . . . . . . . . . . . . . 374
Cutout Effect. . . . . . . . . . . . . . . . . . . . . . . . . . . . . . . . . . . . . . . . . . . . . . . . 374
Using the Cutout Effect in a Stack. . . . . . . . . . . . . . . . . . . . . . . . . . . . 377
Comparing the Cutout and Clone Effects . . . . . . . . . . . . . . . . . . . . . . 378
Dodge and Burn Effect . . . . . . . . . . . . . . . . . . . . . . . . . . . . . . . . . . . . . . . . 378
Noise Effect . . . . . . . . . . . . . . . . . . . . . . . . . . . . . . . . . . . . . . . . . . . . . . . . 379
Paper Grain Images . . . . . . . . . . . . . . . . . . . . . . . . . . . . . . . . . . . . . . . . . . 381
Reveal Effect . . . . . . . . . . . . . . . . . . . . . . . . . . . . . . . . . . . . . . . . . . . . . . . 384
Stack Effects . . . . . . . . . . . . . . . . . . . . . . . . . . . . . . . . . . . . . . . . . . . . . . . 385
Chapter 9 3D DVE and 3D Titling. . . . . . . . . . . . . . . . . . . . . . . . . . . . . . . . . . 389
Workflow: Creating 3D DVEs . . . . . . . . . . . . . . . . . . . . . . . . . . . . . . . . . . . 390
14
Workflow: 3D Titling . . . . . . . . . . . . . . . . . . . . . . . . . . . . . . . . . . . . . . . . . . 391
Working in the 3D World . . . . . . . . . . . . . . . . . . . . . . . . . . . . . . . . . . . . . . 392
Three-Dimensional Space . . . . . . . . . . . . . . . . . . . . . . . . . . . . . . . . . . 392
XYZ Axes . . . . . . . . . . . . . . . . . . . . . . . . . . . . . . . . . . . . . . . . . . . 392
XYZ Coordinates . . . . . . . . . . . . . . . . . . . . . . . . . . . . . . . . . . . . . 392
XZ, XY, YZ Planes . . . . . . . . . . . . . . . . . . . . . . . . . . . . . . . . . . . . 393
Global and Local Coordinate Systems . . . . . . . . . . . . . . . . . . . . . 393
Materials . . . . . . . . . . . . . . . . . . . . . . . . . . . . . . . . . . . . . . . . . . . . . . . 393
Lights . . . . . . . . . . . . . . . . . . . . . . . . . . . . . . . . . . . . . . . . . . . . . . . . . . 394
Setting Preferences . . . . . . . . . . . . . . . . . . . . . . . . . . . . . . . . . . . . . . . . . . 394
Using a Background . . . . . . . . . . . . . . . . . . . . . . . . . . . . . . . . . . . . . . 395
Working in Direct View Mode . . . . . . . . . . . . . . . . . . . . . . . . . . . . . . . 396
Suspending Output to the Output Monitor . . . . . . . . . . . . . . . . . . 397
Page 15

Displaying Guides . . . . . . . . . . . . . . . . . . . . . . . . . . . . . . . . . . . . . . . . 398
Showing the Safe Action/Title Areas . . . . . . . . . . . . . . . . . . . . . . . 398
Showing Construction Lines . . . . . . . . . . . . . . . . . . . . . . . . . . . . . 399
Showing the Grid . . . . . . . . . . . . . . . . . . . . . . . . . . . . . . . . . . . . . . 399
Showing Objects Viewable Within the Frame . . . . . . . . . . . . . . . . 400
Working in Wireframe Mode. . . . . . . . . . . . . . . . . . . . . . . . . . . . . . . . . 400
Rendering Objects as a Wireframe . . . . . . . . . . . . . . . . . . . . . . . . 401
Setting the Viewer Quality Level . . . . . . . . . . . . . . . . . . . . . . . . . . . . . 401
Working with the Camera . . . . . . . . . . . . . . . . . . . . . . . . . . . . . . . . . . . . . . 402
Viewing Through the Alternate Camera . . . . . . . . . . . . . . . . . . . . . . . . 403
Snapping the Camera . . . . . . . . . . . . . . . . . . . . . . . . . . . . . . . . . . 404
Viewing a Scene from Different Angles . . . . . . . . . . . . . . . . . . . . . 404
Manipulating the Camera . . . . . . . . . . . . . . . . . . . . . . . . . . . . . . . . . . . 405
Resetting the Camera . . . . . . . . . . . . . . . . . . . . . . . . . . . . . . . . . . . . . 406
Setting the Camera Position. . . . . . . . . . . . . . . . . . . . . . . . . . . . . . . . . 406
Defining the Camera Interest . . . . . . . . . . . . . . . . . . . . . . . . . . . . . . . . 406
Setting the Clipping Planes . . . . . . . . . . . . . . . . . . . . . . . . . . . . . . . . . 407
Selecting a Projection Method . . . . . . . . . . . . . . . . . . . . . . . . . . . . . . . 408
Setting the Field of View. . . . . . . . . . . . . . . . . . . . . . . . . . . . . . . . . . . . 408
About Objects . . . . . . . . . . . . . . . . . . . . . . . . . . . . . . . . . . . . . . . . . . . . . . . 409
About Drawing Tool Properties . . . . . . . . . . . . . . . . . . . . . . . . . . . . . . 410
Manipulating Objects. . . . . . . . . . . . . . . . . . . . . . . . . . . . . . . . . . . . . . . . . . 410
Selecting and Deselecting Objects. . . . . . . . . . . . . . . . . . . . . . . . . . . . 410
Cutting, Copying, and Pasting Objects. . . . . . . . . . . . . . . . . . . . . . . . . 411
Moving Objects. . . . . . . . . . . . . . . . . . . . . . . . . . . . . . . . . . . . . . . . . . . 412
Locking and Unlocking Objects . . . . . . . . . . . . . . . . . . . . . . . . . . . . . . 413
Reordering Objects . . . . . . . . . . . . . . . . . . . . . . . . . . . . . . . . . . . . . . . 414
Positioning Objects at Specific Locations. . . . . . . . . . . . . . . . . . . . . . . 414
Aligning Objects Relative to Each Other . . . . . . . . . . . . . . . . . . . . . . . 415
Grouping and Ungrouping Objects. . . . . . . . . . . . . . . . . . . . . . . . . . . . 416
15
Page 16

Showing and Hiding Objects . . . . . . . . . . . . . . . . . . . . . . . . . . . . . . . . 417
Changing the Visibility of Objects . . . . . . . . . . . . . . . . . . . . . . . . . . . . 417
Modifying Objects . . . . . . . . . . . . . . . . . . . . . . . . . . . . . . . . . . . . . . . . 418
Adjusting the Anchor Point . . . . . . . . . . . . . . . . . . . . . . . . . . . . . . 418
Scaling Objects. . . . . . . . . . . . . . . . . . . . . . . . . . . . . . . . . . . . . . . 419
Resizing Objects. . . . . . . . . . . . . . . . . . . . . . . . . . . . . . . . . . . . . . 419
Rotating Objects . . . . . . . . . . . . . . . . . . . . . . . . . . . . . . . . . . . . . . 420
Renaming Objects . . . . . . . . . . . . . . . . . . . . . . . . . . . . . . . . . . . . . . . . 421
Setting the Time Span . . . . . . . . . . . . . . . . . . . . . . . . . . . . . . . . . . . . . 422
Working with 3D DVEs . . . . . . . . . . . . . . . . . . . . . . . . . . . . . . . . . . . . . . . . 423
Creating DVEs. . . . . . . . . . . . . . . . . . . . . . . . . . . . . . . . . . . . . . . . . . . 423
Simulating a Textured Surface Using a Displacement Map . . . . . . . . 424
Applying Profile Effects . . . . . . . . . . . . . . . . . . . . . . . . . . . . . . . . . . . . 425
Extruding an Object . . . . . . . . . . . . . . . . . . . . . . . . . . . . . . . . . . . . . . . 425
Blurring Moving Objects . . . . . . . . . . . . . . . . . . . . . . . . . . . . . . . . . . . 426
Working with Graphics . . . . . . . . . . . . . . . . . . . . . . . . . . . . . . . . . . . . . . . . 427
Creating Graphics . . . . . . . . . . . . . . . . . . . . . . . . . . . . . . . . . . . . . . . . 427
16
Creating Squares and Rectangles . . . . . . . . . . . . . . . . . . . . . . . . 427
Creating Circles and Ovals . . . . . . . . . . . . . . . . . . . . . . . . . . . . . . 428
Creating Polylines and Curved Shapes . . . . . . . . . . . . . . . . . . . . 429
Editing Shapes and Paths . . . . . . . . . . . . . . . . . . . . . . . . . . . . . . . . . . 430
Selecting and Deselecting Control Points. . . . . . . . . . . . . . . . . . . 430
Editing a Shape . . . . . . . . . . . . . . . . . . . . . . . . . . . . . . . . . . . . . . 431
Opening and Closing Shapes. . . . . . . . . . . . . . . . . . . . . . . . . . . . 432
Filling Shapes . . . . . . . . . . . . . . . . . . . . . . . . . . . . . . . . . . . . . . . . 433
Removing Segments . . . . . . . . . . . . . . . . . . . . . . . . . . . . . . . . . . 433
Working with Compound Shapes . . . . . . . . . . . . . . . . . . . . . . . . . . . . 434
Creating and Separating Compound Shapes. . . . . . . . . . . . . . . . 434
Combining Shapes within a Compound Shape . . . . . . . . . . . . . . 435
Reversing the Direction of a Shape. . . . . . . . . . . . . . . . . . . . . . . . . . . 436
Page 17

Working with Text . . . . . . . . . . . . . . . . . . . . . . . . . . . . . . . . . . . . . . . . . . . . 436
Creating a Text Object . . . . . . . . . . . . . . . . . . . . . . . . . . . . . . . . . . . . . 437
Using Special or Unicode Characters . . . . . . . . . . . . . . . . . . . . . . . . . 438
Determining a Character’s Unicode Value . . . . . . . . . . . . . . . . . . 439
Entering Special and Unicode Characters. . . . . . . . . . . . . . . . . . . 440
Importing Text . . . . . . . . . . . . . . . . . . . . . . . . . . . . . . . . . . . . . . . . . . . 440
Text Overflow . . . . . . . . . . . . . . . . . . . . . . . . . . . . . . . . . . . . . . . . 440
Placing the Insertion Point . . . . . . . . . . . . . . . . . . . . . . . . . . . . . . . . . . 442
Resizing a Text Object . . . . . . . . . . . . . . . . . . . . . . . . . . . . . . . . . . . . . 443
Selecting and Deselecting Text . . . . . . . . . . . . . . . . . . . . . . . . . . . . . . 444
Editing Text . . . . . . . . . . . . . . . . . . . . . . . . . . . . . . . . . . . . . . . . . . . . . 445
Formatting Text . . . . . . . . . . . . . . . . . . . . . . . . . . . . . . . . . . . . . . . . . . 445
Changing Fonts and Font Sizes . . . . . . . . . . . . . . . . . . . . . . . . . . 445
Changing the Direction of Text . . . . . . . . . . . . . . . . . . . . . . . . . . . 446
Aligning Text into Columns . . . . . . . . . . . . . . . . . . . . . . . . . . . . . . 446
Adding a Column . . . . . . . . . . . . . . . . . . . . . . . . . . . . . . . . . . . . . . 447
Removing a Column . . . . . . . . . . . . . . . . . . . . . . . . . . . . . . . . . . . 448
Changing a Column’s Width . . . . . . . . . . . . . . . . . . . . . . . . . . . . . 449
Setting All Columns to the Same Width. . . . . . . . . . . . . . . . . . . . . 450
Changing a Column’s Text Alignment . . . . . . . . . . . . . . . . . . . . . . 451
Adjusting the Kerning . . . . . . . . . . . . . . . . . . . . . . . . . . . . . . . . . . . . . . 452
Adjusting the Leading. . . . . . . . . . . . . . . . . . . . . . . . . . . . . . . . . . . . . . 452
Adjusting the Paragraph Spacing. . . . . . . . . . . . . . . . . . . . . . . . . . . . . 453
Adjusting the Text Margins. . . . . . . . . . . . . . . . . . . . . . . . . . . . . . . . . . 453
Controlling Rolling, Crawling, and Path Text . . . . . . . . . . . . . . . . . . . . 454
Creating Rolling or Crawling Text . . . . . . . . . . . . . . . . . . . . . . . . . 454
Controlling Crawling Speed and Direction. . . . . . . . . . . . . . . . . . . 455
Clipping Text . . . . . . . . . . . . . . . . . . . . . . . . . . . . . . . . . . . . . . . . . . . . 456
Placing and Moving Text on a Path . . . . . . . . . . . . . . . . . . . . . . . . . . . 457
Creating and Deleting a Path . . . . . . . . . . . . . . . . . . . . . . . . . . . . 457
17
Page 18

Adding Text to a Path . . . . . . . . . . . . . . . . . . . . . . . . . . . . . . . . . . 458
Removing Text from a Path . . . . . . . . . . . . . . . . . . . . . . . . . . . . . 459
Positioning Text on a Path . . . . . . . . . . . . . . . . . . . . . . . . . . . . . . 459
Orienting Text on a Path. . . . . . . . . . . . . . . . . . . . . . . . . . . . . . . . 460
Controlling Object Properties Based on Path Position . . . . . . . . . 461
Working with Surfaces and Materials . . . . . . . . . . . . . . . . . . . . . . . . . . . . . 463
Applying Materials to Objects . . . . . . . . . . . . . . . . . . . . . . . . . . . . . . . 464
Using a Custom Material for an Object’s Surface. . . . . . . . . . . . . 464
Skipping the Drawing of the Back Faces. . . . . . . . . . . . . . . . . . . . . . . 465
Editing Materials . . . . . . . . . . . . . . . . . . . . . . . . . . . . . . . . . . . . . . . . . 465
Changing the Type of Material . . . . . . . . . . . . . . . . . . . . . . . . . . . 465
Changing a Material’s Base Color . . . . . . . . . . . . . . . . . . . . . . . . 466
Changing a Material’s Opacity . . . . . . . . . . . . . . . . . . . . . . . . . . . 466
Allowing Material to be Affected by Light Sources . . . . . . . . . . . . . . . 466
Adjusting the Specular Highlight Color . . . . . . . . . . . . . . . . . . . . . 467
Adjusting the Emissive Color . . . . . . . . . . . . . . . . . . . . . . . . . . . . 468
Adjusting the Shininess of a Material . . . . . . . . . . . . . . . . . . . . . . 469
18
Simulating a Reflective Surface Using an Environment Map . . . . 469
Controlling the Appearance of Overlapping Surfaces . . . . . . . . . . . . . 470
Positioning and Tiling a Texture on a Surface . . . . . . . . . . . . . . . 472
Scaling a Texture on a Surface . . . . . . . . . . . . . . . . . . . . . . . . . . 473
Cropping a Texture on a Surface . . . . . . . . . . . . . . . . . . . . . . . . . 473
Rotating a Texture on a Surface. . . . . . . . . . . . . . . . . . . . . . . . . . 473
Controlling How a Texture is Mapped onto a Surface . . . . . . . . . 474
Tinting a Texture. . . . . . . . . . . . . . . . . . . . . . . . . . . . . . . . . . . . . . 474
Working with Lights and Shadows . . . . . . . . . . . . . . . . . . . . . . . . . . . . . . . 475
Adding, Moving, and Deleting Light Sources. . . . . . . . . . . . . . . . . . . . 476
Editing Light Sources. . . . . . . . . . . . . . . . . . . . . . . . . . . . . . . . . . . . . . 477
Turning Light Sources On or Off . . . . . . . . . . . . . . . . . . . . . . . . . . . . . 477
Changing the Light Type . . . . . . . . . . . . . . . . . . . . . . . . . . . . . . . . . . . 478
Page 19

Using Colored Lights . . . . . . . . . . . . . . . . . . . . . . . . . . . . . . . . . . . . . . 478
Changing the Intensity of a Light Source . . . . . . . . . . . . . . . . . . . . . . . 478
Positioning a Light Source . . . . . . . . . . . . . . . . . . . . . . . . . . . . . . . . . . 479
Adjusting Spot Light Properties . . . . . . . . . . . . . . . . . . . . . . . . . . . . . . 479
Identifying Light Sources . . . . . . . . . . . . . . . . . . . . . . . . . . . . . . . . . . . 480
Adding Shadows to Objects . . . . . . . . . . . . . . . . . . . . . . . . . . . . . . . . . 480
Showing and Hiding Object Shadows . . . . . . . . . . . . . . . . . . . . . . 481
Changing a Shadow’s Location . . . . . . . . . . . . . . . . . . . . . . . . . . . 481
Changing a Shadow’s Appearance . . . . . . . . . . . . . . . . . . . . . . . . 484
Using Shadows to Simulate Glows . . . . . . . . . . . . . . . . . . . . . . . . 485
Importing and Exporting Projects . . . . . . . . . . . . . . . . . . . . . . . . . . . . . . . . 485
Working with Decks and Pages . . . . . . . . . . . . . . . . . . . . . . . . . . . . . . 486
Deleting Decks . . . . . . . . . . . . . . . . . . . . . . . . . . . . . . . . . . . . . . . 487
Moving between Pages . . . . . . . . . . . . . . . . . . . . . . . . . . . . . . . . . 487
Adding Objects to a Page . . . . . . . . . . . . . . . . . . . . . . . . . . . . . . . 487
Editing Objects within a Page . . . . . . . . . . . . . . . . . . . . . . . . . . . . 488
Resizing a Deck. . . . . . . . . . . . . . . . . . . . . . . . . . . . . . . . . . . . . . . 488
Setting the Output Options . . . . . . . . . . . . . . . . . . . . . . . . . . . . . . . . . . . . . 489
Dampening Jittery Text . . . . . . . . . . . . . . . . . . . . . . . . . . . . . . . . . . . . 490
Chapter 10 Image Effects . . . . . . . . . . . . . . . . . . . . . . . . . . . . . . . . . . . . . . . . . 491
3D Warp Effect . . . . . . . . . . . . . . . . . . . . . . . . . . . . . . . . . . . . . . . . . . . . . . 491
Generating a 3D Warp Clip . . . . . . . . . . . . . . . . . . . . . . . . . . . . . . . . . 494
Loading a New 3D Warp Effect . . . . . . . . . . . . . . . . . . . . . . . . . . . . . . 495
Creating 3D Warp Effects in SOFTIMAGE|3D . . . . . . . . . . . . . . . . . . . 496
Template-grid.1-0.dsc . . . . . . . . . . . . . . . . . . . . . . . . . . . . . . . . . . 496
Template-lights.1-0.dsc . . . . . . . . . . . . . . . . . . . . . . . . . . . . . . . . . 498
Tutorial-grid.1-0.dsc. . . . . . . . . . . . . . . . . . . . . . . . . . . . . . . . . . . . 499
Linking the Database. . . . . . . . . . . . . . . . . . . . . . . . . . . . . . . . . . . 499
Using the Grid Template . . . . . . . . . . . . . . . . . . . . . . . . . . . . . . . . 500
Using the Light Template. . . . . . . . . . . . . . . . . . . . . . . . . . . . . . . . 502
19
Page 20

Editing the Model Note . . . . . . . . . . . . . . . . . . . . . . . . . . . . . . . . . 503
Saving Your 3D Scene . . . . . . . . . . . . . . . . . . . . . . . . . . . . . . . . . 505
AVX Host Effect . . . . . . . . . . . . . . . . . . . . . . . . . . . . . . . . . . . . . . . . . . . . . 506
Channel Switcher Effect . . . . . . . . . . . . . . . . . . . . . . . . . . . . . . . . . . . . . . . 508
Color Space Adjustment Effect . . . . . . . . . . . . . . . . . . . . . . . . . . . . . . . . . 509
Defield Effect . . . . . . . . . . . . . . . . . . . . . . . . . . . . . . . . . . . . . . . . . . . . . . . 510
Deflicker Effect . . . . . . . . . . . . . . . . . . . . . . . . . . . . . . . . . . . . . . . . . . . . . . 510
Depth of Field Effect. . . . . . . . . . . . . . . . . . . . . . . . . . . . . . . . . . . . . . . . . . 512
Drop Shadow Effect . . . . . . . . . . . . . . . . . . . . . . . . . . . . . . . . . . . . . . . . . . 515
Field Invert Effect . . . . . . . . . . . . . . . . . . . . . . . . . . . . . . . . . . . . . . . . . . . . 518
Fog Effect . . . . . . . . . . . . . . . . . . . . . . . . . . . . . . . . . . . . . . . . . . . . . . . . . . 519
Frame Average Effect . . . . . . . . . . . . . . . . . . . . . . . . . . . . . . . . . . . . . . . . 521
Graphics Effect. . . . . . . . . . . . . . . . . . . . . . . . . . . . . . . . . . . . . . . . . . . . . . 522
Creating Rolls and Crawls . . . . . . . . . . . . . . . . . . . . . . . . . . . . . . . . . . 523
Creating a Fade. . . . . . . . . . . . . . . . . . . . . . . . . . . . . . . . . . . . . . . . . . 525
Optical Glow Effect. . . . . . . . . . . . . . . . . . . . . . . . . . . . . . . . . . . . . . . . . . . 525
Outsource Effect. . . . . . . . . . . . . . . . . . . . . . . . . . . . . . . . . . . . . . . . . . . . . 527
20
Source Generator Effects. . . . . . . . . . . . . . . . . . . . . . . . . . . . . . . . . . . . . . 529
Warp Effect. . . . . . . . . . . . . . . . . . . . . . . . . . . . . . . . . . . . . . . . . . . . . . . . . 531
Creating Shapes . . . . . . . . . . . . . . . . . . . . . . . . . . . . . . . . . . . . . . . . . 532
Joining Shapes . . . . . . . . . . . . . . . . . . . . . . . . . . . . . . . . . . . . . . . . . . 535
Creating Barrier Shapes . . . . . . . . . . . . . . . . . . . . . . . . . . . . . . . . . . . 538
Animating Shapes . . . . . . . . . . . . . . . . . . . . . . . . . . . . . . . . . . . . . . . . 539
Tracking Warped Shapes . . . . . . . . . . . . . . . . . . . . . . . . . . . . . . . . . . 539
Setting the Rendering Options . . . . . . . . . . . . . . . . . . . . . . . . . . . . . . 542
Index . . . . . . . . . . . . . . . . . . . . . . . . . . . . . . . . . . . . . . . . . . . . . . . . 547
Page 21

Using This Guide
Congratulations on your purchase of an Avid DS Nitris system. You can use
your system to create broadcast-quality output incorporating every possible
production element from full-speed, high-resolution footage, to multimedia
artwork and animation, to computer-generated effects and titling.
This guide contains all the task-oriented instructions, conceptual information,
and reference material you need to use the effects and compositing features of
your system.
This guide is intended for all Avid DS Nitris users, from beginning to
advanced.
n
The documentation describes the features and hardware of all models.
Therefore, your system might not contain certain features and hardware that
are covered in the documentation.
Symbols and Conventions
Avid documentation uses the following symbols and conventions:
Symbol or Convention Meaning or Action
n
c
w
A note provides important related information,
reminders, recommendations, and strong suggestions.
A caution means that a specific action you take could
cause harm to your computer or cause you to lose data.
A warning describes an action that could cause you
physical harm. Follow the guidelines in this document
or on the unit itself when handling electrical
equipment.
Page 22

Using This Guide
Symbol or Convention Meaning or Action
> This symbol indicates menu commands (and
subcommands) in the order you select them. For
example, File > Import means to open the File menu
and then select the Import command.
t
Margin tips
Italic font Italic font is used to emphasize certain words and to
Courier Bold font
Bold font Bold indicates a user interaction.
Ctrl+key or mouse action Press and hold the first key while you press the last
Mouse, Pen, and Keyboard
You can use a two-button mouse (with wheel) or a pen and tablet. The left and
right mouse buttons perform different operations. Unless otherwise stated, use
the left mouse button.
The mouse and pen operate slightly differently. All the procedures in this
guide are documented for the mouse. You can, however, easily use a pen or
the keyboard. The following table shows the terms relating to the mouse, pen,
and keyboard.
This symbol indicates a single-step procedure.
Multiple arrows in a list indicate that you perform one
of the actions listed.
In the margin, you will find tips that help you perform
tasks more easily and efficiently.
indicate variables.
Courier Bold font identifies text that you type.
key or perform the mouse action. For example,
Shift+Alt+C or Ctrl+drag.
22
This Term Means This with a Mouse Means This with a Pen
Click Quickly click and release the
left mouse button. Always use
the left mouse button unless
otherwise stated.
Tap the tablet once with the tip of
the pen, or touch the pen to the tablet
with enough pressure to click.
Page 23

If You Need Help
This Term Means This with a Mouse Means This with a Pen
Double-click Click the left mouse button
twice rapidly.
Right-click Quickly click and release the
right mouse button.
Drag Click and hold the left mouse
button or the wheel while you
move the mouse.
Alt+key,
Ctrl+key,
Shift+key, etc.
Press and hold the first key while you press the second key. For
example, “Press Alt+F1” means to press and hold the Alt key while
you press the F1 key.
Customizing the Pen or Mouse
By customizing the pen, you can adjust the click pressure, switch functions,
and other features. For information on customizing the pen, refer to the
documentation provided with your Avid DS Nitris system.
You can also customize the mouse. For example, you can select left-handed
configuration or change the double-click speed. For information on
customizing the mouse, refer to the Windows online Help.
Quickly tap the tablet twice in the
same screen pixel or press the F5
key to go from single to doubleclick.
Press the top portion of the switch
on the side of the pen or press the F6
key to go from left to right-click.
Press the pen to the tablet while
moving the pen.
If You Need Help
If you are having trouble using Avid DS Nitris:
1. Retry the action, carefully following the instructions given for that task in
this guide. It is especially important to check each step of your workflow.
2. Check for the latest information that might have become available after
the documentation was published in one of two locations:
- If release notes are available, they ship with your application.
- If ReadMe files are available, they are supplied in your Avid
application folder. ReadMe files are also available from Help.
23
Page 24

Using This Guide
3. Check the documentation that came with your Avid application or your
hardware for maintenance or hardware-related issues.
4. See “Avid DS Customer Support” on page 24.
5. For Technical Support, please call 800-800-AVID (800-800-2843).
Avid DS Customer Support
The following sections describe various Avid DS Customer Support options.
E-mail Support
The e-mail address for Avid DS Customer Support is: dssupport@avid.com.
You can use it for sending bug reports, usability questions, and avidds.cab
audit reports for system analysis. All e-mails are logged in the support
database and assigned a case number. Send one support request per e-mail.
n
Web Support
Upload Utility
It is mandatory that you include your SID number in the body of your e-mail
message for verification of your maintenance contract and case logging.
Otherwise, response will be delayed.
The Avid DS Support Center at http://www.softimage.com/avidds provides
quick access to a wide range of resources from the Avid DS teams and user
community. Downloads, including presets, drivers, and Quick Fix Engineering
(QFE), provide the latest solutions for use with your Avid DS system. Online
documentation, tutorials, and Knowledge Base articles ensure that you get the
most out of your work with Avid DS. It's like having a dedicated Avid DS
Customer Support engineer sitting at your desk!
For troubleshooting purposes, you can upload your files for Avid DS
Customer Support personnel to examine. You can upload a project's archive,
media files, or other necessary data. Simply zip the files that you need to
upload and use a short name (for easy retrieval), such as archive.zip or
Case274877.zip.
24
Page 25

To upload your files:
1. Go to the Avid web site at http://www.softimage.com/avidds.
2. Select Contact > Upload Tool.
3. Once the file upload is complete, send an e-mail to dssupport@avid.com
to inform Avid DS Customer Support as there is no automatic notification
when a file is uploaded on the FTP server. Please provide the complete
and exact file name (case sensitive) to retrieve.
Avid Community Forum
Although the Avid DS community forum is frequently monitored by Avid
employees, it is not part of the official support channels. You are invited to
send your support requests to any of the above channels when required.
If you have an e-mail account, you can join the worldwide network of Avid DS
users exchanging ideas. The mailing list has proven to be quite useful for
users, and there is a constant stream of new subscribers.
To subscribe, send an e-mail to majordomo@softimage.com with the
following text in the body of your message: subscribe ds. You can get further
information on using the automated list server by e-mailing
majordomo@softimage.com with “help” as your message.
How to Order Documentation
You can also join other Avid forums on the Avid web site at
http://www.avid.com. Select Support > Forums.
How to Order Documentation
To order additional copies of this documentation from within the
United States, call Avid Sales at 800-949-AVID (800-949-2843). If you are
placing an order from outside the United States, contact your local
Avid representative.
25
Page 26

Using This Guide
Avid Educational Services
For information on courses/schedules, training centers, certifications,
courseware, and books, please visit www.avid.com/training or call Avid Sales
at 800-949-AVID (800-949-2843).
26
Page 27

Chapter 1
Compositing
The Compositing chapter of the Avid DS Nitris Getting Started Guide
introduces you to the basics of compositing, compositing methods, and the
compositing layout. It also covers basic compositing concepts such as the
composite container clip and layer effects. It is important that you read and
understand the Compositing chapter of the Avid DS Nitris Getting Started
Guide and complete the provided tutorials before working on the procedures
in this chapter.
This chapter introduces the Effects Tree as a compositing method and covers
advanced compositing topics such as premultiplication, working with
Photoshop files, and processing.
Page 28

Chapter 1 Compositing
Quick Recap: Compositing
Here is a quick recapitulation of the Compositing chapter of the Avid DS Nitris
Getting Started Guide. Below are answers to basic questions, which you
should know by now, that will help you understand the material presented in
this chapter.
Question Answer
What is Compositing? The layering of two or more images together to form one new integrated image.
What is a matte? A grayscale image that defines the transparency of an image when it is
composited over another. It lets you isolate and protect specific parts of the
image while compositing.
What is the difference between
an internal matte and an
external matte?
What is a composite container
clip?
What is the Layers view? The Layers view is part of the Compositing layout. It displays the content of the
What are the 4 effects that you
can apply to a layer?
What is the result area? The result area is the part of the Layers view that displays the final composite of
An internal matte is part of the image that is stored in the alpha channel. An
external matte can either be created from scratch by using an effect such as the
keyer, provided as a separate clip, or come from another image. For more
information, see “Working with Mattes” on page 39.
A clip on the timeline that lets you layer video clips. An opened container clip
displays the video clips on multiple tracks and the result is a single clip on the
top timeline of the Editing layout. You can apply effects on individual clips
inside the container or on the entire composite container clip.
Remember that when compositing with layers, you are working within a
composite container clip as soon as you switch to the Compositing layout.
composite container clip in a layer format and lets you reorder layers, animate,
add effects, and apply blending operations. For more information, see “Working
with the Layers View” on page 32.
• Color Correction
•DV
• Graphics
•Keyer
all layers both for RGB and alpha channels.
28
Page 29
Using the Effects Tree to Composite
Using the Effects Tree to Composite
In the Avid DS Nitris Getting Started Guide you learned about two methods of
compositing.
• Simple track compositing which lets you composite in the Editing layout
by adding video tracks to the timeline and placing clips on the video
tracks. An advantage of using this method is that when compositing you
can see your clips in context of the timeline.
• Compositing using layers which lets you work in the Compositing layout
with composite container clips and the Layers view. The Layers view has
a great advantage in that it provides a visual interface when layering your
clips. It is also useful when importing Photoshop files as each
“Photoshop” layer occupies its own layer in the Layers view as a linked
image file in Avid DS Nitris. For more information, see “Working with
Layered Photoshop Images” on page 65 and “Working with the Layers
View” on page 32.
The third method is compositing with the Effects Tree. The Effects Tree in the
Compositing layout is a powerful tool that lets you create and manage
complex multi-layered effects and composites.
It shows the relationship between effects and images in a pictorial format. It is
made up of nodes: the graphical representation of the input images, and the
resulting output. Nodes are joined by connectors, which connect input and
output ports.
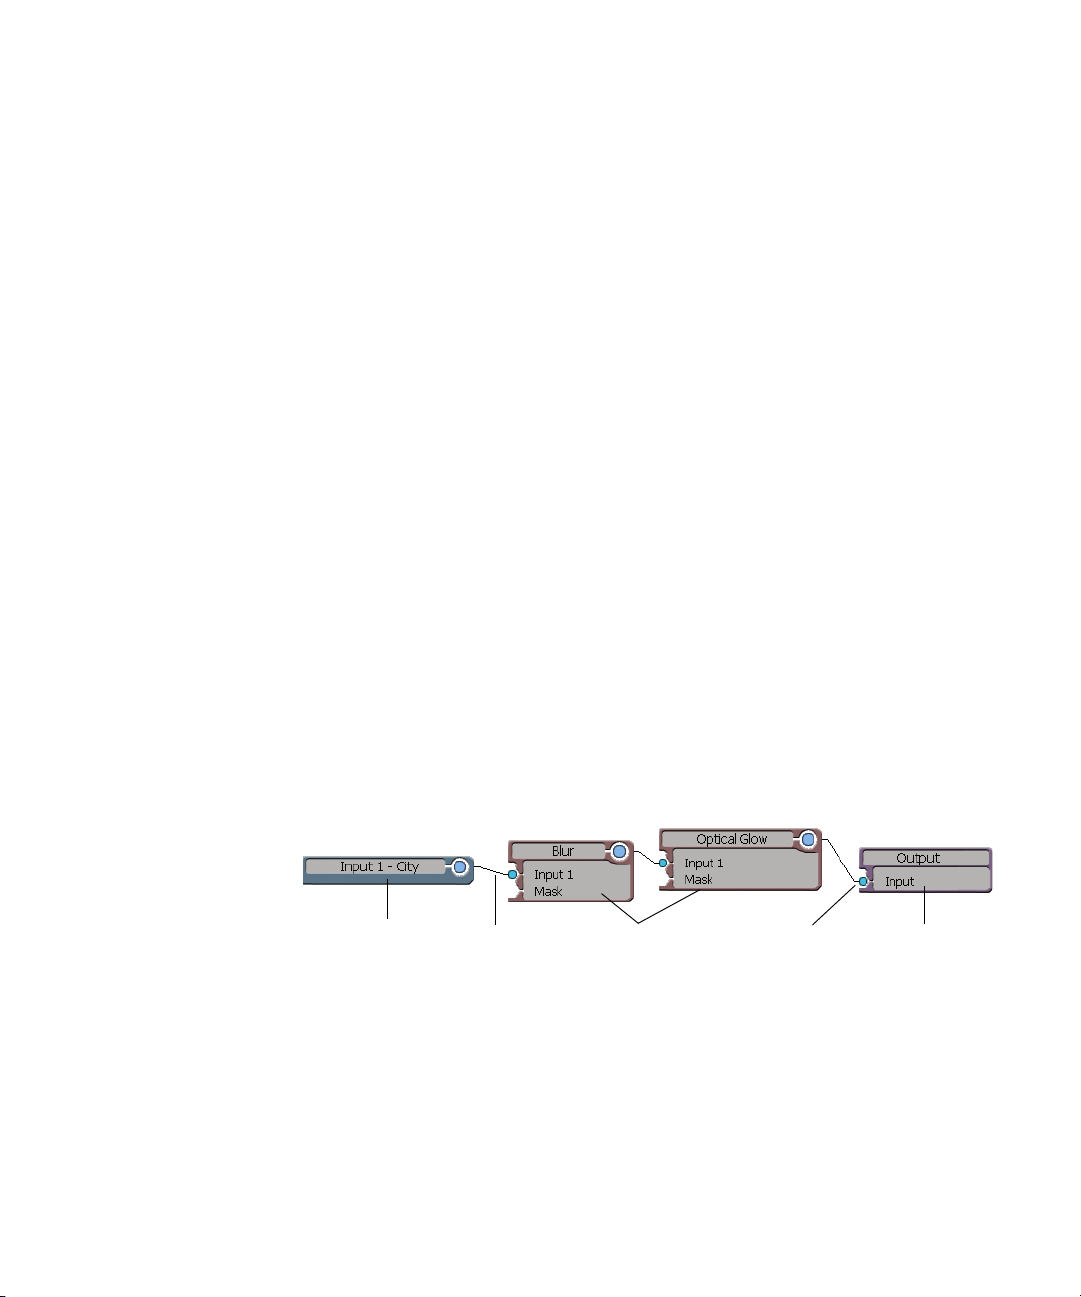
Port
Output nodeEffects nodesInput node Connector
• Input nodes represent the source image from a track in the Layers view or
from a clip and its effects on the timeline.
• Effects nodes represent each effect applied or added to the Effects Tree.
Each effect node reads an input image, processes the image, and gives a
specific output image as the result.
• Output nodes represent the output image of the Effects Tree. The result
of all the nodes is fed to the output node which is displayed in the viewer.
29
Page 30

Chapter 1 Compositing
n
n
You can build and apply an Effects Tree to a clip, track, layer, or as a
transition. Each method has its advantages. For more information. see “Using
Effects Trees” on page 73.
There are a number of advantages for using the Effects Tree:
• You can have complex interactions between layers
• Ability to add multi-input effects. You can apply any combination of
image effects in the Effects Tree.
• You can reuse the treatment of an element repeatedly within a composite
• You can apply blending operations by using the Composite node—see
“Applying Blending Operations in the Effects Tree” on page 111.
Tip: To work more quickly in the Effects Tree, use the keyboard shortcuts.
Select Help > Keyboard Shortcuts. You can also set the default preferences for
your Effects Tree in the User Preferences dialog box. Select File > User
Preferences (Effects Tree property page).
For more information, see “Using Effects Trees” on page 73.
Relationship within the Compositing Layout
30
It is important that you understand the relationship between the different
elements of the Compositing layout in order to work efficiently without
getting lost within the layout.
It is made up of 3 significant parts that interact with each other:
• The composite container timeline
• The Layers view
•The Effects Tree
Page 31

The result area and the viewer
displays the final composite of all
your layers and Effects Trees
The order the images appear in the
Layers view corresponds to the
order of the images on the timeline
of the composite container
Relationship within the Compositing Layout
You can build an Effects Tree per layer letting
you combine multiple images on one layer,
which serves as the input to the layer above it.
n
Adding layers to the Layers view adds a new track on the timeline, but not in
the Effects Tree and vice versa. Similarly, adding an image as input in the
Effects tree adds a new track on the timeline. For more information, see
“Adding Layers” on page 32 and “Adding or Removing Inputs To and From
an Effect Node” on page 81.
Adding an image to the Layers view or to
the Effects Tree as input, adds a new track
in the timeline of the composite container
31
Page 32

Chapter 1 Compositing
Working with the Layers View
In the Layers view, you can work with video images independently of each
other. For example, you can animate, track, apply effects, or apply opacity per
layer.
For more information on the Effects Tree, see “Working with the Effects Tree”
on page 79.
Adding Layers
When you create a composite container clip for compositing, the clips that you
select are automatically added as layers in the Layers view. You can create
additional layers by placing clips on new tracks on the timeline.
To add layers, do one of the following:
t Drag a clip from a bin to the Layers view.
The clip forms a new layer in the composite and is placed on a track. Any
other clips that you add to this track on the timeline are also part of that
layer.
32
n
t From a bin, drag a clip to the timeline ribbon of the timeline.
Timeline ribbon
The track forms a new layer in the composite. Any other clips that you add
to this track on the timeline are also part of that layer.
If you don’t want to immediately add a clip to a layer, right-click while
dragging a clip from a bin to the timeline ribbon. This will create a track on
the timeline. This is especially useful if you want to create mattes on the
timeline and assign them later as external mattes to layers in the Layers view.
Page 33

Reordering Layers
L
Layers are composited from the bottom to the top. You can change the order of
the layers at any time during the compositing session. You can also change the
resulting matte by reordering the external mattes of a layer.
To reorder layers, do one of the following:
t Drag the Layer button to a new position on the Layers view.
Working with the Layers View
Layer
button
n
Renaming Layers
n
t Right-click a layer and select one of the following:
- First to move the matte to the left most position.
- Left to move the matte one position to the left.
- Right to move the matte one position to the right.
- Last to move the matte to the right most position.
If you don't want to animate layers when you reorder them, deselect the
Autokey button before changing the order of your layers.
Layers and tracks are named according to the name of the first clip on the
track. Layers are also named consecutively as you add them, beginning with
L1 (layer). Each layer RGB thumbnail contains the name of the layer, as well
as the name of its corresponding track on the timeline.
As you add tracks or layers, you can rename them. If you rename a track, its
new name will also be updated in the Layer RGB thumbnail.
Although the track name is displayed in the Layer RGB thumbnail, you can
only rename it from the Track or Layer Name property editors. For more
information, see “Changing Track Properties” on page 772 of the
Avid DS Nitris Editing Guide.
ayer name
Track name
33
Page 34

Chapter 1 Compositing
Scrolling Layers
To rename a layer:
1. Right-click an empty area of a layer and select Layer Name.
2. In the Layer Name dialog box, type a new name, and click OK.
As you add more layers to your composite, the layers at the bottom of the
timeline scroll off the bottom of the Layers view. Similarly, as you add more
matte functions to a layer, they scroll to the right or left of the screen. You can
scroll the layers vertically and horizontally to display any layers or mattes that
may be hidden from view.
Horizontal scroll barVertical scroll bar
To scroll layers vertically:
1. Click the textured gray area (vertical scroll bar) to the left of the
layer controls.
2. When the hand button appears, drag up or down to view additional layers.
To scroll layers horizontally:
1. Click the textured gray area (horizontal scroll bar) above the
view switcher.
2. When the hand button appears, drag left or right to view additional mattes
on the layer.
Navigating Through Layers
When working with multiple layers in the Layers view, you can navigate
through the layers. This is handy when you have an Effects Tree per layer that
you want to edit.
34
Page 35

To navigate through layers:
1. Click a layer in the Layers view.
2. Do one of the following:
t Shift + Right Arrow (>) to move to the next layer.
t Shift + Left Arrow (<) to move to the previous layer.
Loading a Layer Effect in the Layers View
When working in the Layers view, you can replace the Key effect by loading
an effect from the Keyer property editor.
To load a new layer effect:
1. Click a layer in the Layers view.
2. Click the Key effect.
Working with the Layers View
3. In the Blue-Green Keyer property editor, click the Load Preset button.
4. In the Load Preset dialog box, select an effect and click OK.
The Key effect in the Layers view is replaced with the loaded effect. The
Key button is also replaced with an Fx button.
5. Click the layer effect button to edit the properties of the effect.
35
Page 36

Chapter 1 Compositing
Animating Layers
When compositing clips in a container clip, you can animate the order of the
layers in the composite, as well as the transparency of each layer. Once the
animation is created, you can process the clip to view the animated frames in
real time.
You can adjust the animated properties or remove the animation at any time,
and animate the process of creating animation using the Autokey button. For
more information, see “Editing Animation” on page 1049 and “Setting
Keyframes Automatically” on page 1022 of the Avid DS Nitris Editing Guide.
Animating the Order of Layers
The Autokey button at the bottom of the Layers view lets you change the order
of the layers over time. When the layer ordering has been animated, this button
turns red.
To animate the order or appearance of the layers:
1. Use the transport controls to advance the clip to a frame in which you
want the animation to begin.
36
2. Reorder your layers by dragging the track button of a layer to a new
position.
3. Click the Autokey button at the bottom of the Layers view to set
a keyframe.
When a keyframe is set, the Autokey button turns red. If the position
indicator is on a frame that is not a keyframe, the button turns green.
4. Advance to the next frame in which you want to change the layer order
and change the layer’s order.
Once an initial keyframe has been set, you no longer need to click the
Autokey button as keyframes are created automatically when you change
the layer’s order (simulating Autokey behavior).
5. Continue adding as many keyframes as needed.
Page 37

Adjusting the Opacity of a Layer
There are two ways available for adjusting the opacity of a layer: Opacity, the
default, which is applied before a composite and Mix, which is applied after
the composite. Right-click the Layer menu and select either option. For more
information, see “Layer Menu” in the Help.
Use the opacity controls to decrease or increase the opacity of a layer to make
it more or less transparent when composited over other layers.
To adjust the opacity:
1. Do one of the following:
t Drag the opacity slider up or down.
t Click in the Opacity Level indicator, type a value and press Enter.
Opacity
level
Working with the Layers View
Opacity slider
2. Select the check box to the left of the Opacity Level indicator to apply the
opacity to a layer.
37
Page 38

Chapter 1 Compositing
Animating the Transparency of a Layer
The Autokey button at the bottom of the Layers view lets you animate the
transparency levels of a matte over time. When a layer has been animated, this
button turns red.
To animate the transparency of a layer:
1. Use the transport controls to advance the clip to a frame in which you
want the animation to begin.
2. Click the Autokey button at the bottom of the Layers view to set a
keyframe.
When a keyframe is set, the Autokey button turns red. If the position
indicator is on a frame that is not a keyframe, the button turns green.
3. Adjust the opacity control on one or more of the layers by moving the
slider or entering a value in the Opacity text box.
4. Click the Autokey button again.
Depending on the accuracy you need, you can move frame by frame or set
larger intervals between animated points.
You can also adjust the opacity of a layer in the Effects Tree using the
Composite effect node. For more information, see “Compositing Two Layers”
on page 100.
Removing Layers and External Mattes
If you want to remove a layer from the composite, you can easily delete it
from the Layers view without deleting the clips on the tracks. You can also
remove any external mattes that you no longer want, but you cannot remove
the original matte.
To remove a layer from the composite:
t On the Layers view, right-click a layer and select Remove Layer.
To remove external mattes:
t Right-click the external matte of a layer and select Delete.
The external matte is removed from the layer.
38
Page 39

Working with Mattes
The information in each pixel of an image is comprised of four channels (or
components): R, G, B, and A (the alpha channel). When compositing, the
alpha channel is very important. It specifies the transparency of each pixel,
allowing portions of the foreground image to reveal or block out the
background image when two images are overlaid.
There are three instances:
• The clip already has a matte in its alpha channel which is preserved when
capturing.
• The clip does not have a matte and in order to use it for compositing you
are required to create one in its alpha channel.
• You are provided with a matte clip to use for compositing. This clip is
known as an external matte.
Using Clips with Internal Mattes
Working with Mattes
When you capture material, you can preserve the clip’s matte in the alpha
channel and immediately use it for compositing.
In the example shown here, the simple compositing method has been used to
layer two video tracks in the Editing layout. The video track that is being used
as the foreground in the composite has a clip with an internal matte.
Clip with matte in alpha channel.
Video track
used as the
foreground
Video track
used as the
background
The result in the viewer. The
composite is possible because
the overlaid clip contains a
matte in its alpha channel.
39
Page 40

Chapter 1 Compositing
When compositing using the video tracks in the Editing layout (simple track
compositing) and you apply a DVE or Picture-in-Picture effect to a clip, a
matte is automatically created using the parameters you specify in the DVE
property editor.
DVE ef fect
Foreground
video track
Once you create the composite, you can enhance it by adding effects, such as
color correction, blurs, graphics, and so on.
n
On video tracks, you cannot apply a Matte Composite operation with external
mattes nor can you adjust the transparency or animate the order of the layers.
If you need to perform any of these tasks, build your composite within a
composite container clip. For more information, see “Using Composite
Container Clips” on page 283 of the Avid DS Nitris Getting Started.
Using Clips without Mattes in the Alpha Channel
Every foreground clip must have a matte in its alpha channel to form a
composite. When you import or capture clips in Avid DS Nitris, each clip will
have an alpha channel. If the captured clip does not have a matte in its alpha
channel, you must create one using a number of effects such as the keyer,
matte, or graphics effect, in order to use it in a composite.
Clips that do not have a matte will have a full (white) alpha channel when you
view the alpha channel. For more information, see “Viewing Mattes” on
page 43.
You can create a matte on the timeline or the Layers view.
40
Page 41

Creating a Matte by Using a Keyer
Keying creates a matte by keying a matte on the foreground clip based on the
RGB, HSL, or YCbCr color values. You can then composite the foreground
clip over a background clip, as shown here:
Blue-Green keyer effect.
Video track with
foreground clip
Video track with
background clip
For more information, see “Keying” on page 117.
Using the Shapes Tools
Working with Mattes
The result in
the viewer
Foreground clip
By using the shapes tools in the Matte effect property editor, you can create
mattes on material that do not have mattes. You can also further use it to cleanup the alpha channel of a matte.
Foreground clip with a matte effect
Resulting composite
Background clip
Matte created with
the shapes tool
41
Page 42

Chapter 1 Compositing
To use the shapes tool to create a matte:
1. Apply a matte effect to the clip.
2. Select the Shapes tab.
3. In the Shapes Creations, select a tool.
4. Draw the shape.
5. To view the matte that you created, right-click the viewer and select
Alpha Component > Matte.
The layer’s matte is displayed as a grayscale image.
For more information, see “Creating Mattes” on page 351.
Creating a Matte on the Timeline
When you want to composite an image on a video track and the image does
not have a matte in its alpha channel, you can create one using a keyer, matte,
or graphics effect.
To create a matte on the timeline:
42
1. Right-click a clip and select Add Clip Effect.
2. From the Load Preset dialog box, select a keyer, the Matte effect, or the
Graphics effect.
t Keyer effects such as the Luminance or Chroma keyers extract the
alpha component based on the luminance or color thresholds in an
image—see “About Keying” on page 117.
t The Matte effect lets you touch up an existing matte, or create one
from scratch—see “Matte Effect” in the Help.
t The Graphics effect lets you create your own matte—see “Painting
and 2D Titling” on page 271.
3. To view the matte that you created, right-click the viewer and select
Alpha Component > Matte.
The layer’s matte is displayed as a grayscale image.
Page 43

Creating a Matte on a Layer
You can create use the Layers view to create mattes on each layer which are
combine to produce a final composite. You can further use the matte blending
operations, see “Applying Blending Operations in the Layers View” on
page 52.
To create a matte on a layer:
1. On a layer in the Layers view, click the Key button.
The Blue-Green Keyer property editor is displayed by default.
Working with Mattes
n
Viewing Mattes
Tip: To load a different keyer, click the Load Preset button and select a
different keyer from the \Keyer folder.
2. Create your matte by keying out specific luminance or chrominance
values.
The matte is displayed in the Layer Alpha thumbnail.
Layer Alpha thumbnail
Key button on the layer
A checkmark beside the Key button indicates that the key is activated.
When the key is deselected, it is not used in the overall composite until
you select it again.
While creating your matte, it is a good idea to view the matte from time to
time.
To view the matte, do one of the following:
t In the Viewer tools, click the Viewer Alpha (Full) button.
t Right-click the viewer and select Alpha Component > Matte.
t When using any keyer effect, go to the Key property page and select the
Output Matte option.
The layer’s matte is displayed as a grayscale image.
43
Page 44

Chapter 1 Compositing
n
Tip: You can also combine mattes and change how layers are composited
using blend and matte operations. For more information, see“Applying
Blending Operations in the Layers View” on page 52
Using External Mattes in the Timeline and Layers View
An external matte is a matte taken from one clip and applied to another.
External mattes may already exist with a clip or you can create one by adding
a keyer effect on the clip. You can also use the alpha or RGB component of
another clip as the external matte. In the example for “Using the Shapes
Tools” on page 41, the matte created can be applied to another clip as an
external matte. Sometimes, you may be provided with a matte clip that you use
for compositing.
There are three methods for adding external mattes: using matte containers,
using the Layers view, and using the Effects Tree. For the Effects Tree method,
see “Using External Mattes in the Effects Tree” on page 98.
RGB clip
without a matte
Background clip
External matte clip
Using Matte Containers on the Timeline
The greatest advantage of using this method is that you can work entirely in the
Editing layout.
The matte container lets you layer video clips on two fixed tracks: the Fill and
Matte tracks. It allows you to combine separate RGB channels of an image with an
alpha channel that was created from channels of another image.
44
Composite result
Page 45

Working with Mattes
It has the following properties:
• The two tracks labeled Fill and Matte are fixed
• Tracks cannot be added or deleted
• Although the tracks can be renamed and recorded, they way they are
connected cannot be changed
• Matte containers are real-time and hardware real-time
• Like the composite container, when it is closed, the result is displayed as a
single clip on the top timeline.
To add an external matte using the matte container:
1. Right-click a clip in the Avid Explorer that you want to use as the
background and drag it to a video track in the timeline.
2. Create another video track.
3. Right-click the clip without a matte in its alpha channel that you want use
as the foreground to the second video track.
4. Create a matte composite using one of the following methods:
t Right-click the clip that you want to use in the matte container and
select Create Matte Container.
n
t Click the Container button in the Toolbar and select Matte
Container
You can only create a matte container from a single clip selection.
5. Click the Viewer Alpha (Full) button to see the alpha channel of the clip.
Notice that there is not matte on the alpha.
6. Right-click the external matte clip in the Avid Explorer and drag it to the
Matte track of the matte container.
45
Page 46

Chapter 1 Compositing
7. Click the Viewer Alpha (Full) button to see the alpha channel of the clip.
Notice that there is a matte on the alpha channel which has been derived
from the external matte clip.
8. Step out of the container to return to the Editing layout and to see the final
composite.
n
n
Using External Mattes on Layers
n
Tip: From inside the matte container, use the Reconnect Viewer button in the
Viewer Tools to connect to the top timeline. For more information, see
“Reconnect Viewer Menu” in the Help.
9. To set matte’s properties, right-click the matte container and select Matte
Properties. This option is also available when working inside the matte
container. select this option when inside the container.
If you get a halo or black outline after compositing, you should check the
premultiplication settings. For more information, see “Compositing with
Premultiplied Images” on page 55.
You can add as many external mattes as you wish to each layer in the
composite. You can also combine or blend them using matte blending
operations to produce the desire effect. The mattes are blended in the order in
which the appear. For more information, see “Applying Blending Operations
in the Layers View” on page 52.
Tip: You can also combine mattes in an Effects Tree by using the Matte
Composite or Key Combiner effect. For more information, see “Compositing
Multiple Mattes” on page 109 and “Key Combiner (Alpha or Luma)” in the
Help.
46
Page 47

Working with Mattes
To add an external matte to a layer:
1. If you are in the Editing layout, make sure that the background clip on the
timeline is selected and switch to the Compositing layout.
This clips forms a layer in the Layers view.
2. From the Avid Explorer, drag the clip without a matte in its alpha that you
want to use as the foreground to the Layers view.
The result of the composite does not
show background because the
foreground clip does not have a matte
A new layer is formed in the Layers view and a new track is created with
the clip in the timeline.
3. Right-click the external matte clip in the Avid Explorer and drag it to the
timeline ribbon of the timeline. When you see a shadow over the timeline
ribbon, release the clip.
The clip is automatically placed on a new track on the timeline, but does
not form a layer in the Layers view.
4. Click the track button of the external matte and drag it to the Layer Alpha
thumbnail.
47
Page 48

Chapter 1 Compositing
Composite
result
External
alpha
Track button
The clip’s matte is added to the right of the layer’s existing matte. The two
mattes are combined with the default matte composite operation (Min.)
and the results are displayed in the Layer Alpha thumbnail.
A layer with an external matte
Matte Expand Matte controls
48
n
Layer Alpha Original Alpha External Matte
5. To change the matte operation between the mattes, right-click the Matte
control and select an operation—see “Applying Blending Operations in
the Layers View” on page 52.
Tip: If the mattes are partially obscured by the viewer, use the horizontal scroll
bar at the bottom of the Layers view to see the external mattes.
6. Right-click the External Matte thumbnail (of this newly added matte) and
select one of the following:
- Alpha to use the external clip’s alpha component as a matte.
- RGB to create a matte based on the RGB components of the external
clip.
Page 49

Combining Mattes
You can add an unlimited number of external mattes to a layer, and then
combine them to produce the desired result. When you add several mattes to a
layer, the mattes are combined using Boolean logic.
To combine mattes on the same layer:
Working with Masks
1. On the layer, make sure the two mattes to be combined are arranged next
to each other.
2. Right-click the Matte Controls button between the two mattes and select
a blend operation.
The combined matte appears in the Layer Matte thumbnail.
For more information, see “Matte Controls Menu” in the Help.
Working with Masks
A powerful feature when compositing is the ability to apply an effect to certain
channels (channel masking) or to certain pixels using a mask (pixel masking).
Masks are an image, portion, or component of an image that defines where an
effect will be applied. They can come from the current image’s alpha channel,
or from an external clip’s R,G,B, luma, or alpha channel.
For example, on the Masking property page of an effect, if you select the red
channel in the Process box, and the alpha channel in the Mask box, then the
effect will only be applied to the red channel using the alpha channel of the
input clip as a mask.
Matte expand
Layer matte Original matte External matte
Matte controls
49
Page 50

Chapter 1 Compositing
Applying Channel or Pixel Masking
When using channel or pixel masking when 8-bit precision is used,
SuperBlack and SuperWhite information (full YCbCr range) is not preserved:
Effects are set to 8-bit precision when:
• In the Options property page, the Precision has been set to Auto with the
sequence’s preference Precision set to 8-bit
• In the Options property page, the Precision has been set to 8-bit
• Using some DS effects that do not support 16-bit or 32-bit/Float precision
(such as Impressionist or Painterly effects).
• Using some third-party effects that do not support 16-bit or 32-bit/Float
precision.
The following example shows you the results using a combination of channel
and pixel masking:
50
Original image
Page 51

Working with Masks
Blur applied to RGB channels
(channel masking)
as a mask (channel & pixel masking)
Blur applied to red channel only
(channel masking)
Image’s alpha channelBlur applied to RGB channels, using alpha
To apply channel or pixel masking:
1. On the Masking property page of an effect, select the channels on which
you want the effect to be applied from the Process box.
Channel
masking
options
2. From the Mask box, select one of the following:
- None to apply the effect to the entire image.
- Alpha to apply the effect using the clip’s alpha channel as a mask.
Pixel
masking
options
51
Page 52

Chapter 1 Compositing
- Mask Input to apply the effect using a matte from another image or
effect in an Effects Tree only.
3. From the Process box, select the channels on which to apply the effect.
Using Alpha and Luma as Mask
When compositing images in the Layers view or the Effects tree, you can
apply a number of blending operations. For more information, see “Applying
Blending Operations in the Layers View” on page 52. You can use the alpha or
luma in the foreground image to mask the blending operation against the
background.
To use the Alpha or Luma as Mask:
1. In the Layers view, right-click the blending operation under the Layer
RGB thumbnail.
2. Select Use Alpha as Mask or Use Luma as Mask.
n
If you are working with a Composite effect node in the Effects Tree, use the
alpha or luma as a mask options by right-clicking the blending operation.
Applying Blending Operations in the Layers View
When compositing clips using the Layers view or the Effects Tree, you can
apply blending operations between the RGB and alpha components of the
image or the matte. You can also apply blending operations to external mattes
on a layer.
The operations differ between the RGB and alpha channels. Most RGB
operations that you select are automatically applied to the alpha channel. You
can, however, change the alpha operation separately. On a layer, the two
images or mattes are combined with the default operation (Over) and
displayed in the result area. For more information, see “Interlayer Alpha Menu
and Interlayer RGB Menu” in the Help.
52
Page 53

Applying Blending Operations in the Layers View
Result area
Layer operations for RGB
and alpha channels.
n
In the Effects Tree, the blending operations are available in the Composite
node. To combine multiple mattes in an Effects Tree, use the Matte Composite
effect. For more information see “Compositing Multiple Mattes” on page 109.
To apply blend operations on a layer:
t Right-click the RGB or alpha operator between the two layers on which
you want to apply the operation, and select an operator from the menu.
The results of the composite appear in the result area at the top of the
Layers view.
53
Page 54

Chapter 1 Compositing
Blend Operations
To apply external matte operations on a layer:
54
1. Right-click the matte controls between the mattes and select an operator.
Matte controls
2. Right-click the External Matte thumbnail and select RGB or Alpha.
Page 55

Compositing with Premultiplied Images
External matte set to Alpha External matte set to RGB
Compositing with Premultiplied Images
Images that contain an alpha channel could be either premultiplied or not.
Premultiplication is a mathematical process where the RGB channels of an
image are multiplied with their corresponding alpha channel values.
How can you tell if an image has already been premultiplied? It’s best to check
with the artist if the image was premultiplied or not. But if you cannot do this,
you may be able to tell by looking at the RGB and alpha channels of the
image, or the results after the image is composited with another.
55
Page 56

Chapter 1 Compositing
A premultiplied source is one which the RGB channels have been multiplied by
the alpha channel. If both the RGB and alpha channels contain black in the
same areas, it’s a good indication that the image is premultiplied.
RGB channels Alpha channel
A non-premultiplied source is one which the RGB channels are independent from
the alpha channel. If the black areas of the alpha channel and the same areas of the
RGB channel are different, it’s a good indication that the image is not premultiplied.
RGB channels Alpha channel
The Science behind Premultiplication
Having premultiplied images simplifies the compositing process as it avoids
the additional operation of multiplying the RGB channels with the alpha
channel. If Avid DS Nitris is given the correct indication about a premultiplied
image, then the proper result is obtained when it is placed over the
background. The soft edges blend well with the background and there are no
noticeable artifacts.
If the incorrect indication is given, then Avid DS Nitris either applies the
premultiplication operation again on an image that is already premultiplied, or
does not apply it at all on an image that should be premultiplied.
56
Page 57

The following table shows the results of composited images with different
premultiplication settings. Keep in mind that the actual compositing operation,
called Over, is as follows:
(RGB Foreground × α) + (1 -α) × RGB Background = Result
Type of material Set to Result
Premultiplied Premultiplied Correct.
Since you informed Avid DS Nitris that the RGB channel has
been multiplied with the alpha channel, it will not perform the
premultiplication.
Operation: [Foreground x α] + (1 -α) × Background
Premultiplied Not premultiplied Incorrect.
These results may cause a black line to appear around the edge
of your image where it should be transparent and antialiased.
Operation: [Foreground × α] × α + (1 - α) × Background
The alpha channel is multiplied twice.
Compositing with Premultiplied Images
Not premultiplied Not premultiplied Correct.
Since you informed Avid DS Nitris that the RGB channel has
not been multiplied with the alpha channel, Avid DS Nitris will
do the premultiplication.
Operation: [Foreground] × α + (1 - α) × Background
Not premultiplied Premultiplied Incorrect.
These results can cause transparent areas of the foreground to
be displayed much brighter than they should.
This happens because you informed Avid DS Nitris that the
image is already premultiplied when in fact it is not, causing
the entire foreground to be added to the background rather than
just areas specified by the alpha channel.
Operation: [Foreground] + (1 - α) × Background
The RGB channel is not multiplied by alpha channel. Therefore
the foreground gets “ADDed” to the background.
57
Page 58

Chapter 1 Compositing
n
You can force a multiplication between alpha and RGB channels for those
effects or clips that have an unpremultiplied alpha on video tracks. You must
select the Force Premultiplication Output option in the Sequence Preferences
dialog box. If you select this option, all effects will no longer be real-time
playable. For more information see “Video Property Page (Sequence
Preferences)” in the Help.
Importing Source Files with an Alpha Channel
When using computer-generated images or sequences in your composites, it’s
important to indicate if the source has been premultiplied or not when you
import the source file into Avid DS Nitris. You can set and change the
premultiplication
The alpha channel of the circle has
a matte that has softness around
the edges (transparency).
If the premultiplication setting is
incorrect, dark areas appear around
the edges of the circle when
composited over a background image.
If the premultiplication setting is
correct, there is no dark halo.
Setting the Premultiplication Option
You can always set the option before importing to avoid getting unexpected
results or artifacts in your composite.
To set the appropriate premultiplied option:
1. Select View > Multi-Instance Views > Capture Settings.
2. In the Media Capture panel, select the Keep Alpha option.
3. If the source is premultiplied, select the Premultiplied Alpha option.
4. If the source is not premultiplied, deselect Premultiplied Alpha.
58
Page 59

Changing the Premultiplication Setting
If you get unexpected results after compositing an imported image, such as a
halo or black outline, it may be because the premultiplication setting
is incorrect. You can change the premultiplication setting after you import the
file.
To check the premultiplication setting:
1. In the Avid Explorer, right-click the clip and select Properties from the
Avid DS Nitris menu.
2. On the File Info tab, check if the Premultiplied Alpha option is selected.
To change the premultiplication setting in the Layers view:
1. If you are compositing in the Layers view, right-click the layer that
contains the image whose premultiplication setting you want to change.
By default Auto is selected. This indicates that the material will be
composited according to the clip’s premultiplication setting.
2. Select Premultiplied or Not Premultiplied from the menu.
Compositing with Premultiplied Images
n
Tip: If you are compositing directly on the top timeline, you can apply the
Premultiplication effect on the clip to change the setting. In the
Premultiplication effect, the Modify Image option will change the outgoing
image's RGB pixels by premultiplying or unpremultiplying the image as
necessary. For more information, see “Applying the Premultiplication Effect”
on page 59.
To change the premultiplication setting in an Effects Tree:
1. If you are using the Composite node in an Effect Tree, select the
Premultiply tab.
2. Select the input that corresponds to the source file that you want to change
and change the Premultiplication setting.
Applying the Premultiplication Effect
The Premultiplication effect lets you change a clip’s premultiplication setting.
When you import material into Avid DS Nitris, you should specify whether
the material is premultiplied or not. However, if you didn’t set the
59
Page 60

Chapter 1 Compositing
premultiplication when you imported the material or a clip’s premultiplication
was incorrectly set, you can use the Premultiplication effect to change the
clip’s setting.
It also lets you change a clip’s premultiplication without having to first create
a composite container clip. You can use this effect to change an outgoing
image’s RGB pixels by premultiplying or undoing the premultiply in the
image as necessary.
You can apply the Premultiplication effect to clips, tracks, or trees.
To apply the Premultiplication effect:
1. Apply the Premultiplication effect to a clip, track, or tree.
2. From the effect’s property editor, select one of the following:
- Premultiplied to flag the clip as premultiplied.
- Not Premultiplied to flag the clip as not premultiplied.
- Auto to
Original image (note line around balloon) Premultiplication effect
maintain the clip’s current premultiplication state.
3. Select the Modify Image option if you want to change the outgoing
image’s RGB pixels by premultiplying or unpremultiplying the image
as necessary.
For example, if you choose Premultiplied in the Premultiplication State
box, as well as the Modify Image option, then the RGB channel values
will be multiplied by the alpha channel values to produce a premultiplied
outgoing image. This option is useful when you work with
unpremultiplied images and you need to add premultiplied information,
such as antialiased text.
60
Page 61

Compositing with Premultiplied Images
When undoing the premultiplication, Avid DS Nitris attempts to remove
the influence of the alpha channel from the RGB channels. This option is
useful when working with a premultiplied image and you need to modify
the alpha channel information separately from the RGB channels.
4. On the Masking property page, indicate whether or not you are using a
mask for the effect. By default, the effect is applied to the RGB channels.
You can derive masks from the alpha of the input clip or an external matte
from another clip.
5. On the Options property page, select the appropriate options.
Click the Help button for detailed information on the Premultiplication
properties.
Automatic Changes to the Premultiplication Setting
An image is no longer premultiplied after you modify the RGB or alpha
channels separately. When dealing with a premultiplied source, you may have
to perform the operations specified in the following table:
Scenario Solution
Applying an effect to a clip that modifies the
alpha channel only (by selecting the Process
Alpha option and deselecting the Process RGB
options on the Masking property page)
Applying a graphics effect to a clip or layer, and
apply strokes only to the alpha or only to the
RGB channels
Applying a key (with the Keep Original Alpha
option on) or matte effect to a clip
Applying an external matte to a premultiplied
source in the Layers view
To “unpremultiply” an image:
• Make sure the effect processed the RGBA channels by
checking Masking property page
• “Unpremultiply” the image using the procedure below
“Unpremultiply” the image before applying the Graphics
effect
Select the Force Premultiplication option from the Key
property editor (Matte property page)
Before you apply the external matte, change the
Premultiplication setting to Non-premultiplied
1. Apply the Premultiplication effect to the source clip—see “Applying the
Premultiplication Effect” on page 59.
2. On the General property page, select the Not Premultiplied option.
3. Click the Modify Image button.
61
Page 62

Chapter 1 Compositing
Compositing Clips over a Black Background
You can composite a single layer or several layers over a black background.
Whether you are using one or several layers, the bottommost layer will always
be composited over black when the Force Premultiplied Output option is
selected. Avid DS Nitris provides a simple method in which you can achieve
this without having to first create a black background clip.
n
Tip: If you want to composite against black in the video track, select the Force
Premultiplied Output option in the Sequence Preferences dialog box. If you
want to composite against black using the Composite effect node, double-click
the node and in the Composite property editor, select the Force Premultiplied
Output option.
To composite clips over a black background using layers:
1. From the timeline, select a clip.
2. From the taskbar, click the Compositing button.
A composite container clip is created and the Compositing layout is
displayed. A layer is also created from the clip.
3. If the clip doesn’t have a matte, create one using a keyer, DVE, matte, or
graphics effect.
4. Add more clips and layers to your composite.
5. Right-click an empty area of the Layers view deselect the Force
Premultiplied Output option, if it’s not already deselected.
The bottommost layer is composited over a black background.
62
Force Premultiplied Output is
deselected.
Force Premultiplied Output is
selected.
Page 63

Unpremultiplying with Color
Often you will use clips that have been created in other applications such as
Adobe Photoshop or Adobe After Effects. If the captured clip consists of a
foreground image (and its matte in the alpha channel), which has been
composited and premultiplied with a color background, you can apply the
Unpremultiply with Color effect. It recovers the original foreground image
colors, especially in the semi-transparent and motion blur regions, keys out the
background color and premultiplies it with a black background color, so you
can use the clip for other compositing operations.
This effect can also be applied to the Effects Tree. For more information, see
“Unpremultiplying with Color in the Effects Tree” on page 107.
Compositing with Premultiplied Images
To unpremultiply with color on the timeline:
1. Using the simple track compositing method, composite the background
and foreground clip on the timeline.
The foreground image
with a matte in its alpha
channel
Background image
63
Page 64

Chapter 1 Compositing
The composited result is displayed in the viewer.You’ll notice that dark
areas appear around the edges of the text. When you view the matte, you
will notice the softness around its edges.
A halo around the text indicates
unwanted artifact
The alpha channel of the text has
a matte that has softness around
the edges.
2. Click the track’s Solo button to only view the foreground image.
Track Sol o
button
3. Apply an Unpremultiply with Color effect to the foreground image.
The Unpremultiply with Color property editor is displayed.
4. From the Effects List, select Original Color.
64
The Original Color property editor is displayed.
5. Click the Color Picker button.
The cursor changes to the eyedropper cursor.
6. In the viewer, select the color that you want to remove and replace with
black.
7. Click the track’s Solo button off to see the result in the viewer.
Page 65

Working with Layered Photoshop Images
Working with Layered Photoshop Images
When you capture a layered Photoshop image into Avid DS Nitris, each layer
is an individual linked image file, and the layered result is imported as a
sequence in the Avid Explorer. All applied blending or layer operations in
Photoshop are maintained in the new Avid DS Nitris sequence. For more
information, see “Capturing from Layered Adobe Photoshop Files” on
page 57 of the Avid DS Nitris Capture and Output Guide.
When you place a Photoshop sequence on the timeline, the composite is
recreated in a composite container clip. When you open the container clip,
layers are displayed in the Layers view and on the timeline. DVEs are applied
to each clip to position them according to the original Photoshop image, and
the opacity of each layer is adjusted to match the opacity levels in the original
Photoshop image.
n
Tip: Layers that were hidden in the original Photoshop file will be displayed
as part of the composite in Avid DS Nitris. After importing the file, you can
mute the layers that you don’t want to use in the composite.
Layers in Photoshop
Opacity settings
are matched in
Avid DS Nitris.
Text layers are
rasterized.
Layer effects are
ignored in
Avid DS Nitris.
65
Page 66

Chapter 1 Compositing
Photoshop layers in Avid DS Nitris
Opacity settings are matched
All layers are visible Outer glow layer
In Avid DS Nitris, the following Photoshop features are supported:
Feature Support in Avid DS Nitris
Color spaces RGBA 8, 16-bit and grayscale (converted to RGBA 8-bit
images)
Text layers Text is rasterized on import
Shape layers Shapes are rasterized on import
Blending modes Normal only
Photoshop Layer Notes and Tips
When you work with Photoshop layers in Avid DS Nitris, there may be times
when you don’t get the same results as those in Photoshop. Try the following:
• Import only RGB or grayscale images.
• In Avid DS Nitris, try unmuting the background if it contains transparent
areas and/or export the alpha channel.
DVE applied
to each clip
effects are ignored
66
Page 67

• In Photoshop, apply layer masks to the layer before you import them
into Avid DS Nitris.
Here are some points to consider when working with Photoshop layers.
• Remember that text or shape layers are rasterized when you import them
into Avid DS Nitris.
• When the layered Photoshop file is recreated in Avid DS Nitris, the
Output Frame Size option for each DVE is turned off by default to
minimize the size of the sequence. This may create some hard edges on
blur and drop shadow effects. To remove these hard edges, open the DVE
property editor for that clip and select the Output Frame Size option.
• Remember that effects are applied in a specific order. The order will affect
the outcome of your shot. For layered Photoshop images, you should
always apply effects after the DVE if you don’t want your material to
suffer from hard edge cropping. For more information, see “Processing
Composites” on page 68.
Using Photoshop Images
Working with Layered Photoshop Images
Once you have imported the layered photoshop images, you can apply effects
to each layer.
To start using the Photoshop image:
1. Drag the Photoshop sequence to the timeline, and click the Container
Clip button.
Container clip
button
The composite container clip is displayed in the Compositing layout. On
each clip, a DVE is applied, positioning them according to their position
in the Photoshop file.
2. Mute the layers that you don’t want to appear in the composite.
3. You can blend operations between layers and create effects on each layer.
67
Page 68

Chapter 1 Compositing
Deleting Imported Photoshop Files
If you no longer need the sequence and master clips associated with the
Photoshop file, you can delete them along with the corresponding media at
any time.
To delete the imported Photoshop file:
1. Select the folder that was created when you imported the file.
2. Right-click the folder and select Delete Clip & Unused Media.
A message box is displayed, prompting you to confirm deletion of the
Targa files in the \Linked Layers folder.
3. Click Ye s to free up the maximum amount of disk space.
The sequence, master clips, and Targa files are deleted.
Processing Composites
Most of the composites, effects, and effect nodes that you apply must be
processed to see the results during a real-time playback.
68
Avid DS Nitris processes each layer independently. It then combines the
results from all layers to process the final composited image for each frame in
your sequence.
Processing is done by selection. You can process the entire sequence or a
specific object in the sequence. Processing can also occur at different stages in
your sequence. When you process a sequence with complex effects,
Avid DS Nitris creates caches at incremental levels. This allows you to make
changes to your effects at any level without having to reprocess the entire
sequence.
When processing the DVE effect, you may notice a slight difference in the
quality of the realtime and the processed DVE. The difference may be more
pronounced for DVEs that are partially processed (part of the clip is realtime,
part is processed). In these cases, it is strongly recommended that you process
the entire effect in order to remove the boundary between the realtime portion
and the processed portion of the effect.
Page 69

Processing Composites
The operations in the Compositing layout are processed in the following order:
An effect applied to a clip
1
inside the container clip.
External mattes are processed from right to left.
3
Layer effects are
4
processed from
bottom to top
Effects Tree
2
Effect nodes applied
to the Effects Tree
5
Composite and blend
operations are processed
between layers from
bottom to top. The opacity
of the matte is factored
into the process.
69
Page 70

Chapter 1 Compositing
Processing Layered Clips on the Timeline
When you layer clips on the timeline, whether it’s on the Editing layout or
inside a container in the Compositing layout, the timeline ribbon will change
color to indicate that processing is required. If the color is red, then you must
process the clips in order to play them in real time. For more information, see
“When is Processing Needed?” on page 923 of the Avid DS Nitris Editing
Guide.
n
Highlighted areas of
timeline ribbon indicate
unprocessed section of
the sequence.
Tip: You can preview the resulting composite before processing all frames in
the sequence. To view the sequence frame by frame, press Ctrl and click Play
in the transport controls.
To process the composite:
1. Select an object or specific time span on the timeline.
2. In the timeline controls, click the Process button.
Process button
3. Select the appropriate options from the Processing Options dialog box.
4. Click OK to begin processing.
A progress indicator appears at the bottom of your desktop to show the
status of the process.
70
n
A progress indicator appears at the bottom of your desktop to show the
status of the process. You can Cancel the process at any time, or press the
spacebar on your keyboard.
You can process the container clip while it is open or closed.
For more information, see “Processing Effects” on page 921 of the
Avid DS Nitris Editing Guide.
Page 71

Processing Effect Nodes
As you add effect nodes to the Effects Tree, you will notice that the timeline
ribbon is highlighted indicating whether processing is required. One of the
methods of processing quickly in the Effects Tree is by adding a cache before
processing the entire or a section of the tree.
When working with large trees, it is a good idea to add cache nodes between
effect nodes to process the effects. This will let you play the effects up to the
cache node in real time. For more information, see “Using Cache Nodes in the
Effects Tree” on page 943 and “Creating Caches at Any Level” on page 938 of
the Avid DS Nitris Editing Guide.
To process a node:
1. Right-click a connector between two nodes and select Add Cache
and Process.
A cache node is added to the tree and the Processing Options dialog box is
displayed.
Processing Composites
n
Cache node (indicated in yellow)
added in Effects Tree
2. In the Processing Options dialog box, select the appropriate options.
To process more than one cache node at a time, add the cache nodes to the
cache list and then select the Cache List option from the Processing Options
dialog box.
3. Click OK to begin processing.
4. A progress indicator appears on the bottom of the desktop to show the
status of the process.
71
Page 72

Chapter 1 Compositing
72
Page 73

Chapter 2
Using Effects Trees
Effects Trees are useful in creating and managing complex composites. This
chapter describes how to apply and use effects trees to composite.
Page 74

Chapter 2 Using Effects Trees
Applying Effects Trees
You can apply an Effects Tree on a clip or track on the timeline or on a Layer.
You can also apply an Effects Tree as a transition on the timeline. You can also
work directly in the Effects Tree of the Compositing layout. For more
information, see “Working with the Effects Tree” on page 79.
Applying an Effects Tree on a Clip or Track
You can build a quick Effects Tree on a clip or track when you want to apply
an unlimited number of effects on a single clip or track.
To apply an Effects Tree to a clip or track:
1. Apply a clip or track effect to a clip or track—see “Applying Effects” on
page 200 of the Avid DS Nitris Getting Started.
2. From the effect’s property editor, click the Load Preset button.
The Load Preset dialog box is displayed.
3. From the Load Preset dialog box, select Effects Tree.
74
An Effects Tree is applied to the clip or track, and the Effects Tree
property editor is displayed.
4. From the Effects Tree property editor, click the Expand button.
The Effects Tree view is displayed with the input as the clip or track on
which you have applied the effects tree. You can now add effect nodes to
the tree. For more information, “Working with the Effects Tree” on
page 79.
Effects Tree
applied to clip
Effects applied in tree
Input from clip
Page 75

Applying an Effects Tree as a Transition
With Effects Trees you can apply a transition between two clips that is
composed of multiple effects.
Applying Effects Trees
n
If you build an Effects Tree on the top timeline, you can only have one image
input when it is applied as a clip effect or a single-sided transition. You can
have two image inputs when they are applied as a two-sided transition.
To apply an Effects Tree as a transition:
1. On the timeline, select the edit point between two overlapping clips.
2. Apply a transition, such as a dissolve or wipe—see “Understanding Image
Transition Effects” on page 893 of the Avid DS Nitris Editing Guide.
3. From the transition’s property editor, click the Load Preset button.
The Load Preset dialog box is displayed.
4. From the \Image Transitions folder, select Effects Tree Transition.
An Effects Tree is applied as a transition and the Effects Tree property
editor is displayed.
5. From the Effects Tree property editor, click the Expand button.
The Effects Tree view is displayed.
6. Add effects to the tree by right-clicking on an empty area of the view and
selecting Add Effect.
7. From the \Image Transitions folder, select a transition effect.
In the following example, a Morph transition was added as the transition
in the Effects Tree.
8. Connect the inputs to the effect—see “Connecting Nodes” on page 81.
75
Page 76

Chapter 2 Using Effects Trees
Clip inputs
Transition effect
Converting a Stack of Effects to an Effects Tree
When working on the timeline, you may find yourself with stacks of effects on
clips, track, or the timeline. To save on screen real estate, you can convert
these stacks to an Effects Tree. Another advantage for converting a stack of
effects to an Effects tree is that you can save the entire stack as a preset, which
you can load to another Effects Tree.
Effects Tree applied as transition
76
You can also select effects on clips, track, and the timeline that you want to be
in an Effects Tree.
To convert a stack of effects on a clip to an Effects Tree:
1. Select the clip or move.
2. Right-click the clip and select Convert Effects Stack to Tree.
The stack of effects is replaced by one effect bar: the Effects Tree bar.
Page 77

Applying Effects Trees
n
Tip: To convert the stack of effects of more than one clip, select the clips and
press Ctrl+9. An Effects Tree bar will replace the stacks on all selected clips.
3. Double-click the Effects Tree bar to open its property editor.
4. Click the Expand button.
The Effects Tree view is displayed.
5. Optional: Save the effects in the Effects Tree as a preset. For more
information, see “Loading and Saving Presets” on page 281.
To convert a selection of effects to an Effects Tree
1. Holding down the Ctrl key and select the effects that you want to be
convert to an Effects Tree.
n
n
The effects need not be of one type; you can select clip, track or timeline
effects for conversion.
2. With the Ctrl key is still pressed, right-click and select Effects to Tree.
The selected effects are replaced by one effect bar: the Effects Tree bar.
Tip: After you make the selection, press Ctrl+9 to convert only the selected
effects to an Effects Tree.
3. Double-click the Effects Tree bar to open its property editor.
77
Page 78

Chapter 2 Using Effects Trees
4. Click the Expand button.
The Effects Tree view is displayed.
n
The new Effects Tree bar occupies the total duration of the stack of effects.
If there is an effect in the stack that has a Mix to Color effect before the
conversion to the Effects Tree and has a shorter duration than that of the new
Effects tree bar, the Mix to color effect will not be preserved. As seen in the
effect’s property editor, the Mix to Color will be changed to Mix to Input so as
to preserve its duration.
Applying an Effects Tree on a Layer
With Effects Trees, you can composite multiple inputs on a layer, and add an
unlimited number of effects to these inputs. You can even add Effects Trees to
more than one layer.
n
When you combine an Effects Tree with other effects on a layer, the tree acts as
an input to the other effects. For example, if you create an Effects Tree and
also use the Color Correction effect on the layer, then the Effects Tree acts as
the input to the Color Correction effect and so on, working upwards through
the effects on the layer.
To apply an Effects Tree to a layer:
1. Select a clip on the timeline and click the Compositing button in the
taskbar.
78
2. In the Compositing layout, select a layer in the Layers view.
The Effects Tree view for the selected layer is displayed.
Within the Effects Tree you can now add inputs and effects to the Effects
Tree. For more information, see “Adding or Removing Inputs To and
From an Effect Node” on page 81 and “Adding Effect Nodes to a Tree” on
page 79.
Page 79

Timeline tracks input
into Effects Tree
Working with the Effects Tree
Green button
indicates an Effects
Tree on a layer
n
Tip: Each layer can have its own Effects Tree. To view the Effects Tree on a
layer, right-click the layer and select Effects Tree (layer).
Opening the Effects Tree View
You can open an Effects Tree view for any effect on the timeline or on a layer.
To open the Effects Tree view, do one of the following:
t On a clip or track, press Ctrl while you double-click the effect bar above a
clip/track.
t On a layer, right-click the layer and select Effects Tree (layer).
Working with the Effects Tree
In the Effects Tree, you can add unlimited effects, switch one input for
another, delete effects, fold nodes, copy trees, and save tree presets. You can
also save tree presets which you can apply to other clips or Effects Trees.
Adding Effect Nodes to a Tree
After you have accessed the Effects Tree view and decided where to apply
your Effects Tree (on a clip, track, or layer), you can begin adding effects to it.
Effects are represented as nodes in the Effects Tree view.
79
Page 80

Chapter 2 Using Effects Trees
To add effects to the Effects Tree, do one of the following:
t Right-click an empty area of the Effects Tree view, and select Add Effect.
In the Load Preset dialog box, select an effect.
t From a toolbar, drag a preset and place it in an Effects Tree view. When
you drag a preset from a toolbar or the Avid Explorer and place it on top
of a highlighted connector, the preset is automatically inserted between
the connected nodes.
t From the Avid Explorer, navigate to the \FactoryPresets folder. Select one
or more presets and drag them to an Effects Tree view.
The effects are placed in the tree in the order in which you selected them.
n
Tip: You can select multiple effects in the Avid Explorer (Ctrl-click) and then
press Ctrl while you drag them to the Effects Tree. The effects are added to the
tree already connected to one another, and in the order in which you selected
them.
After you have added nodes to an effects tree, you can connect them together.
For more information, see “Connecting Nodes” on page 81.
Adding Clips to the Effects Tree
When you add clips to the Effects Tree, you are essentially adding input nodes
that represent the image. Note that you will not be able to view the input node
unless it is connected to the output node. When adding more than one clip, you
can composite them using the Composite effect node which you must in turn
connect to the output node—see “Compositing Multiple Images” on page 100.
Input nodes
representing
clips or images
Effect Node
80
To add an input node, do one of the following:
t From the Avid Explorer, select a clip and drag it to the Effects Tree view.
To select more than one clip, use the Ctrl or Shift keys to select.
New inputs are added to the Effects Tree and new tracks are added to
the timeline.
Page 81

Working with the Effects Tree
t From the timeline of the Compositing layout, drag a track to the Effects
Tree view.
The new input node is added to the Effects Tree view.
Although you can add multiple inputs to the Effects Tree, they won’t be
visible in the viewer until connected to the output node.
Adding or Removing Inputs To and From an Effect Node
You can add or show inputs (ports) in the effect node. You can also remove or
hide any input. For example, the DVE effect node shows the Foreground and
Background ports by default. You can add or show the Local and Transform
inputs when you want to use them.
n
When working with dynamic effect nodes such as the composite container or
the 3D DVE node, you can add multiple inputs (or ports) to the node.
To add or remove inputs or ports to an effect node:
Connecting Nodes
When you want to connect nodes, you can use kissing, twanging, sticky
connection, or dragging from an output port.
To connect nodes, do one of the following:
t Kissing: Drag a node’s input port over the output port of another node, so
Starting position
1. Right-click the effect node and select Add/Remove Inputs.
2. Select the input or port that you want to show or hide.
it “kisses” the edge of the second node, and hold for a fraction of a
second.
Button turns blue when connected
While holding the mouse button down, you can drag the newly connected
node to another node and connect it to that one as well.
81
Page 82

Chapter 2 Using Effects Trees
“Kissing” second node Final result
t Twanging: Drag a node over an existing connector.
The existing connector snaps or “twangs” to the input and output ports of
the node.
82
n
Tip: If you don’t release the mouse button, you can move the node away from
the connector and no connection will take place. Even though you haven’t
made a permanent connection, the results are displayed in the viewer. This is
handy to quickly see how an effect may affect your tree. If the node has
multiple ports, you can drag the node through the connector until it connects
to the desired input.
t Sticky connection: Click a node’s output port and release the mouse
button. The connector becomes “stuck” to the pointer. You can move the
pointer over another node’s input port and click to connect it.
Page 83

Working with the Effects Tree
Click node’s output port Release mouse button and move
away from node. The connector is
“stuck” to the pointer.
t Dragging from an output port: Drag a node’s output port towards the
input port of another node.
A connector is displayed from the output port and turns blue to indicate
the output is connected. As you get close to the input node, the connector
snaps to it. If it doesn’t, it is probably because the input node is invalid.
Click output node Drag to input node
Disconnecting Nodes
To disconnect nodes, you can rip, click a connector, click and drag a connector
from an input port, or drag the input port.
To disconnect nodes, do one of the following:
Click node’s input port
t Ripping: Click a node and “shake” or “rip” it away from the other nodes,
or press R and drag a node away from another node or connector.
The selected node is placed where you release the mouse button. If there
were other nodes connected to the selected node, then the connector will
be joined between the two.
t Click anywhere on a connector.
The selected connector turns white. When you release the mouse button,
the connector is removed.
83
Page 84

Chapter 2 Using Effects Trees
t Click and drag connector: Click the connector that is attached to the
input port and drag it away from the node.
The connector is removed.
To switch one input for another, do one of the following:
t Disconnect the current input node and connect the new input node to
the effect.
t Click a track button and drag it over an input node.
If the image contributes to the composite, the viewer and layer thumbnails
are updated.
n
Selecting Nodes
You cannot switch the primary input.
There are many ways to select nodes in an Effects Tree.
To select a node:
t Click a node’s title bar.
The selected node becomes highlighted.
To select multiple nodes, do one of the following:
t Right-click an empty area of the view and select Select All.
t Hold down the Ctrl key and click the nodes (if a node was already
selected, it becomes deselected).
t Drag a selection rectangle around several nodes.
t Right-click a node and select Select Proceeding Nodes or Select
Subsequent Nodes to highlight all nodes before or after the
selected node.
84
Page 85

Collapsing and Expanding Nodes
You can collapse nodes if you want to hide the inputs and effects associated
with them.
View of nodes when expanded.
To collapse a node:
t Right-click a node and select Collapse.
The selected node is collapsed, which is useful when a node contains
several inputs and you want hide them to maintain as much space as
possible in the view.
Working with the Effects Tree
View of nodes when collapsed.
Removing Nodes
n
To expand a node:
t Right-click a node and select Expand.
The selected node is expanded.
You can only delete input nodes when an Effects Tree is applied on a layer.
Also, you cannot delete the primary input node (usually input 1).
Tip: You can also replace effect nodes with another. However, an effect node
can only be replaced with an effect that has the same number of inputs.
To remove a node:
t Right-click a node(s), and select Delete.
The node(s) are removed from the Effects Tree. Any connections to other
nodes are also deleted.
85
Page 86

Chapter 2 Using Effects Trees
To reset an Effects Tree:
t Right-click an empty area of the view and select Reset All.
All nodes and effects are removed except for the input and output nodes.
Editing an Effect Node
When you open an effect’s property editor from an Effects Tree, you can edit
any effect in the tree. If you have multiple effects in your Effects Tree, you can
select which property editor you want to view.
To edit an effect in an Effects Tree:
t Double-click an effects node in the tree.
The effect’s property editor is displayed. You can now edit the effect using
the parameters in the property editor. You can also select other effect
nodes in the tree directly from this property editor’s Effect list:
Effect list
86
n
Effects Trees of folded nodes are not displayed in the Effects list. However,
once you expand the Effects Tree view, you can see them in the tree. Doubleclick the expanded node to display its property editor.
To add an effect to the Effect list:
t Right-click an effect and select Expose.
Page 87

The effect is displayed in the Effect list. This is useful if you build a
complex tree, but don’t want to expose its properties in the Effect list. If
you don’t want to expose the properties, deselect this option.
Viewing and Bypassing Nodes
When your Effects Tree grows, it is handy to view or bypass certain nodes in
the tree. For example, you may want to view the output of your tree without a
certain effect. In this case, you can bypass the effect node that you don’t want
to see.
Another example is when you apply several effects and you want to see the
result up to a certain point. In this case, you can view the node previous to that
point. You can only view one node at a time.
You can also select to view nodes in separate viewers. This is handy, for
example, if you want to match the colors in one clip with those of another.
To bypass a node:
1. Select the effects that you want to bypass.
Working with the Effects Tree
n
2. Right-click a node and select Bypass.
You can also hit B on your keyboard.
The node’s output port turns orange, and the viewer updates to display the
tree without the effect that you bypassed. Bypassed nodes will not
be processed.
To view a node:
1. Select the node whose output you want to view.
2. Right-click a node and select View.
The output of the selected node is displayed in the viewer and the effect’s
output port turns green.
Tip: If your Effects Tree starts getting large, it’s a good idea to add a cache
node between some of the effects and process them. This will save you time
and let you play the effects up to the cache node in real time. For more
information, see “Creating Caches at Any Level” on page 938 of the
Avid DS Nitris Editing Guide.
87
Page 88

Chapter 2 Using Effects Trees
To view an effect in a floating viewer:
t Right-click a node and select Open Viewer.
The output of the node (with any applied effects) is displayed in its
own viewer.
Folding Nodes
When working with large Effects Trees, it can be difficult to navigate the tree
and locate your effects. “Folding” nodes into a new Effects Tree node can help
organize your view.
All output connections for folded nodes can’t be reconnected when:
• You select effects that have their output ports connected to two different
nodes and try to fold them. Since a folded node only has one output port,
only one of the output ports of the effects inside the folded tree will be
connected to the output.
• You select nodes that aren’t in a series (for example, you have three effects
and you select 1 and 3) and fold them; connection to the input node will
be lost.
88
n
In these situations, you will be prompted to undo the folding to regain all
connections.
Tip: In your user preferences, you can make new nodes automatically fold and
group when they’re added to the Effects Tree, and automatically expand
existing nodes when you position the pointer over them. Select File > User
Preferences (Effects Tree property page).
Page 89

Working with the Effects Tree
To fold nodes:
1. In an Effects Tree, select the nodes you want to fold or group.
Selected nodes
2. Right-click one of the selected nodes and select one of the following:
- Fold Minimal
- Fold All
Fold Minimal
The selected nodes are placed in a new Effects Tree with a red border, which only displays
the inputs that are directly connected to the effect that feeds the new Effects Tree.
89
Page 90

Chapter 2 Using Effects Trees
Fold All
To unfold nodes:
t Right-click the folded Effects Tree and select one of the following:
- Unfold
- Unfold and Repel
The selected nodes are placed in a new Effects Tree with a red border, which
displays all inputs, both connected and unconnected, from each effect.
The nodes are placed in the parent Effects Tree.
The nodes are placed in the parent Effects Tree. Any nodes that were
close to the folded are repelled away from the nodes as they are
unfolded.
Attracting or Repelling Nodes
When you have many nodes in an Effects Tree, sometimes it’s easier to focus
on a group of nodes by pushing other nodes away from the group. You can
repel or attract nodes to/from selected nodes.
Nodes are attracted or repelled by an amount that is a factor of the size of the
selection. If you select a bigger node, then nodes will be repelled or attracted
farther than if you select a smaller node.
n
90
Tip: You can set the amount at which nodes are repelled in the User
Preferences dialog box. Select File > User Preferences (Effects Tree property
page).
Page 91

Working with the Effects Tree
To repel nodes:
1. In the Effects Tree, select the nodes that you want to remain stationary.
2. On your keyboard, press the equal (=) key.
n
All nodes in the tree are pushed away from the selected nodes.
Keep in mind that when you select nodes, they must fall together within a
square region to be repelled/attracted. For example, if you have four nodes
positioned in two rows and you select two nodes diagonally, then attracting
and repelling will not work.
To attract nodes:
1. In the Effects Tree, select the nodes that you want to remain stationary.
2. On the keyboard, press the minus (–) key.
All nodes in the tree are pulled closer to the selected nodes.
91
Page 92

Chapter 2 Using Effects Trees
Organizing Nodes
When creating complex effects using the Effects Tree, you may end up with a
large number of nodes all over the Effects Trees workspace. To work more
efficiently and to have a clear idea of which node is connected to which, it’s
best to organize your Effect Tree as you work.
There are two ways of organizing nodes:
92
n
• Arranging all nodes in the Effects Tree in a more coherent or structured
manner displaying all the input, effect, and output nodes.
• Sorting a selected number of nodes, or a branch of the Effects Tree, to
display how they are connected.
If you have not selected any node(s), then organizing the branch will
rearrange itself around the output node. Unlike the Organize All Nodes
option, you will notice that the nodes are not framed. Instead, the focus is
on the selected nodes. To frame the Effects Tree, select the Frame All
option.
Tip: To save vertical space in the Effects Tree, you can use the Densely
Organize All Nodes or Densely Organize Branch options. For more
information, see “Effects Tree Menu” in the Help.
Page 93

Command Shortcut
Organize Branch Shift + ]
Organize All Nodes Shift + [
Densely Organize Branch [
Densely Organize All Nodes ]
Renaming Nodes
Working with the Effects Tree
To organize nodes in the Effects Tree:
t Right-click the Effects Tree and select one of the following:
When you add several similar effects, such as color correction, it may become
difficult to differentiate between each effect. Renaming the effect nodes makes
it easier for you to locate them in a tree.
n
Renaming Input Ports
You cannot rename input or output nodes. However, since the second part of
an input port’s name in an Effects Tree is derived from a track, you can
rename the track. The name will be propagated to the input node.
To rename an effect node:
1. Do one of the following:
t Right-click the node and select Rename Effect.
t Alt + click the name.
2. Enter a new name for the node.
You can rename an input port’s name using the input’s name to help you
determine the node from which an input originates.
To rename node input ports, do one of the following:
t Right-click a node’s input port name, and select Rename Input.
t Alt + click the input port name.
t Right-click a node and select Use Input Names.
93
Page 94

Chapter 2 Using Effects Trees
The name of the node connected to the input port is appended to the input
port’s name and number. For example, if a Blue-Green keyer is connected
to Input 1 of a Composite node, then the input port’s name will be
displayed as Input 1 - Blue Green Keyer when you select this option from
the Effects Node menu.
n
Tip: You can set the Use Input Names option as the default in the User
Preferences dialog box. Select File > User Preferences (Effects Tree property
page).
Displaying Tooltips
Tooltips are handy when you’re working with a zoomed-out tree and the node
or input names are difficult to see. You can display tooltips on nodes, node
input names, and connectors. You can also determine how quickly tooltips are
displayed when you position the pointer over these objects.
To display tooltips on nodes, connectors, and node inputs:
1. Select File > User Preferences.
2. On the Effects Tree property page, select one or more options from the
Tooltip Settings box.
Zooming the Effects Tree
Zooming the Effects Tree lets you focus on one part of your tree, which may
be useful in complex trees with many effects.
To zoom the Effects Tree:
94
t Position the pointer over a node from which you want the Effects Tree to
zoom in or out and do one of the following:
- Press Z+right-click the Effects Tree and drag right or left.
- Press Z and drag a selection around the nodes you want to zoom in.
Press Z and click in the Effects Tree to go back to the original size.
- Press Alt+Z to zoom in on the Effects Tree or press Alt+X to
zoom out.
The Effects Tree incrementally zooms in or out each time you press
the key commands.
Page 95

Working with the Effects Tree
n
n
Tip: You can set the amount at which the incremental zoom takes place by
selecting the Steps option in the Mouse Zoom box in the User Preferences
dialog box. Select File > User Preferences (Effects Tree property page).
When you apply an Effects Tree to a clip or track, it can only use one input:
from the clip or track. If you want to create a multi-input effect, apply an
Effects Tree on a layer.
Using the Birds Eye View
The Birds Eye view lets you interactively move an Effects Tree to see nodes or
effects that are outside the current view.
To use the Birds Eye View:
1. Right-click an empty area in the Effects Tree view and select Birds Eye
View.
1
Close view
Darker region indicates
there are more nodes
and/or effects outside the
Effects Tree view.
2
2. Drag your cursor over the light-colored region in the Birds Eye View to
reveal more nodes and effects.
The open hand changes to a closed hand to show that you’re dragging the
view. The Effects Tree moves accordingly to display more nodes and
effects.
3. To close the view, click the Close button in the top-right hand corner.
95
Page 96

Chapter 2 Using Effects Trees
Saving and Loading Trees
Once you create a complex tree, you can save it as a preset and reuse it in an
existing tree or apply it as a clip or track effect. When you save a tree, all the
nodes that comprise the tree including the source (input), effects, and output
are saved with the tree.
You can also add an Effects Tree preset to an existing tree or replace the tree
with a preset.
Saving an Effects Tree
After creating an effects tree, you can save it as a preset. If you want to apply
an Effects Tree preset to a clip or track, it can only have one input.
To save an Effects Tree as a preset:
1. Do one of the following:
t On a clip, track, or transition, double-click the Effects Tree effect bar.
t In an Effects Tree view, right-click an empty area and
select Properties.
2. In the Effects Tree property editor, click the Save Preset button.
3. In the Save Preset dialog box, select a folder, type a name and description
n
Loading an Effects Tree
96
If you try to save an Effects Tree from an effect’s property editor, only the
current effect will be saved as a preset. Make sure you select General from the
Effect list before you save the Effects Tree.
Before loading an Effects Tree, you may want to view it first.
To view an Effects Tree:
1. Double-click the Effects Tree preset node.
The Effects Tree property editor is displayed.
for your preset, and click OK.
The preset is saved in the folder you selected.
The Effects Tree Preset property editor is displayed.
Page 97

Working with the Effects Tree
2. In the Effects Tree property editor, click the Expand button.
The Effects Tree view is displayed in a floating window.
To load an Effects Tree:
1. Right-click an empty area of an Effects Tree view and select Add Effect.
The Load Preset dialog box is displayed.
2. Browse through the folders and select a preset.
The Effects Tree preset is added to the current Effects Tree view. It looks
like any other effect node.
3. Connect the preset node to the tree.
97
Page 98

Chapter 2 Using Effects Trees
Effects Tree preset
Using the Effects Tree to Composite
The Effects Tree can be used to composite multiple images and combine
multiple effects. Some artists prefer this method because it visually maps out
the nodes of the tree. This section includes examples of how the Effects Tree
can be used to composite images.
Using External Mattes in the Effects Tree
An external matte is a matte taken from one clip and applied to another.
External mattes may already exist with a clip or you can create one by adding
a keyer effect on the clip. You can also use the alpha or RGB component of
another clip as the external matte. In the example for “Using the Shapes
Tools” on page 41, the matte created can be applied to another clip as an
external matte. Sometimes, you may be provided with a matte clip that you use
for compositing.
98
There are three methods for adding external mattes: using the Effects Tree,
using the Layers view, and using matte containers. For the Layers view and
matte container methods, see “Using External Mattes in the Timeline and
Layers View” on page 44.
Page 99

RGB clip
without a matte
Using the Effects Tree to Composite
Background clip
Composite result
External matte clip
To add an external matte to the Effects Tree:
1. In the Effects Tree, add Composite effect node and connect it to the
background as shown here:
2. Drag the clip that you want to use as the foreground to the Effects Tree.
3. Drag the external matte clip to the Effects Tree.
4. Add the Key Combiner - Luma effect (\Tree Effects folder) to the tree
and connect the nodes as shown here:
99
Page 100

Chapter 2 Using Effects Trees
You are using the Luma channel of your external matte as a source for the
alpha and combining this alpha channel with RGB channels of the clip
(TextRGB)
n
If you want to combine the alpha channel with the RGB channels of the clip
using the alpha channel of the matte as the source for the alpha, use the Key
Combiner - Alpha effect. You can also open the Key Combiner property editor
and select the source from which to map the output image’s alpha channel.
Compositing Two Layers
The Over effect is a real-time effect which lets you composite two images.
To composite two layers:
1. In the Layers view, click a layer to display its Effects Tree.
2. Right-click in the Effects Tree and select Add Effect.
3. From the \Tree Effects\Blending Operations folder, select Over.
4. Connect the input nodes to the Over node as follows:
5. In the Options property page, select the appropriate options.
6. Click OK to begin processing.
7. A progress indicator appears on the bottom of the desktop to show the
status of the process.
Compositing Multiple Images
In an Effects Tree, the Composite effect node lets you composite upto 64
images. Open the Composite node's property editor to get a visual interface of
the input images, which is similar to the Layer’s view.
100
 Loading...