

Page 1

Avid® DS Nitris
Reference
Version 7.0
™
make manage move | media
™
Avid
®
Page 2

Copyright and Disclaimer
Product specifications are subject to change without notice and do not represent a commitment on the part
of Avid Technology, Inc.
The software described in this document is furnished under a license agreement. You can obtain a copy of
that license by visiting Avid's Web site at www.avid.com. The terms of that license are also available in the
product in the same directory as the software. The software may not be reverse assembled and may be
used or copied only in accordance with the terms of the license agreement. It is against the law to copy the
software on any medium except as specifically allowed in the license agreement.
No part of this document may be reproduced or transmitted in any form or by any means, electronic or
mechanical, including photocopying and recording, for any purpose without the express written permission
of Avid Technology, Inc.
Copyright © 2003 Avid Technology, Inc. and its licensors. All rights reserved.
The Avid|DS application uses JScript and Visual Basic Scripting Edition from Microsoft Corporation.
Attn. Government User(s). Restricted Rights Legend
U.S. GOVERNMENT RESTRICTED RIGHTS. This Software and its documentation are “commercial
computer software” or “commercial computer software documentation.” In the event that such Software or
documentation is acquired by or on behalf of a unit or agency of the U.S. Government, all rights with
respect to this Software and documentation are subject to the terms of the License Agreement, pursuant to
FAR §12.212(a) and/or DFARS §227.7202-1(a), as applicable.
Trademarks
888 I/O, Adrenaline, AirPlay, AirSPACE, AirSPACE HD, AniMatte, AudioSuite, AudioVision, AutoSync, Avid,
Avid DNA, AVIDdrive, AVIDdrive Towers, AvidNet, AvidNetwork, AVIDstripe, Avid Mojo, Avid Unity, Avid
Xpress, AVoption, AVX, CamCutter, ChromaCurve, ChromaWheel, DAE, D-Fi, D-fx, Digidesign, Digidesign
Audio Engine, Digidesign Intelligent Noise Reduction, DigiDrive, Digital Nonlinear Accelerator,
DigiTranslator, DINR, D-Verb, Equinox, ExpertRender, FieldPak, Film Composer, FilmScribe, FluidMotion,
HIIP, HyperSPACE, HyperSPACE HDCAM, IllusionFX, Image Independence, Intraframe, iS9, iS18, iS23,
iS36, Lo-Fi, Magic Mask, make manage move | media, Marquee, Matador, Maxim, MCXpress, Media
Composer, MediaDock, MediaDock Shuttle, Media Fusion, Media Illusion, MediaLog, Media Reader, Media
Recorder, MEDIArray, MediaShare, Meridien, MetaSync, NaturalMatch, Nearchive, NetReview,
NewsCutter, Nitris, OMF, OMF Interchange, OMM, Open Media Framework, Open Media Management,
ProEncode, Pro Tools, QuietDrive, Recti-Fi, RetroLoop, rS9, rS18, Sci-Fi, Softimage, Sound Designer II,
SPACE, SPACEShift, Symphony, the Avid|DS logo, Trilligent, UnityRAID, Vari-Fi, Video Slave Driver,
VideoSPACE, Xdeck, and XSI are either registered trademarks or trademarks of Avid Technology, Inc. in
the United States and/or other countries.
All other trademarks contained herein are the property of their respective owners.
GOT FOOTAGE?
Editors — Filmmakers — Special Effects Artists — Game Developers — Animators — Educators —
Broadcasters — Content creators of every genre — Just finished an incredible project and want to
share it with the world?
Send us your reels and we may use your footage in our show reel or demo!*
For a copy of our release and Avid’s mailing address, go to www.avid.com/footage.
*Note: Avid cannot guarantee the use of materials submitted.
Avid DS Nitris Reference • 0130-05584-01 • September 2003
2
Page 3

Contents
Contents . . . . . . . . . . . . . . . . . . . . . . . . . . . . . . . . . . . . . . . . . . . . 3
Using This Guide . . . . . . . . . . . . . . . . . . . . . . . . . . . . . . . . . . . . 23
Who Should Use This Guide . . . . . . . . . . . . . . . . . . . . . . . . . . . . . . . . . 23
Symbols and Conventions . . . . . . . . . . . . . . . . . . . . . . . . . . . . . . . . . . . 24
Using the Mouse, Pen, and Keyboard . . . . . . . . . . . . . . . . . . . . . . . 25
Customizing the Pen or Mouse . . . . . . . . . . . . . . . . . . . . . . . . . . . . 26
If You Need Help . . . . . . . . . . . . . . . . . . . . . . . . . . . . . . . . . . . . . . . . . . 26
Accessing the Online Documentation . . . . . . . . . . . . . . . . . . . . . . . 26
If You Have Documentation Comments. . . . . . . . . . . . . . . . . . . . . . 27
How to Order Documentation . . . . . . . . . . . . . . . . . . . . . . . . . . . . . 27
Avid Educational Services . . . . . . . . . . . . . . . . . . . . . . . . . . . . . . . . 27
Avid DS Customer Support . . . . . . . . . . . . . . . . . . . . . . . . . . . . . . . . . . 28
E-mail Support . . . . . . . . . . . . . . . . . . . . . . . . . . . . . . . . . . . . . . . . . 28
Web Support . . . . . . . . . . . . . . . . . . . . . . . . . . . . . . . . . . . . . . . . . . 28
FTP Support. . . . . . . . . . . . . . . . . . . . . . . . . . . . . . . . . . . . . . . . . . . 28
Mailing List . . . . . . . . . . . . . . . . . . . . . . . . . . . . . . . . . . . . . . . . . . . . 29
Chapter 1 Desktop Reference . . . . . . . . . . . . . . . . . . . . . . . . . . . . . . . . . . 31
Property Editors . . . . . . . . . . . . . . . . . . . . . . . . . . . . . . . . . . . . . . . . . . . 32
Global Controls . . . . . . . . . . . . . . . . . . . . . . . . . . . . . . . . . . . . . . . . 32
Recycling, Locking, and Focusing Property Editors. . . . . . . . . . . . . 45
Entering Values . . . . . . . . . . . . . . . . . . . . . . . . . . . . . . . . . . . . . . . . 52
Help . . . . . . . . . . . . . . . . . . . . . . . . . . . . . . . . . . . . . . . . . . . . . . . . . . . . 57
Layout Menu. . . . . . . . . . . . . . . . . . . . . . . . . . . . . . . . . . . . . . . . . . . . . . 59
User Preferences Dialog Box . . . . . . . . . . . . . . . . . . . . . . . . . . . . . . . . . 60
General Property Page . . . . . . . . . . . . . . . . . . . . . . . . . . . . . . . . . . 61
Animation Property Page . . . . . . . . . . . . . . . . . . . . . . . . . . . . . . . . . 63
Editing Property Page . . . . . . . . . . . . . . . . . . . . . . . . . . . . . . . . . . . 65
Titling Property Page . . . . . . . . . . . . . . . . . . . . . . . . . . . . . . . . . . . . 67
3
Page 4

Effects Tree Property Page . . . . . . . . . . . . . . . . . . . . . . . . . . . . . . . 68
Capture Property Page . . . . . . . . . . . . . . . . . . . . . . . . . . . . . . . . . . . 71
Data Management Property Page . . . . . . . . . . . . . . . . . . . . . . . . . . 72
Level Meters Property Page . . . . . . . . . . . . . . . . . . . . . . . . . . . . . . . 73
Scripting/Logging Property Page . . . . . . . . . . . . . . . . . . . . . . . . . . . 74
Avid Explorer Property Page . . . . . . . . . . . . . . . . . . . . . . . . . . . . . . 75
Time Display Property Page . . . . . . . . . . . . . . . . . . . . . . . . . . . . . . . 76
Favorites Property Page . . . . . . . . . . . . . . . . . . . . . . . . . . . . . . . . . . 77
Toolbars . . . . . . . . . . . . . . . . . . . . . . . . . . . . . . . . . . . . . . . . . . . . . . . . . 77
Closing Toolbars Automatically . . . . . . . . . . . . . . . . . . . . . . . . . . . . 78
Changing the Size and Look of Toolbar Buttons . . . . . . . . . . . . . . . 78
Toolbar Menu . . . . . . . . . . . . . . . . . . . . . . . . . . . . . . . . . . . . . . . . . . 79
Taskbar Menu . . . . . . . . . . . . . . . . . . . . . . . . . . . . . . . . . . . . . . . . . . . . . 80
Command Mapping Dialog Box . . . . . . . . . . . . . . . . . . . . . . . . . . . . . . . 81
Using Templates for Command Maps . . . . . . . . . . . . . . . . . . . . . . . 83
Customizing the Command Map . . . . . . . . . . . . . . . . . . . . . . . . . . . 83
Viewing the Mapped Commands . . . . . . . . . . . . . . . . . . . . . . . . . . . 85
Checking to See if a Key is Free . . . . . . . . . . . . . . . . . . . . . . . . . . . 85
Load Preset Dialog Box . . . . . . . . . . . . . . . . . . . . . . . . . . . . . . . . . . . . . 87
Save Preset Dialog Box . . . . . . . . . . . . . . . . . . . . . . . . . . . . . . . . . . . . . 87
Viewer Properties . . . . . . . . . . . . . . . . . . . . . . . . . . . . . . . . . . . . . . . . . . 88
Display Property Page . . . . . . . . . . . . . . . . . . . . . . . . . . . . . . . . . . . 88
Guides Property Page . . . . . . . . . . . . . . . . . . . . . . . . . . . . . . . . . . . 90
Image Grabber Property Page . . . . . . . . . . . . . . . . . . . . . . . . . . . . . 92
Onion Skinning Property Page . . . . . . . . . . . . . . . . . . . . . . . . . . . . . 92
Edit Layout Dialog Box . . . . . . . . . . . . . . . . . . . . . . . . . . . . . . . . . . . . . . 94
Preference Management Dialog Box . . . . . . . . . . . . . . . . . . . . . . . . . . . 94
Export Preferences Property Page . . . . . . . . . . . . . . . . . . . . . . . . . . 95
Import Preferences Property Page. . . . . . . . . . . . . . . . . . . . . . . . . . 96
Splitter Menu . . . . . . . . . . . . . . . . . . . . . . . . . . . . . . . . . . . . . . . . . . . . . . 98
View Menu . . . . . . . . . . . . . . . . . . . . . . . . . . . . . . . . . . . . . . . . . . . . . . . 98
View Switcher Menu . . . . . . . . . . . . . . . . . . . . . . . . . . . . . . . . . . . . . . . . 99
Chapter 2 Capture and Output Reference. . . . . . . . . . . . . . . . . . . . . . . . 101
AAF/AFE View . . . . . . . . . . . . . . . . . . . . . . . . . . . . . . . . . . . . . . . . . . . 101
4
Page 5

AAF/AFE Settings . . . . . . . . . . . . . . . . . . . . . . . . . . . . . . . . . . . . . 102
AAF/AFE List . . . . . . . . . . . . . . . . . . . . . . . . . . . . . . . . . . . . . . . . . 103
ALE (Avid Log Exchange) Import View . . . . . . . . . . . . . . . . . . . . . . . . 105
ALE Import Tools . . . . . . . . . . . . . . . . . . . . . . . . . . . . . . . . . . . . . . 106
ALE List . . . . . . . . . . . . . . . . . . . . . . . . . . . . . . . . . . . . . . . . . . . . . 107
ALE Create Logs Dialog Box . . . . . . . . . . . . . . . . . . . . . . . . . . . . . 108
Audio Input Monitor . . . . . . . . . . . . . . . . . . . . . . . . . . . . . . . . . . . . . . . 109
Audio Output Monitor . . . . . . . . . . . . . . . . . . . . . . . . . . . . . . . . . . . . . . 110
Capture Error Log Dialog Box . . . . . . . . . . . . . . . . . . . . . . . . . . . . . . . 111
Capture List Dialog Box . . . . . . . . . . . . . . . . . . . . . . . . . . . . . . . . . . . . 112
Capture Settings View . . . . . . . . . . . . . . . . . . . . . . . . . . . . . . . . . . . . . 113
Video Capture Settings . . . . . . . . . . . . . . . . . . . . . . . . . . . . . . . . . 114
Audio Capture Settings . . . . . . . . . . . . . . . . . . . . . . . . . . . . . . . . . 115
Media Capture Settings . . . . . . . . . . . . . . . . . . . . . . . . . . . . . . . . . 115
Conform Error Log . . . . . . . . . . . . . . . . . . . . . . . . . . . . . . . . . . . . . . . . 120
Capture Tool. . . . . . . . . . . . . . . . . . . . . . . . . . . . . . . . . . . . . . . . . . . . . 121
Transport Controls (Capture and Output Tools) . . . . . . . . . . . . . . 126
Video Input Parameters . . . . . . . . . . . . . . . . . . . . . . . . . . . . . . . . . 127
Capture File Formats . . . . . . . . . . . . . . . . . . . . . . . . . . . . . . . . . . . . . . 129
Deck Configuration View . . . . . . . . . . . . . . . . . . . . . . . . . . . . . . . . . . . 131
Deck Menu. . . . . . . . . . . . . . . . . . . . . . . . . . . . . . . . . . . . . . . . . . . 136
EDL View . . . . . . . . . . . . . . . . . . . . . . . . . . . . . . . . . . . . . . . . . . . . . . . 137
EDL Tools . . . . . . . . . . . . . . . . . . . . . . . . . . . . . . . . . . . . . . . . . . . 138
Edit List . . . . . . . . . . . . . . . . . . . . . . . . . . . . . . . . . . . . . . . . . . . . . 139
Ripple Sources Dialog Box . . . . . . . . . . . . . . . . . . . . . . . . . . . . . . 141
EDL Conform Dialog Box. . . . . . . . . . . . . . . . . . . . . . . . . . . . . . . . 141
EDL Properties Dialog Box . . . . . . . . . . . . . . . . . . . . . . . . . . . . . . 143
Print EDL Dialog Box . . . . . . . . . . . . . . . . . . . . . . . . . . . . . . . . . . . 143
EDL Menu . . . . . . . . . . . . . . . . . . . . . . . . . . . . . . . . . . . . . . . . . . . 144
Explorer Recapture Options Dialog Box. . . . . . . . . . . . . . . . . . . . . . . . 145
Export Preferences Dialog Box . . . . . . . . . . . . . . . . . . . . . . . . . . . . . . 146
Export to File Dialog Box . . . . . . . . . . . . . . . . . . . . . . . . . . . . . . . . . . . 147
External Controller Setup View. . . . . . . . . . . . . . . . . . . . . . . . . . . . . . . 147
Import Preferences Dialog Box. . . . . . . . . . . . . . . . . . . . . . . . . . . . . . . 149
Insert Tape Dialog Box . . . . . . . . . . . . . . . . . . . . . . . . . . . . . . . . . . . . . 149
5
Page 6

MediaManager Setup View . . . . . . . . . . . . . . . . . . . . . . . . . . . . . . . . . . 153
MediaManager View . . . . . . . . . . . . . . . . . . . . . . . . . . . . . . . . . . . . . . . 154
MediaManager Settings . . . . . . . . . . . . . . . . . . . . . . . . . . . . . . . . . 154
OMF (Open Media Framework) View . . . . . . . . . . . . . . . . . . . . . . . . . . 155
OMF Tools . . . . . . . . . . . . . . . . . . . . . . . . . . . . . . . . . . . . . . . . . . . 156
OMF Conform Dialog Box. . . . . . . . . . . . . . . . . . . . . . . . . . . . . . . . 157
Export Composition Dialog Box . . . . . . . . . . . . . . . . . . . . . . . . . . . 159
Output Tool . . . . . . . . . . . . . . . . . . . . . . . . . . . . . . . . . . . . . . . . . . . . . . 160
Output Tool (Output to Tape) . . . . . . . . . . . . . . . . . . . . . . . . . . . . . 163
Output Tool (Output to File) . . . . . . . . . . . . . . . . . . . . . . . . . . . . . . 165
Output Tool (Output to Reference). . . . . . . . . . . . . . . . . . . . . . . . . 166
Output Tool (Output to ProEncode) . . . . . . . . . . . . . . . . . . . . . . . . 167
Video Output Parameters . . . . . . . . . . . . . . . . . . . . . . . . . . . . . . . . 168
Converted Output Formats . . . . . . . . . . . . . . . . . . . . . . . . . . . . . . . 170
Output File Formats . . . . . . . . . . . . . . . . . . . . . . . . . . . . . . . . . . . . 171
DPX Export Dialog Box . . . . . . . . . . . . . . . . . . . . . . . . . . . . . . . . . 173
Script Editor View . . . . . . . . . . . . . . . . . . . . . . . . . . . . . . . . . . . . . . . . . 174
Script Editor Menus . . . . . . . . . . . . . . . . . . . . . . . . . . . . . . . . . . . . 176
Tape Library View . . . . . . . . . . . . . . . . . . . . . . . . . . . . . . . . . . . . . . . . . 177
Tapes Menu . . . . . . . . . . . . . . . . . . . . . . . . . . . . . . . . . . . . . . . . . . 178
Add New Tape Dialog Box . . . . . . . . . . . . . . . . . . . . . . . . . . . . . . . 179
Timeline Recapture Dialog Box. . . . . . . . . . . . . . . . . . . . . . . . . . . . . . . 180
Chapter 3 Editing Reference . . . . . . . . . . . . . . . . . . . . . . . . . . . . . . . . . . 183
Animation Controls (Global in Status Bar) . . . . . . . . . . . . . . . . . . . . . . 184
Animation Key Menu . . . . . . . . . . . . . . . . . . . . . . . . . . . . . . . . . . . . . . . 185
Animation Tools . . . . . . . . . . . . . . . . . . . . . . . . . . . . . . . . . . . . . . . . . . 187
Animation Editor Menus . . . . . . . . . . . . . . . . . . . . . . . . . . . . . . . . . . . . 189
File Menu (Animation Editor) . . . . . . . . . . . . . . . . . . . . . . . . . . . . . 189
Edit Menu (Animation Editor) . . . . . . . . . . . . . . . . . . . . . . . . . . . . . 189
View Menu (Animation Editor) . . . . . . . . . . . . . . . . . . . . . . . . . . . . 191
Keys Menu (Animation Editor) . . . . . . . . . . . . . . . . . . . . . . . . . . . . 194
Curves Menu (Animation Editor). . . . . . . . . . . . . . . . . . . . . . . . . . . 196
Animation Editor Preferences . . . . . . . . . . . . . . . . . . . . . . . . . . . . . . . . 197
Editor Property Page (Animation Editor Preferences) . . . . . . . . . . 198
6
Page 7

Keys Property Page (Animation Editor Preferences). . . . . . . . . . . 199
Curve Processing (Animation Editor Preferences) . . . . . . . . . . . . 200
Paste Options (Animation Editor Preferences) . . . . . . . . . . . . . . . 202
Animation Graph Menu. . . . . . . . . . . . . . . . . . . . . . . . . . . . . . . . . . . . . 203
Animation Tree Menu . . . . . . . . . . . . . . . . . . . . . . . . . . . . . . . . . . . . . . 209
Edit Animation Menu . . . . . . . . . . . . . . . . . . . . . . . . . . . . . . . . . . . . . . 210
Audio Effects . . . . . . . . . . . . . . . . . . . . . . . . . . . . . . . . . . . . . . . . . . . . 211
3 Band Tone Control Property Editor. . . . . . . . . . . . . . . . . . . . . . . 212
4 Band Parametric EQ Property Editor . . . . . . . . . . . . . . . . . . . . . 213
10 Band Graphic EQ Property Editor. . . . . . . . . . . . . . . . . . . . . . . 215
Dynamics Effects . . . . . . . . . . . . . . . . . . . . . . . . . . . . . . . . . . . . . . 216
Dynamics Property Editor . . . . . . . . . . . . . . . . . . . . . . . . . . . . . . . 217
Fade Property Editor (Audio Effect). . . . . . . . . . . . . . . . . . . . . . . . 222
Gain Property Editor . . . . . . . . . . . . . . . . . . . . . . . . . . . . . . . . . . . 223
Parametric EQ Property Editor . . . . . . . . . . . . . . . . . . . . . . . . . . . 223
Reverb Property Editor . . . . . . . . . . . . . . . . . . . . . . . . . . . . . . . . . 224
Timewarp (audio) Property Editor . . . . . . . . . . . . . . . . . . . . . . . . . 225
Timewarp (audio timezone) Property Editor . . . . . . . . . . . . . . . . . 226
VST Host Property Editor. . . . . . . . . . . . . . . . . . . . . . . . . . . . . . . . 228
Avid Explorer Menu . . . . . . . . . . . . . . . . . . . . . . . . . . . . . . . . . . . . . . . 229
Avid Explorer Tools . . . . . . . . . . . . . . . . . . . . . . . . . . . . . . . . . . . . . . . 232
Bin Columns . . . . . . . . . . . . . . . . . . . . . . . . . . . . . . . . . . . . . . . . . . . . . 233
Bin Tools. . . . . . . . . . . . . . . . . . . . . . . . . . . . . . . . . . . . . . . . . . . . . . . . 237
Blend Property Editor . . . . . . . . . . . . . . . . . . . . . . . . . . . . . . . . . . . . . . 238
Timing Property Page (Blend) . . . . . . . . . . . . . . . . . . . . . . . . . . . . 238
Cache List View . . . . . . . . . . . . . . . . . . . . . . . . . . . . . . . . . . . . . . . . . . 239
Clip Menu . . . . . . . . . . . . . . . . . . . . . . . . . . . . . . . . . . . . . . . . . . . . . . . 240
Clip Activeness Menu. . . . . . . . . . . . . . . . . . . . . . . . . . . . . . . . . . . . . . 243
Clip Property Editor . . . . . . . . . . . . . . . . . . . . . . . . . . . . . . . . . . . . . . . 243
General Property Page (Clip). . . . . . . . . . . . . . . . . . . . . . . . . . . . . 243
Source Property Page (Clip) . . . . . . . . . . . . . . . . . . . . . . . . . . . . . 245
Position Property Page (Clip). . . . . . . . . . . . . . . . . . . . . . . . . . . . . 246
Clip Transition Menu. . . . . . . . . . . . . . . . . . . . . . . . . . . . . . . . . . . . . . . 247
CmdLine . . . . . . . . . . . . . . . . . . . . . . . . . . . . . . . . . . . . . . . . . . . . . . . . 247
Container Clip Menu. . . . . . . . . . . . . . . . . . . . . . . . . . . . . . . . . . . . . . . 248
7
Page 8

Image Transition Effects . . . . . . . . . . . . . . . . . . . . . . . . . . . . . . . . . . . . 249
Dissolve Property Editor . . . . . . . . . . . . . . . . . . . . . . . . . . . . . . . . . 249
Crossfade Property Editor . . . . . . . . . . . . . . . . . . . . . . . . . . . . . . . 251
Wipe Property Editor . . . . . . . . . . . . . . . . . . . . . . . . . . . . . . . . . . . 252
Locator Menu . . . . . . . . . . . . . . . . . . . . . . . . . . . . . . . . . . . . . . . . . . . . 259
Locator Property Editor . . . . . . . . . . . . . . . . . . . . . . . . . . . . . . . . . . . . . 259
General Property Page (Locator) . . . . . . . . . . . . . . . . . . . . . . . . . . 259
Position Property Page (Locator) . . . . . . . . . . . . . . . . . . . . . . . . . . 260
Locator View Menu . . . . . . . . . . . . . . . . . . . . . . . . . . . . . . . . . . . . . . . . 260
Media Storage Configuration Dialog Box . . . . . . . . . . . . . . . . . . . . . . . 261
Media Storage Information Dialog Box . . . . . . . . . . . . . . . . . . . . . . . . . 263
Media Options (1/2) Dialog Box . . . . . . . . . . . . . . . . . . . . . . . . . . . . . . 264
Media Options (2/2) Dialog Box . . . . . . . . . . . . . . . . . . . . . . . . . . . . . . 265
Media Properties Dialog Box. . . . . . . . . . . . . . . . . . . . . . . . . . . . . . . . . 266
Media Property Page (Media Properties) . . . . . . . . . . . . . . . . . . . . 266
General Property Page (Media Properties) . . . . . . . . . . . . . . . . . . 268
File Info Property Page (Media Properties) . . . . . . . . . . . . . . . . . . 269
Track Patching Property Page (Media Properties) . . . . . . . . . . . . . 270
Mixer . . . . . . . . . . . . . . . . . . . . . . . . . . . . . . . . . . . . . . . . . . . . . . . . . . . 270
Mixer: Standard View . . . . . . . . . . . . . . . . . . . . . . . . . . . . . . . . . . . 271
Mixer: Routing View . . . . . . . . . . . . . . . . . . . . . . . . . . . . . . . . . . . . 273
Mixer Configuration Formats . . . . . . . . . . . . . . . . . . . . . . . . . . . . . 274
Mixer Input Strips . . . . . . . . . . . . . . . . . . . . . . . . . . . . . . . . . . . . . . 275
Mixer Output Strips . . . . . . . . . . . . . . . . . . . . . . . . . . . . . . . . . . . . . 279
Navigation Menu . . . . . . . . . . . . . . . . . . . . . . . . . . . . . . . . . . . . . . . . . . 280
NLE Tools Toolbar . . . . . . . . . . . . . . . . . . . . . . . . . . . . . . . . . . . . . . . . 281
Project Manager . . . . . . . . . . . . . . . . . . . . . . . . . . . . . . . . . . . . . . . . . . 286
Archive Property Page (Project Manager) . . . . . . . . . . . . . . . . . . . 287
Restore Property Page (Project Manager) . . . . . . . . . . . . . . . . . . . 288
Delete Property Page (Project Manager) . . . . . . . . . . . . . . . . . . . . 289
Media Property Page (Project Manager) . . . . . . . . . . . . . . . . . . . . 290
Slip/Slide Mode . . . . . . . . . . . . . . . . . . . . . . . . . . . . . . . . . . . . . . . . . . . 291
Surround Panner. . . . . . . . . . . . . . . . . . . . . . . . . . . . . . . . . . . . . . . . . . 293
Test Pattern. . . . . . . . . . . . . . . . . . . . . . . . . . . . . . . . . . . . . . . . . . . . . . 294
Time Effects . . . . . . . . . . . . . . . . . . . . . . . . . . . . . . . . . . . . . . . . . . . . . 294
8
Page 9

3:2 Contract Property Editor . . . . . . . . . . . . . . . . . . . . . . . . . . . . . 294
3:2 Expand Property Editor . . . . . . . . . . . . . . . . . . . . . . . . . . . . . . 295
Deinterlace Property Editor . . . . . . . . . . . . . . . . . . . . . . . . . . . . . . 295
Interlace Property Editor . . . . . . . . . . . . . . . . . . . . . . . . . . . . . . . . 296
Timewarp (video) Property Editor . . . . . . . . . . . . . . . . . . . . . . . . . 297
Timeline . . . . . . . . . . . . . . . . . . . . . . . . . . . . . . . . . . . . . . . . . . . . . . . . 306
Overview Area of the Timeline . . . . . . . . . . . . . . . . . . . . . . . . . . . . 309
Timeline Controls . . . . . . . . . . . . . . . . . . . . . . . . . . . . . . . . . . . . . . 311
Ruler Menu . . . . . . . . . . . . . . . . . . . . . . . . . . . . . . . . . . . . . . . . . . 312
Timeline Ribbon . . . . . . . . . . . . . . . . . . . . . . . . . . . . . . . . . . . . . . . 313
Track Selector . . . . . . . . . . . . . . . . . . . . . . . . . . . . . . . . . . . . . . . . 314
Track Menu . . . . . . . . . . . . . . . . . . . . . . . . . . . . . . . . . . . . . . . . . . 315
Track Property Editor . . . . . . . . . . . . . . . . . . . . . . . . . . . . . . . . . . . 316
Timeline Navigation Bar . . . . . . . . . . . . . . . . . . . . . . . . . . . . . . . . . 317
Track Effect Menu . . . . . . . . . . . . . . . . . . . . . . . . . . . . . . . . . . . . . 320
Effect Menu . . . . . . . . . . . . . . . . . . . . . . . . . . . . . . . . . . . . . . . . . . 320
Timeline Effect Menu . . . . . . . . . . . . . . . . . . . . . . . . . . . . . . . . . . . 321
Timeline Menu . . . . . . . . . . . . . . . . . . . . . . . . . . . . . . . . . . . . . . . . 322
Timeline Property Editor . . . . . . . . . . . . . . . . . . . . . . . . . . . . . . . . 324
Timeline to Clip Dialog Box . . . . . . . . . . . . . . . . . . . . . . . . . . . . . . . . . 324
Transport Controls . . . . . . . . . . . . . . . . . . . . . . . . . . . . . . . . . . . . . . . . 328
Position Bar Menu . . . . . . . . . . . . . . . . . . . . . . . . . . . . . . . . . . . . . 332
Timecode Boxes (Transport Controls). . . . . . . . . . . . . . . . . . . . . . 332
Timecode Menu . . . . . . . . . . . . . . . . . . . . . . . . . . . . . . . . . . . . . . . 333
Customizing the Transport Controls . . . . . . . . . . . . . . . . . . . . . . . 335
Trim Mode Controls . . . . . . . . . . . . . . . . . . . . . . . . . . . . . . . . . . . . . . . 336
Video Effects . . . . . . . . . . . . . . . . . . . . . . . . . . . . . . . . . . . . . . . . . . . . 337
Fade Property Editor (Video Effect). . . . . . . . . . . . . . . . . . . . . . . . 337
Warp Property Editor . . . . . . . . . . . . . . . . . . . . . . . . . . . . . . . . . . . 339
Viewers. . . . . . . . . . . . . . . . . . . . . . . . . . . . . . . . . . . . . . . . . . . . . . . . . 343
Source and Record Viewers . . . . . . . . . . . . . . . . . . . . . . . . . . . . . 343
Viewer Tools . . . . . . . . . . . . . . . . . . . . . . . . . . . . . . . . . . . . . . . . . 345
Viewer Menu . . . . . . . . . . . . . . . . . . . . . . . . . . . . . . . . . . . . . . . . . 346
Reconnect Viewer Menu . . . . . . . . . . . . . . . . . . . . . . . . . . . . . . . . 349
Configure Viewer Display Menu. . . . . . . . . . . . . . . . . . . . . . . . . . . 349
9
Page 10

Creating Media Archive Dialog Box . . . . . . . . . . . . . . . . . . . . . . . . . . . 351
New Project Dialog Box . . . . . . . . . . . . . . . . . . . . . . . . . . . . . . . . . . . . 353
Open Sequence Dialog Box . . . . . . . . . . . . . . . . . . . . . . . . . . . . . . . . . 360
New Sequence Preferences Dialog Box. . . . . . . . . . . . . . . . . . . . . . . . 360
Open Project Dialog Box. . . . . . . . . . . . . . . . . . . . . . . . . . . . . . . . . . . . 367
Processing Options Dialog Box. . . . . . . . . . . . . . . . . . . . . . . . . . . . . . . 368
Purge Dialog Box . . . . . . . . . . . . . . . . . . . . . . . . . . . . . . . . . . . . . . . . . 373
Sample Rate Conversion Options. . . . . . . . . . . . . . . . . . . . . . . . . . . . . 377
Save Sequence Dialog Box . . . . . . . . . . . . . . . . . . . . . . . . . . . . . . . . . 378
Save Snapshot Dialog Box . . . . . . . . . . . . . . . . . . . . . . . . . . . . . . . . . . 378
Sequence Preferences Dialog Box . . . . . . . . . . . . . . . . . . . . . . . . . . . . 379
Video Property Page (Sequence Preferences). . . . . . . . . . . . . . . . 379
Audio Property Page (Sequence Preferences). . . . . . . . . . . . . . . . 386
Sequence View Menu . . . . . . . . . . . . . . . . . . . . . . . . . . . . . . . . . . . . . . 387
Throttle Manager Service . . . . . . . . . . . . . . . . . . . . . . . . . . . . . . . . . . . 388
Cache Menu . . . . . . . . . . . . . . . . . . . . . . . . . . . . . . . . . . . . . . . . . . . . . 389
Cache Node Menu . . . . . . . . . . . . . . . . . . . . . . . . . . . . . . . . . . . . . . . . 391
Data Management Menu. . . . . . . . . . . . . . . . . . . . . . . . . . . . . . . . . . . . 393
Edit View Menu . . . . . . . . . . . . . . . . . . . . . . . . . . . . . . . . . . . . . . . . . . . 394
Edit Menu . . . . . . . . . . . . . . . . . . . . . . . . . . . . . . . . . . . . . . . . . . . . . . . 395
File Menu . . . . . . . . . . . . . . . . . . . . . . . . . . . . . . . . . . . . . . . . . . . . . . . 396
Swift Menu . . . . . . . . . . . . . . . . . . . . . . . . . . . . . . . . . . . . . . . . . . . . . . 397
Avid DS RP Project List . . . . . . . . . . . . . . . . . . . . . . . . . . . . . . . . . . . . 400
Web Viewer. . . . . . . . . . . . . . . . . . . . . . . . . . . . . . . . . . . . . . . . . . . . . . 401
Avid Event Log . . . . . . . . . . . . . . . . . . . . . . . . . . . . . . . . . . . . . . . . . . . 402
Avid Event Log Menu . . . . . . . . . . . . . . . . . . . . . . . . . . . . . . . . . . . 403
Event Types . . . . . . . . . . . . . . . . . . . . . . . . . . . . . . . . . . . . . . . . . . 403
Avid Event Log Settings Dialog Box . . . . . . . . . . . . . . . . . . . . . . . . 404
Avid DS RP . . . . . . . . . . . . . . . . . . . . . . . . . . . . . . . . . . . . . . . . . . . . . . 405
Avid DS RP Project List . . . . . . . . . . . . . . . . . . . . . . . . . . . . . . . . . . . . 406
10
Chapter 4 Paint & Titling Reference . . . . . . . . . . . . . . . . . . . . . . . . . . . . 407
Graphics Layout . . . . . . . . . . . . . . . . . . . . . . . . . . . . . . . . . . . . . . . . . . 408
The Graphics Combo View. . . . . . . . . . . . . . . . . . . . . . . . . . . . . . . 409
Graphics Property Tree. . . . . . . . . . . . . . . . . . . . . . . . . . . . . . . . . . . . . 410
Page 11

Navigating the Graphics Property Tree . . . . . . . . . . . . . . . . . . . . . 410
Using the Pop-up Menu . . . . . . . . . . . . . . . . . . . . . . . . . . . . . . . . . 411
Paint Menu. . . . . . . . . . . . . . . . . . . . . . . . . . . . . . . . . . . . . . . . . . . 411
Graphics Combo View . . . . . . . . . . . . . . . . . . . . . . . . . . . . . . . . . . . . . 412
Graphics Object View (GOV) . . . . . . . . . . . . . . . . . . . . . . . . . . . . . . . . 413
Changing the Time Scale. . . . . . . . . . . . . . . . . . . . . . . . . . . . . . . . 415
Viewing Graphics Objects . . . . . . . . . . . . . . . . . . . . . . . . . . . . . . . 415
Manipulating Graphics Objects . . . . . . . . . . . . . . . . . . . . . . . . . . . 416
Graphics Bar Menu . . . . . . . . . . . . . . . . . . . . . . . . . . . . . . . . . . . . 421
Graphics Object View Menu . . . . . . . . . . . . . . . . . . . . . . . . . . . . . 422
Save Raster Paint Log Menu . . . . . . . . . . . . . . . . . . . . . . . . . . . . . 422
Graphics Toolbars . . . . . . . . . . . . . . . . . . . . . . . . . . . . . . . . . . . . . . . . 423
General (graphics) Toolbar . . . . . . . . . . . . . . . . . . . . . . . . . . . . . . 423
General 2 Toolbar . . . . . . . . . . . . . . . . . . . . . . . . . . . . . . . . . . . . . 427
Tools Toolbar . . . . . . . . . . . . . . . . . . . . . . . . . . . . . . . . . . . . . . . . . 428
Bas Relief Brush. . . . . . . . . . . . . . . . . . . . . . . . . . . . . . . . . . . . . . . . . . 436
Brush . . . . . . . . . . . . . . . . . . . . . . . . . . . . . . . . . . . . . . . . . . . . . . . . . . 437
Chrome Brush . . . . . . . . . . . . . . . . . . . . . . . . . . . . . . . . . . . . . . . . . . . 438
Clip Holder . . . . . . . . . . . . . . . . . . . . . . . . . . . . . . . . . . . . . . . . . . . . . . 439
Clone . . . . . . . . . . . . . . . . . . . . . . . . . . . . . . . . . . . . . . . . . . . . . . . . . . 441
Color Blend. . . . . . . . . . . . . . . . . . . . . . . . . . . . . . . . . . . . . . . . . . . . . . 442
Type Property Page . . . . . . . . . . . . . . . . . . . . . . . . . . . . . . . . . . . . 442
Cutout. . . . . . . . . . . . . . . . . . . . . . . . . . . . . . . . . . . . . . . . . . . . . . . . . . 444
Dodge and Burn . . . . . . . . . . . . . . . . . . . . . . . . . . . . . . . . . . . . . . . . . . 445
Main Property Page . . . . . . . . . . . . . . . . . . . . . . . . . . . . . . . . . . . . 445
Range Property Page . . . . . . . . . . . . . . . . . . . . . . . . . . . . . . . . . . 446
Edit Shape . . . . . . . . . . . . . . . . . . . . . . . . . . . . . . . . . . . . . . . . . . . . . . 447
General Property Page . . . . . . . . . . . . . . . . . . . . . . . . . . . . . . . . . 447
Tracker Property Page. . . . . . . . . . . . . . . . . . . . . . . . . . . . . . . . . . 449
Edit Text . . . . . . . . . . . . . . . . . . . . . . . . . . . . . . . . . . . . . . . . . . . . . . . . 452
Ellipse. . . . . . . . . . . . . . . . . . . . . . . . . . . . . . . . . . . . . . . . . . . . . . . . . . 452
Erase . . . . . . . . . . . . . . . . . . . . . . . . . . . . . . . . . . . . . . . . . . . . . . . . . . 452
Font . . . . . . . . . . . . . . . . . . . . . . . . . . . . . . . . . . . . . . . . . . . . . . . . . . . 453
Freehand . . . . . . . . . . . . . . . . . . . . . . . . . . . . . . . . . . . . . . . . . . . . . . . 455
Glass Brush . . . . . . . . . . . . . . . . . . . . . . . . . . . . . . . . . . . . . . . . . . . . . 456
11
Page 12

Graphics Properties . . . . . . . . . . . . . . . . . . . . . . . . . . . . . . . . . . . . . . . 456
General Property Page . . . . . . . . . . . . . . . . . . . . . . . . . . . . . . . . . . 456
Raster Mode Property Page . . . . . . . . . . . . . . . . . . . . . . . . . . . . . . 459
Options Property Page . . . . . . . . . . . . . . . . . . . . . . . . . . . . . . . . . . 460
Group . . . . . . . . . . . . . . . . . . . . . . . . . . . . . . . . . . . . . . . . . . . . . . . . . . 462
Magic Wand . . . . . . . . . . . . . . . . . . . . . . . . . . . . . . . . . . . . . . . . . . . . . 463
Masks . . . . . . . . . . . . . . . . . . . . . . . . . . . . . . . . . . . . . . . . . . . . . . . . . . 464
General Property Page . . . . . . . . . . . . . . . . . . . . . . . . . . . . . . . . . . 465
Paper Grain Property Page . . . . . . . . . . . . . . . . . . . . . . . . . . . . . . 466
Paint Style . . . . . . . . . . . . . . . . . . . . . . . . . . . . . . . . . . . . . . . . . . . . . . . 467
Polyline . . . . . . . . . . . . . . . . . . . . . . . . . . . . . . . . . . . . . . . . . . . . . . . . . 469
Rectangle . . . . . . . . . . . . . . . . . . . . . . . . . . . . . . . . . . . . . . . . . . . . . . . 469
Reshaper. . . . . . . . . . . . . . . . . . . . . . . . . . . . . . . . . . . . . . . . . . . . . . . . 470
Reshaper Tool Shortcuts . . . . . . . . . . . . . . . . . . . . . . . . . . . . . . . . 470
Reshaper Property Page . . . . . . . . . . . . . . . . . . . . . . . . . . . . . . . . 471
Reshaping a Stroke . . . . . . . . . . . . . . . . . . . . . . . . . . . . . . . . . . . . 472
Reveal. . . . . . . . . . . . . . . . . . . . . . . . . . . . . . . . . . . . . . . . . . . . . . . . . . 476
Smear . . . . . . . . . . . . . . . . . . . . . . . . . . . . . . . . . . . . . . . . . . . . . . . . . . 477
Special Effect . . . . . . . . . . . . . . . . . . . . . . . . . . . . . . . . . . . . . . . . . . . . 477
Stack Effect . . . . . . . . . . . . . . . . . . . . . . . . . . . . . . . . . . . . . . . . . . . . . . 478
Stroke . . . . . . . . . . . . . . . . . . . . . . . . . . . . . . . . . . . . . . . . . . . . . . . . . . 478
Text . . . . . . . . . . . . . . . . . . . . . . . . . . . . . . . . . . . . . . . . . . . . . . . . . . . . 479
Textured Brush . . . . . . . . . . . . . . . . . . . . . . . . . . . . . . . . . . . . . . . . . . . 480
Time Span (Graphics) . . . . . . . . . . . . . . . . . . . . . . . . . . . . . . . . . . . . . . 481
Titling Body . . . . . . . . . . . . . . . . . . . . . . . . . . . . . . . . . . . . . . . . . . . . . . 483
Titling Style . . . . . . . . . . . . . . . . . . . . . . . . . . . . . . . . . . . . . . . . . . . . . . 485
Transformations . . . . . . . . . . . . . . . . . . . . . . . . . . . . . . . . . . . . . . . . . . 487
Color Editor Dialog Box. . . . . . . . . . . . . . . . . . . . . . . . . . . . . . . . . . . . . 489
Mini Color Editor . . . . . . . . . . . . . . . . . . . . . . . . . . . . . . . . . . . . . . . . . . 492
Import Image Dialog Box. . . . . . . . . . . . . . . . . . . . . . . . . . . . . . . . . . . . 495
12
Chapter 5 3D DVE and 3D Titling Reference. . . . . . . . . . . . . . . . . . . . . . 497
3D DVE Layout . . . . . . . . . . . . . . . . . . . . . . . . . . . . . . . . . . . . . . . . . . . 498
3D DVE Toolbar . . . . . . . . . . . . . . . . . . . . . . . . . . . . . . . . . . . . . . . 499
3D DVE Layers Toolbar . . . . . . . . . . . . . . . . . . . . . . . . . . . . . . . . . 504
Page 13

3D DVE Property Editors Toolbar . . . . . . . . . . . . . . . . . . . . . . . . . 505
3D DVE Combo View . . . . . . . . . . . . . . . . . . . . . . . . . . . . . . . . . . . . . . 507
3D DVE Object View (3D OV) . . . . . . . . . . . . . . . . . . . . . . . . . . . . . . . 508
Selecting and Deselecting Objects . . . . . . . . . . . . . . . . . . . . . . . . 509
Hiding and Showing Objects . . . . . . . . . . . . . . . . . . . . . . . . . . . . . 509
Changing an Object’s Duration . . . . . . . . . . . . . . . . . . . . . . . . . . . 510
Collapsing and Expanding Views. . . . . . . . . . . . . . . . . . . . . . . . . . 510
Zooming and Panning in the 3D DVE Object View . . . . . . . . . . . . 511
3D DVE Layers Menu . . . . . . . . . . . . . . . . . . . . . . . . . . . . . . . . . . 511
3D DVE Object View Menu . . . . . . . . . . . . . . . . . . . . . . . . . . . . . . 513
3D DVE Page Menu. . . . . . . . . . . . . . . . . . . . . . . . . . . . . . . . . . . . 513
3D DVE Layers . . . . . . . . . . . . . . . . . . . . . . . . . . . . . . . . . . . . . . . 514
Creating and Deleting 3D DVE Layers . . . . . . . . . . . . . . . . . . . . . 515
Reordering 3D DVE Layers . . . . . . . . . . . . . . . . . . . . . . . . . . . . . . 516
Showing and Hiding 3D DVE Layers . . . . . . . . . . . . . . . . . . . . . . . 516
Changing a 3D DVE Layer’s Type . . . . . . . . . . . . . . . . . . . . . . . . . 517
Renaming 3D DVE Layers . . . . . . . . . . . . . . . . . . . . . . . . . . . . . . . 517
Manipulating Objects in 3D DVE Layers . . . . . . . . . . . . . . . . . . . . 518
Viewing a 3D DVE Layer from Different Sides. . . . . . . . . . . . . . . . 520
3D DVE Page (Viewer) Menu . . . . . . . . . . . . . . . . . . . . . . . . . . . . 521
Light Menu . . . . . . . . . . . . . . . . . . . . . . . . . . . . . . . . . . . . . . . . . . . 521
Rotate Menu . . . . . . . . . . . . . . . . . . . . . . . . . . . . . . . . . . . . . . . . . 522
Shape Menu. . . . . . . . . . . . . . . . . . . . . . . . . . . . . . . . . . . . . . . . . . 523
Text Menu . . . . . . . . . . . . . . . . . . . . . . . . . . . . . . . . . . . . . . . . . . . 524
Effects. . . . . . . . . . . . . . . . . . . . . . . . . . . . . . . . . . . . . . . . . . . . . . . . . . 526
Effect . . . . . . . . . . . . . . . . . . . . . . . . . . . . . . . . . . . . . . . . . . . . . . . 526
Info . . . . . . . . . . . . . . . . . . . . . . . . . . . . . . . . . . . . . . . . . . . . . . . . . 527
Light . . . . . . . . . . . . . . . . . . . . . . . . . . . . . . . . . . . . . . . . . . . . . . . . 527
Paragraph . . . . . . . . . . . . . . . . . . . . . . . . . . . . . . . . . . . . . . . . . . . 529
Render . . . . . . . . . . . . . . . . . . . . . . . . . . . . . . . . . . . . . . . . . . . . . . 530
Shadow . . . . . . . . . . . . . . . . . . . . . . . . . . . . . . . . . . . . . . . . . . . . . 530
Surfaces. . . . . . . . . . . . . . . . . . . . . . . . . . . . . . . . . . . . . . . . . . . . . 532
Time Span (3D DVE) . . . . . . . . . . . . . . . . . . . . . . . . . . . . . . . . . . . 537
3D DVE . . . . . . . . . . . . . . . . . . . . . . . . . . . . . . . . . . . . . . . . . . . . . 538
3D DVE/Options. . . . . . . . . . . . . . . . . . . . . . . . . . . . . . . . . . . . . . . 541
13
Page 14

Camera. . . . . . . . . . . . . . . . . . . . . . . . . . . . . . . . . . . . . . . . . . . . . . 546
Path . . . . . . . . . . . . . . . . . . . . . . . . . . . . . . . . . . . . . . . . . . . . . . . . 547
Transform . . . . . . . . . . . . . . . . . . . . . . . . . . . . . . . . . . . . . . . . . . . . 548
Chapter 6 Image Effects Reference. . . . . . . . . . . . . . . . . . . . . . . . . . . . . 549
3D Warp . . . . . . . . . . . . . . . . . . . . . . . . . . . . . . . . . . . . . . . . . . . . . . . . 550
General Property Page . . . . . . . . . . . . . . . . . . . . . . . . . . . . . . . . . . 550
Timing Property Page . . . . . . . . . . . . . . . . . . . . . . . . . . . . . . . . . . . 553
Generic Property Page . . . . . . . . . . . . . . . . . . . . . . . . . . . . . . . . . . 554
Source Property Page . . . . . . . . . . . . . . . . . . . . . . . . . . . . . . . . . . 555
Accented Edges . . . . . . . . . . . . . . . . . . . . . . . . . . . . . . . . . . . . . . . . . . 556
Accented Edges Property Page . . . . . . . . . . . . . . . . . . . . . . . . . . . 556
Angled Strokes . . . . . . . . . . . . . . . . . . . . . . . . . . . . . . . . . . . . . . . . . . . 557
Angled Strokes Property Page . . . . . . . . . . . . . . . . . . . . . . . . . . . . 557
Bas Relief . . . . . . . . . . . . . . . . . . . . . . . . . . . . . . . . . . . . . . . . . . . . . . . 558
Bas Relief Property Page . . . . . . . . . . . . . . . . . . . . . . . . . . . . . . . . 558
Blur . . . . . . . . . . . . . . . . . . . . . . . . . . . . . . . . . . . . . . . . . . . . . . . . . . . . 559
General Property Page . . . . . . . . . . . . . . . . . . . . . . . . . . . . . . . . . . 559
Bubble. . . . . . . . . . . . . . . . . . . . . . . . . . . . . . . . . . . . . . . . . . . . . . . . . . 561
General Property Page . . . . . . . . . . . . . . . . . . . . . . . . . . . . . . . . . . 561
Chalk and Charcoal. . . . . . . . . . . . . . . . . . . . . . . . . . . . . . . . . . . . . . . . 562
Chalk and Charcoal Property Page . . . . . . . . . . . . . . . . . . . . . . . . 562
Channel Switcher . . . . . . . . . . . . . . . . . . . . . . . . . . . . . . . . . . . . . . . . . 563
General Property Page . . . . . . . . . . . . . . . . . . . . . . . . . . . . . . . . . . 563
Charcoal . . . . . . . . . . . . . . . . . . . . . . . . . . . . . . . . . . . . . . . . . . . . . . . . 565
Charcoal Property Page . . . . . . . . . . . . . . . . . . . . . . . . . . . . . . . . . 565
Chrome . . . . . . . . . . . . . . . . . . . . . . . . . . . . . . . . . . . . . . . . . . . . . . . . . 566
Chrome Property Page . . . . . . . . . . . . . . . . . . . . . . . . . . . . . . . . . . 566
Clouds. . . . . . . . . . . . . . . . . . . . . . . . . . . . . . . . . . . . . . . . . . . . . . . . . . 567
Color Gradient. . . . . . . . . . . . . . . . . . . . . . . . . . . . . . . . . . . . . . . . . . . . 568
Color Gradient Property Page . . . . . . . . . . . . . . . . . . . . . . . . . . . . 568
Color Space Adjustment . . . . . . . . . . . . . . . . . . . . . . . . . . . . . . . . . . . . 570
General Property Page . . . . . . . . . . . . . . . . . . . . . . . . . . . . . . . . . . 570
Colored Pencil. . . . . . . . . . . . . . . . . . . . . . . . . . . . . . . . . . . . . . . . . . . . 571
Colored Pencil Property Page . . . . . . . . . . . . . . . . . . . . . . . . . . . . 571
14
Page 15

Conte Crayon . . . . . . . . . . . . . . . . . . . . . . . . . . . . . . . . . . . . . . . . . . . . 572
Conte Crayon Property Page . . . . . . . . . . . . . . . . . . . . . . . . . . . . . 572
Craquelure . . . . . . . . . . . . . . . . . . . . . . . . . . . . . . . . . . . . . . . . . . . . . . 574
Craquelure Property Page . . . . . . . . . . . . . . . . . . . . . . . . . . . . . . . 574
Crop . . . . . . . . . . . . . . . . . . . . . . . . . . . . . . . . . . . . . . . . . . . . . . . . . . . 574
Crosshatch . . . . . . . . . . . . . . . . . . . . . . . . . . . . . . . . . . . . . . . . . . . . . . 575
Crosshatch Property Page . . . . . . . . . . . . . . . . . . . . . . . . . . . . . . . 575
Custom Filter . . . . . . . . . . . . . . . . . . . . . . . . . . . . . . . . . . . . . . . . . . . . 575
General Property Page . . . . . . . . . . . . . . . . . . . . . . . . . . . . . . . . . 576
Cutout. . . . . . . . . . . . . . . . . . . . . . . . . . . . . . . . . . . . . . . . . . . . . . . . . . 577
Cutout Property Page . . . . . . . . . . . . . . . . . . . . . . . . . . . . . . . . . . 577
Dark Strokes. . . . . . . . . . . . . . . . . . . . . . . . . . . . . . . . . . . . . . . . . . . . . 578
Dark Strokes Property Page . . . . . . . . . . . . . . . . . . . . . . . . . . . . . 578
Defield . . . . . . . . . . . . . . . . . . . . . . . . . . . . . . . . . . . . . . . . . . . . . . . . . 579
General Property Page . . . . . . . . . . . . . . . . . . . . . . . . . . . . . . . . . 579
Deflicker . . . . . . . . . . . . . . . . . . . . . . . . . . . . . . . . . . . . . . . . . . . . . . . . 580
Black Property Page . . . . . . . . . . . . . . . . . . . . . . . . . . . . . . . . . . . 580
White Property Page . . . . . . . . . . . . . . . . . . . . . . . . . . . . . . . . . . . 581
Depth of Field . . . . . . . . . . . . . . . . . . . . . . . . . . . . . . . . . . . . . . . . . . . . 582
Depth of Field Property Page. . . . . . . . . . . . . . . . . . . . . . . . . . . . . 582
External Data Property Page . . . . . . . . . . . . . . . . . . . . . . . . . . . . . 583
Deterministic Noise. . . . . . . . . . . . . . . . . . . . . . . . . . . . . . . . . . . . . . . . 584
Deterministic Noise Property Page . . . . . . . . . . . . . . . . . . . . . . . . 584
Diffuse Glow . . . . . . . . . . . . . . . . . . . . . . . . . . . . . . . . . . . . . . . . . . . . . 586
Diffuse Glow Property Page. . . . . . . . . . . . . . . . . . . . . . . . . . . . . . 586
Dip to Color. . . . . . . . . . . . . . . . . . . . . . . . . . . . . . . . . . . . . . . . . . . . . . 587
Timing Property Page . . . . . . . . . . . . . . . . . . . . . . . . . . . . . . . . . . 587
Drop Shadow . . . . . . . . . . . . . . . . . . . . . . . . . . . . . . . . . . . . . . . . . . . . 589
General Property Page . . . . . . . . . . . . . . . . . . . . . . . . . . . . . . . . . 589
Dry Brush . . . . . . . . . . . . . . . . . . . . . . . . . . . . . . . . . . . . . . . . . . . . . . . 590
Dry Brush Property Page . . . . . . . . . . . . . . . . . . . . . . . . . . . . . . . . 590
Edge . . . . . . . . . . . . . . . . . . . . . . . . . . . . . . . . . . . . . . . . . . . . . . . . . . . 591
General Property Page . . . . . . . . . . . . . . . . . . . . . . . . . . . . . . . . . 591
Emboss Image . . . . . . . . . . . . . . . . . . . . . . . . . . . . . . . . . . . . . . . . . . . 592
Emboss Image Property Page . . . . . . . . . . . . . . . . . . . . . . . . . . . . 592
15
Page 16

Field Invert . . . . . . . . . . . . . . . . . . . . . . . . . . . . . . . . . . . . . . . . . . . . . . 593
General Property Page . . . . . . . . . . . . . . . . . . . . . . . . . . . . . . . . . . 593
Film . . . . . . . . . . . . . . . . . . . . . . . . . . . . . . . . . . . . . . . . . . . . . . . . . . . . 593
General Property Page . . . . . . . . . . . . . . . . . . . . . . . . . . . . . . . . . . 593
RGB Curves Property Page . . . . . . . . . . . . . . . . . . . . . . . . . . . . . . 595
Film Grain . . . . . . . . . . . . . . . . . . . . . . . . . . . . . . . . . . . . . . . . . . . . . . . 595
Film Grain Property Page . . . . . . . . . . . . . . . . . . . . . . . . . . . . . . . . 596
Fog . . . . . . . . . . . . . . . . . . . . . . . . . . . . . . . . . . . . . . . . . . . . . . . . . . . . 596
Fog Property Page . . . . . . . . . . . . . . . . . . . . . . . . . . . . . . . . . . . . . 596
External Data Property Page . . . . . . . . . . . . . . . . . . . . . . . . . . . . . 597
Fractal Noise . . . . . . . . . . . . . . . . . . . . . . . . . . . . . . . . . . . . . . . . . . . . . 598
Settings Property Page. . . . . . . . . . . . . . . . . . . . . . . . . . . . . . . . . . 598
Transform Property Page . . . . . . . . . . . . . . . . . . . . . . . . . . . . . . . . 599
Colors Property Page . . . . . . . . . . . . . . . . . . . . . . . . . . . . . . . . . . . 601
Frame Average . . . . . . . . . . . . . . . . . . . . . . . . . . . . . . . . . . . . . . . . . . . 602
General Property Page . . . . . . . . . . . . . . . . . . . . . . . . . . . . . . . . . . 603
Fresco . . . . . . . . . . . . . . . . . . . . . . . . . . . . . . . . . . . . . . . . . . . . . . . . . . 604
Fresco Property Page. . . . . . . . . . . . . . . . . . . . . . . . . . . . . . . . . . . 604
Glass. . . . . . . . . . . . . . . . . . . . . . . . . . . . . . . . . . . . . . . . . . . . . . . . . . . 605
Glass Property Page . . . . . . . . . . . . . . . . . . . . . . . . . . . . . . . . . . . 605
Glowing Edges . . . . . . . . . . . . . . . . . . . . . . . . . . . . . . . . . . . . . . . . . . . 606
Glowing Edges Property Page . . . . . . . . . . . . . . . . . . . . . . . . . . . . 606
Grain . . . . . . . . . . . . . . . . . . . . . . . . . . . . . . . . . . . . . . . . . . . . . . . . . . . 607
Grain Property Page . . . . . . . . . . . . . . . . . . . . . . . . . . . . . . . . . . . . 607
Granite . . . . . . . . . . . . . . . . . . . . . . . . . . . . . . . . . . . . . . . . . . . . . . . . . 608
Graphic Pen . . . . . . . . . . . . . . . . . . . . . . . . . . . . . . . . . . . . . . . . . . . . . 609
Graphic Pen Property Page . . . . . . . . . . . . . . . . . . . . . . . . . . . . . . 609
Halftone Screen . . . . . . . . . . . . . . . . . . . . . . . . . . . . . . . . . . . . . . . . . . 610
Halftone Screen Property Page . . . . . . . . . . . . . . . . . . . . . . . . . . . 610
Impressionist Effects . . . . . . . . . . . . . . . . . . . . . . . . . . . . . . . . . . . . . . . 611
Brush Property Page . . . . . . . . . . . . . . . . . . . . . . . . . . . . . . . . . . . 611
Plot Property Page . . . . . . . . . . . . . . . . . . . . . . . . . . . . . . . . . . . . . 616
Size Property Page. . . . . . . . . . . . . . . . . . . . . . . . . . . . . . . . . . . . . 617
Color Property Page . . . . . . . . . . . . . . . . . . . . . . . . . . . . . . . . . . . . 620
Paper Property Page . . . . . . . . . . . . . . . . . . . . . . . . . . . . . . . . . . . 622
16
Page 17

Ink Outlines. . . . . . . . . . . . . . . . . . . . . . . . . . . . . . . . . . . . . . . . . . . . . . 623
Ink Outlines Property Page . . . . . . . . . . . . . . . . . . . . . . . . . . . . . . 623
Linear Gradient. . . . . . . . . . . . . . . . . . . . . . . . . . . . . . . . . . . . . . . . . . . 624
Properties Property Page. . . . . . . . . . . . . . . . . . . . . . . . . . . . . . . . 624
Marble. . . . . . . . . . . . . . . . . . . . . . . . . . . . . . . . . . . . . . . . . . . . . . . . . . 627
Morph . . . . . . . . . . . . . . . . . . . . . . . . . . . . . . . . . . . . . . . . . . . . . . . . . . 628
Shapes Property Page. . . . . . . . . . . . . . . . . . . . . . . . . . . . . . . . . . 628
Render Property Page . . . . . . . . . . . . . . . . . . . . . . . . . . . . . . . . . . 630
Mosaic . . . . . . . . . . . . . . . . . . . . . . . . . . . . . . . . . . . . . . . . . . . . . . . . . 632
Mosaic Property Page . . . . . . . . . . . . . . . . . . . . . . . . . . . . . . . . . . 632
Motion Blur . . . . . . . . . . . . . . . . . . . . . . . . . . . . . . . . . . . . . . . . . . . . . . 633
Motion Blur Property Page . . . . . . . . . . . . . . . . . . . . . . . . . . . . . . . 633
Negative . . . . . . . . . . . . . . . . . . . . . . . . . . . . . . . . . . . . . . . . . . . . . . . . 635
Neon Glow . . . . . . . . . . . . . . . . . . . . . . . . . . . . . . . . . . . . . . . . . . . . . . 635
Neon Glow Property Page . . . . . . . . . . . . . . . . . . . . . . . . . . . . . . . 635
Noise/Grain Remover . . . . . . . . . . . . . . . . . . . . . . . . . . . . . . . . . . . . . . 637
General Property Page . . . . . . . . . . . . . . . . . . . . . . . . . . . . . . . . . 637
Note Paper . . . . . . . . . . . . . . . . . . . . . . . . . . . . . . . . . . . . . . . . . . . . . . 639
Note Paper Property Page . . . . . . . . . . . . . . . . . . . . . . . . . . . . . . . 639
Optical Glow . . . . . . . . . . . . . . . . . . . . . . . . . . . . . . . . . . . . . . . . . . . . . 640
General Property Page . . . . . . . . . . . . . . . . . . . . . . . . . . . . . . . . . 640
Black Diffusion Property Page . . . . . . . . . . . . . . . . . . . . . . . . . . . . 641
White Diffusion Property Page . . . . . . . . . . . . . . . . . . . . . . . . . . . . 642
Outsource. . . . . . . . . . . . . . . . . . . . . . . . . . . . . . . . . . . . . . . . . . . . . . . 644
General Property Page . . . . . . . . . . . . . . . . . . . . . . . . . . . . . . . . . 644
Paint Daubs . . . . . . . . . . . . . . . . . . . . . . . . . . . . . . . . . . . . . . . . . . . . . 645
Paint Daubs Property Page . . . . . . . . . . . . . . . . . . . . . . . . . . . . . . 646
Palette Knife . . . . . . . . . . . . . . . . . . . . . . . . . . . . . . . . . . . . . . . . . . . . . 646
Palette Knife Property Page. . . . . . . . . . . . . . . . . . . . . . . . . . . . . . 647
Patchwork. . . . . . . . . . . . . . . . . . . . . . . . . . . . . . . . . . . . . . . . . . . . . . . 648
Patchwork Property Page . . . . . . . . . . . . . . . . . . . . . . . . . . . . . . . 648
Pattern . . . . . . . . . . . . . . . . . . . . . . . . . . . . . . . . . . . . . . . . . . . . . . . . . 649
Photocopy. . . . . . . . . . . . . . . . . . . . . . . . . . . . . . . . . . . . . . . . . . . . . . . 650
Photocopy Property Page . . . . . . . . . . . . . . . . . . . . . . . . . . . . . . . 650
Picture-in-Picture . . . . . . . . . . . . . . . . . . . . . . . . . . . . . . . . . . . . . . . . . 651
17
Page 18

Plaster. . . . . . . . . . . . . . . . . . . . . . . . . . . . . . . . . . . . . . . . . . . . . . . . . . 652
Plaster Property Page . . . . . . . . . . . . . . . . . . . . . . . . . . . . . . . . . . 652
Plastic Wrap . . . . . . . . . . . . . . . . . . . . . . . . . . . . . . . . . . . . . . . . . . . . . 653
Plastic Wrap Property Page . . . . . . . . . . . . . . . . . . . . . . . . . . . . . . 653
Creating Altered Polaroid Photos . . . . . . . . . . . . . . . . . . . . . . . . . . 653
Polar Coordinates . . . . . . . . . . . . . . . . . . . . . . . . . . . . . . . . . . . . . . . . . 654
Poster Edges. . . . . . . . . . . . . . . . . . . . . . . . . . . . . . . . . . . . . . . . . . . . . 654
Poster Edges Property Page . . . . . . . . . . . . . . . . . . . . . . . . . . . . . 655
Posterize . . . . . . . . . . . . . . . . . . . . . . . . . . . . . . . . . . . . . . . . . . . . . . . . 655
General Property Page . . . . . . . . . . . . . . . . . . . . . . . . . . . . . . . . . . 656
Premultiplication . . . . . . . . . . . . . . . . . . . . . . . . . . . . . . . . . . . . . . . . . . 657
General Property Page . . . . . . . . . . . . . . . . . . . . . . . . . . . . . . . . . . 657
Radial Blur. . . . . . . . . . . . . . . . . . . . . . . . . . . . . . . . . . . . . . . . . . . . . . . 658
Radial Blur Property Page . . . . . . . . . . . . . . . . . . . . . . . . . . . . . . . 658
Radial Gradient . . . . . . . . . . . . . . . . . . . . . . . . . . . . . . . . . . . . . . . . . . . 660
Properties Property Page . . . . . . . . . . . . . . . . . . . . . . . . . . . . . . . . 660
Reticulation . . . . . . . . . . . . . . . . . . . . . . . . . . . . . . . . . . . . . . . . . . . . . . 663
Reticulation Property Page . . . . . . . . . . . . . . . . . . . . . . . . . . . . . . . 663
Ripple . . . . . . . . . . . . . . . . . . . . . . . . . . . . . . . . . . . . . . . . . . . . . . . . . . 664
Ripple Property Page . . . . . . . . . . . . . . . . . . . . . . . . . . . . . . . . . . . 664
RGB-YUV Dither . . . . . . . . . . . . . . . . . . . . . . . . . . . . . . . . . . . . . . . . . . 665
Rough Pastels. . . . . . . . . . . . . . . . . . . . . . . . . . . . . . . . . . . . . . . . . . . . 665
Rough Pastels Property Page . . . . . . . . . . . . . . . . . . . . . . . . . . . . 666
Scatter Noise. . . . . . . . . . . . . . . . . . . . . . . . . . . . . . . . . . . . . . . . . . . . . 667
Scatter Noise Property Page . . . . . . . . . . . . . . . . . . . . . . . . . . . . . 667
Sharpen. . . . . . . . . . . . . . . . . . . . . . . . . . . . . . . . . . . . . . . . . . . . . . . . . 669
General Property Page . . . . . . . . . . . . . . . . . . . . . . . . . . . . . . . . . . 669
Smudge Stick . . . . . . . . . . . . . . . . . . . . . . . . . . . . . . . . . . . . . . . . . . . . 670
Smudge Stick Property Page . . . . . . . . . . . . . . . . . . . . . . . . . . . . . 670
Solarize . . . . . . . . . . . . . . . . . . . . . . . . . . . . . . . . . . . . . . . . . . . . . . . . . 671
General Property Page . . . . . . . . . . . . . . . . . . . . . . . . . . . . . . . . . . 671
Solid Color. . . . . . . . . . . . . . . . . . . . . . . . . . . . . . . . . . . . . . . . . . . . . . . 672
Spatter. . . . . . . . . . . . . . . . . . . . . . . . . . . . . . . . . . . . . . . . . . . . . . . . . . 672
Spatter Property Page . . . . . . . . . . . . . . . . . . . . . . . . . . . . . . . . . . 673
Special Filter . . . . . . . . . . . . . . . . . . . . . . . . . . . . . . . . . . . . . . . . . . . . . 673
18
Page 19

General Property Page . . . . . . . . . . . . . . . . . . . . . . . . . . . . . . . . . 673
Spherize . . . . . . . . . . . . . . . . . . . . . . . . . . . . . . . . . . . . . . . . . . . . . . . . 674
Spherize Property Page. . . . . . . . . . . . . . . . . . . . . . . . . . . . . . . . . 674
Spill Correction . . . . . . . . . . . . . . . . . . . . . . . . . . . . . . . . . . . . . . . . . . . 675
Spill Property Page . . . . . . . . . . . . . . . . . . . . . . . . . . . . . . . . . . . . 675
Sponge . . . . . . . . . . . . . . . . . . . . . . . . . . . . . . . . . . . . . . . . . . . . . . . . . 676
Sponge Property Page. . . . . . . . . . . . . . . . . . . . . . . . . . . . . . . . . . 676
Sprayed Strokes. . . . . . . . . . . . . . . . . . . . . . . . . . . . . . . . . . . . . . . . . . 677
Sprayed Strokes Property Page . . . . . . . . . . . . . . . . . . . . . . . . . . 677
Stained Glass . . . . . . . . . . . . . . . . . . . . . . . . . . . . . . . . . . . . . . . . . . . . 678
Stained Glass Property Page. . . . . . . . . . . . . . . . . . . . . . . . . . . . . 678
Stamp . . . . . . . . . . . . . . . . . . . . . . . . . . . . . . . . . . . . . . . . . . . . . . . . . . 680
Stamp Property Page. . . . . . . . . . . . . . . . . . . . . . . . . . . . . . . . . . . 680
Sumi-e . . . . . . . . . . . . . . . . . . . . . . . . . . . . . . . . . . . . . . . . . . . . . . . . . 681
Sumi-e Property Page . . . . . . . . . . . . . . . . . . . . . . . . . . . . . . . . . . 681
Texturizer . . . . . . . . . . . . . . . . . . . . . . . . . . . . . . . . . . . . . . . . . . . . . . . 681
Texturizer Property Page . . . . . . . . . . . . . . . . . . . . . . . . . . . . . . . . 681
Threshold . . . . . . . . . . . . . . . . . . . . . . . . . . . . . . . . . . . . . . . . . . . . . . . 683
General Property Page . . . . . . . . . . . . . . . . . . . . . . . . . . . . . . . . . 683
Timecode . . . . . . . . . . . . . . . . . . . . . . . . . . . . . . . . . . . . . . . . . . . . . . . 684
Timecode Property Page . . . . . . . . . . . . . . . . . . . . . . . . . . . . . . . . 684
Torn Edges. . . . . . . . . . . . . . . . . . . . . . . . . . . . . . . . . . . . . . . . . . . . . . 686
Torn Edges Property Page . . . . . . . . . . . . . . . . . . . . . . . . . . . . . . 686
Tracker/Stabilizer . . . . . . . . . . . . . . . . . . . . . . . . . . . . . . . . . . . . . . . . . 687
Input1/Input2/Output Property Pages . . . . . . . . . . . . . . . . . . . . . . 688
Advanced Property Page . . . . . . . . . . . . . . . . . . . . . . . . . . . . . . . . 689
DVE Property Page . . . . . . . . . . . . . . . . . . . . . . . . . . . . . . . . . . . . 691
Quality Property Page . . . . . . . . . . . . . . . . . . . . . . . . . . . . . . . . . . 693
Twirl . . . . . . . . . . . . . . . . . . . . . . . . . . . . . . . . . . . . . . . . . . . . . . . . . . . 696
Twirl Property Page . . . . . . . . . . . . . . . . . . . . . . . . . . . . . . . . . . . . 696
Underpainting . . . . . . . . . . . . . . . . . . . . . . . . . . . . . . . . . . . . . . . . . . . . 697
Underpainting Property Page. . . . . . . . . . . . . . . . . . . . . . . . . . . . . 697
Watercolor . . . . . . . . . . . . . . . . . . . . . . . . . . . . . . . . . . . . . . . . . . . . . . 698
Watercolor Property Page . . . . . . . . . . . . . . . . . . . . . . . . . . . . . . . 699
Waterpaper. . . . . . . . . . . . . . . . . . . . . . . . . . . . . . . . . . . . . . . . . . . . . . 699
19
Page 20

Waterpaper Property Page . . . . . . . . . . . . . . . . . . . . . . . . . . . . . . . 700
Wood. . . . . . . . . . . . . . . . . . . . . . . . . . . . . . . . . . . . . . . . . . . . . . . . . . . 701
Chapter 7 Compositing Reference. . . . . . . . . . . . . . . . . . . . . . . . . . . . . . 703
Layers View. . . . . . . . . . . . . . . . . . . . . . . . . . . . . . . . . . . . . . . . . . . . . . 704
Layers. . . . . . . . . . . . . . . . . . . . . . . . . . . . . . . . . . . . . . . . . . . . . . . 704
Layer Controls . . . . . . . . . . . . . . . . . . . . . . . . . . . . . . . . . . . . . . . . 705
Matte Controls . . . . . . . . . . . . . . . . . . . . . . . . . . . . . . . . . . . . . . . . 708
Result Area. . . . . . . . . . . . . . . . . . . . . . . . . . . . . . . . . . . . . . . . . . . 709
Compositing Tools Toolbar. . . . . . . . . . . . . . . . . . . . . . . . . . . . . . . 710
Result Area Menu. . . . . . . . . . . . . . . . . . . . . . . . . . . . . . . . . . . . . . 711
Layer Effect Menu . . . . . . . . . . . . . . . . . . . . . . . . . . . . . . . . . . . . . 712
Layer Menu. . . . . . . . . . . . . . . . . . . . . . . . . . . . . . . . . . . . . . . . . . . 713
Matte Controls Menu . . . . . . . . . . . . . . . . . . . . . . . . . . . . . . . . . . . 714
Interlayer Alpha Menu and Interlayer RGB Menu. . . . . . . . . . . . . . 716
External Matte Menu . . . . . . . . . . . . . . . . . . . . . . . . . . . . . . . . . . . 722
Effects Tree. . . . . . . . . . . . . . . . . . . . . . . . . . . . . . . . . . . . . . . . . . . . . . 724
Effects Node Menu . . . . . . . . . . . . . . . . . . . . . . . . . . . . . . . . . . . . . 724
Input Node Menu . . . . . . . . . . . . . . . . . . . . . . . . . . . . . . . . . . . . . . 728
Output Node Menu . . . . . . . . . . . . . . . . . . . . . . . . . . . . . . . . . . . . . 729
Effects Tree Menu . . . . . . . . . . . . . . . . . . . . . . . . . . . . . . . . . . . . . 730
Compositing Effects . . . . . . . . . . . . . . . . . . . . . . . . . . . . . . . . . . . . . . . 731
AVX Host . . . . . . . . . . . . . . . . . . . . . . . . . . . . . . . . . . . . . . . . . . . . 731
Blue-Green Keyer. . . . . . . . . . . . . . . . . . . . . . . . . . . . . . . . . . . . . . 733
Chroma Keyer . . . . . . . . . . . . . . . . . . . . . . . . . . . . . . . . . . . . . . . . 735
Color Correction Classic . . . . . . . . . . . . . . . . . . . . . . . . . . . . . . . . . 737
Composite . . . . . . . . . . . . . . . . . . . . . . . . . . . . . . . . . . . . . . . . . . . 741
Difference Keyer. . . . . . . . . . . . . . . . . . . . . . . . . . . . . . . . . . . . . . . 748
DVE . . . . . . . . . . . . . . . . . . . . . . . . . . . . . . . . . . . . . . . . . . . . . . . . 751
Effects Tree Property Editor . . . . . . . . . . . . . . . . . . . . . . . . . . . . . . 753
Flicker . . . . . . . . . . . . . . . . . . . . . . . . . . . . . . . . . . . . . . . . . . . . . . . 753
HSL Keyer . . . . . . . . . . . . . . . . . . . . . . . . . . . . . . . . . . . . . . . . . . . 755
Key Combiner. . . . . . . . . . . . . . . . . . . . . . . . . . . . . . . . . . . . . . . . . 760
Linear Luma Keyer . . . . . . . . . . . . . . . . . . . . . . . . . . . . . . . . . . . . . 760
Luma Keyer . . . . . . . . . . . . . . . . . . . . . . . . . . . . . . . . . . . . . . . . . . 760
20
Page 21

Matte Effect . . . . . . . . . . . . . . . . . . . . . . . . . . . . . . . . . . . . . . . . . . 762
Matte Composite . . . . . . . . . . . . . . . . . . . . . . . . . . . . . . . . . . . . . . 763
Motion Tracker . . . . . . . . . . . . . . . . . . . . . . . . . . . . . . . . . . . . . . . . 765
Motion Path Menu . . . . . . . . . . . . . . . . . . . . . . . . . . . . . . . . . . . . . 769
Over Effect . . . . . . . . . . . . . . . . . . . . . . . . . . . . . . . . . . . . . . . . . . . 769
Premultiplication. . . . . . . . . . . . . . . . . . . . . . . . . . . . . . . . . . . . . . . 770
Spill Correction. . . . . . . . . . . . . . . . . . . . . . . . . . . . . . . . . . . . . . . . 771
Tracker/Stabilizer . . . . . . . . . . . . . . . . . . . . . . . . . . . . . . . . . . . . . . 772
Transform Node . . . . . . . . . . . . . . . . . . . . . . . . . . . . . . . . . . . . . . . 778
Global DVE . . . . . . . . . . . . . . . . . . . . . . . . . . . . . . . . . . . . . . . . . . 780
Chapter 8 Color Correction Reference . . . . . . . . . . . . . . . . . . . . . . . . . . 783
Color Correction Property Editor . . . . . . . . . . . . . . . . . . . . . . . . . . . . . 784
HSL Property Page . . . . . . . . . . . . . . . . . . . . . . . . . . . . . . . . . . . . 784
Channels Property Page . . . . . . . . . . . . . . . . . . . . . . . . . . . . . . . . 792
Levels Property Page. . . . . . . . . . . . . . . . . . . . . . . . . . . . . . . . . . . 794
Curves Property Page . . . . . . . . . . . . . . . . . . . . . . . . . . . . . . . . . . 795
Chapter 9 Common Property Pages Reference . . . . . . . . . . . . . . . . . . . 801
Alpha Property Page . . . . . . . . . . . . . . . . . . . . . . . . . . . . . . . . . . . . . . 802
Border Property Page. . . . . . . . . . . . . . . . . . . . . . . . . . . . . . . . . . . . . . 804
Color Property Page . . . . . . . . . . . . . . . . . . . . . . . . . . . . . . . . . . . . . . . 805
Color Property Page . . . . . . . . . . . . . . . . . . . . . . . . . . . . . . . . . . . . . . . 806
Colors Property Page . . . . . . . . . . . . . . . . . . . . . . . . . . . . . . . . . . . . . . 810
Crop Property Page . . . . . . . . . . . . . . . . . . . . . . . . . . . . . . . . . . . . . . . 811
DVE Property Page . . . . . . . . . . . . . . . . . . . . . . . . . . . . . . . . . . . . . . . 812
External Data Property Page . . . . . . . . . . . . . . . . . . . . . . . . . . . . . . . . 815
General Property Page. . . . . . . . . . . . . . . . . . . . . . . . . . . . . . . . . . . . . 816
Key Property Page . . . . . . . . . . . . . . . . . . . . . . . . . . . . . . . . . . . . . . . . 819
Key Property Page . . . . . . . . . . . . . . . . . . . . . . . . . . . . . . . . . . . . . . . . 821
Key Values Property Page . . . . . . . . . . . . . . . . . . . . . . . . . . . . . . . . . . 823
Masking Property Page . . . . . . . . . . . . . . . . . . . . . . . . . . . . . . . . . . . . 825
Matte Property Page. . . . . . . . . . . . . . . . . . . . . . . . . . . . . . . . . . . . . . . 828
Matte Property Page. . . . . . . . . . . . . . . . . . . . . . . . . . . . . . . . . . . . . . . 831
Options Property Page . . . . . . . . . . . . . . . . . . . . . . . . . . . . . . . . . . . . . 833
21
Page 22

Shapes Property Page . . . . . . . . . . . . . . . . . . . . . . . . . . . . . . . . . . . . . 835
Source Property Page. . . . . . . . . . . . . . . . . . . . . . . . . . . . . . . . . . . . . . 837
Spill Matte 2 Property Page . . . . . . . . . . . . . . . . . . . . . . . . . . . . . . . . . 838
Spill Replace Property P age . . . . . . . . . . . . . . . . . . . . . . . . . . . . . . . . 840
R1–R4 and L1–L4 Property Page . . . . . . . . . . . . . . . . . . . . . . . . . . . . 841
Tracker Property Page . . . . . . . . . . . . . . . . . . . . . . . . . . . . . . . . . . . . . 844
Index . . . . . . . . . . . . . . . . . . . . . . . . . . . . . . . . . . . . . . . . . . . . . 847
22
Page 23

Using This Guide
Congratulations on your purchase of an Avid DS Nitris system. You can
use your system to create broadcast-quality output incorporating every
possible production element from full-speed, high-resolution footage, to
multimedia artwork and animation, to computer-generated effects and
titling.
n
The documentation describes the features and hardware of all models.
Therefore, your system might not contain certain features and hardware
that are covered in the documentation.
Who Should Use This Guide
This guide is intended for all Avid DS Nitris users, from beginning to
advanced. It includes information about supported file formats, dialog box
options, menus, and other reference material. Use this guide as a
supplement to the other guides in the Avid DS Nitris documentation set.
Page 24

Using This Guide
Symbols and Conventions
Unless noted otherwise, the material in this document applies to the
Windows XP operating system.
Avid DS Nitris documentation uses the following symbols and
conventions:
Symbol or
Convention
Meaning or Action
n
c
w
> This symbol indicates menu commands (and subcommands)
t
Margin tips In the margin, you will find tips that help you perform tasks
Italic font Italic font is used to emphasize certain words and to indicate
Courier Bold
font
A note provides important related information, reminders,
recommendations, and strong suggestions.
A caution means that a specific action you take could cause
harm to your computer or cause you to lose data.
A warning describes an action that could cause you physical
harm. Follow the guidelines in this document or on the unit
itself when handling electrical equipment.
in the order you select them. For example, File > Import
means to open the File menu and then select the Import
command.
This symbol indicates a single-step procedure. Multiple
arrows in a list indicate that you perform one of the actions
listed.
more easily and efficiently.
variables.
Courier Bold font identifies text that you type.
24
Bold font Bold indicates a user interaction.
Page 25

Using the Mouse, Pen, and Keyboard
In Avid DS Nitris, you can use a two-button mouse (with wheel) or a pen
and tablet. The left and right mouse buttons perform different operations.
Unless otherwise stated, use the left mouse button.
The mouse and pen operate slightly differently. All the procedures in this
guide are documented for the mouse. You can, however, easily use a pen
or the keyboard. The following table shows the terms relating to the
mouse, pen, and keyboard.
This Term Means This with a Mouse Means This with a Pen
Symbols and Conventions
Click Quickly click and release the
left mouse button. Always
use the left mouse button
unless otherwise stated.
Double-click Click the left mouse button
twice rapidly.
Right-click Quickly click and release the
right mouse button.
Drag Click and hold the left mouse
button or the wheel while you
move the mouse.
Alt+key,
Ctrl+key,
Shift+key,
etc.
Press and hold the first key while you press the second key. For
example, “Press Alt+F1” means to press and hold the Alt key
while you press the F1 key.
Tap the tablet once with the tip of
the pen, or touch the pen to the
tablet with enough pressure to
click.
Quickly tap the tablet twice in the
same screen pixel or press the F5
key to go from single to doubleclick.
Press the top portion of the switch
on the side of the pen or press the
F6 key to go from left to rightclick.
Press the pen to the tablet while
moving the pen.
25
Page 26

Using This Guide
Customizing the Pen or Mouse
By customizing the pen, you can adjust the click pressure, switch
functions, and other features. For information on customizing the pen,
refer to the documentation provided with your Avid DS Nitris system.
You can also customize the mouse. For example, you can select lefthanded configuration or change the double-click speed. For information on
customizing the mouse, refer to the Windows online Help.
If You Need Help
If you are having trouble using Avid DS Nitris:
1. Retry the action, carefully following the instructions given for that task
in this guide. It is especially important to check each step of your
workflow.
2. Check for the latest information that might have become available
after the documentation was published in one of two locations:
- If release notes are available, they ship with your application.
- If ReadMe files are available, they are supplied in your Avid
application folder. ReadMe files are also available from Help.
3. Check the documentation that came with your Avid application or
your hardware for maintenance or hardware-related issues.
4. See “Avid DS Customer Support” on page 28.
5. For Technical Support, please call 800-800-AVID (800-800-2843).
For international enquiries and support services, contact your local
Avid Reseller. Support offerings may vary per location.
Accessing the Online Documentation
The online library contains all the Avid DS Nitris documentation in PDF
format. If it was installed on your workstation, you can access it from the
Help menu in Avid DS Nitris.
26
Page 27

If You Need Help
n
You will need Adobe® Acrobat® Reader® installed to view the
documentation online.
To access the online library, do one of the following:
t In Avid DS Nitris, select Help > Online Library.
t Insert the Drivers CD-ROM into your CD-ROM drive, and select
Online Library from the main menu.
To install Adobe Acrobat Reader:
1. Insert the Drivers CD-ROM into your CD-ROM drive.
2. Under the Various section, select Utilities.
If You Have Documentation Comments
We’d appreciate any comments or suggestions you may have about the
Avid DS Nitris documentation.
Please e-mail your documentation comments to:
dsdocs@avid.com
Include the title of the document, its part number, and the specific section
you are commenting on in all correspondence.
How to Order Documentation
To order additional copies of this documentation from within the
United States, call Avid Sales at 800-949-AVID (800-949-2843). If you
are placing an order from outside the United States, contact your local
Avid representative.
Avid Educational Services
For information on courses/schedules, training centers, certifications,
courseware, and books, please visit www.avid.com/training or call
Avid Sales at 800-949-AVID (800-949-2843).
27
Page 28

Using This Guide
Avid DS Customer Support
The following sections describe various Avid DS Customer Support
options.
E-mail Support
The e-mail address for Avid DS Customer Support is:
dssupport@avid.com.
You can use it for sending bug reports, usability questions, and avidds.cab
audit reports for system analysis. All e-mails are logged in the support
database and assigned a case number. Send one support request per e-mail.
n
Web Support
FTP Support
It is mandatory that you include your SID number in the body of your
e-mail message for verification of your maintenance contract and case
logging, otherwise, response will be delayed.
The Avid DS Customer Support and Download sections at
http://www.softimage.com/avidds provide quick access to a wide range
of resources from the Avid DS teams and user community. Downloads,
including presets, drivers, and Quick Fix Engineering (QFE), provide the
latest solutions for use with your Avid DS Nitris system. Online
documentation, tutorials, and Knowledge Base articles ensure that you get
the most out of your work with Avid DS Nitris. It's like having a dedicated
Avid DS Customer Support engineer sitting at your desk!
For troubleshooting purposes, an FTP server is available for uploading
large files for Avid DS Customer Support personnel to examine. You can
upload a project's archive, media files, or other large piece of data. Simply
zip the files to upload and use a short name for easy retrieval, such as
archive.zip or Case274877.zip. You can use a Windows Command Prompt
or an FTP application to upload files to our server.
28
Page 29

Avid DS Customer Support
Command Prompt Commands
Command Description
Site access ftp ftp.softimage.com [Enter]
Folder access cd incoming [Enter]
User name anonymous [Enter]
Password “your e-mail address” [Enter]
Transfer mode bin [Enter]
Upload command Put “path:\file name” [Enter]
Once the file upload is complete, send an e-mail to dssupport@avid.com
to inform Avid DS Customer Support as there is no automatic notification
when a file is uploaded on the FTP server. Please provide the complete and
exact file name (case sensitive) to retrieve.
Mailing List
Although the Avid DS mailing list is frequently monitored by Avid
employees, it is not part of the official support channels. You are invited to
send your support requests to any of the above channels when required.
If you have an e-mail account, you can join the worldwide network of Avid
DS users exchanging ideas. The mailing list has proven to be quite useful
for users, with a constant stream of new subscribers.
To subscribe, send an e-mail to majordomo@softimage.com with the
following text in the body of your message: subscribe ds. You can get
further information on using the automated list server by e-mailing
majordomo@softimage.com with “help” as your message.
You can also go to http://www.avid.com/support/forms.html, which is a
great source of information, available on the Avid web site for Avid DS.
29
Page 30

Using This Guide
30
Page 31

Chapter 1
Desktop Reference
This chapter contains reference information about the desktop.
• Property Editors
• Help
• Layout Menu
• User Preferences Dialog Box
• Tool ba rs
• Taskbar Menu
• Command Mapping Dialog Box
• Load Preset Dialog Box
• Save Preset Dialog Box
• Viewer Properties
• Edit Layout Dialog Box
• Preference Management Dialog Box
• Splitter Menu
• View Menu
• View Switcher Menu
Page 32

Desktop Reference
Property Editors
Property editors display the properties of a selected object or tool. You can
adjust the values of properties using the text boxes, lists, options, and
sliders, as well as set animation keyframes. Any values that you change are
immediately applied to the object.
Property editors contain global controls for loading, saving, and viewing
presets, processing, animating properties, selecting effects, and previewing
clips. Different property editors have different global controls.
Property editors come in two sizes: default and large. Most of the time, you
will see the default-sized property editors. But if you’re in the Effects
layout, you’ll see the large ones.
n
Global Controls
Unlike the default-sized property editors, the large ones do not recycle.
Instead, they display what is currently selected.
Tip: If you have used a Color Correction effect and you are not in the
Effects layout, you can open its property editor in two different sizes:
default or large. Press Ctrl+Shift to open a default size property editor and
press Ctrl to open a large property editor.
To open a property editor, do one of the following:
t Right-click an object and select Properties.
t Double-click an object.
The global controls let you determine how parameters are displayed in a
property editor window, create animation, process effects, save and load
presets, specify transitions, track DVEs, and set animation keyframes.
These controls are displayed on most property editors.
32
Page 33

Title bar controls
Global controls
Property Editors
Title Bar Controls
The title bar controls let you focus, recycle, lock, and close property
editors as you select different objects.
Title bar
controls
33
Page 34

Desktop Reference
Option Description
Focus In Focus mode, a property editor displays only one
specific type of property, regardless of which object is
selected.
For example, if you open the Brush FX property editor
in the Graphics layout and set it to Focus mode, the Fill
FX properties will appear in the same property editor
window, but the Time Span properties will open in a
new property editor window.
Recycle In Recycle mode, the same property editor is reused
whenever you select an object that has an associated
property editor.
For example, if you open a video effect’s property
editor, then select an audio effect, the audio clip’s
properties replace the video clip’s properties in the
same property editor window.
Lock In Lock mode, the property editor always displays the
properties of the object on which it’s locked.
34
For example, if you open a video effect’s property
editor, set it to Lock mode, and then select an audio
effect, the audio effect’s properties will be displayed in
a new property editor window.
Close Closes the property editor
Page 35

Tab Controls
Property Editors
The tab controls let you view additional tabs on a property editor. This is
useful for property editors that contains many property pages, such as the
keyers.
Tab controls
Option Description
Display Previous Tab Displays previous tab(s) on this property page
Display Next Tab Displays next tab(s) on this property page
Animation Controls
The animation controls let you turn auto animation on or off, move
between keyframes, and set keyframes.
Animation controls
35
Page 36

Desktop Reference
Option Description
Auto Automatically creates a keyframe when you make any
< (previous key) Moves the position indicator to the previous keyframe
> (next key) Moves the position indicator to the next keyframe
Animation Key Sets a keyframe at the current frame with the current
Animating Parameters
In the property editors, an animation button appears beside numeric
parameters that you can animate. This lets you set keyframes after you
adjust the parameter’s value. Also, you can easily access the animation
editor from the Animation pop-up menu.
adjustments to properties. That is, you do not have to
click the Animation Key button each time you change a
property.
property settings. Right-click this button to display the
Animation Key menu—see Animation Key Menu.
36
Page 37

Animation button
Property Editors
Animation Menu
To animate a parameter:
t Click the Animation button beside the parameter you want to animate.
The Animation button turns red to indicate that a keyframe was set.
To reset an animated parameter:
t Right-click an Animation button and select Remove Animation.
To access the Animation menu:
t Right-click an Animation button—see Animation Menu.
The Animation pop-up menu lets you open the animation editor, locate and
remove keyframes, and set keyframes automatically for the selected
parameter.
37
Page 38

Desktop Reference
To access the Animation pop-up menu:
t Right-click the Animation button in any property editor.
Option Description
Animation Editor Displays the animation editor—see “Understanding
the Animation Editor” in the Help.
Remove Key Removes keyframes for the parameter at the current
position indicator location
Remove Animation Removes all keyframes for the parameter in the
function curve
First Key Moves the position indicator to the first keyframe set
for the parameter in the function curve
Last Key Moves the position indicator to the last keyframe set
for the parameter in the function curve
38
Previous Key Moves the position indicator to the previous keyframe
set for the parameter
Next Key Moves the position indicator to the next keyframe set
for the parameter
Autokey Turns Autokey mode on or off. Automatically creates
keyframes as you adjust the settings.
Tip: You can activate this mode by clicking the
n
Autokey button at the bottom-right of the
desktop.
Constant Changes the function curve to a constant curve. This
option has no effect on a motion path.
Linear Changes the function curve to a linear curve
Bézier Changes the function curve to a Bézier curve
Page 39
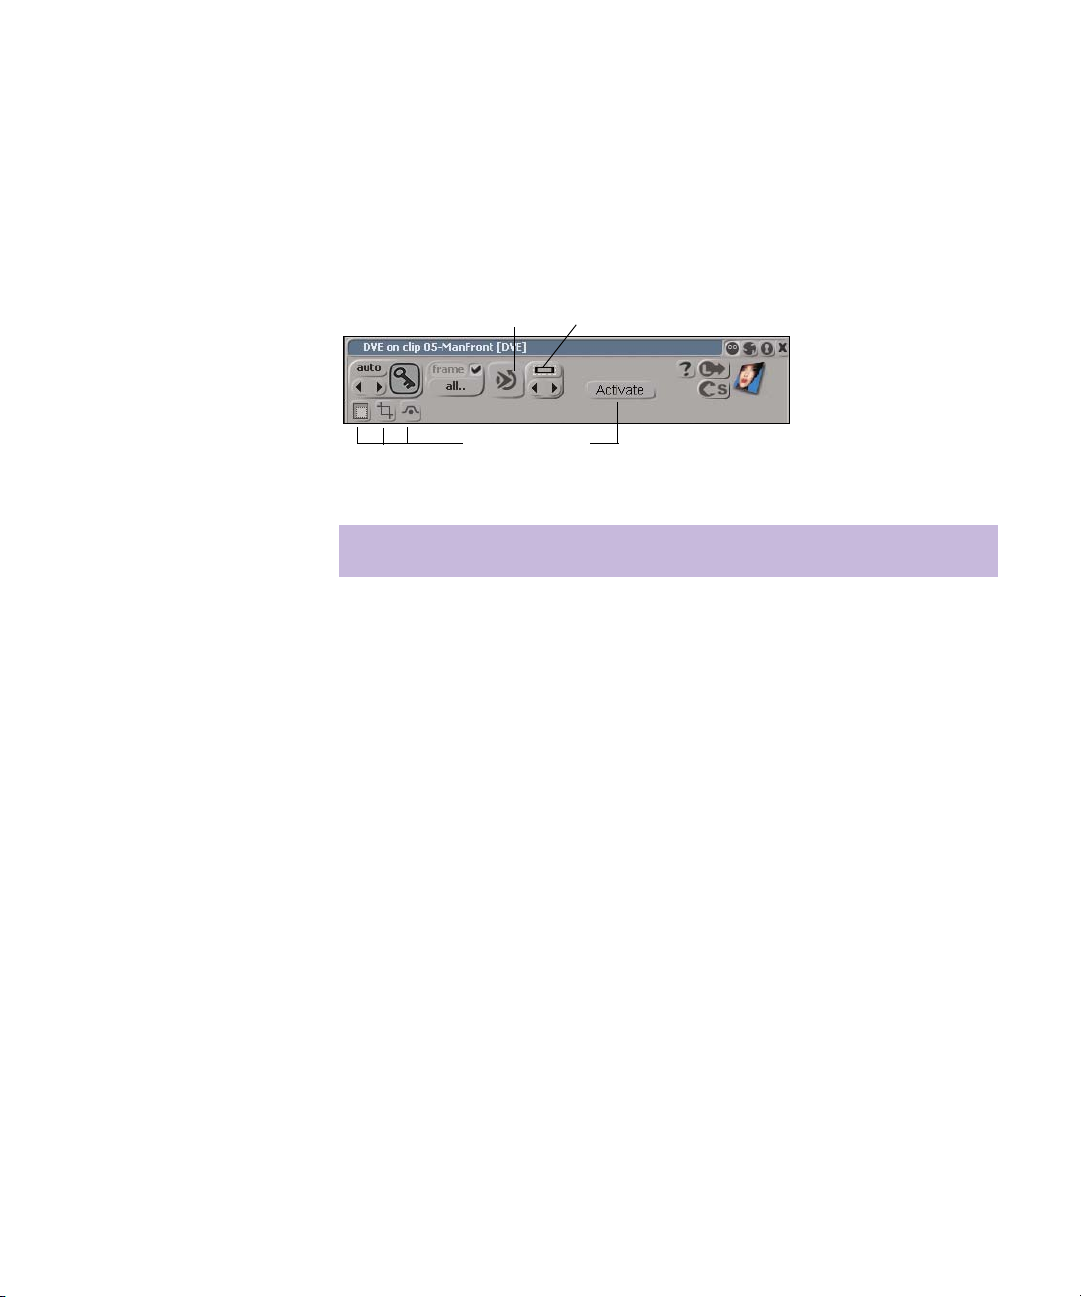
Effect Controls
Property Editors
The effect controls let you preview effects, limit processing to a selected
region in the viewer, bypass effects, crop function curves in the animation
editor, and select effects.
Preview
Effect controls
Select Effect
Option Description
Preview Plays the output of the current effect in the viewer
Activate Switches the context to the interactive tool of the effect
associated with the property editor. For example, when
switching between effects, such as a DVE and a
Tracker, you must activate the tool before you can use
the interactive tools in the viewer.
Subregion Limits processing to a specified region in the viewer.
Drag a rectangular area to specify the region.
Bypass Turns off the effect. When you use multiple input
effects, such as a Composite effect, the first input is
passed through directly as the output.
Crop Curves Crops the selected effect’s function curve in the
animation editor when the effect is resized on the
timeline
39
Page 40

Desktop Reference
Option Description
Select Effect Selects the current effect on the timeline, in an Effects
tree or in the Layers view, and displays its property
editor.
This is most useful if you are using many effects and
want to quickly identify property editors with their
corresponding clips. Open a property editor, lock it, and
click the Select Effect button to highlight the clip in the
timeline, Effects Tree, or Layers view.
Not available in the Graphics and 3D DVE
n
layouts.
Effects Tree Controls
Previous Effect/Next
Effect
Selects the previous/next effect on the timeline, Effects
Tree, or Layers view, and displays its property editor.
The display of effects depends on the effect type. If you
are using multiple, different types of effects, such as
four Color Correction and two Channel Switcher
(image effect) effects, then the current effect type is
sequentially displayed each time you click the Previous
Effect or Next Effect button.
To display other effect types used on the timeline, press
Ctrl to display them.
For more information, see
Not available in the Graphics and 3D DVE
n
layouts.
The Effects Library.
The Effects Tree controls let you view or bypass an effect, expand an
Effects Tree, or display another effect’s property editor.
40
Page 41

Effects Tree controls
Effects list
Property Editors
n
Depending on which effect you apply, these controls may be arranged
differently on the property page.
Option Description
View Displays the output of the current effect in the viewer.
When you want to change an effect and you’ve
n
added more effects after it, you can view the
effect if you want to focus only on the current
effect.
You can only view one node at a time. If several
n
nodes are selected, the V key and the toolbar
button are not available.
Tip: On the Shape and Paint trackers, it’s useful
n
to select both the View and Bypass options to
improve tracking speed.
Expand Expands the current Effects Tree. For example, if you
apply a Selective Color Correction effect in an Effects
Tree and click Expand, the tree expands to display the
effects that comprise this effect.
This option is only applicable when you use
n
Effects Tree effects, such as the Selective Color
Correction effect or if you fold nodes.
41
Page 42

Desktop Reference
Process Controls
Option Description
Effects List Lets you choose the effect to display in the current
property editor. This is useful when you have many
effects in an Effects Tree and want to quickly switch to
display the properties of another effect.
Only effects on which the Expose command is
n
selected are displayed in this list.
The process controls let you choose what to process and how it will be
processed.
Process controls
42
Option Description
Frame Processes effects in the current frame and creates a
cache file. Makes the effect viewable on the selected
frame.
Auto-process Turns the Frame option on or off. When selected, each
time you change a parameter, the frame is automatically
reprocessed.
All Processes all frames with the applied effect and creates
a cache file. Makes the effect playable in real time.
Preview For real-time playable effects, plays back the current
effect. For unprocessed non-real-time playable effects,
plays back a lower quality preview version of the effect,
with dropped frames, in Loop mode.
Page 43

DVE-Tracker Controls
Available only in the 2D DVE property editor, the tracker controls let you
set specific options for tracking images using the 2D DVE.
Property Editors
Tracker controls
Option Description
Global Applies a transformation (scale, rotation, or translation)
to participating layers in the composite. The DVE
property editor for each layer must also have its Global
DVE option activated.
SRT Turns on/off any DVE transformation (scaling, rotation,
or translation) that has been applied to the current layer
Track Turns on/off any motion tracking that has been applied
to the current layer. Clicking the Tracker button opens
the Motion Tracker property editor.
Activate When you are using more than one interactive tool at
the same time (in the Compositing layout), such as a
Luma keyer and DVE, clicking the Activate button
gives priority to the property editor on which this
button was pressed. For example, if you scaled an
image using the DVE, and then click the Activate
button in the Luma keyer property editor, the image
appears in full size to let you concentrate on areas in the
image that you want to key out.
43
Page 44

Desktop Reference
Preset Controls
The preset controls let you save and load presets. A thumbnail of the
current effect is displayed with the preset controls.
Preset controls
Option Description
Transition Controls
Save Preset
Saves presets by opening the Save Preset dialog box,
where you can save the current parameter settings as a
preset. You can choose the folder to save it in or create
a new folder in which to store your customized presets.
Load Preset
Loads and displays presets by opening the Load Preset
dialog box, where you can select a preset file to load
into the property editor.
Displays the thumbnail of the selected effect
Thumbnail
The transition controls let you specify the type and duration of a transition.
Transition controls
44
Page 45

Option Description
Dur (duration) Specifies the duration, in frames, of a transition
Select Transition Lets you choose between the Dissolve, DVE, and Wipe
transitions
Transition location Specifies whether the selected edit point is the start,
center, or end of the transition
Recycling, Locking, and Focusing Property Editors
The title bar buttons let you recycle, lock, and focus property editors. By
default, most property editors are set to Recycle mode when you first
display them. When you select an object that does not have any properties
or select a new type of object, the property editor is hidden from view, but
not closed.
Property Editors
The recycle, lock, and focus modes let you work more efficiently with
property editors. They let you display the same property editor, compare
the parameter values of two different objects by locking and displaying
their property editors, and view several different property editors for the
same object simultaneously. This is especially useful when you are
working with graphics because many graphics objects have similar
properties.
Using the Recycle Mode
In the Recycle mode, the same property editor window is reused whenever
you select an object. For example, if you open a generated clip’s property
editor, and then select an audio effect, the properties of the generated clip
are replaced by the properties of the audio effect.
To use the Recycle mode:
1. In the Graphics layout, select an object and open its property editor.
2. In the title bar of the property editor, click the Recycle button.
By default, most property editors are set to the Recycle mode.
45
Page 46

Desktop Reference
Property editor
displays
properties of
selected clip
Property editor
in Recycle
mode
46
3. Select a different object.
The same property editor window updates to display the properties of
the newly selected object.
Page 47

Property Editors
Property editor
in Recycle
mode
Same property editor
window is reused and
updated to display
properties of the newly
selected object
Using the Lock Mode
n
In the Lock mode, the property editor continues to display the properties of
the object on which it is locked. You can, for example, lock the property
editor of one graphics object and open another property editor for a
different graphics object. This lets you compare the parameter values
between the two graphics objects.
Property editors accessed from the Layers view are automatically set to
Focus mode instead of the default Recycle mode.
To use the Lock mode:
1. Select an object and open its property editor.
2. In the title bar of the property editor, click the Lock button.
The property editor is locked to the selected object.
47
Page 48
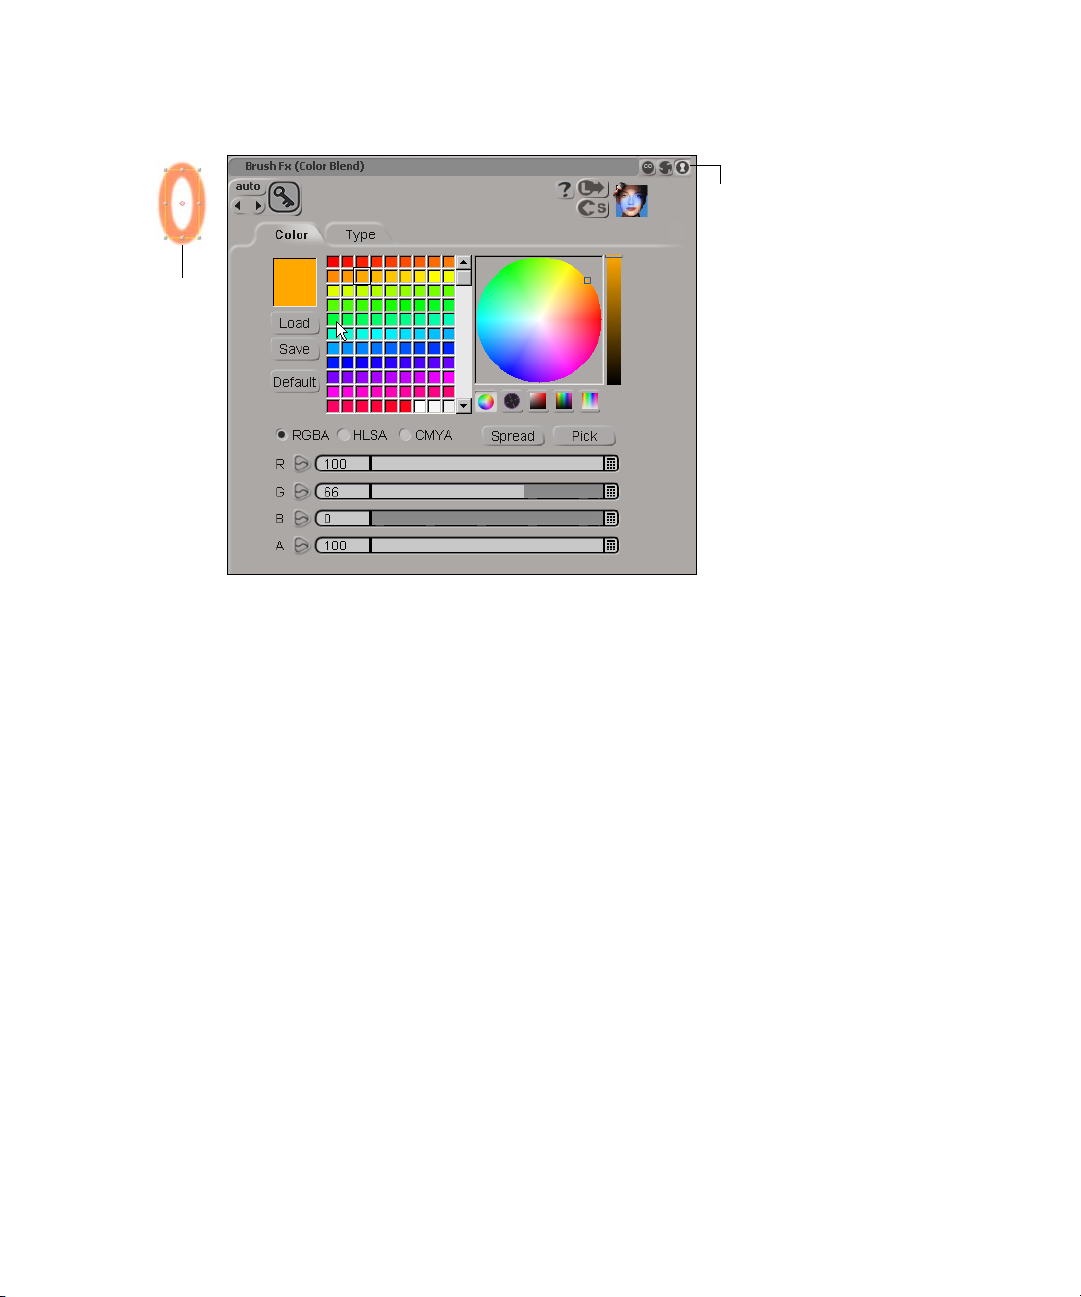
Desktop Reference
Selected
object
Property editor
in Lock mode
48
3. If desired, select another object and open its property editor.
A second property editor (in Recycle mode) opens on top of the first
property editor.
Page 49

Second selected
object and its
property editor in
Recycle mode
Property Editors
Property
editor in
Recycle mode
4. Drag the second property editor to another location to view both
property editors, so that you can compare the values of both graphics
objects.
Property editor of second selected
object in recycle mode.
Viewing the two property editors side-by-side lets you
compare and adjust values.
Property editor of first selected
object in lock mode.
49
Page 50

Desktop Reference
Using the Focus Mode
In the Focus mode, a property editor displays the properties of a specific
type of property. The Focus and Lock modes differ in that the Lock mode
links a property editor with a specific object, such as a stroke or text body,
whereas the Focus mode links a property editor with a type of property,
such as brush or fill. Property editors in Focus mode will continue to
update as the selection changes—as long as the type of object doesn’t
change. Property editors in Lock mode ignore selection changes.
This mode is most useful in the Graphics layout, where there are many
different types of properties, such as the brush or fill properties of a stroke,
or the face, edge, or shadow properties of a title. Setting a property editor
to Focus mode ensures that a property editor of a particular type, such as
brush properties, is always available in a layout.
To use the Focus mode:
1. Select an object and open its property editor.
The graphics property tree displays the properties of the selected
object.
50
2. From the graphics property tree, click a property button.
The property editor is in the default Recycle mode.
3. In the title bar of the property editor, click the Focus button.
The property editor is focused on the specific type of property you
selected.
Page 51

Selected object and
its property editor in
Focus mode
Property Editors
Property editor
in Focus mode
4. From the graphics property tree, click a different property button.
t If the property you selected was the same type as the first, then the
same property editor window is used to display its properties.
t If the property is of a different type than the first, then a second
property editor (in Recycle mode) is opened to display its
properties. The first property editor continues to display the
properties of the object on which it is focused.
5. Drag the second property editor to another location to view both
property editors at the same time.
51
Page 52

Desktop Reference
Entering Values
Brush stroke properties of selected object
Property editors of both selected property buttons
Brush Fx properties of selected object
There are several ways to enter numerical values and timecode information
in Avid DS Nitris . You can choose the method that is the most convenient
for you. There are also keyboard shortcuts available that let you quickly
enter values and timecodes.
Using Text Boxes
52
Text boxes are located beside or below a property name in a dialog box or
property editor. To increase or decrease values in a text box, you can enter
new values directly in the box, drag the sliders to the right or left, or use a
number of different keyboard and mouse operations.
Text box
Drag clockwise or counterclockwise to
increase or decrease values
Slider
Page 53

Property Editors
To enter and adjust values in a text box:
1. Click in a text box.
The contents of the text box is selected and an insertion point (flashing
vertical bar) appears.
2. Do one of the following:
t Type in the numerical values and press Enter.
t Use any of the following shortcuts.
To enter value Do this
Increase value by 1/10
of a unit
Decrease value by 1/10
of a unit
Increase value by 1 unit Press ] or roll the mouse wheel forward
Decrease value by 1 unit Press [ or roll the mouse wheel backward
Increase value by 10
units
• Press Shift+]
• Hold down the Shift key and drag clockwise around
the text box
• Hold down the Shift key and roll the mouse wheel
forward
• Press Shift+[
• Hold down the Shift key and drag counterclockwise
around the text box
• Hold down the Shift key and roll the mouse wheel
backward
• Press Ctrl+]
• Hold down the Ctrl key and drag clockwise around
the text box
• Hold down the Ctrl key and roll the mouse wheel
forward
53
Page 54

Desktop Reference
To enter value Do this
Decrease value by 10
units
Cancel command and
close dialog box
Set value to minimum Press Ctrl+Home
Set value to maximum Press Ctrl+End
To replace the contents of a text box:
• Press Ctrl+[
• Hold down the Ctrl key and drag counterclockwise
around the text box
• Hold down the Ctrl key and roll the mouse wheel
backward
Press Esc
1. Click in a text box.
The contents of the text box is highlighted in blue.
2. Type in new values and press Enter.
To adjust values using the slider:
t Drag the slider to the right to increase values or to the left to decrease
them
54
t Press Shift and drag the slider to adjust values slowly.
t Press Ctrl and drag the slider to adjust values quickly.
Drag right or left to increase
or decrease values
To enter values using the calculator:
1. Click the Calculator button next to the slider.
The calculator is displayed.
Page 55

2. Do one of the following:
t Use the keyboard to enter numbers.
t Use your pointer to select numbers on the calculator.
3. If you performed mathematical operations, click the Equal button.
4. Click OK.
The calculator closes and the value is added to the text box.
Using the Pop-up Menus in Numerical Text Boxes
By right-clicking in a text box, you can open a pop-up menu, containing
commands for cutting, copying, pasting, deleting, undoing, and selecting
all values.
Property Editors
Using Timecode Boxes
There are SMPTE timecode boxes in several places in the Avid DS Nitris
interface, such as in the status bar, on the transport controls, and in
property editors.
55
Page 56

Desktop Reference
Entering values in timecode boxes is similar to entering values in text
boxes except that you can also use absolute or relative input methods. The
absolute input method replaces the current value with the value you enter.
The relative input method offsets the current timecode by the value you
specify.
The following table summarizes the various means of entering values in
timecode boxes assuming that the current timecode is 01:12:34:00.
You en t e r NTSC result PAL result Description
Absolute Input Method
5223 00:00:52:23 00:00:52:23 Replaces the current
timecode
/5223 01:12:52:23 01:12:52:23 Replaces the rightmost
portion of current
timecode
56
.40 00:00:01:10 00:00:01:15 Replaces the current
timecode with this many
frames (direct frame
entry)
10:00.40 00:10:01:10 00:10:01:15 Combines timecode
value with direct frame
entry
3:::1 03:00:00:01 03:00:00:01 Skip fields by entering
colons (:)
Relative Input Method
110+
110-
.110+
.110-
01:12:35:10
01:12:32:20
01:12:37:20
01:12:30:10
01:12:35:10
01:12:32:15
01:12:38:10
01:12:29:15
Increases or decreases
the current timecode by
the value entered
Increases or decreases
the current timecode by
the number of frames
entered
Page 57

You en t e r NTSC result PAL result Description
Help
Help
1.10+
1.10-
] or [ 01:12:34:01
Shift+] or Shift+[ 01:12:34:01
1:12:35:10
1:12:32:20
01:12:33:29
01:12:33:20
1:12:35:10
1:12:32:15
01:12:34:01
01:12:33:24
01:12:34:10
01:12:33:15
Use the period (.) to
separate seconds and
frames.
Nudges the current
timecode up or down by
1 frame
Nudges the current
timecode up or down by
10 frames
The Help menu lets you access the Avid DS Nitris help system to quickly
retrieve reference information. You can also access the Avid web site,
where you can find product-related information and tutorials as well as the
Avid DS Nitris support center.
To access the Help menu:
t Select Help.
Option Description
Contents and Index Opens the contents window of the online help, which
displays help topics by category
Keyboard Shortcuts Opens a PDF file which displays all the keyboards
shortcuts
Documentation Library If installed on your system, opens the Documentation
Library for online viewing of the Avid DS Nitris
documentation.
New Features Tour If installed, starts the New Features Tour multimedia
application
57
Page 58

Desktop Reference
Option Description
Download Lets you download various utilities and tools
Web Tutorials Lets you access the latest Avid DS Nitris tutorials
Knowledge Base Lets you access and search the Avid DS Nitris
Knowledge Base for useful information
Customer Service Loads the Avid DS Nitris Customer Service home
page
Avid DS Nitris Home
Loads the Avid DS Nitris home page
Page
About Avid DS Nitris Displays the program’s build number and version
along with the product serial number
58
Page 59

Layout Menu
Layout Menu
The Layout menu lets you customize the views in the current layout, or
create your own layouts.
To access the Layout menu:
t Select Layout.
Option Description
Editing Displays the Editing layout
Graphics Displays the Graphics layout
Compositing Displays the Compositing layout
3D DVE Displays the 3D DVE layout
Media Input/Output Displays the Media Input/Output layout
Classic Layouts Displays the default layouts
Xtra Layouts Displays alternate layouts
New Layout Lets you create a custom layout. When a layout is
created, a new layout button is added to the taskbar.
Blank Lets you name and create a custom layout from
scratch. Creates an empty layout to which you add the
various layout components that you want to work
with. To build your layout, use the components under
New Layout > Copy Layout.
Copy Current Layout Creates a custom layout based on the current layout
Copy Layout Lets you create a custom layout based on a copy of an
existing layout
59
Page 60

Desktop Reference
Option Description
Edit Layout Turns edit mode on or off. In this mode, all the
windows and views in the current layout are
highlighted so that you can move or resize them.
When you turn off the edit mode, your changes are
automatically saved for the current session.
Save Layouts Saves all edits made to your custom layout
Restore Default Layout Restores the default configuration of the current layout
New Combo View Creates a new combo view and puts you in Edit
Combo View mode
Edit Combo View Lets you customize a combo view
Delete Combo View Deletes the currently active combo view
New Toolbar Displays the toolbar dialog box in which you enter a
name to create a custom toolbar.
Customize Toolbars Displays the Customize Toolbars window, where you
select from a category of tools to display their
associated commands. These commands can be
dragged to your custom toolbar for easy access while
working.
Import/Export
Preferences
Displays the Preference Management dialog box
User Preferences Dialog Box
The User Preferences dialog box lets you adjust the settings that affect the
way you work with Avid DS Nitris . For example, you can set preferences,
such as automatic saves, number of undo levels, animation preferences,
and the number of type of tracks to display when you open a new
sequence. You can also set editing preferences, such as pre-roll and postroll frames.
60
Page 61

User Preferences Dialog Box
After setting the preferences, they become part of your user profile under
your user name. The next time you start Avid DS Nitris , these preferences
are used.
n
Do not customize the fonts, windows scheme, or taskbar properties on the
Windows 2000 desktop or Avid DS Nitris may not function properly.
Click on the links above for information on each of the property pages.
To open the User Preferences dialog box:
t Select File > User Preferences.
General Property Page
The General property page lets you set preferences, such as automating the
loading of the current sequence, setting the number of undo levels, and
autosaving preferences.
For example, if you know that you will be working on the same sequence
for several sessions, you can set Avid DS Nitris to automatically open that
sequence each time you start the application. You can also set Avid DS
Nitris to automatically save your work at regular intervals.
61
Page 62

Desktop Reference
Option Description
Window Management Sets preferences for window management
Highlight the Window
with Focus
Give Windows Focus
Shows you which view has focus by displaying
small red brackets at the view’s corners
Gives focus to an area by rolling the mouse over it
When the Mouse Enters
Them
Update Default Window
Size/Position
Lets you choose the default window size and
position based on the last resized window, the last
closed window, or the last moved window.
On Resizing Sets the default window size and position based
on the last resized window
On Closing Sets the default window size and position based
on the last closed window
On Moving Sets the default window size and position based
on the last moved window
Autosave Sets autosave preferences
Save Automatically Every
X Minutes
Saves the current sequence at regular intervals.
This option can protect you from losing work in
the event of a power failure or system failure.
62
Miscellaneous Sets user preferences, such as number of undo
levels and loading last sequence at startup
Load Last Sequence at
Startup
Loads the last saved sequence each time you start.
Tip: If you need to override this setting, hold
down the Shift key when you double-click the
Avid DS Nitris
icon when starting the
application. This is useful when you want to start
a new sequence.
Single Click on Container
Icon Opens Container
Opens a container clip with a single click.
Usually, you have to double-click on the container
clip to open it.
Page 63

User Preferences Dialog Box
Option Description
Number of Undo Levels Sets the number of commands or actions that you
can undo and redo. The default number is 50;
maximum is 1000.
The higher the number of levels you set, the more
memory is required (which can slow down
performance), but the further you can backtrack.
Tip: You can access the Undo and Redo
n
commands from the Edit menu. The
keyboard shortcuts are Ctrl+Z and Ctrl+Y,
respectively.
Scrubbing Sets scrubbing preferences
Play Audio When
Scrubbing
Animation Property Page
The Animation property page lets you set preferences, such as the default
interpolation and slope mode for inserted keys.
If you frequently animate objects or parameters, you can set Avid DS
Nitris to automatically set keyframes as you adjust an object’s properties
or a parameter’s values. Instead of clicking the Animation Key button each
time you want to add a keyframe, the Autokey mode automatically records
any adjustments that you make.
Option Description
Default Interpolation for
Inserted Keys
Automatic (From
Neighboring Keys)
When selected, lets you hear the audio tracks
when scrubbing on the timeline
Sets the default interpolation type for inserted
keys
Repeats the value of a key point. The movement is
characterized by sudden changes at keyframes
and static positions between keyframes.
63
Page 64

Desktop Reference
Option Description
Constant Repeats the value of a key point until the next one.
The movement is characterized by sudden
changes at keyframes and static positions between
keyframes.
Linear Connects key points by straight line segments.
The movement is characterized by sudden
changes at each keyframe.
Spline Results in a smooth transition. When selected,
spline interpolation accelerates and decelerates to
ease into and out of each keyframe. The degree of
acceleration and deceleration before and after the
keyframe is determined by the key point’s tangent
handles.
Default Slope Constraint for
Sets the default slope type for inserted keys
Inserted Keys
None (DS - Use
Neighboring Slopes)
Sets the slope of an inserted key automatically
using the slopes of neighboring keys. This mode
does not affect the slope of these neighboring
keys.
Automatic (3D - Use &
Affect Neighboring
Slopes)
Plateau (Horizontal for
Local Min & Max)
Sets the slope of an inserted key automatically to
the slopes of neighboring keys. This mode affects
the slope of neighboring keys.
Sets the slope of an inserted key automatically to
zero if the next key has the same value, or if that
key is a local minima or maxima.
A local minima/maxima is a key point where both
previous and next keys have either smaller
(minima) or larger (maxima) values. This is
useful for holding key point values to prevent the
automatic interpolation from going above or
below your keyframed values.
Zero (All Horizontal) Constrains the slope of key points to zero. The
tangent handles remain horizontal, so that only
the slope tension can be modified.
64
Page 65

User Preferences Dialog Box
Option Description
Autokey Toggles the Autokey button on or off
Set Keys When Changing
Values (Autokey)
Editing Property Page
The Editing property page lets you change various default settings, such as
the preferred track type, transition duration, still image duration, and the
number of pre-roll and post-roll frames.
Option Description
Extra Material Lets you change the number of pre-roll and
Pre-roll (frames) Specifies the default number of pre-roll
Automatically sets keyframes as you adjust an
object’s properties or a parameter’s values.
Instead of clicking the Animation Key each time
you want to add a keyframe, the Autokey button
automatically records any adjustment that you
make.
post-roll frames
frames before a transition (or timeline
selection). When you play back the processed
frames, the pre-roll frames are added to the
in-point.
Post-roll (frames) Specifies the default number of post-roll
frames after a transition (or timeline
selection). When you play back the processed
frames, the post-roll frames are added to the
out-point.
Selectable Objects (J-K-L keys) Lets you select the type of object that moves
on the timeline when you use the J-K-L keys
Edit Points and Clip Handles Lets you to move these objects with the J-K-
L keys
65
Page 66

Desktop Reference
Option Description
Clips Lets you move clips with the J-K-L keys
Effect bars Lets you move effect bars with the J-K-L
keys
Activeness Lets you move activeness bars with the J-K-L
keys
Markers and Locators Lets you move locators, in-points, and out-
points with the
J-K-L keys
Preferred video track type Lets you select the type of track when you
create new tracks inside of a sequence
Transitions Lets you specify default values for transition
duration and position
Default Duration (frames) Specifies the default length, in frames, of
transitions
66
Default Position Specifies the default position of a transition
with respect to the selected edit point.
Start: The transition begins at the edit point
Center: The transition is centered over the
edit point
End: The transition ends at the edit point
Default Still Image Duration
(frames)
Show Overlays in Viewer Displays locators (global, local/clip), in/out-
Always update clips in source
viewer
Specifies the number of frames you want to
be created when you capture a still image
points, start/end of clip, and start/end of
available material
Automatically updates the clip in the bin
when the in-point or out-point of a clip in the
source viewer is changed
Page 67

Titling Property Page
The Titling property page lets you set preferences that allow you to see or
hide text outside the output area, as well as control the way text is selected.
Option Description
User Preferences Dialog Box
Disable Text
Overlay
Selection
Criteria
(Ctrl+mouse)
Titling Font
Only
Titling Style
Only
Both Lets you select all text characters when you hold down the Ctrl
Allows you to see text existing outside the output area
Controls the way text is selected when you hold down the Ctrl
key and drag
Lets you select text characters with like fonts when you hold
down the Ctrl key and drag
Lets you select text characters with like style attributes, such as
bold, italic, etc., when you hold down the Ctrl key and drag
key and drag
67
Page 68

Desktop Reference
Effects Tree Property Page
The Effects Tree property page lets you set preferences that affect how
nodes in the Effects Tree are connected and disconnected, how tooltips are
displayed, the speed in which the Effects Tree pans, how names are
displayed on nodes and ports, and how new nodes are place in Effects
Trees.
Option Description
Interaction Sets preferences for connecting and disconnecting
Enable Enhanced Interaction Enables enhanced features such as “kissing”,
nodes in the Effects Tree
“ripping”, “twanging” and sticky connections.
Connecting Nodes
(1=slow, 10=fast)
Disconnecting Nodes
(1=slow, 10=fast)
Minimum Node Drag for
Interaction (in pixels)
Lets you increase or decrease the response time
when connecting nodes. For example, a value of 1
means that when you drag a node to touch another
node (“kissing”), you have to hold it there for a
longer period of time before a connection is made.
Lets you increase or decrease the response when
disconnecting nodes. For example, a value of 1
means that you can easily “rip” a node away from
another node to disconnect it.
Lets you set the distance in which you must drag a
node (in pixels) before interaction will take place.
For example, the default setting of 20 means that
you must drag a node at least 20 pixels before it
will be connected (twangs) to another node. Values
range from 0 to 500. If this option is set to 0, then
automatic connection twanging will take place if
you click or double-click a node.
68
Page 69

Option Description
User Preferences Dialog Box
Allow Connection
Replacement
Pan Speed (0=None,
10=Fast)
Node Attract/Repel Spacing
(1=Small, 10=Large)
Auto-expand Collapsed
Nodes
Lets you turn connection replacement on or off.
When selected, you can replace a connection using
enhanced interactivity such as “kissing” or
“twanging”.
When this option is deselected, a node will only
twang to a connection if there is currently nothing
attached to its input port.
Lets you set the speed at which the Effects Tree
pans when you drag nodes around. Values range
from 0 (no panning) to 10 (fastest).
Let you set the spacing in which nodes are
pushed/pulled towards or away from each other.
Values range from 1 to 10. A larger value
attracts/repels nodes a larger distance.
Lets you automatically expand a collapsed node
when you position the pointer over it. When you
move the pointer away from the node, it
automatically collapses again.
Tip: If you want a node to remain expanded
n
while this option is selected, deselect
Collapse from the menu when you right click
on a node.
Tooltip Settings Sets preferences for tooltips. This is helpful, for
example, when you zoom out an Effects Tree and
it’s difficult to see a node’s name. You can display
tooltips on nodes, node inputs, and connectors,
and specify the speed at which the tooltips are
displayed.
Enable Tooltips on Nodes Displays tooltips on nodes
Enable Tooltips on Node
Inputs
Enable Tooltips on
Connectors
Displays tooltips on node inputs
Displays tooltips on connectors between nodes
69
Page 70

Desktop Reference
Option Description
Tooltip Delay (in
milliseconds)
New Nodes Lets you set how new nodes are displayed in an
Collapse Automatically collapses all new nodes that you
Use Input Names Lets you append the input port’s name with the
Lets you specify how quickly (in milliseconds)
tooltips are displayed when you position the cursor
over a node, node input, or connector.
Effects Tree.
add to an Effects Tree. This feature is useful to
conserve space in your Effects Tree.
Tip: You can also select the Auto-expand
n
Collapsed Nodes option so that nodes will
automatically expand when you position the
cursor over them.
input’s name instead of just Input 1, Input 2, etc.
Node names are only displayed on nodes when
this option is selected or if you choose “Use Input
Names” from the menu when you right-click a
node.
For example, if a Blue Green keyer is connected to
Input 1 of a Composite node, then the Composite
node’s input port name will be displayed as “Input
1- Blue Green Keyer” when you select this option
from the Composite node. All input port names
will update to reflect the input’s name.
70
Mouse Zoom
x Steps (1=Small, 10=Large)
Lets you set the distance at which the Effects Tree
zooms in or out when you use the commands
Alt+Z (zoom in) and Alt+X (zoom out). A larger
value increases the amount of the zoom.
Page 71

Capture Property Page
The Capture property page lets you set options for controlling a deck
during the capture process.
Option Description
Batch Capture
User Preferences Dialog Box
Rewind the tape after
capture
Eject the tape after
capture
No interaction when
inserting new tape
Display recapture
list
Stop the deck after
capture
After all clips from a single tape are recaptured, sends a
signal to the deck to rewind the tape.
After all clips from a single tape are recaptured, sends a
signal to the deck to eject the tape.
Prevents Avid DS Nitris from displaying dialog boxes
that would interrupt a batch capture. If you select this
option and “Eject the tape after capture,” and you know
the order of tapes, you can batch capture without
interacting with the Avid DS Nitris application—see
Batch Capturing Without Interaction.
Displays a list of clips to be recaptured, which you can
sort and select clips to be recaptured—see Capture List
Dialog Box.
After capturing from tape, puts the deck into stop
mode, rather than stand-by mode.
71
Page 72

Desktop Reference
Data Management Property Page
The Data Management property page lets you delete the unreferenced
media of the current project when you quit Avid DS Nitris . You can also
specify the number of frames that separate each clip that is archived to tape
as well as the padding for generated subclip names. You can also specify
your SMTP server so that you can receive email when your processing jobs
are complete.
Option Description
Archive Lets you set a gap between clips on your archive
tape.
Gap between Clips in
Archive (Frames)
Padding for Generated
Subclip Names
No padding to subclip
suffix
Padded suffix Specifies that you want padding or zeroes added to
Maximum number of
zeroes to use
Email Notification Lets you specify your SMTP server so that email
SMTP Server Lets you enter the name of your SMTP (Simple
Specifies the number of frames that separate each
clip that is archived to tape. The number must be an
integer value between 1 and 50.
The gap between your archived clips must be
n
at least one frame to make sure that the whole
archive is performed correctly and
accurately.
Lets you specify whether you want padding or
zeroes added to subclip names.
Specifies that no padding or no zeroes will be added
to subclip names.
subclip names.
Specifies the number of zeroes to add to subclip
names.
messages can be sent.
Mail Internet Protocol) email server, which lets
Avid DS Nitris send an email message when a
processing job is complete.
72
Page 73

Level Meters Property Page
The Level Meters property page lets you adjust the settings for the Mixer,
the Audio Input Monitor, and the Audio Output Monitor meters.
Option Description
Peak Specifies the level that you expect to be the maximum.
Minimum Specifies the minimum level displayed on the Level meter.
HeadRoom Specifies the expected dynamic range. Range: 0 to 24 dB
Alignment Specifies the level of the visual alignment indicator.
Graduations Specifies the space, in decibels, between the markings on the
User Preferences Dialog Box
Range: 0 to -24 dB
Range: -144.5 to -24 dB
Range: 0 to 24 dB less than the headroom level
level meter. Range: 1 to 24 dB. A value of 0 turns off the level
meter markings.
Peak Hold Indicates whether the decibel level went above that of the
specified peak level at any time during playback
Max Hold Indicates the maximum decibel level achieved during playback
Scale Waveform
Display to Peak
Level (Mixer
only)
Scales the waveform display on the timeline so that the edge of
the display represents the peak level specified above. Any audio
above the peak level is clipped.
73
Page 74

Desktop Reference
Scripting/Logging Property Page
The Scripting/Logging property page lets you determine the scripting
language for your scripts, the command log size, and whether a log file is
created.
Option Description
Scripting Language Determines the scripting language used to create and run
scripts
Command Log Size Determines the number of command lines retained in the
History pane of the Script Editor
Lines Specifies the maximum number of command lines
retained in the History pane of the Script Editor
Unlimited Specifies that there is no limit to the number of command
lines retained in the History pane of the Script Editor
74
Log File Lets you create a command log file for each Avid DS
Nitris session
Log Commands to
File
File Name Specifies the location where the log file is saved and its
... Displays the Log File Path dialog box
Creates a command log file for each Avid DS Nitris
session
name
Page 75

Avid Explorer Property Page
The Avid Explorer property page lets you set options for how paths are
displayed in a bin and whether to keep the Views menu open.
Option Description
Group files as frame Sets the Avid DS Nitris group folder to interpret
Expand Views folder Keeps the Views folder open whenever you view it in
User Preferences Dialog Box
sequential file names as frames. Deselect this option to
interpret sequential file names as fields—see “Grouping
Files as Frames or Fields” in the Help.
an Avid Explorer pane.The Views folder includes the
Avid Event Log, Deck Configuration, Tape Library, and
other views.
Display the full path in
the address bar
Display the full path in
the title bar
Shows the complete system path in the address bar of
any folder displayed through Avid Explorer. If this
option is not selected, only the folder name is
displayed.
Shows the complete system path in the address bar of
any folder displayed through Avid Explorer. If this
option is not selected, only the folder name is
displayed.
75
Page 76

Desktop Reference
Time Display Property Page
The Time Display property page lets you specify how time is displayed on
the timeline.
Option Description
Time Display Format Specifies which format is used to display time on
Use Default Format Uses SMPTE NTSC drop frame for NTSC
Use (other) Specifies whether to use the audio sample rate
the timecode scale. The available choices vary,
depending on whether you are working on a PAL
or NTSC sequence.
sequences, and EBU PAL (25 fps) for PAL
sequences
(NTSC and PAL) or SMPTE NTSC non-drop
frame (NTSC only)
76
Display as Frames Displays time in terms of frames only, as opposed
to hours:minutes:seconds:frames
Time Base Specifies which timecode scale is displayed on the
timeline
Show Time in Top Time (Container clips only) Displays the timecode scale
of the top timeline.
Show Time in Parent
Time
Show Time in Sequence
Time
(Container clips only) Displays the timecode scale
of the parent timeline.
Displays the timecode scale of the current
sequence
Page 77

Favorites Property Page
The Favorites property page lets you set the paths or locations where
presets for various groups are saved. You can also determine the folder in
which preset families are classified.
Option Description
User Path The location where your own personal presets are saved
Workgroup Path The location where presets for the group of people with
Factory Path Displays the default location of the original presets shipped
Project Path Displays the default location of the current project’s presets
Toolbars
whom you work are saved
with Avid DS Nitris
Toolbars
Preset Family
Locations
Path Displays the folder in which you can find the selected
Family Displays the family name of the presets
Displays the folder in which preset families are located
preset family
The toolbars contain commonly used tools, as well as presets which are
specially customized effects, transitions, or tools. Toolbar buttons let you
activate tools or commands and apply presets. For example, you can save a
color correction preset and then apply it to other clips in a sequence. Or
you can save a titling style as a preset and use it to quickly create new
titles.
77
Page 78

Desktop Reference
Closing Toolbars Automatically
Automatic closing of a toolbar lets you execute commands from any
floating toolbar and then automatically closes the toolbar. This streamlines
your desktop.
n
n
You can only auto-close floating toolbars. The default toolbars that are
fixed on the desktop cannot be auto-closed.
To automatically close a toolbar:
1. Right-click a floating toolbar and select Auto-Close Toolbar.
The toolbar automatically closes after you execute a command.
2. Click a button on the toolbar.
The command is executed and the toolbar is automatically closed.
3. To reopen the floating toolbar, select it from View > Default Toolbar
or User Toolbars, or use its keyboard shortcut.
Tip: For quick access to a floating toolbar, assign a keyboard shortcut to it
in the Command Mapping dialog box.
Changing the Size and Look of Toolbar Buttons
You can easily customize the size and look of toolbar buttons. To save
space on the desktop, you can display them as long, thin buttons or display
them larger for better visibility. You can also display the buttons in icon or
text form, as well as choose from eight different “themes”.
78
To change the size of toolbar buttons:
t Right-click a toolbar button and select Button Size > size.
To change the look of toolbar buttons:
1. Right-click a toolbar button and select Button Mode > mode.
2. Right-click a toolbar button again and select Button Theme > theme.
Page 79

Toolbar Menu
Toolbars
The Toolbar pop-up menu lets you create new toolbars, delete and copy
toolbars, display toolbar buttons as text or icons, show or hide the toolbars’
title bars, customize existing toolbars, and more.
To access the Toolbar menu:
t Right-click a button on a toolbar.
Option Description
Customize Menu
Button
Toolbar Group
Separator
Remove Item from
Toolbar
Customize Toolbars Displays the Customize Toolbars window, which lets you
Show Hidden Items Displays the space separators (in red) which are usually
New Toolbar Creates a new toolbar
For menus, lets you rename the button on the toolbar and
reorder the commands and presets in the list.
For preset list buttons, lets you rename the button on the
toolbar, set the path to the preset folder, and turn on/off
the display of submenus.
Changes the name of the group
Deletes a selected item
add buttons for the following to a selected toolbar:
commands, menus, property editors, floating toolbars,
transports controls (viewer area only), timecode boxes,
and more.
invisible in the toolbar, such as the vertical and
horizontal spacing between buttons, line breaks, and
empty lines. This is very useful when customizing
toolbars.
from the toolbar
Copy Toolbar Copies the current toolbar and displays it on the desktop
79
Page 80

Desktop Reference
Option Description
Delete Toolbar Deletes the selected floating toolbar.
Note: You cannot delete the fixed, default toolbars.
Display Titlebar Displays the title bar of a selected toolbar. Does not
apply to the floating toolbars.
Auto-Close Toolbar Automatically closes a floating toolbar after executing a
command
Button Theme Lets you select a different style for the look of the
buttons on the toolbar. There are eight themes: 3rdFloor,
Alpha, Alumina, Carboneum, Evo (default), Evo1,
Lamellae, and Pane.
Button Mode Lets you display buttons as icons or text
Button Size Lets you display buttons in various sizes: thin, default, or
large
Taskbar Menu
80
The Taskbar pop-up menu lets you add, remove, copy, and rename layouts.
To access the Taskbar menu:
t Right-click a layout button in the taskbar.
Option Description
New Layout Creates an empty layout. You will be prompted to
name the new layout.
Copy Layout Copies the selected layout. You will be prompted to
name the new layout.
Rename Layout Displays the Rename Layout dialog box, where you
can specify a new name for the selected layout
Page 81

Command Mapping Dialog Box
Option Description
Remove Layout Removes the selected layout from the taskbar
n
Default layouts cannot be renamed or removed. These commands are not
available when you right-click on a default layout’s button, in the taskbar.
Command Mapping Dialog Box
The Command Mapping dialog box lets you associate commands with
keys or key combinations that, when pressed, provide quick access to the
commands, tools, views, or property editors you most frequently use. You
can choose one of several default command maps, or create your own.
When you select a
group, a list of
commands is displayed
in the Command list.
Templates let you save a set of
command maps. Default templates
include the Avid DS Nitris default
keys. You can also create your own
template.
If a command is
mapped to a modifier
key, the Ctrl, Shift, or Alt
options will be selected
when you select a
command from the list.
The keymap shows the keys that are
mapped to the current group, the currently
selected command, and global keys,
which exist in all contexts and views.
81
Page 82

Desktop Reference
To access the Command Mapping dialog box:
t Select File > Command Mapping.
Option Description
Template Lists the available templates
New Adds a new template
Remove Removes currently selected template
View in Explorer Lets you view the command maps in the current
template in Internet Explorer
Group Lists the available groups which contain tools and
views
Command Lists the commands under the currently selected group
and the key to which they are mapped
82
Description Shows a description of the currently selected
command, and the key to which it is bound.
Clear Removes the binding between the selected key and its
command
You cannot clear bindings in a default template.
n
Context Defines a collection of tools, key mappings, and views
dedicated to a type of work
View Lists the views with which you may be working. When
selected, this option will show if conflicts exist
between command maps within the current context.
Modifier Keys Changes the command normally associated with a key,
if held down when the command key is pressed.
Modifier keys include Ctrl, Shift, and Alt.
Ctrl Shows the command maps controlled by the Ctrl
modifier
Page 83

Option Description
Shift Shows the command maps controlled by the Shift
modifier
Alt Shows the command maps controlled by the Alt
modifier
Using Templates for Command Maps
Templates allow you to save a set of command maps. Default templates
include the Avid DS Nitris default keys, as well as templates based on
other popular, standard keyboard templates. You can use a default template
or customize one. Default templates cannot be edited.
To use an existing template:
t From the Template list, select a template.
A list of default and custom keyboard templates is displayed.
Command Mapping Dialog Box
To create a new template:
t Click the New button and Enter a name for the new template.
To remove a template:
t Click the Remove button.
n
You cannot delete a default template or any of its commands.
Customizing the Command Map
To map and define your own keys, you must create a new template, since
the default shortcuts are read-only. Before assigning a key to a command,
you can check to see where that key is used in other contexts.
A context is a collection of tools, key mappings, and views dedicated to a
type of work. To know if a given key is currently unassigned, you need to
specify the context and the view you will be working in.
83
Page 84

Desktop Reference
For example, if you are working in the Graphics layout, which is also
considered the graphics context, and you open the animation editor. The
animation editor now takes priority. Therefore, if you press A, the Add
Keys command from the animation editor would take priority instead of
the Select tool, which also has its shortcut mapped to A in the Graphics
layout.
You can map commands using specific keys of your preference. It may be
useful for you to choose an existing template to work with and customize
the key commands you use most.
To create a new template:
1. In the Command Mapping dialog box, click the New button.
2. Enter a name for the new template.
A copy of the existing template is created and saved under another
name. You can customize it to optimize your work.
To assign a key to a command:
84
n
1. In the Command Mapping dialog box, select a template from the
Template list.
2. Select a group from the Group list.
3. Drag a command from the Command list to a key on the keyboard
displayed in the Command Mapping dialog box.
The key mapped to this command is shown in red on the on-screen keyboard,
and its associated key binding appears in the Current Binding box.
For combination keys, such as Alt+key, Ctrl+key, Shift+key, Alt+Shift+key,
drag a command to a key on the keyboard while pressing the modifier keys.
If you map a command to key that is already assigned, it will take priority.
The command that was previously mapped to that key will no longer be
mapped to any key; it will be unassigned.
Page 85

Viewing the Mapped Commands
You can use command maps as a reference for keyboard shortcuts during
your work sessions, or to check whether a key has already been mapped to
another command. Viewing command maps in a browser window gives
you a printable list that you can use as an offline reference.
To view the mapped commands:
1. Select a template from the Template list.
A list of groups associated with this template is displayed.
2. From the Group list, select a group.
A list of commands in this group is displayed in the Command list, and
the keys that are mapped to the current group are shown in a tan color
on the keyboard. Commands that are global and exist in all contexts
are shown in beige.
3. From the Command list, select a command.
The key mapped to this command is displayed in red on the keyboard.
Command Mapping Dialog Box
If a command is mapped to a modifier key, then the Ctrl, Shift, and/or
Alt options are selected when you choose the command in the list.
To view the mapped commands in a browser:
1. Select a template from the Template list.
2. Click the View in Explorer button.
Checking to See if a Key is Free
To know if a given key is currently unassigned, you must specify the
context and the view you will be working in. A context is a collection of
tools, key mappings, and views dedicated to a type of work.
Specifying the context and view will reveal any conflicts with commands
mapped to the same key, but in different contexts. These conflicts are
shown in dark brown.
85
Page 86

Desktop Reference
For example, suppose you’re working in the Graphics layout, which is also
considered the graphics context, and you open the animation editor. If you
press A, the Add Keys command from the animation editor would take
priority and you would not be able to activate the command that you would
usually get in the Graphics layout, which is the Select tool
To see if the key is used in another context:
1. Select a template from the Template list.
2. From the Context list, select the context that most closely reflects the
work you will be doing.
3. From the View list, select the view in which you will be working.
By selecting and deselecting the View option, you can see if a conflict exists
between two commands when you are working in the chosen context and view.
These conflicts are indicated by displaying a dark brown key. This information
will help you to create your own custom command map or template.
Key color Description
86
White Keys that are free and not mapped to any command in
the current context or view
Beige Keys that are global and exist in all contexts and views
Tan Keys that are mapped to commands grouped under the
currently selected group
Red Key that is currently selected in the command list
Dark Brown Keys that are also being used currently by another view
or context that are of higher priority. The keys will
continue to work as expected within the group until you
enter a view or context with a higher priority.
Page 87

Load Preset Dialog Box
The Load Preset dialog box lets you load a preset into a property page.
Option Description
Avid Explorer Tools Lets you navigate through and manage the contents of
Bin Tools Changes the way the contents of the bin are displayed.
File Name Lets you enter a name for your preset.
File Types Lets you select a file type for your preset.
Save Preset Dialog Box
Load Preset Dialog Box
your bins.
These tools appear for all bin contents.
The Save Preset dialog box lets you save the settings of your property
editor as a preset in a desired location.
Option Description
Avid Explorer Tools Lets you navigate through and manage the contents of
your bins.
Bin Tools Changes the way the contents of the bin are displayed.
These tools appear for all bin contents.
File Name Lets you enter a name for your preset.
File Types Lets you select a file type for your preset.
87
Page 88

Desktop Reference
Viewer Properties
The Viewer property editor lets you control all aspects of the viewer. You
can save presets of your viewer settings to a toolbar and use them to
quickly and easily switch between display resolutions, zoom levels, alpha
levels, and the display of guidelines. You can also perform onion-skinning
in the viewer, which allows you to blend the current frame with preceding
and/or successive frames at a certain percentage.
To open the Viewer Properties:
t Right-click on a viewer and select Viewer Properties.
Display Property Page
The Display property page lets you change the viewer display mode.
88
Option Description
Channels Displays specified combination of image’s red, green,
and blue channels
Resolution Specifies display resolution (full, half, or quarter) of
viewer image
Fields Specifies which field (first, second, or both) is shown in
viewer
Alpha Controls display of image’s alpha channel
Display Turns display of image’s alpha channel on or off
Full, 25%, 75% Specifies level of intensity at which image’s alpha
channel is displayed
Zoom & Pan Controls size and position of image in viewer. You can
scale image from 1% to 10,000%.
Only the view of the image is affected, not its
n
actual size.
Page 89

Viewer Properties
Option Description
Zoom Level Specifies size of image in viewer
X and Y Pan Specifies location of image in viewer
Reset Resets X/Y Pan and Zoom Level to the default values
Quick/Mouse Zoom Specifies zoom level of image
Steps Specifies number of times to press Alt+Z to reach
Quick Zoom Level
Quick Zoom Level Specifies size of image in viewer.
Tip: Press Alt+Q to switch between zooming the
n
viewer to the Quick Zoom Level and the previous
zoom level.
Press Alt+Z to zoom to the Quick Zoom Level.
Use Current Zoom Sets Quick Zoom Level to value set in Zoom Level
Auto Automatically pans and/or zooms the viewer when
using these interactive tools: graphics/paint tools,
Shape tool in the Matte and Keyer effects, DVE tool,
and Tracker tool.
Pan Automatically pans the viewer
Zoom Automatically zooms the viewer
Zone Defines the area around the pointer. A small zone
means that the pointer must be close to the edge of the
viewer before an auto-pan occurs. A large zone causes
an auto-pan when the pointer is farther away from the
edge of the viewer. Default zone is 1. Values: 0 to 30.
Speed Determines the speed at which an auto-zoom or auto-
pan occurs. A speed of 0 turns off auto-pan and autozoom. Default speed is 4. Values: 0 to 10.
89
Page 90

Desktop Reference
Option Description
Indicate if Viewer is
Scaled
Square pixels Turns display of square pixels on or off. Since the
Guides Property Page
The Guides property page lets you control the display and use of
guidelines and grids in the viewer.
Displays an exclamation mark (!) when the viewer
scales the image in a way that may introduce unwanted
artifacts in the image. This warns you when the
correspondence between source and display pixels is
not 1:1.
ITU-R 601 standard specifies a higher horizontal than
vertical resolution (or a 0.9 ratio), the image appears
stretched horizontally when displayed on a computer
monitor (which has square pixels).
When selected, this command displays the image in
square pixels as it would appear on a computer monitor.
When deselected, this command displays the image in
non-square pixels as it would appear on a video
monitor.
90
Option Description
Grid Controls display of grid
Display Turns display of grid on or off
Horizontal spacing Specifies horizontal distance, in pixels, between points
on grid
Vertical spacing Specifies vertical distance, in pixels, between points on
grid
X offset Adjusts positioning of grid along X axis
Y offset Adjusts positioning of grid along Y axis
Page 91

Option Description
Viewer Properties
Display outside
Displays grid outside viewable area
output area
Snap Aligns graphics objects to grid
Guidelines Controls display of guidelines
Display Turns display of guidelines on or off
Lock Locks guidelines in place, so you don’t accidentally
move while aligning graphics objects
Snap Aligns graphics/paint objects to guidelines
Safe Action/Title Displays safe action and safe title guides in viewer
Display Turns display of safe action/title guides on or off
Aspect Ratio Displays guide for 4x3 or 16x9 aspect ratios
Action Displays safe action guide
Title Displays safe titles guide
Crosshair Turns display of crosshair on or off
Outside Displays guides outside viewable area
Display Pixel Info Displays location (X,Y) coordinates and RGB color
information on the pixel in the viewer that the cursor is
hovering over
Guide Color Specifies color used to display guidelines and grid
Color swatch Displays selected or default color. Click the color
swatch to display the Mini Color Editor.
91
Page 92

Desktop Reference
Image Grabber Property Page
The Image Grabber property page lets you control the comparison buffer.
Option Description
Use Compare Buffer Turns comparison buffer on or off
Opacity Level Controls transparency of color. Values: 0 (completely
Grab Compare Image Takes snapshot of image currently displayed in viewer
Reset Compare Crop Resets crop marks to display entire image
Reset Compare Position Resets comparison image to its original position
Onion Skinning Property Page
transparent) to 100 (completely opaque).
92
The Onion Skinning property page lets you blend the current frame with
preceding and/or successive frames at a certain percentage. This is useful
for rotoscopy work.
Option Description
Use Onion Skinning Enables onion skinning in viewer
Frames Before Sets the frames visible before the current frame
Number of Frames Sets opacity of first onion skin frame before current
frame
Step Specifies frame interval between current and previous
frames
Starting Opacity Sets opacity of first onion skin frame before current
frame
Page 93

Viewer Properties
Option Description
Opacity Fade Sets opacity percentage in which blending decreases
between each frame
Position Defines position of onion skin in viewer
Above Places onion skin on top of current frame
Below Places onion skin under current frame
Current Frame Controls parameters for current frame
Opacity Defines opacity of current frame
Frames After Sets the frames visible after the current frame
Number of Frames Sets opacity of first onion skin frame after current
frame
Step Specifies frame interval between current frame and the
frames after
Starting Opacity Sets opacity of first onion skin frame after current
frame
Opacity Fade Sets opacity percentage in which blending decreases
between each frame
Position Defines position of onion skin in viewer
Above Places onion skin on top of current frame
Below Places onion skin underneath current frame
93
Page 94

Desktop Reference
Edit Layout Dialog Box
The Edit Layout dialog box lets you specify whether changes that you
make to layouts are saved for future sessions, or used for the current
session only. If you do not save your edits, they will be lost when you close
Avid DS Nitris .
Option Description
Layouts Lists the Avid DS Nitris layouts.Layouts that you
Save Saves changes to selected layouts for future sessions
Don’t Save Applies changes to edited layouts for the current
edited are automatically selected. Deselect layouts if
you do not want to save the edits that you made.
session without saving them for future sessions
Preference Management Dialog Box
The Preference Management dialog box lets you import and export
preference sets. A preference set is a collection of Avid DS Nitris layouts,
toolbars, combo views, and/or key maps. Importing and exporting
preference sets lets you share customized controls with other users.
When you import or export a preference set, its internal hierarchy is
preserved. For example, if you export an entire layout, any toolbars
contained in the layout are automatically exported with it.
n
94
Preference sets with the same name are appended with a number to
differentiate them.
To access the Preference Management dialog box:
t Select Layout > Import/Export Preferences.
Page 95

Export Preferences Property Page
The Export Preferences property page lists all of the components of the
current preference set (layouts, toolbars, combo view, and keymaps), and
lets you export some or all of them as a new preference set.
Option Description
Preference Set to Export Lets you select specific components of the current
preference set to export as a new preference set
Type Specifies whether you are exporting entire layouts,
toolbars, combo views, or keymaps
Select All Selects all available components
Select None Deselects all available components
Export Displays the Export Preferences dialog box
Preference Management Dialog Box
n
When you export existing layout to a new preference set, its components
are automatically exported as well.
When you export a preference set, you can only include the layouts and
keymaps you customized. You can export any toolbar.
To export a preference set:
1. In the Preference Management dialog box, select the Export
Preferences tab.
2. Select the controls that you want to export. Use the Type list to switch
between the layouts, toolbars, and keymaps in the preference sets.
3. Click the Select All button to select all controls.
4. Click Export to export the selected controls.
5. Do one of the following:
t In the File Name text box, enter the path to the folder in which you
want to save the preference sets.
95
Page 96

Desktop Reference
t Click Paths to select a default or project path.
t Use the Avid Explorer to navigate to the folder in which you want
to save the preference sets.
6. Enter a name for the preference set in the File Name text box and click
OK.
Import Preferences Property Page
The Import Preferences property page lets you select a preference set from
which import components (layouts, toolbars, combo views, and keymaps).
For example, you can import a custom layout that another user has
designed and exported.
Option Description
Filename Specifies the name of the preference set from which
you are importing components
96
n
Browse... Displays the Import Preferences dialog box, where you
can select a preference set to import
Preference Set to Import Lets you select specific components from the
preference set
Type Specifies whether you are importing entire layouts,
toolbars, combo views, or keymaps
Select All Selects all of the components in the preference set
Select None Deselects all of the components in the preference set
Import Imports all of the selected components from the
preference set
When you import an entire layout from an existing preference set, its
components are automatically imported as well. Some types of layouts are
unsupported and can not be imported.
Page 97

Preference Management Dialog Box
When you import a preference set, you can import all of the controls in the
set, or you can select only the controls that you need.
To import a preference set:
1. In the Preference Management dialog box, select the Import
Preferences tab.
2. Do one of the following:
t In the File Name text box, enter the name and location of the
preference sets that you want to import.
t Click Browse.
The Import Preferences dialog box is displayed.
3. Locate the preference sets that you want to import and click OK.
4. Select the controls that you want to import. Use the Type list to switch
between the layouts, toolbars, combo views, and keymaps preference
sets.
5. Click the Select All button to select all controls.
6. Click the Import button to import the selected controls.
You will be prompted to restart Avid DS Nitris when the import is
complete.
If you imported a layout, additional layout buttons appear in the
taskbar.
97
Page 98

Desktop Reference
Splitter Menu
View Menu
The Splitter pop-up menu lets you remove horizontal and vertical splitter
bars from a layout in Edit Layout mode. Removing splitter bars allows you
to reduce the number of available views.
To access the Splitter menu:
1. Select Layout > Edit Layout.
2. Position the pointer over a splitter bar, until you see the directional
arrow, and right-click the splitter bar.
Option Description
Remove Splitter Bar Removes the selected splitter bar from the layout
98
The View menu lets you customize your toolbars and select views. If you
select a view that is not accessible from a view switcher in the current
layout, the view is displayed in a new window, which you can resize and
position.
To access the View menu:
t Select View.
Option Description
Single-Instance Views Displays the views that you can only once in a layout
or view
Multi-Instance Views Displays the views that you can use more than once
in a layout or view
Default Combo Views Displays the default combo views
Page 99

Option Description
User Combo Views Displays the combo views that you have created
Default Toolbars Displays the default toolbars
User Toolbars Displays the toolbars you created
Taskbar Shows or hides the taskbar at the far left of the
View Switcher Menu
The View Switcher menu lets you add, remove and manipulate views from
the view switcher, manipulate and hide the view switcher, and display the
buttons as text, small, or large buttons.
To access the View Switcher menu:
View Switcher Menu
desktop
1. Select Layout > Edit Layout.
2. Right-click the view switcher.
3. When you’re done, select Layout > Edit Layout again.
Option Description
Add View Adds a placeholder for a view
Remove View Removes the selected view
Icon Lets you select an icon for the view
Position: Top Moves the view switcher to the top of the view
Position: Right Moves the view switcher to the right of the view and
displays it vertically
Position: Bottom Moves the view switcher to the bottom of the view
99
Page 100

Desktop Reference
Option Description
Position: Left Moves the view switcher to the left of the view and
displays it vertically
Alignment: Left Left aligns the buttons in the view switcher
Alignment: Center Centers all the buttons in the view switcher
Alignment: Right Right aligns the buttons in the view switcher
Text Buttons Displays text on the buttons
Small Buttons Displays small buttons
Big Buttons Displays large buttons
Hide Hides the view switcher
100
 Loading...