

Page 1

MAGIC BULLET LOOKS FOR PINNACLE STUDIO 12
Getting Started
Online Help
Installation
Support
What is Magic Bullet
Looks SE?
Copyright
Red Giant Software
License
Features of Looks SE
System and GPU
Requirements
Preparing for Looks SE
Presets
Looks Library (90
Presets)
LooksBuilder SE
Interface
LooksBuilder SE
Overview
What is a Look?
Info Bar and Help
Preview Area
Looks Drawer and
Presets
Tools and Controls
Tools Chain
Hands-On Mode
Application Reference
Studio Plug-in Reference
Welcome to Magic Bullet Looks Studio Edition v1.0 help!
The help is organized by subject in the navigation bar on the
left. Click on a subject and the corresponding instructions
will open in this frame. Below are pages that you should
review to get started with the Studio Edition of Magic Bullet
Looks.
Features in Looks SE
Graphics Card Requirements
Apply Looks SE in Pinnacle Studio
Pinnacle Studio 12 1
Page 2
MAGIC BULLET LOOKS FOR PINNACLE STUDIO 12
A new approach to Looks
Magic Bullet Looks SE is an all-new package for applying and editing the look of your
video or film footage. It consists of two parts: the Looks SE plugin for Studio, and the
new LooksBuilder SE standalone application for applying and customizing Look presets. It
goes beyond traditional color correction tools to incorporate a wide variety of image
enhancement tools that, when used in combination, can create a wide variety of
outstanding color changes to give video a more "filmic" look; make a dim, blue sh ot
appear as if it was shot at sundown; or emulate edge focus or shutter streaking effects
not possible in any other package.
Application Support
Magic Bullet Looks SE has been created to run as a plug-in for Pinnacle Studio 12 and is
included as part of Pinnacle Studio Ultimate. It will appear in the Video Effects tools
panel.
Pinnacle Studio 12 2
Page 3

MAGIC BULLET LOOKS FOR PINNACLE STUDIO 12
LooksBuilder SE- A Revolutionary Interface
The LooksBuilder SE user interface allows you to apply and customize Looks. It features
most of the power of the full-blown Magic Bullet Looks tool that is used by broadcast and
film professionals. See the full description of the LooksBuilder SE interface here
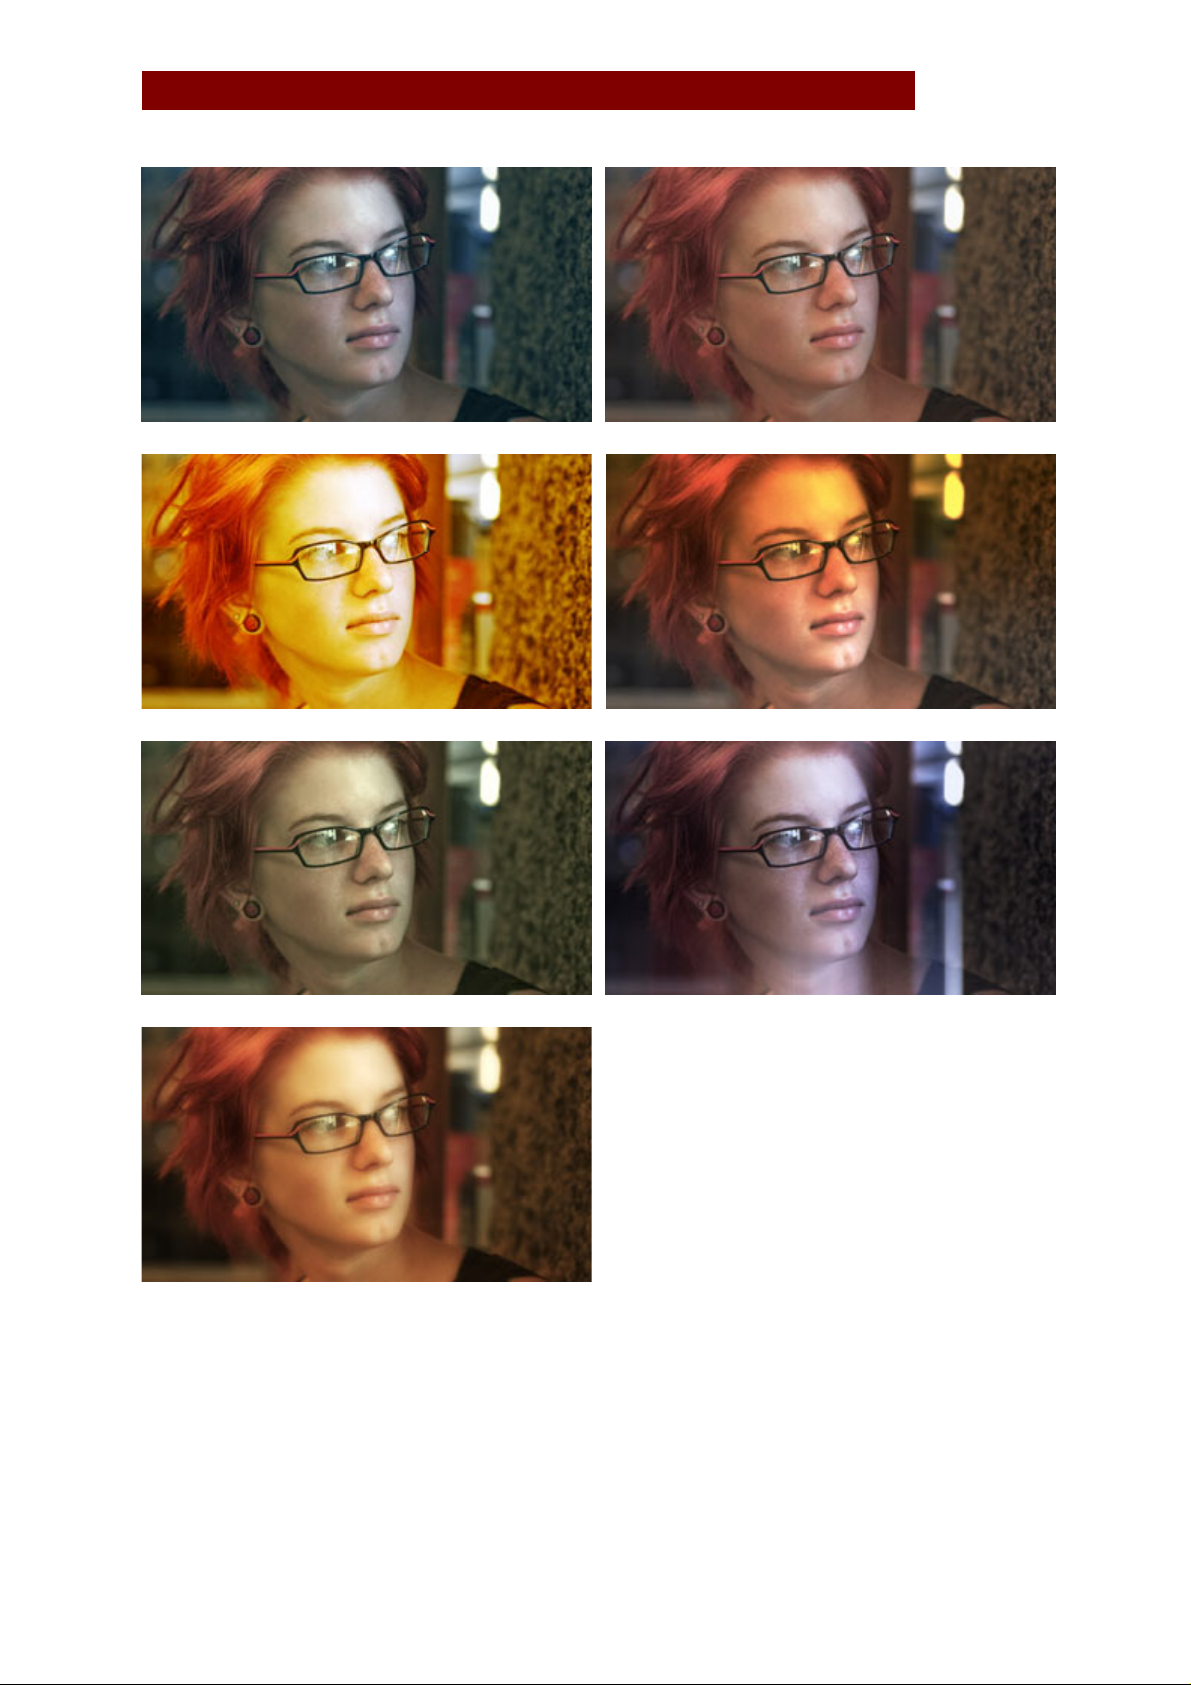
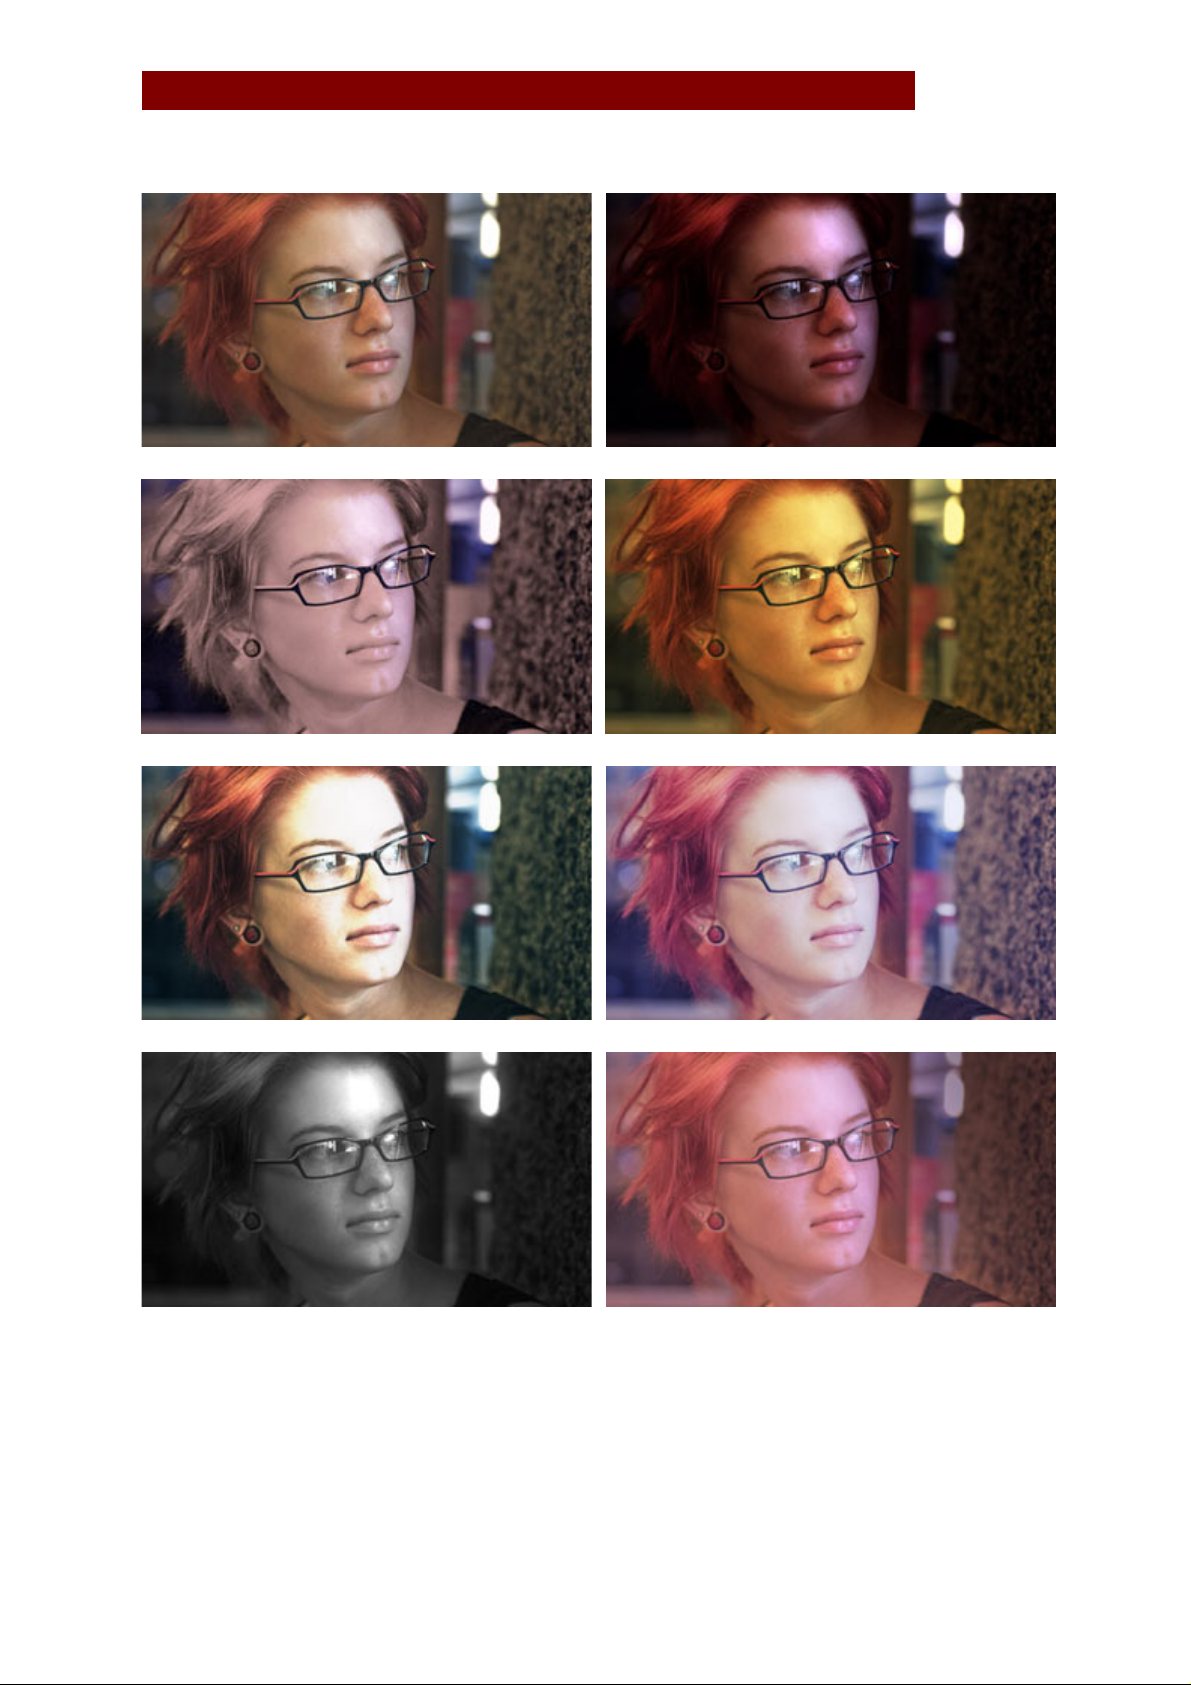
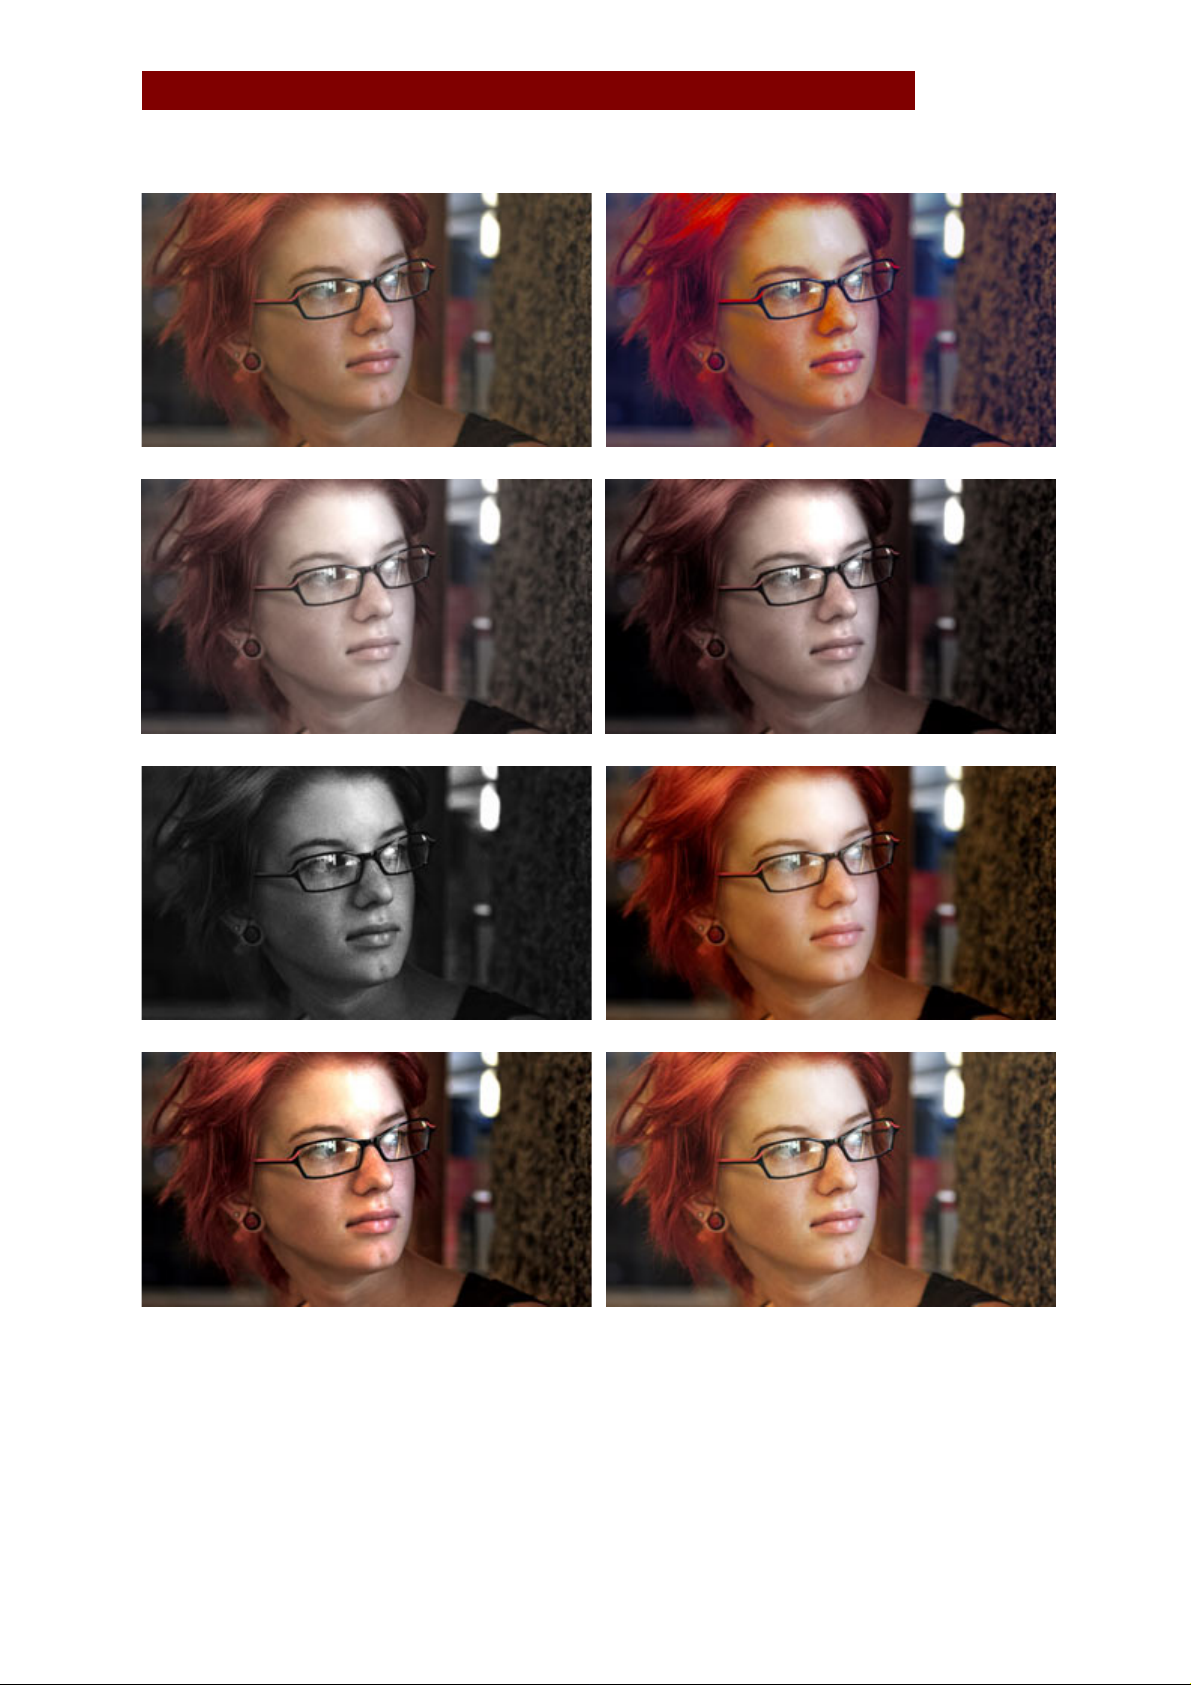
A Multitude of Presets
Looks SE features 90 editable preset Looks that you can use on your projects. These
presets have been divided into individual categories to make searching and browsing
easier. Individual categories include: Basic, Black and White Tints, Diffusion, Horror,
Music Videos, Popular Film, Popular TV, Special Effects, Stock Emulation, and
Tints/Grads.
To preview the different Looks, go to the Presets Gallery
Look Theater
A unique preview mode is built right into the top navigation bar of LooksBuilder SE.
Simply click the preview button to begin an interactive slide show that shows the looks as
applied to a frame from your project or any JPEG file. The slide show applies each presets
from the Look Library for a few seconds at a time, or can be paused and moved forward
manually.
.
.
Pinnacle Studio 12 3
Page 4

MAGIC BULLET LOOKS FOR PINNACLE STUDIO 12
System Requirements
Magic Bullet Looks SE requires specific graphics card capabilities to run. Without the
correct card, the software will not install or run, and the installer will warn you if you
don’t have the necessary graphics card installed in your system.
Magic Bullet Looks SE uses an advanced render engine that depends on the same kind of
graphics processing used in the latest video games like World of Warcraft, Call of Duty or
the games that run on the Xbox 360 or Playstation 3 systems. The Looks engine can
render color effects, diffusion and other tools faster on an advanced graphics processor
than on today's fastest CPUs from Intel or AMD.
Magic Bullet Looks SE supports a wide range of cards from both ATI or NVIDIA. For ATI
cards, we require a 9600 XT or greater, or an X series card starting with the X700 series.
Cards with greater model numbers and at least 128 MB of RAM can generally run the
Looks engine.
For NVIDIA cards, we support the 6600 model and higher or QuadroFX 1300 and up.
Cards with higher model numbers and a minimum of 128 MB of RAM can run Looks SE.
For users working with HD images, we require that the video card have at least 256 MB
of RAM. In all cases, we suggest using the latest video drivers for your graphics card.
The Looks system does NOT support Intel GMA processors. These graphics
processors are integrated into the system motherboard of many low-cost
systems and are used frequently in laptop computers. The Intel GMA processors
are capable of 2D graphics but they do NOT have the advanced graphics
processing capabilities required to drive the Looks engine. If you have one of
these processors, you will likely be prompted during installation that the
graphics processor is unsupported.
NOTE: Since all media is processed with high dynamic range quality like a raw digital
photo, you will absolutely need a 256 MB graphics card or larger for HD projects. We do
NOT recommend using a card with only 64 MB of RAM. For newer cards from ATI and
NVIDIA, we recommend a minimum of 256 MB of RAM.
Rendering
In most cases, the Looks SE plug-in requires rendering to generate final color-corrected
output. The Studio host application will either render the content in the background as
you work or it will generate the final result during the Make Movie process.
NOTE: The maximum render size in Looks is 8192 x 8192 pixels, but is dependent on the
video card in the system. Most cards will support 2K media (2048 x 1536) rendering but
only the NVIDIA 8800 series cards or Quadro 4600/5600 support 8K output at time of
this writing.
Performance Expectations
Since the processing requirements vary wildly by the number of tools in a look, it is
difficult to give exact output or render speed expectations on every system with every
look. On the highest-end systems such as a PC system with an Nvidia 8800 GT graphic
card, you can expect relatively speedy rendering.
On a Dell 8600 with 8800 GT card, we tested some of the looks for render speed on an
HD clip. This is a higher data rate than DV, but lower than full 1080p HD media. The
following table shows the render speed of various Look presets. The render speed is
noted for the output time relative to the length of the media. For example, a look that is
Pinnacle Studio 12 4
Page 5

MAGIC BULLET LOOKS FOR PINNACLE STUDIO 12
2.4x real time means that 1 minute of media will take approximately 2 minutes and 25
seconds to render.
Look Complexity Render Speed
Neo, Epic Extremely Simple 1.1x project time
Subtle Film Simple 1.5x project time
Basic Moderate 2.4x project time
Dream Look Complex 3x project time
Pinnacle Studio 12 5
Page 6
MAGIC BULLET LOOKS FOR PINNACLE STUDIO 12
Installation
Magic Bullet Looks SE comes packaged as a complete software installer. You must
have installed your copy of Pinnacle Studio Ultimate before installing Magic Bullet Looks
SE. The installer will automatically place the required components on your hard drive and
guide you through the process of installing the plug-in.
Installer Step-by-Step
The Windows installer is labeled Magic_Bullet_Looks_SE_Install. exe. To begin, simply
double-click the installation icon. You will be greeted with the Red Giant Software splash
screen.
Click next to bring up the product splash screen.
Pinnacle Studio 12 6
Page 7
MAGIC BULLET LOOKS FOR PINNACLE STUDIO 12
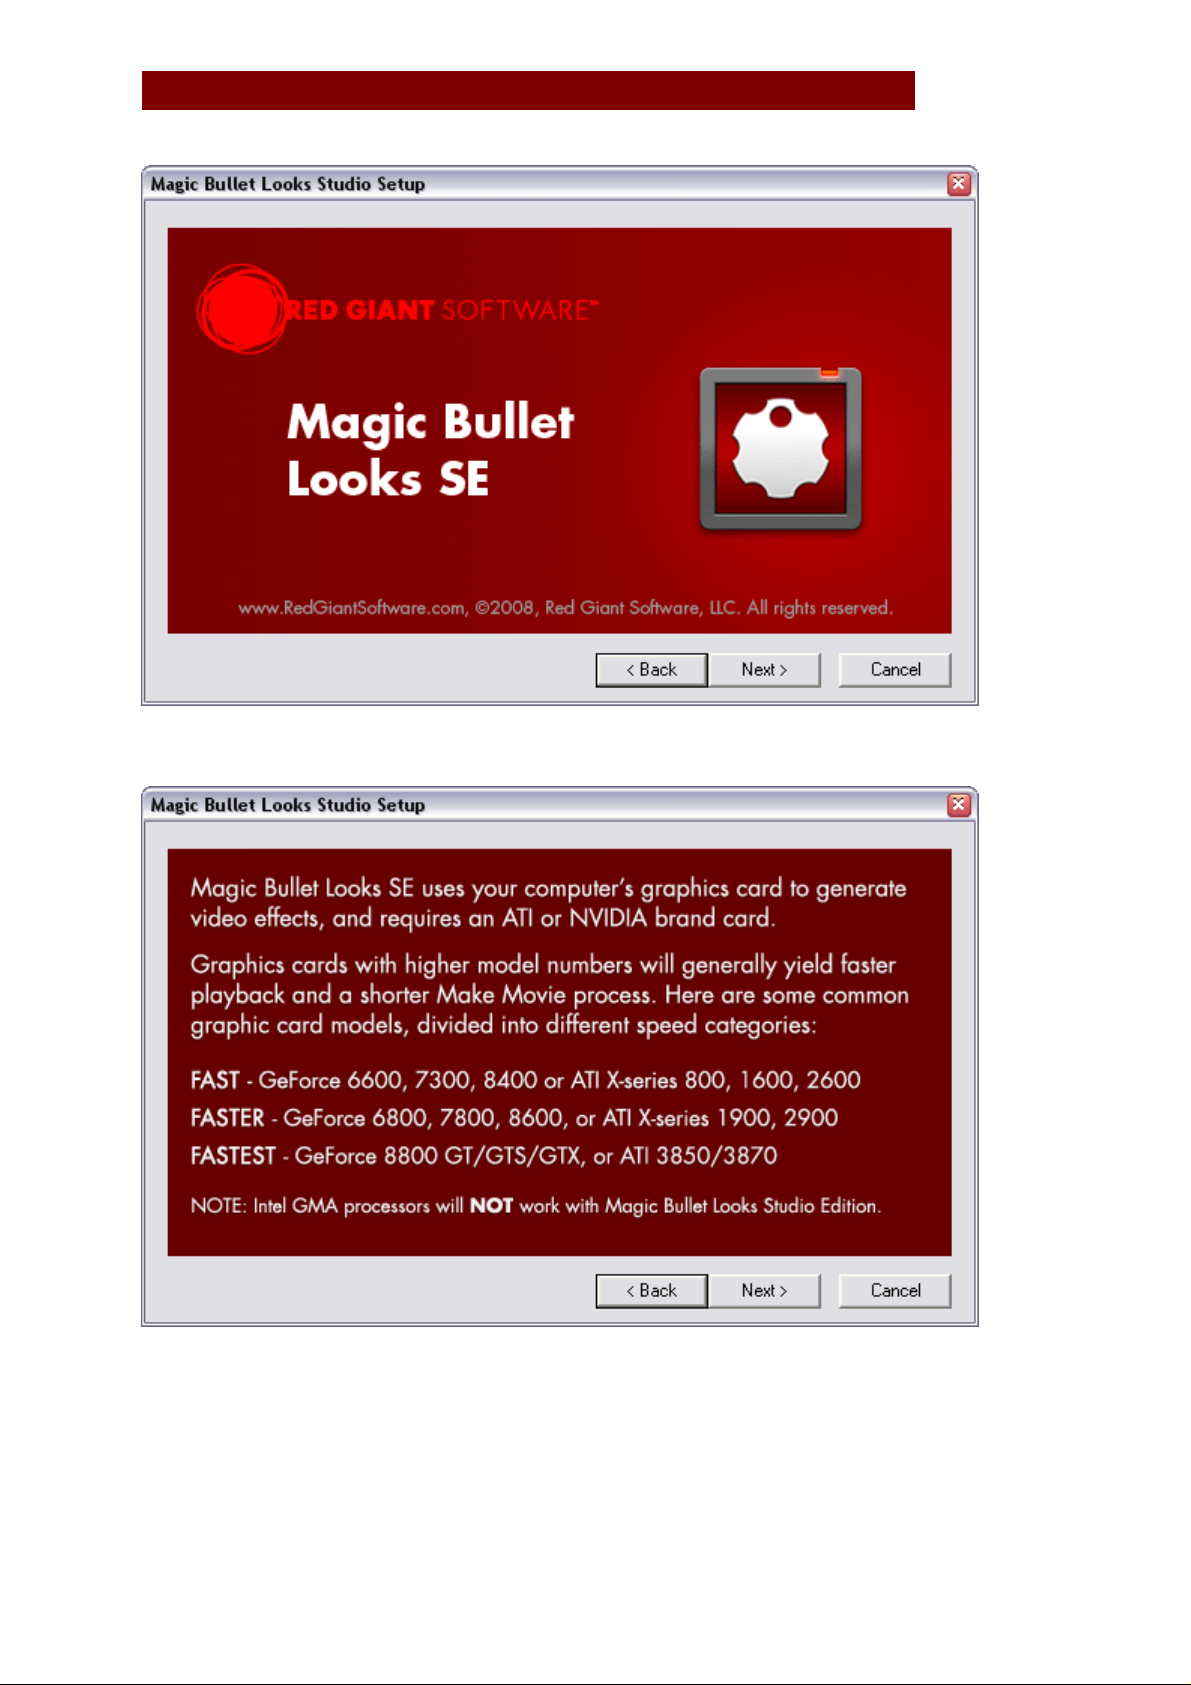
Click Next to move to the graphics card recommendation screen.
Click Next to open to the installer instruction screen.
Pinnacle Studio 12 7
Page 8
MAGIC BULLET LOOKS FOR PINNACLE STUDIO 12
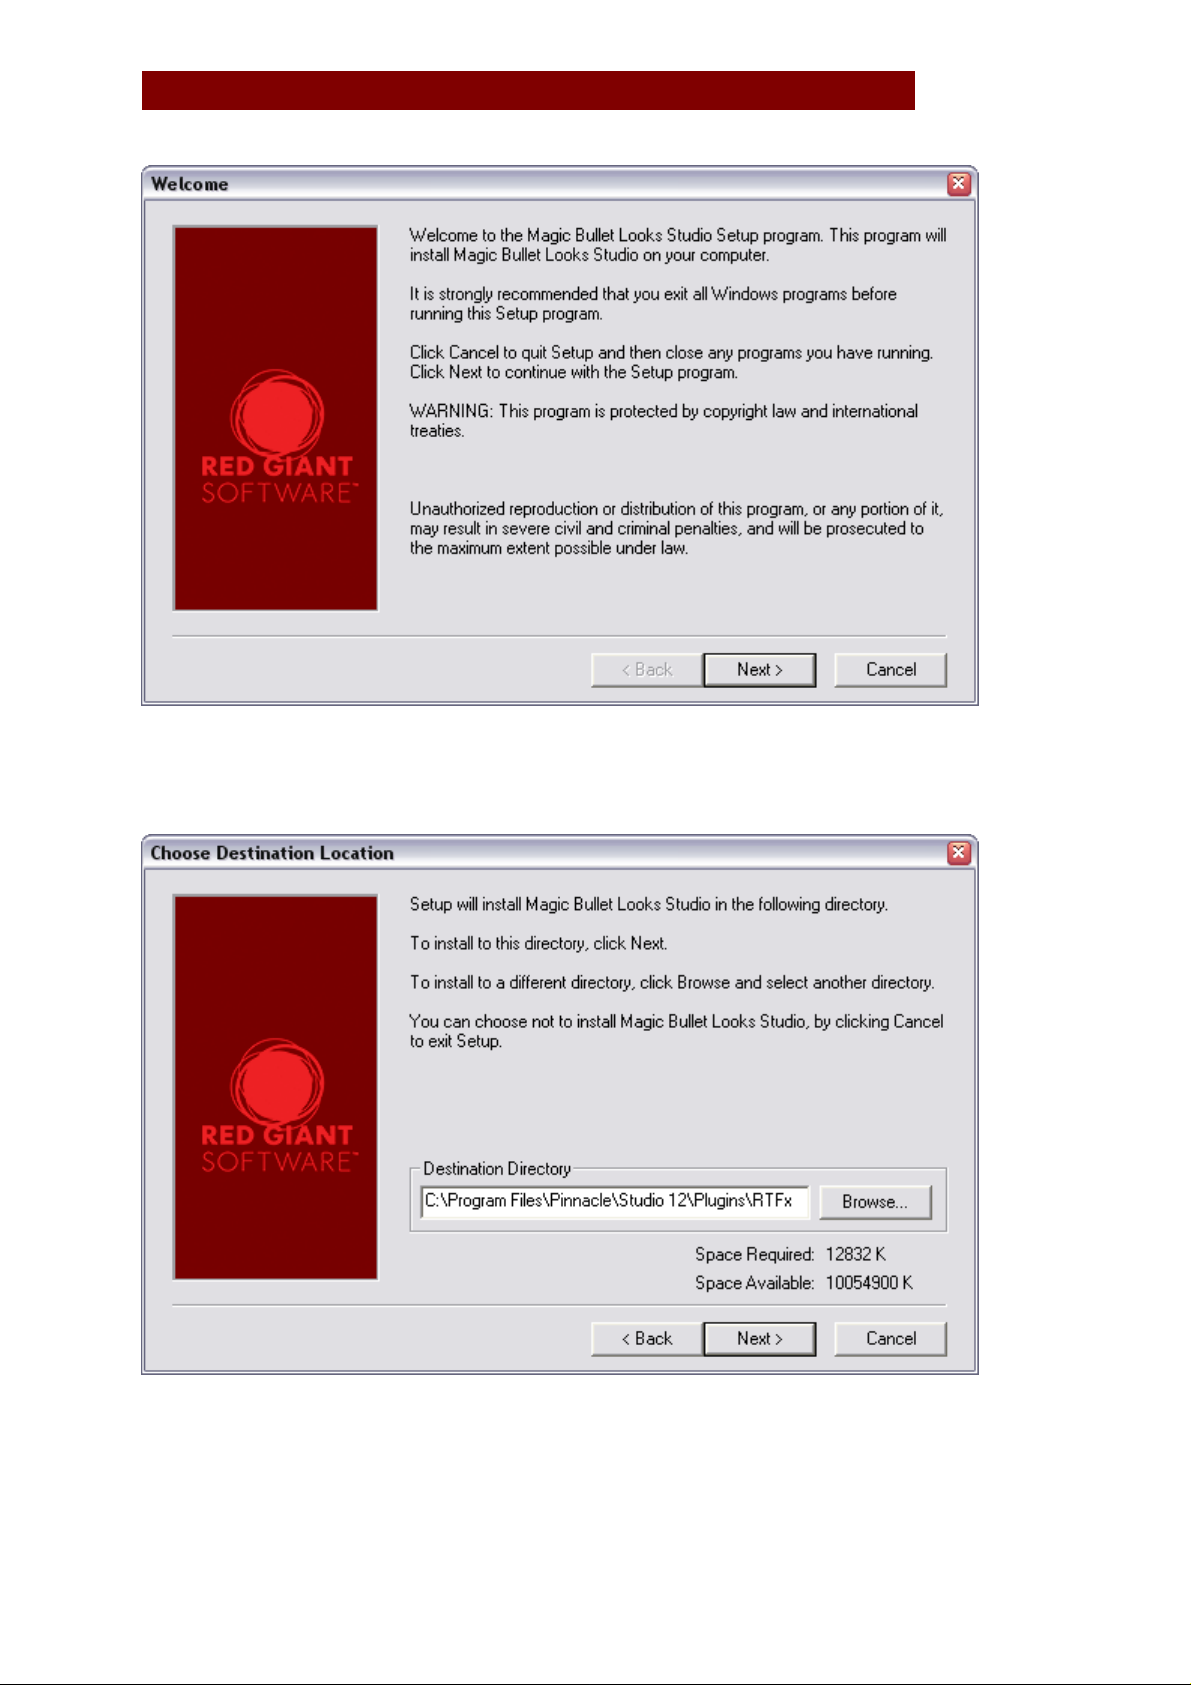
The final screen is the path options screen where you choose an installation location. If
you install Studio on your default drive, you can simply click Next to complete the
installation.
Pinnacle Studio 12 8
Page 9
MAGIC BULLET LOOKS FOR PINNACLE STUDIO 12
Looks SE Plug-in: Getting Started
To access the LooksBuilder SE application where you choose, edit and apply looks, you
must first apply the Looks SE plug-in from the Video Toolbox. First select a clip, then
click the Video Toolbox button in the upper left corner of the Timeline/Storyboard
window. If you need more general information about Video Effects, see "Using Video
Effects" in the Studio Plus manual.
The Video Toolbox button
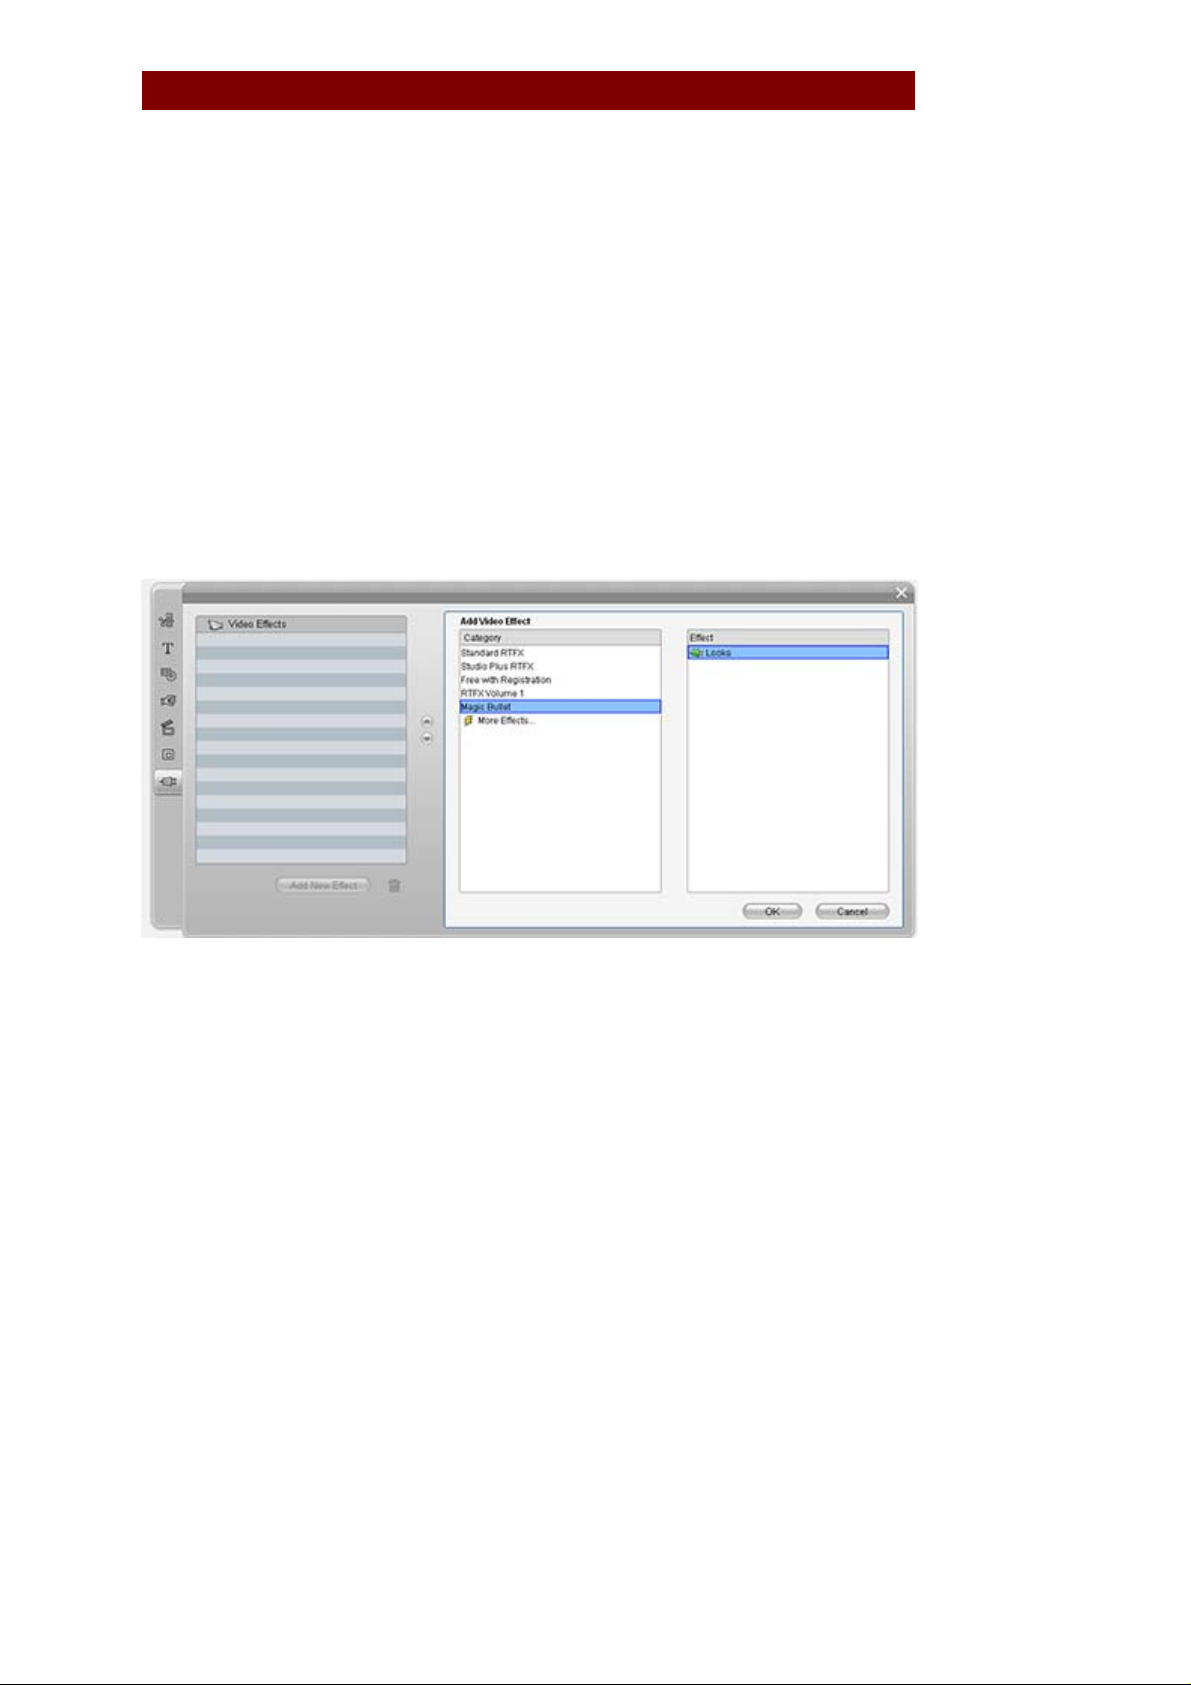
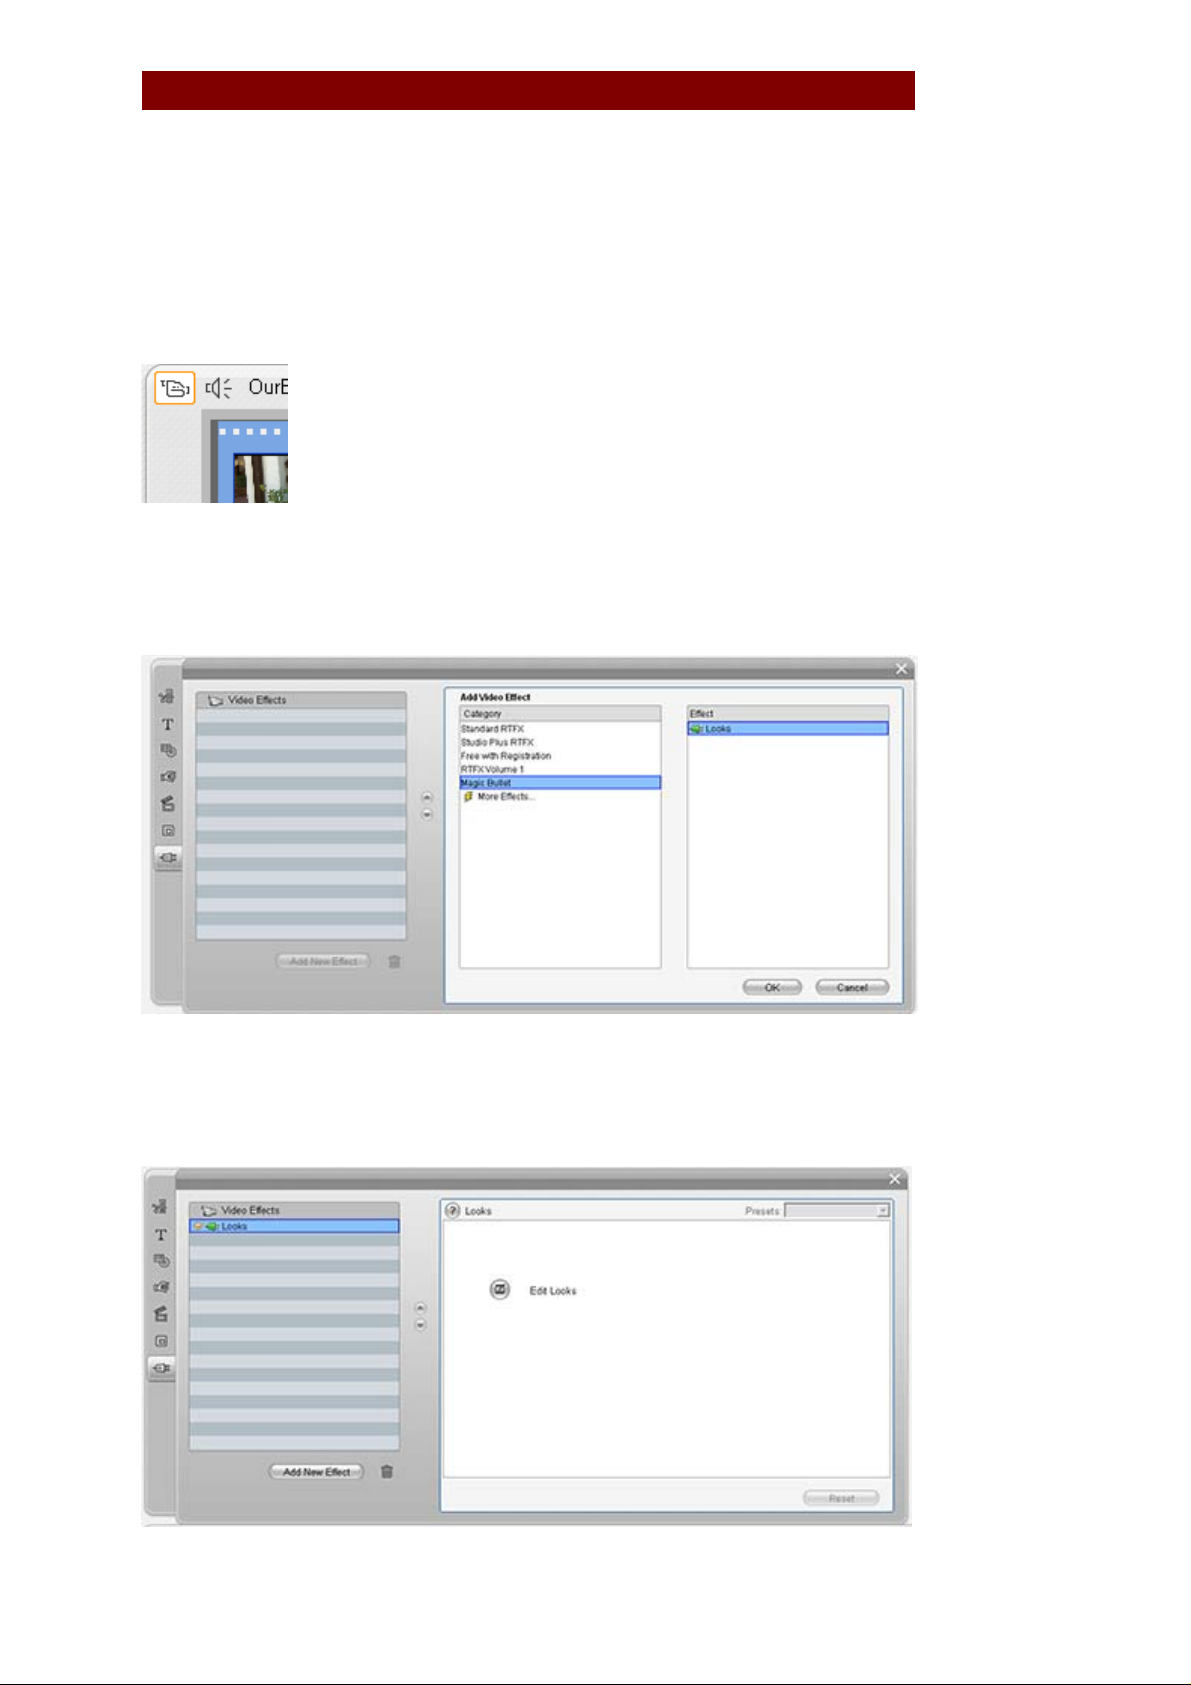
Once you have the Video Toolbox panel open, click the Video Effects tool to reveal the
video effects options. Then click the Add New Effect button to add a video effect to your
clip.
The Looks effect is the only effect available from the Magic Bullet category
The Looks SE plug-in user interface consists of a single button: The Edit Looks button in
the Looks panel. Clicking the Edit button brings up the LooksBuilder SE inte rface. The
help button (the question mark), will open the HTML-based help.
The Looks panel in Studio
Pinnacle Studio 12 9
Page 10
MAGIC BULLET LOOKS FOR PINNACLE STUDIO 12
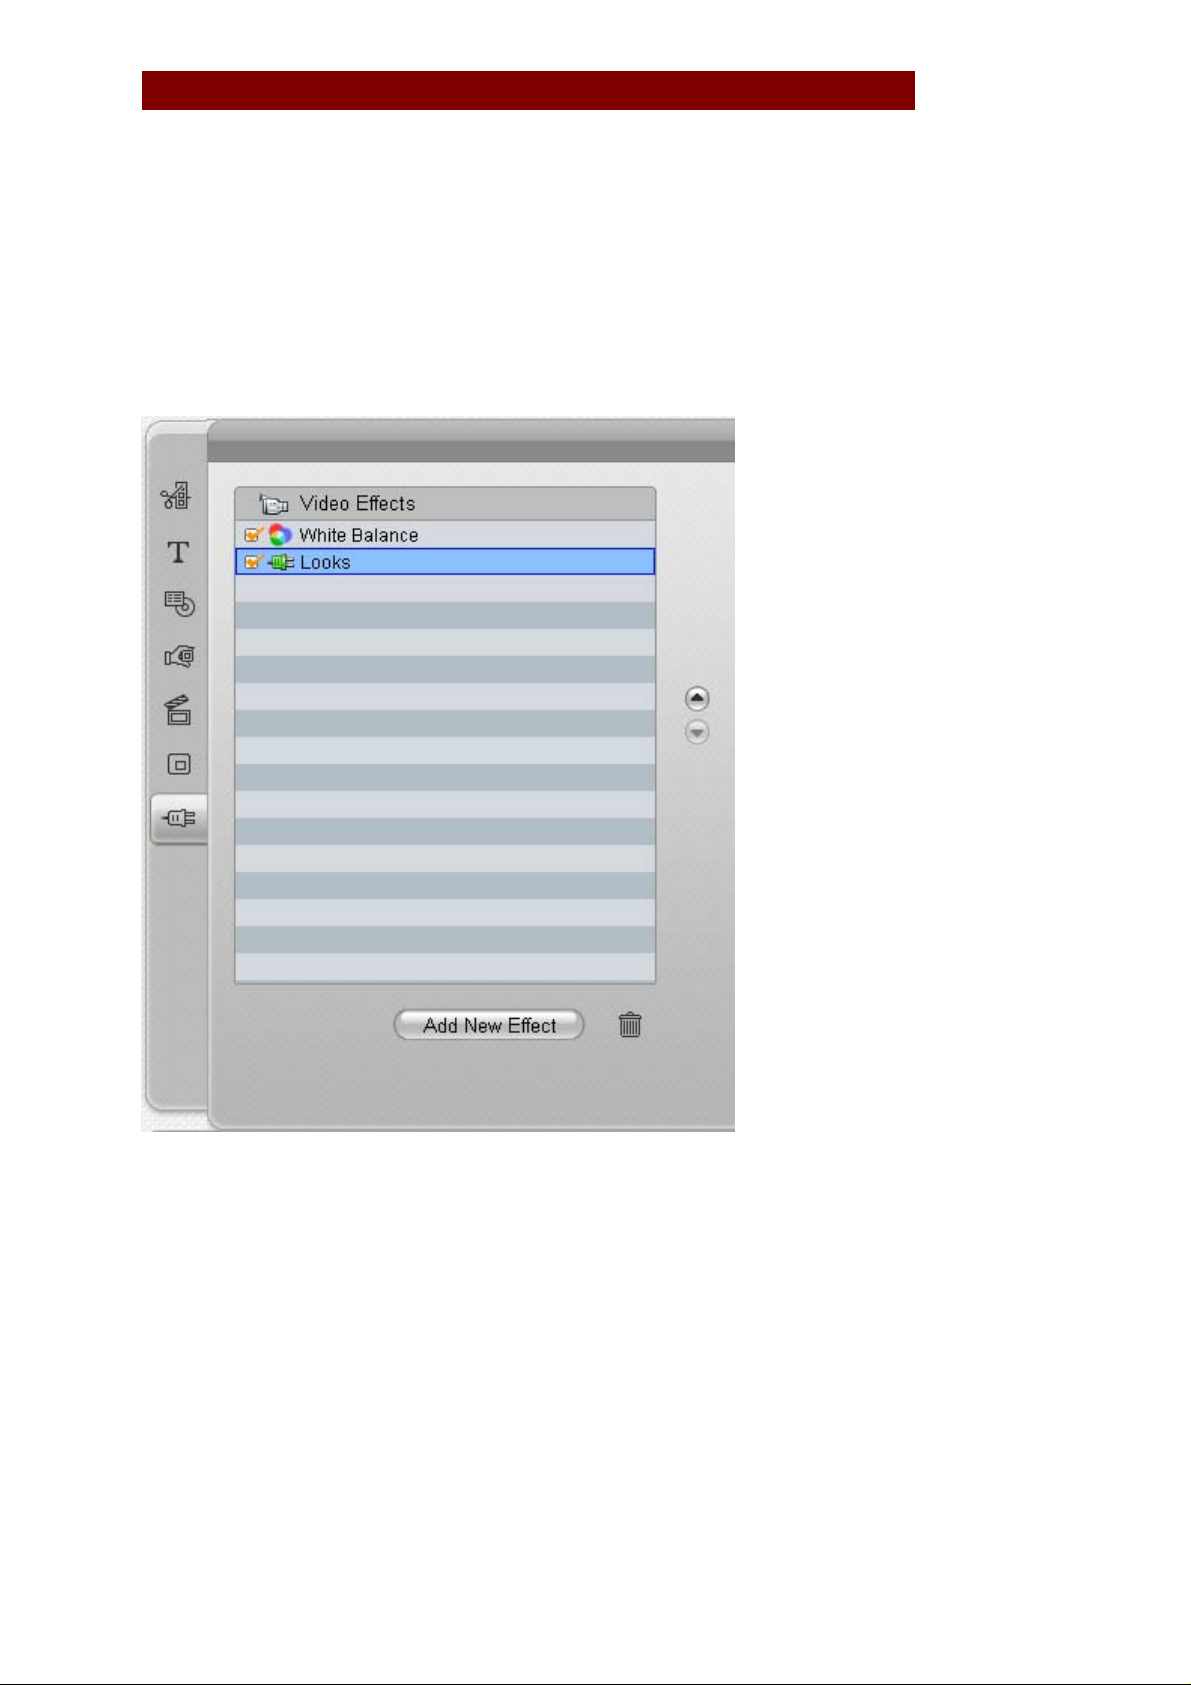
Stacking effects
It is possible to use Looks SE in combination with other color correction effects in Studio
(such as Color Correction or White Balance effects) in the Standard RTFX category. We
recommend that you apply these effects before applying the Looks SE plug-in. In the
Video Effects panel, the effects are rendered from top to bottom. Apply any color
correction effects to your footage first, then apply Looks SE. You can rearrange the order
of the effects by selecting the look and clicking the up or down arrows to the right of the
effect list.
The White Balance effect applied before Looks SE in the Video Effect toolbox
Pinnacle Studio 12 10
Page 11

MAGIC BULLET LOOKS FOR PINNACLE STUDIO 12
Preparing for Looks SE
There is a wealth of information—and just as much misinformation—on the web and in
print about how to shoot DV/HDV for the best results. Here, straight from Stu
Maschwitz's accumulated knowledge, is the short version of how you can shoot the best
footage in preparation for Looks SE. If you want even more information on shooting and
color processing, check out Stu Maschwitz's DV Rebel's Guide
Turn Down the Sharpening
If your camera has the option, reduce the internal sharpening control to almost none.
The harsh, over-sharpened edges that appear on high-contrast images are a signature
giveaway of video. It’s worth experimenting with your camera’s settings to find the best
sharpening amount, but it will almost certainly be less than the default setting. You can
always make the video look crisper later on, but you cannot take the sharpening artifacts
out once captured to tape, DVD, HDV or whatever your medium.
Shoot in 16:9 Mode
Especially if you plan on going out to film, but also if a nice, letterboxed video output is
your desire. Electronic "16:9 mode" is not as good as shooting with a native 16:9 chip,
but it’s better than not shooting with it. Be careful though: if a full-frame version of your
project is ever needed, it could be a lot of extra work to create it. 16:9 mode is for
projects which are primarily intended for widescreen presentation.
book from Peachpit Press.
Don’t Overexpose
DV and HDV do not react well to blown-out areas of the frame. If a hot or overexposed
look is your desire, it’s far better to shoot at a normal exposure and use Magic Bullet
Looks SE to burn it out later.
Many cameras have an option to display a zebra pattern in the viewfinder over areas that
are blown out to 100% white. This is a very helpful option wh en shooting for Looks SE.
An ND Grad filter can help keep sunny skies from blowing out, and putting one on the
camera will even do a better job than Looks SE’s built-in Grad and Exposure tools!
Don’t Underexpose
DV doesn't react well to dark areas either! Brightening up a dark DV shot will bri ng out
all the compression and noise that you never knew was there.
Shoot it Plain
As an owner of Magic Bullet Looks SE, you have the most powerful image adjustment
tools in the world at your fingertips. Shoot your footage as “normal” looking as possible,
and wait until you get it into a Magic Bullet project to create those crazy looks you have
in mind. This gives you the power and control to change your mind about how you want
it to look. This means avoiding color filters or diffusion filters on the camera (with the
exception of the ND Grad mentioned above), and setting the white balance to the correct
camera preset for the type of light you’re using.
Shoot it Consistent
The best favor you can do for yourself is to ensure that shots in the same sequence look
similar to one another. Watch not only the lighting on your foreground subject, but that
of your backgrounds as well. Use presets for white balance, so that even if your battery
goes dead and you lose your camera settings, you can still return to the same color
balance you were using before. Use a color monitor on the set to compare playback of
your last setup to the feed from the current one. Try to keep all of your similar skin tones
in the same exposure range from one shot to the next—some cameras have zebra
patterns in their viewfinders that help you do this. Finally , create a pre-flight checklist for
your camera that combines these guidelines with your own experiences, and run through
it before beginning every new shot.
Pinnacle Studio 12 11
Page 12

MAGIC BULLET LOOKS FOR PINNACLE STUDIO 12
As with any advice, please take the above into consideration and make your own
decisions. These guidelines have worked well for Stu while working at his post-production
company, The Orphanage, but there could be any number of reasons that you may need
to do something different. Magic Bullet Looks SE should be flexible enough to handle
whatever you throw at it, but if you follow the above guidelines, you are on the road to
superior results.
Pinnacle Studio 12 12
Page 13
MAGIC BULLET LOOKS FOR PINNACLE STUDIO 12
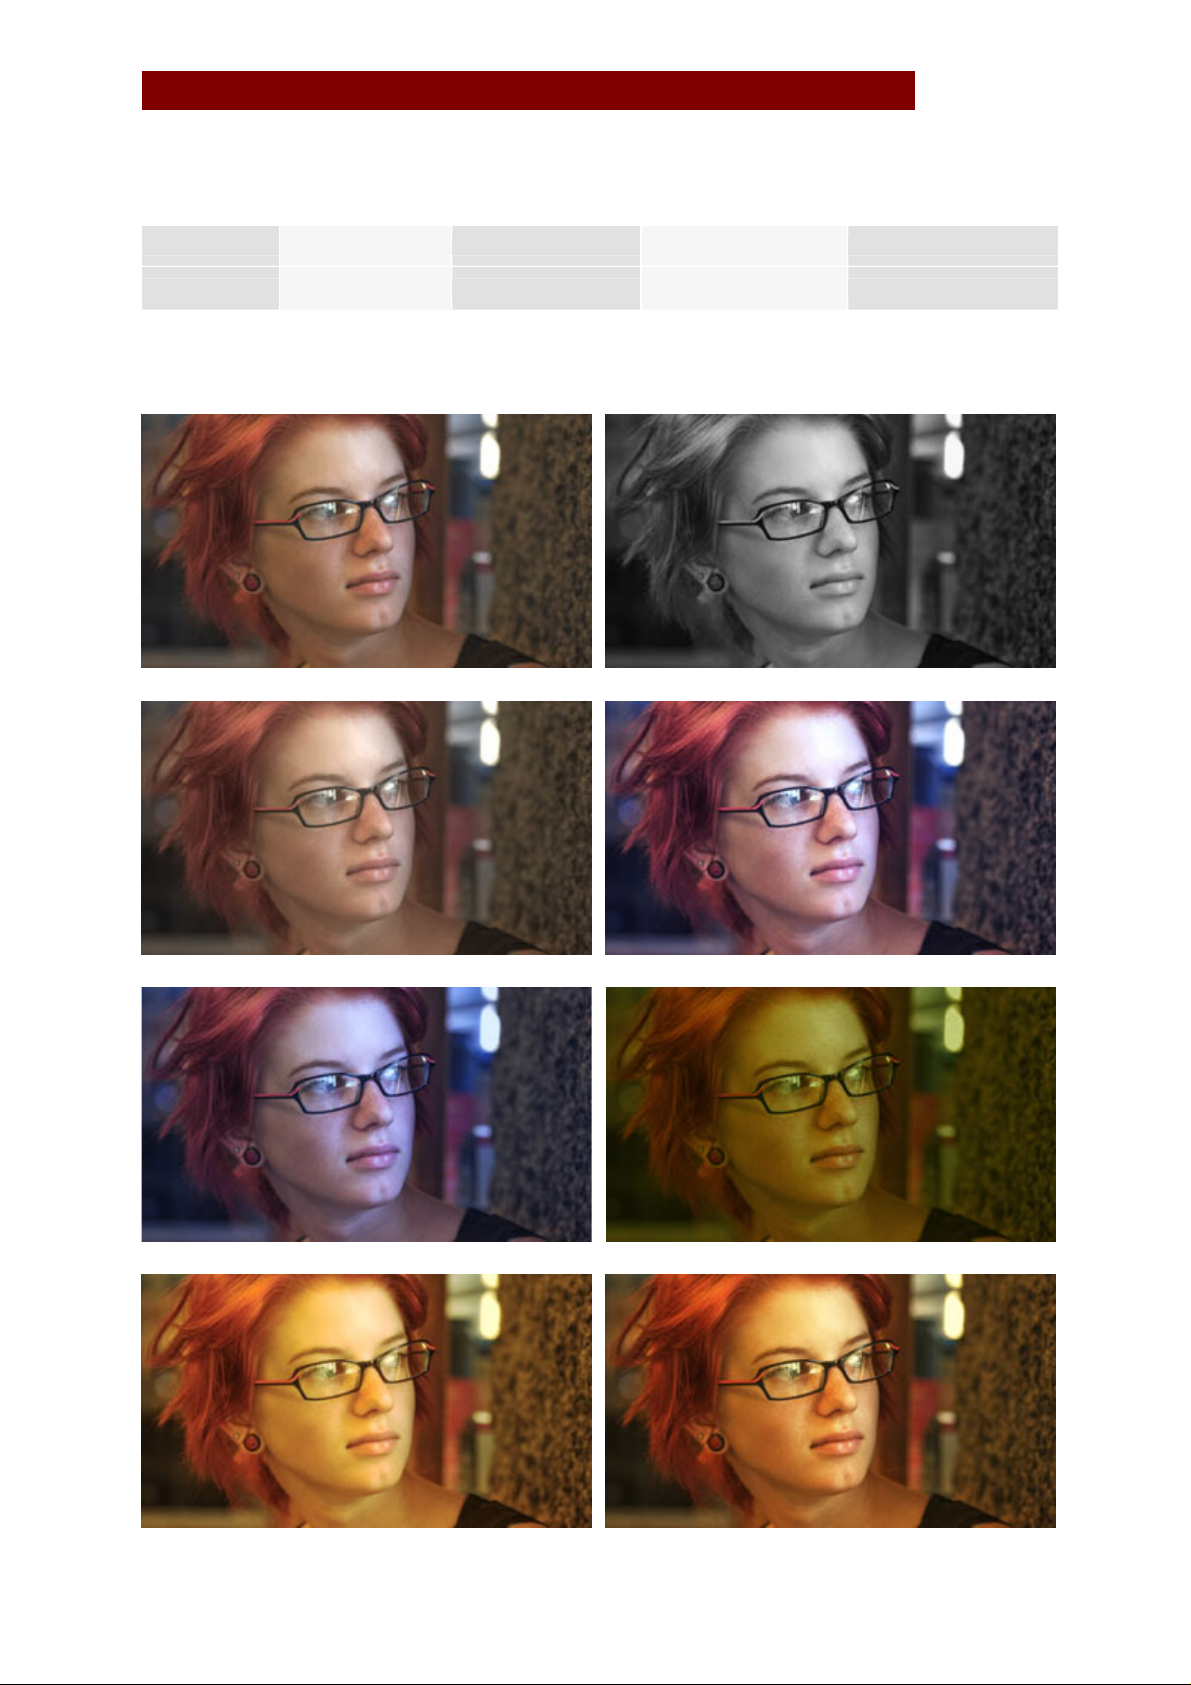
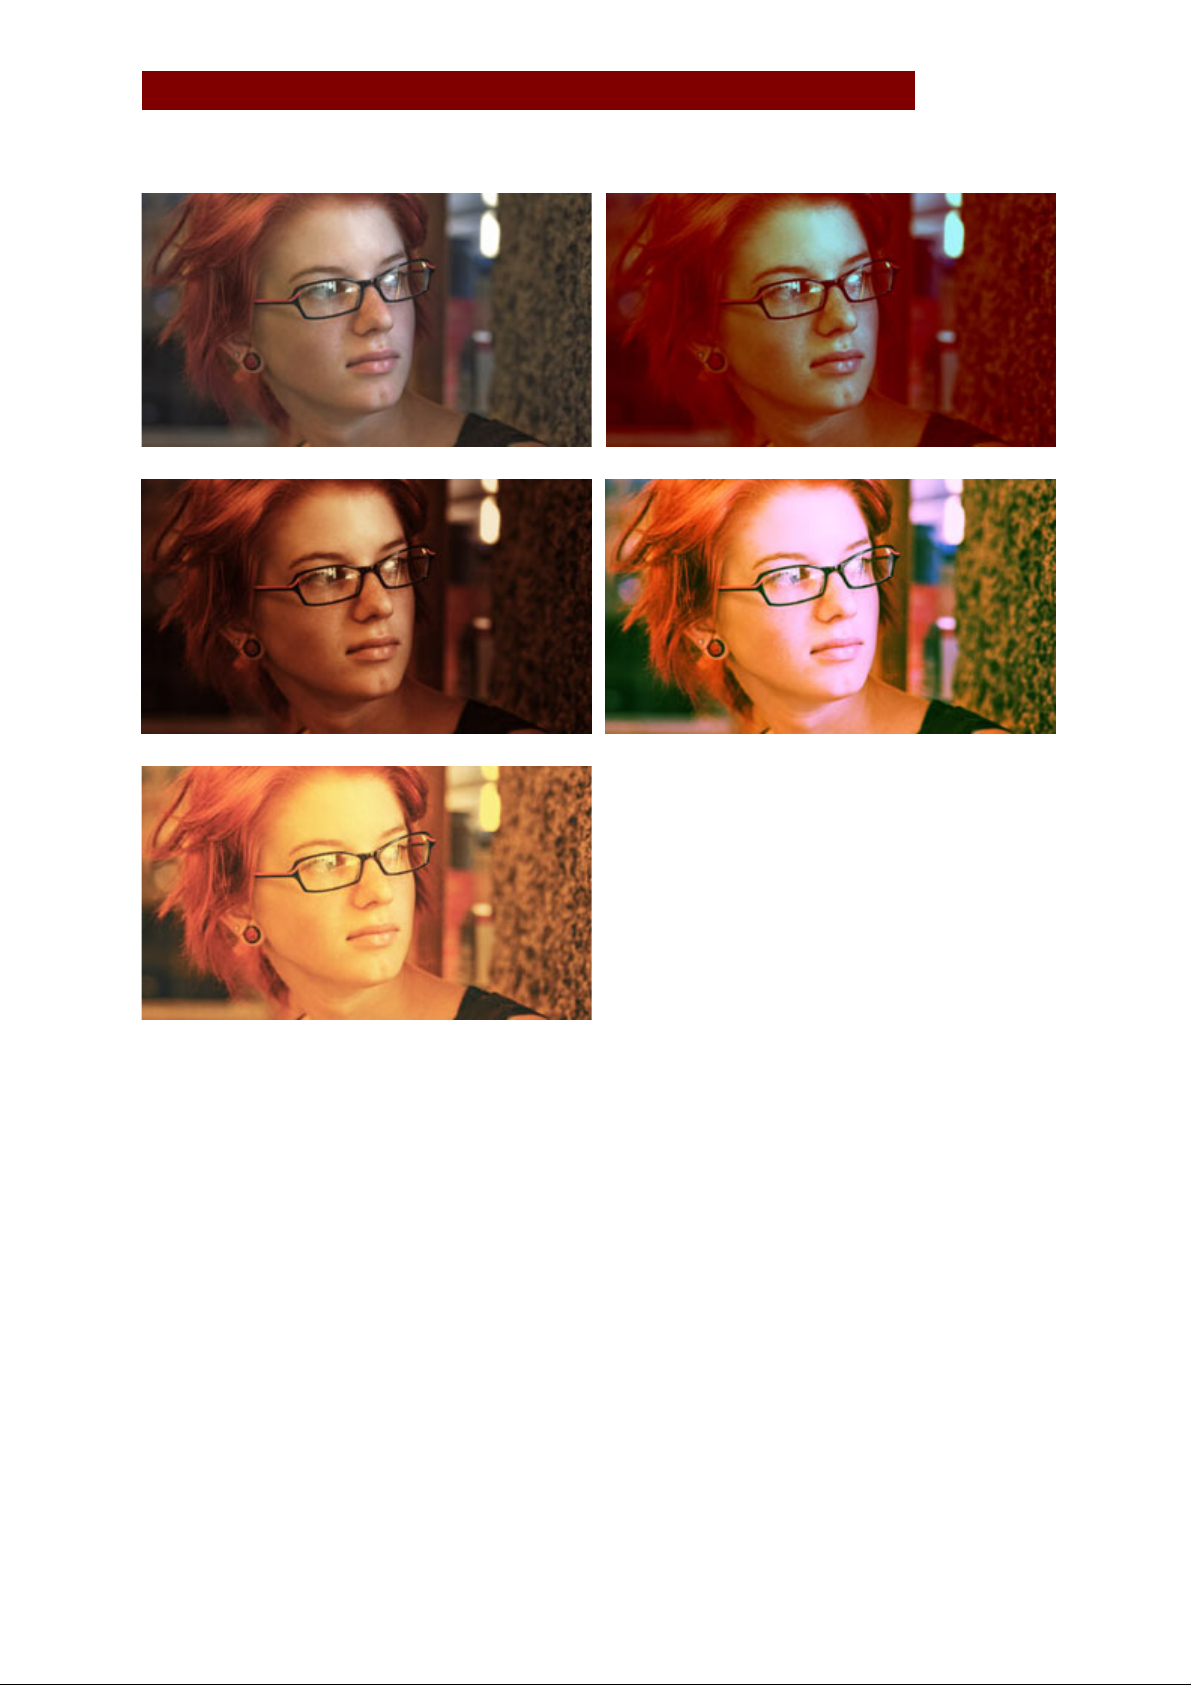
PRESETS – Looks Library (90 Presets)
Basic Black & White Tints Diffusion Horror Music Videos
Popular Film Popular TV Special Effects Stock Emulation Tints an d Grads
Basic
Clean Start Basic Black & White
Basic Black Diffusion Basic Cool Max
Basic Cool Basic Grunge
Basic Warm Max Basic Warm
Pinnacle Studio 12 13
Page 14
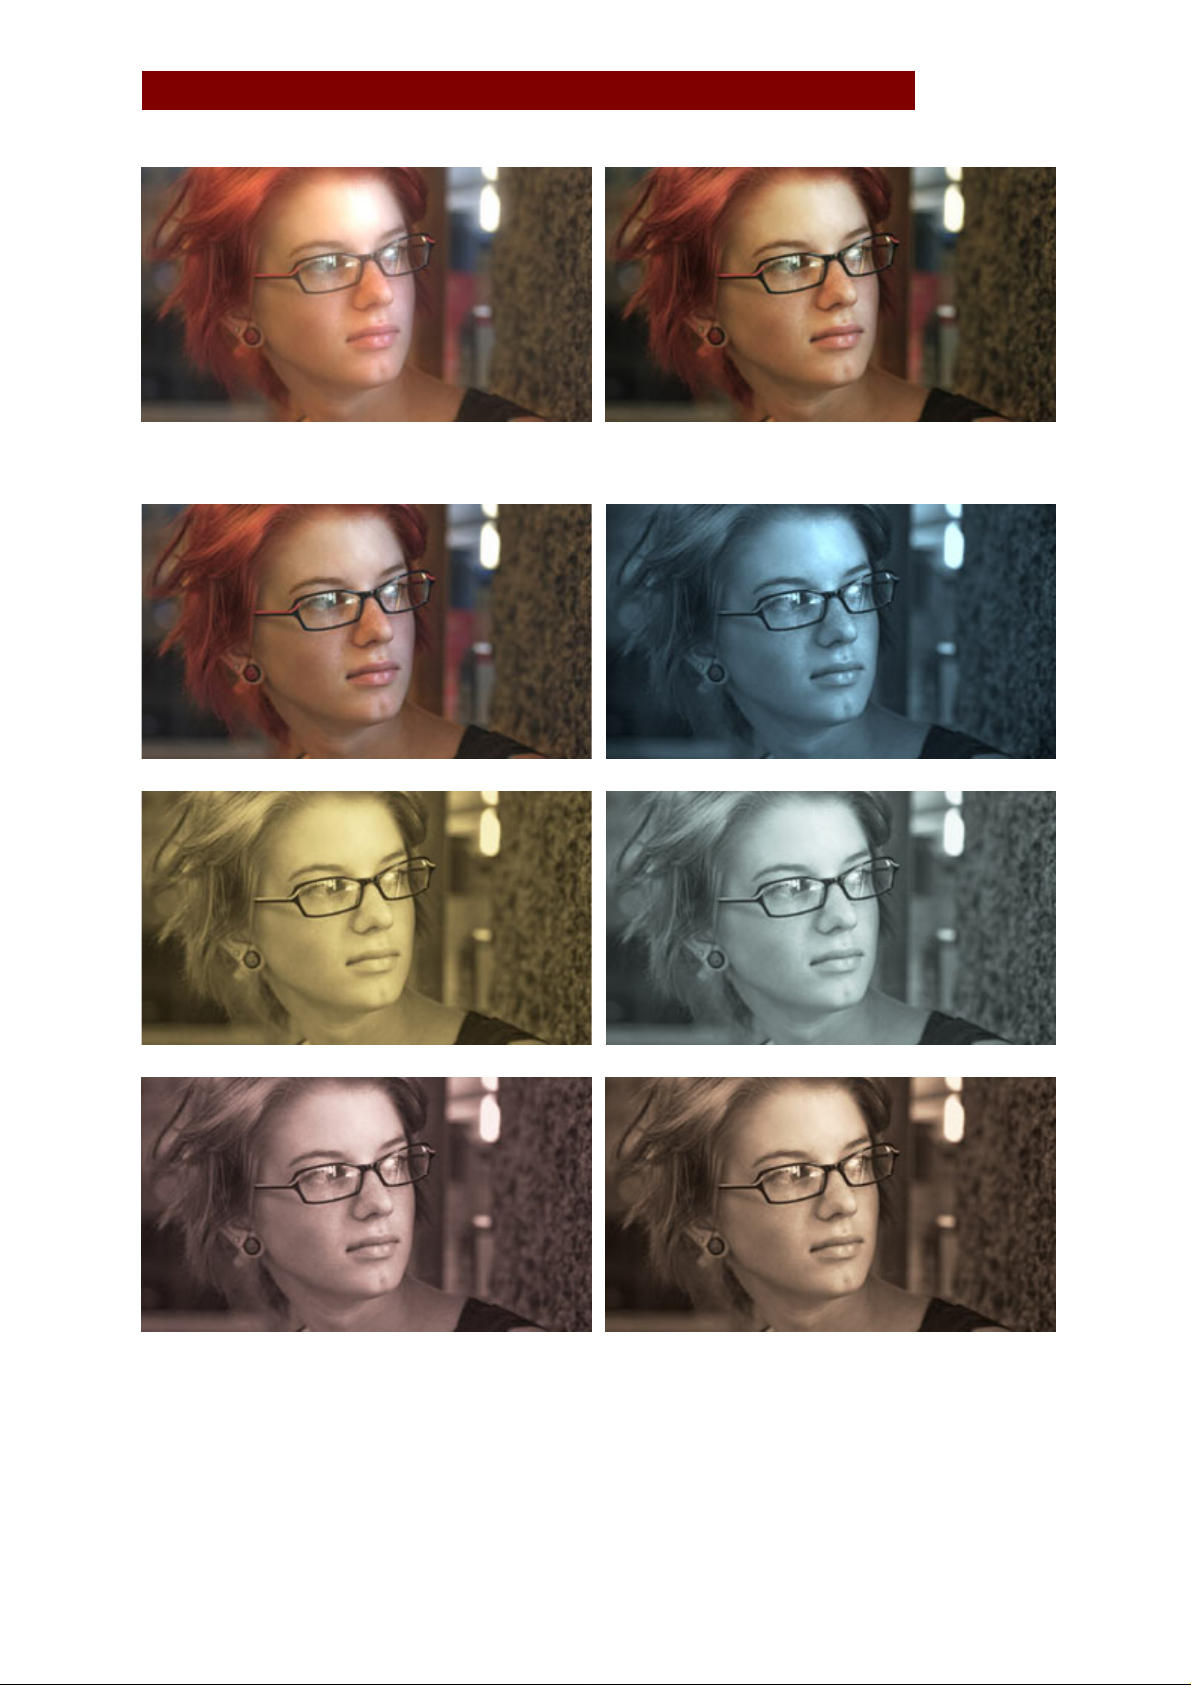
MAGIC BULLET LOOKS FOR PINNACLE STUDIO 12
Basic White Diffusion Basic
Black& White Tints
Clean Start Blue Chrome
Gold Process Platinum Process
Sepia Big Grain Sepia Contrasty
Pinnacle Studio 12 14
Page 15

MAGIC BULLET LOOKS FOR PINNACLE STUDIO 12
Diffusion
Clean Start Black Diffusion 3.5
Edge Noise Soften SultryTron
SuperBloom Telecine Net Warm
Unbloom
Pinnacle Studio 12 15
Page 16
MAGIC BULLET LOOKS FOR PINNACLE STUDIO 12
Horror
Clean Start Color of Hell
Deep Copper Green Vision
Hot Maddy
Pinnacle Studio 12 16
Page 17
MAGIC BULLET LOOKS FOR PINNACLE STUDIO 12
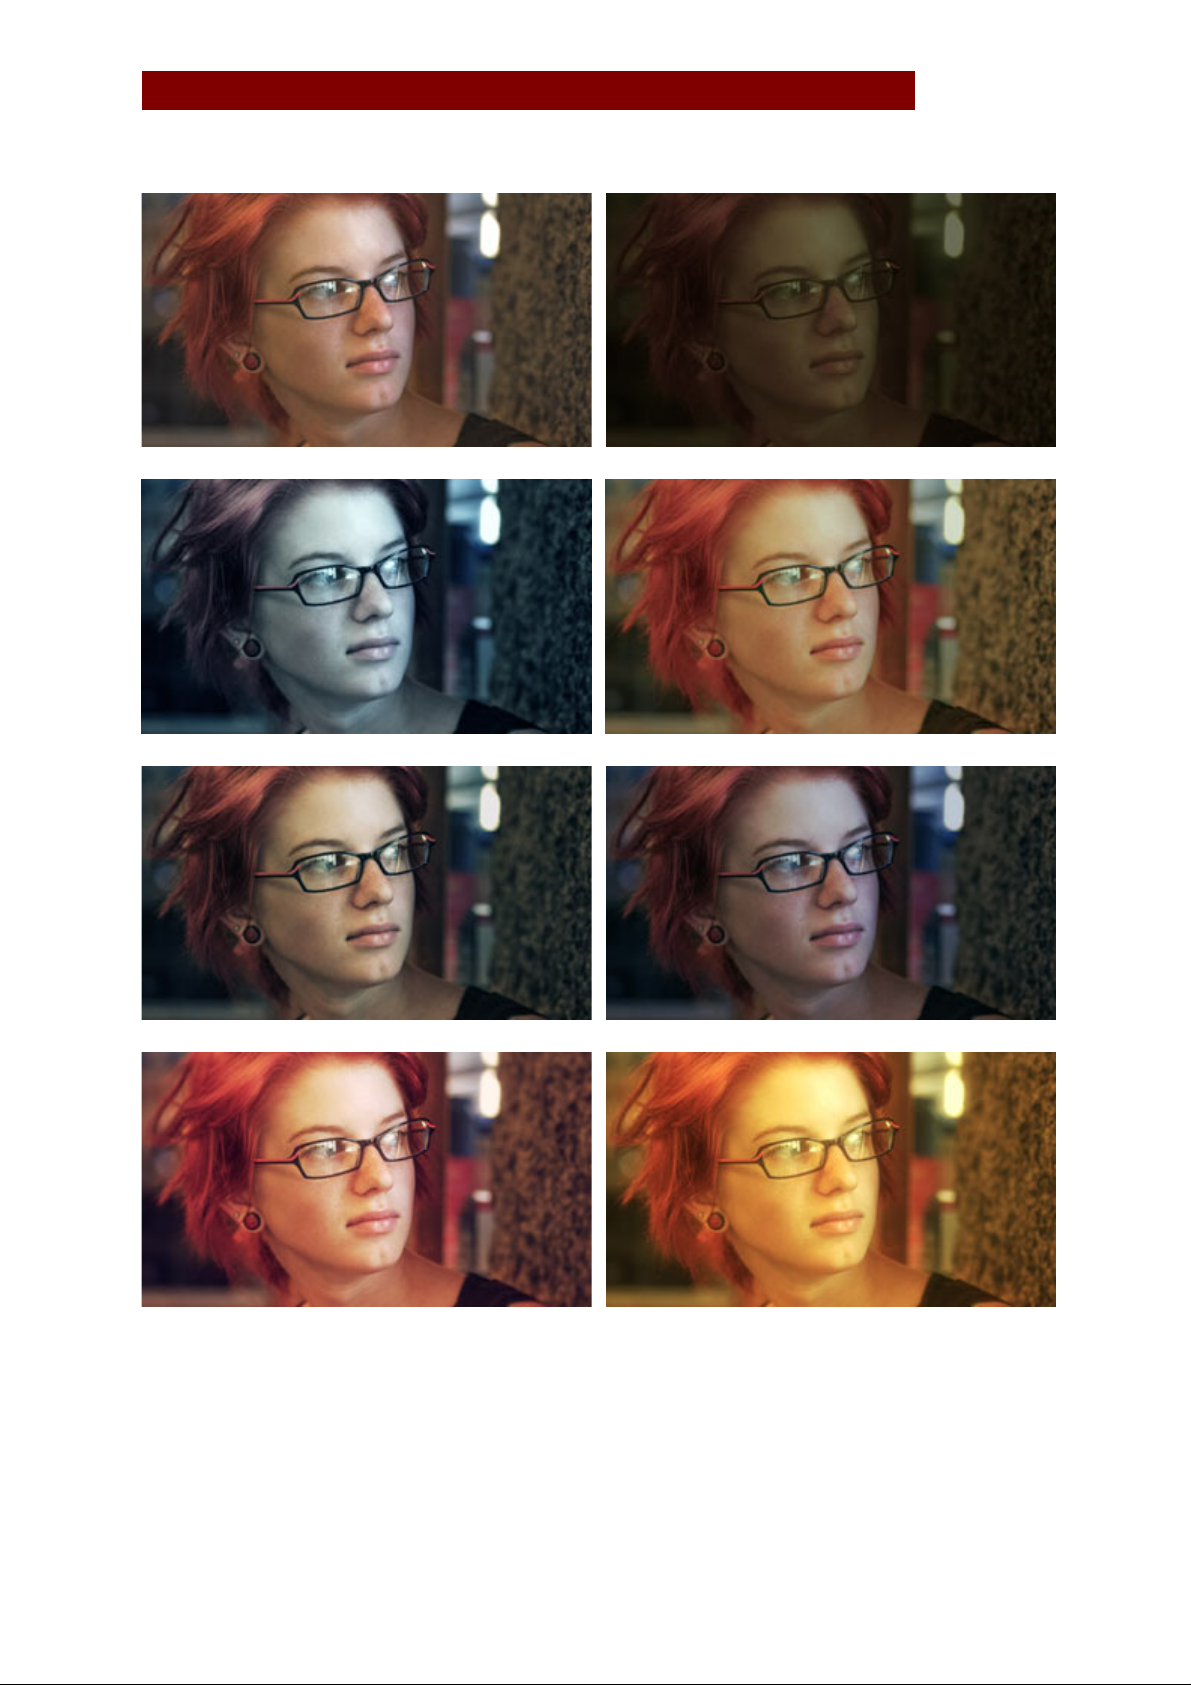
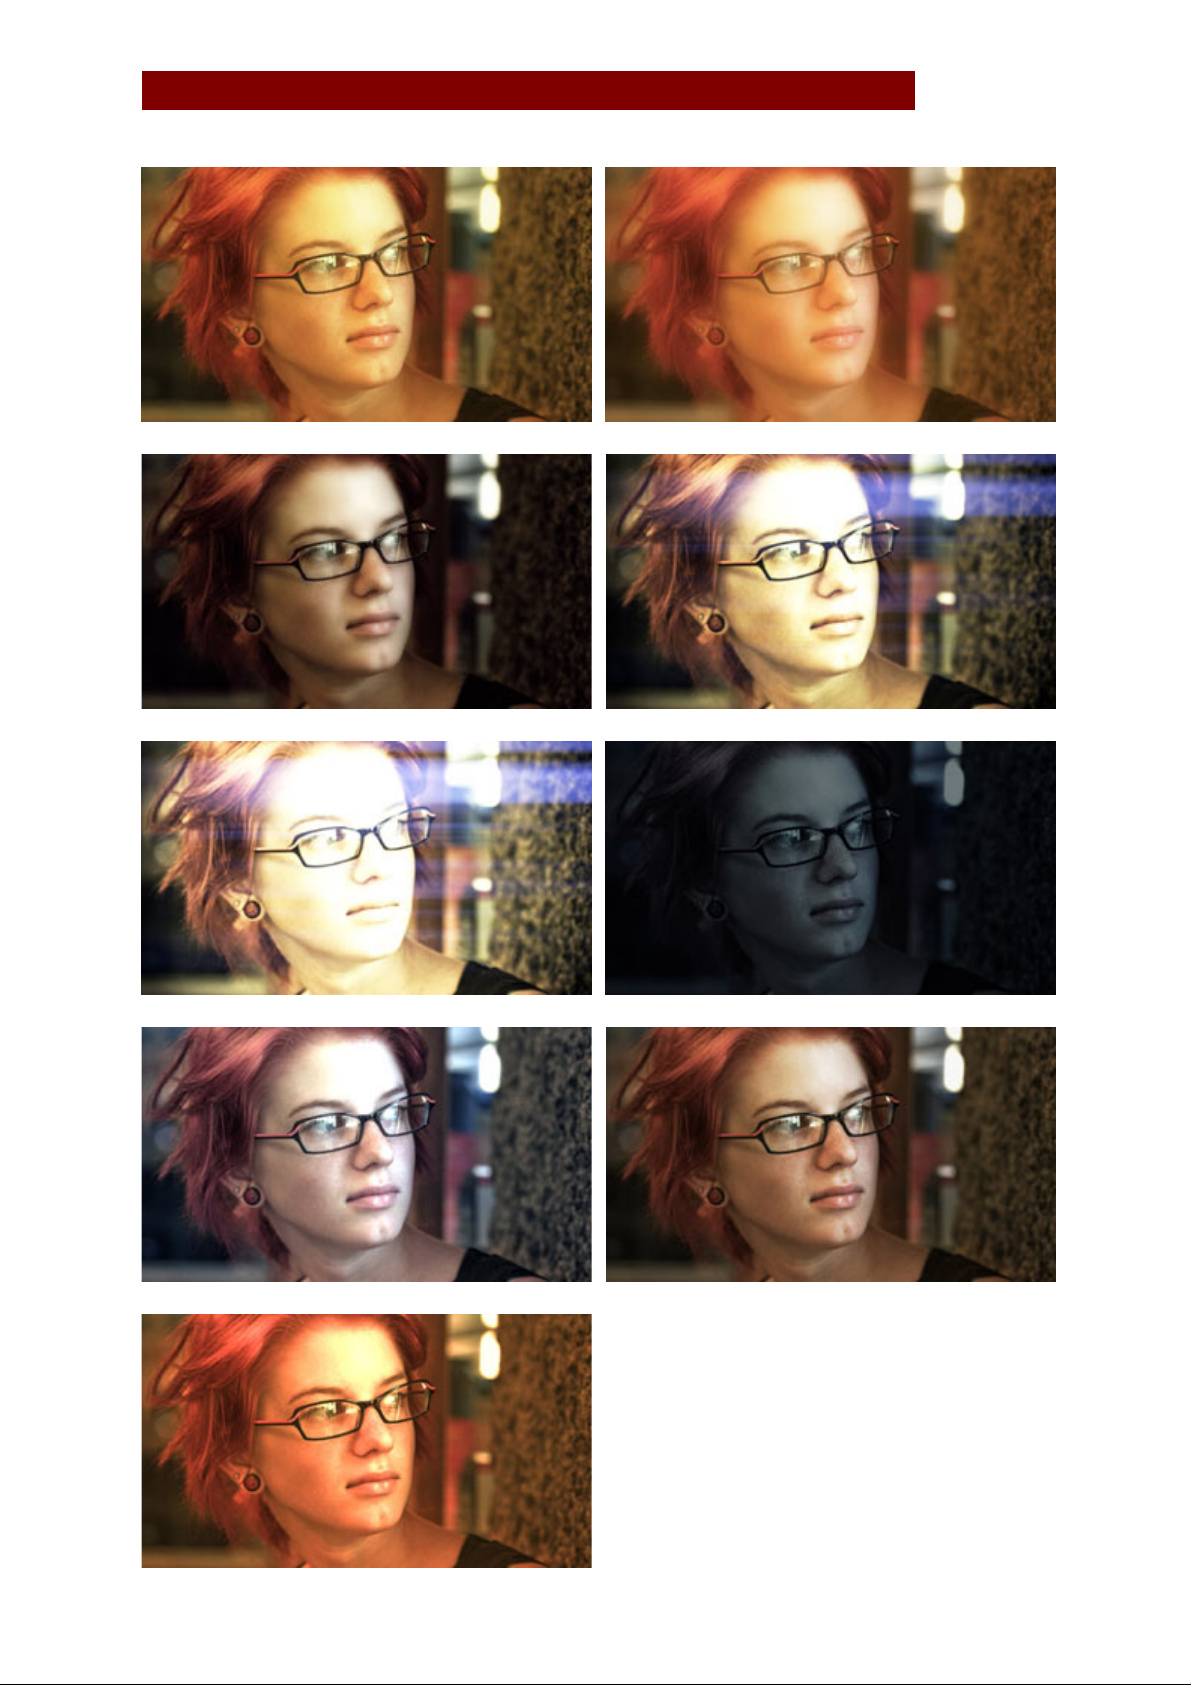
Music Videos
Clean Start Aged
Berlin Big Country
Coolish Alternate Coolish
Crush Blue Edge Dream Look Alternate
Pinnacle Studio 12 17
Page 18
MAGIC BULLET LOOKS FOR PINNACLE STUDIO 12
Dream Look Sharp Dream Look
Green Pearl Infusion Subtle
Infusion Night Time
Punchy Sharp
Pinnacle Studio 12 18
Page 19

MAGIC BULLET LOOKS FOR PINNACLE STUDIO 12
Warm Bird
Pinnacle Studio 12 19
Page 20
MAGIC BULLET LOOKS FOR PINNACLE STUDIO 12
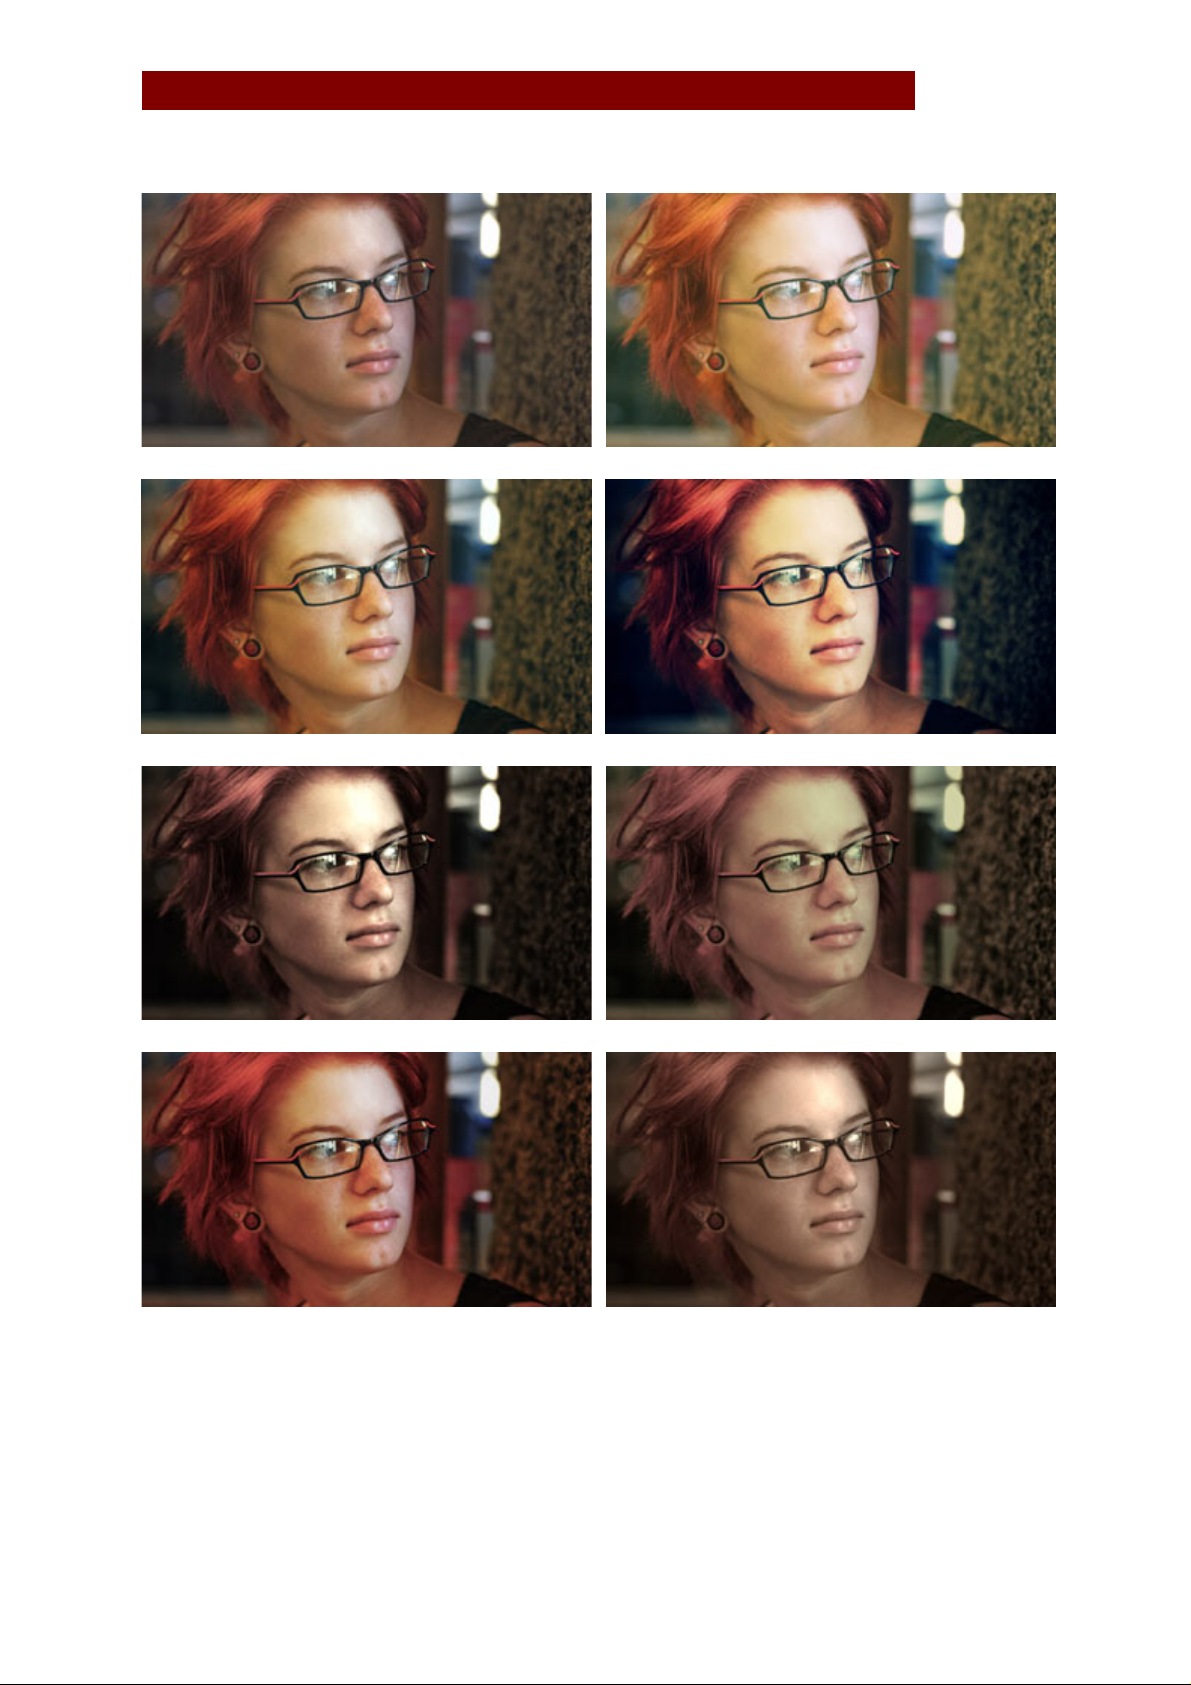
Popular Films
Clean Start Bistro Alternate
Bistrocity Blockbuster
Bronze Aggressive Bronze
Buffalo Curahee
Pinnacle Studio 12 20
Page 21
MAGIC BULLET LOOKS FOR PINNACLE STUDIO 12
Echo Blue Epic
Mexicali Miami
Neo Ultimatum
Warm and Fuzzy
Pinnacle Studio 12 21
Page 22
MAGIC BULLET LOOKS FOR PINNACLE STUDIO 12
Popular TV
Clean Start Crime Scene Alternate
Crime Scene Glamour Gold
Hot and Cold Jealous Indigo
New Noir Purple Shadow Push
Pinnacle Studio 12 22
Page 23
MAGIC BULLET LOOKS FOR PINNACLE STUDIO 12
Special Effects
Clean Start Benumbed
Days of Night Multi Grad Cool
Pink Spot Star Filter Tight
Pinnacle Studio 12 23
Page 24
MAGIC BULLET LOOKS FOR PINNACLE STUDIO 12
Swing Tilt Film Warm Spot Focus
Pinnacle Studio 12 24
Page 25
MAGIC BULLET LOOKS FOR PINNACLE STUDIO 12
Stock Emulation
Clean Start AG Film Stock
Bleach Bypass Light Bleach Bypass
BW Film Stock Grainy Color Reversal Old Style
Color Reversal Max Contrast
Pinnacle Studio 12 25
Page 26
MAGIC BULLET LOOKS FOR PINNACLE STUDIO 12
Mishandled Negative No 85
Subtle Film Soft Subtle Film
Two Strip Cool Stock Warm Stock 01
Pinnacle Studio 12 26
Page 27
MAGIC BULLET LOOKS FOR PINNACLE STUDIO 12
Tints & Grade
Clean Start Brilliant Orange Crush
Grad Deep Blue Grad Sky
Pinnacle Studio 12 27
Page 28
MAGIC BULLET LOOKS FOR PINNACLE STUDIO 12
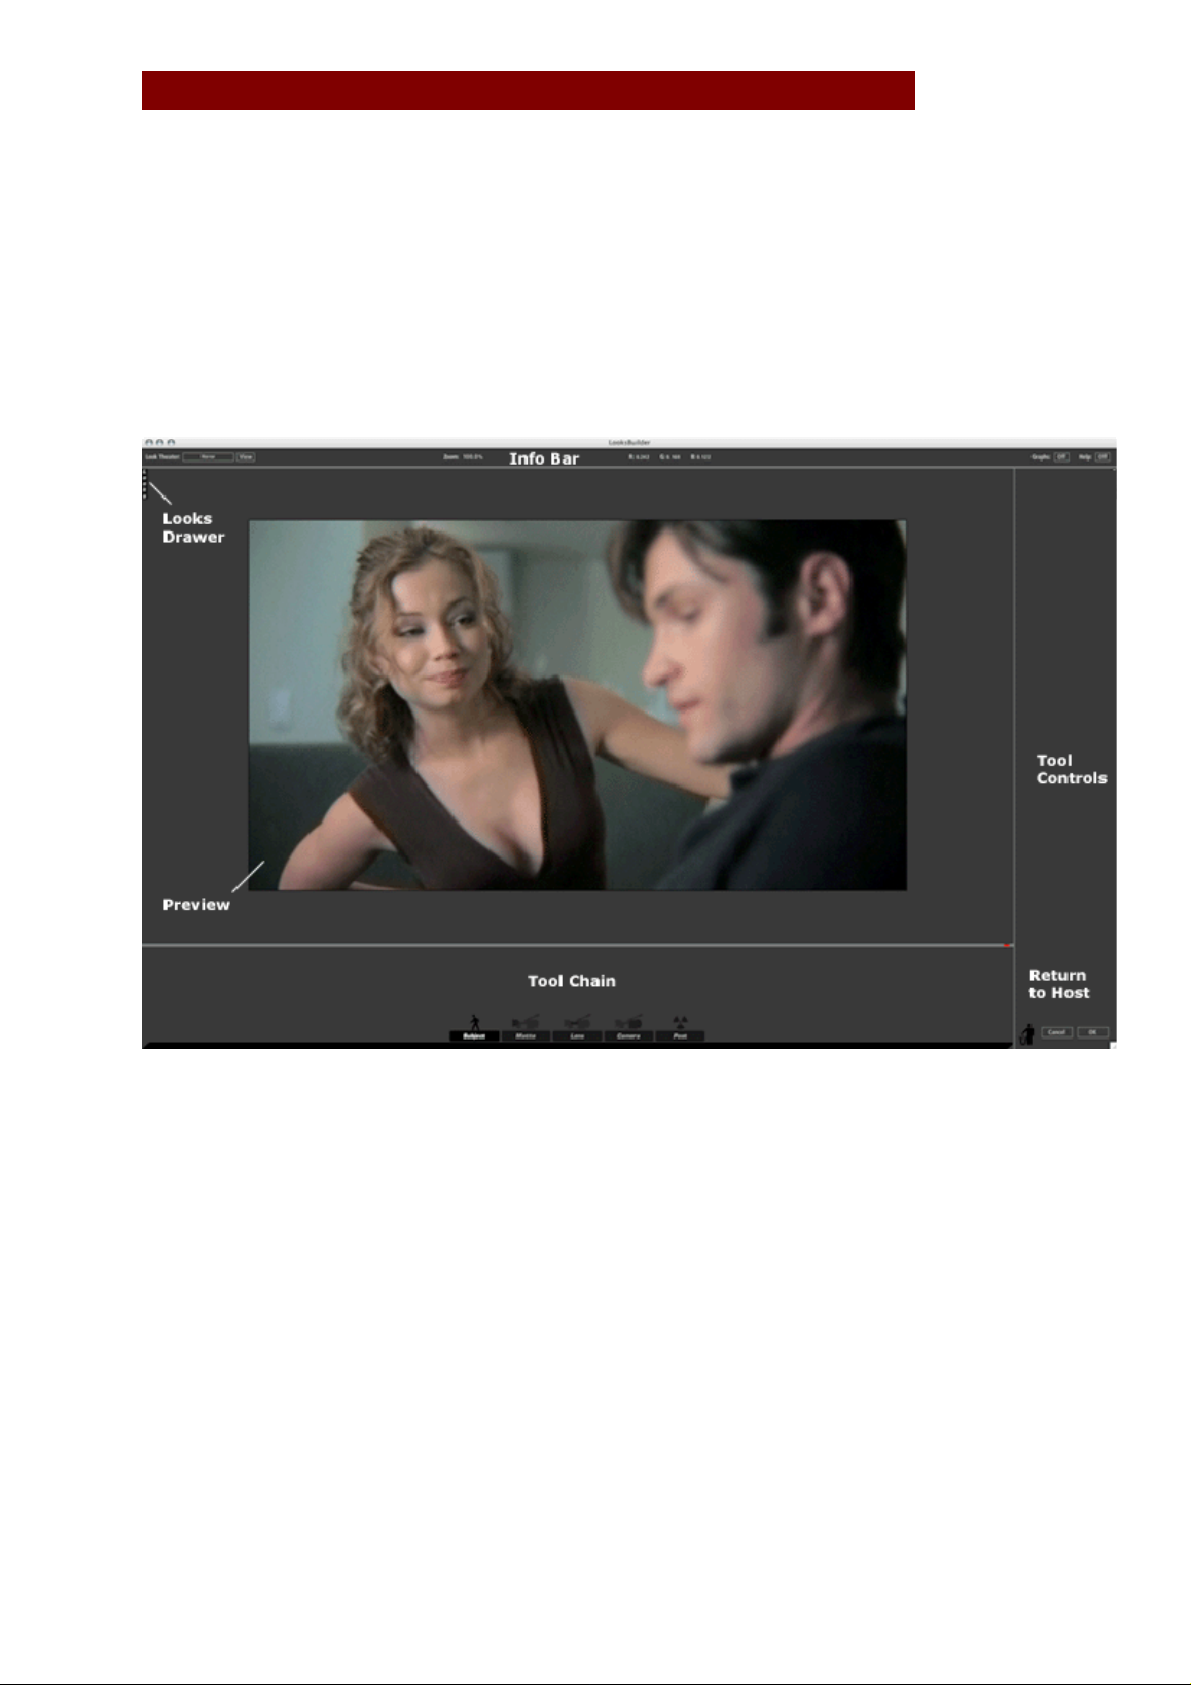
LooksBuilder SE Interface
Magic Bullet LooksBuilder SE is a standalone application that lets you edit looks and apply
them to your footage. The LooksBuilder user interface appears with the current frame
from your timeline ready to apply and edit a look. The OK and Cancel buttons in the
lower right corner are used to apply the Look (OK) or simply return to Pinnacle Studio
without updating the Look (Cancel). The following figures show the interface as it
appears with no Look applied and minimal controls.
The interface appears empty and no Look is applied by default. The left side of the screen
is used to open the Looks QuickDrawer that lets you apply Look presets. Look presets are
made of a combination of tools. These tools manipulate the color, softness, saturation,
focus and more on your video. Once a Look preset is clicked, it loads the approriate tools
into the Tool Chain. The Tool Chain is where the action is and where you can edit your
looks.
Pinnacle Studio 12 28
Page 29
MAGIC BULLET LOOKS FOR PINNACLE STUDIO 12
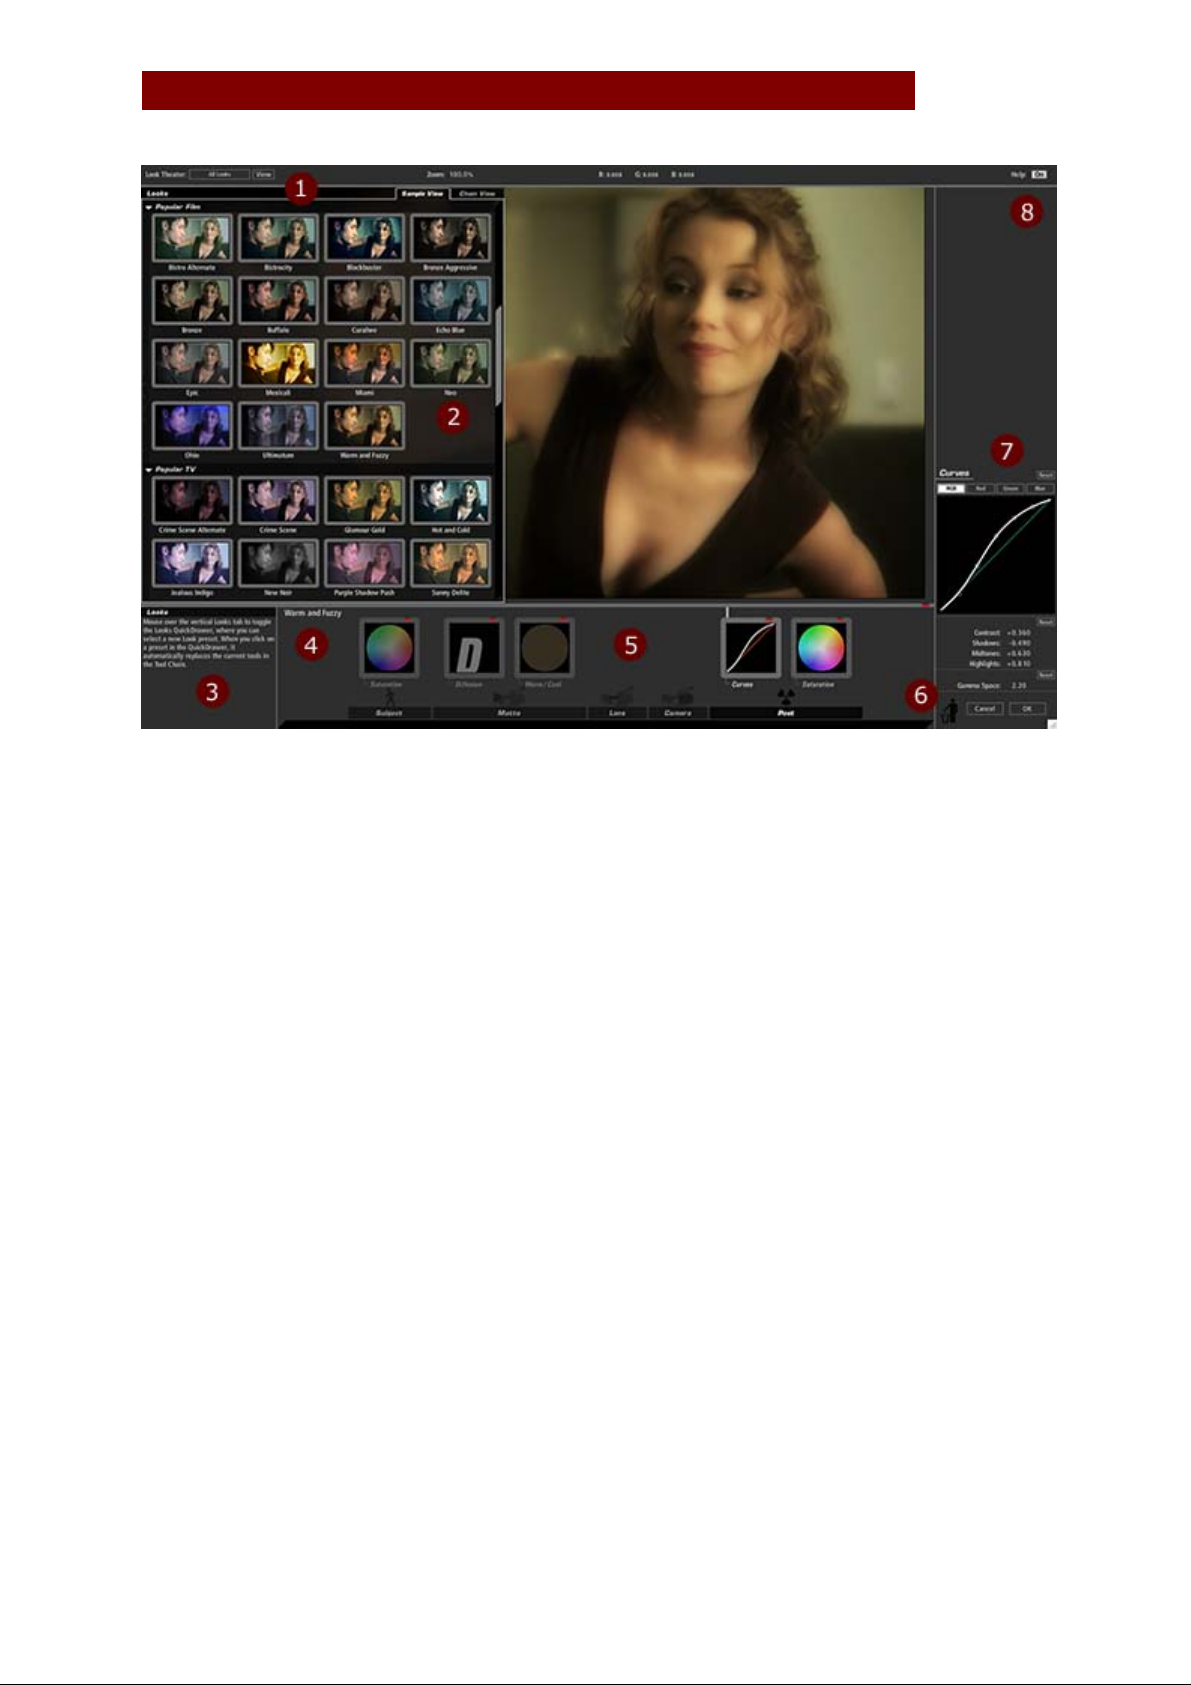
The figure above shows the interface with a look loaded and the Looks QuickDrawers
superimposed to show you a set of available preset options. Below is a table that
describes each part of the interface.
1 Look Theater controls for browsing looks interactively.
The Looks Quickdrawer shows all the presets. Open by mousing to the left side of
2
the screen.
The interactive help changes as you place your mouse on the LooksBuilder SE
3
controls.
4 Saving custom looks is easy, just click the label, change the name and press Enter.
5 The Tool Chain shows individual tools, click one to bring up its controls.
6 Remove a tool by drag and dropping it on the trash. Click OK to return to Studio.
7 Each Tool has controls. Here the Curves tool is showing the custom curve controls.
8 You can turn on and off interactive help by clicking the switch in the info bar.
Pinnacle Studio 12 29
Page 30

MAGIC BULLET LOOKS FOR PINNACLE STUDIO 12
LooksBuilder SE: What is a Look?
LooksBuilder SE lets you apply a number of different tools to alter the way an image
appears, allowing you to make it seem warm and fuzzy to emphasize a scene that is
happy; or cold and dark to make a scene feel distant or lonely. The Tools are added to
the chain when a Look preset is applied. Each icon's appearance shows the effect that it
has on the image. Reading the tool states lets you understand how a Look is built from
the individual tools. The following image shows the Coolish alternate Look preset applied
in the Tool Chain.
NOTE: You will never see the Tool Chain in this state. This is a composite to show all the
tools active but unselected. This is just an illustration.
The look in this case uses eight different tools, including Contrast, Saturation, Fill Light,
Diffusion, Curves and Auto Shoulder. These are applied in a specific order to create the
look (with the Contrast tool on the left being the first tool, and the Auto Shoulder tool on
the right being the last tool) to affect the image. The sections below give a tool-by-tool
breakdown of a typical look to help you better understand how to read a look so you can
alter it to best suit your footage.
If you want more information on the specific controls in the Tool C hain, see the Tool
Chain section.
Subject Tools
The Subject tools are meant to alter the media before processing. In the case of Coolish
Alternate, three tools are used prior to coloring and diffusing the image: Contrast,
Saturation and Fill Light.
Contrast in this case is set to –.25 or 25% negative contrast. Rather than enhancing the
separation between dark and lights, this tool brings them closer together. Why? To allow
for more radical changes later. When an image already has a lot of contrast, tools later in
the chain can cause the darks to be crushed or lose detail. By applying this negative
contrast up front, this look avoids this problem. Note how the Contrast icon looks very
gray with no pure white or black colors, which is exactly how the image will change.
The Saturation tool is used here to remove a little bit of saturation from the image. This
allows for broader color changes in curves and removes a bit of the common
Pinnacle Studio 12 30
Page 31
MAGIC BULLET LOOKS FOR PINNACLE STUDIO 12
oversaturation of colors in DV or HDV media shot on consumer or prosumer devices.
Fill Light in this instance is used to lighten the shadows by more than half. This protects
against the big contrast change in Curves. This is also used to color the shadows a deep
blue. Often directors or directors of photography will try to push the shadows to blue
make the scene appear cold without touching the flesh tones in the image. F ill Light in
this instance is a great way to achieve this effect. The Fill Light icon has turned the
silhouette more blue to show the effect.
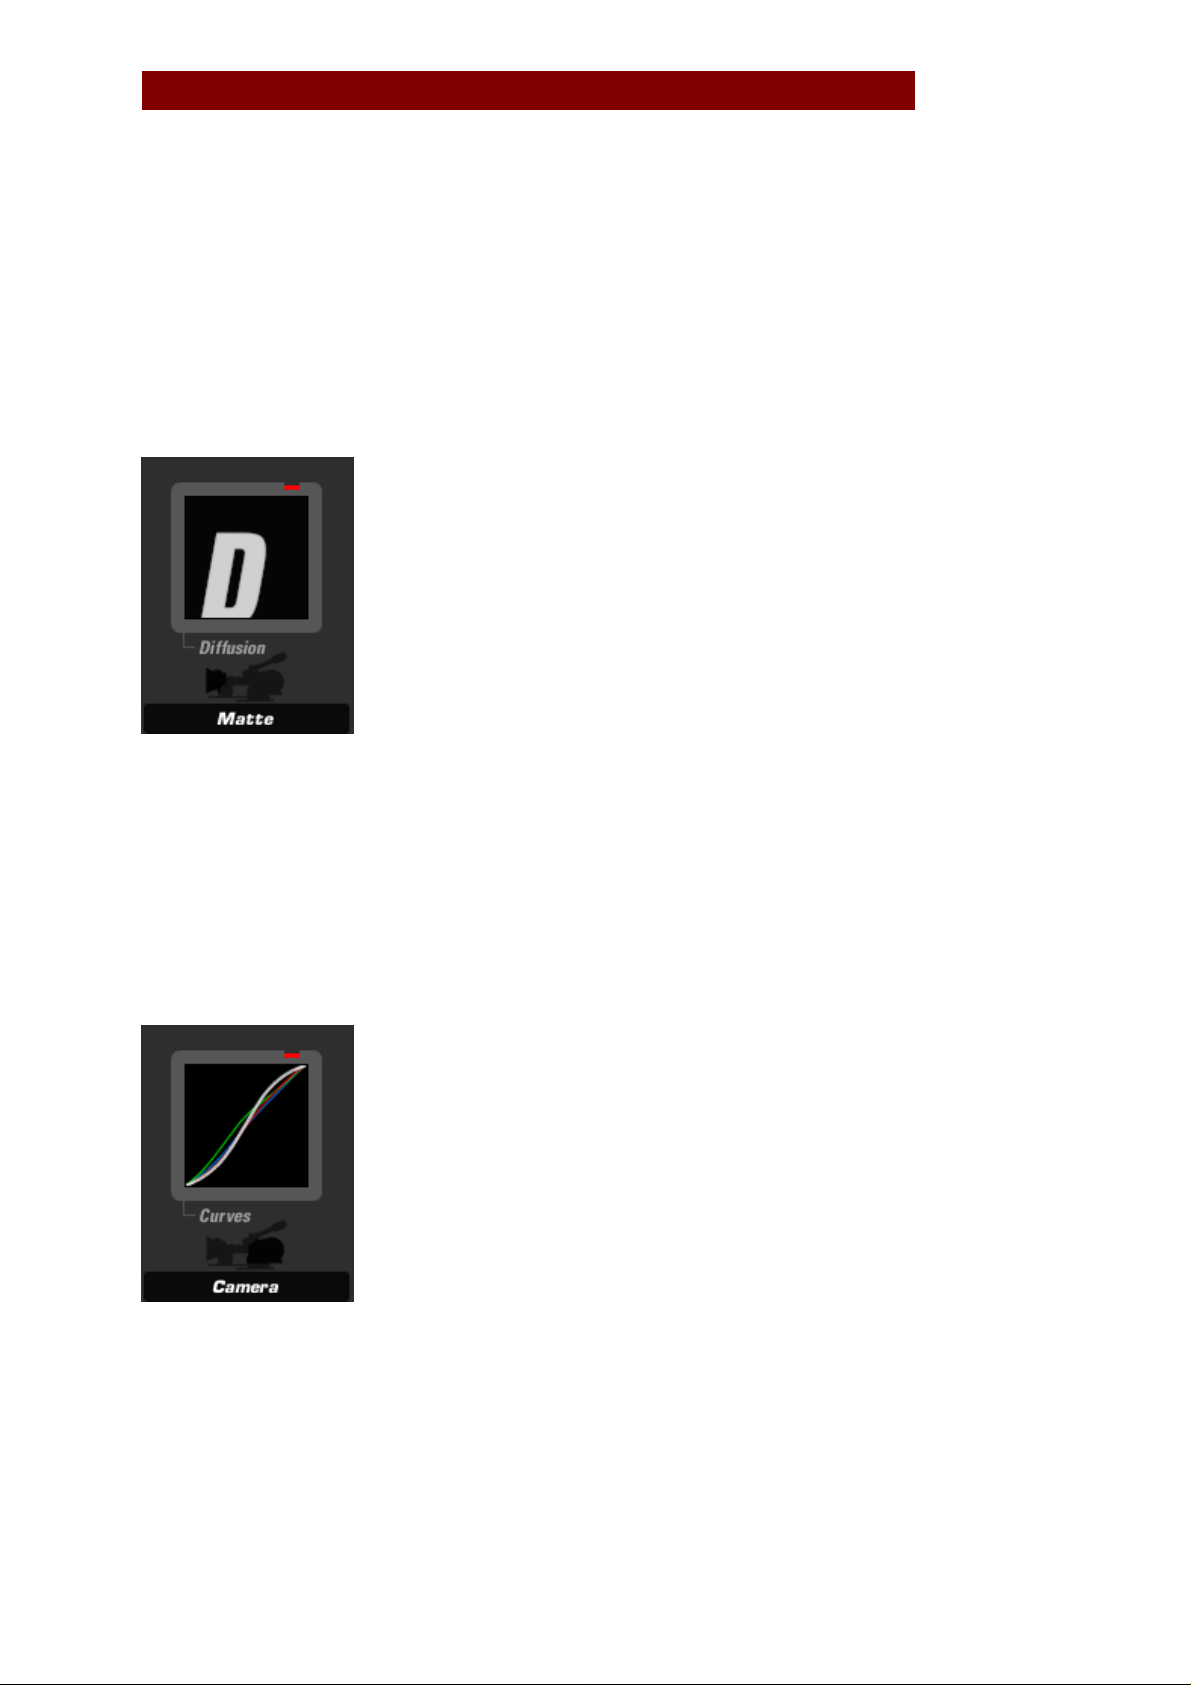
Matte Tools
The only Matte tool in this case is Diffusion.
The Diffusion tool in this case is set to a size of 1% and a grade of 2. These values make
for a softening in the highlights without changing the brightness in the image. This
setting tends to hide noise and soften the highlights in image, which can make actors and
actresses look smoother. This setting isn't strong enough to lose significant detail, so
again this is a great look for media shot on DV/HDV cameras. Notice also how the icon is
actually fairly sharp, indicating that this specific setting doesn't cause a lot of bloom or
glow in the image.
Camera Tools
The camera tool in this instance is just the Curves tool.
The Curves settings in this case are set to generate strong contrast, with the shadows set
to map to a low value, and the highlights to roll off at the top with greater brightness.
Also, the green line indicates that the green shadow and midtone values are mapped
higher than normal. This counteracts the blue push in the shadows so that flesh tones
don't appear too blue and unnatural.
Post Tools
The Post tools in this case are Contrast, Saturation and Auto Shoulder.
Pinnacle Studio 12 31
Page 32

MAGIC BULLET LOOKS FOR PINNACLE STUDIO 12
Contrast is set here to add a bit of contrast in the highlights with a value of +.23 or 23%
more contrast and a Pivot value of .91. These combine to cause the contrast to stretch
the midtones and highlight values.
Saturation is set to 93%. This value creates a little less saturation in the scene. Also,
exposure compensation is used in this tool to bring the overall range back to close to the
original.
Auto Shoulder is set here to catch any overbrights and push them back into the 0-1.0
range, in case this look is applied to an image that is very bright to begin with. Auto
Shoulder is a great way to make sure that when you output a Look in your editor, you
don't have any out-of-range values that would cause bleed on screen when you create a
master tape.
Pinnacle Studio 12 32
Page 33

MAGIC BULLET LOOKS FOR PINNACLE STUDIO 12
LooksBuilder SE: Info Bar and Help
The Information Bar provides controls and readouts for the Look Theater view controls,
Preview zoom, RGB readout and the Graphs and Help switches.
Look Theater
The Looks Theater allows you to preview different Looks on your own image, like a slide
show. You can choose to view all Looks in the library or individual sub-categories. Press
the space bar key to pause and resume the slide show. Use the left and right arrow keys
to move forward and back through the Looks manually. Hit Enter to apply the current
look. Timing controls can be changed by altering the Looks Theater values in Preferences.
Look Theater Category: Click to toggle between All Looks, Basic, Black and White Tints,
Diffusion, Horror, Music Videos, Popular Film, Popular TV, Special Effects, Stock
Emulation, Tints/Grads, Custom Looks, and any other categories in the Looks library.
Look Theater View: Click to view each available Look for a few seconds at a time as a
slide show. You can control the view and transition time for the theater presentation by
selecting the Preferences menu item. Clicking View while prev iewing stops the slide show
and no Look is applied.
Zoom
Zoom: Scrub the percentage value to zoom the image or click on the number to enter a
specific value. You can also zoom in 10% increments with the , (comma) and . (period)
keys, or use the scroll wheel on your mouse. Double-click the word “Zoom” to snap the
image to full screen.
RGB numeric readout
Red: Displays the amount of red color information at the cursor’s current location in
floating point units from 0.000 to 100.000. Anything over 1.000 is an overbright value
Pinnacle Studio 12 33
Page 34

MAGIC BULLET LOOKS FOR PINNACLE STUDIO 12
and will be clamped on output.
Green: Displays the amount of green color information at the cursor’s current location in
floating point units from 0.000 to 100.000. Anything over 1.000 is an overbright value
and will be clamped on output.
Blue: Displays the amount of blue color information at the cursor’s current location in
floating point units from 0.000 to 100.000. Anything over 1.000 is an overbright value
and will be clamped on output.
Help button
Help: Click on the “On” or ‘Off” box to toggle the Help display on or off. When On, mouse
over a tool or onscreen element to view help information in a window in the screen’s
lower left corner.
Pinnacle Studio 12 34
Page 35

MAGIC BULLET LOOKS FOR PINNACLE STUDIO 12
LooksBuilder SE Preview
The preview area shows the current imported image, either from the host application or a
still image loaded from the File > Open Image File... menu command. Scrolling down
using a mouse with a scroll wheel zooms out (, key) . Scrolling up zooms in (. key). The
preview area only shows a single frame and includes no time navigation controls. The
Preview area can change based on the Look that is loaded in the Tool Chain or show
overlays for some tools.
Overlays in Preview
A number of tools have onscreen controls that appear in the Preview area to allow you to
alter the tool controls visually. Some controls have spot controls for isolating the area of
operation or the region that they can effect using three concentric circles. These tools
include Vignette, Edge Focus, Spot Focus and others. Below is a shot of the Vignette tool.
The center area shows the center point. The dotted line defines the fall-off area and the
outer circle defines the radius.
Pinnacle Studio 12 35
Page 36

MAGIC BULLET LOOKS FOR PINNACLE STUDIO 12
Mousing over the outer circle will change the hand to a cross-hair to designate that the
tool control has the focus and can be changed by clicking and dragging the circle in or
out.
Finally, the overlay will fade out after approximately four seconds. The fade-out is only to
Pinnacle Studio 12 36
Page 37

MAGIC BULLET LOOKS FOR PINNACLE STUDIO 12
temporarily hide the cursor if you move your mouse outside the window. This lets you
evaluate the look without the distraction of the yellow lines.
Pinnacle Studio 12 37
Page 38

MAGIC BULLET LOOKS FOR PINNACLE STUDIO 12
LooksBuilder SE: Looks QuickDrawer
You can mouse over the vertical Looks hot area to bring the Looks QuickDrawer into
view. This panel lets you choose a preset from any of 10 or more categories. When you
click on a preset in the QuickDrawer, it automatically replaces the current tools in the
Tool Chain. This allows you to quickly evaluate the Look. As soon as your mouse leaves
the QuickDrawer panel, the panel will close and you can edit the look or apply it to your
footage by clicking OK (if launched from a host application).
If you want to see a preview of each look with a description, check out the Library
gallery.
Two views
The Sample View shows the available Looks applied to a sample image with a label under
each for the name. The Sample image is either the current image in LooksBuilder SE.
Click on a Look to apply it to your image.
Pinnacle Studio 12 38
Page 39

MAGIC BULLET LOOKS FOR PINNACLE STUDIO 12
The Chain View displays each available Look as a chain of its individual components.
Clicking on a Look applies it to your image just as in sample view.
Pinnacle Studio 12 39
Page 40

MAGIC BULLET LOOKS FOR PINNACLE STUDIO 12
Pinnacle Studio 12 40
Page 41

MAGIC BULLET LOOKS FOR PINNACLE STUDIO 12
Tools and Controls
Subject
3 Way Color Corrector
Chromatic Aberration
Color Contrast
Contrast
Crush
Curves
Exposure
Grad Exposure
Fill Light
Lift-Gamma-Gain
Offset-Gamma-Gain
Range Saturation
Saturation
Spot Exposure
Spot Fill
Warm/Cool
Matte
Color Filter
Diffusion
Exposure
Grad Exposure
Gradient
Lightflex
Sky Filter
Spot Exposure
Star Filter
Warm/Cool
Lens
Anamorphic Flare
Chromatic Aberration
Deflare
Edge Softness
Exposure
Grad Exposure
Spot Exposure
Swing-Tilt
Vignette
Camera
2-Strip Process
3-Strip Process
Black & White
Color Contrast
Color Reversal
Contrast
Crush
Curves
Exposure
Film Grain
Grad Exposure
Neg Bleach Bypass
Range Saturation
Saturation
Shoulder
Shutter Streak
Spot Exposure
Warm/Cool
Post
3 Way Color Corrector
Auto Shoulder
Color Contrast
Contrast
Crush
Curves
Exposure
Film Grain
Grad Exposure
Lift-Gamma-Gain
Offset-Gamma-Gain
Print Bleach Bypass
Range Saturation
Saturation
Spot Exposure
Telecine Net
Warm/Cool
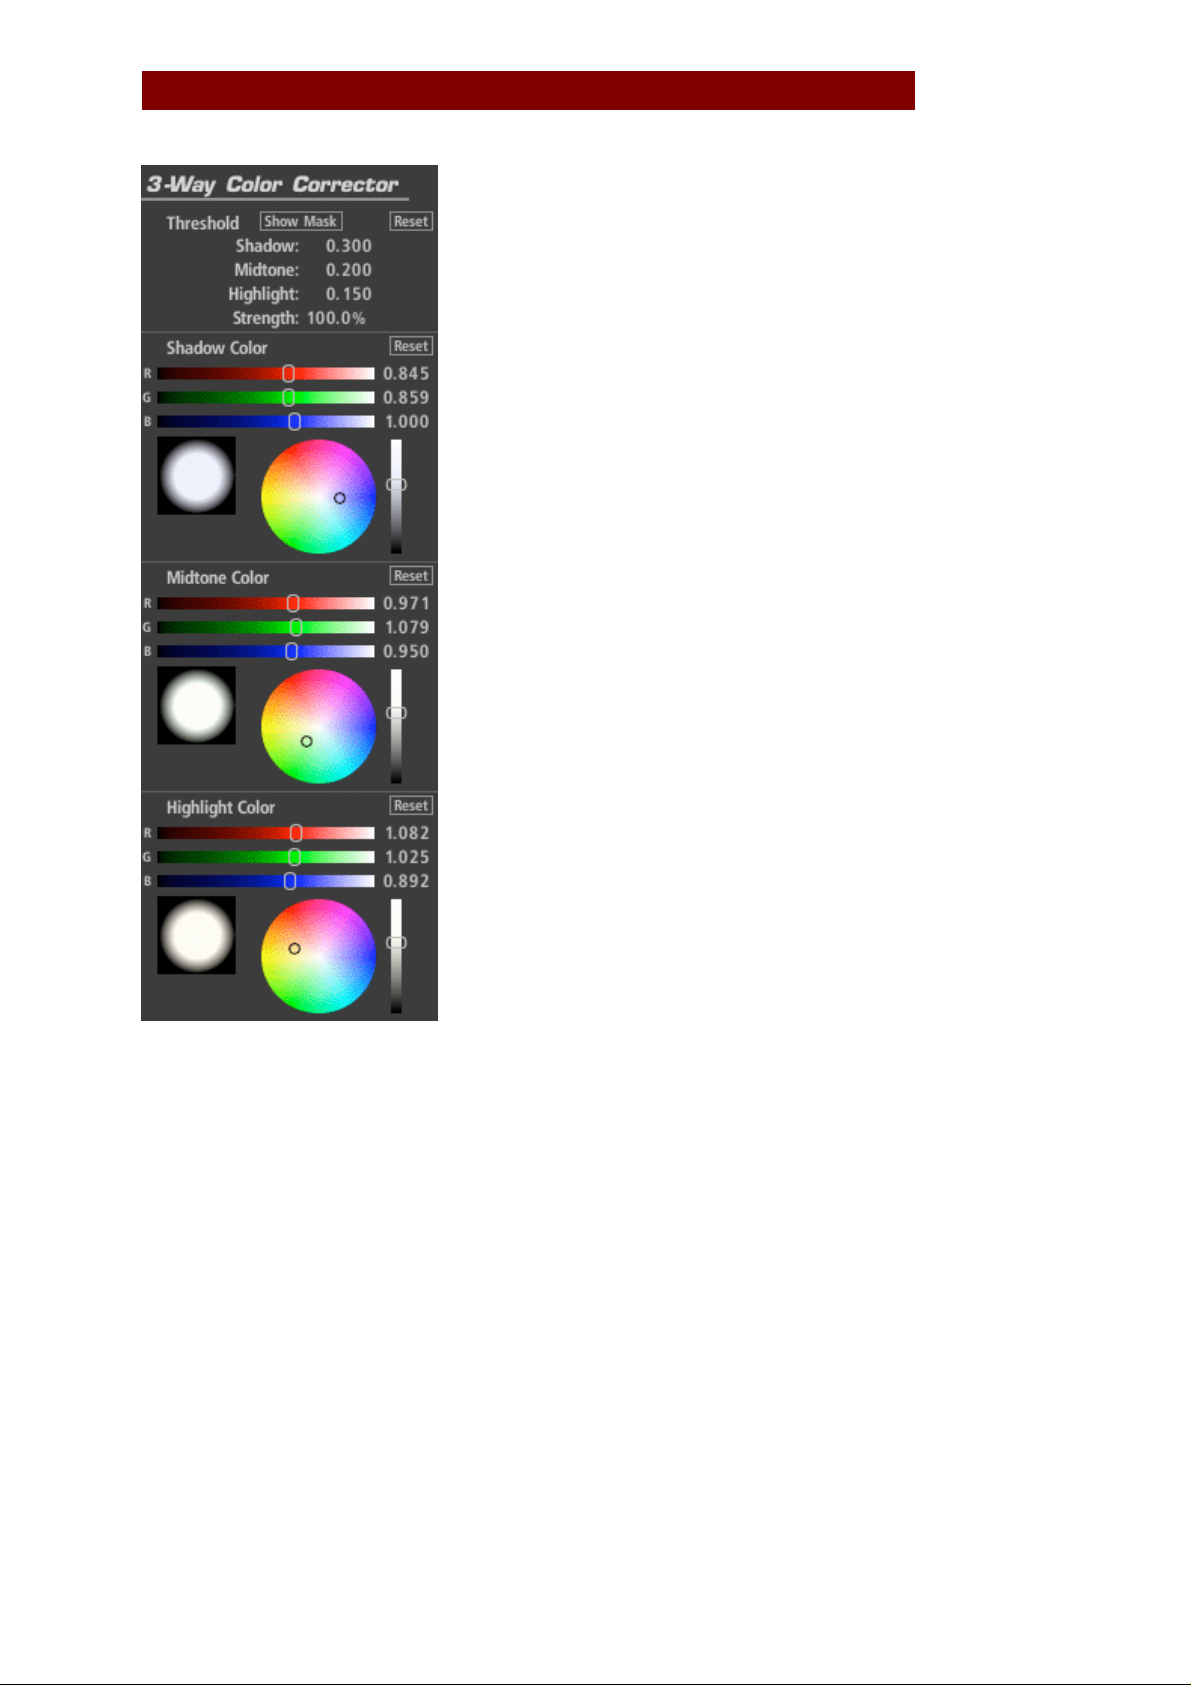
Three Way Color Corrector (appears in Subject, Post)
The 3-Way Color Corrector tool provides shadow, midtone, and highlight color correction
with control over tone ranges using masks for highlight shadow and midtone regions. It
also includes color offset and exposure controls. This tool has an advantage over LiftGamma-Gain, in that it can define the value ranges of its three basic controls. With HDRI
(High Dynamic Range Imagery), behavior of overbright pixels is also more predictable
with 3-Way Color Corrector.
Threshold Controls: Determines the range affected by each respective Color control.
Shadows are all values between 0.0 and Shadow. Midtones are the "hump" of values
between 0.0 and 1.0, centered on Midtone. Highlights are all values higher than
Highlight.
Strength: specifies the extent to which the effect is applied.
Shadow, Midtone, Highlight Color: the target color to which each respective image range
is tinted.
Pinnacle Studio 12 41
Page 42
MAGIC BULLET LOOKS FOR PINNACLE STUDIO 12
Pinnacle Studio 12 42
Page 43
MAGIC BULLET LOOKS FOR PINNACLE STUDIO 12
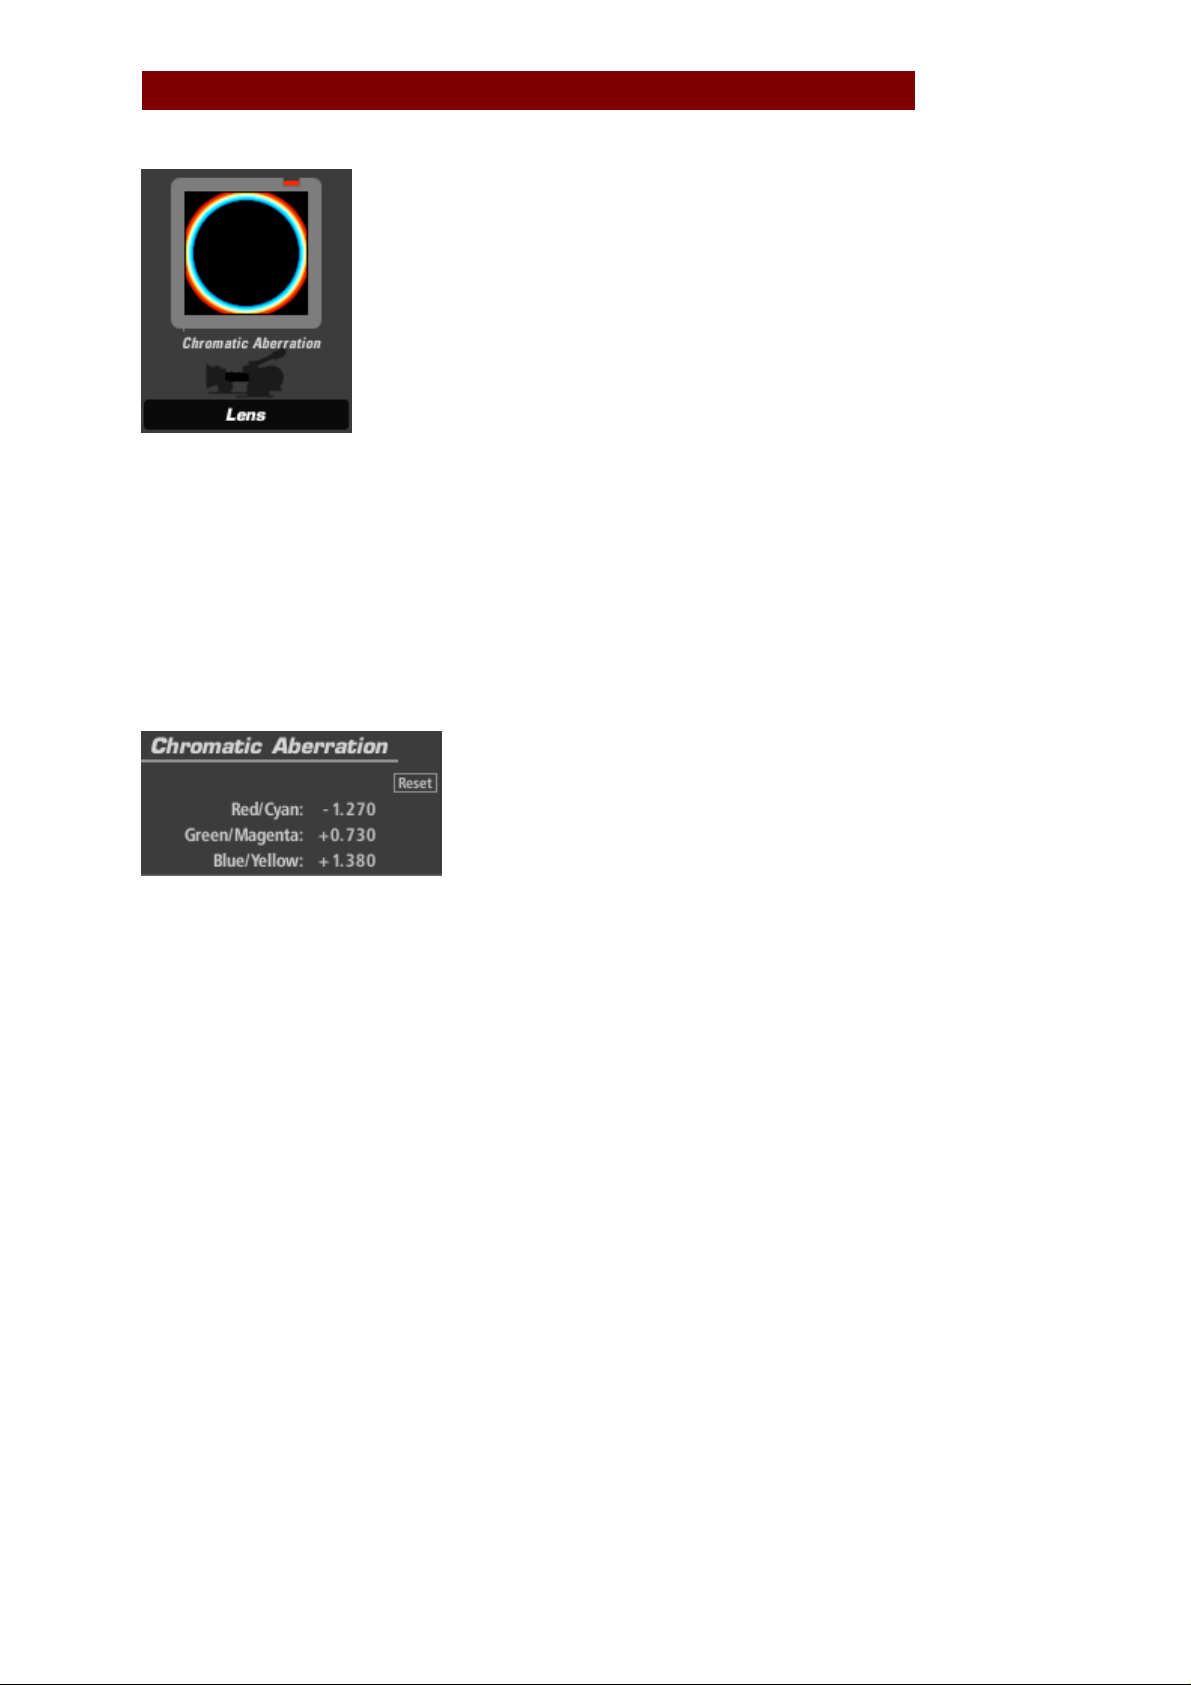
Chromatic Aberration (appears in Subject, Lens)
The Chromatic Aberration tool emulates the look of misprinted film or poor quality lenses
by shifting the red, green and blue channels. This tool can also be used to correct for
minor chromatic aberration problems in the original image.
Red/Cyan, Green/Magenta, Blue/Yellow: scales each primary color and its opposite from
the center. For example, the Red/Cyan control scales cyan to the right and red to the left
around edges with positive values and the opposite with negative values in the same
control.
Pinnacle Studio 12 43
Page 44

MAGIC BULLET LOOKS FOR PINNACLE STUDIO 12
Color Contrast (appears in Subject, Camera, or Post)
The Color Contrast tool deepens the contrast of an image while simultaneously adding an
overall tint or color cast to the image. Works just like the Contrast tool, but allows
separate control of the R, G and B channels, allowing you to tint highlights toward one
hue and shadows toward the opposite.
Pivot: The midtone (inflection) point of th e contrast curve, for all three channels on a 0-
1.0 scale.
Exposure Compensation: corrects for any resulting changes in overall exposure.
Contrast: Depending on the Pivot setting, highlights or shadows take on this hue and its
opposite, respectively.
Pinnacle Studio 12 44
Page 45

MAGIC BULLET LOOKS FOR PINNACLE STUDIO 12
Contrast (appears in Subject, Camera, or Post)
The Contrast tool offers a simple film response or S-curve contrast adjustment with
control over the midtone (inflection) point for the contrast curve.
Contrast: the amount of contrast
Pivot: The midtone (inflection) point of th e contrast curve, for all three channels on a 0-
1.0 scale.
Exposure Compensation: corrects for any resulting changes in overall exposure.
Pinnacle Studio 12 45
Page 46

MAGIC BULLET LOOKS FOR PINNACLE STUDIO 12
Crush (appears in Subject, Camera, or Post)
Crush (Subject, Camera, or Post tool): Crush deepens the shadows in the image, adding
controls for tint of the shadow area.
Gamma: the assumed gamma of the input media
Exposure Compensation: corrects for any resulting changes in overall exposure.
Color: the tint color, weighted toward the shadows.
Pinnacle Studio 12 46
Page 47

MAGIC BULLET LOOKS FOR PINNACLE STUDIO 12
Curves (appears in Subject, Camera, or Post)
The Curves tool provides a master curve, plus red, green, and blue curve controls with
fixed-control-point editing for adjusting shadow, midtone and highlight areas with a
single, easy-to-use control.
Contrast: adds to the “S” shape of the overall curve
Shadows: weighted to the lower half of the curve
Midtones: weighted to the midpoint of the curve
Highlights: weighted to the upper half of the curve
RGB, Red, Green, Blue: allows adjustment on individual color channels
Gamma Space: the assumed gamma of the input media
Pinnacle Studio 12 47
Page 48

MAGIC BULLET LOOKS FOR PINNACLE STUDIO 12
Exposure (appears in Subject, Matte, Lens, Camera, or Post)
The Exposure tool modifies the amount of light passed to the next Tool. The light value is
calibrated in stops like a camera exposure control and can be adjusted by up to plus or
minus 16 stops. The gamma in the Advanced I/O Input tab influences how the stops are
measured.
Stops: with a 1.0 gamma, each positive stop doubles the amount of light, each negative
stop halves it.
Pinnacle Studio 12 48
Page 49

MAGIC BULLET LOOKS FOR PINNACLE STUDIO 12
Grad Exposure (appears in Subject, Matte, Lens, Camera, or Post)
The Grad Exposure tool applies exposure adjustment in a soft rectangular area with
rotation and falloff controls. The gamma setting in the Advanced I/O Input tab influences
how the stops are measured.
Stops: with a 1.0 gamma, each positive stop doubles the amount of light, each negative
stop halves it.
X1, Y1, X2, Y2: establishes the positions of the start and end of the gradient
Falloff: weights the gradient tow ard one end or the other of the gradient
Color Balance: tints the exposed regions
Pinnacle Studio 12 49
Page 50

MAGIC BULLET LOOKS FOR PINNACLE STUDIO 12
Fill Light (appears in Subject)
The Fill Light tool lightens and tints the shadows to bring out detail in the darkest areas
of an image.
Fill: extent to which the Light Color is added to the scene
Light Color: color used to illuminate shadow areas
Pinnacle Studio 12 50
Page 51

MAGIC BULLET LOOKS FOR PINNACLE STUDIO 12
Lift-Gamma-Gain (appears in Subject or Post)
The Lift-Gamma-Gain tool uses the standard color model to correct master lift, gamma
and gain with color offsets for each control and strength adjustment to blend the result
with the previous tool’s output. Generally preferred to Offset-Gamma-Gain because it
adjusts blacks without affecting white.
Gamma Space: the assumed gamma of the input media
Strength: the extent to which the effect is applied
Exposure Compensation: corrects for any resulting changes in overall exposure
Lift: sets the black level – shadow level and color
Gamma: darkens, brighten and/or tints midtones.
Gain: brightens or tints the entire image, affecting mostly the highlights.
Pinnacle Studio 12 51
Page 52

MAGIC BULLET LOOKS FOR PINNACLE STUDIO 12
Offset-Gamma-Gain (appears in Subject or Post)
The Offset-Gamma-Gain tool uses the standard offset, gamma, gain color model to
correct master offset, gamma and gain values with color offset for each control and
strength adjustment to blend the result with the previous tool’s output.
Gamma Space: the assumed gamma of the input media
Strength: the extent to which the effect is applied
Exposure Compensation: corrects for any resulting changes in overall exposure
Offset: tints the entire image (un like the Lift control in Lift-Gamma-Gain, which only
affects the shadows).
Gamma: darkens, brightens and/or tints midtones.
Gain: brightens or tints the entire image, affects mostly the highlights.
Pinnacle Studio 12 52
Page 53

MAGIC BULLET LOOKS FOR PINNACLE STUDIO 12
Ranged Saturation (appears in Subject, Camera, or Post)
The Ranged Saturation tool controls the saturation of the shadows, midtones and
highlights of an image.
Saturation: includes controls for Shadow, Midtone and Highlight saturation
Threshold: Determines the range affected by each corresponding Saturation control.
Shadows are all values between 0.0 and the specified value. Midtones are the "hump" of
values between 0.0 and 1.0, centered on the Midtone value. Highlights are all values
higher than the Highlight number.
Exposure Compensation: corrects for any resulting changes in overall exposure.
Component Balance: weights the operation to favor a particular color.
Pinnacle Studio 12 53
Page 54

MAGIC BULLET LOOKS FOR PINNACLE STUDIO 12
Saturation (appears in Subject, Camera, or Post)
Saturation increases or decreases the saturation or vibrancy of the colors in the image
with precise control in linear light.
Saturation: the total amount of saturation in the image, on all channels
Exposure Compensation: corrects for any resulting changes in overall exposure
Component Balance: weights the operation to favor a particular color.
Pinnacle Studio 12 54
Page 55

MAGIC BULLET LOOKS FOR PINNACLE STUDIO 12
Spot Exposure (appears in Subject, Matte, Lens, Camera, or Post)
The Spot Exposure tool controls the light in a circular area of the image with on-screen
adjustments for size and position.
Stops: with a 1.0 gamma, each positive stop doubles the amount of light, each negative
stop halves it.
Center: the center of the blur region (and the least blurred area), expressed as
percentage offset from the image center.
Radius: size of the area outside which the blur operation is at full strength
Spread: threshold/softening region feathers the radius
Falloff: sets the median point between the Radius and Spread
Color Balance: tints the exposed regions
Pinnacle Studio 12 55
Page 56

MAGIC BULLET LOOKS FOR PINNACLE STUDIO 12
Spot Fill Light (appears in Subject)
The Spot Fill Light tool works like the standard fill ligh t control, but adds circular area
control for finer control of the effect with on-screen adjustments for size and position.
Fill: extent to which the Light Color is added to the scene
Radius: size of the area outside which the blur operation is at full strength
Spread: threshold/softening region feathers the radius
Falloff: sets the median point between the Radius and Spread
Light Color: color used to illuminate shadow areas
Pinnacle Studio 12 56
Page 57

MAGIC BULLET LOOKS FOR PINNACLE STUDIO 12
Warm/Cool (appears in Matte)
The Warm/Cool tool creates a color temperature offset, making the image warmer (more
orange) or cooler (more blue) with additional tint bias adjustment to move the color
towards green or red.
Warm/Cool: offsets color temperature (left and right on the color map)
Tint: offsets the color toward red or green (up and down on the color map)
Exposure Compensation: corrects for any resulting changes in overall exposure.
Pinnacle Studio 12 57
Page 58
MAGIC BULLET LOOKS FOR PINNACLE STUDIO 12
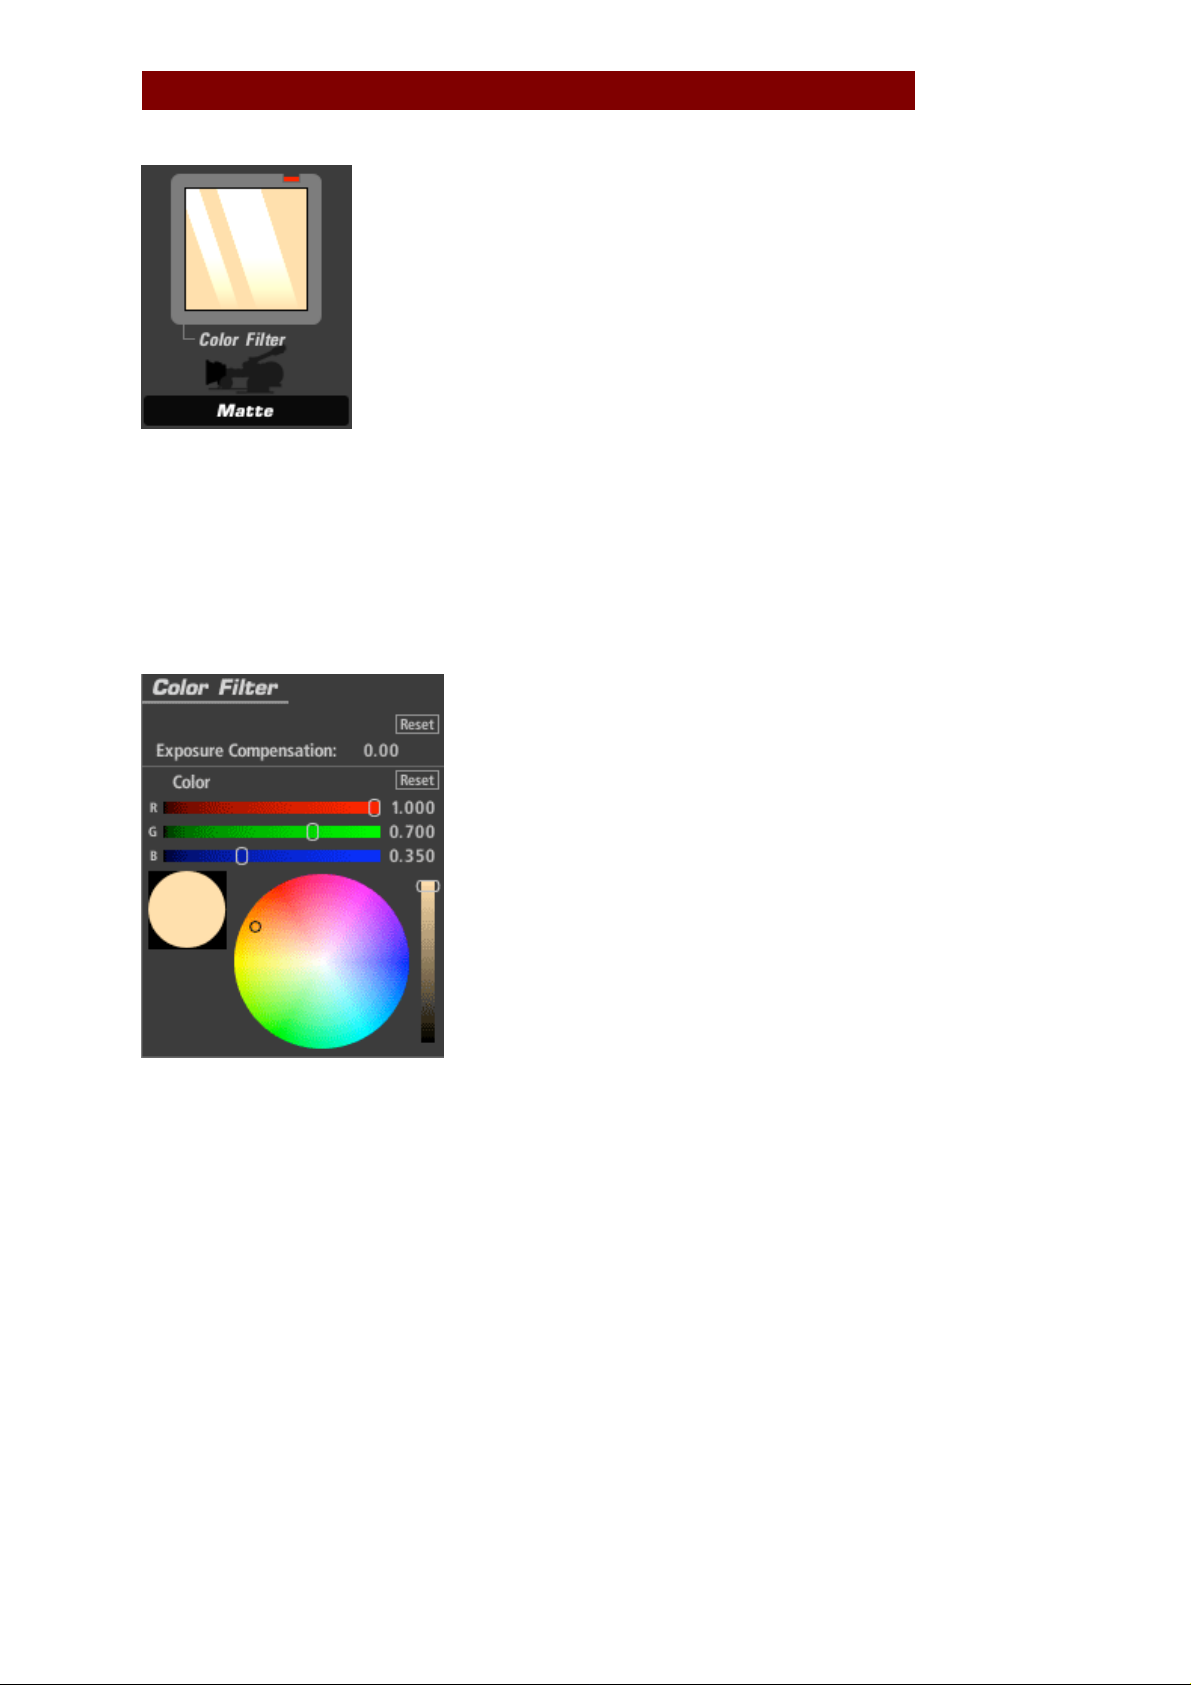
Color Filter (appears in Matte)
The Color Filter tool creates a color overlay filter, like that used in a matte box, where
the imposed color typically darkens the image. An integrated exposure adjustment can
be used for brightness compensation.
Color: the color of the filter – typically bright and saturated.
Exposure Compensation: corrects for any resulting changes in overall exposure.
Pinnacle Studio 12 58
Page 59
MAGIC BULLET LOOKS FOR PINNACLE STUDIO 12
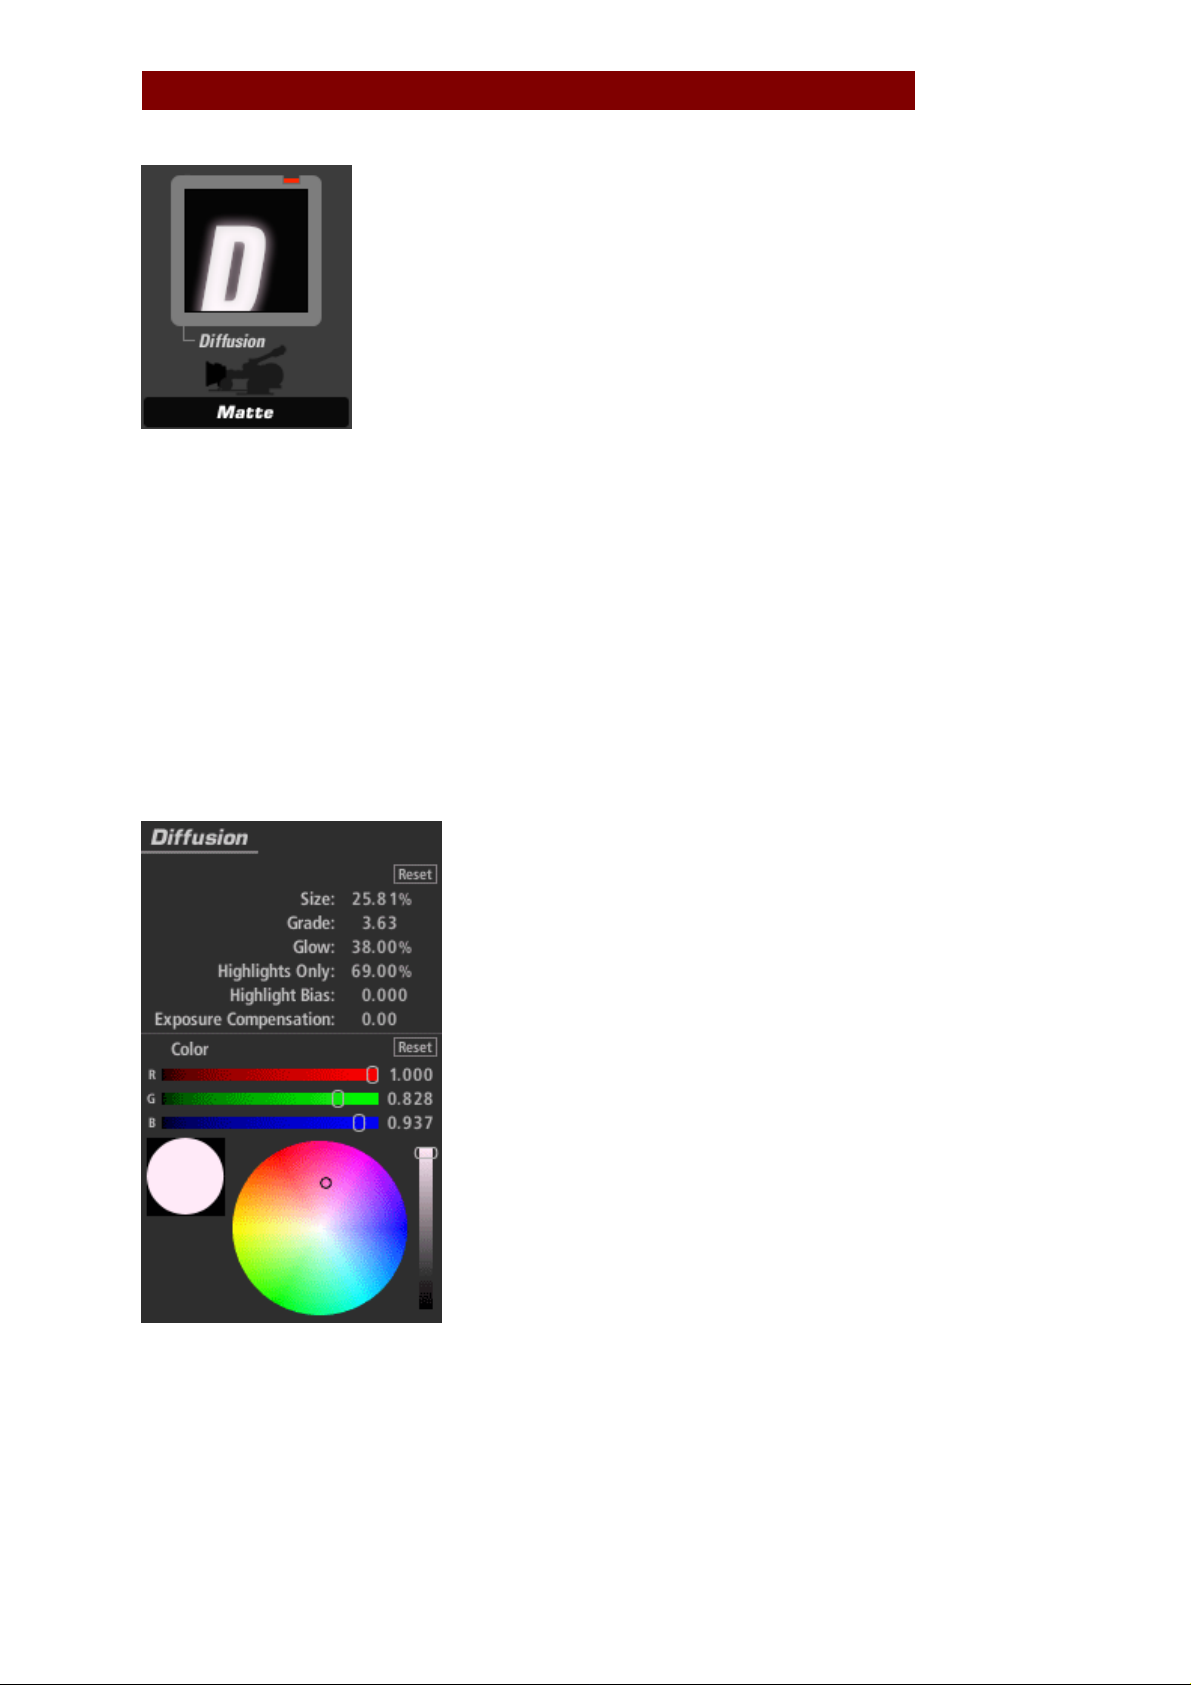
Diffusion (appears in Matte)
The Diffusion tool adds a diffuse glow with control over size and emulation of filter
grades. Color offset lets you add a tint to the glow effect in order to emulate a tinted
diffusion filter.
Size: the range of diffusion, as a percentage of total image size
Grade: adjusts the softness of the diffusion grade
Glow: amount of luminance/bloom added to highlights
Highlights Only: the extent to which operation is restricted to the brightest regions of the
image
Highlight Bias: a lower number pushes more of the image into the Highlights region.
Exposure Compensation: corrects for any resulting changes in overall exposure
Color: tints the glow area
Pinnacle Studio 12 59
Page 60
MAGIC BULLET LOOKS FOR PINNACLE STUDIO 12
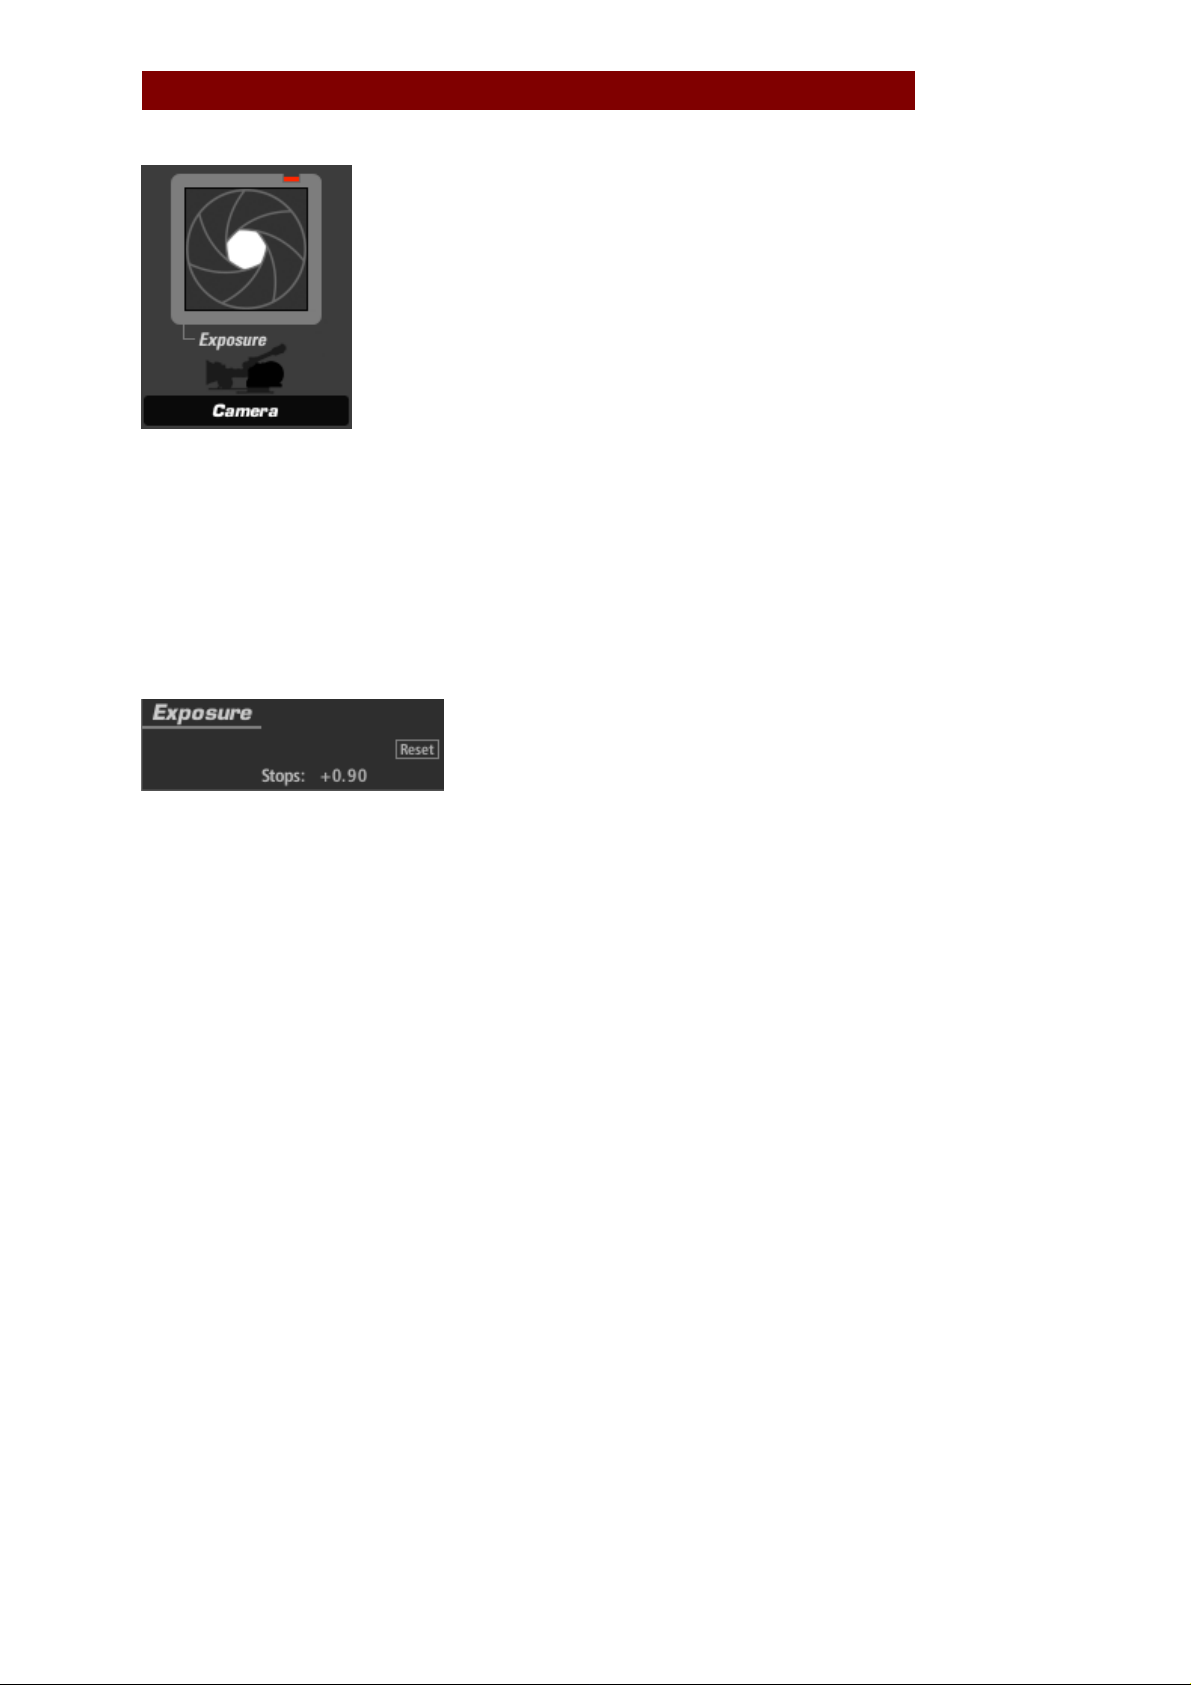
Exposure (appears in Subject, Matte, Lens, Camera, or Post)
The Exposure tool modifies the amount of light passed to the next Tool. The light value is
calibrated in stops like a camera exposure control and can be adjusted by up to plus or
minus 16 stops. The gamma in the Advanced I/O Input tab influences how the stops are
measured.
Stops: with a 1.0 gamma, each positive stop doubles the amount of light, each negative
stop halves it.
Pinnacle Studio 12 60
Page 61

MAGIC BULLET LOOKS FOR PINNACLE STUDIO 12
Grad Exposure (appears in Subject, Matte, Lens, Camera, or Post)
The Grad Exposure tool applies exposure adjustment in a soft rectangular area with
rotation and falloff controls. The gamma setting in the Advanced I/O Input tab influences
how the stops are measured.
Stops: with a 1.0 gamma, each positive stop doubles the amount of light, each negative
stop halves it.
X1, Y1, X2, Y2: establishes the positions of the start and end of the gradient
Falloff: weights the gradient tow ard one end or the other of the gradient
Color Balance: tints the exposed regions
Pinnacle Studio 12 61
Page 62
MAGIC BULLET LOOKS FOR PINNACLE STUDIO 12
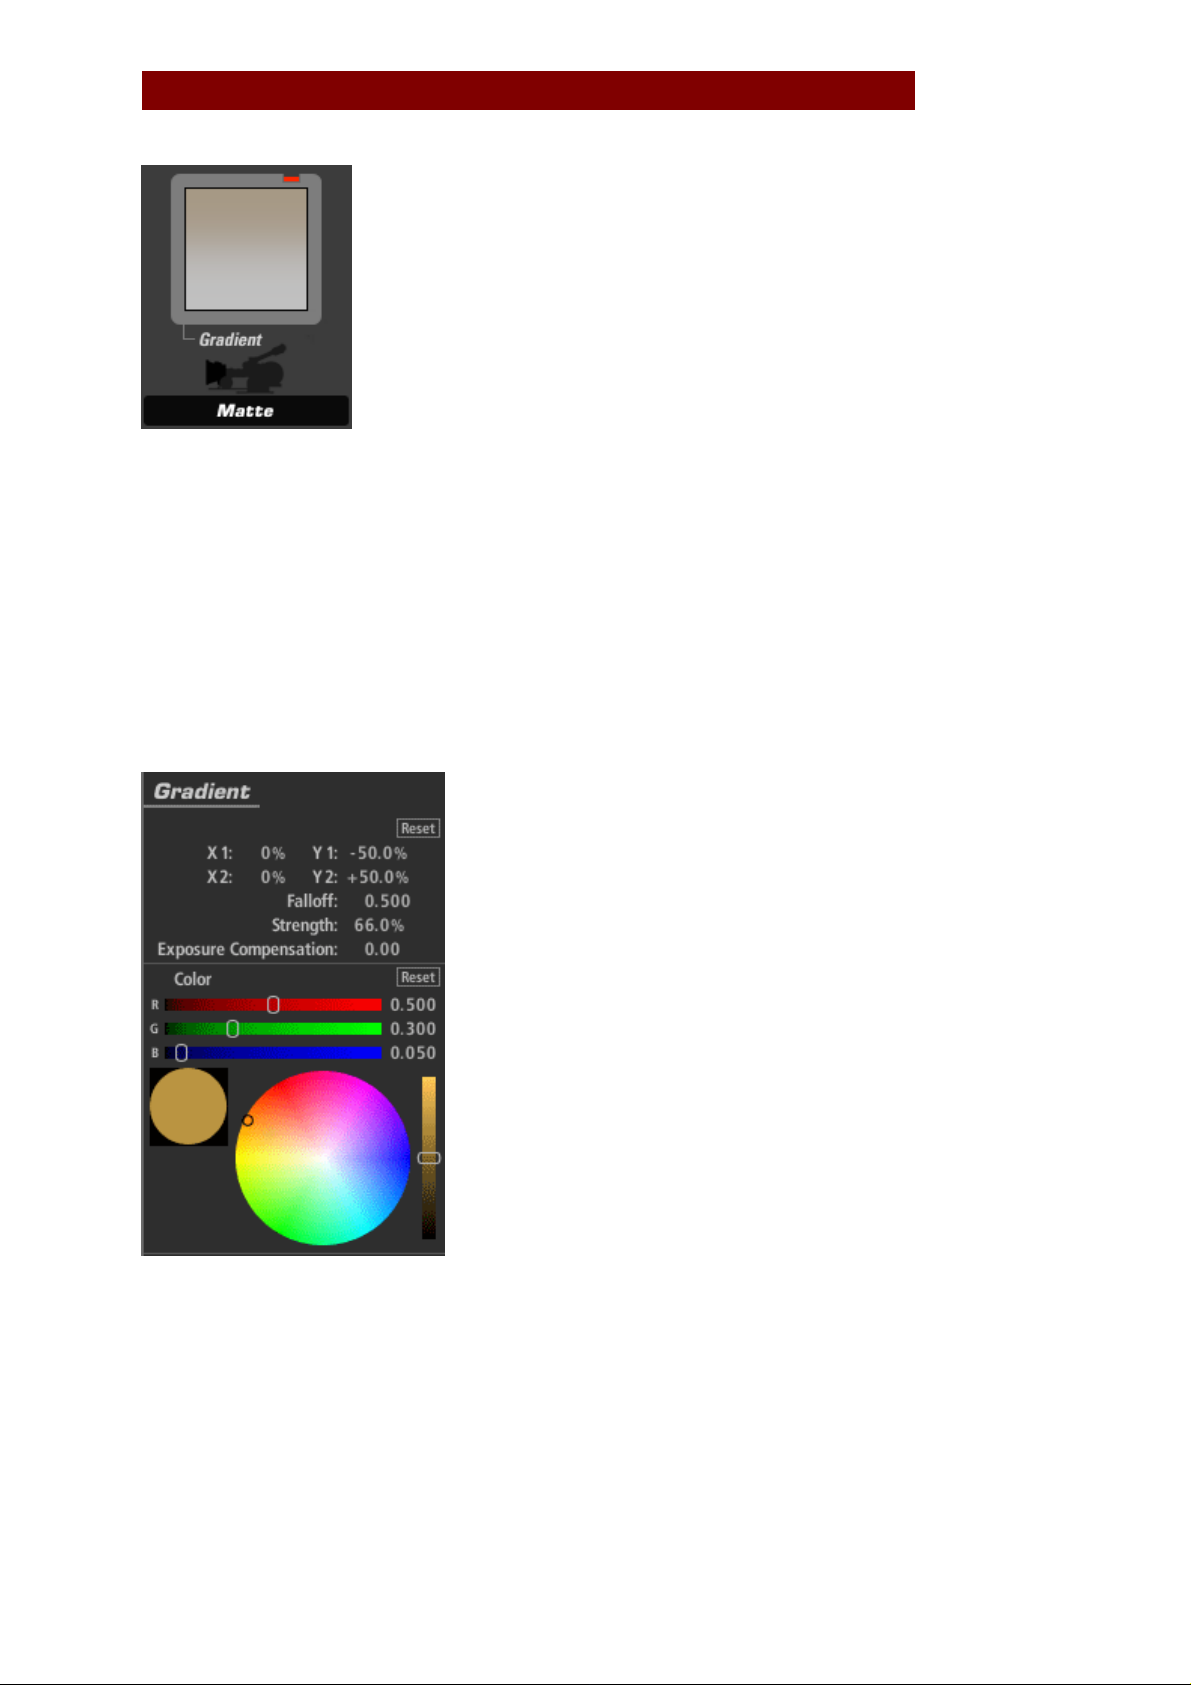
Gradient (appears in Matte)
The Gradient tool adds a colored tint, like a matte box gradient, with control over color,
falloff, and strength. On-screen overlay controls let you position the effect easily.
Stops: with a 1.0 gamma, each positive stop doubles the amount of light, each negative
stop halves it.
X1, Y1, X2, Y2: establishes the positions of the start and end of the gradient
Falloff: weights the gradient tow ard one end or the other of the gradient
Strength: specifies the extent to which the effect is applied
Exposure Compensation: corrects any resulting changes in overall exposure.
Color: the color of the filter – typically bright and saturated.
Pinnacle Studio 12 62
Page 63
MAGIC BULLET LOOKS FOR PINNACLE STUDIO 12
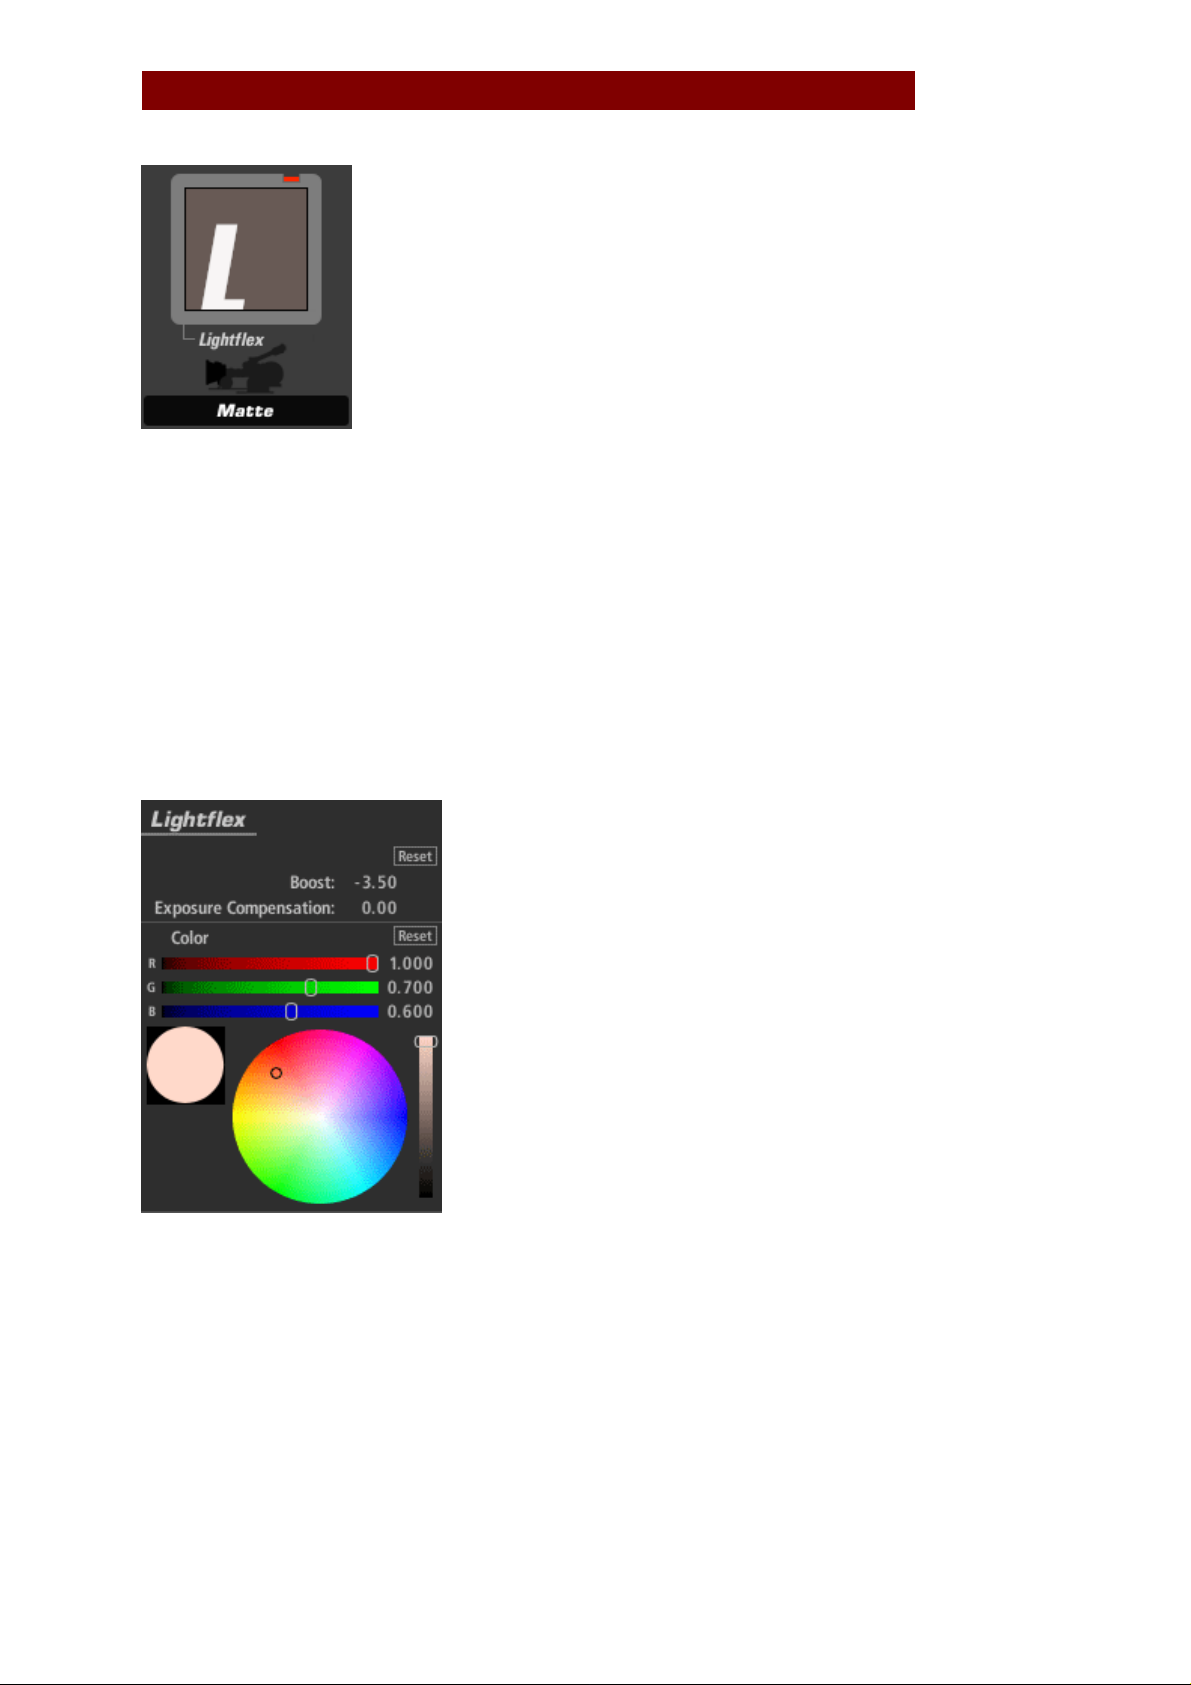
Lightflex (appears in Matte)
The Lightflex tool emulates the flashing of light in the film box. It flashes the image with
a base illumination. This has the effect of lowering the contrast of the scene that the
camera photographs.
The actual Lightflex device was used by cinematographer Freddie Francis to create a filmwithin-the-film look in The French Lieutenant’s Woman, and again to create the color look
of Dune.
Boost: lifts the black pedestal on all three channels, proportional to the Color setting
Exposure Compensation: corrects for any resulting changes in overall exposure
Color: the specified color is flashed into the blacks.
Pinnacle Studio 12 63
Page 64

MAGIC BULLET LOOKS FOR PINNACLE STUDIO 12
Sky Filter (appears in Matte)
The Sky Filter tool emulates the look of a polarizer on a blue or partially blue sky. The
digital version doesn’t control reflections but does add saturation and contrast to a sky.
Tint: determines the relative amount of blue or green in the sky color.
Strength: specifies the extent to which the effect is applied where 0 produces no result
and 100% causes a strong blue tint.
Exposure Compensation: corrects for any resulting changes in overall exposure.
Pinnacle Studio 12 64
Page 65

MAGIC BULLET LOOKS FOR PINNACLE STUDIO 12
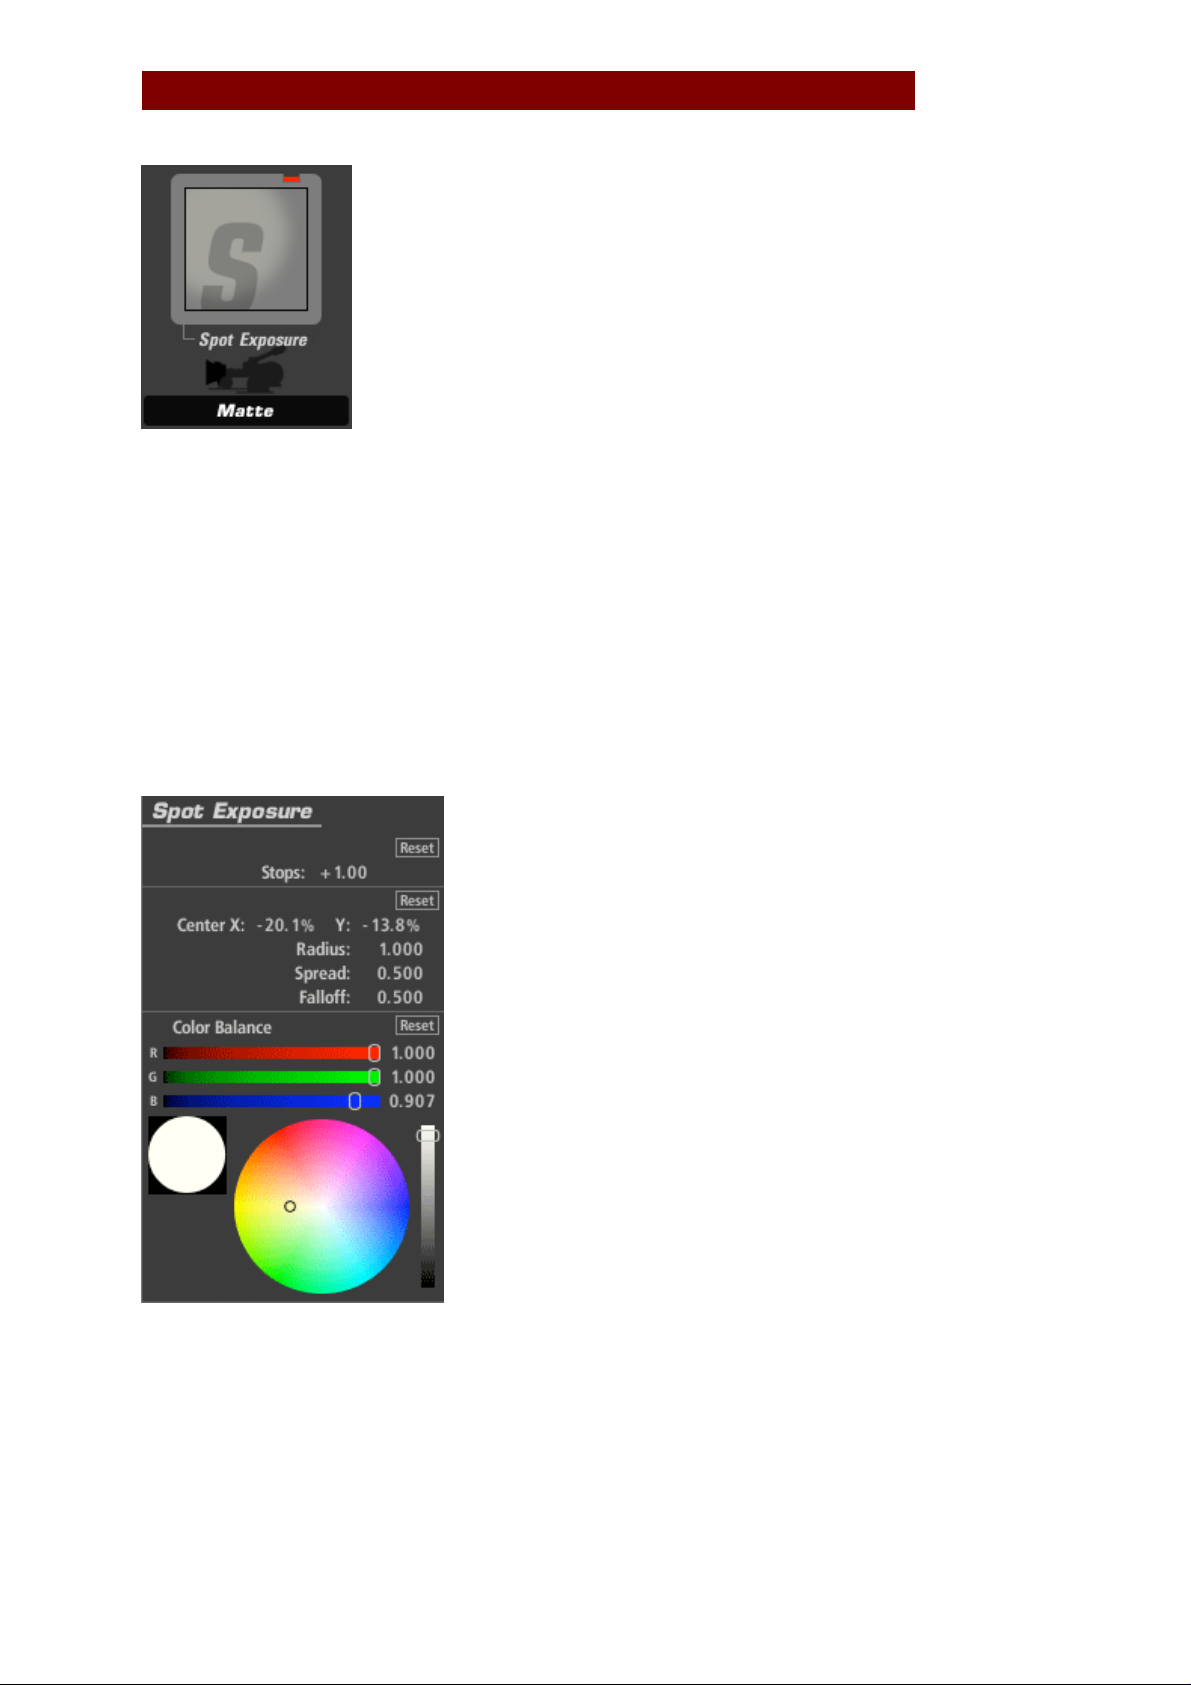
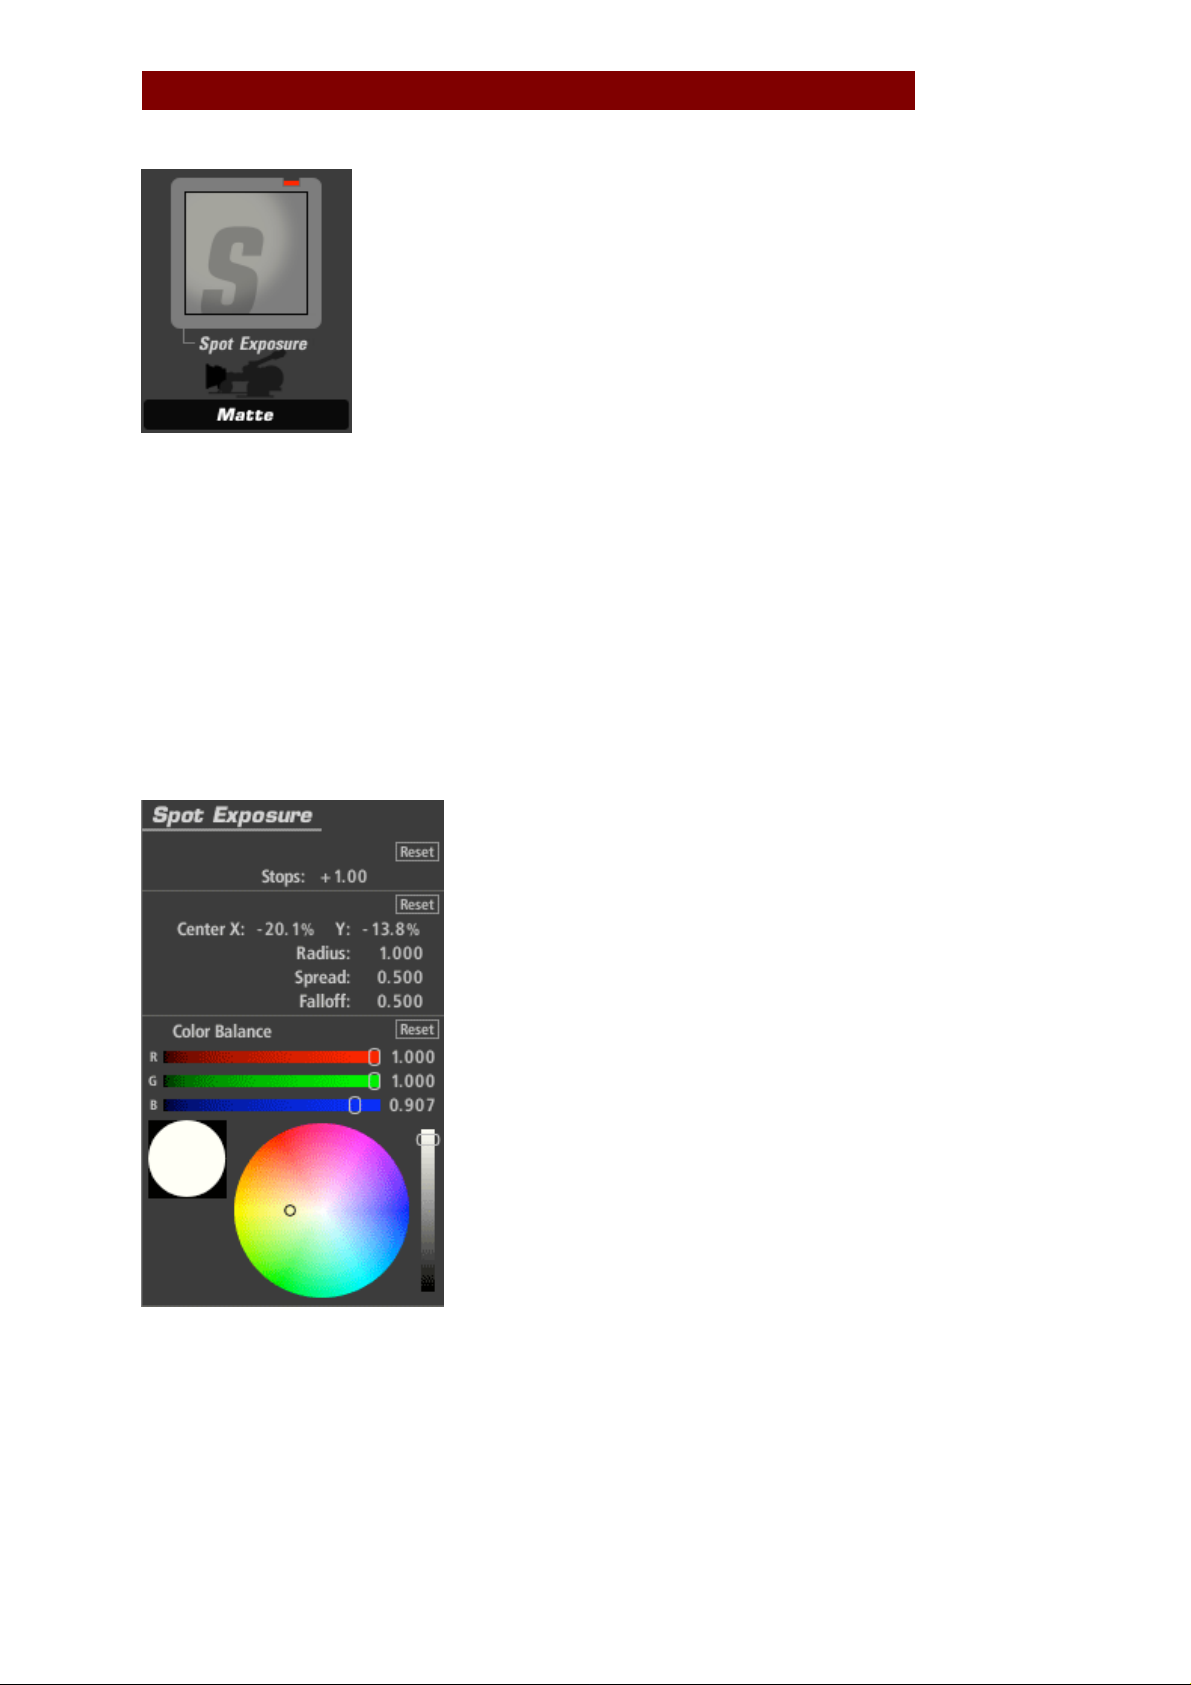
Spot Exposure (appears in Subject, Matte, Lens, Camera, or Post)
The Spot Exposure tool controls the light in a circular area of the image with on-screen
adjustments for size and position.
Stops: with a 1.0 gamma, each positive stop doubles the amount of light, each negative
stop halves it.
Center: the center of the blur region (and the least blurred area), expressed as
percentage offset from the image center.
Radius: size of the area outside which the blur operation is at full strength
Spread: threshold/softening region feathers the radius
Falloff: sets the median point between the Radius and Spread
Color Balance: tints the exposed regions
Pinnacle Studio 12 65
Page 66

MAGIC BULLET LOOKS FOR PINNACLE STUDIO 12
Star Filter (appears in Matte)
The Star Filter tool generates 2-point star shapes on overbright areas of an image,
emulating the look of a star filter on a real camera.
Size: Sets the size of the stars, as a percentage of the screen size.
Threshold: the luminance level above which highlights are picked up by the flare. Lower
it to get more flare effect.
Threshold Softness: introduces softness into the boundaries of the Threshold region,
softening the overall flare effect naturally.
Boost: Lifts the white values in the image to create brighter stars.
Angle: Controls the angle of the stars.
Color: Shifts the color of star from the overbright color tint toward a pure color.
Pinnacle Studio 12 66
Page 67

MAGIC BULLET LOOKS FOR PINNACLE STUDIO 12
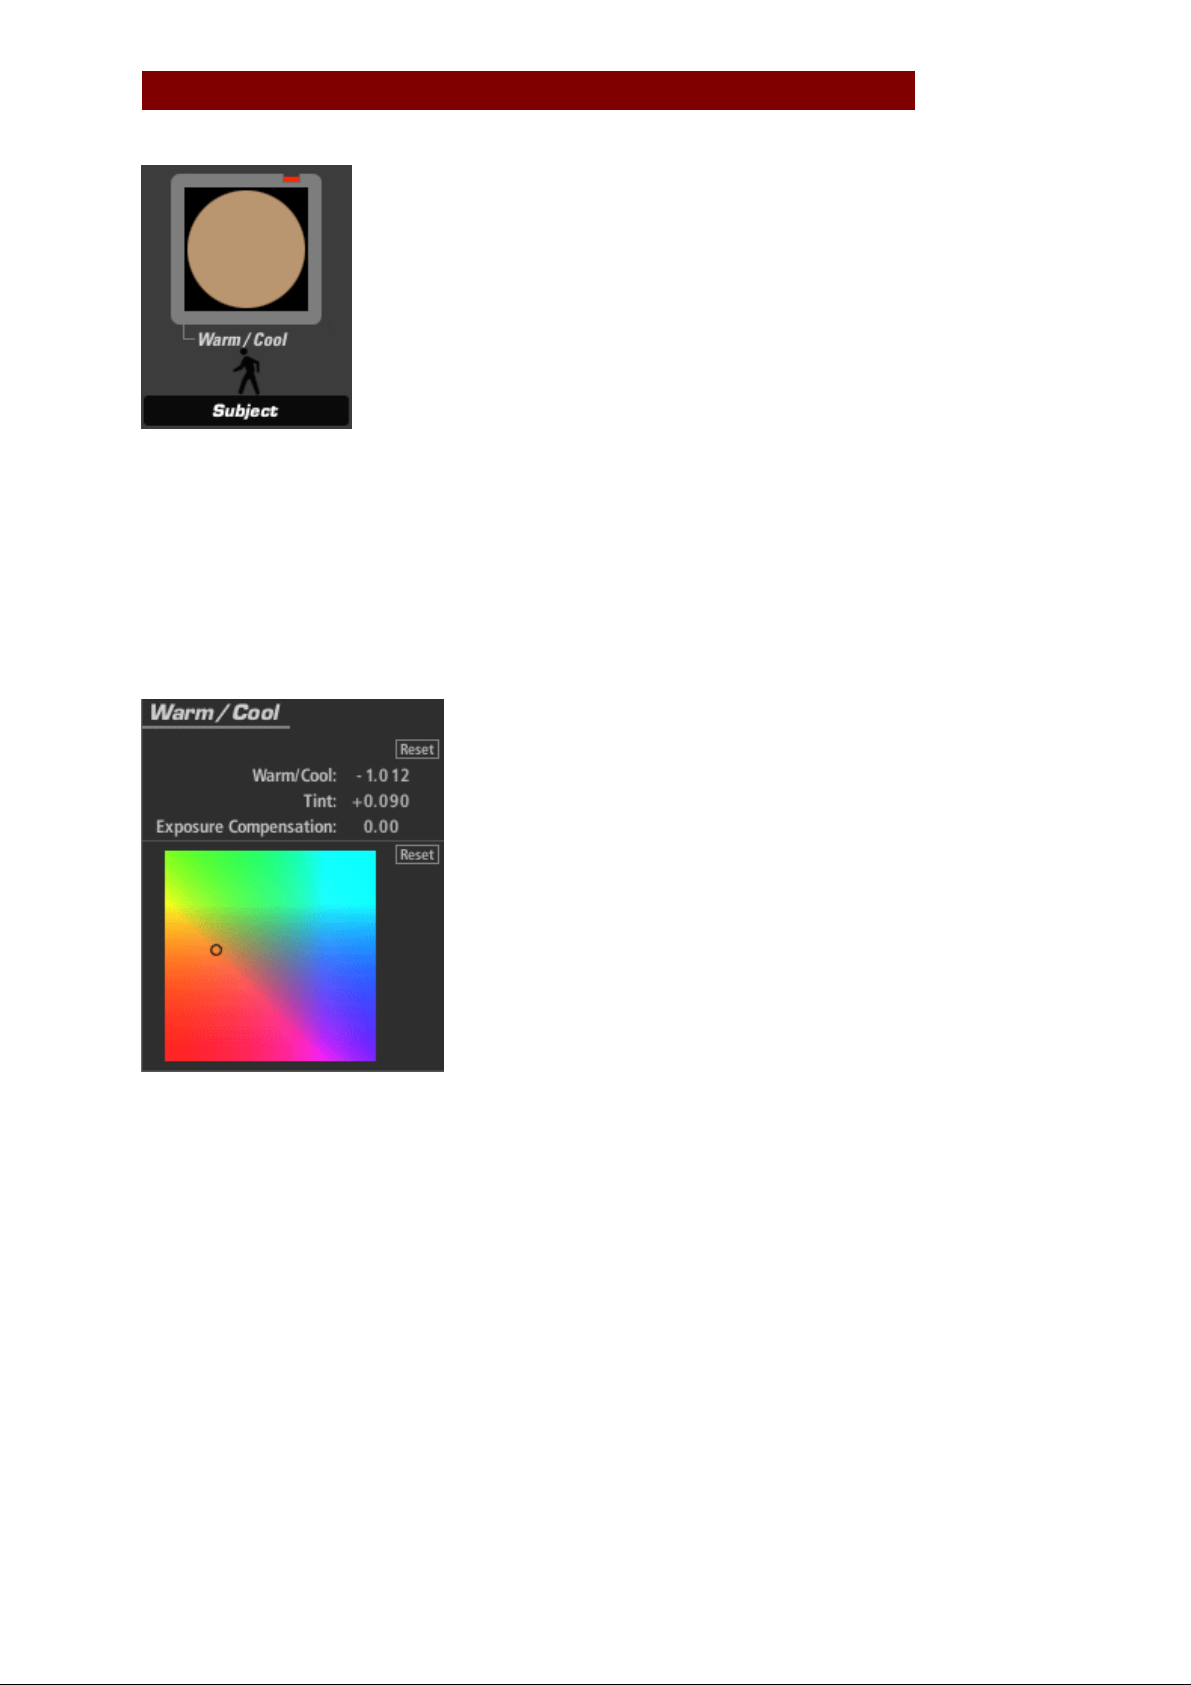
Warm/Cool (appears in Matte)
The Warm/Cool tool creates a color temperature offset, making the image warmer (more
orange) or cooler (more blue) with additional tint bias adjustment to move the color
towards green or red.
Warm/Cool: offsets color temperature (left and right on the color map)
Tint: offsets the color toward red or green (up and down on the color map)
Exposure Compensation: corrects for any resulting changes in overall exposure.
Pinnacle Studio 12 67
Page 68

MAGIC BULLET LOOKS FOR PINNACLE STUDIO 12
Anamorphic Flare (appears in Lens)
The Anamorphic Flare tool produces the look of an anamorphic flare created from internal
lens reflections.
Show Mask: displays the threshold matte used to isolate the highlights, but only when
you adjust the threshold controls.
Size: the extent to which the flare extends from each highlight area.
Threshold: the luminance level above which highlights are picked up by the flare. Lower
it to get more flare effect.
Threshold Softness: introduces softness into the boundaries of the Threshold region,
softening the overall flare effect naturally.
Boost: lifts the white values
Reflection: adds a secondary flare, positioned as an inversion of the first.
Reflection Boost: lifts the luminance of the reflection flare.
Color: The color of the flare
Pinnacle Studio 12 68
Page 69

MAGIC BULLET LOOKS FOR PINNACLE STUDIO 12
Chromatic Aberration (appears in Subject, Lens)
The Chromatic Aberration tool emulates the look of misprinted film or poor quality lenses
by shifting the red, green and blue channels. This tool can also be used to correct for
minor chromatic aberration problems in the original image.
Red/Cyan, Green/Magenta, Blue/Yellow: scales each primary color and its opposite from
the center. For example, the Red/Cyan control scales cyan to the right and red to the left
around edges with positive values and the opposite with negative values in the same
control.
Pinnacle Studio 12 69
Page 70

MAGIC BULLET LOOKS FOR PINNACLE STUDIO 12
Deflare (appears in Lens)
Deflare is a simulated contrast enhancement that increases contrast to provide better
shadow definition.
Size: the range around highlight pixels, as a percentage of total image size
Strength: specifies the extent to which the effect is applied
Exposure Compensation: corrects for any resulting changes in overall exposure
Pinnacle Studio 12 70
Page 71

MAGIC BULLET LOOKS FOR PINNACLE STUDIO 12
Edge Softness (appears in Lens)
The Edge Softness tool creates a circular, out-of-focus area with controllable falloff and
on-screen adjustments of position and size.
Blur Size: size of the blur operation itself
Quality: number of blur iterations. The default of 3 is equivalen t to a standard Gaussian
blur operation.
The following controls can be drag-adjusted in the Preview area:
Center: the center of the blur region (and the least blurred area), expressed as
percentage offset from the image center.
Radius: size of the area outside which the blur operation is at full strength
Spread: threshold/softening region feathers the radius
Pinnacle Studio 12 71
Page 72

MAGIC BULLET LOOKS FOR PINNACLE STUDIO 12
Exposure (appears in Subject, Matte, Lens, Camera, or Post)
The Exposure tool modifies the amount of light passed to the next Tool. The light value is
calibrated in stops like a camera exposure control and can be adjusted by up to plus or
minus 16 stops. The gamma in the Advanced I/O Input tab influences how the stops are
measured.
Stops: with a 1.0 gamma, each positive stop doubles the amount of light, each negative
stop halves it.
Pinnacle Studio 12 72
Page 73

MAGIC BULLET LOOKS FOR PINNACLE STUDIO 12
Grad Exposure (appears in Subject, Matte, Lens, Camera, or Post)
The Grad Exposure tool applies exposure adjustment in a soft rectangular area with
rotation and falloff controls. The gamma setting in the Advanced I/O Input tab influences
how the stops are measured.
Stops: with a 1.0 gamma, each positive stop doubles the amount of light, each negative
stop halves it.
X1, Y1, X2, Y2: establishes the positions of the start and end of the gradient
Falloff: weights the gradient tow ard one end or the other of the gradient
Color Balance: tints the exposed regions
Pinnacle Studio 12 73
Page 74
MAGIC BULLET LOOKS FOR PINNACLE STUDIO 12
Spot Exposure (appears in Subject, Matte, Lens, Camera, or Post)
The Spot Exposure tool controls the light in a circular area of the image with on-screen
adjustments for size and position.
Stops: with a 1.0 gamma, each positive stop doubles the amount of light, each negative
stop halves it.
Center: the center of the blur region (and the least blurred area), expressed as
percentage offset from the image center.
Radius: size of the area outside which the blur operation is at full strength
Spread: threshold/softening region feathers the radius
Falloff: sets the median point between the Radius and Spread
Color Balance: tints the exposed regions
Pinnacle Studio 12 74
Page 75
MAGIC BULLET LOOKS FOR PINNACLE STUDIO 12
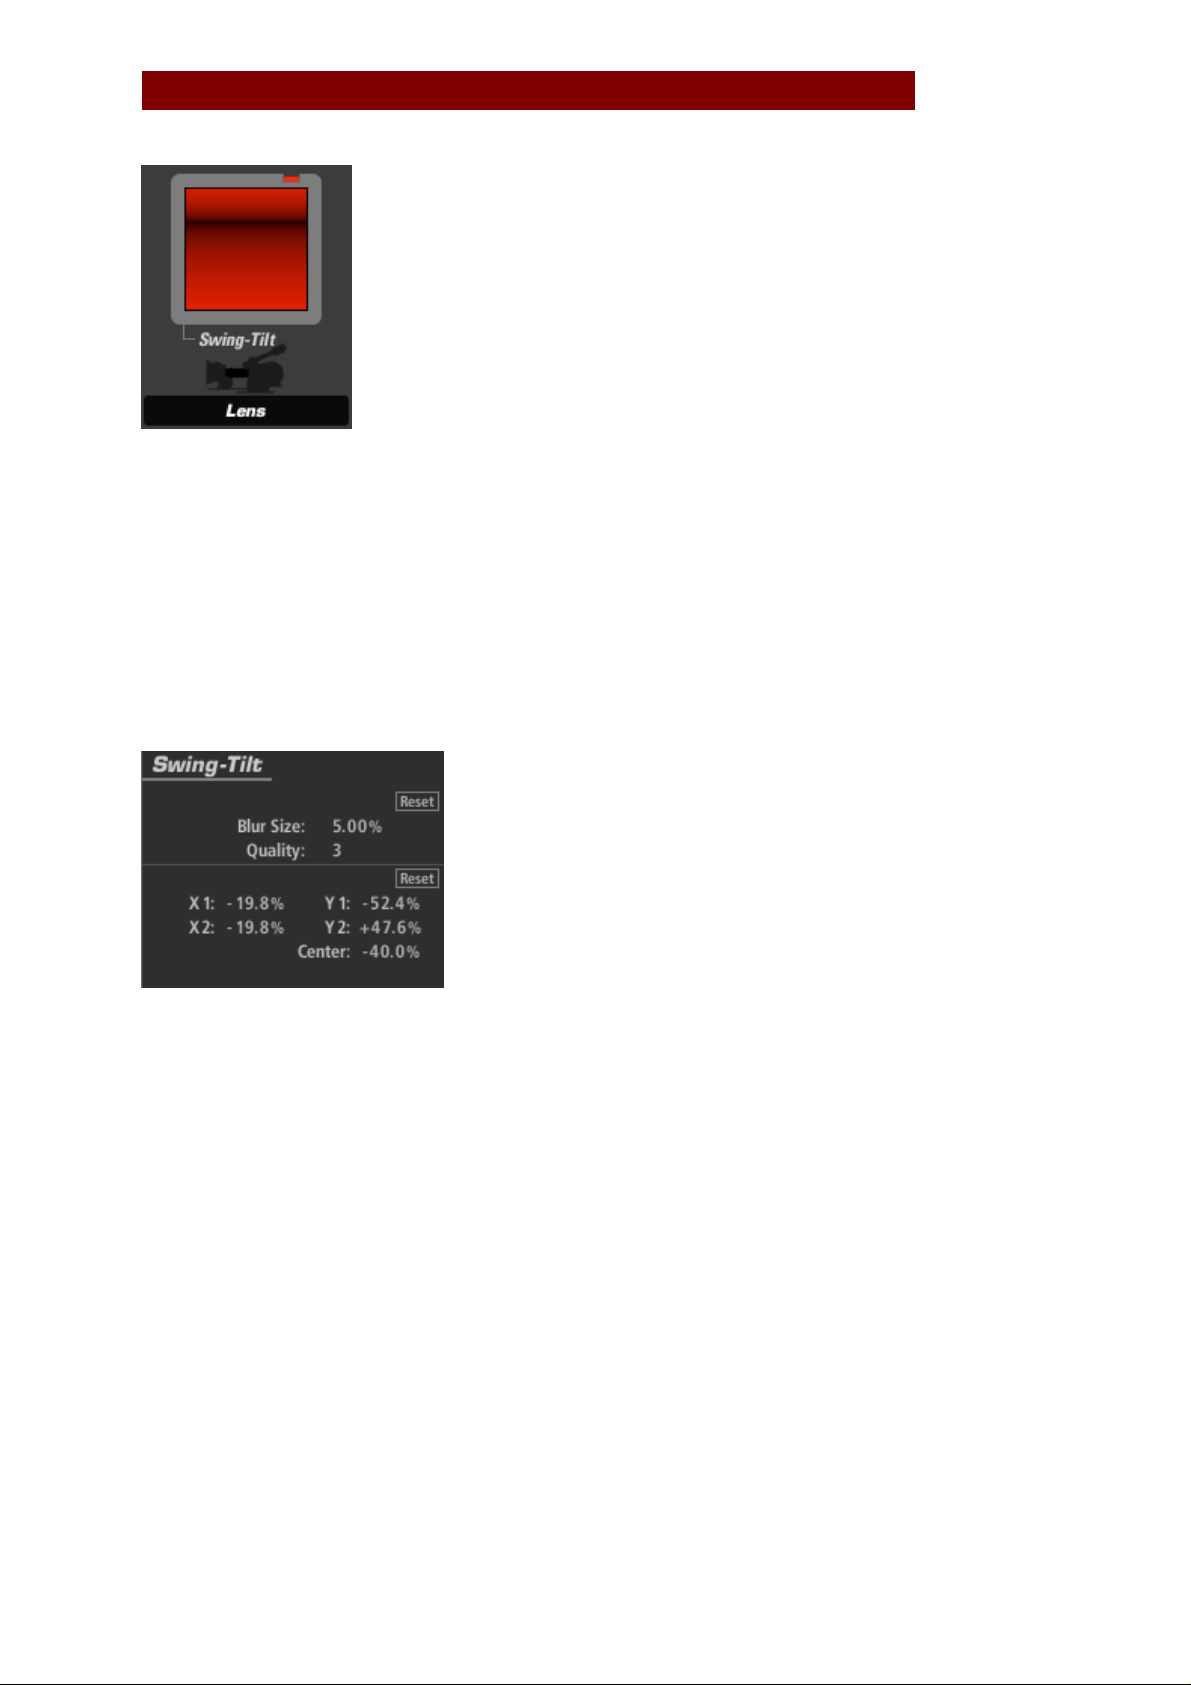
Swing-Tilt (appears in Lens)
A swing/tilt lens tilts the plane of focus, allowing a camera to focus on objects at different
distances in the same frame. This can simulate the out-of-focus qualities of a real
swing/tilt lens, or it can be used to create a faux depth- of-field effect.
Blur Size: size of the blur operation itself
Quality: number of blur iterations. The default of 3 is equivalen t to a standard Gaussian
blur operation.
X1, Y1, X2, Y2: establishes the positions of the start and end of the gradient
Center: offsets the center point between the start and end coordinates
Pinnacle Studio 12 75
Page 76

MAGIC BULLET LOOKS FOR PINNACLE STUDIO 12
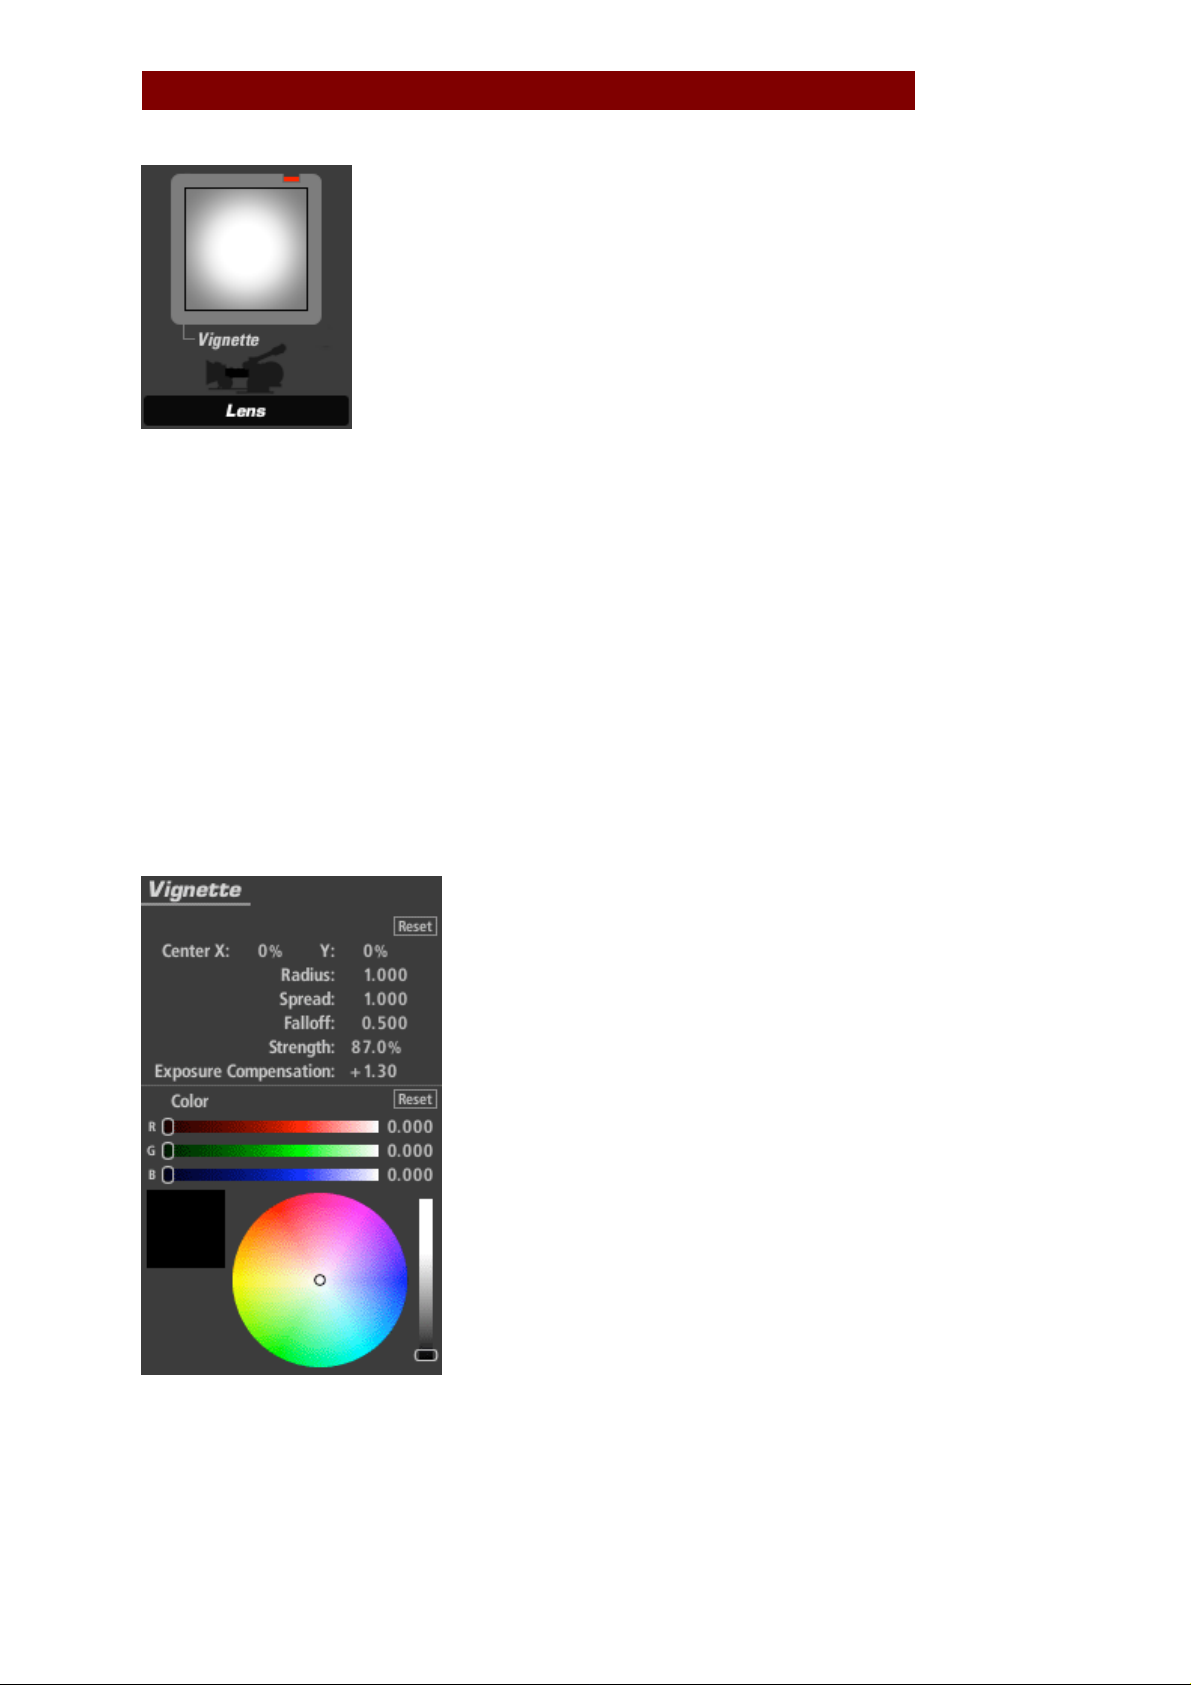
Vignette (appears in Lens)
Vignette (Lens tool): The Vignette tool darkens the edges of an image with control over
darkness, tint and falloff with on-screen adjustments for size and position.
Radius: size of the area outside which the darkening operation is at full strength. By
default, this encompasses the image boundary.
Spread: sets the start of the falloff area and is definied by a dotted line in the image.
Inside the spread there is no vignette effect.
Falloff: weights the gradient toward the spread line or toward the edge. The default of .5
causes a darkening half way between the spread line and the radius.
Strength: specifies the extent to which the effect is applied where 0 is no effect and 100
is full effect.
Exposure Compensation: corrects for any resulting changes in overall exposure.
Color: The vignette by default just darkens the edge toward black but the color value can
push the vignette toward any color.
Pinnacle Studio 12 76
Page 77
MAGIC BULLET LOOKS FOR PINNACLE STUDIO 12
Vignette (appears in Lens)
Vignette (Lens tool): The Vignette tool darkens the edges of an image with control over
darkness, tint and falloff with on-screen adjustments for size and position.
Radius: size of the area outside which the darkening operation is at full strength. By
default, this encompasses the image boundary.
Spread: sets the start of the falloff area and is definied by a dotted line in the image.
Inside the spread there is no vignette effect.
Falloff: weights the gradient toward the spread line or toward the edge. The default of .5
causes a darkening half way between the spread line and the radius.
Strength: specifies the extent to which the effect is applied where 0 is no effect and 100
is full effect.
Exposure Compensation: corrects for any resulting changes in overall exposure.
Color: The vignette by default just darkens the edge toward black but the color value can
push the vignette toward any color.
Pinnacle Studio 12 77
Page 78

MAGIC BULLET LOOKS FOR PINNACLE STUDIO 12
2 Strip (appears in Camera)
The 2-strip Process tool emulates the old technical 2-strip printing process where images
were printed to black and white with a red and green filter, then cemented together for
projection. The creates distinct look that mostly preserves flesh tones but shifts green
toward to a teal blue and makes red colors more prominent.
Green Sensitivity: controls the relative amount of red or cyan in the image
Exposure Compensation: corrects for any resulting changes in overall exposure.
Pinnacle Studio 12 78
Page 79
MAGIC BULLET LOOKS FOR PINNACLE STUDIO 12
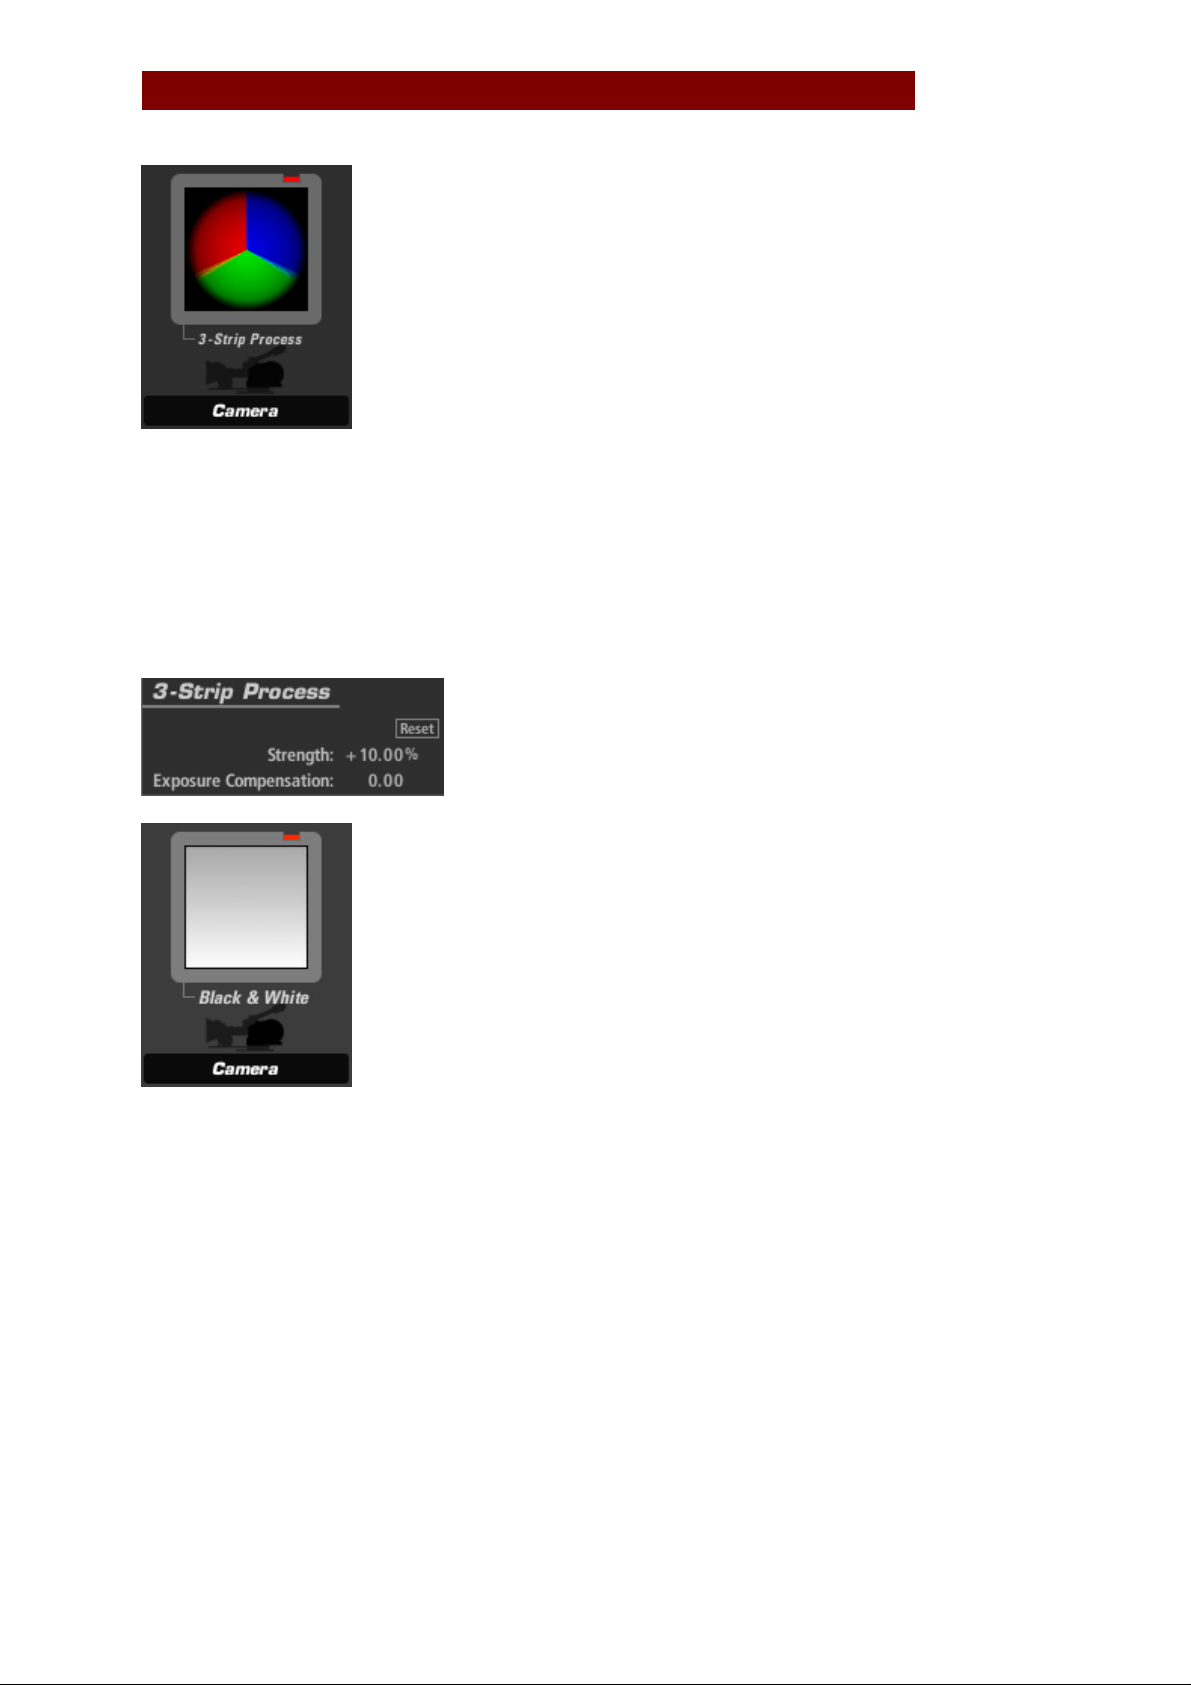
3 Strip (appears in Camera)
The 3-strip Process tool creates the contrast and punch of the Technicolor 3-strip print
process where prints were made using a dye-printing process that used cyan, magenta
and yellow inks.
Strength: the extent to which the effect is applied
Exposure Compensation: corrects for any resulting changes in overall exposure.
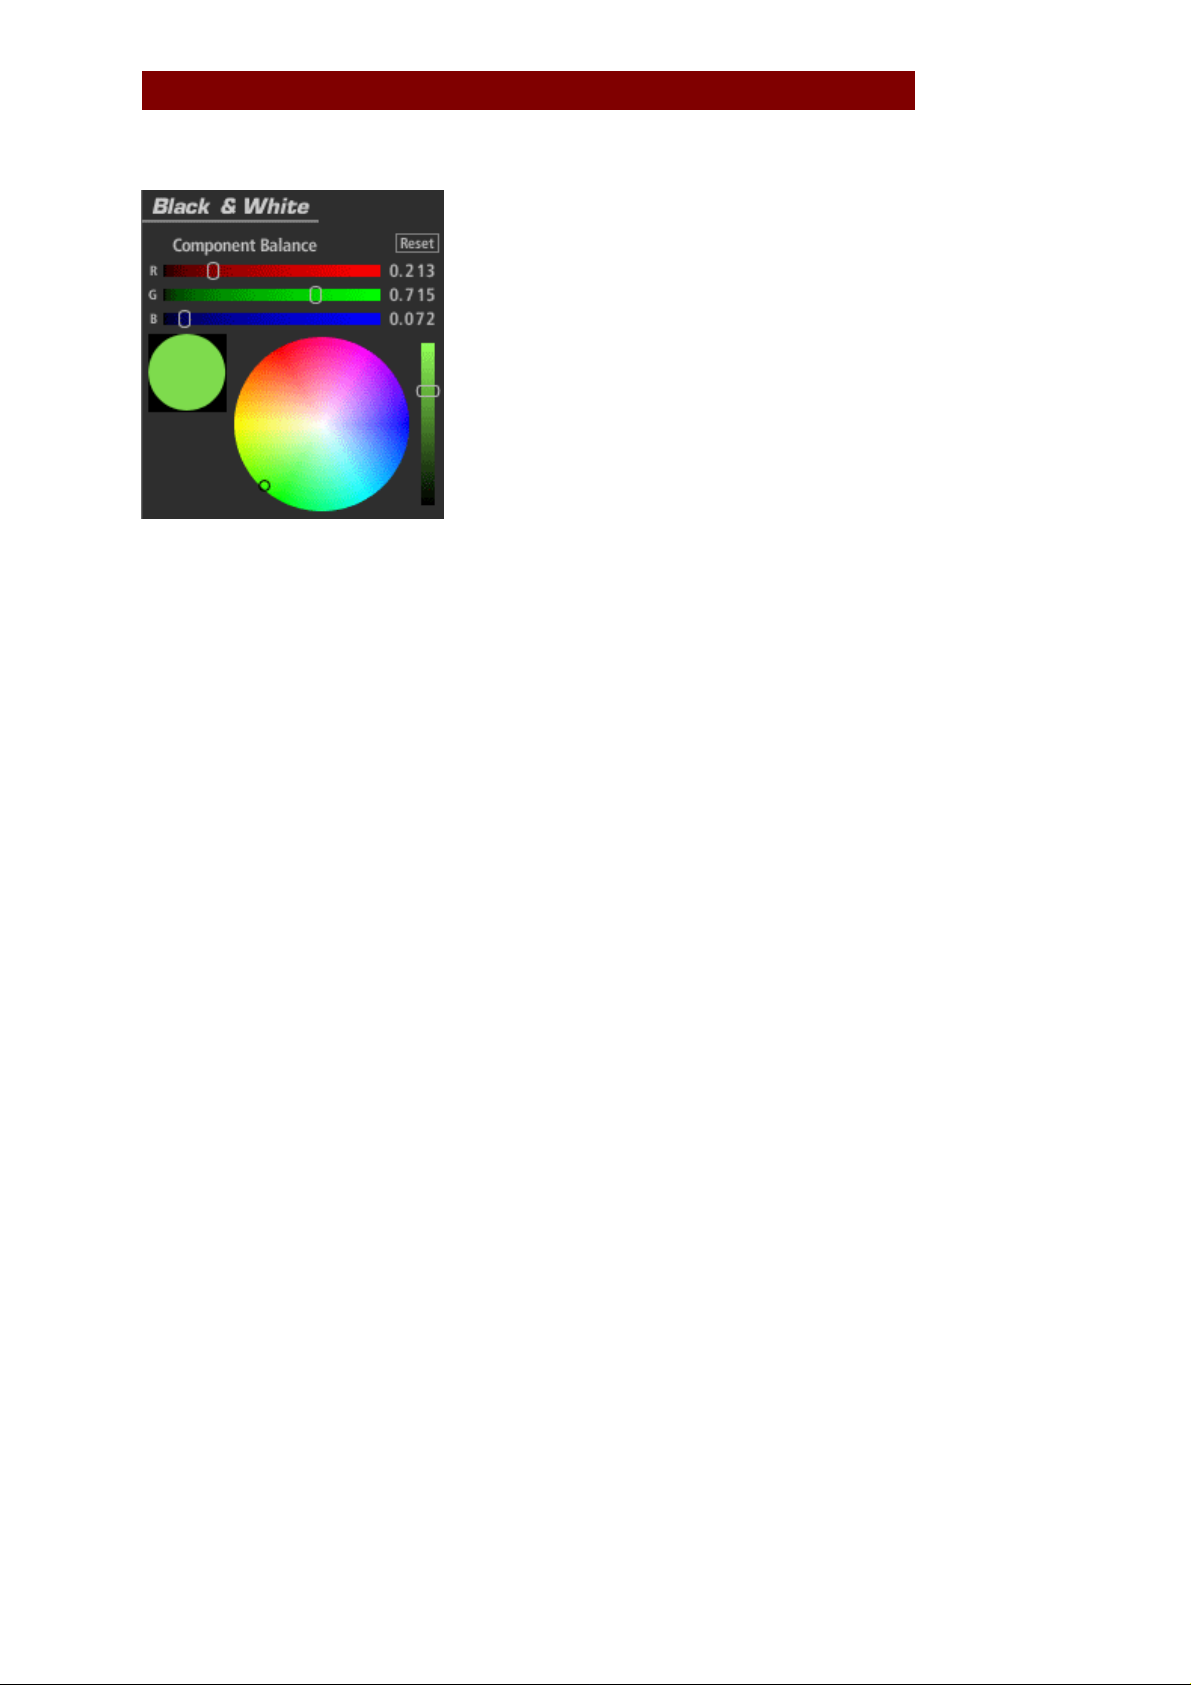
Black and White (appears in Camera)
The Black & White Process tool removes all color. It gives you control over tone shifting
where the color wheel controls the balance of tones used to create the final black and
white output.
Component Balance: selects the hues to use for black and white luminance. A gray
setting uses R, G and B channels equally. The default uses predominantly green, often
the channel with the strongest luminance and contrast (and the one most prominent in
human vision).
Pinnacle Studio 12 79
Page 80
MAGIC BULLET LOOKS FOR PINNACLE STUDIO 12
Pinnacle Studio 12 80
Page 81

MAGIC BULLET LOOKS FOR PINNACLE STUDIO 12
Color Contrast (appears in Subject, Camera, or Post)
The Color Contrast tool deepens the contrast of an image while simultaneously adding an
overall tint or color cast to the image. Works just like the Contrast tool, but allows
separate control of the R, G and B channels, allowing you to tint highlights toward one
hue and shadows toward the opposite.
Pivot: The midtone (inflection) point of th e contrast curve, for all three channels on a 0-
1.0 scale.
Exposure Compensation: corrects for any resulting changes in overall exposure.
Contrast: Depending on the Pivot setting, highlights or shadows take on this hue and its
opposite, respectively.
Pinnacle Studio 12 81
Page 82

MAGIC BULLET LOOKS FOR PINNACLE STUDIO 12
Color Reversal (appears in Camera)
The Color Reversal tool emulates the color reversal film process providing greater
contrast.
Strength: specifies the extent to which the effect is applied.
Exposure Compensation: corrects for any resulting changes in overall exposure.
Pinnacle Studio 12 82
Page 83

MAGIC BULLET LOOKS FOR PINNACLE STUDIO 12
Contrast (appears in Subject, Camera, or Post)
The Contrast tool offers a simple film response or S-curve contrast adjustment with
control over the midtone (inflection) point for the contrast curve.
Contrast: the amount of contrast
Pivot: The midtone (inflection) point of th e contrast curve, for all three channels on a 0-
1.0 scale.
Exposure Compensation: corrects for any resulting changes in overall exposure.
Pinnacle Studio 12 83
Page 84

MAGIC BULLET LOOKS FOR PINNACLE STUDIO 12
Crush (appears in Subject, Camera, or Post)
Crush (Subject, Camera, or Post tool): Crush deepens the shadows in the image, adding
controls for tint of the shadow area.
Gamma: the assumed gamma of the input media
Exposure Compensation: corrects for any resulting changes in overall exposure.
Color: the tint color, weighted toward the shadows.
Pinnacle Studio 12 84
Page 85

MAGIC BULLET LOOKS FOR PINNACLE STUDIO 12
Curves (appears in Subject, Camera, or Post)
The Curves tool provides a master curve, plus red, green, and blue curve controls with
fixed-control-point editing for adjusting shadow, midtone and highlight areas with a
single, easy-to-use control.
Contrast: adds to the “S” shape of the overall curve
Shadows: weighted to the lower half of the curve
Midtones: weighted to the midpoint of the curve
Highlights: weighted to the upper half of the curve
RGB, Red, Green, Blue: allows adjustment on individual color channels
Gamma Space: the assumed gamma of the input media
Pinnacle Studio 12 85
Page 86

MAGIC BULLET LOOKS FOR PINNACLE STUDIO 12
Exposure (appears in Subject, Matte, Lens, Camera, or Post)
The Exposure tool modifies the amount of light passed to the next Tool. The light value is
calibrated in stops like a camera exposure control and can be adjusted by up to plus or
minus 16 stops. The gamma in the Advanced I/O Input tab influences how the stops are
measured.
Stops: with a 1.0 gamma, each positive stop doubles the amount of light, each negative
stop halves it.
Pinnacle Studio 12 86
Page 87

MAGIC BULLET LOOKS FOR PINNACLE STUDIO 12
Film Grain (appears in Camera or Post)
The Film Grain tool adds grain-like noise, with softness controls for individual channels
and shadow and highlight masking for greater realism.
Color Mode: creates individual red, green and blue grain when on, monochromatic grain
when off
Amount: grain intensity
Shadow Suppress: percentage to which grain is withheld from shadow regions
Shadow Threshold: luminance level below which Shadow Suppress operates
Highlight Suppress: percentage to which grain is withheld from highlight regions
Highlight Threshold: luminance level above which Highlight Suppress operates
Red, Green, Blue Softness: blurs the grain on individual channels
Component Balance: effectively tints the grain
Pinnacle Studio 12 87
Page 88
MAGIC BULLET LOOKS FOR PINNACLE STUDIO 12
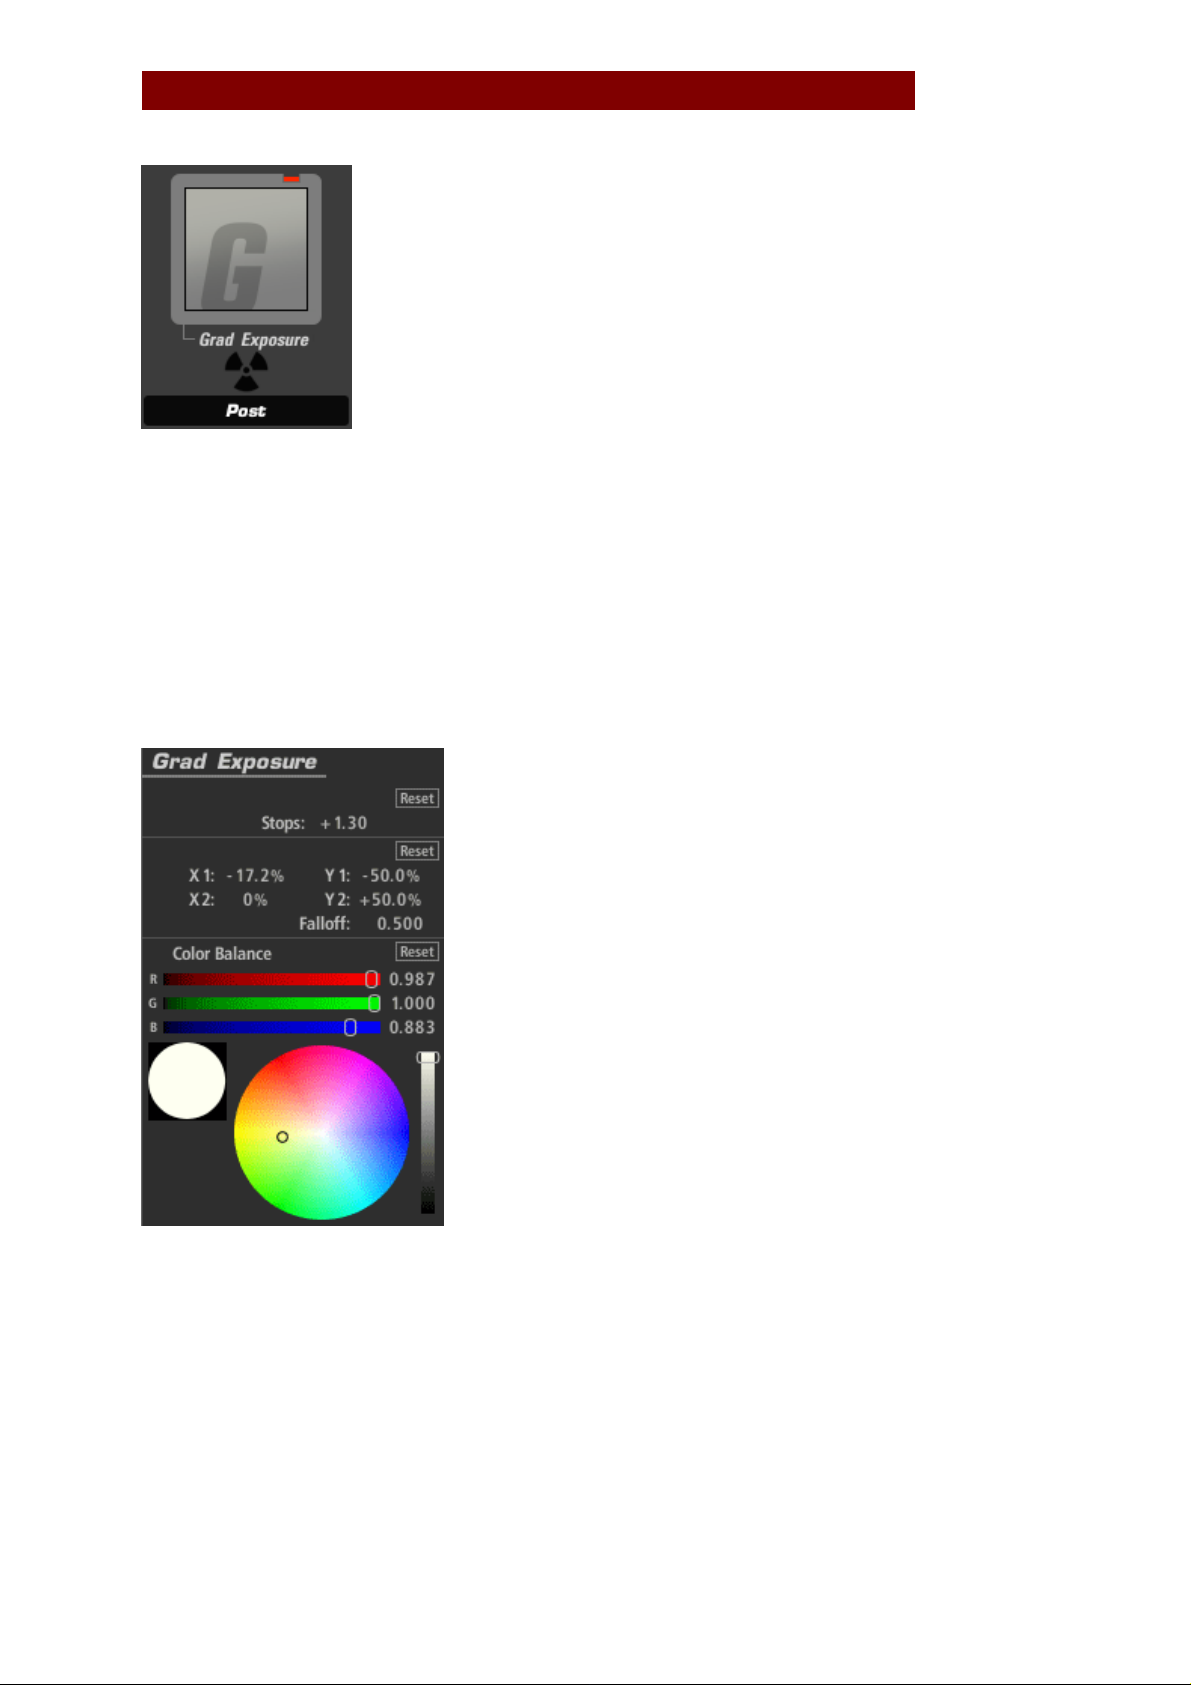
Grad Exposure (appears in Subject, Matte, Lens, Camera, or Post)
The Grad Exposure tool applies exposure adjustment in a soft rectangular area with
rotation and falloff controls. The gamma setting in the Advanced I/O Input tab influences
how the stops are measured.
Stops: with a 1.0 gamma, each positive stop doubles the amount of light, each negative
stop halves it.
X1, Y1, X2, Y2: establishes the positions of the start and end of the gradient
Falloff: weights the gradient tow ard one end or the other of the gradient
Color Balance: tints the exposed regions
Pinnacle Studio 12 88
Page 89

MAGIC BULLET LOOKS FOR PINNACLE STUDIO 12
Negative Bleach Bypass (appears in Camera)
The Negative Bleach Bypass tool emulates the look of processing the negative with a skip
bleach process used to retain silver on the negative and decrease saturation and increase
contrast.
Silver Retention: the more silver is retain ed, the more desaturated and contrasty the
look.
Exposure Compensation: corrects for any resulting changes in overall exposure.
Pinnacle Studio 12 89
Page 90

MAGIC BULLET LOOKS FOR PINNACLE STUDIO 12
Ranged Saturation (appears in Subject, Camera, or Post)
The Ranged Saturation tool controls the saturation of the shadows, midtones and
highlights of an image.
Saturation: includes controls for Shadow, Midtone and Highlight saturation
Threshold: Determines the range affected by each corresponding Saturation control.
Shadows are all values between 0.0 and the specified value. Midtones are the "hump" of
values between 0.0 and 1.0, centered on the Midtone value. Highlights are all values
higher than the Highlight number.
Exposure Compensation: corrects for any resulting changes in overall exposure.
Component Balance: weights the operation to favor a particular color.
Pinnacle Studio 12 90
Page 91

MAGIC BULLET LOOKS FOR PINNACLE STUDIO 12
Saturation (appears in Subject, Camera, or Post)
Saturation increases or decreases the saturation or vibrancy of the colors in the image
with precise control in linear light.
Saturation: the total amount of saturation in the image, on all channels
Exposure Compensation: corrects for any resulting changes in overall exposure
Component Balance: weights the operation to favor a particular color.
Pinnacle Studio 12 91
Page 92

MAGIC BULLET LOOKS FOR PINNACLE STUDIO 12
Shoulder (appears in Camera)
The Shoulder tool pushes the brightest values in the image into the 0-1.0 brightness
range, yielding a natural result for images with over-bright values. The controls define
which values will be altered. Any luminance v a lues in the Red, Green, and Blue channels
which fall between the rolloff start and the brightest value will be re-mapped to a normal
range.
Rolloff Start: value between 0 and 1 establishing the luminance value at which the rolloff
is based
Brightest Value: the ceiling from which highlights are rolled off
Strength: specifies the extent to which the effect is applied.
Pinnacle Studio 12 92
Page 93
MAGIC BULLET LOOKS FOR PINNACLE STUDIO 12
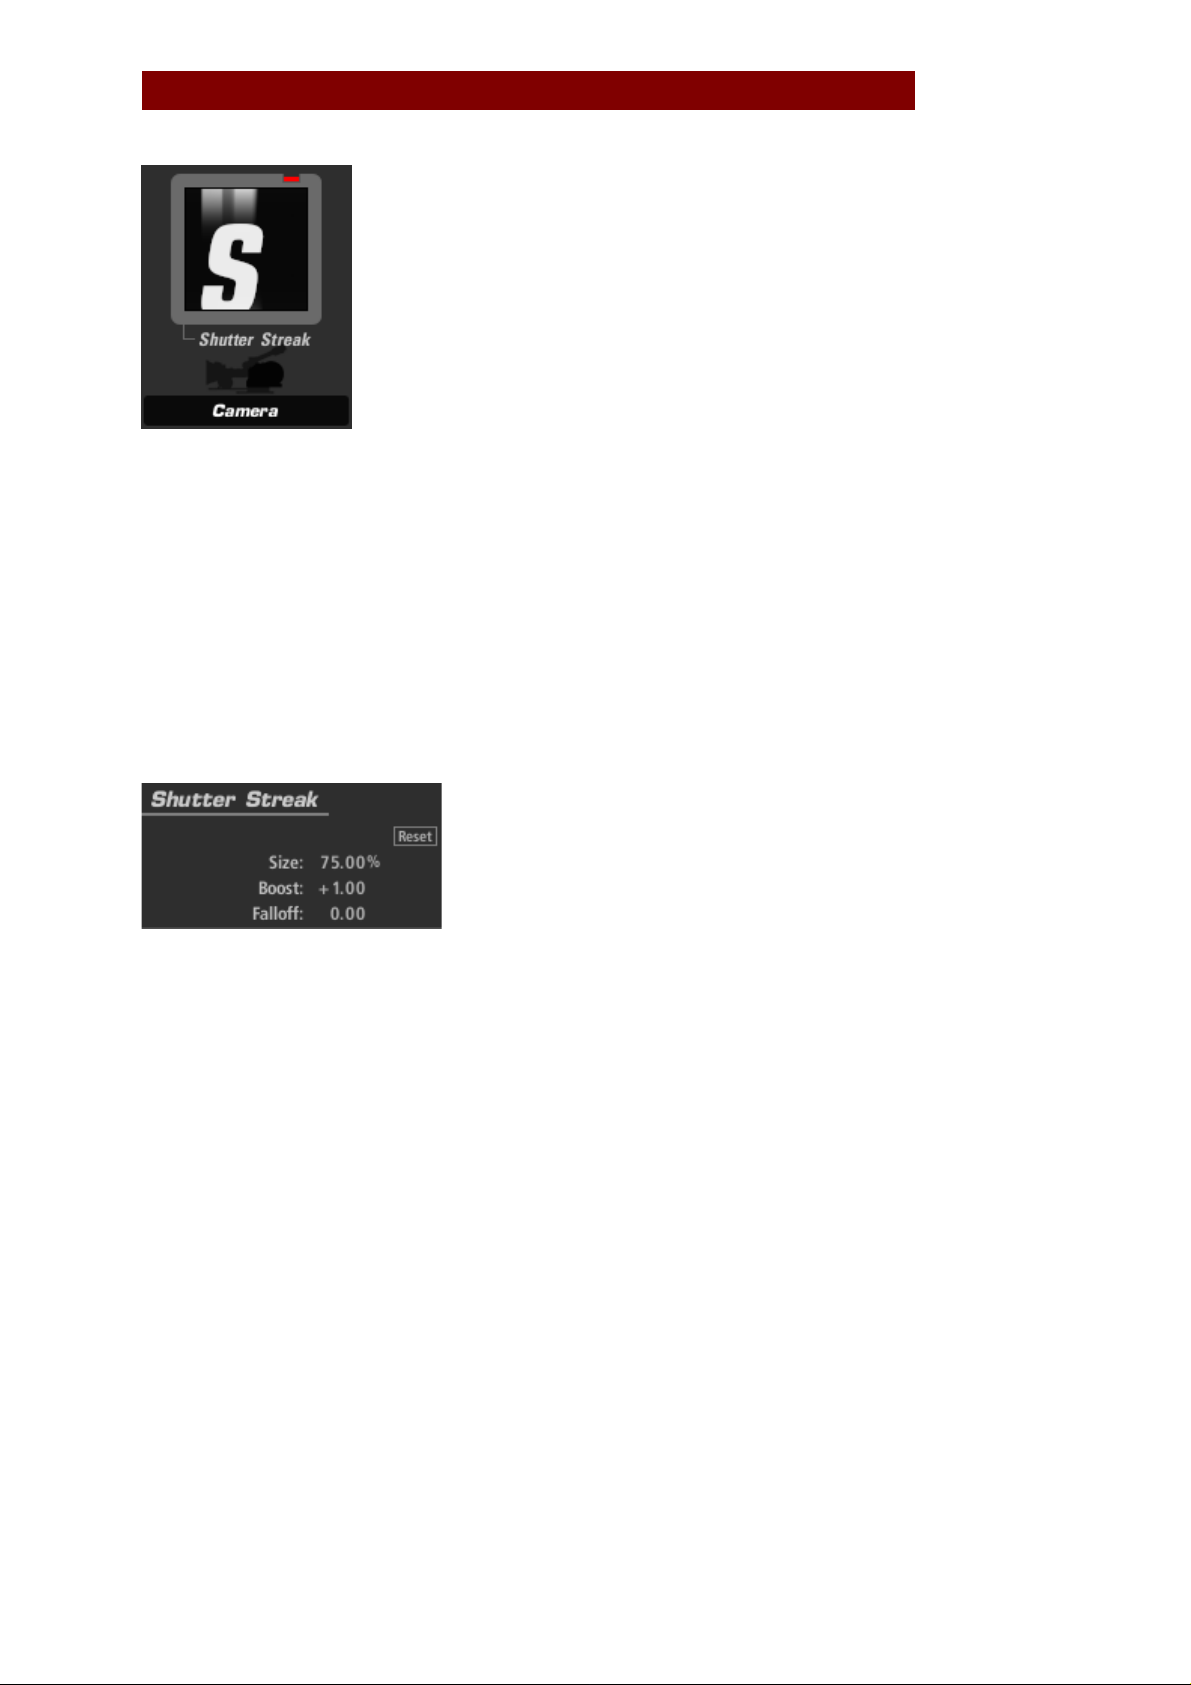
Shutter Streak (appears in Camera)
The Shutter Streak tool emulates the look of light leaking into the bottom and top of the
film because of a misaligned film gate.
Size: The horizontal scale of the streak as measured from the midpoint of the frame to
the top and bottom edges.
Boost: increases or decreases the overall exposure change of just the streaks and not the
underlying image.
Falloff: controls the softness of the streak as it approaches the center of the image.
Positive values cause greater falloff and less visible streak, while negative values
emphasize the streak in the frame.
Pinnacle Studio 12 93
Page 94
MAGIC BULLET LOOKS FOR PINNACLE STUDIO 12
Spot Exposure (appears in Subject, Matte, Lens, Camera, or Post)
The Spot Exposure tool controls the light in a circular area of the image with on-screen
adjustments for size and position.
Stops: with a 1.0 gamma, each positive stop doubles the amount of light, each negative
stop halves it.
Center: the center of the blur region (and the least blurred area), expressed as
percentage offset from the image center.
Radius: size of the area outside which the blur operation is at full strength
Spread: threshold/softening region feathers the radius
Falloff: sets the median point between the Radius and Spread
Color Balance: tints the exposed regions
Pinnacle Studio 12 94
Page 95
MAGIC BULLET LOOKS FOR PINNACLE STUDIO 12
Warm/Cool (appears in Matte)
The Warm/Cool tool creates a color temperature offset, making the image warmer (more
orange) or cooler (more blue) with additional tint bias adjustment to move the color
towards green or red.
Warm/Cool: offsets color temperature (left and right on the color map)
Tint: offsets the color toward red or green (up and down on the color map)
Exposure Compensation: corrects for any resulting changes in overall exposure.
Pinnacle Studio 12 95
Page 96

MAGIC BULLET LOOKS FOR PINNACLE STUDIO 12
Three Way Color Corrector (appears in Subject, Post)
The 3-Way Color Corrector tool provides shadow, midtone, and highlight color correction
with control over tone ranges using masks for highlight shadow and midtone regions. It
also includes color offset and exposure controls. This tool has an advantage over LiftGamma-Gain, in that it can define the value ranges of its three basic controls. With HDRI
(High Dynamic Range Imagery), behavior of overbright pixels is also more predictable
with 3-Way Color Corrector.
Threshold Controls: Determines the range affected by each respective Color control.
Shadows are all values between 0.0 and Shadow. Midtones are the "hump" of values
between 0.0 and 1.0, centered on Midtone. Highlights are all values higher than
Highlight.
Strength: specifies the extent to which the effect is applied.
Shadow, Midtone, Highlight Color: the target color to which each respective image range
is tinted.
Pinnacle Studio 12 96
Page 97

MAGIC BULLET LOOKS FOR PINNACLE STUDIO 12
Auto-shoulder (appears in Post)
The Auto-shoulder tool pushes the brightest values in the image into a usable range to
compensate for overbrights in the image. Greater control
over this process can be achieved with the Shoulder tool in
the Camera category. This tool is best used to compensate
for small overbrights before returning to an editing
application that doesn't handle overbright ranges natively.
Strength: specifies the extent to which the effect is applied.
Pinnacle Studio 12 97
Page 98

MAGIC BULLET LOOKS FOR PINNACLE STUDIO 12
Color Contrast (appears in Subject, Camera, or Post)
The Color Contrast tool deepens the contrast of an image while simultaneously adding an
overall tint or color cast to the image. Works just like the Contrast tool, but allows
separate control of the R, G and B channels, allowing you to tint highlights toward one
hue and shadows toward the opposite.
Pivot: The midtone (inflection) point of th e contrast curve, for all three channels on a 0-
1.0 scale.
Exposure Compensation: corrects for any resulting changes in overall exposure.
Contrast: Depending on the Pivot setting, highlights or shadows take on this hue and its
opposite, respectively.
Pinnacle Studio 12 98
Page 99

MAGIC BULLET LOOKS FOR PINNACLE STUDIO 12
Contrast (appears in Subject, Camera, or Post)
The Contrast tool offers a simple film response or S-curve contrast adjustment with
control over the midtone (inflection) point for the contrast curve.
Contrast: the amount of contrast
Pivot: The midtone (inflection) point of th e contrast curve, for all three channels on a 0-
1.0 scale.
Exposure Compensation: corrects for any resulting changes in overall exposure.
Pinnacle Studio 12 99
Page 100

MAGIC BULLET LOOKS FOR PINNACLE STUDIO 12
Crush (appears in Subject, Camera, or Post)
Crush (Subject, Camera, or Post tool): Crush deepens the shadows in the image, adding
controls for tint of the shadow area.
Gamma: the assumed gamma of the input media
Exposure Compensation: corrects for any resulting changes in overall exposure.
Color: the tint color, weighted toward the shadows.
Pinnacle Studio 12 100
 Loading...