

Page 1

PCTV MediaCenter Remote Control
Page 2

PCTV MediaCenter Remote Control
GB August 2004
© Pinnacle Systems GmbH 2004
All rights reserved.
No part of this manual may be reproduced or transferred to other media without
explicit written permission from Pinnacle Systems GmbH, Braunschweig,
Germany.
All brand or product names are trademarks or registered trademarks of their
respective holders.
This manual is printed on chlorine-free, bleached paper using solvent-free ink.
Pinnacle Systems GmbH has written this manual to the best of its knowledge,
but does not guarantee that the programs/systems will fulfill the users’ intended
applications.
No warranty is made as to the specifications of features.
Pinnacle Systems GmbH retains the right to make alterations to the content of
the manual without obligation to inform third parties.
All quotes, sales, supply and manufacturing contracts from Pinnacle Systems
GmbH, including consulting, installation and other contractual services are
subject exclusively to the General Sales and Delivery Terms of Pinnacle
Systems GmbH.
Page 3

Table of Contents
Installation ............................................................................................................. 1
Internal Installation ............................................................................................ 2
Internal Installation via a Serial Port ................................................................. 3
External Installation...........................................................................................5
Settings .................................................................................................................. 6
Select Remote Control ....................................................................................... 6
Select Hardware ................................................................................................. 6
Automatic Program Start ................................................................................... 6
Check Remote Control Function ....................................................................... 7
Closing the Remote Control .............................................................................. 7
Remote Control Button Assignments.................................................................... 8
Button Assignments for Remote Control Type A ............................................ 9
Button Assignments for Remote Control Type B .......................................... 14
Troubleshooting................................................................................................... 19
Custom Configuration ......................................................................................... 20
General ............................................................................................................. 20
Sections ............................................................................................................ 20
Supported Commands...................................................................................... 22
Special keys .....................................................................................................23
Specific Characteristics.................................................................................... 24
i
Page 4

Notes
ii
Page 5
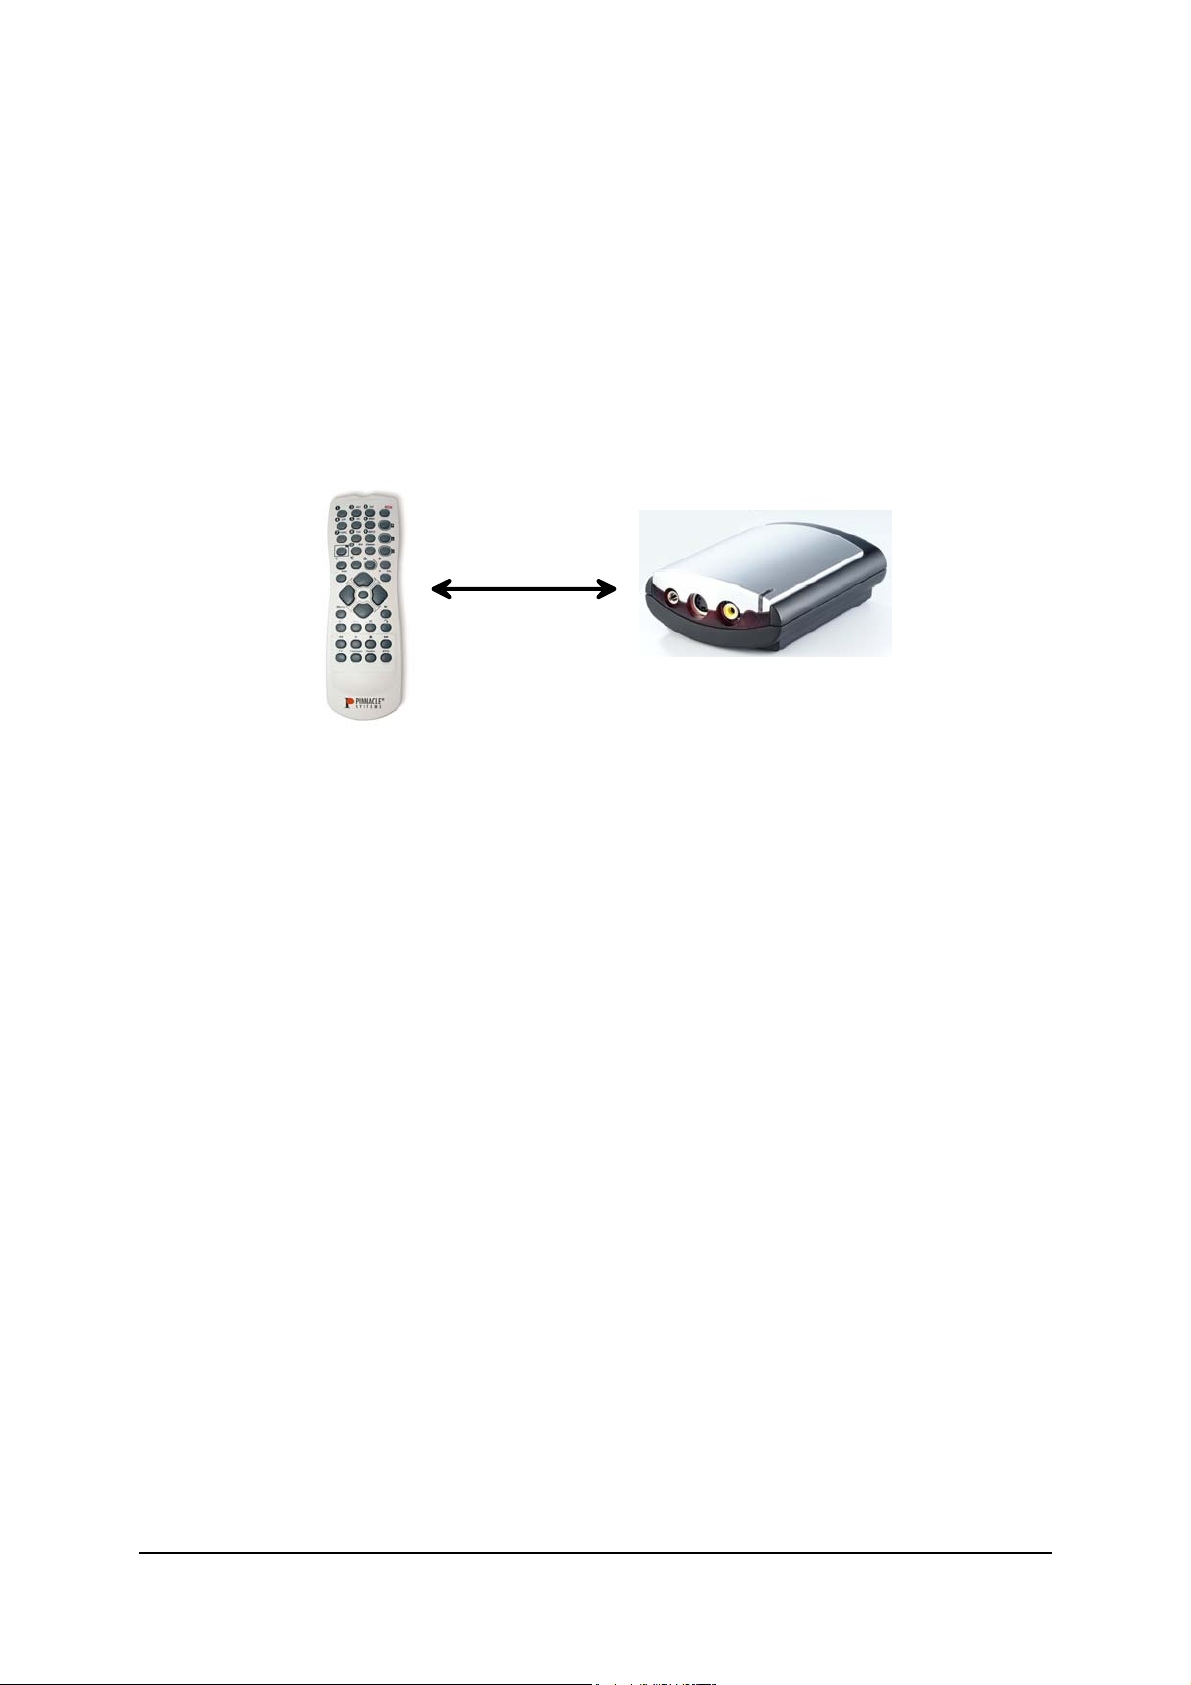
Installation
The installation of your remote control is dependent on your Pinnacle device:
If you have an internal board with a separate remote input terminal,
follow the installation instructions in the section "Internal Installation".
If you have an internal board without a separate remote input terminal,
follow the installation instructions in the section "Internal Installation Via a
Serial Port".
If you have an external device, follow the installation instructions in the
section "External Installation".
The illustrations in this chapter are only examples and may differ in
appearance from your hardware or remote control.
1
Page 6
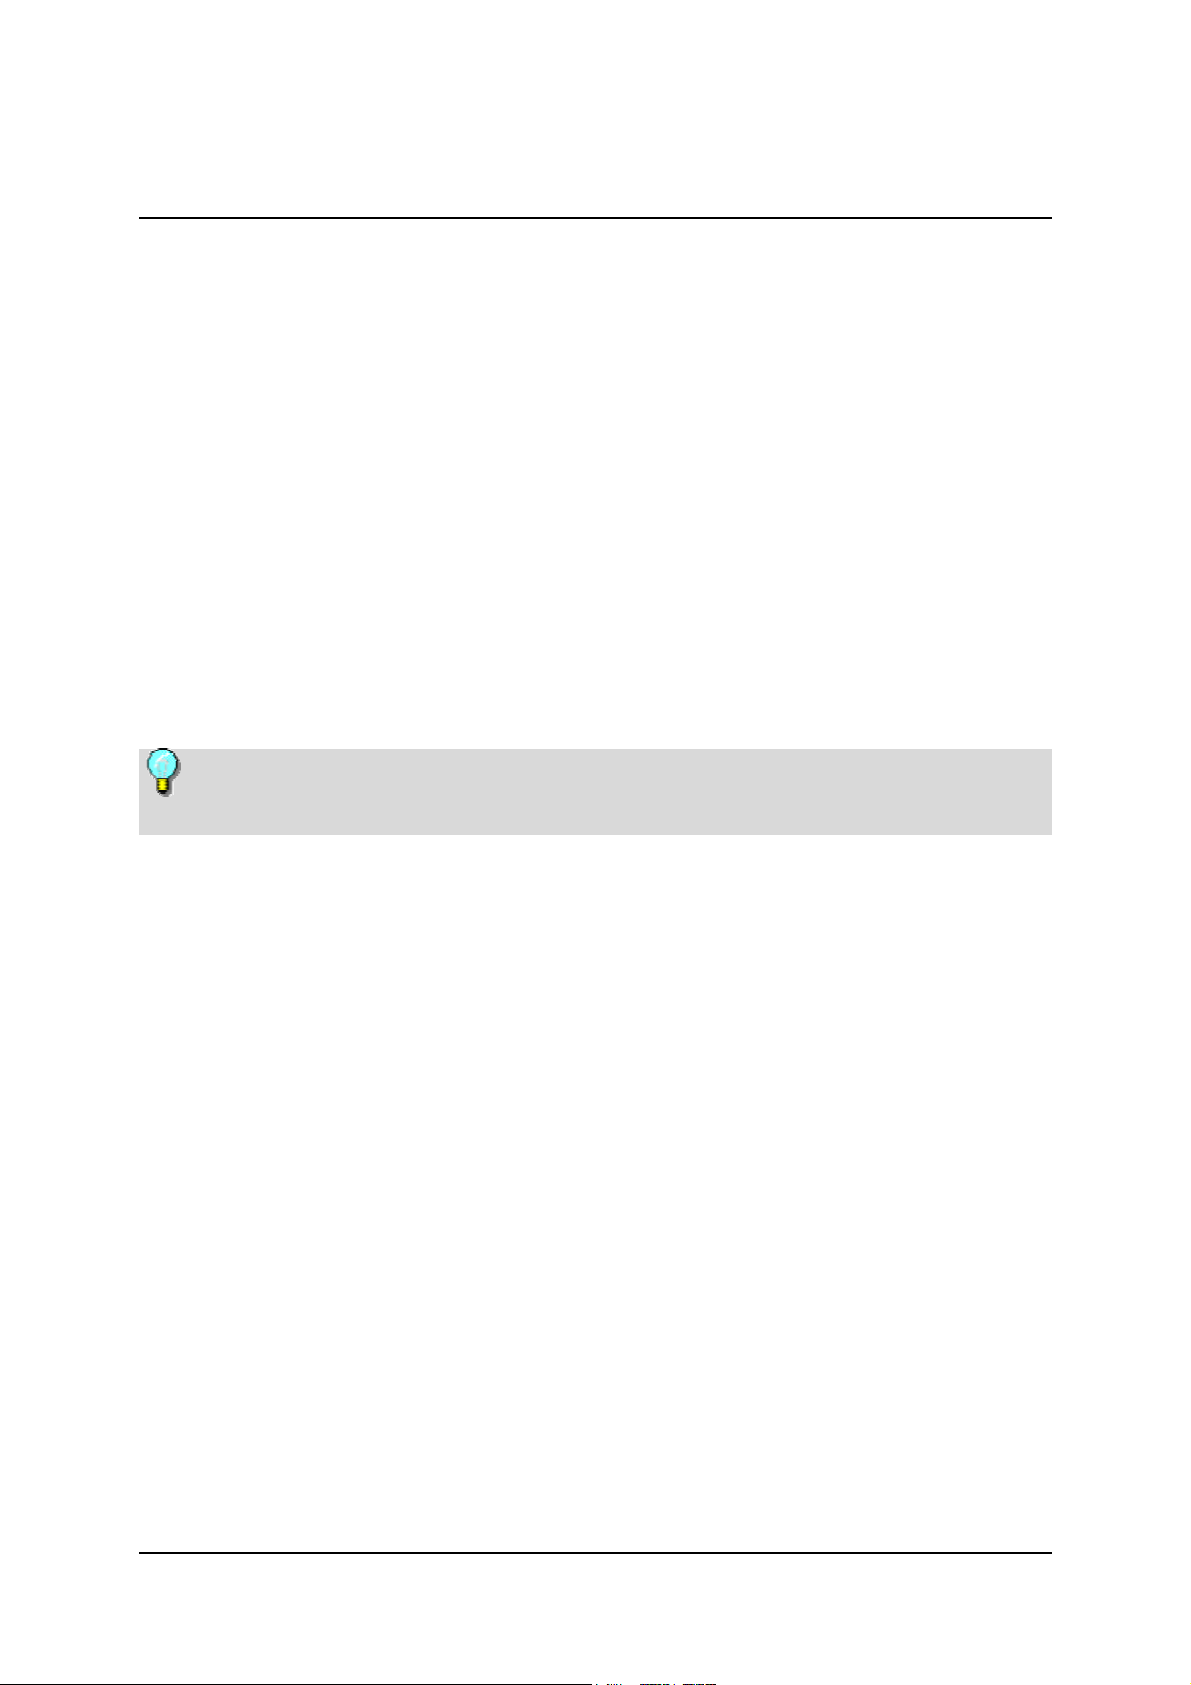
Internal Installation
Depending on the model, your board may not have a separate remote input
terminal. In this case, follow the instructions in the section "Internal Installation
via a Serial Port".
In order to install the remote control device insert the receiver cable of the
remote control into the remote control input of your hardware.
Now fasten the other end of the receiver cable to your monitor or the housing
of your computer by using the adhesive strip included in the delivery
quantity.
Make certain that the area between the remote control and the receiver are
unobstructed.
Now insert the batteries (2x mignon 1.5V (R 06; AA)) into the remote
control.
2
Page 7
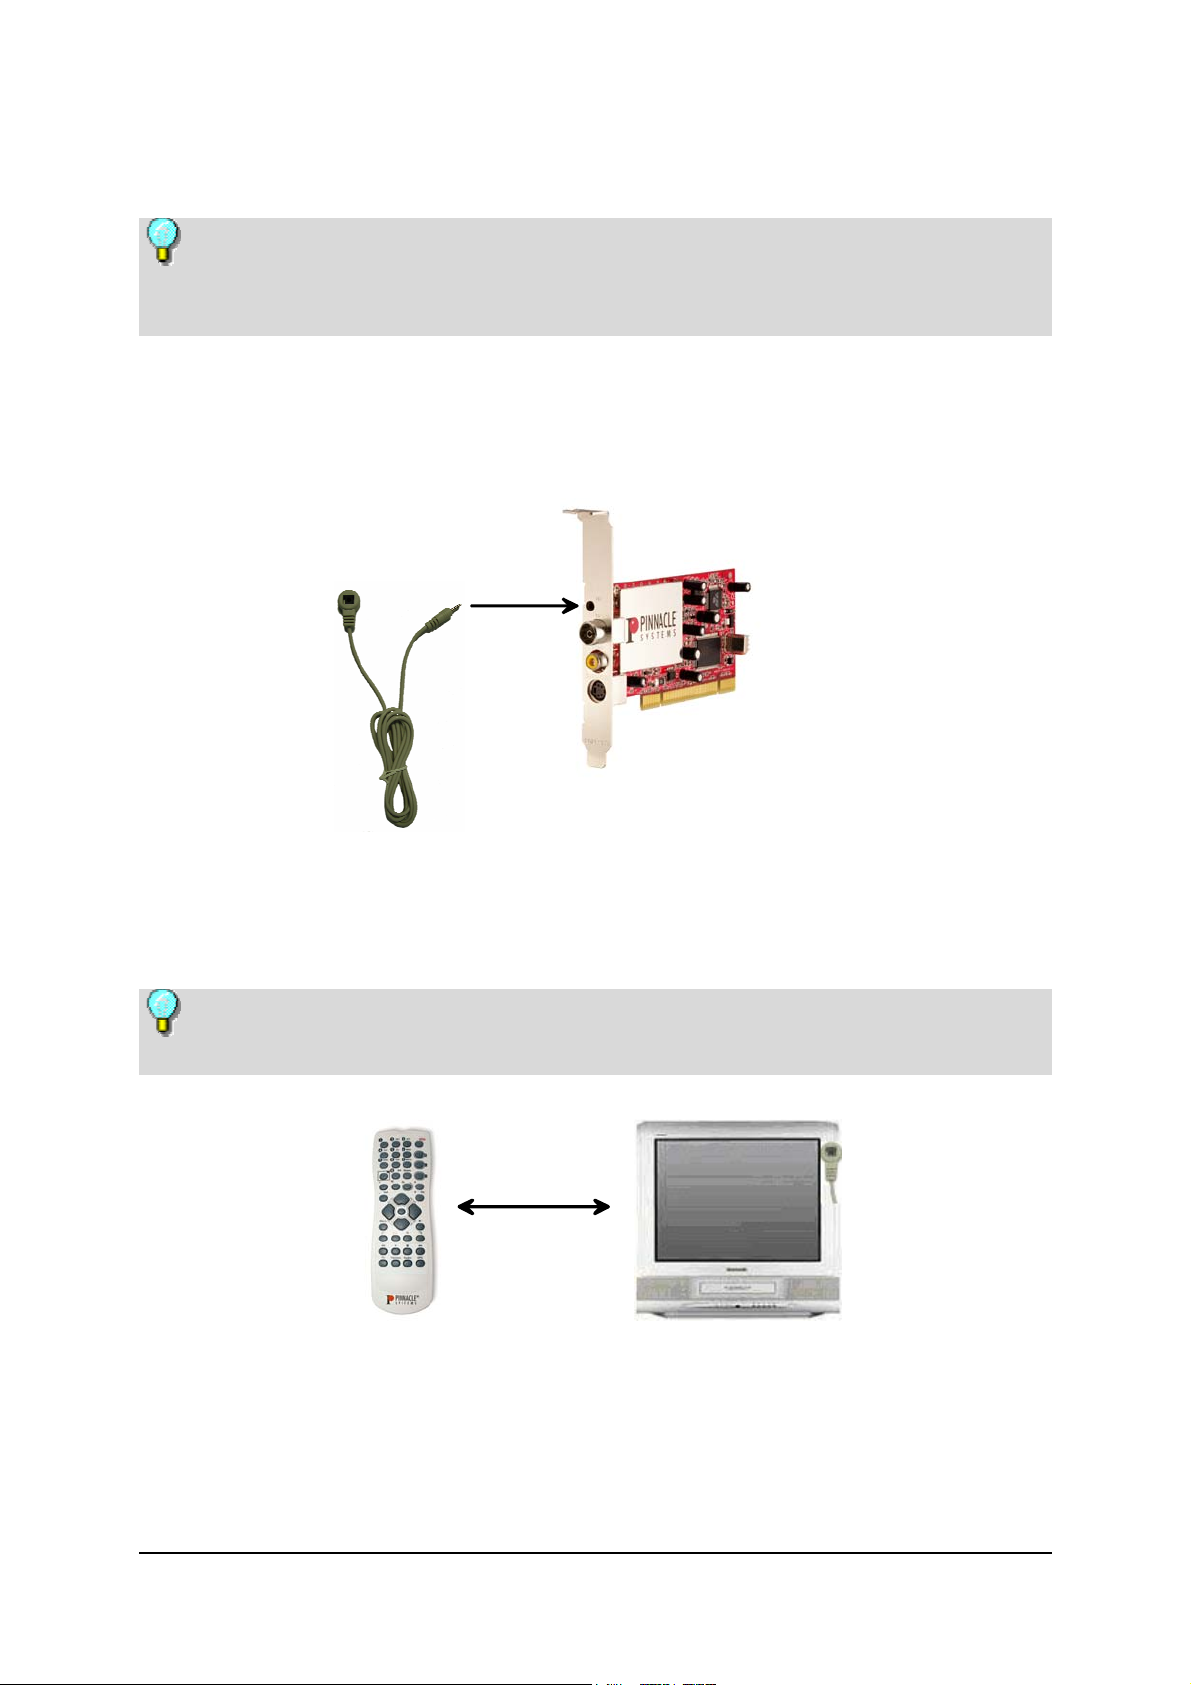
Internal Installation via a Serial Port
Connect the 9-pin plug of the remote control receiver to an available serial
port on your computer.
Use the adhesive strips provided to secure the other end of the receiver to
your monitor or computer housing.
Make certain that the area between the remote control and the receiver are
unobstructed.
Now insert the batteries (2x mignon 1.5V (R 06; AA)) into the remote
control.
3
Page 8
Remote Control Configuration
After you have connected your remote control to a serial port and installed
the board, you need to select which serial port the remote control receiver
should be connected to. To do this, click on the symbol
select the option COM: The dialog window "Remote Configuration" appears.
In this window, a maximum of four alternative ports are indicated. Serial
ports, which are already being used or are not present, are greyed out and are
not available for configuration.
Automatic serial port configuration
To automatically configure the serial port of your receiver, click on Auto
Detection: A test is performed to determine and display which port is being
used by the receiver.
If, after this test is performed, no serial port is found or displayed, check the
configuration of the serial ports in your system or perform a manual
configuration.
in the task bar and
Manual serial port configuration
You can also manually configure the port.
To do this, click on the display of the serial port being used by the receiver.
Configuration Modification
In order to modify the configuration, you can bring up the "Remote
Configuration" window at any time while the program is active. To do this,
use the right mouse button to click on the symbol
option COM.
in the task bar and on the
4
Page 9
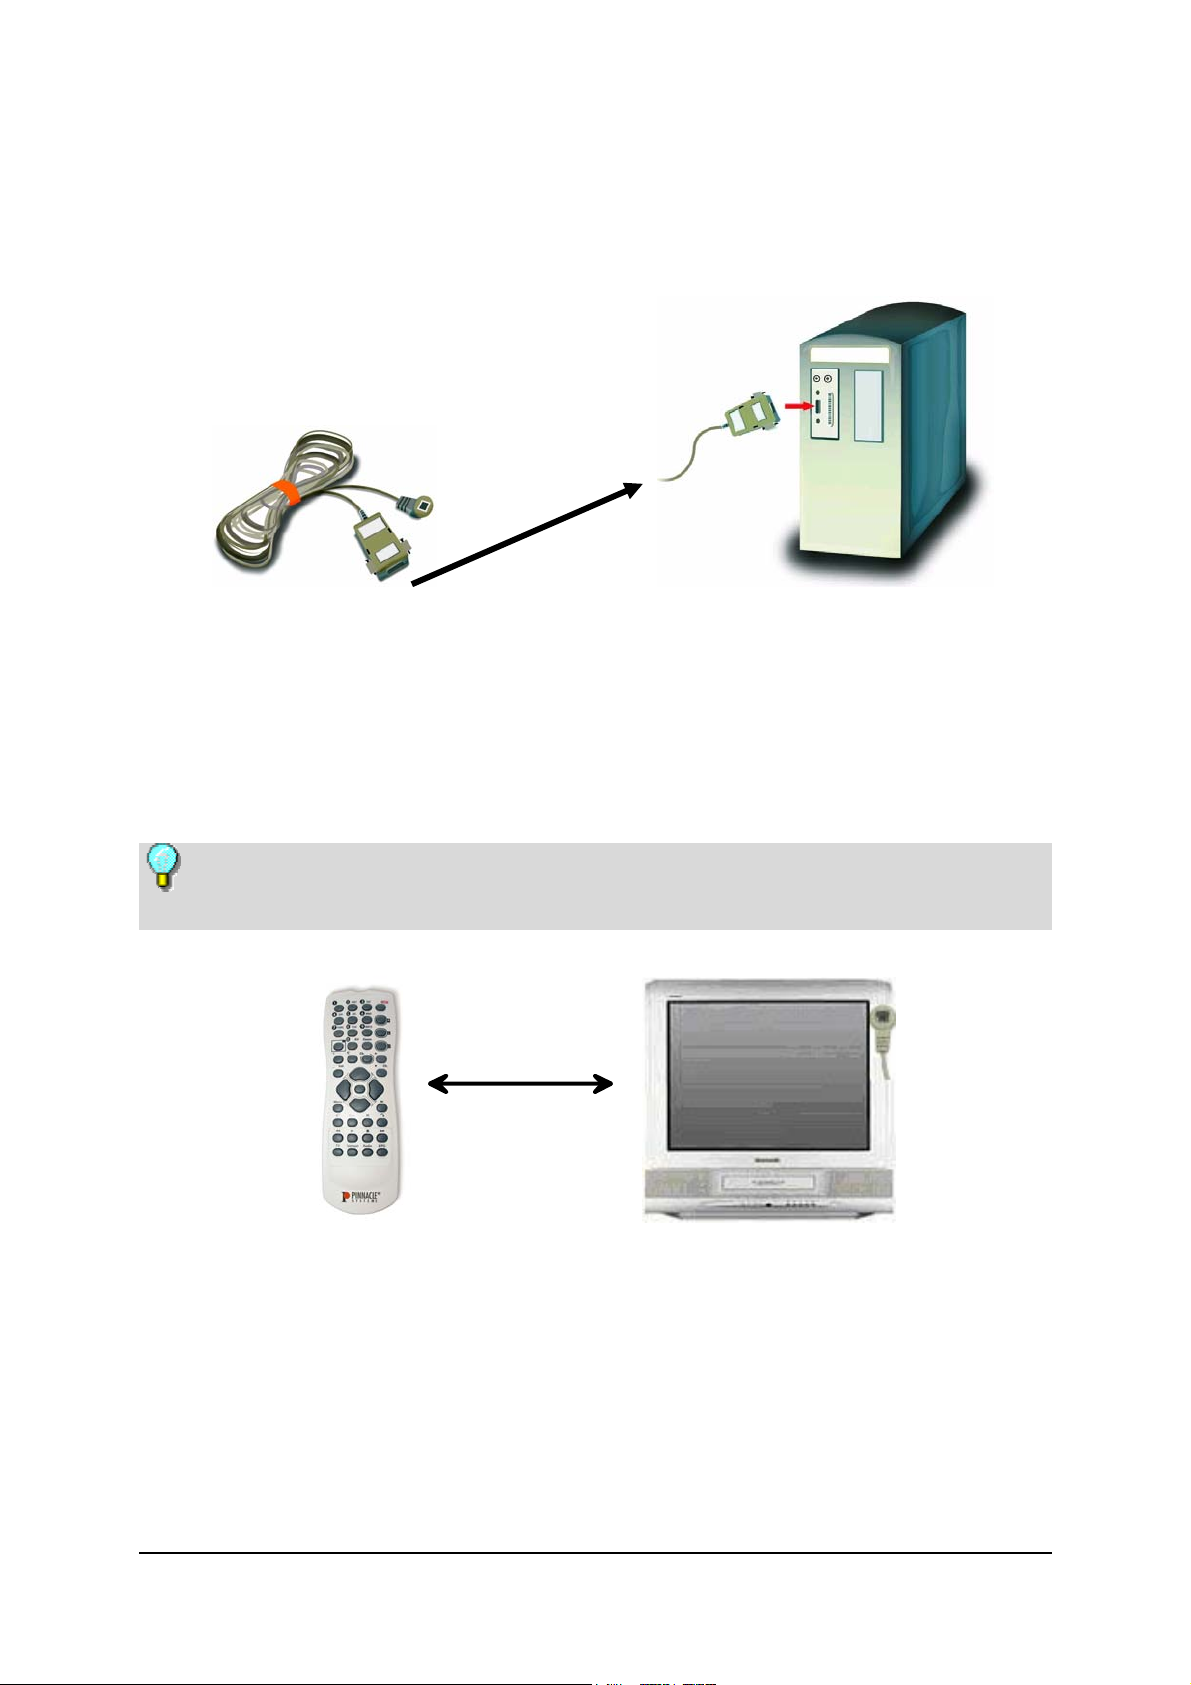
External Installation
Please insert the batteries (2x mignon 1.5V (R 06; AA)) into the remote
control.
The remote control infra-red receiver can be found on the front of the unit.
Ensure that there is a clear line of sight between the remote control and the
receiver. The range of the remote control is about 5 metres.
5
Page 10

Settings
After the device has been installed, the remote control program is automatically
activated each time Windows is started. The active program is indicated by the
symbol
To make more exact settings for your PCTV MediaCenter remote control, click
on the symbol
available:
Select Remote Control
If you have more than one remote control installed, a list of all the remote
controls available will be displayed.
In order for your system to detect which remote control your would like to
control your software with, you need to define the existing remote controls in
your system.
To do this, click on the option Test and choose field 1. Now press the button
on the remote control, which you would like to be associated with "Remote
control 1".
Now select field 2 and press the button on the remote control, which you
would like to be associated with "Remote control 2".
in the task bar.
. In the context menu that now appears, there are several options
After you have set the names of your remote controls, select the remote
control in the context menu, which you would like to control your application
with.
Select Hardware
If you have installed more than one device, all the devices available are
displayed.
In this case, select the hardware, which you would like to control with your
remote control.
Automatic Program Start
In this menu, you can keep your PCTV MediaCenter remote control from
starting automatically:
To do this, deactivate the command Automatically start with Windows.
6
Page 11

Check Remote Control Function
In the context menu described above, you can check that your remote control is
functioning properly.
To do this, click the menu option Test and then press any button on the
remote control (which needs to be pointed towards the receiver).
Closing the Remote Control
In this context menu, you can also close the remote control program:
To do this, select the option Quit!:
If an automatic program start has been set, the next time Windows is started,
the remote control program is started again ("Automatic Program Start").
If the automatic program start has been deactivated, the program can be
restarted via the Pinnacle program group under ...\Tools\Remote.
7
Page 12

Remote Control Button Assignments
The button assignments for the remote control depend on whether you have
Remote Control Type A or Type B:
Remote Control Type A
Remote Control Type B
8
Page 13

Button Assignments for Remote Control Type A
The following provides an overview of the individual remote control
functions:
Off
Multi-channel preview
Input buttons
Station list
AV
Full screen display
Sound Off/On
Volume +
Volume -
Confirm
Cursor left
Menu
Start recording
Jump back
Play
Rewind
Start TV
Start Teletext
(videotext)
Zoom
Info
Switch between last stations
Channel +
Channel -
Cursor up
Cursor right
Cursor down
Start live TV
Pause
Jump forward
Stop
Fast forward
Start EPG
Start Radio
9
Page 14

Detailed Description of the Buttons
In order for you to better understand the individual button functions, they are
described in detail as follows:
Off
The Pinnacle MediaCenter can be switched Off with this button.
Input buttons
Press the input buttons to enter numbers (for example, to select TV stations
directly or to enter your PIN code) or letters (for example, to name a playlist).
To do this, repeatedly press a button until the number or letter you want appears
according to the numbers or letters assigned to that button (similar to how a cell
phone works).
Full-screen display
Press this button to enlarge the preview window, which appears when a movie
or a photo is displayed, to the entire size of your screen. Press the button again
to return to the preview window.
AV
The AV button allows you to switch the video input between the tuner,
composite video or S-Video.
Zoom
The zoom button allows you to zoom in on an image during live TV coverage or
media playback. Press the button again to zoom out of the image.
10
Page 15

Multi-channel preview
With this button you can call up a preview of all of the television channels
available.
Station list
Use this button to open the station list in order to get an overview of all the
stations available and edit them as well.
Info
This button lets you display station information such as the name of the
currently selected television channel, the time or mono / stereo reception.
Sound Off/On
This button switches the sound off and on.
Switch between last stations
This button lets you toggle between the current and the last selected television
channel.
Volume +/-
You can increase or decrease the volume by using these buttons.
Channel +/-
With these buttons you can switch to either the next or the previous television
channel of the station list.
11
Page 16

Cursor buttons (up, down, left, right)
Press these buttons to move back and forth within a window and select a
function. You can see which function has been selected by its highlighted
background.
In videotext mode, you can scroll to the previous or next videotext page by
pressing the Up or Down buttons.
Confirm
Use this button to start the selected function.
Menu
This button allows you to enter the DVD menu when playing a DVD. Pressing
the button while playing any other medium will call up the Pinnacle
MediaCenter Settings Menu.
Start live TV
This button lets you switch to live TV when playing back a time-shifted
recording.
Start recording
With this button you can begin recording the selected television program.
Recording can be interrupted through renewed pressing of the start or stop
button.
Pause
Use this button to temporarily stop playback of a particular medium. To
continue simply press the play button.
In addition, you can start a time-shift recording by pressing this button in TV
mode.
In videotext mode you can use this button to either activate or deactivate the
automatic page update function.
12
Page 17

Jump back/Jump forward
With these buttons you can jump back or forward to entire tracks or music titles
when showing a film or playing music.
In addition, you can also jump to either the first videotext page (100) or the last
videotext page (899) in videotext mode.
Play
Depending on the selected medium, you can use the Play button to start a film, a
music piece or a photo slideshow. Playback can be stopped by pressing the
Pause button or continued at the same point by pressing the Play button once
again.
In videotext mode you can press the Play button to have hidden text displayed.
Stop
Use the Stop button to stop a playback or recording.
In videotext mode you can use this button to hide the text again which you had
displayed by pressing the Play button.
Rewind/Fast Forward
Depending on the selected media, you can use these buttons to rewind and/or
fast forward a film, a music piece or a photo slideshow to any desired position.
In videotext mode you can use these buttons to go to either the previous or the
next videotext sub-page.
Start TV/Teletext/Radio/EPG
Use the TV button to activate TV mode.
Press the Teletext button once to call up videotext so that it is fully displayed on
screen and twice to display videotext in transparent form.
If radio operation is included in your delivery quantity, then you can start it by
pressing the radio button.
You can use the EPG button to call up the Electronic Program Guide.
13
Page 18

Button Assignments for Remote Control Type B
The following diagram shows you an overview of the individual functions for
the Remote Control Type B:
Sound on / off
Teletext
TV
Various other
functions
Volume + / -
Left
Down
Back
Full screen
Rewind
Playback
On / off
EPG
Help
Start page / Menu
Channel + / -
Up
Right
OK
Switch between
last 2 stations
Pause
Start recording
Fast forward
Stop
14
Jump back
Letter/Number
AV
Jump forward
Input buttons
Delete
Page 19

Button Descriptions in Detail
In order for you to better understand the individual button functions, they are
described in detail as follows:
On/Off
Press this button to turn the Pinnacle MediaCenter on and off.
Sound On/Off
Press this button to turn the sound on and off.
Start Teletext/TV/EPG
If you press the Teletext button once, the videotext is displayed fully on the
screen. If you press it twice, the videotext is displayed in transparent format.
Activate TV mode by pressing the TV button and open the Electronic Program
Guide by pressing the EPG button.
Various Other Functions
Depending on the type of media selected and the category, these buttons have
various functions, which are each displayed on the screen. Pressing a certain
button activates the corresponding function.
Help
Press this button to activate the Pinnacle MediaCenter Online Help.
Volume +/-
Press these buttons to increase or decrease the volume.
15
Page 20

Start Page/Menu
Press this button to start the Pinnacle MediaCenter application or to go to either
the start page (if the application is already running) or the Pinnacle MediaCenter
Settings menu.
Channel +/-
While in TV mode, press these buttons to go to the next or to the previous TV
channel on the station list.
Cursor buttons (up, down, left, right)
Press these buttons to move back and forth within a window and select a
function. You can see which function has been selected by its highlighted
background.
In videotext mode, you can scroll to the previous or next videotext page by
pressing the Up or Down buttons.
OK
Press this button to start the function you have selected.
Back
Press this button to return to the previous page or menu selection.
Switch Between Last Two Stations
Press this button to switch between the current and last TV station selected.
16
Page 21

Full Screen
Press this button to enlarge the preview window, which appears when a movie
or a photo is displayed, to the entire size of your screen. Press the button again
to return to the preview window.
Pause
Press the Pause button to pause the playback of a medium. To resume playback,
press the Playback button.
You can also start a timeshift recording by pressing the Pause button in TV
mode.
In videotext mode, you can turn the automatic page update on and off with this
button.
Start Recording
Press this button to start recording the currently selected TV station. If you press
the Start Recording button again or the Stop button, the recording is stopped.
Rewind/Fast Forward
With these buttons and depending on the medium, you can rewind or fast
forward a movie, a piece of music or slideshow to the point you want.
In videotext mode, you can use these buttons to go to the previous or next
videotext sub-page.
Playback
With the Playback button and depending the chosen medium, you can start the
playback of a movie, a piece of music or a slideshow. Playback can be paused
by pressing the Pause button. Press the Playback button again to resume
playback from the same point.
In videotext mode, you can display hidden text by pressing the Playback button.
17
Page 22

Jump Back/Jump Forward
Press these buttons to jump back and forth between whole tracks or music titles
while playing a movie or playing music.
You can also jump to the first videotext page (page 100) or to the last videotext
page (page 899) while in videotext mode.
Stop
Press the Stop button to stop the playback of a medium or of a recording.
In videotext mode, you can use this button to rehide hidden text that you had
displayed with the Playback button..
Input buttons, Letter/Number (C/N),
Delete (DEL)
Press the input buttons to enter numbers (for example, to select TV stations
directly or to enter your PIN code) or letters (for example, to name a playlist).
To do this, repeatedly press a button until the number or letter you want appears
according to the numbers or letters assigned to that button (similar to how a cell
phone works).
You can also use the Letter/Number button (C/N) to do this: Depending on how
often you press the button, you have only letters or only numbers available.
You can delete the letters or numbers you just entered by pressing the Delete
button (DEL).
AV
Press the AV button to switch the video input between tuner, composite video or
S-video.
18
Page 23

Troubleshooting
If your remote control fails to function as expected, check to ensure that
you are pointing the remote at the receiver.
The angle between the remote control and the receiver should be a maximum
of 30°.
the distance between the remote and the receiver is not too great.
The remote control has a range of about 5 metres.
there is a clear line of sight between the remote and the receiver.
the batteries are correctly inserted and are not run down.
the program for the remote control program is active (recognizable by the
symbol in the taskbar).
19
Page 24

Custom Configuration
The remote control can be used for additional applications by assigning hot
keys.
The user is solely responsible for any settings resulting from modifications.
These results will not be addressed by Pinnacle Systems’ Technical Support.
It is therefore recommended that customised programming is only undertaken by
experienced users.
General
Use the profiles file profiles.in in the directory …\shared files\programs\remote
to assign specific functions to the remote control keys.
…\shared files\programs\ stands for your installation directory.
In the current version, these functions include:
Starting an application
Simulating a keyboard event (pressing and releasing keys).
Back up the existing profiles.ini prior to making any changes to the file!
Sections
The profiles.ini file consists of at least one [default] section in which the default
keyboard layout is stored (among other things). After the installation, the start
keys for Pinnacle MediaCenter are assigned by default:
[default]
for example
key38=EXEC c:\...\mediacenter\mediacenter.exe
…
20
Page 25

Each program has an individual keyboard layout. The name of the main screen
of each program serves as the section name:
[Pinnacle MediaCenter]
key38=KEYBOARD ALT+T+^T+^ALT
…
Once the screen „Pinnacle MediaCenter“ is active, the configuration section’s
individual command layout of the same name [Pinnacle MediaCenter] is
enabled.
Command definitions of keys that were not assigned to a specific application are
listed in the [default] section.
Some screens, for instance in Word, change their name by using the name of the
currently displayed document as an extension. Currently, only the „Fixed title -
variable title“ theme is supported. In the section [title -], the fixed title part,
including the hyphen, is assigned to another section name. For example:
Hexeditor HEdit:
[title -]
HEdit -=HEdit
[HEdit]
key63=KEYBOARD UP+^UP
key62=KEYBOARD DOWN+^DOWN
21
Page 26

Supported Commands
The following commands are supported:
EXEC
Description: Start a Windows program
Syntax: EXEC Path of the application that is to be started [ | ] command line
parameter
Example: EXEC c:\WINNT\system32\notepad.exe
KEYBOARD
Description: Simulate key stroke sequence
Syntax: KEYBOARD Key stroke sequence
Key stroke sequence: = key + [^] key + ...
Key: = any ASCII-character, except lower case letters OR special keys
Prefix ^ stands for “release key”.
22
Page 27

Special keys
Code Meaning / Key
CTRL
ALT
SHIFT
F1...F12
TAB
UP
DOWN
LEFT
RIGHT
ESC
ENTER
BLANK
NUM0..NUM9
NUMDIV
NUMMUL
Ctrl
Alt
Shift key
F1…F12
Tab key
↑
↓
←
→
Esc
Enter key
Spacebar
Keys 0…9 on the key pad
/ key
* key
NUMSUB
NUMADD
SCROLL
NUMLOCK
PGUP
PGDN
Back
POS1
End
Delete
Insert
- key
+ key
Scroll Lock key
Number Lock key
Page up
Page down
←−−
Pos1 key
End key
Del key
Insert key
For example:
key38=KEYBOARD CTRL+ESC+^ESC+^CTRL+P+^P
→ Pressing the TV key displays the Start Menu and then the Program Menu.
23
Page 28

Specific Characteristics
Key Stroke Pause
In some cases it is necessary to wait a moment after pressing the keys so that the
appropriate application can respond correctly to the simulated key strokes.
To indicate the pause, the plus sign is replaced by a space. For example:
KEYBOARD CTRL+ESC+^ESC+^CTRL P+^P
→ After CTRL + ESC, wait 100 milliseconds before pressing the P key.
Release a key
Releasing the key has to be indicated explicitly. This provides maximum
flexibility when simulating complex key strokes.
By pressing the keys ALT + TAB, the user can toggle between open application
screens. To forward through two applications, the following key stroke would
be incorrect:
Press ALT once and release
Press TAB twice and release
Instead, the following key combinations are correct:
Press and hold ALT
Press TAB twice and release
Release ALT
The key strokes would be as follows:
ALT+TAB+^TAB+TAB+^TAB+^ALT
24
Page 29

Original Key Codes
If a key is pressed longer than one half second, you must add the value 64 to
the code, in order to activate the Repeat function.
Original key code for remote control type A
key49...57
key58
key45
key27
key15
key61
key26
key29
key39
key22
key47
key46
key31
key30
key43
key60
key37
key23
key63
key28
key59
key62
key25
key21
key19
key14
key13
key38
key07
key11
key24
key42
key41
25
Page 30

Original key code for remote control type B
key1
key40
key41
key9-11
key43
key44
key19
key18
key13
key8
key34
key47
key37
key2
key42
key12
key6
key15
key16
key17
key20
key21
key45
key35
key46
key36
key38
key39
key22-33
26
 Loading...